Category: How to

How to

  • Boost Your Gaming Performance: Step-by-Step Guide on Moving Steam Games to SSD

    Have you noticed that your favorite games take a long time to load on your PC? If so, it may be time to consider moving your Steam games to an SSD. This can significantly improve your computer’s overall performance and make your gaming experience much smoother. However, the process of moving your games can seem daunting at first.

    Don’t worry; we’ve got you covered with this quick guide on how to move Steam games to your SSD. It’s a simple process that can be completed in just a few steps, and the results are definitely worth it. So, grab a cup of coffee, and let’s get started!

    Check Available Space on SSD

    If you’re wondering how to move a Steam game to your SSD, the first step is to ensure that you have enough space on your SSD. You can check how much free space you have by going to “This PC” or “My Computer” and right-clicking on your SSD drive. From there, click on “Properties” and look for the “Free space” indicator.

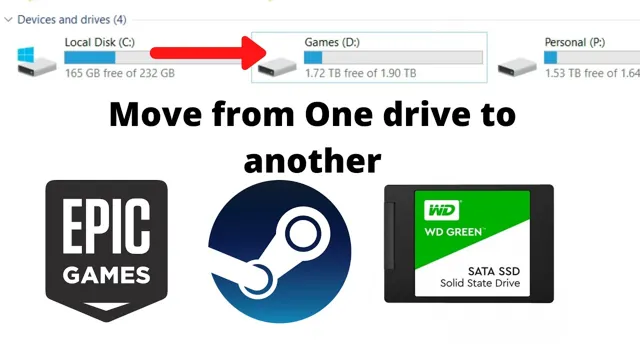
    If you don’t have enough space, you may want to consider freeing up some space by uninstalling any programs or deleting unnecessary files. Once you have enough space, you can easily move your Steam game to your SSD by right-clicking on the game in your Steam Library, selecting “Properties,” and navigating to the “Local Files” tab. From there, click on “Move Install Folder” and select the location on your SSD where you want the game to be moved to.

    With these simple steps, you can enjoy faster game load times and overall improved performance on your SSD.

    Use Windows Disk Management or Third-Party Tools

    When it comes to checking the available space on your SSD, there are a few ways to go about it. One option is to use Windows Disk Management, which is built into the Windows operating system. To access it, simply right-click on the Windows button in the bottom left corner of your screen, and select “Disk Management.

    ” From there, you’ll be able to see all the drives connected to your computer and how much space is available on each one. Another option is to use third-party tools, such as CrystalDiskInfo or TreeSize, which can provide even more detailed information about your SSD’s available space and overall health. Regardless of which method you choose, it’s important to regularly check on the available space on your SSD to ensure that you’re not running out of storage and potentially compromising the performance of your computer.

    So, the next time you’re wondering how much space you have left on your SSD, give one of these options a try!
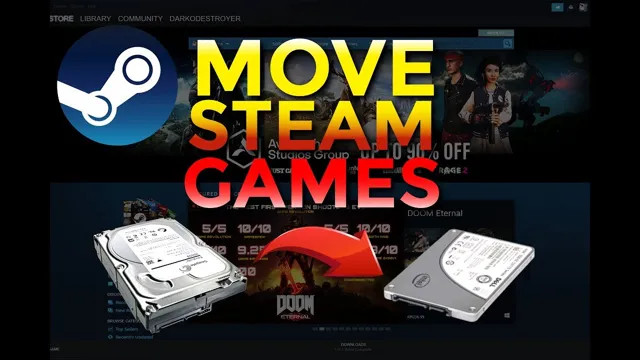
    how do i move a steam game to ssd

    Locate Game Files on HDD

    If you’re looking to move a Steam game to an SSD, the first step is to locate the game files on your HDD. This can be done by opening Steam and navigating to your Library. Right-click on the game you want to move and select Properties from the drop-down menu.

    Click on the Local Files tab and then click on Browse Local Files. This will open the folder where your game files are located on your HDD. To move the game to your SSD, you will need to create a folder for it on the SSD.

    You can name the folder whatever you like, but it’s a good idea to name it something that’s easy to remember. Once you’ve created the folder, simply copy and paste the game files from your HDD to the new folder on your SSD. Once the game files have been copied, you can open Steam and navigate to the game in your Library.

    Right-click on the game and select Properties again. This time, click on the Local Files tab and then click on Move Install Folder. Select the folder on your SSD where you copied the game files, and click Move Folder.

    That’s it! Your game is now installed on your SSD and should run much faster than it did on your HDD. Just remember that moving a game can take some time, especially if it’s a large game with lots of files. But the increased speed and performance of playing from your SSD will definitely be worth the wait.

    Open Steam and Access Game Properties

    If you want to locate game files on your HDD, the first thing you need to do is open Steam and access game properties. This will give you the necessary information to find where your games are stored on your hard drive. Steam makes it very easy to find your game files, as most games are installed in a default directory in your Steam library folder.

    Once you have located the game you are looking for, right-click on it and select “Properties.” From there, click the “Local Files” tab, and then click “Browse Local Files.” This will bring up the folder where your game files are stored on your hard drive.

    If you’re someone who likes to customize your game files, finding them is crucial. It allows you to manually add things like mods or custom content to the game. Additionally, it can be helpful if you need to delete a game or troubleshoot any game issues.

    Knowing where your game files are located can save you a lot of time and frustration when trying to make changes to your games. If you’re a Steam user, accessing game properties and locating game files is a quick and easy process!

    Move Game Files to SSD

    So, you’ve got a new SSD and want to take advantage of its faster speed by moving some of your Steam games onto it? Don’t worry, it’s a simple process. First, open Steam and go to your library of games. Find the game you want to move, right-click on it, and select “Properties”.

    Then, select the “Local Files” tab and click “Move Install Folder”. From here, choose your SSD as the new install location. Steam will then move the game files to your SSD.

    It’s important to note that some games may require additional steps, such as backups and restores. But for the majority, moving your games to an SSD is a relatively easy process that should improve their performance. So, go ahead and free up some space on your old hard drive and enjoy the faster load times that come with an SSD.

    Create New Folder on SSD and Copy Files Over

    Moving game files to your SSD can greatly improve your gaming experience, allowing for faster loading times and smoother gameplay. To do this, you will need to create a new folder on your SSD and copy the game files over. Start by determining which games you want to move and how much space they take up.

    Once you have that information, create a new folder on your SSD and name it something like “Games” or “Game Files.” Then, simply copy the game files from their current location on your hard drive and paste them into the new folder on your SSD. Depending on the size of the game and the speed of your SSD, this process might take some time, but the end result is sure to be worth it.

    So why not give it a try? Your gaming experience will thank you!

    Update Steam Settings

    If you’re looking to move a Steam game to an SSD, it’s a straightforward process. Firstly, you’ll want to update your Steam settings to set up your SSD as the default installation directory. Head to your Steam client and click “Steam” in the top left corner, then “Settings,” and then “Downloads.

    ” Here, you’ll see an option to “Steam Library Folders.” Click this and select “Add Library Folder.” Choose the directory where you want to install the game(s) and click “New Folder.

    ” Once you’ve added the folder, click “Select” to set it as your default installation directory. From now on, every game you install will be automatically downloaded to your SSD. If you want to move specific games, head to your Steam library, right-click on the game and select “Properties.

    ” Click the “Local Files” tab, select “Move Install Folder,” and choose the directory where you want the game to be moved to on your SSD. And that’s it – you’re good to go!

    Change Install Location for Future Games

    If you’re running low on disk space and want to change where future games are installed on Steam, it’s an easy process that will save you a lot of hassle down the line. To begin, open up Steam and click on the “Settings” option. From there, select the “Downloads” tab and click on “Steam Library Folders.

    ” Here you will see a list of all the locations where games can be installed. To add a new folder, click on “Add Library Folder” and choose the location where you want to install your games. You can also move an existing folder to a new location by selecting it and clicking on “Move Folder.

    ” Finally, make sure to set the new location as the default by clicking on “Make Default Folder.” By following these simple steps, you can easily ensure that all future games are installed in a location that suits your needs.

    Benefits of Gaming on SSD

    “How do I move a Steam game to SSD?” is a common question asked by gamers looking to enhance their gaming experience. Utilizing a solid-state drive (SSD) can provide numerous benefits for gaming, such as faster load times, improved game performance, and reduced system lag. Fortunately, moving a game to your SSD is a simple process.

    First, make sure that your SSD has enough space to accommodate the game’s files. Next, locate the game’s file location within your Steam library, right-click on the game, and select “Properties.” In the “Local Files” tab, click on “Move Install Folder” and select your SSD as the new destination.

    The game will start moving, and you’ll be able to experience all the benefits a faster, more efficient gaming system can offer. So, don’t hesitate to move your favorite game to an SSD and enjoy a seamless gaming experience!

    Faster Load Times and Improved Game Performance

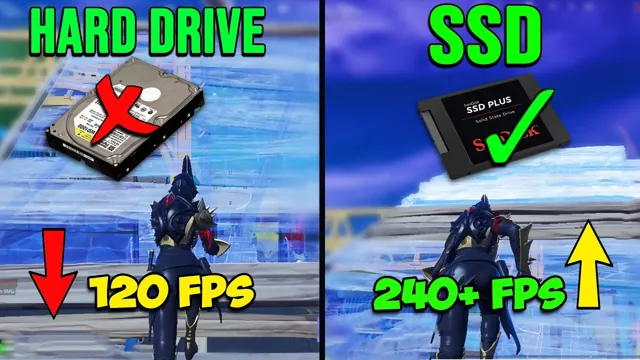
    Gaming on an SSD comes with various benefits, the most prominent being faster load times and improved game performance. With an SSD, games load significantly faster compared to traditional hard drives, giving players a seamless experience without delays. Additionally, the increased read and write speeds of an SSD make it possible to launch large gaming files in seconds, allowing gamers to enjoy their favorite games without extended wait times.

    SSDs are effective at mitigating lag, which is a significant issue that can severely impact gameplay experience. With an SSD, some of the most demanding games run smoothly even at the highest settings, enhancing the player’s gaming experience significantly. In conclusion, gaming on an SSD results in smoother gameplay and faster load times, leading to a better gaming experience overall.

    Final Thoughts

    If you want to know how to move your Steam games to your SSD, the process is actually quite simple. First, you will want to create a new Steam library folder on your SSD. To do this, open Steam and click on “Steam” in the top left corner.

    From there, click on “Settings” and then “Downloads.” Next, click on “Steam Library Folders” and then “Add Library Folder.” Choose the location where you want to create the new library folder on your SSD and click “New Folder.

    ” Once the folder is created, select it and click “OK.” Now, all you have to do is move your games from your current Steam library folder to the new one on your SSD. Simply right-click on each game in your Steam library, select “Properties,” and then click on “Local Files.

    ” From there, click on “Move Install Folder” and choose the new library folder you just created on your SSD. Voila! Your game will now be on your SSD and ready to go. So, if you’re tired of slow load times and want to rev up your gaming experience, moving your Steam games to an SSD is definitely the way to go.

    Conclusion

    In conclusion, moving a Steam game to an SSD is like giving your computer a shot of espresso. It wakes it up, speeds up your game loading times, and ultimately leads to a smoother and more enjoyable gaming experience. So, when in doubt, remember to give your computer some TLC and transfer those games to your shiny new SSD for maximum gaming goodness.

    FAQs

    Can I move a Steam game to my SSD if it’s already installed on my HDD?
    Yes, you can move a Steam game from your HDD to your SSD. First, create a new Steam library folder on your SSD, then go to the game’s properties in Steam and select “Move Install Folder” to move it to the new library folder.

    Will moving a Steam game to my SSD improve its performance?
    Yes, moving a Steam game to your SSD can improve its performance. This is because SSDs have faster read and write speeds than HDDs, resulting in faster load times and potentially smoother gameplay.

    How much space does my SSD need to have to move a Steam game to it?
    The amount of space needed on your SSD will vary depending on the size of the game you want to move. Make sure to have enough space on your SSD to accommodate the game’s size, plus a little extra for any updates or future DLC.

    Can I still access my Steam game on my HDD after I move it to my SSD?
    Yes, you can still access your Steam game on your HDD even after you’ve moved it to your SSD. However, the game will only be playable from the SSD, so you’ll need to launch it from there in order to benefit from the performance boost.
  • Effortlessly Transfer C Drive from SSD to HDD: A Step-by-Step Guide!

    Are you looking to move your C drive from SSD to HDD? Maybe you’ve realized that you’re running out of space on your SSD and want to free up some room, or perhaps you simply want to optimize your system by having files stored on separate drives. Whatever your reason, the process of moving your C drive from SSD to HDD might sound daunting at first, but with the right guidance, it can be a smooth and straightforward task. In this blog, we’ll provide you with step-by-step instructions on how to transfer your operating system from your SSD to your HDD, so you can make the most out of your storage space without sacrificing performance or stability.

    So let’s dive in!

    Backup Important Data

    If you’re looking to move your C drive from an SSD to an HDD, there are a few steps you’ll need to take to ensure that you don’t lose any important data. First and foremost, it’s crucial to back up all of your important files, documents, and folders to an external hard drive or cloud storage. Once you’ve backed up all of your important data, you can use a software program to clone your C drive onto your HDD.

    This process involves creating a bootable USB drive, connecting your new HDD to your computer, and installing the software program. After the cloning process is complete, you’ll need to change your boot order to boot from the new HDD instead of the old SSD. While this process may seem daunting, it’s actually quite straightforward and can be completed in just a few simple steps.

    By taking the time to back up your important data and following these instructions carefully, you can safely and easily move your C drive from your SSD to your HDD.

    Copy Contents of C Drive to HDD

    Backing up important data is always a smart move to ensure that you don’t lose any important files or documents in case of a system crash or failure. Copying contents of C drive to a separate external HDD is a good way to keep your precious data safe. It might seem like a daunting task, but it’s actually pretty straightforward and easy to do.

    All you need is an HDD with enough space to accommodate all the files from your C drive. Simply connect your external HDD to your computer, locate your important files and folders, and drag and drop them onto the external drive. It’s important to note that you should do this periodically to keep your backup up-to-date with any changes you make to your C drive files.

    By taking this simple precaution, you’ll have peace of mind knowing that all your important files are safely stored and can be easily retrieved in case of any emergency.

    how do i move c drive from ssd to hdd

    Change Drive Letter of HDD

    If you ever need to change the drive letter of your HDD (hard disk drive), it’s always best to backup your important data first. This ensures that any data or files you have stored on the drive are kept safe and secure during the process. You don’t want to risk losing important files, documents, photos, or videos due to an error or mistake.

    So, take the time to transfer everything onto an external hard drive, cloud storage, or another location on your computer before proceeding with changing the drive letter. This may seem like a hassle, but it’s well worth it in the long run. Remember, it’s always better to be safe than sorry when it comes to protecting your valuable data.

    Update Boot Settings

    If you want to move your C drive from your SSD to your HDD, you’ll need to update your boot settings. This is a crucial step to ensure that your computer recognizes the new location of your operating system. First, you’ll need to go into your BIOS settings and change the boot order to prioritize your HDD.

    This will ensure that your computer boots up from your HDD instead of your SSD. Next, you’ll need to clone your C drive from your SSD to your HDD using a third-party software. Make sure that you select the option to copy all partitions and ensure that your C drive is set as the active partition.

    Once you’ve successfully cloned your C drive, shut down your computer and remove your SSD. Then, restart your computer, and it should boot up using your HDD as the primary drive. Remember to check that all your files and applications are working correctly on your new drive.

    By updating your boot settings, you’ll be able to enjoy faster boot-up times and better storage capacity on your HDD.

    Reboot System and Enter BIOS

    If you’re looking to update your computer’s boot settings, you’ll need to reboot the system and enter BIOS. The BIOS, or Basic Input/Output System, is responsible for managing hardware settings and initializing software during the boot process. To enter BIOS, you’ll typically need to press a specific key as your computer is starting up, such as F2 or Delete.

    Once you’re in BIOS, you can navigate through the various settings to customize your boot options. For example, you may want to change the boot order so that your computer boots from a USB drive instead of the hard drive. It’s important to note that making changes in BIOS can be risky, so it’s important to proceed with caution and make backup copies of any important files before making any changes.

    By following the proper steps and taking necessary precautions, you can successfully update your computer’s boot settings and optimize its performance.

    Change Boot Order to HDD

    If you’re struggling with changing the boot order on your computer to prioritize the hard drive, you’ve come to the right place. The process is relatively simple and can be done in a few steps. First, access your computer’s BIOS settings by restarting your computer and pressing the appropriate key (usually F2 or Delete) as soon as the screen shows the manufacturer’s logo.

    Once you’re in the BIOS menu, navigate to the Boot tab, and look for the boot order options. You can then select the hard drive option and move it to the top of the list by using the respective arrow keys. Save the changes and exit the BIOS settings to reboot your computer.

    Voila! Your computer will now boot from the hard drive first. Keep in mind that the exact steps may vary depending on your computer’s brand and model, so make sure to consult your manual or manufacturer’s website. By prioritizing your hard drive as the boot device, you’ll be able to enjoy a faster, more reliable start-up experience.

    Save and Exit BIOS

    Once you’ve made the necessary changes to your computer’s BIOS settings, it’s time to save and exit. This step is crucial to ensure that your changes take effect and your computer boots up properly. To save and exit, you’ll need to navigate to the “Exit” tab in your BIOS menu.

    There, you’ll see an option to “Save changes and exit,” which you should select. Keep in mind that if you make any mistakes or encounter any issues with your computer’s booting process after making changes to BIOS settings, you can always return to the BIOS menu to make further adjustments. Updating boot settings may seem daunting at first, but once you become familiar with your computer’s BIOS menu, it will become second nature.

    Test Your New HDD

    If you’re looking to move your C drive from an SSD to an HDD, there are a few steps you can take to ensure a smooth transfer. First, make sure you have a backup of all your important files and data. Next, use disk cloning software to clone your SSD’s C drive onto the new HDD.

    Once the cloning process is complete, you’ll need to go into your computer’s BIOS settings and change the boot order so that the HDD is the primary boot drive. This will ensure that your computer boots from the HDD instead of the SSD. Finally, test your new HDD to make sure everything is working properly.

    You can do this by running a disk benchmark test or by simply opening and saving files to the new drive. With these steps, you should have no problem moving your C drive from an SSD to an HDD.

    Ensure System is Booting Up Correctly

    Testing your new HDD is a crucial step in ensuring that your system will boot up correctly. Even the best quality HDDs can sometimes have issues, so it’s important to run a test before relying on it for storage. There are a few different methods for testing your HDD, but one of the most popular is using software specifically designed for this purpose.

    Programs like CrystalDiskInfo or HD Tune can help you identify any potential issues with your hard drive, such as bad sectors or read errors. Once you’ve run a test and confirmed that your new HDD is free of any issues, you can feel confident that your system will boot up correctly. It’s important to note, however, that even if your test comes back clean, there’s still a chance that your HDD could fail in the future.

    It’s always a good idea to keep regular backups of your important data, just in case something goes wrong. Another thing to keep in mind when testing your new HDD is to make sure that it’s compatible with your system. Most modern HDDs will work with just about any system, but it’s still a good idea to check the manufacturer’s website to make sure that your system meets the minimum requirements.

    If you’re not sure how to check this, a quick online search should give you all the information you need. Overall, testing your new HDD is a simple step that can save you a lot of headaches in the long run. By taking the time to run a test and ensure that your HDD is working properly, you can feel confident that your system will boot up correctly and that your data will be safe and secure.

    So if you’ve recently installed a new HDD, be sure to take the time to run a test and make sure everything is running smoothly.

    Verify Files on HDD

    When you purchase a new hard disk drive (HDD), it’s important to test it thoroughly to make sure it’s working correctly. One of the best ways to do this is by verifying the files on your HDD. This process involves checking the integrity of every file on your hard drive to ensure they have not been corrupted or lost.

    Failure to do this could result in data loss and damage to your system. To begin the verification process, you’ll need to run a disk checking utility. Windows users can use the built-in CHKDSK tool to scan their hard drive for errors.

    Simply open the command prompt, type “chkdsk /f” and press enter. This will initiate the file verification process and attempt to repair any errors found on the drive. If you’re using a Mac, you can verify your files by using the Disk Utility application.

    Simply open Disk Utility, select your hard drive and click “First Aid.” This will scan your drive and check for any errors or corrupted files. It’s important to note that verifying your files can take some time, especially if you have a large amount of data on your HDD.

    However, it’s a critical step that should not be skipped. By verifying your files, you can ensure that your new HDD is working correctly and that your data is safe and secure. Overall, verifying your files is a simple but crucial step in testing your new HDD.

    It’s important to stay vigilant and take the necessary precautions to protect your data, as a failed or corrupted hard drive can be a major headache. By taking the time to run regular file verification checks, you can rest easy knowing that your system is running smoothly and your data is protected.

    Conclusion

    In conclusion, moving your C drive from SSD to HDD is like a game of Jenga- carefully and strategically moving each block until you reach your desired outcome. However, unlike Jenga, you won’t have to worry about everything tumbling down. With a little patience and know-how, you can easily transfer your C drive and enjoy the benefits of increased storage space on your HDD.

    FAQs

    What is the best way to move the C drive from an SSD to an HDD?
    One of the simplest ways to move the C drive from an SSD to an HDD is to use a cloning software such as EaseUS Todo Backup or AOMEI Backupper. These programs will copy the contents of your SSD to the HDD, allowing you to access your files and programs from the new drive.

    Can I move my C drive without reinstalling the operating system (OS)?
    Yes, you can move the C drive without reinstalling the operating system. Cloning software can make a duplicate of your current OS and transfer it to the new drive. Just make sure that the HDD has enough space to accommodate all of your files before initiating the cloning process.

    What precautions should I take before transferring the C drive to a new HDD?
    Before transferring the C drive to a new HDD, it is essential to back up all of your important files and data. You can use an external drive or cloud storage to do this. Additionally, ensure that the HDD has enough space to accommodate all of your files and software.

    Will moving the C drive from SSD to HDD affect my computer’s performance?
    The performance of your computer may be affected by moving the C drive from SSD to HDD. SSDs are often faster and more efficient than HDDs, so your programs and files may take longer to load from the HDD. However, if you have a high-performing HDD, the difference may not be significant.

  • How to Transfer EFT to SSD in a Flash: A Step-by-Step Guide!

    If you’ve been using a traditional hard drive for your computer, you may have noticed a decrease in performance over time. This can be frustrating, especially if you’re trying to get work done or play your favorite game. Luckily, there’s a solution – moving to an SSD, or solid-state drive.

    An SSD is a type of storage device that uses flash memory to store data. This means it’s faster than a traditional hard drive, which uses mechanical components to read and write data. In this blog, we’ll discuss how to move your EFT, or electronic funds transfer, to an SSD so you can enjoy faster and more reliable performance.

    Let’s jump in!

    Why Upgrade to SSD?

    If you’re asking yourself “how do I move EFT to SSD?” then you’re likely looking to upgrade to a solid-state drive. And for good reason – SSDs offer many advantages over traditional hard drives. For starters, they are much faster, making your computer run more smoothly and reducing load times for programs and files.

    They are also more reliable, as they have no moving parts that can break down over time. Additionally, SSDs are often smaller and more energy-efficient, meaning they take up less space in your computer and use less power. So if you’re looking to give your computer a boost, upgrading to an SSD is definitely worth considering.

    And as for how to move EFT to SSD, there are a few different methods you can use depending on your operating system and installation preferences.

    Benefits of Using SSDs Over EFTs

    When it comes to storage devices, SSDs have become increasingly popular in recent years. This is because they offer a number of benefits over EFTs (electromechanical storage devices) that can make a big difference in your experience of using your computer. So why should you upgrade to an SSD? Well, for starters, SSDs are much faster than EFTs – they can access data almost instantly, which means your computer will run much more quickly.

    This can be especially noticeable when you’re trying to start your computer up, or when you’re running multiple applications at once. Additionally, SSDs are much more reliable than EFTs – because they have no moving parts, there’s less chance of them breaking down or failing over time. This means you’ll be able to store your data in peace, without worrying about losing it.

    Overall, upgrading to an SSD is a great way to boost the performance and reliability of your computer, and it’s definitely worth considering if you haven’t done so already.

    how do i move eft to ssd

    Cost/Benefit Analysis for Upgrading to SSD

    Upgrading to SSD If you’re still using a traditional hard drive in your computer or laptop, you may want to consider upgrading to an SSD. Solid-state drives have several advantages over traditional hard drives, including faster load times, increased durability, and improved energy efficiency. When it comes to cost, SSDs are generally more expensive than traditional hard drives, but this cost is outweighed by the benefits you’ll receive from the improved performance and longevity of an SSD.

    Plus, with the decreasing cost of SSDs, it’s becoming more affordable to upgrade. So, if you’re looking to speed up your computer, protect your data, and improve your overall computing experience, it’s definitely worth considering an SSD upgrade.

    Preparing for the Move

    Moving your Escape from Tarkov (EFT) game to a solid-state drive (SSD) can greatly enhance your overall gaming experience. Before you begin, be sure to back up your game files, as moving them to a new location can sometimes result in their corruption or loss. Next, ensure that your SSD has enough space to accommodate the game files, as EFT requires a significant amount of storage.

    Once you have confirmed this, open Steam and select the game from your library. Click on the “Properties” tab, navigate to “Local Files”, and then select “Move Install Folder”. From here, choose the location of your SSD and begin the transfer process.

    This may take some time depending on the size of the game and the speed of your SSD. Once the transfer is complete, open the game to confirm that it is working properly on the new drive. Congratulations, you have successfully moved your EFT game to an SSD and can now enjoy faster load times and smoother gameplay!

    Backing up EFT Data

    When it comes to moving your EFT data, backing it up is crucial to ensure a smooth transition. You never know what could happen during the move, so preparing for the worst is always a good idea. Start by identifying what data needs to be backed up – this will likely include transaction histories, account information, and customer data.

    Then, determine the best method for backing up the data. Cloud storage, external hard drives, and USB drives are all viable options. Don’t forget to test your backup before the move to ensure that everything is in working order.

    Remember: a little extra preparation goes a long way in avoiding potential headaches and difficulties.

    Choosing the Right SSD

    When preparing to upgrade your computer with a new SSD, it’s important to take a few steps to ensure a smooth transition. First, make sure to back up all of your important files and data onto an external hard drive or cloud storage service. This will ensure that you don’t lose anything important during the installation process.

    Next, consider the size of the SSD you’ll need. Think about how much storage space you’re currently using and then add a bit extra for future growth. You’ll also want to make sure that the SSD you choose is compatible with your computer’s hardware and operating system.

    With these preparations in place, you’ll be ready to make the move to a faster and more efficient SSD that will boost your computing performance.

    Transferring Data to the SSD

    If you’re wondering how to move EFT to SSD, there are a few options available to you. One option is to use a cloning tool, which will copy the contents of your current hard drive onto the new SSD. This is a great option if you want to transfer everything, including your operating system, programs, and files, to the new drive.

    Another option is to manually transfer your files to the new SSD. This can be done using a USB drive, external hard drive, or by using a cloud storage service like Dropbox or Google Drive. You can also reinstall your operating system and programs onto the new SSD, and then manually transfer your files over.

    Whichever method you choose, be sure to backup all of your important files and data before transferring them to the new drive. This will help to ensure that you don’t lose any important information in the transfer process.

    Cloning EFT to SSD

    Cloning your existing EFT files to an SSD can greatly improve the speed and performance of your system. Fortunately, the process of transferring data to the SSD is quite simple, especially if you are using a dedicated cloning software tool. Essentially, this software will create a copy of your existing EFT data and place it onto your SSD, creating an exact replica of your current system.

    Once the cloning process is complete, you can simply swap out your old hard drive with the new SSD and your system should boot up and perform much faster than before. It’s like moving into a bigger, nicer and more efficient house – all your belongings are in the same place, but everything functions much better. Overall, this process is a worthwhile investment for anyone who wants to get the most out of their EFT experience.

    Manual Data Transfer for Clean Install

    When doing a clean install of your operating system on an SSD, transferring data from your old drive is essential. Doing so manually is the best way to ensure your important files and media are safely relocated. One option is to connect the old drive as an external device, then copy and paste files onto the new SSD.

    Another option is to use a cloud-based storage service, like Dropbox or Google Drive, to house your data temporarily while you complete the clean install. Whichever method you choose, it’s important to take the time to sort through your files and delete any unnecessary items. By doing so, you’ll free up space on your new drive and help keep it running smoothly.

    With these steps in mind, you’ll be able to easily and safely transfer your data to your new SSD and enjoy a fresh start on your operating system.

    Final Steps

    Moving EFT to an SSD can help you improve your gaming experience significantly. In order to complete the transition, there are a few final steps you need to take. First, you need to ensure that your SSD is properly formatted and ready to use.

    Once that is done, you can move the EFT files from your existing drive to the new SSD. This is a straightforward process that can be done manually or by using a software tool designed for this specific task. Once you have moved the files, you may need to adjust your game settings to ensure optimal performance.

    This may include changing your graphics settings, adjusting your audio settings, and optimizing your network settings. By taking these final steps, you can ensure that your move from EFT to SSD is successful and that you enjoy the improved gaming experience that comes with it.

    Verifying Data Transfer Completeness

    Verifying data transfer completeness is a crucial final step in any data transfer process. It involves ensuring that all data has been accurately and completely transferred from the source system to the destination system. One way to do this is to perform a data reconciliation process, which compares the data in the source system to the data in the destination system and identifies any discrepancies.

    This process helps to ensure that all data has been transferred correctly and completely. It is also essential to perform data validation at the destination system, which involves verifying that the transferred data is complete, accurate, and usable. By performing these final steps, you can be confident that your data transfer process has been successful and that you have all the data you need for your business operations.

    Formatting and Reusing EFT or Selling it

    When it comes to the final steps of formatting and reusing your EFT (Electronic Funds Transfer) or deciding whether to sell it, there are a few things to consider. First, if you plan on reusing the EFT, it’s important to properly format it to ensure it meets the necessary standards and is easily understandable for others. This may involve cleaning up any unnecessary coding or adding in specific information that was previously missing.

    Additionally, if you’re considering selling your EFT, it’s important to ensure that it is protected and secure, as it contains valuable financial data. You may want to work with a reputable company that specializes in EFT sales to ensure that everything is handled properly. Regardless of whether you plan on reusing or selling your EFT, it’s important to consider its value and take the necessary steps to protect it.

    Conclusion

    When it comes to moving your EFT files to an SSD, it’s important to take a moment to reflect on the process. Sure, you could simply drag and drop your files and call it a day. But why settle for mediocrity when you could achieve greatness? In the spirit of EFT’s intense gameplay, let’s approach this task with the same level of precision and skill.

    Follow these steps carefully, and watch as your loading times decrease and your victories increase. Remember, the goal is not just to move your files – it’s to optimize your gaming experience. Happy raiding!”

    FAQs

    What is SSD and how is it different from HDD?
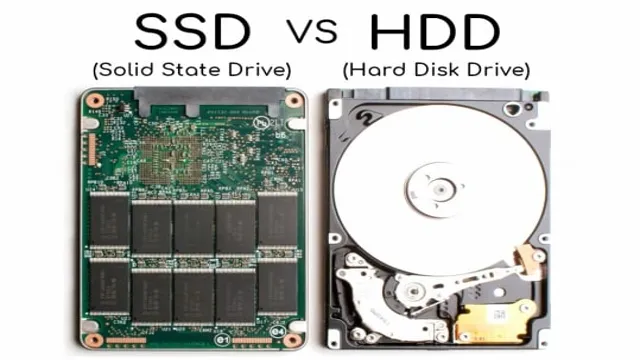
    SSD (Solid State Drive) is a type of storage device that uses NAND-based flash memory to store data, while HDD (Hard Disk Drive) uses spinning disks to read and write data. SSDs are faster, more reliable, and consume less power than HDDs.

    Can I clone my current OS and files from my HDD to my new SSD?
    Yes, you can use cloning software like Acronis True Image, Macrium Reflect, or Samsung Data Migration to clone your current OS and files from your HDD to your new SSD. Just make sure to back up important data and create a recovery drive before proceeding with the cloning process.

    Do I need to reinstall Windows after moving from HDD to SSD?
    It’s not necessary to reinstall Windows after moving from HDD to SSD, but it’s recommended to do a fresh installation to optimize performance. If you choose to clone your HDD to SSD, you can run into issues with misaligned partitions and unused space on the SSD.

    How do I physically install the SSD into my desktop/laptop?
    The process varies depending on your computer’s configuration, but generally, you need to open up the case and locate an unused drive bay or a spare 2.5-inch mounting location. You can then connect the SSD to the motherboard using a SATA cable and a power connector. Refer to your computer’s manual or online guides for detailed instructions.

  • Unlock the Power of Your SSD: Step-by-Step Guide to Migrating Games from HDD for Lightning-Fast Performance

    Do you find yourself frustrated with slow game loading times? Have you considered moving your games from your HDD to your SSD? This could greatly improve the speed and overall performance of your games. But, where do you start? Don’t worry, we’ve got you covered. In this blog, we’ll discuss the benefits of moving games to an SSD, and provide you with a guide on how to do it.

    So, grab a snack and let’s get started!

    Check SSD Storage

    If you’re wondering how to move your games from an HDD (hard disk drive) to an SSD (solid-state drive), the process is pretty straightforward. The first step is to install the SSD into your computer and make sure it’s properly recognized. Next, you’ll need to transfer the games you want to move to the SSD.

    This can be done by copying the game files from the HDD and pasting them into the SSD. Once the files have been transferred, you can uninstall the game from the HDD to free up space. Keep in mind that not all games may benefit from being moved to an SSD, but in general, games with longer load times or frequent loading screens will see a significant improvement in performance.

    So, if you’re looking for a way to optimize your gaming experience, checking out SSD storage could be a game-changer.

    Ensure enough space on SSD to accommodate games to be moved.

    Before you move your games to your SSD, it’s important to check that you have enough storage available. You don’t want to start moving your games only to find out that you don’t have enough space, resulting in failed transfers or missing files. So, the first step is to assess how much space your games require and how much space is currently available on your SSD.

    You can easily check your SSD storage by opening File Explorer and looking at the “This PC” section. Right-click on your SSD drive and select “Properties” to see the used and free space available. It’s generally recommended to leave at least 20% of your SSD space free for optimum performance, so keep this in mind when calculating how much storage you need.

    Once you’ve confirmed you have enough space available, you can start moving your games to your SSD with peace of mind.

    how do i move games from hdd to ssd

    Create New Folders on SSD

    When it comes to moving games from your HDD to an SSD, one of the most important steps is creating new folders on your SSD. This may seem like a trivial task, but it can make a big difference when it comes to keeping your games organized and running smoothly. Luckily, it’s quite easy to create new folders on an SSD.

    Simply right-click on the SSD drive in your file explorer and select “New” > “Folder”. Give the folder a name that makes sense to you, such as “Games” or “Steam Library,” and then you’re ready to start moving your games over. By keeping your games organized in dedicated folders on your SSD, you’ll be able to find them quickly and easily, and you’ll also ensure that they’re not taking up space on your HDD unnecessarily.

    So if you’re looking to optimize your gaming setup and get the most out of your SSD, creating new folders is a great place to start.

    Create new folders on SSD to categorize games being moved.

    If you’ve recently upgraded your PC with an SSD and want to move your games to this speedy drive, then it’s a good idea to create new folders and categorize your games accordingly. This will not only make it easier to find and access your games, but it will also keep your SSD organized. To get started, simply right-click on your SSD drive and select “New Folder”.

    You can then name the folder based on the type of games you plan on moving. For instance, you could create a folder called “Action Games” or “Racing Games” and move the respective games into these folders. One of the benefits of categorizing your games in this manner is that it allows you to quickly locate and launch the game you want to play.

    It can be frustrating to have to search through dozens of games, so creating folders helps to reduce any confusion or wasted time. Plus, by keeping your SSD organized, you’ll be extending its lifespan and ensuring it functions smoothly. Whether you’re an avid gamer or just someone who wants to keep their PC organized, creating new folders on your SSD is a simple and effective solution.

    Copy Game Files from HDD to SSD Folders

    So, you’ve decided to upgrade your gaming experience by installing your games on an SSD. But, how do you move your games from your HDD to your SSD? First, you need to create a folder on your SSD where you want your games to be stored. Once you have created the folder, open your File Explorer and navigate to the folder where your games are currently installed on your HDD.

    Select all of the game files that you want to move and copy them. Then, paste the copied files into the folder you created on your SSD. If you want to save some space on your HDD, you can safely delete the game files that you copied to your SSD.

    Once the game files have been successfully moved to your SSD, you can simply launch the game and enjoy faster load times and improved performance. It’s as simple as that!

    Copy game files from source HDD onto designated SSD folders.

    When upgrading your computer, it is essential to transfer your game files from the source HDD onto your designated SSD folders. This process involves copying your game files manually into the SSD folders while ensuring that you don’t miss any critical files. You can do this by opening both your HDD and SSD folders side-by-side, selecting the game files you want to copy, right-clicking, selecting “Copy,” and then pasting them into the appropriate SSD folder.

    It is also essential to ensure that you have enough space on your SSD to accommodate all the game files you want to transfer. This process can take some time, depending on the size of your game files and the speed of your computer’s processor, but it is crucial to ensure that your games run smoothly on your new SSD. So, if you want to enjoy your favorite games with fast loading times and smooth performance, don’t forget to copy your game files from your HDD to your designated SSD folders.

    Update Game Launcher

    If you’re wondering how to move games from HDD to SSD, the process is actually quite simple! First, you’ll want to make sure that your SSD is properly installed and recognized by your computer. Next, you can either uninstall the game from your HDD and then reinstall it onto your SSD, or you can simply move the game files directly from your HDD to your SSD. To do this, locate the game’s installation folder on your HDD (usually found within the “Program Files” or “Program Files (x86)” folder), then copy and paste the entire folder onto your SSD.

    Once the transfer is complete, you may need to update your game launcher to recognize the new installation location. Overall, moving your games from HDD to SSD can greatly improve your gaming experience by reducing load times and increasing overall performance.

    Update the game launcher to recognize the new location of game files on SSD.

    As an avid gamer, there is nothing more frustrating than a slow-loading game. Moving game files to an SSD can significantly enhance loading times. However, to take advantage of this upgrade, you need to update your game launcher.

    Failing to do so will lead to instances where your computer will still pull files from the previous location. That would defeat the purpose of investing in an SSD in the first place. Fortunately, updating your launcher is painless.

    The process depends on the launcher you use, but it should be straightforward. Search for options where you can change the location of the game files. Point it to the new SSD location, and you’re good to go! Remember to double-check that the location is correct before saving your changes.

    Overall, moving game files to an SSD and updating your launcher is an easy win for gamers looking to upgrade their gaming experience.

    Launch Game From SSD

    If you’re looking to improve your gaming experience, moving your games from an HDD to an SSD is a great place to start. Not only will this result in faster load times and better performance, but it can also free up space on your HDD for other files and programs. To move your games, you’ll first need to install your SSD and ensure that it’s recognized by your computer.

    Next, you can use a file transfer utility or simply copy and paste the game files from your HDD to your SSD. Once your games are on your SSD, you’ll need to update your game launchers or shortcuts to point to the new location. After that, you should be able to enjoy faster load times and smoother gameplay.

    By taking the time to move your games from your HDD to your SSD, you’ll be able to take your gaming experience to the next level.

    Test the game by launching it from SSD, and ensure it is working perfectly.

    Launching a game from an SSD can significantly improve performance and reduce loading times. It’s important to ensure that the game is working perfectly before diving in. One way to do this is by checking the game’s settings to ensure that it’s optimized to run on an SSD.

    Additionally, you can test the game’s loading times and performance by launching it from the SSD and playing for a few minutes. If the game runs smoothly and there are no glitches, then you know that everything is working perfectly. However, if you encounter any issues, it’s important to troubleshoot them before continuing to play.

    Overall, launching a game from an SSD can greatly enhance your gaming experience.

    Conclusion

    So, in summary, moving games from an HDD to an SSD is like upgrading from a station wagon to a Ferrari. It may take a bit of time and effort, but the improved performance and speed will make the journey all worth it. Plus, with those lightning-fast loading times, you’ll blow your competition away on the virtual racetrack!”

    FAQs

    Why should I move my games from HDD to SSD?
    Moving games from HDD to SSD can significantly improve the loading times and overall performance of the games. It can also reduce stuttering and lag in some cases.

    Can I move my games manually or do I need a software?
    You can move your games manually by simply copying the game folder from the HDD to the SSD. However, using a software like Steam Mover or EaseUS Todo PCTrans can simplify the process and ensure that all necessary files are moved.

    How much space do I need on my SSD to move games?
    The space required for each game varies, but in general, you will need at least the same amount of free space on the SSD as the game takes up on the HDD. It’s recommended to have some extra space for future game updates and DLCs.

    Can I still play my games on the HDD after moving them to the SSD?
    Yes, you can still play your games on the HDD after moving them to the SSD. However, you may experience longer loading times and reduced performance compared to playing the game on the SSD.

  • Step-by-step Guide: Easy and Quick Ways to Move Fortnite from SSD to SSD

    If you’re a dedicated Fortnite player, you know how frustrating it can be when your game lags or freezes mid-match. These types of issues are often caused by slow load times and insufficient storage space on your computer’s hard drive. Fortunately, the solution is simple: transfer your game files to a new SSD.

    In this blog post, we’ll walk you through the steps needed to move Fortnite to a new SSD, so you can enjoy faster load times, smoother gameplay, and less stress during those intense matches. Are you ready to level up your Fortnite experience? Let’s get started!

    Requirements

    If you’re looking to move Fortnite from one SSD to another, there are a few requirements you need to consider. Firstly, you’ll need to ensure that the new SSD you’re moving the game to has enough space for the game files. This can vary depending on the size of your game library, so make sure to check before you start the transfer.

    Additionally, you’ll need to have a means of making the transfer between the two SSDs. This could be done by connecting both drives to your computer and manually transferring the files, or by using a third-party tool to help automate the process. Lastly, it’s important to back up any important files before you start the transfer to ensure that you don’t lose any data in the process.

    Overall, moving Fortnite from one SSD to another can be a great way to free up space on your primary drive, but make sure to take the necessary steps to ensure a smooth transition.

    Check available space on destination SSD

    If you’re planning on migrating your data to a new SSD, one of the most important things to consider is the available space on the destination SSD. Before you start transferring your data over, it’s essential to make sure that there is enough space on the SSD to accommodate everything you’re planning to move. If you run out of space mid-transfer, you could end up losing data or having to start the process all over again, which can be incredibly time-consuming.

    One way to avoid this is to check the available space on the destination SSD before you begin the transfer. This will give you a clear idea of how much data you can move over and help you avoid any unnecessary headaches. So, be sure to take the time to check the available space on your destination SSD and plan accordingly for a smooth and stress-free data migration process.

    how do i move fortnite from ssd to ssd

    Backup Your Game Data

    If you are a gamer and have invested a lot of time playing Fortnite, the last thing you want is to lose all your progress due to a technical difficulty or a hardware failure. To avoid such a disaster, it’s crucial to back up your game data regularly. One such instance where you might need to move your Fortnite files is when upgrading your hard drive or swapping to a new one.

    If you’re wondering how to move Fortnite from SSD to SSD, don’t worry, it’s a simple process that won’t take long to complete. The first step is to back up your game files on an external hard drive or cloud storage. Once you’ve done that, uninstall the game from the original SSD, and then reinstall it on the new one.

    Finally, transfer the saved game data from the backup location to the new SSD, and you’re ready to go. This process will ensure that all your saved progress, skins, and other in-game items are safe and ready to use on the new SSD. Remember to always make backups regularly, so you never have to go through the hassle of setting up the game all over again.

    Copy Fortnite game data from source SSD

    As a dedicated gamer, you understand the essentiality of game data backup. When it comes to Fortnite, one of the best ways to backup your game data is to copy it from your source SSD. It’s a quick and straightforward process that ensures you save your progress securely.

    However, before you start copying, it’s advisable to ensure you have enough space on the target drive for successful data transfer. You don’t want to start copying only to get stuck halfway due to insufficient space. Also, ensure that both the source and target drives are connected correctly to your computer.

    With everything set, you can begin the copying process, which may take some time depending on the size of the game data. Once the transfer is complete, you can confirm that your data is safe by running the game from the target SSD. So, if you care about your Fortnite progress, don’t take any chances.

    Copy your game data from the source SSD and back it up securely.

    Uninstall Fortnite from the source SSD

    If you’re looking to free up space on your SSD or simply want to move Fortnite to another SSD, you might be wondering how to do so. Fortunately, the process is relatively straightforward. The first step is to uninstall Fortnite from the source SSD.

    To do this, simply navigate to the Epic Games Launcher and click on the library tab. From there, find Fortnite and click on the gear icon next to the Launch button. Select uninstall and follow the prompts to complete the process.

    Once Fortnite has been uninstalled, you can reinstall it on the new SSD by selecting the desired drive during the installation process. By following these steps, you’ll be able to easily move Fortnite from one SSD to another without any hassle.

    Uninstalling using Control Panel

    Uninstalling Fortnite from your source SSD using Control Panel is a straightforward process. Firstly, you need to open the Control Panel from your Windows menu. Once you have done that, go to Programs and Features, where you can find all of the installed programs on your computer.

    Scroll through the list of installed programs and look for Fortnite. Once you find Fortnite, you need to right-click on the program and select the “Uninstall” option. The uninstallation wizard will pop up and guide you through the process of uninstalling Fortnite from your source SSD.

    It’s worth noting that this process may take a while to complete depending on the size of your Fortnite installation. However, once the process is complete, you will have freed up the space that Fortnite once occupied on your SSD. This method is an effective way to remove Fortnite from your source SSD if you no longer want to play the game.

    Uninstalling using the Windows Settings app

    Uninstalling Fortnite from your computer’s source SSD can be accomplished through the Windows Settings app. This allows you to completely remove the game from your system and free up space on your hard drive. To get started, open the Settings app and click on the “Apps” section.

    From there, locate Fortnite in the list of installed apps and click on it. Once you have clicked on the game, you will be given the option to “Uninstall.” Select this option and follow any additional prompts that appear on your screen to complete the uninstallation process.

    Keep in mind that this process may take some time depending on how much data needs to be removed. By following these steps, you can successfully remove Fortnite from your computer’s source SSD and reclaim valuable space on your hard drive.

    Install Fortnite on the destination SSD

    If you’re wondering how to move Fortnite from one SSD to another, the good news is that it’s pretty straightforward. First, you need to make sure that you have enough space on the new SSD to install the game. Once you do, simply open the Epic Games Launcher and go to the Library tab.

    From there, find Fortnite in your list of installed games and click on the gear icon to the right of it. In the drop-down menu, select “Move” and choose your new SSD as the destination. The launcher will then begin moving the game to the new location.

    It’s important to note that the moving process may take some time, depending on the size of the game and the speed of your computer. Once the transfer is complete, you should be able to play Fortnite from your new SSD without any issues.

    Downloading and installing Fortnite

    To get the best gaming experience, it’s essential to install Fortnite on a destination SSD. SSD refers to Solid State Drive, which has faster read and write speeds than the traditional hard drives. Installing Fortnite on an SSD will significantly reduce the game’s loading time, and you will get smoother and faster gameplay.

    Before downloading and installing Fortnite, make sure that you have enough free space on your SSD to avoid any glitches or crashes. Once you have enough space, download Fortnite from Epic Games and create an account or log in with your existing account. After that, select the destination SSD on which you want to install the game and begin the installation process.

    It may take some time to complete the installation, but once it’s done, you can launch the game and start playing it. With an SSD, you will notice an instant improvement in the game’s performance, and you’ll be able to enjoy Fortnite to the fullest.

    Launch Fortnite

    If you’re looking to move Fortnite from one SSD to another, the process can seem daunting, but with a few simple steps, you’ll be back to playing your favorite game in no time. First, navigate to the folder where Fortnite is currently installed on your SSD. Next, copy the entire Fortnite folder and paste it into the desired location on your new SSD.

    Once the files have finished copying over, launch the Epic Games Launcher and select the “Library” option from the left-hand menu. From there, locate Fortnite in your game library and click on the gear icon next to the “Launch” button. In the drop-down menu, select “Verify” to ensure that the game is correctly installed on your new SSD.

    Once Fortnite has finished verifying, you’re all set! Launch the game and get ready to battle it out with your friends. Just remember to uninstall Fortnite from your old SSD so that you don’t waste any precious storage space.

    Verify that the game works correctly on the new SSD

    To verify that the game works correctly on the new SSD, the first step is to launch Fortnite. Once the game has loaded successfully, navigate to the settings menu to ensure that the graphics and audio settings are configured correctly. It is also recommended to run a benchmark test to ensure that the game is running smoothly and at a high frame rate.

    If any issues are found, adjust the settings accordingly until the game is performing optimally on the new SSD. Additionally, consider monitoring the temperature of the SSD during gameplay to ensure that it is not overheating and causing performance issues. Overall, launching Fortnite and conducting the necessary tests and adjustments will ensure that the game is working correctly on the new SSD.

    Conclusion

    In summary, moving Fortnite from one SSD to another is as easy as slurping a Slurpee from one cup to another. Don’t sweat it, just follow these simple steps and in no time, your Fortnite will be ready to battle royale on its new home. Happy gaming!”

    FAQs

    How do I transfer Fortnite from one SSD to another SSD?
    To transfer Fortnite from one SSD to another SSD, you need to first locate the game files on the original SSD. Then, copy and paste the entire Fortnite folder onto the new SSD. You can also use a migration tool to transfer the game files if you prefer.

    Can I move only certain files of Fortnite from one SSD to another?
    Yes, you can move specific files of Fortnite from one SSD to another by manually selecting the files and transferring them to the new SSD. However, it is recommended to transfer the entire Fortnite folder, as doing so will ensure that you do not miss any important files.

    How long does it take to transfer Fortnite from one SSD to another?
    The time it takes to transfer Fortnite from one SSD to another depends on the size of the game files and the speed of the SSDs. Generally, it can take anywhere from a few minutes to an hour or more.

    Do I need to reinstall Fortnite after transferring it to a new SSD?
    No, you do not need to reinstall Fortnite after transferring it to a new SSD. The game files should work fine on the new SSD, as long as all the necessary files were transferred. However, if you experience any issues with the game, you can try verifying the game files or reinstalling the game.

  • Boost Your System Performance: Step-by-Step Guide on How to Migrate Your Boot Drive to SSD

    If you’re looking to increase your computer’s speed and performance, moving your operating system from a traditional hard drive to a solid-state drive (SSD) can make a world of difference. A boot drive is a storage device that holds the operating system and essential software your computer needs to start up. Upgrading this drive to an SSD is one of the easiest and most effective ways to breathe new life into your computer.

    However, many people are intimidated by the prospect of moving their boot to an SSD. The process can seem complicated, but we’re here to guide you through it step-by-step. In this guide, we’ll explain why moving your boot to an SSD can be so valuable and walk you through the process of doing it yourself.

    With our help, you’ll soon be enjoying faster boot ups and a significantly improved computing experience!

    Backup Your Data

    If you’re upgrading to a new SSD and want to move your boot over, there are a few steps you need to follow. The first thing you need to do is backup your data, just in case something goes wrong during the process. Once you’ve done that, you’ll need to clone your existing hard drive to the new SSD.

    There are many tools that can help you with this, such as Acronis True Image or EaseUS Todo Backup. These programs will make a copy of your entire hard drive, including your operating system, applications, files, and settings. Once the cloning process is complete, you’ll need to set the new SSD as your boot drive.

    You can do this by going into your BIOS settings and selecting the new SSD as the primary boot device. After that, you should be good to go! Your computer will now boot up faster and perform better overall, thanks to the increased speed and performance of your new SSD. So, don’t be afraid to make the switch – just make sure you backup your data first!

    Using a Backup Service or External Hard Drive

    Backing up your data is crucial to keeping your important files safe and secure. One method of backing up your data is by using a backup service or an external hard drive. A backup service allows you to upload your important files to a remote server, which can be accessed if your computer crashes or is stolen.

    External hard drives are physical devices that can store your files and can be easily transported. Both methods have their pros and cons, so it’s important to weigh your options and choose the one that works best for you. With the rise of cyber-attacks and data breaches, a backup service can give you more peace of mind as it ensures that your data is stored offsite.

    However, an external hard drive is good for those who prefer to physically have their data with them and want to avoid any subscription fees. Regardless of the method you choose, backing up your data should be an essential habit to ensure you never lose your important files.

    how do i move my boot to my ssd

    Making Sure All Important Files are Saved

    Backing up your data is essential in ensuring that all important files are saved, and you won’t lose them due to any unforeseen circumstances. There are multiple ways to backup your data, such as using a cloud-based service or an external hard drive. It’s always better to have multiple backups in different locations in case one backup fails.

    Losing important data can be devastating, and it’s always better to be prepared beforehand to avoid any mishaps. It’s also important to regularly back up your data, so you always have access to the latest versions of your files. So, make sure to take the time to backup your data, and you’ll have peace of mind knowing that your files are safe and secure.

    Cloning Your Boot Drive

    If you’re wondering how to move your boot drive to your SSD, the process is called cloning and can save you a lot of time and hassle. Cloning your boot drive simply means copying everything from your existing drive to your new SSD, including the operating system, boot files, and any installed programs. To do this, you’ll need cloning software like Macrium Reflect or EaseUS Todo Backup.

    Follow the step-by-step instructions provided by the software to create a bootable USB drive or CD, and then use it to boot your computer. You’ll then be able to clone your existing drive to the SSD by selecting the appropriate settings in the cloning software. Once the cloning process is complete, you can set your computer to boot from the SSD and enjoy faster performance and quicker boot times.

    Just don’t forget to back up your important files before you begin, just in case anything goes wrong during the cloning process.

    Using a Cloning Software

    Cloning your boot drive can be an effective way to protect your system and ensure the smooth running of your computer. By using a cloning software, you can create an exact copy of your boot drive, including all the files and programs, and transfer them to a backup storage device or new computer. This process can save you a lot of time and hassle in case your primary disk fails or your system encounters any issues.

    Additionally, cloning can also be useful if you want to upgrade your hard drive or migrate to a new computer without losing your data or settings. Overall, cloning your boot drive can provide peace of mind and help you maintain the efficiency of your system.

    Creating a Bootable USB

    Cloning your boot drive is an essential step in creating a bootable USB for your system. Cloning allows you to copy every detail, including files, applications, and operating system preferences, from your boot drive to the USB drive. This feature is incredibly useful for creating an exact replica of your current drive, allowing you to transfer it to another system or simply back it up.

    To begin copying your boot drive, you’ll need a cloning software and a compatible USB drive. Once you have these things, simply follow the software’s instructions, and the software will do the rest for you. Remember, cloning your drive may take some time, so be sure to schedule enough time to complete the process fully.

    By cloning your boot drive, you can have peace of mind that your current system is safe and secure, and you can take your system with you on the go.

    Transferring the Cloned Data to SSD

    Cloning your boot drive is a wise choice if you want to transfer all of your data and settings to a new solid-state drive (SSD). This process is straightforward and only requires software that can clone your hard drive. First, you need to connect your SSD to your computer, either through a USB adaptor or by installing it in your PC’s drive bay.

    After that, install a cloning software and follow the instructions to clone your drive. Most cloning software comes with a step-by-step guide, so don’t worry if you’re not tech-savvy. Once the cloning process is complete, you can then swap out the drives and your new SSD should boot up and work seamlessly.

    It’s crucial to backup all important data before starting the cloning process as it’s irreversible once started. Additionally, always make sure that the SSD has enough space to accommodate everything on your boot drive. By cloning your boot drive, you can enjoy faster boot times, quicker application response times, and an overall better computing experience that an SSD offers.

    Installing the SSD

    “Moving your Boot to Your SSD: Step-by-Step Guide” So you’ve decided to upgrade your computer’s storage performance by installing an SSD. Congratulations, you’re in for a faster and smoother computing experience! But now comes the tricky part — how do you move your boot to your SSD? Well, worry not, as we’ve got you covered with this step-by-step guide. First, before you install your new SSD, back up all your important data to an external hard drive or cloud storage.

    This is important because you’ll be wiping your old hard drive clean before cloning your boot to your SSD. Next, use a cloning software such as EaseUS Partition Master, Macrium Reflect, or Clonezilla to clone your old hard drive’s boot partition to your new SSD. Make sure you select the option to “clone boot sector” or “clone MBR” (Master Boot Record) during the process.

    Once the cloning is complete, shut down your computer and disconnect the old hard drive. With only the SSD plugged in, boot up your computer and go to the BIOS settings. Make sure the SSD is selected as the first boot device.

    Save the changes and exit BIOS. You should now be able to boot up your computer normally from your new SSD. Finally, double-check that everything transferred correctly.

    Check if your system recognizes the SSD as the new boot drive, and make sure all your files and applications are intact. You’re now ready to enjoy the improved speed and performance of your newly installed SSD! In summary, moving your boot to your SSD isn’t as complicated as it may seem. Just remember to back up your data, use a cloning software, update your BIOS settings, and check that everything is working correctly.

    Happy computing!

    Opening Your Computer and Finding the Appropriate Slot

    To install an SSD in your computer, the first step is to open up your computer and locate the appropriate slot for the SSD. This may require a bit of research or consultation with your computer manual. Once you’ve located the correct slot, you can then insert the SSD.

    Make sure you’re handling the SSD carefully and avoid touching any of the delicate components. It’s also important to ensure that the SSD is securely and firmly in place. Once you’ve installed the SSD, you’ll need to configure your computer to recognize it.

    This may require some additional steps and configurations, but once completed, you’ll be able to enjoy the increased speed and performance of your computer. By following these steps, you can upgrade your computer’s storage capabilities and breathe new life into your system.

    Plugging in the SSD and Securing It

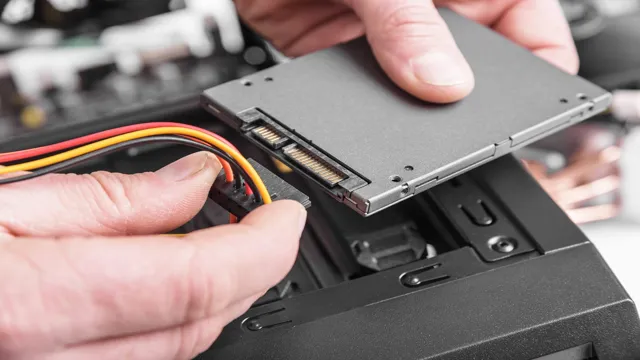
    The next step in installing an SSD is plugging it in and securing it. First, locate an empty drive bay in your computer case and gently insert the SSD into it. Next, connect the SATA data cable to the SSD and the motherboard, and connect the SATA power cable to the power supply unit.

    It’s important to ensure that the cables are securely connected to prevent any loose connections. Once the SSD is connected, screw it into place using the small screws included with your computer case. Be careful not to overtighten the screws as this can damage the SSD or the case.

    Now that your SSD is plugged in and secured, you’re one step closer to enjoying faster boot times and improved overall performance for your computer system.

    Boot from the SSD

    Moving your boot to your SSD can drastically improve your computer’s performance. To do so, you first need to clone your operating system to the SSD using a cloning tool like Clonezilla or EaseUS Todo Backup. Once the cloning process is complete, you can change your boot order in your computer’s BIOS to boot from the SSD.

    This will ensure that your computer starts up faster and runs programs with greater speed and efficiency. However, it’s important to note that simply moving your boot to your SSD won’t solve all performance issues. You may still need to optimize your computer’s settings and remove unnecessary programs to truly get the most out of your SSD.

    Overall, moving your boot to your SSD is a powerful way to optimize your computer’s performance and ensure it runs as smoothly as possible.

    Changing Boot Priority in BIOS Settings

    To boot from the SSD, you’ll need to change the boot priority in the BIOS settings. This process involves entering into the BIOS setup, locating the boot priority section, and moving your SSD to the top of the priority list. Essentially, this tells your computer to look for an operating system on the SSD before trying any other storage devices.

    To do this, you’ll need to restart your computer and watch for a prompt to enter into the BIOS setup. This could be a key such as F2, F10, or Del, depending on the manufacturer of your motherboard. Once in the setup, navigate to the boot priority section and use the arrow keys to move your SSD to the top of the list.

    Save and exit, and your computer will now boot from the SSD. It’s important to note that changing the boot priority can have implications for other operating systems or storage devices on your computer. If you have multiple drives with different operating systems installed, be sure to consider the order in which they should boot.

    Additionally, make sure to save any important data before making changes to avoid any potential data loss.

    Checking If the Boot Is Successful

    After installing an SSD, the next step is to check if the boot is successful. The first thing to do is to ensure that the computer is set to boot from the SSD. This can be done by accessing the BIOS settings and setting the SSD as the primary boot drive.

    Once this is done, save and exit the BIOS, and the computer will restart. If the boot is successful, the computer will start up quickly, and programs will open almost immediately. You can also check if the SSD is set as the primary drive by accessing the computer’s system properties.

    Here, you can see information about your system and check if the SSD is the primary drive. In case the SSD is not the primary drive, you can change it by following the same process as earlier. Remember to always make sure that the SSD is set as the primary boot drive to get the most out of your SSD’s fast reading and writing speeds.

    Enjoy Your Faster System!

    Are you tired of dealing with sluggish system performance? One solution may be to move your boot to your SSD. Not sure how to do it? Don’t worry, it’s simpler than you might think. First, you’ll need to clone your existing boot drive onto your SSD.

    There are various software options available to help you with this process. Once you’ve completed cloning your drive, you’ll need to set your SSD as the primary boot device in your system BIOS. This will ensure that your computer boots from your new, faster SSD.

    Finally, you may need to do a bit of cleanup to optimize your system for your new SSD. Deleting old files and programs that you no longer need can help to free up space and improve performance. With a little bit of effort, you’ll be enjoying a much faster and more responsive system in no time!

    Conclusion

    Moving your boot to an SSD is like giving your computer a superhero upgrade. With lightning-fast speeds and increased performance, your computer will be transformed from a mere mortal to a tech powerhouse. So don’t hesitate to make the switch and let your computer soar to new heights!”

    FAQs

    What is an SSD?
    An SSD (Solid State Drive) is a type of storage device similar to a hard drive that uses NAND-based flash memory to store data.

    Why would someone want to move their boot to an SSD?
    Moving your boot to an SSD can significantly improve your computer’s performance and speed up the boot time.

    How do I check if my computer is compatible with an SSD?
    You can check your computer’s specifications online or consult with a technician to see if your computer is compatible with an SSD.

    Can I move my entire operating system to an SSD or just the boot?
    You can move your entire operating system to an SSD using software like cloning tools or fresh installation methods.

    How do I move my boot to an SSD?
    You can move your boot to an SSD by cloning your current boot drive using software like EaseUS or Acronis or by fresh installing your operating system on the SSD.

  • Game On with SSD: A Step-by-Step Guide on How to Move Your Games to Your SSD Card

    Have you ever experienced slow loading times when playing your favorite games? It’s frustrating, right? Especially when you’re excited to dive into a new level, but it takes forever to load. Well, the solution is simple: move your games to an SSD card. If you’re not familiar with what an SSD card is, allow me to explain.

    An SSD card is a type of storage device that uses flash memory instead of a traditional hard drive with spinning disks. The result? Faster reading and writing speeds, which translates to faster loading times and improved performance. Think of it as an express lane for your game data.

    In this blog, we’ll explore how to move your games to an SSD card and the benefits you can expect to enjoy. So, grab your controller and let’s dive in!

    Checking SSD Card Capacity

    If you’re looking to move your games to your SSD card, the first thing you need to do is check the capacity of your SSD. You’ll want to make sure it has enough available space to hold all of your games, as they can take up quite a bit of storage. To check the capacity of your SSD, you can go to your computer’s file explorer and right-click on the drive where the SSD is located.

    From there, click on “Properties” and you should see a breakdown of how much free space is available on the drive. If you find that your SSD doesn’t have enough space for all of your games, you may need to consider deleting some files or upgrading to a larger capacity SSD. Once you’ve checked the capacity and made any necessary adjustments, you can start moving your games to the SSD for faster load times and improved performance.

    Accessing Game Files on Computer

    If you’re an avid gamer, you must know the importance of storage capacity for your computer’s hard drive or SSDs. Checking your computer’s SSD card capacity will help you determine if you have enough space to download and store your favorite games. Accessing your game files is easy, and all you need to do is locate the game’s installation folder.

    Once you locate it, you can check how much space the game is taking, and how much space you have left on your SSD. It’s essential to have sufficient space because games take up a considerable amount of storage, and you don’t want your computer to slow down or crash due to insufficient storage. By periodically checking your SSD card capacity, you can avoid these issues and keep on gaming without any interruptions.

    how do i move my games to my ssd card

    Creating a Folder on SSD Card

    If you have an SSD card, you might be wondering how much space you have left to create a new folder. Checking the capacity of your SSD card is straightforward, and there are a few ways to do it. One of the easiest ways is to plug your SSD card into your computer and open the file explorer.

    From there, right-click on your SSD card, and select “Properties.” This will show you the remaining capacity on your drive, giving you an idea of how much space you have left. If you’re close to maxing out your SSD card, it might be a good idea to clear some space before creating a new folder.

    That way, you won’t run into any issues with space or performance down the road. Overall, keeping an eye on your SSD card’s capacity can help you make better use of your storage space.

    Moving Game Files to SSD Card

    If you’re looking to optimize your gaming experience, one of the best ways to do so is by moving your game files to an SSD card. An SSD card provides faster load times and better overall performance than a traditional hard drive. Moving your games to an SSD card is a simple process, requiring only a few steps.

    First, you’ll need to connect your SSD card to your computer. Once connected, find the game files you’d like to move and copy them to the SSD card. You can then delete the original game files from your computer’s hard drive.

    Finally, open your game launcher or platform and update the file path to the new location of your game files on the SSD card. With your games now on an SSD card, you’ll enjoy quicker load times and smoother gameplay. So why wait? Give it a try and see the difference for yourself!

    Copying Game Files to SSD Folder

    When it comes to upgrading your gaming experience, a solid-state drive (SSD) can make all the difference. Not only does it provide faster load times, but it can also improve overall system performance. However, to truly reap the benefits of an SSD, you’ll need to move your game files to the SSD folder.

    This process involves copying the game files from their current location and pasting them into a designated folder on your SSD. While this may sound daunting, it’s a straightforward process and worth the effort for the improved gaming experience. By moving your game files to the SSD card, you’ll notice faster load times and smoother gameplay with shorter load screens.

    So, let’s get started, and see how easy it is to move those game files to your SSD card.

    Deleting Games from Computer

    Deleting games from your computer can be a challenging task, especially if you are running low on storage. One way to free up space is to move your game files to an SSD card. This method is ideal for those who want quick access to their games without sacrificing performance.

    To get started, the first step is to select the game that you want to move and locate its installation files. You can do this by accessing the game’s installation directory, which is usually found in the Program Files folder. Once you have located the necessary files, you can copy them to your SSD card.

    It’s important to note that this may take some time depending on how large the game is. After the files have been successfully copied over, you can delete the original game files on your computer to free up storage space. By following this method, you can create more room on your computer and still keep your favorite games accessible.

    Launching Games on SSD Card

    Are you tired of slow loading times and constant lag while playing your favorite games? Well, the solution might be as simple as moving them to your SSD card. But how exactly do you do that? First, you need to make sure that your SSD card has enough space to accommodate your games. Then, you can simply go to the game’s installation folder and copy it to the SSD card.

    Of course, this might take a while depending on the size of the game. Once you have copied the game, you can delete it from its original location to save space on your hard drive. Finally, you can launch the game from its new location on your SSD card and enjoy faster load times and smoother gameplay.

    So, don’t let slow loading times ruin your gaming experience any longer – move your games to your SSD card today!

    Redirecting Game Launch Location

    If you’re someone who loves gaming, launching games from an SSD card is a game-changer. The speedy loading time and smooth gameplay are unbeatable compared to using a regular hard drive. So, if you’re wondering how to redirect the game launch location to your SSD card, we’ve got you covered.

    First, make sure your SSD card is installed and recognized on your computer. Then, go to the game’s properties and select “browse local files” to locate the game’s installation folder. From there, simply copy and paste the game’s folder onto your SSD card.

    Finally, right-click on the game’s .exe file and select “Create Shortcut”. Move the shortcut to your desktop or start menu and voila! You’re all set to enjoy the benefits of gaming with an SSD card.

    Updating Game Settings

    Updating game settings is a critical step that every player must take, especially when launching games on an SSD card. When it comes to optimizing game performance, an SSD card offers faster load times, quicker boot times, and improved overall gameplay experience. However, users must adjust game settings to ensure the game is running to its full potential.

    Game settings can be adjusted in-game, with options such as graphics quality, resolution, and anti-aliasing, or through third-party software, such as NVIDIA Control Panel. By updating game settings, players can fine-tune their gaming experience with maximum efficiency, allowing them to immerse themselves in the game world without any lag or delays. Remember to prioritize critical settings, such as resolution, before adjusting other options.

    Updating game settings is easy and can make a big difference in how smoothly your favorite games run. So, why not take the time to optimize your game settings to get the most out of your SSD card today?

    Benefits of Moving Games

    Are you wondering how to move your games to your SSD card? Well, you’ve come to the right place to learn about the benefits of doing so. Firstly, moving your games to your SSD card can significantly improve the loading times and overall performance of your games. This is because SSDs are faster and more reliable than traditional hard drives.

    Therefore, your games will load much quicker, and you won’t have to wait as long for them to start up. Additionally, moving your games to your SSD card can free up space on your primary hard drive, allowing it to run smoother. This is especially true if you have limited space on your primary drive.

    Overall, moving your games to your SSD card can improve your gaming experience and make it more enjoyable. So, don’t hesitate to make the switch and reap the benefits.

    Faster Loading Times and Improved Performance

    By moving games to a faster hosting service, you can significantly improve the overall performance of your games. Faster loading times, less lag and smoother gameplay can transform the gaming experience for players. With faster hosting, your games will load quickly, which means players can jump right into the action without waiting around.

    Plus, faster hosting can handle increased traffic and demands, ensuring that your games stay up and running no matter how busy they get. This can boost player confidence and contribute to greater player engagement and retention. Ultimately, investing in faster hosting is an investment in the future of your games and your business.

    So why wait? Make the move today and start reaping the rewards!

    More Space on Computer’s Main Hard Drive

    When it comes to finding more space on your computer’s main hard drive, one effective solution is to move your games. This not only frees up valuable storage space, but it also offers a range of benefits for your computer’s performance. By relocating your games to a separate hard drive or SSD, you can reduce the amount of strain on your main drive and improve overall system speed.

    Additionally, you’ll be able to better manage your game library – keeping track of what you have, what you play, and what you might want to delete or move around. Ultimately, moving games can help boost your computer’s capacity and performance, while also making your gaming experience more streamlined and enjoyable. So if you’re looking to optimize your computer’s performance, consider moving your games for some quick and easy results!

    Conclusion

    Moving games to your SSD card is like giving them rocket boots; they’ll fly faster than ever before! With a few simple steps, you can transfer your games to your SSD card and give yourself the ultimate gaming experience. So say goodbye to sluggish loading times and hello to lightning-fast gameplay. It’s time to level up!”

    FAQs

    What is an SSD card?
    An SSD card is a Solid State Drive which uses flash memory to securely store data and files, unlike a traditional hard drive that uses spinning disks.

    Can I move games to an SSD card?
    Yes, you can move games to an SSD card if it has enough space. You will need to locate the game files and copy them over to the SSD card.

    How do I locate my game files on my computer?
    To locate the game files, go to the installation folder where the game is installed and look for the game’s executable file, which should have a .exe file extension.

    Do I need to uninstall the game before moving it to an SSD card?
    No, you do not need to uninstall the game before moving it to an SSD card. You can simply copy the game files over to the SSD card and then create a new shortcut from the new location.

    Will moving my games to an SSD card improve their performance?
    Moving your games to an SSD card can significantly improve their performance, as the read and write speeds of an SSD card are faster than a traditional hard drive. This results in faster load times and smoother gameplay.

  • Step-by-Step Guide: Moving Minecraft to a Different SSD Hassle-Free!

    As a Minecraft player, you know how important it is to have fast and efficient gameplay. You don’t want to be lagging behind or waiting for long load times. One way to boost your game’s performance is by moving Minecraft to a new SSD.

    This upgrade will significantly improve your gaming experience and provide you with a smoother and more seamless experience. The process of moving Minecraft to a new SSD may sound intimidating, but it’s actually effortless, and this guide will show you how to do it step by step. So, get ready to enhance your Minecraft experience and take your gameplay to new heights!

    Check available space on new SSD

    If you’re considering moving your Minecraft game to a different SSD, there are a few things you need to keep in mind. First and foremost, you need to make sure you have enough space on your new SSD to accommodate the game. To check the available space on your new SSD, you can simply navigate to “This PC” on your Windows computer, right-click on the new SSD, and select “Properties.

    ” This will give you an overview of how much space is available and how much has been used. Once you confirm that you have enough space for Minecraft, you can begin the process of transferring the game to your new SSD. This can typically be done by copying the game files from your old SSD or hard drive and pasting them onto the new SSD.

    Keep in mind that this process may take some time, depending on the size of the game and the transfer speed of your computer. But with a bit of patience and effort, you’ll be able to enjoy Minecraft on your new SSD in no time.

    Open File Explorer and navigate to new SSD

    After installing a new SSD, the first step you should take is to check the available space. To do this, open File Explorer and navigate to the new SSD. Once there, right-click on the SSD and select Properties.

    This will bring up a window with information about the drive, including the total capacity and the amount of space available. You want to make sure that the SSD has enough space to store all of your important files and programs. If it doesn’t, you may need to consider upgrading to a larger SSD or moving some files to an external drive.

    It’s always a good idea to keep an eye on the amount of available space on your SSD, as running out can cause performance issues and other problems. With a quick check of the available space, you can make sure that your new SSD is ready to go and can handle all of your storage needs.

    how do i move my minecraft to a different ssd

    Create a backup of Minecraft saves

    If you’re wondering how to move your Minecraft to a different SSD, the process is relatively straightforward. First, ensure that you have created a backup of your Minecraft saves so that you don’t lose any progress. Next, locate your Minecraft game files on your current SSD and then copy them to your new SSD – it’s that simple! Once you’ve done this, you’ll need to update your Minecraft launcher to point to the new file path.

    To do this, launch the Minecraft launcher and navigate to the game directory settings. From there, update the file path to your new SSD and save your changes. That’s it! You’re ready to enjoy Minecraft on your new SSD with all your previous progress intact.

    Remember, taking the time to create a backup is crucial to avoid any unnecessary hiccups, so don’t forget to do this before you begin.

    Open Minecraft and click on ‘Options’

    To ensure the safety of your Minecraft worlds and prevent any loss of progress, it’s essential to create backups of your Minecraft saves. To do this, open Minecraft and click on “Options.” From there, click on “Resource Packs” and then click on the “Open resource pack folder” button.

    This will take you to the Minecraft saves folder, where you can locate and copy your saved worlds. It’s best to save these backups to a separate location, such as an external hard drive or cloud storage, to ensure they are protected. By creating regular backups of your Minecraft worlds, you can rest assured that your progress is safe and secure, and you won’t have to start from scratch if something goes wrong.

    Click on ‘Resource Packs’ and then ‘Open Pack Folder’

    When it comes to Minecraft, it’s important to always have a backup of your saves. You never know when something could go wrong, and losing all your hard work would be devastating. Thankfully, creating a backup is easy.

    First, click on “Resource Packs” from the main menu. Then, select “Open Pack Folder.” This will take you to the folder where your Minecraft packs are located.

    From here, you can create a backup of your saves by copying the “Saves” folder to an external location, such as a USB drive or cloud storage. It’s important to do this regularly, especially if you make a lot of changes to your game. By having a backup, you can rest easy knowing that your progress is safe and secure.

    So don’t wait – create a backup of your Minecraft saves today!

    Copy all files in the folder to a backup location

    Creating a backup of Minecraft saves is crucial to ensure you don’t lose your hard work and progress in the game. One essential step in this process is to copy all files in the folder to a backup location. This can be done easily by navigating to the saves folder in your Minecraft game directory and selecting all the files.

    Then, simply create a new folder in a backup location and paste the files into it. This will create an exact copy of your Minecraft saves, ready to be restored in case of any issues with your game. Make sure to regularly update your backup to ensure your progress is always preserved.

    By taking these simple steps, you can enjoy playing Minecraft without worrying about losing your saves. So, go ahead and create your backup today to secure your Minecraft adventure!

    Uninstall Minecraft from old SSD

    If you’re looking to move your Minecraft game to a different SSD, you may need to uninstall it from your old one first. Fortunately, the process is relatively simple. First, you’ll need to open up the start menu and navigate to the control panel.

    From there, click on “programs and features,” then locate Minecraft in the list of installed programs. Click the “uninstall” button, and follow the prompts to complete the process. Once Minecraft is uninstalled from your old SSD, you can then install it on the new one, following the appropriate prompts and selecting the new SSD as the installation location.

    This process should ensure that your Minecraft game is running smoothly from your new SSD. Remember to always safely remove hardware before changing physical storage devices.

    Open ‘Control Panel’ and click on ‘Programs and Features’

    Uninstalling Minecraft from an old SSD can free up valuable storage space for other games and applications. To start the process, open the ‘Control Panel’ on your computer and click on ‘Programs and Features’. This will bring up a list of all installed programs on your computer.

    Find ‘Minecraft’ in the list and click on it. You will see an option to ‘Uninstall’ or ‘Change’ the program. Click ‘Uninstall’ and follow the prompts to completely remove Minecraft from your old SSD.

    Keep in mind that this process will delete all saved data and settings for the game, so make sure to back up any important files before proceeding. With Minecraft successfully uninstalled, you can enjoy the extra storage space and improved performance on your computer.

    Select Minecraft and click on ‘Uninstall’

    Uninstalling Minecraft from an old SSD can seem like a daunting task, but with a few simple steps, it can be completed quickly and easily. First, navigate to the “Programs and Features” section in your computer’s control panel. Once there, scroll down until you find Minecraft and click on it.

    From there, select the “Uninstall” option and follow the prompts to complete the process. It’s that simple! By following these steps, you’ll be able to clear up valuable space on your old SSD and ensure your computer is running at its best. So why wait? Get started today and say goodbye to unnecessary clutter on your computer!

    Reinstall Minecraft on new SSD

    If you’re looking to move your existing Minecraft game to a new SSD, you’ll need to reinstall it on the new drive first. Start by downloading the Minecraft launcher from the official website and save it to your new SSD. Then, open the launcher and log in using your Minecraft account credentials.

    Click on the “Options” button and select “Game Directory” to see where your game files are currently located. Copy all of the files from this folder and paste them into the “game” folder on your new SSD. Finally, return to the Minecraft launcher, click on “Installations,” and select the new game directory location.

    Once you’ve completed these steps, you’ll be able to launch Minecraft from your new SSD and play your existing game. It’s simple and easy to do, and it will provide you with faster loading times and improved overall performance. So why not give it a try?

    Go to the Minecraft website and download the latest version

    If you want to reinstall Minecraft on your new SSD, the first step is to head over to the Minecraft website and download the latest version. This will ensure that you have the most up-to-date version of the game to install. Once you have the setup file downloaded, you’ll want to transfer it over to your new SSD if you haven’t done so already.

    Then, simply run the setup file and follow the on-screen instructions to complete the installation process. It’s important to note that if you had any saved games or worlds on your old hard drive, you will need to transfer those over as well to continue playing them. By following these steps, you’ll have Minecraft up and running on your new SSD in no time.

    Happy mining!

    Select the new SSD as the installation location

    If you’ve just installed a new SSD on your computer, you may want to move your Minecraft installation to it for improved performance and faster load times. Reinstalling Minecraft on your new SSD is a straightforward process that can be accomplished in just a few easy steps. First, navigate to the Minecraft website and download the installation file.

    Once downloaded, run the installer and select the new SSD as the installation location. This will ensure that the game and all of its files are stored on your new SSD. By doing so, you’ll benefit from faster load times, reduced texture flickering, and fewer performance issues.

    Overall, reinstalling Minecraft on your new SSD is one of the best ways to get the most out of your game and enjoy a smoother, more immersive gaming experience.

    Restore Minecraft saves from backup

    Are you looking to move your Minecraft to a different SSD? Maybe your current SSD is running out of space or you just got a new one that you want to use. Whatever the reason, transferring your Minecraft saves is actually quite easy. The first step is to make a backup of your current Minecraft saves, which can be found in the “saves” folder in your Minecraft game directory.

    Once you have made a backup, you can then copy and paste the saves into the new SSD’s Minecraft game directory. If you encounter any issues with the transfer, you can always restore your backup to ensure that you don’t lose any progress. Overall, moving your Minecraft saves to a different SSD is a simple process and can help to improve your game’s performance and storage capabilities.

    Copy all backup files to the new Minecraft install location

    When setting up a new Minecraft install location, it’s crucial to ensure that all of your saved game data is properly restored from your backup files. To start this process, you’ll need to navigate to the folder where your backups are stored and copy all of the files over to the new Minecraft directory. This will include any saved game data, world settings, and other customizations you had made in your previous installation.

    Once everything has been copied over, you can launch Minecraft from the new location and verify that your saved games are available. If everything looks good, you’re ready to start playing! By backing up your Minecraft data and restoring it to a new location, you can ensure that you never lose a minute of progress in your favorite game. Remember to take the time to do this regularly, and you’ll always be able to get back to where you left off.

    Keyword: Minecraft saves.

    Open Minecraft and verify the saved games have been restored

    To restore Minecraft saves from backup, open Minecraft and click on the “Singleplayer” option. Check if the saved games have been successfully restored. If not, go to the Minecraft backup folder and copy the saved game files from the backup folder to the Minecraft saved games folder.

    Open Minecraft again and check to see if the saved games have been restored. It’s important to back up Minecraft saved games regularly to avoid losing progress due to game glitches, corrupted files, or accidental deletions. By keeping a backup of your saved games, you can easily restore them and pick up where you left off without any hassle or frustration.

    So, make sure to take this simple step to protect your Minecraft saves and avoid any unnecessary setbacks.

    Finalize the transfer

    So, you’ve decided to move your Minecraft game to a different SSD, but you’re not sure how to finalize the transfer? Here’s a step-by-step guide to help you out. First, make sure that your new SSD is properly installed and recognized by your computer. Then, locate your Minecraft game files on your old SSD.

    Copy the game files and paste them into your new SSD, ensuring that you place them in the correct file location. After your game files have been copied, double-check to make sure that all game data has been successfully transferred. Next, launch Minecraft and navigate to the game settings.

    Select “options” and then “resource packs” and change the location of the resource pack folder to the new SSD. Finally, test your game to ensure that it launches properly and that all your game data is intact. With these steps, you should have successfully moved your Minecraft game to your new SSD without any issues.

    Delete any remaining Minecraft files on old SSD

    As we finalize the transfer of our Minecraft files to a new SSD, it’s important to remember to delete any remaining files on the old one. This step is crucial to prevent any future conflicts or confusion with the game files. First, it’s important to make sure that you have backed up all necessary files before deleting anything.

    Once you’re sure that everything is safe and secure, you can proceed with the deletion process. Simply navigate to the Minecraft folder on your old SSD and delete any remaining files or folders. This will ensure a clean and seamless transfer to your new storage device.

    By completing this step, you can have peace of mind knowing that your Minecraft game files are fully transferred and secured on your new SSD.

    Restart the computer and verify Minecraft works on new SSD

    Once you’ve successfully cloned your Minecraft game onto your new SSD, it’s important to take the final steps to ensure everything is working properly. The last thing you want is to run into issues with your game after all the effort you’ve put in. The first step is to restart your computer to make sure all changes are fully implemented.

    Once it’s up and running, check your Minecraft game to verify that it’s working on your new SSD. If everything looks good, you’re done! Your game will now run faster and smoother, giving you a much better gaming experience. So, sit back, relax, and enjoy your newly transferred Minecraft game on your new SSD!

    Conclusion

    In conclusion, moving your Minecraft game to a different SSD is like relocating your own home to a better neighborhood – it takes some work, but the payoff is worth it. And with the help of some crafty tech skills and a careful touch, you can easily make the switch and enjoy a faster, stronger, and more Minecraft-friendly setup. So go ahead and set your digital roots down in a new spot – you won’t regret making the move!”

    FAQs

    What is an SSD?
    An SSD (Solid State Drive) is a type of storage device that uses NAND-based flash memory to store data, unlike traditional hard disk drives which use rotating disks.

    Can I move my Minecraft game to a different SSD?
    Yes, you can move your Minecraft game to a different SSD by copying the game installation folder to the new SSD, and then changing the game directory path in the game launcher settings.

    What are the benefits of having Minecraft installed on an SSD?
    Having Minecraft installed on an SSD can result in faster load times, smoother gameplay, and improved overall performance.

    How do I check if my computer has an SSD?
    You can check if your computer has an SSD by opening the Device Manager and looking under the “Disk Drives” section. If your computer has an SSD, it will be listed as a “Solid State Drive” or “SSD.”

  • Upgrade Your PC to Lightning-Fast Speed: Learn How to Move Your OS to an SSD

    Have you ever realized that your computer’s speed isn’t what it used to be? The thought of moving your Operating System (OS) to a Solid State Drive (SSD) can be intimidating, but fear not! In this step-by-step guide, we’ll show you how to rejuvenate your computer and increase its speed by moving the OS to a brand new SSD. By the end of this guide, you’ll have a better understanding of the advantages of using an SSD and a more efficient way of upgrading your computer’s overall performance. So sit back, relax, and get ready to give your computer a whole new lease of life!

    Backup Your Data First

    Before moving your operating system (OS) to a solid-state drive (SSD), it’s crucial to backup your data first. A solid-state drive is faster, more durable, and more efficient than a traditional hard drive. However, moving your OS to an SSD requires a complete clone of the data on your current drive.

    If the cloning process goes wrong, you could lose your data permanently. Therefore, it’s important to backup your data to an external hard drive, cloud storage or use Windows’ built-in backup tool. This way, you can easily retrieve your data if something goes wrong in the cloning process.

    Once you’ve backed up your data, you can then proceed with cloning your OS to an SSD by using dedicated software or tools provided by your SSD manufacturer. Overall, backing up your data is a necessary step to ensure a smooth transition to an SSD and prevent data loss.

    Why You Need to Do It

    Backing up your data may seem like a trivial task, but it’s a crucial one that you should make a priority. Losing your valuable data due to unforeseen circumstances, such as hardware failures, hacking, or ransomware attacks, can be catastrophic for your business or personal life. That’s why it’s essential to take preventive measures to safeguard your data.

    The first step is to back up your data to an external hard drive, cloud-based service, or both, depending on your storage needs. By backing up your data, you’ll have a secondary copy of it that you can use to restore or recover your data in case the primary copy gets lost or corrupted. It’s always better to be safe than sorry, and backing up your data is one of the simplest and most effective ways to protect yourself from data loss.

    So, don’t wait until it’s too late – start backing up your data today!

    how do i move my os to a ssd

    Ways to Backup Your Data

    As technology continues to advance and become an increasingly integral part of our daily lives, it’s crucial to take the necessary steps to protect our data. One of the easiest and most effective ways to do this is by backing up your data. There are numerous ways to backup your data, including cloud-based options such as Google Drive and Dropbox, as well as offline options such as external hard drives and USB drives.

    By regularly backing up your data, you can ensure that you never lose important information due to a hardware failure, theft, or other unforeseen events. Plus, backing up your data can provide peace of mind knowing that your information is securely stored in more than one location. So, whether you’re a casual computer user or a business owner, make sure to prioritize backing up your data to keep it safe and readily accessible whenever you need it.

    Check Compatibility and Prepare Your SSD

    Moving your operating system (OS) to a solid-state drive (SSD) can provide a significant boost to your computer’s performance. However, before you begin the process, you need to ensure that your computer and SSD are compatible. Check your computer’s specifications to see if it can support an SSD, and ensure that the SSD you choose is compatible with your computer’s interface.

    Once you’ve determined compatibility, you’ll need to prepare your SSD for the migration process. This includes backing up any important data, updating your SSD’s firmware, and cloning your existing OS to the SSD. It’s important to note that moving your OS to an SSD can be a complex process, and it’s important to follow instructions carefully to prevent data loss or other issues.

    With the right preparation and attention to detail, however, you can enjoy the benefits of faster boot times and improved system performance.

    The Importance of Compatibility

    When it comes to SSDs, compatibility is key. Before you make any purchase, it’s important to check if the SSD you have your eye on is compatible with your device. This means checking the size, interface type, and form factor to ensure it will fit and work properly.

    Once you’ve confirmed compatibility, it’s time to prepare your SSD for installation. This includes backing up any important data, initializing the drive, and formatting it to the correct file system. By taking these steps, you can ensure that your SSD will function optimally and give you the speed and storage capacity you need.

    Don’t overlook the importance of compatibility and preparation – it will save you time, money, and frustration in the long run.

    Formatting Your SSD for OS Installation

    Before formatting your SSD for OS installation, it’s crucial to ensure that your SSD is compatible with your computer and operating system. Check your system’s manual or do some online research to confirm that your SSD meets the specifications needed to work with your system. Also, make sure to back up any important data as formatting your SSD will wipe all existing data.

    Once you’ve checked compatibility and backed up your data, it’s time to prepare your SSD by connecting it to your computer and initializing it. This process involves creating a partition on your SSD and assigning a file system for it to use. This will allow your operating system to recognize your SSD as a storage device and enable you to install your OS onto it.

    With the right preparation, formatting your SSD can be a straightforward process, giving you a faster and more efficient computer experience.

    Clone Your OS to the SSD

    If you want to speed up your computer, cloning your OS to a SSD can be a great way to do it. But how do you move your OS to a SSD? The first step is to purchase an SSD that is large enough to hold your operating system and any other programs you want to run quickly. Then, you can use software such as Macrium Reflect or EaseUS Todo Backup to copy your OS and everything on it to the SSD.

    This process is called cloning. Once the cloning is complete, you can set your BIOS to boot from the SSD instead of your old hard drive. This will ensure that your computer starts up from the SSD every time you turn it on.

    In no time at all, you’ll be enjoying faster boot and load times, and an overall more responsive computer. Just remember to back up all your important files before you start the cloning process, just in case something goes wrong.

    Different Methods for Cloning Your OS

    If you’re upgrading to an SSD, one of the first things you might want to do is to clone your OS to your new drive. This will ensure that you don’t need to reinstall your operating system and all your programs from scratch. There are a few different methods available for cloning your OS.

    One popular program for cloning your OS is Macrium Reflect, which is free to use. You’ll also need a USB flash drive or DVD to create a bootable rescue media to use with Macrium. Another popular option is EaseUS Todo Backup, which is also free to use and allows you to clone your OS with just a few clicks.

    Whatever method you choose, cloning your OS to your new SSD is a great way to save time and ensure that your new drive is up and running as quickly as possible.

    How to Choose the Right Cloning Software

    Choosing the right cloning software can make all the difference when it comes to moving your operating system onto a new SSD. There are plenty of options out there, but it’s important to find a software that not only clones your OS, but also moves your data and applications without any issues. Look for a software that provides easy-to-understand instructions and a user-friendly interface.

    Some popular options include EaseUS Todo Backup, Acronis True Image, and Macrium Reflect. It’s also important to choose a software that works well with your specific operating system, whether it’s Windows or Mac. By doing your research and choosing the right cloning software, you can easily transfer your OS to your new SSD and continue operating without any interruptions.

    Set Up Your Boot Order in BIOS

    If you want to move your operating system (OS) from your standard hard drive to a solid-state drive (SSD), you’ll need to set up your boot order in the BIOS. The BIOS is the basic input/output system on a computer’s motherboard that controls how the computer boots up and runs. By default, the boot order is usually set to look for devices like the hard drive first, which means you’ll need to change it so that the computer loads from the SSD instead.

    To do this, you’ll need to enter the BIOS setup menu and find the boot order settings. From there, you can move the SSD to the top of the list, which will ensure that the computer boots from the SSD instead of the hard drive. It’s important to note that the process may vary depending on your computer’s model and manufacturer, so it’s always a good idea to consult your user manual or search online for specific instructions.

    Overall, changing your boot order is a simple but important step in moving your OS to an SSD and can significantly improve your computer’s overall performance.

    What Is BIOS and Why You Need to Modify It?

    BIOS BIOS, or Basic Input/Output System, is a firmware that comes pre-installed on a motherboard. It is responsible for initializing the hardware components when the computer is turned on and loading the operating system. However, BIOS also provides access to various settings that can be customized by the user to optimize the system’s performance.

    One of the essential settings in BIOS is the boot order, which determines which device the computer will try to boot from first. By default, the boot order is set to the hard drive, meaning that the computer will load the operating system from it. But suppose you want to install a new operating system from a USB drive or DVD.

    In that case, you need to modify the boot order to prioritize the device containing the installation media. This can be done by entering the BIOS setup during boot and navigating to the boot order section. From there, you can rearrange the boot devices by dragging and dropping them in the desired order using the arrow keys.

    Remember to save the changes before exiting the setup to apply them. Overall, tweaking BIOS settings can be a powerful tool to optimize your system, so don’t be afraid to explore them.

    Steps to Change Boot Order in BIOS

    Changing the boot order in BIOS can be a simple and quick process, but it’s important to know the steps involved to avoid any issues. The boot order determines which device or drive your computer will start up from when it’s powered on. To change the boot order in BIOS, you first need to enter the BIOS setup menu.

    This can typically be done by pressing a key or combination of keys during the boot process. Once in the BIOS menu, navigate to the boot order or boot priority section, which is usually located under the advanced or settings tab. From there, you can use the arrow keys to move the preferred device or drive to the top of the list.

    It’s important to save and exit the BIOS menu after making changes, as failure to do so can result in the changes not being applied. By changing the boot order in BIOS, you can prioritize booting from a specific device or drive and improve the overall performance of your computer.

    Install the SSD and Enjoy the Benefits

    Looking to upgrade your computer with a faster storage solution? Installing an SSD (solid-state drive) can give your machine a noticeable performance boost and reduce load times significantly. But before you can reap the benefits of an SSD, you need to move your operating system (OS) to it. There are numerous methods available, but the easiest and most efficient way is by using a cloning software.

    First, you need to connect the SSD to your computer, and then download and install the cloning software. Next, launch the software, select your OS drive as the source, and the SSD as the destination. Finally, initiate the cloning process and wait for it to finish.

    Once it’s done, shut down your computer, disconnect the old hard drive, and boot up your system from the newly-installed SSD. And voila, your OS has been successfully migrated to a faster, more reliable storage solution. By following these simple steps, you can enjoy the faster load times and increased efficiency an SSD has to offer.

    How to Install the SSD

    If you’re looking to upgrade your computer’s storage capacity and speed, installing a solid-state drive (SSD) is a great choice. Not only will it give you faster boot and load times, but your programs will run smoother and your computer will be more responsive overall. To install an SSD, you’ll need to first ensure that your computer has an available SATA port and a power supply connector.

    Once you have that, you’ll need to remove the existing hard drive and install the SSD in its place. Don’t worry, it’s not as complicated as it sounds! Just remember to backup your data beforehand and take your time during the installation process. With a new SSD in place, you’ll be able to enjoy all the benefits of quicker and more reliable storage.

    Benefits of Moving OS to SSD

    SSD, Operating System, Benefits If you’re looking to give your computer new life, consider moving your operating system (OS) to an SSD. The benefits are numerous. First, SSDs are significantly faster than traditional hard drives, which means your computer will boot up faster and programs will open with lightning speed.

    They also offer greater durability, as they don’t have moving parts that can wear down over time. Additionally, SSDs are more energy-efficient, which is great news for anyone who wants to reduce their energy consumption. Finally, SSDs are quieter than hard drives, helping to create a more peaceful computing experience overall.

    Make the move to an SSD and start enjoying all these benefits today!

    Conclusion

    If you want to give your old computer a new lease on life, moving your OS to an SSD is the way to go. Not only will you notice a significant boost in performance, but you’ll also have more space for all your important files and programs. And the best part? You’ll feel like a computer wizard for knowing how to do it yourself.

    So go ahead, channel your inner tech guru and give your computer the upgrade it deserves!”

    FAQs

    What is an SSD and why should I move my OS to it?
    An SSD (Solid State Drive) is a non-volatile storage device that can significantly improve your computer’s performance. Moving your operating system (OS) to an SSD can make your computer boot faster, load programs quicker, and increase overall system responsiveness.

    Can I move my OS to an SSD without reinstalling Windows?
    Yes, you can. There are a variety of tools available that allow you to clone or migrate your operating system from your old hard drive to a new SSD. Some popular options include Macrium Reflect, Acronis True Image, and EaseUS Todo Backup.

    What size SSD do I need to move my OS?
    The size of the SSD you need depends on the size of your operating system and the amount of data you have on your existing hard drive. As a general rule of thumb, you should get an SSD that is at least as large as your current hard drive. For example, if your existing hard drive is 500GB, you should get a 500GB SSD.

    Do I need to backup my data before moving my OS to an SSD?
    Yes, it is always a good idea to back up your data before making any changes to your computer’s storage. Moving your operating system to a new SSD involves some level of risk, and you don’t want to lose any important files or documents in the process. You can use an external hard drive or cloud storage service to back up your data.

  • Smoothly Migrate Your Windows Operating System from Hard Drive to SSD: A Step-by-Step Guide

    Are you tired of a sluggish and slow computer that makes you wait for ages just to open a folder or run a program? Well, upgrading your old hard drive to an SSD may be just the solution for you! SSDs or Solid-State Drives, are the latest storage technology that offers lightning-fast read and write speeds. In comparison to traditional hard drives, SSDs are more durable, silent, and consume less power. But, if you are using an older computer, you may have to jump through a few hoops to get Windows up and running on the new SSD.

    In this blog, we will guide you through the process of getting Windows onto an SSD so that you can enjoy the benefits of a faster and more responsive computing experience. From backing up your data to installing new drivers, we will cover all the steps you need to take to ensure a smooth transition. So, buckle up, follow along, and get ready to give your old PC a new lease of life!

    Backup your data from HDD

    If you’re looking to upgrade from a traditional hard drive to a speedy SSD, it’s important to backup your data first. One way to do this is by using a cloning software, such as Acronis True Image, to transfer your entire HDD to the new SSD. Another option is to manually back up important files and folders onto an external drive or cloud storage service.

    Once your data is safely backed up, you can install the new SSD and transfer your Windows operating system using a transfer tool provided by the SSD manufacturer. One popular tool is Samsung’s Data Migration software, which allows you to easily transfer all your files, applications, and settings to your new SSD. With these steps, you can smoothly transition from an old HDD to a brand new SSD with your data intact and ready to go.

    Copy system files to SSD

    To speed up your computer’s performance, it’s essential to copy system files to your SSD. But before that, it’s crucial to create a backup of your data from your HDD. This will ensure that you have a copy of all your important files and documents in case anything goes wrong during the copying process.

    There are several ways to backup your data, including using an external hard drive, cloud storage, or a USB drive. However, the easiest and most efficient way is to use Windows built-in backup feature. To backup your data using Windows backup, you need to go to Control Panel, then Backup and Restore.

    Next, click on Set Up Backup and follow the instructions. You can choose to create a system image, which will create an exact copy of your entire HDD, including the operating system and files. Once you’ve created a backup, it’s time to copy system files to your SSD.

    You can use a cloning software like EaseUS Todo Backup, which makes the process simple and straightforward. Simply connect your SSD to your computer and run the software. It will detect your SSD and guide you through the cloning process, which will copy all the files from your HDD to your SSD.

    In conclusion, backing up your data before copying system files to your SSD is essential to ensure the safety of your important files. With Windows backup and cloning software, the process is straightforward and can significantly improve your computer’s performance. Invest some time in creating a backup and copying system files to your SSD; your computer will thank you for it!

    how do i get windows from hard drive to ssd

    Make SSD bootable

    Backing up your data from HDD is a crucial step towards making your SSD bootable. Before transferring your data to the new drive, it is important to create a backup of your important files and documents. This ensures that no data is lost during the transfer process.

    The easiest way to backup your data is either by using an external hard drive or uploading files to a cloud service, such as Google Drive or Dropbox. Once you have created the backup, proceed to transfer the data to your new SSD. It is important to note that cloning software can be used to transfer everything from your old hard drive to the new one, but it is recommended to start fresh and install a clean version of your operating system on the SSD.

    By following these steps, you can ensure a smooth transition to a faster and more efficient SSD. Don’t forget to securely dispose of your old hard drive to protect your sensitive data.

    Prepare SSD for Windows

    If you’re looking to upgrade your computer’s storage to an SSD and want to transfer your Windows operating system from your old hard drive, there are a few steps you need to take. First, you’ll need to clone your hard drive to the SSD using specialized software. This will create an exact copy of your hard drive onto the new SSD, including all of your files, settings, and operating system.

    Once the cloning process is complete, you’ll need to make sure your computer boots from the new SSD instead of the old hard drive. You can do this by entering your computer’s BIOS settings and selecting the SSD as the primary boot device. Finally, you may need to activate your copy of Windows again, as the transfer to the new SSD may trigger the activation process.

    With these steps complete, you’ll be up and running with a faster, more reliable SSD and the familiar Windows operating system.

    Partition SSD for Windows installation

    If you’re planning to install Windows on your SSD, it’s important to partition it first. Partitioning your SSD means dividing it into separate sections or volumes to help organize your data and optimize your system’s performance. One advantage of partitioning is that you can keep Windows and your programs separate from your personal data, making it easier to manage backups and restores.

    Another perk of partitioning is that it allows you to allocate space more efficiently, as certain applications may require more or less space than others. When partitioning your SSD, be sure to allocate enough space for Windows and any applications you plan to install, while still reserving enough space for your files, photos, videos, and other personal data. By properly partitioning your SSD, you’ll have a more organized and optimized system, ensuring a smooth and speedy performance for all your computing needs.

    Connect SSD to your motherboard

    Connecting your SSD to your motherboard is an easy process that can take your computer’s performance to the next level. Before installing Windows on your new SSD, you will need to prepare it properly. First, you will need to remove any existing data on the SSD.

    This can be done by formatting the drive. You can format your SSD by right-clicking on it in Windows Explorer and selecting the Format option. Ensure that you select the correct file system before formatting the drive.

    Next, you will need to initialize the SSD and create a partition. This is done through the Disk Management tool in Windows. Once you have completed these steps, your SSD will be ready for Windows installation.

    By installing Windows on your SSD, you will notice significant improvements in boot times, application load times, and overall system performance. Don’t forget to backup your important data before formatting and installing Windows on your new SSD.

    Enter BIOS and change boot order

    When installing a new solid-state drive (SSD) on your computer, it’s essential to prepare it correctly for Windows installation. One crucial step is to enter the BIOS and change the boot order to prioritize the SSD. This ensures your computer boots from the SSD rather than the old hard drive, which may still contain the operating system.

    You can access the BIOS by pressing a specific key during startup, usually F2 or Delete. Once inside, navigate to the Boot Order tab and move the SSD to the top of the list. Save your changes and exit the BIOS, and you’re ready to proceed with the installation.

    By properly preparing your SSD, you’ll ensure faster system performance and a seamless installation of Windows.

    Install Windows onto SSD

    Installing Windows onto an SSD can improve overall computer performance. First, you need to make sure that your SSD is connected to your computer and recognized by the BIOS. Then, you can clone your hard drive using software like Macrium Reflect.

    This software allows you to transfer all your data and Windows operating system to the SSD. After cloning, shut down your computer, remove the hard drive and replace it with the SSD. Upon powering on, your computer should boot from the SSD.

    Finally, check that your Windows installation is activated and up to date. With these steps, you can easily migrate your Windows operating system and enjoy faster boot times and application load times on your SSD.

    Boot from Windows installation media

    If you want to install Windows onto an SSD, you’ll need to boot from your Windows installation media. This could be a USB drive or a DVD, depending on what you have available and what your computer supports. First, you’ll need to change your computer’s boot order so that it prioritizes the installation media over your current operating system.

    This means that when you start the computer, it will look for the installation media first and load Windows from there instead of from the SSD. Once you’ve changed the boot order, you can insert the installation media and follow the prompts to install Windows onto the SSD. Keep in mind that this process will overwrite any existing data on the SSD, so make sure to back up any important files before starting the installation.

    With a bit of patience and some technical know-how, you’ll be up and running with Windows on your SSD in no time!

    Select SSD as installation location

    When installing Windows onto your computer, it is essential to select the SSD as the installation location. SSD, or Solid State Drive, is a faster and more reliable storage option compared to the traditional HDD. By selecting the SSD as the installation location, you will enjoy faster boot and loading times, smoother multitasking, and a more responsive system overall.

    To do this, you need to go to the Windows installation process, select “Custom” installation, and then choose the SSD as the destination drive. However, keep in mind that SSD typically has less storage capacity than HDD, so make sure you back up your data before the installation process. With SSD, you will experience a significant improvement in your computer’s performance, making it well worth the investment.

    So, choose SSD as the installation location and enjoy a fast and responsive system!

    Finalize Windows setup on SSD

    Moving your Windows setup from a hard drive to an SSD might seem like a daunting task, but it’s actually a very straightforward process. The first step is to clone your hard drive onto the SSD, which can be done using a cloning program like Clonezilla or Macrium Reflect. Once that’s done, you’ll need to physically install the SSD into your computer and make sure it’s recognized in the BIOS.

    Finally, you’ll need to change your boot order to prioritize the SSD over the hard drive and initialize it as the boot drive. After doing all of these steps, you should be able to enjoy the improved speed and performance of your new SSD without any hiccups or issues. Just be sure to double-check your BIOS settings and make sure everything is set up correctly before proceeding.

    Conclusion

    In essence, the process of moving Windows from a hard drive to an SSD involves cloning or migrating the operating system. But don’t be fooled, it’s not as simple as dragging and dropping. It requires a bit of patience, technical know-how, and the right tools to ensure a smooth transition.

    So just remember, when it comes to moving your OS over, don’t be afraid to dive in and get your hands dirty. After all, what’s the point of having a speedy SSD if you’re not going to use it to its full potential?”

    FAQs

    What is an SSD and how is it different from a hard drive?
    SSD stands for Solid State Drive and uses flash memory to store data, while a hard drive uses spinning platters to store it. SSDs are generally faster and more reliable than hard drives.

    Can I transfer my Windows operating system from my hard drive to an SSD?
    Yes, you can clone or transfer your Windows operating system from a hard drive to an SSD using software such as EaseUS Todo Backup, Acronis True Image, or Macrium Reflect.

    Do I need to reinstall Windows on my new SSD after transferring it from my hard drive?
    Generally, no. If you successfully clone or transfer your Windows operating system from your hard drive to your SSD, you should be able to boot from the SSD and have the same operating system and files as before.

    What should I do with my old hard drive after transferring my Windows operating system to an SSD?
    You can keep your old hard drive as a backup or for additional storage, or you can choose to wipe it clean and donate or recycle it. Just make sure to back up any important files before wiping it.