Category: How to

How to

  • Decoding the SSD Essentials: How to Choose the Right SSD for Your Needs

    If you are planning to upgrade or replace your computer’s hard drive, solid-state drives (SSDs) are the way to go. These devices offer faster boot times, quicker file transfer speeds, and more reliability compared to traditional hard drives. However, choosing the right SSD can be a daunting task, considering the various options available in the market.

    With so many brands, models, and specifications to choose from, it’s easy to get overwhelmed. So, how do you pick the best SSD for your needs? In this blog post, we will guide you through the essential factors to consider when choosing the right SSD for your computer. With our expert tips, you’ll be able to make an informed decision and get the best SSD that suits your needs and budget.

    Understanding SSD Types

    When it comes to choosing an SSD, it’s essential to understand the different types available on the market. The most common types of SSDs are SATA, NVMe, and PCIe. SATA SSDs are the most basic and affordable option, but they have a slower read/write speed compared to the other two types.

    NVMe, on the other hand, is known for its high speed and performance, making it the go-to choice for gamers and professionals who deal with large files. Finally, PCIe SSDs are the fastest and most expensive type of SSDs, but they require a PCIe slot to function properly. So, when deciding which SSD to purchase, you should consider your needs and budget.

    If you need high speed and performance, then NVMe or PCIe SSDs might be the best option for you. However, if you’re on a tight budget, then SATA SSDs can still offer significant improvements over traditional hard drives. In conclusion, understanding the different types of SSDs available can help you make the right decision when purchasing one for your computer.

    SATA SSDs vs NVMe SSDs

    When shopping for a new SSD, you may come across two types: SATA and NVMe. But what’s the difference between the two? SATA SSDs have been around for a while and are known for their reliability. They connect to your computer through the SATA interface, which limits their data transfer speed to around 550 MB/s.

    NVMe SSDs, on the other hand, connect through the PCIe interface, which allows for much faster speeds. In fact, NVMe SSDs can reach transfer speeds of up to 3500 MB/s, making them ideal for high-performance tasks like gaming, video editing, and 3D rendering. However, they do come with a higher price tag compared to SATA SSDs.

    Ultimately, the type of SSD you choose will depend on your budget and your specific needs. If you’re looking for a reliable, budget-friendly option, a SATA SSD may be the way to go. But if you need lightning-fast speeds for demanding tasks, an NVMe SSD is definitely worth considering.
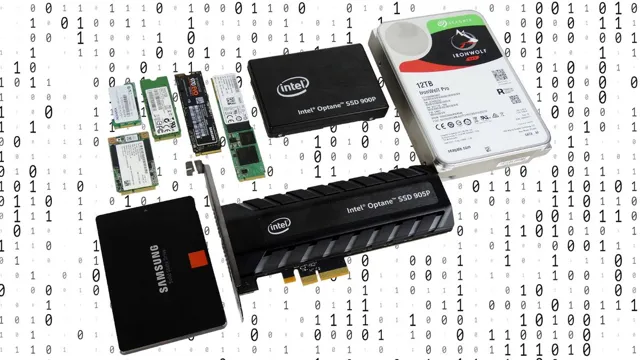
    how do i know what kind of ssd to buy

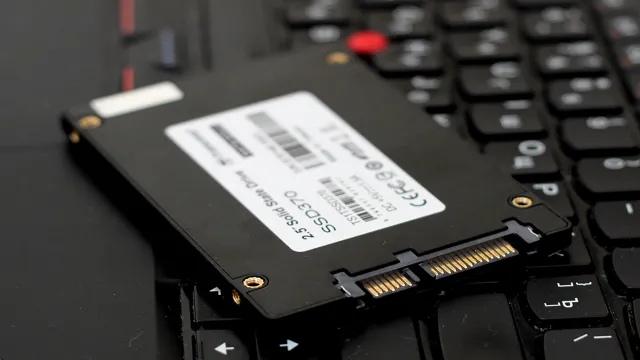
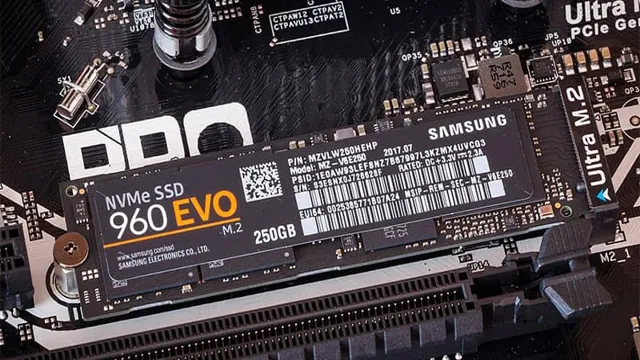
    2.5-inch SSDs vs M.2 SSDs

    When it comes to SSDs (solid-state drives), we have different types available for use. Two of the most common ones are the 5-inch SSD and the M.

    2 SSD. The 5-inch SSD is the more traditional and classic form that has been around for years.

    It has a rectangular shape, a SATA connector, and various storage capacities. On the other hand, the M.2 SSD is a smaller and more advanced version that uses the NVMe interface.

    It is best suited for modern-day motherboards, and it doesn’t require any cables since it directly plugs into the motherboard. When it comes to speed, the M.2 SSD definitely comes out on top since it has an NVMe interface, allowing for faster data transfer rates, while the

    5-inch SSD relies on the older SATA interface. However, the 5-inch SSD still has advantages, such as being more affordable and easier to install.

    Ultimately, the decision on which SSD to use depends on one’s needs and preferences in terms of features, speed, capacity, and price.

    Considerations for Compatibility

    When choosing an SSD, it’s important to consider compatibility factors that match your computer’s hardware specifications. First, determine what type of connector your motherboard requires, whether it’s SATA or PCIe. SATA is more common and affordable while PCIe is faster but more expensive.

    You can also check the storage capacity your computer can handle, whether it’s M.2 or 5-inch form factor.

    M.2 SSDs are smaller and faster while 5-inch SSDs are larger but slower.

    You can check your computer’s manual or do a quick online search for specific details. It’s also important to consider the SSD’s endurance rating, which is the amount of data it can write before performance starts to degrade. Higher endurance ratings are better, especially for heavy workloads.

    Overall, knowing your computer’s compatibility requirements and the SSD’s performance specs can help you choose the right SSD for your needs.

    Form Factor Compatibility

    When building a computer system, it is essential to consider form factor compatibility. The form factor is the physical size, shape, and layout of the components that go into building a computer. This factor determines the size and shape of the computer case and the type of motherboard that fits inside it.

    A compatible form factor is needed to ensure that all the components fit together correctly, allowing the computer to function as intended. Some of the most common form factors used in building computers include ATX, Micro-ATX, and Mini-ITX. It is essential to choose the right form factor for your computer, as using the wrong one can result in compatibility issues that cause system malfunctions.

    In addition, using an incompatible form factor can result in a significant amount of frustration and wasted time. Make sure to do your research before building your computer system to ensure that all the components you choose are compatible and that your computer works efficiently and effectively.

    Interface Compatibility

    When it comes to interface compatibility, there are several factors to consider. One of the most important things to keep in mind is the user experience. You want your interface to be as user-friendly as possible, which means making it easy for users to navigate and use.

    This may require you to investigate and ensure compatibility with various devices and platforms, such as mobile devices, operating systems, browsers, and software applications. Other factors to consider include data compatibility and security. Your interface should be able to seamlessly integrate and import data from various sources while maintaining the highest level of security.

    Ultimately, interface compatibility comes down to ensuring that your interface works well with all the different components and technologies that it interacts with. By doing so, you can enhance the usability, accessibility, and functionality of your interface for your users.

    Determining Your Storage Needs

    Are you looking to upgrade your computer’s storage with an SSD, but not sure what kind to buy? Determining your storage needs is key in choosing the right SSD for your system. Consider factors such as the amount of storage space you need and the type of tasks you will be performing on your computer. If you plan on using your computer for high-performance tasks such as video editing or gaming, you may want a larger capacity, high-speed SSD.

    However, for everyday use such as web browsing and word processing, a smaller capacity SSD may suffice. It’s important to also consider the form factor and interface of the SSD, as they can affect compatibility with your system. By assessing your storage needs and understanding your system’s requirements, you can make an informed decision about which SSD to purchase.

    So, think about what you’ll use your computer for and how much space you need to help you choose the right SSD to improve your system’s performance.

    Storage Capacity

    When determining your storage needs, there are a few factors to consider. First, you’ll want to assess how much data you currently have and how much you anticipate accumulating in the future. It’s also essential to keep in mind the type of files you’ll be storing and how much space they require.

    For example, photos and videos take up significantly more space than documents and emails. Additionally, think about how quickly you’ll need to access this data. If you require quick and frequent access, a solid-state drive (SSD) may be a better option than a traditional hard drive.

    Finally, consider your budget. More extensive storage options can be costly, but don’t skimp on storage capacity if you’ll need it in the future. It’s better to invest in a larger storage solution upfront, than having to continuously upgrade as you run out of space.

    By evaluating these factors, you can confidently determine the storage capacity needed to store your valuable data securely.

    Read and Write Speeds

    Read and Write Speeds If you’re considering buying a new storage device, determining your storage needs and understanding read and write speeds will help you make a more informed choice. Read and write speeds refer to how quickly data can be read from or written to a storage device. The higher the speed, the faster the data can be transferred.

    This is especially important for tasks like transferring large files or backing up important data. For example, if you regularly work with large media files, like videos or photos, you’ll want a storage device with fast read and write speeds to ensure smooth playback and easy editing. On the other hand, if you mainly use your computer for web browsing and word processing, slower read and write speeds may be sufficient.

    It’s important to balance your storage needs with your budget, as devices with faster read and write speeds often come at a higher price point. Ultimately, understanding read and write speeds will help you choose the right storage device for your needs.

    Brand and Price Comparison

    When it comes to choosing the right SSD, there are many things to consider. One of the first things to look at is brand and price comparison. Not all brands are created equal, and some may be more reliable or offer better performance than others.

    Additionally, prices can vary widely between brands, so it’s important to do your research to find the best deal. Another factor to consider is the size of the SSD. Depending on your needs, you may want something with a higher capacity, but this will generally come at a higher cost.

    If you’re just looking for something to store your operating system, a smaller SSD may be sufficient. Ultimately, the best way to know what kind of SSD to buy is to do your research, compare prices and features, and consider what your specific needs are. By taking the time to find the right SSD, you can ensure that your computer runs smoothly and efficiently.

    Top SSD Brands

    When it comes to solid-state drives (SSDs), there are a few top brands that come to mind. These brands include Samsung, Intel, Crucial, Kingston, and Western Digital. While there are many other SSD brands on the market, these five are known for their quality, performance, and reliability.

    When comparing these brands, it’s important to take into consideration factors such as price, storage capacity, read/write speeds, and overall performance. For those looking for a budget-friendly option, Kingston and Crucial offer SSDs at lower price points while still providing decent reading and writing speeds. Meanwhile, Samsung and Intel are known for their top-tier performance and higher price points.

    Ultimately, when choosing an SSD brand it’s all about finding the right balance between price and performance that meets your storage needs.

    Price Comparison

    When it comes to shopping for products, it’s natural to want the best brand at the best price. However, finding that perfect combination can be overwhelming. It’s easy to assume that the more expensive a brand is, the higher quality it is.

    But that’s not always the case. Sometimes, you may find equally good quality in a lesser-known brand that’s significantly cheaper. To ensure you’re getting the best value for your money, it’s always a good idea to do brand and price comparisons.

    Check out different retailers and online stores, and compare prices of the same product between them. Additionally, check reviews and ratings of different brands before you make a purchase. Take the time to browse through forums and discussion boards to see what other people are saying about the quality of different products.

    Doing so can save you a lot of money and help you make an informed decision.

    Conclusion

    If you’re in the market for an SSD, it’s important to do your research and make sure you’re getting one that fits your needs and budget. Determine what kind of performance you’re after, the capacity you require, and whether you want a SATA or NVMe interface. Once you have a good handle on these factors, you’re ready to start making informed purchasing decisions.

    After all, when it comes to SSDs, knowledge is power – and power, as we all know, is one of the best things an SSD can give you.”

    FAQs

    What is the difference between SATA and NVMe SSDs?
    SATA SSDs are commonly used and offer good performance at an affordable price. NVMe SSDs, on the other hand, offer faster read and write speeds but are more expensive than SATA SSDs.

    What size SSD should I get?
    The size of SSD you should get depends on your storage needs. If you only need to install your operating system and a few applications, a 256GB SSD will suffice. If you need to store a lot of media files and games, a 1TB SSD would be more appropriate.

    Can I replace my laptop’s HDD with an SSD?
    Yes, you can upgrade your laptop’s HDD to an SSD by cloning your existing drive or doing a fresh install of your operating system onto the new SSD. This will provide faster boot times and overall better performance.

    Do I need to purchase an SSD from the same brand as my laptop or desktop computer?
    No, you can purchase an SSD from any reputable brand as long as it is compatible with your computer. Check the specifications of your computer to ensure what type of SSD is supported before making a purchase.

    Is it worth upgrading to an SSD?
    Yes, upgrading to an SSD can significantly improve the overall performance and speed of your computer. It will also reduce boot times and application load times, making for a more efficient and enjoyable user experience.

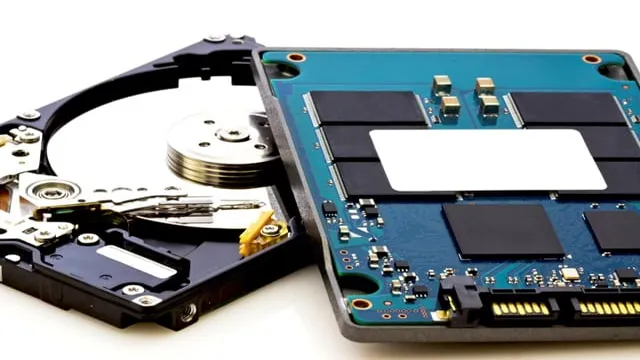
  • Step-by-Step Guide: Installing an SSD Drive to Show Up on Your Computer

    If you’re a gamer or perform heavy tasks on your computer, you know the importance of having a fast and reliable storage drive. That’s where an SSD comes in! Not only do these drives provide faster boot and load times, but they’re also more durable and energy-efficient compared to traditional hard drives. However, installing an SSD may seem like a daunting task for some.

    In this tutorial, we’ll show you step-by-step how to install an SSD drive so you can take advantage of all the benefits it has to offer. So grab your screwdriver and let’s get started!

    Check Compatibility

    If you’re wondering how to install an SSD drive so it shows up on your computer, the first thing to do is check compatibility. Not all computers are built to support SSDs, so it’s crucial to make sure your PC or laptop can handle the upgrade. Check your computer’s manual or online specifications to see if it has an available slot for an SSD.

    If it doesn’t, you may need to upgrade your motherboard or purchase an external enclosure. Once you’ve confirmed compatibility, opening up your computer and installing your SSD is relatively straightforward. Ensure you have all the necessary tools and follow the manufacturer’s instructions, which typically involve removing the old hard drive, connecting the SSD via SATA cable or another connection, and securing it in place with screws.

    After installation, you’ll need to format your SSD and migrate data from your old hard drive to enjoy faster boot and load times.

    Check motherboard manual for M.2 or SATA slots.

    When it comes to upgrading your PC, it’s essential to check compatibility before purchasing any new hardware. If you’re looking to add an M.2 or SATA drive to your system, the first thing to do is to check your motherboard’s manual.

    Most modern motherboards have M.2 slots available, but it’s essential to ensure that the drive you plan to purchase is compatible with your motherboard. SATA slots, on the other hand, are much more common and can be found on most motherboards.

    Again, it’s crucial to make sure that the drive you want to install is compatible with both the motherboard and the other components in your system. Checking compatibility is especially important if you’re planning to install a high-end NVMe M.2 drive, as some low-end motherboards may not support these types of drives.

    In short, before purchasing any M.2 or SATA drives, make sure to check your motherboard’s manual to ensure compatibility. Upgrading your system can be a great way to improve performance, but not taking the time to check compatibility can result in a waste of time and money.

    By doing your research beforehand, you can make sure that your upgrade goes smoothly and that your system runs faster and more efficiently than ever before.

    how do i install an ssd drive to show up

    Make sure SSD is compatible with port type.

    One essential factor to consider when upgrading your computer’s storage to an SSD is the compatibility of the drive with the port type. Not all SSDs are compatible with all port types, and using an incompatible SSD could lead to performance issues or, at worst, damage to your computer. Before purchasing an SSD, it’s crucial to check the specifications of both your computer and the SSD to ensure compatibility.

    This step is especially important if you have an older computer with outdated ports, as you may need to upgrade your motherboard to use certain types of SSDs. So, before you make any purchases, take the time to check compatibility and make sure you’re buying the right SSD for your computer’s port type.

    Connect the SSD

    When it comes to upgrading your computer’s storage speed, installing an SSD drive can make a world of difference. But once you’ve purchased your new SSD, how do you go about installing it so that it shows up on your system? First, you’ll need to physically connect the drive to your computer. Most modern computers have a dedicated slot for SSDs, but you may need to use an adapter to fit the drive correctly.

    Once everything is connected, you’ll need to power up your computer and head into your system’s BIOS. From there, you’ll want to navigate to the boot settings and make sure that your SSD is selected as the primary boot device. Finally, save your changes and exit the BIOS.

    Your computer should now recognize the new drive and display it in the file explorer. With a little bit of patience and some careful installation, your SSD should be up and running in no time, delivering lightning-fast speeds and superior storage performance.

    Plug in power and data cable to motherboard and SSD.

    When it comes to installing an SSD (solid-state drive), one of the essential steps is connecting it to the motherboard and power source. To do this, you’ll need to plug in the power and data cable to both the motherboard and the SSD. This step is relatively simple and straightforward, but it’s essential to ensure that you’ve plugged in everything correctly.

    The SSD will typically have a small, rectangular port where you’ll connect the data cable, while the power cable will connect to a larger, square-shaped port. Once you’ve plugged both the cables, you should be good to go, and your motherboard should detect the SSD automatically. Keep in mind that if you’re building a PC from scratch, it’s crucial to make sure that your power supply unit has enough power connectors to support all the components, including the SSD.

    By following this step, you can ensure that your SSD is connected and ready to go, allowing you to take full advantage of its faster read/write speeds and improved performance.

    Screw in SSD to case.

    After screwing in the SSD to the case, it’s time to connect it. First, locate the SATA connector on the motherboard. It’s usually located near the bottom of the board and will be labeled as SATA 1, SATA 2, etc.

    Connect one end of the SATA cable to the connector on the motherboard and the other to the SSD. Make sure the connector is properly seated on both ends. Next, locate the power connector on the power supply.

    It’s a small, rectangular connector with multiple pins. Connect one end of the power cable to the power connector on the SSD and the other to the power supply. Again, make sure the connector is properly seated on both ends.

    It’s important to note that if you’re using an M.2 SSD, you don’t need to connect a SATA cable or a power cable. M.

    2 SSDs connect directly to the motherboard and are powered by the motherboard as well. Once you’ve connected the cables, double-check that everything is connected properly and securely. You don’t want any loose connections that could cause data loss or damage to your hardware.

    Once you’re confident that everything is connected correctly, you’re ready to start using your new SSD!

    Initialize and Format SSD

    If you’ve recently purchased an SSD drive, you’re probably wondering how to install it properly in your computer. First, you’ll need to initialize the SSD in your system’s Disk Management utility. This will ensure it’s recognized by your computer and ready for use.

    To do this, right-click the Windows Start button and select Disk Management. From there, find the SSD drive and select Initialize Disk. Once it’s initialized, you can create partitions on the SSD and format it for use.

    When formatting, you should choose the NTFS file system for maximum compatibility with your system. Once the formatting process is complete, your SSD drive should show up in Windows Explorer, ready for you to use as a lightning-fast storage option. So, if you’re looking to speed up your computer and improve its overall performance, consider adding an SSD drive and following these simple steps to get it up and running quickly.

    Right-click Start Menu and open Disk Management.

    If you’ve just installed a new SSD and are wondering how to get it ready for use, the first step is to initialize and format it. This can be done easily by right-clicking on the Start menu and selecting Disk Management. A new window will open up, showing you all the disks connected to your computer.

    Find your new SSD on the list, right-click it, and select “Initialize Disk.” A wizard will guide you through the process of selecting the partition style (either MBR or GPT) and creating a partition on the disk. Once the disk is initialized, you can format it by right-clicking on the unallocated space and selecting “New Simple Volume.

    ” Follow the wizard to select the file system and format the disk. Once this is done, your new SSD is ready to use! With its faster speeds and improved stability, you’re sure to notice a difference in your computer’s performance. So why not take a few minutes to initialize and format your new SSD today?

    Initialize SSD and format disk to NTFS file system.

    Initializing and formatting a new SSD is an essential step towards setting up your system or adding storage to an existing one. To begin, you should first install your SSD into an available drive bay in your computer or attach it through a USB adapter. Once the new storage device is connected to the computer, you can then initialize it through the “Disk Management” tool in Windows.

    Be sure to select the proper disk to initialize and choose the correct partition style, GPT or MBR, based on your system requirements. Next, you will need to format the SSD to the NTFS file system, which is the standard file system used in Windows operating systems. Formatting will also create a usable file structure, for example, the Master File Table (MFT) that keeps track of all the files on the drive.

    By formatting the SSD to NTFS, you can maximize the storage capacity, improve disk performance, and ensure compatibility with other software applications. With the SSD initialized and formatted, you can then begin transferring over your files or installing your favorite games and programs without any hiccups.

    Verify SSD is Showing Up

    If you’ve installed an SSD into your computer but it’s not showing up, there may be a few things you need to check. Firstly, ensure that the drive is correctly connected to your motherboard. Double-check all cables to make sure they’re properly seated and snug.

    Once you’ve confirmed that the cables aren’t the issue, head to your computer’s BIOS. Check if it recognizes your new SSD. If it does, it should be visible in your boot order options.

    If it’s still not showing, consider formatting the drive, or possibly updating your BIOS. Lastly, it’s worth checking your operating system to ensure the drive is recognized in your disk management. This may involve selecting and initializing the drive to make it available for use.

    Once you’ve done all of these checks, your SSD should be successfully detected.

    Open Disk Management and look for SSD.

    SSD. Are you having trouble finding your SSD on your computer? Don’t worry; we’ve got you covered. First, open Disk Management on your computer.

    You can do this by searching for it in the Windows search bar or right-clicking on the Windows button and selecting Disk Management. Once you’re in Disk Management, look for your SSD. It should be labeled as “Disk 0” with a size equal to or larger than your SSD’s capacity.

    If you can’t see it, make sure it’s properly connected to your computer. If it is, right-click the unallocated space and select “New simple volume.” Follow the prompts to create a new partition for your SSD.

    Now, you should be able to see your SSD in File Explorer. Congratulations, you’ve successfully verified that your SSD is showing up!

    If not, check BIOS settings and update drivers.

    If your new SSD is not showing up on your computer, the first thing you should do is verify that it is properly connected. Check if the cables are securely plugged into both the SSD and the motherboard. If that doesn’t solve the issue, make sure to check your BIOS settings.

    Sometimes, your computer might not recognize the SSD since it is not set as the default boot device. You can change this in your BIOS settings. Additionally, it is essential to keep your drivers up to date.

    Outdated drivers could cause problems when trying to connect your SSD. You can check if you have the latest drivers for your motherboard and SSD by visiting the manufacturer’s website and downloading the latest versions. In conclusion, if your new SSD is not showing up, don’t panic.

    The first step is to make sure it is properly connected, and if that doesn’t work, check your BIOS settings and update your drivers. With a few simple troubleshooting steps, you can ensure that your SSD is up and running in no time. Remember to always double-check everything to save yourself the trouble of dealing with the same issue in the future.

    Keep your technology updated, and you’ll be good to go!

    Conclusion

    Congratulations, you’re about to give your computer a fresh spring in its step by installing an SSD drive! And don’t worry, it’s not rocket science – just follow the simple steps we’ve outlined and you’ll have your drive appearing in no time. Think of it like giving your trusty old computer a new pair of speedy sneakers – it’ll be zipping through tasks with lightning-fast speed in no time. So, strap on your tech toolbelt and get ready to become an SSD installation pro.

    FAQs

    What tools do I need to install an SSD drive?
    You will need a screwdriver, an SATA cable, and a power cable for the SSD drive.

    Do I need to clone my existing hard drive before installing an SSD?
    It is recommended to clone your existing hard drive to the new SSD drive to transfer your operating system and data.

    How do I physically install the SSD drive?
    You should first shut down and unplug your computer, then open the case, locate an available drive bay, and screw in the SSD drive.

    How do I ensure that my computer recognizes the new SSD drive?
    After physically installing the drive, you can enter your computer’s BIOS settings and ensure that the SATA port connected to the SSD drive is enabled.

  • Upgrade Your Desktop: A Step-by-Step Guide on How to Go from HDD to SSD

    If you’re tired of sluggish performance and long boot times on your desktop computer, it might be time for an upgrade. Specifically, upgrading your hard drive from a traditional hard disk drive (HDD) to a solid-state drive (SSD) can make a world of difference. SSDs are faster, more reliable, and more energy-efficient than HDDs, making them a popular choice for computer enthusiasts and professionals alike.

    But before you pull the trigger on an SSD upgrade, it’s important to know what you’re getting into. In this blog post, we’ll explore the benefits of upgrading from HDD to SSD, what you need to consider before making the switch, and how to install your new SSD for optimal performance. So sit back, relax, and get ready to take your desktop computing experience to the next level!

    Preparation

    If you are looking to upgrade from an HDD to an SSD on your desktop, there are a few things you need to prepare before making the switch. Firstly, you need to ensure that the SSD you purchase is compatible with your desktop. Check your motherboard to make sure it supports SATA III or NVMe, which are the most common connectors for SSDs.

    You also need to make sure you have enough space on your SSD to transfer all the data from your HDD. It’s a good idea to get an SSD that has a larger capacity than your HDD to ensure you have ample storage space going forward. Before you physically install the SSD, you should also make sure to back up all your data to an external drive or cloud storage.

    This ensures that you don’t lose any important files during the transfer process. Once you have everything backed up and your SSD ready, you’re ready to make the switch and enjoy the speed and performance benefits of an SSD!

    Back up your data

    Backing up your data is an essential aspect of computer maintenance that is often overlooked. The process of preparing for a data backup involves several important steps. Firstly, it is crucial to determine what data you need to back up.

    Important files such as documents, photos, and videos should be included, along with any other files that are essential to your work or personal life. Next, you’ll need to choose the backup method that works best for you, such as cloud storage, an external hard drive, or a USB drive. Once you have decided on the method, make sure it is set up correctly and that you have sufficient storage space.

    Finally, it’s critical to establish a regular backup schedule to ensure that your data is always up-to-date and secure. By taking these steps to prepare for a data backup, you can enjoy peace of mind knowing that your files are safe and easily accessible whenever you need them.

    how do i go from hdd to ssd desktop

    Choose the right SSD for your desktop

    Choosing the right SSD for your desktop requires some preparation. Before you begin your search, it’s important to know what you’re looking for in terms of storage capacity, transfer speeds, and reliability. Take a look at the amount of storage you currently have on your desktop and think about how much more you might need in the near future.

    Do you use a lot of big files? If so, you’ll need more storage than someone who only uses basic programs and files. Next, consider the transfer speeds you need. If you frequently transfer large files from one location to another, you’ll need a drive with fast transfer speeds to avoid delays or slowing down your computer.

    Finally, think about reliability. You want to choose a drive with a good reputation for durability, so it won’t fail on you after only a short time. By taking these factors into consideration, you’ll be able to choose the right SSD for your desktop and get the storage and speed you need to power through your projects.

    Check your system compatibility

    One of the most critical steps in installing or upgrading software is to check your system compatibility before starting the installation process. It may seem like an unnecessary step that you can skip, but preparing your system beforehand can save you time and frustration down the road. Most software applications have a set of minimum system requirements that your computer must meet to run them correctly.

    These requirements could include hardware specifications, such as processor speed, RAM, and disk space, or software prerequisites, such as operating system version and installed libraries. Ignoring these requirements could lead to errors, crashes, or overall poor performance of the software. Therefore, it’s essential to check your system compatibility first by reviewing the software’s system requirements and cross-checking them against your computer specifications.

    This will help ensure that everything runs smoothly when you start the installation process. So, take a few minutes to prepare and save yourself from a potential headache.

    Installation

    So, you’re ready to make the switch from an HDD to an SSD on your desktop. Congratulations, you’re about to experience a whole new level of speed and performance! But, before you dive in, there are a few things to keep in mind. First, make sure that your desktop supports an SSD.

    You can do this by checking the specifications of your motherboard or consulting with a professional. Once you’ve confirmed that your desktop is compatible, you’ll need to back up all your data from your HDD onto an external drive or cloud storage. Then, you’ll want to physically install the SSD by opening up your desktop and locating the drive bay.

    Carefully insert the SSD into the bay and secure it in place. Next, connect the power and data cables to the SSD and motherboard respectively. Finally, you’ll need to transfer your data from the external storage to the SSD and configure it as your primary drive.

    By following these steps, you’ll have successfully upgraded your desktop from an HDD to an SSD!

    Shut down your desktop and open the case

    If you want to upgrade your computer’s hardware, the first thing to do is shut down your desktop and open up the case. Make sure you’re working in a clean and well-lit space before starting. Once you’ve got the case open, take note of how everything is currently arranged.

    This will be helpful when it’s time to put everything back together. If you’re not comfortable doing this on your own, don’t hesitate to call a professional. They can make sure everything is done properly and safely.

    When you’re ready to begin the installation process, start by unplugging the power cord and any other cables that are attached to the devices you’re replacing. Carefully remove the devices, being careful not to damage any wires or components. Install the new hardware according to the instructions provided, taking care to connect any necessary cables.

    Once everything is in place, replace the cover and reconnect all the cables. Finally, turn your computer back on and make sure everything is working correctly. With a little patience and attention to detail, you can upgrade your computer’s hardware and improve its performance in no time!

    Find the HDD and disconnect it

    If you are looking to upgrade your computer’s storage capacity, you may need to install a new HDD. Before doing so, you need to find the location of the current HDD and disconnect it safely. This will ensure that you don’t accidentally damage any components or lose any data.

    To find the HDD, you can refer to your computer’s user manual or conduct a quick online search. Once you have located it, you need to shut down your computer and unplug it from the power source. Then, carefully remove the cover of your computer to access the HDD.

    Depending on your computer model, the HDD may be attached by screws or clips. Unscrew or unclip the HDD and gently disconnect any cables connected to it. You can now safely remove the old HDD and install the new one.

    Remember to handle the HDD with care to avoid static discharge and damage. By following these steps, you can upgrade your computer’s storage capacity safely and efficiently.

    Install the SSD and connect it

    When it comes to installing an SSD for your computer, the process is simple and straightforward. First, you need to locate the SSD bay in your computer’s case and then carefully slide the SSD into the slot. Don’t force it, as SSDs are delicate and can be easily damaged.

    Once the SSD is firmly in place, you will need to connect the power cable and the SATA data cable to the SSD. These cables should be connected to the motherboard and your power supply unit. If you have a laptop, you may need to remove the old hard drive first before installing the SSD.

    Overall, the process of installing an SSD is relatively easy, and it offers a significant upgrade in terms of fast boot times and improved performance. By upgrading your hard drive to an SSD, you can give your computer a new lease on life and enjoy faster system responsiveness. So if you’re looking to improve your computer’s performance, consider installing an SSD today!

    Secure the SSD in place

    When it comes to installing an SSD, it’s crucial to secure it in place to prevent any potential damage. There are different ways to mount an SSD depending on your computer’s case and mounting options. One effective method is to use a bracket or adapter that screws into the case and holds the SSD securely in place.

    Another option is a drive bay that slides into the case and has designated slots for the SSD’s screws. Whichever method you choose, make sure to use the correct screws that fit your drive and case. Not securing the SSD properly can lead to it becoming loose, which can cause damage and affect its performance.

    Remember to always handle the SSD with care and take your time during the installation process to avoid any mishaps. By following these steps, you’ll be well on your way to a properly installed SSD that functions smoothly and efficiently.

    Migrating Data

    So, you’ve decided to upgrade your desktop’s hard drive to a faster and more reliable solid-state drive (SSD). But, how do you actually transfer all your data from your old HDD to the new SSD? Well, there are a few different methods you could use depending on your situation. First, you could physically remove the old HDD and install the new SSD, then use a cloning software to transfer everything over.

    Another option is to create a backup of your data onto an external hard drive and then restore that backup onto the new SSD. Either way, it’s important to make sure you have a backup of all your important files before making any changes. Once the migration is complete, you should notice a significant increase in the speed and performance of your desktop.

    So, don’t be afraid to make the switch to an SSD and enjoy the benefits it brings.

    Migrate your operating system

    Migrating an operating system can be a daunting task, but it’s not impossible. Moving your data from one operating system to another requires careful planning and execution. It’s crucial to back up your data before attempting a migration.

    Once the backup is complete, you can use either a manual transfer method or automated software to complete the migration. Automated software can scan all your files and transfer them accordingly, saving you time and effort. It’s important to ensure that the target system has all the necessary drivers and software installed before migrating your data.

    This will help prevent any compatibility issues and ensure that your new operating system functions correctly. By following these tips, you can make the migration process as smooth as possible, so you can get back to using your computer in no time.

    Transfer your files

    Whether you’re upgrading to a new computer or switching to a different operating system, migrating your data can be an overwhelming task. Fortunately, there are plenty of options available to make the transfer process as seamless as possible. One of the most popular methods is to use an external hard drive to transfer your files.

    This method involves copying all of your data onto the hard drive and then transferring it to your new or different computer. Another option is to use a cloud storage service, such as Google Drive or Dropbox, to back up and transfer all of your files. This is a great option if you have limited storage space on your external hard drive or if you want to access your files from anywhere.

    Regardless of which option you choose, it’s important to make sure that all of your important files, such as photos, documents, and emails, are backed up and transferred safely. By taking the time to migrate your data properly, you can save yourself a lot of headaches down the road and ensure that your files are always easily accessible.

    Update your BIOS, firmware, and drivers

    When migrating data, you should always remember to update your BIOS, firmware, and drivers beforehand. This is important because the latest versions contain bug fixes, security updates, and new features that can improve the compatibility and stability of your system. Updating your BIOS, firmware, and drivers can also prevent data loss or corruption during the migration process.

    Think of it like taking care of your car before a long road trip – you wouldn’t want to hit the road without checking if your tires are properly inflated and your oil is changed, right? Similarly, updating your system’s components is an essential step to ensure a smooth and successful data migration. Make sure to check the manufacturer’s website for updates or use a reliable driver updater tool to automate the process. By doing this, you can avoid any potential headaches and protect your valuable data.

    Conclusion

    Upgrading from an HDD to an SSD desktop is like upgrading from a bicycle to a Ferrari. The process may seem intimidating at first, but with a little bit of patience and know-how, anyone can make the switch. The result will be a lightning-fast desktop that can handle any task with ease – leaving your old HDD in the dust.

    So don’t be afraid to take the leap and join the SSD revolution, your computer (and your patience) will thank you.”

    FAQs

    What are the benefits of upgrading from an HDD to an SSD for a desktop computer?
    Upgrading to an SSD can result in significantly faster boot times, application load times, and overall system performance. It can also improve energy efficiency and potentially extend the lifespan of your computer’s hardware.

    Is it difficult to replace an HDD with an SSD in a desktop computer?
    The complexity of the process can vary depending on your computer’s make and model, but in general, it is a fairly straightforward process that involves cloning your existing operating system onto the new SSD and physically replacing the storage drive.

    Can I keep my existing files and software when upgrading to an SSD?
    Yes, it is possible to clone your existing operating system and files onto the new SSD using software such as EaseUS Todo Backup or Macrium Reflect. However, it is recommended that you back up all important files before attempting the upgrade.

    What should I look for when choosing an SSD for my desktop computer?
    Look for an SSD with a high read and write speed, a sufficient amount of storage space for your needs, and a reasonable price point. It is also important to consider factors such as the SSD’s form factor, interface type, and endurance rating.

  • Unlock the Puzzle of Choosing the Perfect SSD: A Comprehensive Guide on How to Know What SSD to Get

    SSDs, or solid-state drives, are becoming the go-to storage option for modern-day computing. They offer fast read and write speeds, higher durability, and overall better performance compared to traditional hard drives. But with so many options available, choosing the right SSD can be overwhelming.

    Whether you’re upgrading your laptop or building a new desktop, choosing the right SSD for your needs is crucial. The right SSD can significantly improve your computer’s boot time, load times, and overall system performance. However, choosing the wrong one can lead to slower performance and even system crashes.

    In this blog post, we’ll guide you through the process of choosing the right SSD for your needs. We’ll cover the different types of SSDs available, their storage capacity, and how to determine the right balance of speed, storage, and performance. With this guide, you’ll be well-equipped to make an informed decision and get the most out of your computer.

    Assess Your Needs

    One common question that many people have when shopping for an SSD is, “how do I know what SSD to get?” The first step is to assess your needs. Ask yourself how much storage you need, what type of SSD interface you need, and what your budget is. If you use your computer for gaming or video editing, you’ll want a larger-capacity SSD with high read and write speeds.

    But, if you only use your computer for basic tasks like web browsing and word processing, you may not need as much storage or speed. Consider your specific needs to find an SSD that meets them. Don’t forget to check the warranty and read reviews from other customers to ensure you’re making a wise investment.

    With careful thought and research, you’ll be able to find the perfect SSD to improve the performance of your computer.

    What tasks do you use your computer for?

    When it comes to assessing your needs for a computer, it’s important to consider the tasks you will be using it for. Will you mainly use it for browsing the internet or checking emails? Or perhaps you need it for intensive tasks such as graphic design or video editing. Understanding the specific tasks and applications you will be running on your computer will help you determine the necessary specifications such as processing power, memory, and storage capacity.

    Don’t forget to also consider factors such as portability, battery life, and screen size if you plan on using it on the go. By assessing your needs, you can ensure that you purchase a computer that is tailored to your usage and will handle the tasks you need it for effectively. So, take the time to consider your needs and make an informed decision that will meet your computer requirements.

    how do i know what ssd to get

    What is your budget?

    When it comes to determining your budget for a project, the first step is assessing your needs. This means taking a close look at what you hope to achieve and what resources will be required to make it happen. Consider the scope of the project, the level of expertise needed, and any necessary equipment or materials.

    Once you have a good understanding of your needs, you can start to determine what budget you will need to make it all happen. Keep in mind that it’s important to be realistic about what you can afford and what trade-offs you may need to make. While it can be tempting to skimp on certain aspects of the project to save money, it’s important to remember that cutting corners can only lead to poor quality results.

    In short, when it comes to assessing your needs and determining your budget, the key is to strike the right balance between quality and affordability. So ask yourself, what do I really need to make this project a success? And then work to find a budget that meets those needs while staying within your means. By taking a deliberate and thoughtful approach to your budget, you can ensure that your project is set up for success from the start.

    Learn the Terminology

    If you’re wondering how to choose the right SSD for your computer, you’ll want to start by learning the terminology. Solid State Drives, or SSDs, are storage devices that use flash memory instead of spinning disks to store data. There are a few different factors to consider when choosing an SSD, including capacity, speed, and form factor.

    Capacity refers to how much storage space the drive has, while speed is measured in read and write speeds. Form factor refers to the physical size and shape of the drive, which will determine whether it will fit in your computer’s case. When comparing SSDs, you’ll want to look at specifications like sequential read and write speeds, random read and write speeds, and endurance ratings.

    SSDs are generally faster and more reliable than traditional hard drives, so investing in a good SSD will give your computer a significant performance boost.

    What is an SSD?

    Solid-State Drives (SSDs) are increasingly becoming popular storage options for computers and other electronic devices. Unlike traditional hard drives, which use rotating disks to store data, SSDs use only semiconductor memory chips. The result is a faster, more responsive device that can access data almost instantly, and has no moving parts.

    SSDs are also less prone to damage due to drops or physical shocks because they have no spinning disks. Another important feature of SSDs is that they require less power than traditional hard drives, which in turn helps to extend battery life. The term “Solid-State” refers to the absence of moving parts in the drive, making it more reliable and efficient.

    If you’re in the market for a new device, consider an SSD-based option for faster and more responsive computing.

    What is SATA?

    SATA, or Serial ATA, is a type of computer bus interface that connects storage devices, such as hard drives and solid-state drives, to a motherboard. It has largely replaced the older Parallel ATA technology. SATA is faster, more reliable and easier to use.

    One of the main benefits of SATA is its bandwidth, which determines the rate at which data can be transferred. In other words, it allows for faster data transfer between the storage device and the motherboard. But what do we mean by “bandwidth”? The bandwidth is like the width of a pipe.

    The wider the pipe, the more water can flow through it. Similarly, the wider the bandwidth, the more data can be transferred per unit of time. By learning these technical terms, you’ll be able to better understand the world of computers and technology.

    What is NVMe?

    NVMe, or Non-Volatile Memory Express, has become increasingly popular in recent years, especially in the world of solid-state drives (SSDs). NVMe is a standard protocol that allows for fast communication between the system and storage devices, making it ideal for high-speed data transfer and low-latency storage access. But with all the technical jargon surrounding NVMe, it’s important to learn the terminology to fully understand how it works.

    Some key terms to know include controllers, namespaces, and queues. Controllers oversee data flow between the system and storage, while namespaces provide logical partitions within the drive for data management. Queues, on the other hand, allow for parallel processing of commands, improving overall performance.

    Understanding these terms will help you make more informed decisions when selecting an NVMe storage solution.

    Consider Your Options

    If you’re wondering how to choose the right SSD for your needs, it’s important to consider your options carefully. The first thing to consider is what type of SSD will work best for your system. Do you need a traditional SATA SSD or do you require something faster like a PCIe SSD? Additionally, it’s important to consider the amount of storage space you need.

    SSDs are typically more expensive than traditional hard drives, so you don’t want to overspend on storage you won’t use. Finally, consider the brand and seller you’re purchasing from. Not all SSDs are created equal, and it’s important to do your research and read reviews before making a purchasing decision.

    By taking the time to consider all of your options, you can ensure that you choose an SSD that will meet your needs and provide optimal performance for your system.

    Do you need a small or large capacity?

    When considering whether to go for a small or large capacity, it’s important to think about your needs and future plans. If you are a single person or a small family, a smaller capacity may be more suitable for your needs. It will take up less space, use less energy, and will be more cost-effective.

    On the other hand, if you have a larger family or often host gatherings, a larger capacity will be more beneficial as it will have more space for storing food and drinks. It’s also worth thinking about the future; if you plan on expanding your family or have a growing business, a larger capacity may be a more viable option in the long run. Ultimately, it depends on your lifestyle and what you plan to use your refrigerator for.

    At the end of the day, you want to ensure that you choose a refrigerator that will serve all your needs and provide you with convenience while still being energy-efficient.

    Check read and write speeds

    When it comes to storage devices, checking the read and write speeds is crucial. You want to make sure you have a device that can transfer your data quickly and efficiently. There are many options to consider when checking read and write speeds, including SSDs, HDDs, and external hard drives.

    SSDs are generally faster than HDDs, but they can be more expensive. They also have a limited amount of writes, so if you plan to use them for heavy writing tasks, you may want to consider a hard disk drive instead. HDDs are slower than SSDs, but they are more affordable and have a larger capacity.

    External hard drives can also be a good option for those who need extra storage space on their computer but don’t want to replace their internal drive. No matter what option you choose, it’s important to check the read and write speeds before making a purchase. This will ensure that you get a device that can meet your needs and will be able to handle your data quickly and efficiently.

    With so many options to choose from, it may take some time to find the right one for you, but doing your research and comparing speeds will help you make an informed decision. So go ahead and take the time to consider your options and find a storage device that will work best for you.

    Look for reviews and ratings

    When it comes to making a purchase, it’s always important to do your research. This is especially true when buying something online, where you can’t physically see or touch the product before committing to a purchase. That’s why it’s essential to consider your options carefully and look for reviews and ratings from other customers.

    Reading reviews can give you a better idea of the quality of the product, the level of customer service you can expect, and any potential issues or concerns other customers may have had. Pay attention to both positive and negative reviews, and consider the overall rating of the product as well. By taking the time to research and read reviews, you can make an informed decision about your purchase and feel more confident in your choices.

    So the next time you’re considering buying something online, be sure to look for reviews and ratings to help guide you in the right direction.

    Make Your Purchase

    If you’re wondering how to choose the right SSD (solid-state drive) for your computer, there are a few key factors to consider. First, you’ll want to determine the size of the drive you need based on your data storage requirements. SSDs come in a range of capacities, from 128GB to 2TB or more, so be sure to choose one that can accommodate all of your files and programs.

    Next, consider the speed of the SSD. Look for one with high read and write speeds to ensure faster boot times and program load speeds. Additionally, check the interface type of your computer’s motherboard to ensure compatibility.

    Most SSDs today use SATA or PCIe interfaces. Finally, consider brand reputation and user reviews to help guide your decision. Popular brands like Samsung, Western Digital, and Crucial are known for their quality SSDs.

    Ultimately, investing in a good SSD can greatly improve your computer’s performance and speed, making it a worthwhile upgrade. So, now that you have a better understanding of what to look for, go ahead and make your purchase for the right SSD for your needs!

    Ensure compatibility with your system

    Before making a purchase, it is important to ensure compatibility with your system. There is nothing more frustrating than investing time and money into a product that doesn’t work with the equipment you already have. Take the time to research and compare specifications to find the right fit for your system.

    When choosing software or hardware, check the minimum requirements and compare them to your device’s specifications to ensure compatibility. It’s also a good idea to read reviews and feedback from others who have used the same product on similar systems. Don’t rush into a purchase without doing your homework – it could save you both time and money in the long run.

    Remember, investing in a compatible product will lead to a smoother and more efficient experience for you and your device.

    Compare prices from different retailers

    When it comes to making a purchase, especially a big-ticket item, it’s essential to compare prices from different retailers to ensure you’re getting the best deal. After all, why pay more than you have to? With the advent of online shopping, it’s never been easier to shop around and compare prices without ever leaving your home. Start by doing a quick Google search for the product you’re interested in and browse through the results.

    Take note of the product’s price at each retailer and any special deals or discounts they may be offering. Be sure to also factor in things like shipping costs, taxes, and return policies, as these can vary widely between retailers. By taking the time to compare prices and do your research, you can save yourself a significant amount of money and ensure you’re getting the best value for your purchase.

    Remember, a few extra minutes of research can add up to big savings in the long run!

    Purchase with warranty protection in mind

    When making a purchase, it’s important to keep warranty protection in mind. No matter how careful we are, there’s always a chance that something could go wrong with our new purchase. That’s why it’s crucial to ensure that we’re protected should anything happen.

    Before making a purchase, make sure to read through the warranty policy thoroughly. Check what’s covered and what’s not, and ensure that you understand any terms and conditions before signing off on your purchase. It’s also worth considering purchasing an extended warranty for added protection.

    While it might cost a little more upfront, it could save you a lot of money and stress in the long run. Remember, it’s always better to be over-prepared than under-prepared when it comes to protecting your investments. So, be sure to keep warranty protection in mind when making your next purchase.

    Conclusion

    Finding the right SSD is like finding the perfect pair of shoes – it requires a combination of research, trial and error, and ultimately, personal preference. Just like how a shoe must fit comfortably and provide the right support for your feet, an SSD must meet your storage needs and improve your device’s performance. So, whether you go for a well-known brand or take a chance on a lesser-known one, the key is to understand your storage requirements, read reviews, and never underestimate the power of a good fit.

    FAQs

    What factors should I consider when selecting an SSD?
    When selecting an SSD, you should consider factors such as capacity, speed, durability, and price.

    How do I know if an SSD is compatible with my computer?
    To know if an SSD is compatible with your computer, check your computer’s specifications and look for the SATA interface and form factor of the SSD.

    What is the difference between SLC, MLC, and TLC NAND flash memory?
    SLC (Single-Level Cell) NAND flash memory stores one bit of data per cell, MLC (Multi-Level Cell) stores two or more bits per cell, while TLC (Triple-Level Cell) stores three bits per cell. SLC is faster, more durable, but also more expensive, while TLC is slower, less durable, but more affordable.

    Should I get an SSD with DRAM cache?
    Yes, getting an SSD with DRAM cache can improve the drive’s performance, especially in tasks that involve frequent write operations, or when running multiple applications simultaneously.

    How much storage capacity do I need for an SSD?
    The required storage capacity for an SSD depends on your usage pattern. If you need to store a lot of multimedia files, go for a larger capacity SSD. If you only need to store software and documents, a smaller capacity SSD would suffice.

  • 10 Signs It’s Time to Replace Your SSD: Expert Tips for Optimal Performance

    If you’re a computer user, you know how important it is to have a reliable storage system. An SSD (Solid State Drive) is one of the fastest and most efficient storage devices you can buy on the market today. But how long do they last? When should you replace your SSD? It’s a question that many people puzzle over.

    SSDs are sturdy, long-lasting drives, but they do have a limited lifespan, just like any other hardware component. In this blog post, we’ll take a closer look at how long SSDs typically last, and we’ll examine the signs that suggest it’s time to replace your SSD.

    Performance Metrics

    As a computer owner, it’s important to keep tabs on the performance metrics of your SSD. Over time, these drives can become worn out and experience decreased performance. But how do you know when it’s time to replace your SSD? One key metric to keep an eye on is the SSD’s total bytes written (TBW) – this metric indicates how much data has been written to the drive since it was first used.

    For example, if your SSD has a TBW of 100TB, it means that it can safely write up to 100 terabytes of data before it starts to wear out. Other important metrics to keep an eye on include the drive’s read and write speeds, as well as its error rate. If you notice a steady decline in any of these metrics, it may be a sign that it’s time to replace your SSD.

    Ultimately, it’s important to regularly monitor your SSD’s performance metrics to ensure that your computer stays running smoothly and without interruptions.

    Drive Health Monitoring

    Drive Health Monitoring is a crucial tool when it comes to ensuring that your computer’s hard drive is functioning properly. One of the key aspects of Drive Health Monitoring is tracking the performance metrics of your hard drive. This involves keeping an eye on how quickly your hard drive can access, read, and write data.

    By monitoring these metrics, you can identify potential problems early on before they can cause major issues. Some of the most important performance metrics to keep an eye on include read and write speeds, seek times, and latency. By regularly monitoring these metrics, you can ensure that your hard drive is running optimally, preventing data loss and system crashes.

    So next time you’re experiencing slow performance or unexpected errors, consider checking your Drive Health Monitoring performance metrics!

    how do i know when to replace ssd

    S.M.A.R.T. Data

    S.M.A.

    R.T. Data is an essential tool when it comes to keeping track of the performance of your systems.

    These performance metrics can provide valuable insights into the health of your machines, helping you identify issues before they become major problems. By monitoring key performance indicators such as disk usage, CPU load, and memory consumption, you can get a clear picture of how your machines are performing and make informed decisions about when to upgrade or replace hardware. The beauty of S.

    M.A.R.

    T. Data is that it provides real-time, actionable information that you can use to optimize your systems and keep them running smoothly. By staying on top of your performance metrics, you can ensure optimal performance, increase productivity, and avoid costly downtime.

    So if you’re not already using S.M.A.

    Symptoms of Failing SSD

    If you’re experiencing slow booting time, application crashes, strange noises, or file corruption, it may be time to consider replacing your SSD. These are some common symptoms of failing SSD. Additionally, if you notice a decrease in storage capacity, or if your system is not recognizing the SSD, it’s likely that it’s time to replace it.

    It’s important to note that these symptoms may also be caused by other issues such as malware or software updates, so it’s best to seek professional assistance to diagnose the problem accurately. When it comes to replacing your SSD, it’s essential to ensure that you have backed up your data beforehand to avoid losing important files. Investing in a quality SSD and regularly maintaining it can help prolong the lifespan of your device and prevent potential data loss.

    Slow Boot Time

    One of the most common symptoms of a failing SSD is slow boot time. If you notice that your computer takes longer than usual to start up or shut down, it could be a sign that your SSD is failing. This is because the boot process involves reading and writing a lot of data from the storage device, and if there are any issues with the SSD, it can significantly slow down the process.

    In some cases, you may also experience random crashes or errors when using your computer. It’s essential to act quickly if you notice any of these symptoms, as a failing SSD can result in data loss and other serious issues. So, if you suspect that your SSD is failing, it’s essential to back up your data and replace your storage device as soon as possible.

    Frequent Crashes

    If you’re finding yourself frustrated by frequent crashes, it could very well be a symptom of a failing SSD. These crashes can occur for a variety of reasons, one of which is when your computer is struggling to perform even basic tasks. This could be caused by the inability of your SSD to keep up with the demands you’re placing on it.

    Another symptom to look out for is freezing and stuttering during operation. This often indicates that your SSD is having trouble accessing vital information, which can cause performance to suffer. If you’re noticing any of these issues, it’s important to take action quickly to avoid more severe problems down the line.

    Consider backing up your data and consulting with a professional to diagnose the issue and determine if it’s time for a replacement. By catching these issues early on, you can save yourself a lot of time and frustration in the long run.

    File System Corruption

    If you’re experiencing sluggishness or strange behavior with your computer, it could be a sign of a failing SSD. One of the most common symptoms of a failing SSD is file system corruption, which can cause your computer to crash or files to become unreadable. You may also notice that your computer takes longer to boot up or open programs.

    If you hear strange noises or notice your computer getting excessively hot, it could be a sign of physical damage to the SSD. Don’t ignore these warning signs or try to tough it out. Failing SSDs can become completely unusable without warning, resulting in the loss of important data.

    Take action immediately and get it checked out by a professional. Remember, prevention is always better than a cure.

    How Old is Your SSD?

    Wondering how to know when to replace your SSD? Well, it depends on how old it is and how frequently you use it. SSDs, just like any other hardware components, have a lifespan which can be impacted by factors such as usage, temperature, and the number of read and write cycles. Most quality modern SSDs usually have a lifespan of 5 to 7 years.

    You can use S.M.A.

    R.T. (Self Monitoring Analysis and Reporting Technology) to check the health of your SSD, and it will show you the total host reads and writes, total power on hours, and power cycle counts of your SSD.

    In addition to this, if your SSD has started showing errors frequently even after regular maintenance, it might be the right time to upgrade or replace it. So, it’s always better to keep an eye on the health status of your SSD and plan for a replacement when it reaches the end of its lifecycle.

    Manufacturer’s Warranty

    SSD, Manufacturer’s Warranty, Age If you own a solid-state drive (SSD), it’s important to know how old it is and when its manufacturer’s warranty expires. While SSDs offer faster speeds and greater durability than traditional hard drives, they do have a limited lifespan. How long your SSD lasts depends on several factors, including usage patterns and the type of NAND flash memory it uses.

    Most SSDs come with a manufacturer’s warranty that covers them for a certain period of time, typically five years, but this can vary depending on the brand. It’s important to keep track of your SSD’s age and warranty status so you can plan ahead for a potential replacement. SSDs can fail suddenly and without warning, so it’s best to be prepared.

    Checking your SSD’s age and warranty status is easy and can be done using software tools or by contacting the manufacturer directly. Don’t wait until it’s too late to find out if your SSD is still covered under warranty. Stay informed and keep your data safe by keeping track of your SSD’s age.

    Average Lifespan of SSD

    As digital technology has advanced, so has the storage capacity of devices. Solid-state drives (SSDs) have become a popular choice for their faster data retrieval speeds than traditional hard disk drives. However, one question that frequently arises is their lifespan.

    How old is your SSD? On average, most SSDs can last up to 10 years, depending on how heavily they are used. However, this number can vary based on the manufacturer, the type of memory used, and the usage patterns. More frequently used drives may experience wear and tear quicker and thus have a shorter lifespan.

    Additionally, the drive’s performance may slow down over time. Nevertheless, modern SSD technology has significantly increased longevity, and with proper maintenance, an SSD can last beyond a decade. So, if you’re wondering how long your SSD will last, it ultimately depends on how often, and for what applications you use it.

    Conclusion

    It’s simple, really. You know it’s time to replace your SSD when it starts acting like a teenager – slow, unresponsive, and prone to crashing. So just like you would with a grumpy adolescent, take the hint and swap it out for a shiny new one.

    Trust us, you’ll both be happier for it.”

    FAQs

    What are the signs that indicate I need to replace my SSD?
    When your SSD starts showing slow performance, frequently crashes, produces noise or error messages, or files start getting corrupt, it indicates that you need to replace your SSD.

    What is the lifespan of an SSD?
    The lifespan of an SSD depends on various factors like usage, storage conditions, etc. However, in general, a good quality SSD can last up to five years or more.

    Can I replace my HDD with SSD?
    Yes, you can replace your HDD with an SSD. It will not only improve your system’s performance but also enhance its durability and battery life.

    How to transfer data from my old SSD to the new one?
    You can clone your old SSD to the new one by using third-party software like Clonezilla, EaseUS, or Macrium Reflect. Alternatively, you can also take a backup of your old SSD on an external hard drive and then restore it on the new one.

  • Efficiently Upgrade to Lightning-Fast Performance: Simplified Guide on Migrating OS to SSD

    Are you tired of waiting ages for your computer to boot up? Or do you want your applications and games to load faster? One solution to these problems is to migrate your operating system (OS) to a solid-state drive (SSD). An SSD offers faster read and write speeds than a hard disk drive (HDD). Plus, an SSD has no moving parts, which means it’s less prone to failure.

    In this quick guide, we’ll explore the steps for migrating your OS to an SSD, so you can enjoy a faster and more responsive computer experience. You’ll be able to enjoy the benefits of faster load times, bootups, and system responses by the end of this guide. So, let’s get started!

    Check SSD Compatibility

    If you want to upgrade your hard drive to a super-fast SSD and keep only your OS, you’re in luck! But before you make the swap, here are a few things you should consider to ensure compatibility. Firstly, check your computer’s specifications to make sure your motherboard and BIOS can support an SSD. Next, check the interface of the SSD – it’s best to match it with the interface of the drive it’s replacing, if possible.

    Also, make sure you select an SSD with enough capacity to hold your OS and any necessary files. Once you’ve chosen your SSD, it’s time to migrate! You can use built-in Windows backup tools or third-party software to transfer your OS over to the SSD. Just be sure to backup all of your important files before starting the migration process.

    With a little preparation, upgrading to an SSD can be quick and painless – your PC will be up and running faster than ever! So, don’t hesitate to try it out and enjoy improved efficiency and speed with your OS running on an SSD.

    Check Your OS

    When it comes to upgrading your computer’s storage to an SSD, it’s important to check your operating system’s compatibility. While most modern operating systems support SSDs, older systems may require updates or even a complete overhaul to be compatible. For example, Windows 7 does not natively support SSDs with the TRIM feature, which helps maintain SSD performance over time.

    In this case, a software update or upgrading to a newer operating system like Windows 10 would be necessary. Additionally, if you’re running a 32-bit operating system, you may need to upgrade to a 64-bit version to fully utilize the benefits of an SSD, as 32-bit systems have a limit on how much memory they can address. So before investing in a new SSD, make sure your operating system can support it fully.

    how do i migrate only my os to an ssd

    Check the SSD Type

    When it comes to upgrading your computer’s hard drive to an SSD, it’s crucial to check the compatibility of the drive with your system. One important consideration is the type of SSD you are planning to install. There are two main types to choose from: SATA and NVMe.

    SATA is an older, slower type of SSD that connects to your computer motherboard with a cable. NVMe is a newer, faster type that uses a different interface called PCIe. While NVMe drives can offer faster speeds, they may not be compatible with older systems that don’t have PCIe slots.

    On the other hand, SATA drives are more widely compatible, but may not offer the same speed benefits as NVMe drives. It is important to do your research before making a decision and ensure that the SSD type you choose is compatible with your system to ensure a smooth upgrade process.

    Create a Backup

    If you’re looking to upgrade from a traditional hard drive to an SSD, it’s important to know how to migrate your operating system over to the new drive. The good news is that you can do this easily and efficiently by creating a backup of your OS. There are a few different methods you can use to do this, including using built-in tools like Windows backup or third-party software like Macrium Reflect.

    Depending on which method you choose, you may need an external hard drive or a separate partition on your current drive to store the backup. Once you’ve created a backup, you can then clone the data onto your new SSD and enjoy faster boot times and overall system performance. Remember, it’s always a good idea to back up your important data before making any changes to your system, just in case something goes wrong during the migration process.

    Backup Your Files and Folders

    Creating a backup is an essential step to safeguard your files and folders. It ensures that your important data is not lost in case your computer crashes or is attacked by malware. There are several ways to create a backup, such as using an external hard drive, cloud storage services, or a network-attached storage device.

    You can also utilize backup software that automatically saves your data periodically. It is crucial to choose a secure backup location to protect your information from theft or damage. The primary keyword “backup” is essential to mention throughout the content to keep the focus on the topic.

    So, ensure you create a backup of your data regularly and keep it in a secure location to have peace of mind in case of any unpredictable events.

    Create a Windows Recovery Drive

    Creating a Windows recovery drive is a crucial step in protecting your important data in case of a system failure. This type of backup allows you to recover your files, documents, and settings quickly and easily, without the need for expensive data recovery services. The process is simple and can be completed in just a few easy steps.

    First, you need to insert a USB drive into your computer and format it accordingly. Then, navigate to the Control Panel and select “Create a recovery drive.” Follow the on-screen instructions to complete the setup, and your Windows recovery drive will be ready to use.

    It’s important to note that this backup will only work for the computer on which it was created, so if you have multiple devices, you’ll need to create a Windows recovery drive for each one. By taking the time to create a Windows recovery drive, you’ll have peace of mind knowing that your important data is safe and secure.

    Create a Cloning Image

    Are you looking to migrate your operating system to an SSD but want to keep all your files and programs intact? If so, creating a cloning image is the way to go. By doing this, you’ll essentially copy the entire contents of your existing hard drive (including the OS, files, and programs) onto the SSD, which means that once the process is complete, your computer will boot up and function as it did before, but with the added benefit of faster load times and performance. To create a cloning image, you’ll need software that allows you to clone your hard drive, such as Acronis True Image or Clonezilla.

    Once you have the software installed, simply follow the instructions provided to create the clone. Make sure to back up any important files before beginning the process, as there is always a risk of data loss during the cloning process. Overall, creating a cloning image is a reliable and straightforward way to migrate your OS to an SSD.

    Download a Disk Cloning Software

    Disk Cloning Software If you’re planning to upgrade your hard drive or transfer your data to a new computer, cloning your hard drive can be a great solution. The process involves making a copy of your entire hard drive, including the operating system, applications, and personal data. To create a cloning image, you’ll need disk cloning software, which you can download online, often for free.

    One great option is Clonezilla, which is powerful and user-friendly. Once you download the software, it’s easy to get started. Simply attach a second hard drive to your computer and follow the software’s instructions to create a cloning image.

    The process may take some time, depending on the size of your hard drive, but it’s worth it to have a complete backup of your entire system. Once you have the cloning image, you can easily transfer it to a new hard drive or computer, making the transition seamless and stress-free. So if you want to ensure that your data is safe and secure, download disk cloning software today and create a cloning image of your hard drive.

    Create a Cloning Image of Your OS

    Creating a cloning image of your OS can be a lifesaver in case of a system failure or hardware malfunction. It is always better to be prepared for the worst-case scenario, and one way to do that is by creating a backup of your entire system. A cloning image is an exact replica of your OS, which includes all the data, software, and configurations present on your computer.

    You can create this image using various software tools available online, such as Clonezilla, Macrium Reflect, or EaseUS Todo Backup. Once you have created the cloning image, you can back it up to an external hard drive or USB flash drive. This will enable you to quickly restore your entire system in case of an emergency.

    So, don’t wait until it’s too late. Creating a cloning image is a simple yet effective way to ensure that your valuable data and settings are always safe and sound.

    Install the SSD

    So you’re looking to install an SSD and migrate only your OS? Well, you’ve come to the right place! Migrating your OS to an SSD can significantly improve your computer’s performance and boot-up speed. First, make sure your new SSD is compatible with your computer. Once you have your SSD, connect it to your computer.

    Then, use a cloning software like EaseUS Todo Backup or Acronis True Image to migrate only your OS to the SSD. Follow the instructions of the software carefully to avoid any errors. Once the cloning is complete, restart your computer and enter the BIOS to change the boot order to the SSD first.

    Congratulations, you’ve successfully migrated your OS to your new SSD! Enjoy the faster speed and improved performance that comes with it.

    Open Your Laptop or Computer Case

    So, you’ve got yourself a new SSD, and you’re eager to enjoy the benefits of faster storage. The first step in installing it is to open up your laptop or computer case. Make sure to shut down and unplug your device before attempting this.

    Once you’ve carefully removed the screws and popped open the case, you’ll need to locate the storage bays. If you’re lucky, there’ll be a spare one readily available. If not, you may need to remove your existing hard drive to make room for the new one.

    Now comes the fun part – install the SSD. Depending on your device, this may involve either sliding it into a slot and securing it with screws, or attaching it to a bracket. Once the installation is complete, don’t forget to put everything back together and boot up your device.

    It’s time to enjoy the lightning-fast speed of your new SSD!

    Connect the SSD Drive

    Installing an SSD drive can greatly enhance a computer’s performance and speed. To connect the SSD drive, the first step is to physically install it into the computer’s case. Identify the appropriate drive bay, which is typically located near the power supply.

    Slide the SSD into the bay and secure it with screws. Next, connect the SATA data and power cables to the SSD and motherboard. Make sure the cables are securely connected to avoid any data transfer errors.

    Once the SSD is installed and connected, it’s time to configure it. This involves initializing the drive and partitioning it as needed. It’s important to note that the process may vary depending on the operating system being used.

    In summary, installing an SSD involves physically connecting it to the computer and configuring it as needed to achieve optimal performance. Don’t forget to backup important data before transferring it to the new drive.

    Migrate Your OS to SSD

    Are you tired of waiting for your computer to boot up every morning? Upgrading to an SSD can help improve the speed of your computer. But how do you migrate only your OS to an SSD? It’s actually a simpler process than you might think. One option is to use a cloning software, which will create an exact copy of your operating system and transfer it to your new SSD.

    This is a great option if you want everything to stay the same on your computer and keep all your files and settings in place. Another option is to do a clean install of your OS onto the SSD. This requires more work, but it ensures a fresh and clean operating system.

    To do this, you’ll need to create a bootable USB drive with your OS installation files and then install it on your new SSD. Either way, upgrading to an SSD is a great investment to improve your computing experience.

    Boot from the Cloning Image

    If you’re looking to speed up your computer’s performance and can’t afford to buy a brand new system, then migrating your OS to an SSD is an excellent solution. However, the migration process can be a bit intimidating. One of the essential steps is to create a cloning image of your OS, which is a type of backup file containing all your files, programs, and settings.

    Once you have a cloning image, you can boot your computer from it, allowing you to transfer everything over to your new SSD. It’s essential to remember that any changes you make after creating the cloning image may not transfer over to the new drive, so ensure you have everything you need before making the switch. By using an SSD, your computer will boot up much faster, your applications will run much smoother, and it will generally improve the overall performance of your machine.

    Don’t let the migration process scare you off; do your research and follow the steps carefully, and you’ll have a speedy computer in no time.

    Select the Migration Destination (Your SSD Drive)

    When it comes to migrating your operating system to an SSD, selecting the destination drive is key. Your SSD drive will not only store your OS but also your most frequently used apps. This makes it critical to choose an SSD with ample storage space to ensure that you don’t run out of storage down the line.

    Another factor to consider when selecting your SSD is its read and write speeds, which can impact the speed at which your system boots up and opens applications. While there are several options on the market, it’s important to choose an SSD that’s compatible with your system to ensure a seamless migration process. By selecting the right destination drive, you can enhance your system’s overall performance and enjoy faster boot times and improved application speeds.

    So, before diving into the migration process, take the time to research and select the best SSD drive for your needs.

    Enjoy Your New SSD-Fast Computer!

    So, you’re ready to upgrade your computer by installing a brand new SSD. But, you don’t want to go through the hassle of reinstalling your entire operating system and all your programs. Luckily, there is an easy solution- migrate only your OS to your new SSD.

    This process involves copying your operating system files onto your new SSD and setting it as the new boot drive. Not only will this significantly increase the speed of your computer, but it will also save you time and headache. To complete this process, you’ll need a tool to clone your hard drive, such as Macrium Reflect or EaseUS Todo Backup, and an external adapter to connect your new SSD to your computer.

    Once you’ve cloned your OS to your SSD, set it as the primary boot drive in your BIOS settings and you’re good to go! Enjoy your new SSD-fast computer and all the benefits it brings.

    Conclusion

    In conclusion, migrating only your OS to an SSD can be a daunting task, but with the right tools and knowledge, it can be accomplished easily. Think of it like packing for a vacation – you only bring the essential items with you, leaving behind the unnecessary weight. Your OS is the most essential item on your hard drive, so why not give it the VIP treatment and move it to the fastest storage available? Your computer will thank you for it with lightning-fast boot times and speedy application launches.

    So go ahead, make the move to an SSD and experience computing in the fast lane.”

    FAQs

    What is the benefit of migrating only the OS to an SSD?
    Migrating only the OS to an SSD can significantly improve the boot and load times of your computer, while also reducing wear and tear on your other hard drives.

    Is it possible to migrate only the OS to an SSD?
    Yes, it is possible to migrate only the OS to an SSD using various software tools. However, it may require some technical knowledge and patience.

    Can I migrate only the OS to an SSD without reinstalling Windows?
    Yes, it is possible to migrate only the OS to an SSD without reinstalling Windows using tools such as EaseUS Todo Backup or AOMEI Backupper.

    Which SSD is best for migrating only the OS?
    It is recommended to choose an SSD with sufficient storage space and high read/write speeds, such as the Samsung 860 EVO or Crucial MX500. However, the specific needs may vary depending on the user’s system requirements.

  • Boost Your PC’s Speed: The Ultimate Guide on How to Migrate Your OS to an SSD

    Ready to give your computer a serious speed boost? Migrating your operating system to an SSD (solid-state drive) is one of the most effective ways to make your computer run faster and smoother. But if you’ve never done it before, the process can seem a bit daunting. Don’t worry! This comprehensive guide will walk you through the steps of migrating your OS to SSD, from choosing the right SSD to transferring your files and settings.

    By the end, you’ll have a faster, more powerful computer that’s ready to take on even the most demanding tasks. So let’s get started!

    Check Compatibility and Capacity

    When it comes to transferring your operating system to a new SSD, there are a few things you need to consider to ensure a successful migration. First, you’ll want to check if your computer’s motherboard supports the SSD’s interface, such as SATA or NVMe. If it doesn’t, you may need to purchase an adapter or choose a different SSD that is compatible with your system.

    Next, you’ll want to ensure that the SSD has enough capacity to store your operating system and any necessary files or applications. You can check how much space your current operating system is taking up by checking your computer’s storage settings. It’s recommended to choose an SSD with at least double the capacity of your current operating system to allow for future updates and additional files.

    By checking compatibility and capacity before migrating your operating system to an SSD, you can ensure a smooth transition to faster boot times and improved overall performance.

    Check Your System’s Compatibility with SSD

    When upgrading your computer with an SSD, you need to ensure that your system is compatible with it. Different SSD interfaces are compatible with different types of motherboards. So, the first step is to check your motherboard’s interface, whether it is SATA, PCIe, NVMe, or M.

    Once you know the interface, you can then look for SSDs that are compatible with your system. Another important factor to consider is the capacity of the SSD you need.

    If you plan to use the SSD as a boot drive, 120GB or 240GB might be sufficient. However, if you want to store large files or run demanding applications, you may need a larger capacity. The good news is that SSDs are available in a wide range of capacities, from 128GB to 4TB or more.

    To summarize, before purchasing an SSD, you need to check your system’s compatibility, including your motherboard’s interface and the storage capacity you need. This will help ensure that your system can benefit from the speed and performance that an SSD provides. So, take the time to research and choose the right SSD for your needs, and you’ll enjoy faster boot times, improved application performance, and more responsive access to your files and data.

    how do i migrate my os to an ssd

    Check Available Capacity in SSD

    When it comes to upgrading your computer’s storage capacity, checking compatibility and available storage space is crucial to ensuring a successful installation. One important consideration is the type of SSD that works with your computer. Not all SSDs are created equal, and choosing an incompatible model can lead to issues such as overheating or reduced performance.

    Additionally, it’s important to consider the available storage capacity. An SSD that’s too small can limit your ability to store files and run programs efficiently. On the other hand, an SSD that’s too large can be unnecessarily expensive.

    By checking compatibility and available storage capacity, you can make a smart choice that meets your needs while staying within your budget. So, before you rush to purchase that shiny new SSD, take a moment to consider the factors that will help you find the right model for your computer.

    Backup Your Data and Files

    So you’ve decided to upgrade your computer’s hard drive to an SSD for faster performance, but are wondering how to migrate your operating system without losing your important data and files. The good news is that it can be done with relative ease. The first step is to backup your data and files onto an external hard drive or cloud storage service.

    This ensures that you don’t lose any important files during the migration process. Next, you can use a cloning software such as Acronis True Image or Macrium Reflect to copy your current hard drive onto the new SSD. Make sure to deselect any files or programs that you don’t want transferred.

    Once the cloning process is complete, you can replace your old hard drive with the new SSD and boot up your computer. Voila, you now have a faster and more efficient operating system without sacrificing your valuable data and files.

    Backup Important Data and Files If Necessary

    Backing up your important data and files is crucial to ensure their safety and accessibility in case of any mishaps. Losing valuable data can be disastrous and can result in significant losses. Therefore, it is always essential to keep a backup of your files and data, either by storing them on external hard drives, cloud storage, or other means.

    Having a backup plan in place will give you the peace of mind that your important documents, images, videos, and audio files are safe and can be retrieved anytime you need them. So, make sure to regularly back up your data and files to avoid any unpleasant surprises. Remember, prevention is always better than cure!

    Clone Your System Drive to SSD

    If you’re looking to upgrade to an SSD or want to replace your current system drive with a faster one, you might be wondering how to migrate your operating system without losing any data. While it may sound like a daunting task, cloning your entire system drive to an SSD is actually a straightforward process. First, you’ll need to select a reliable cloning software (some free options include Clonezilla and EaseUS Todo Backup).

    Next, you’ll need to connect the SSD to your computer using an external enclosure or adapter. Once the software is installed, you can select your current system drive as the source and the SSD as the target. Just make sure there’s enough space on the target drive for everything you’re copying over.

    The software will then begin cloning your entire operating system, including all your files, settings, and applications. Once the process is complete, just switch the boot order in your BIOS to ensure your computer starts up from the new SSD instead of the old system drive. And voila – you’ll have a faster, more efficient operating system up and running in no time!

    Download and Install Disk Cloning Software

    If you’re planning to upgrade your system drive to an SSD, cloning your current drive is the way to go. Before getting started, you’ll need to download and install disk cloning software. One popular option is EaseUS Todo Backup, which offers a user-friendly interface and reliable performance.

    Once you have the software installed, connect your SSD to your computer and follow the on-screen instructions to clone your system drive. It’s important to note that cloning your drive will create an exact duplicate, so make sure your SSD has enough storage capacity to accommodate all of your files. With the right software and a bit of patience, cloning your system drive to an SSD can be a quick and painless process.

    By doing so, you’ll be able to enjoy faster boot and load times and an overall snappier computing experience.

    Connect SSD to PC and Clone System Drive

    Connecting your SSD to your PC and cloning your system drive is a great way to give your computer a boost in performance. To get started, make sure you have the necessary cables and tools to connect your SSD to your PC. Once you’ve connected the SSD, you’ll need software that can clone your system drive.

    There are a number of different options out there, but it’s important to choose one that’s reliable and easy to use. Once you’ve found the right software, follow the instructions to clone your system drive to your SSD. This process can take some time, depending on the size of your system drive, but it’s well worth the effort.

    When you’re finished, you should notice a significant improvement in your computer’s speed and performance. So why wait? Give your computer the boost it needs by connecting your SSD and cloning your system drive today!

    Set SSD as Your Boot Drive

    If you’re looking to speed up your PC performance, switching from a hard drive to a solid-state drive (SSD) is a great option. Not only does an SSD read and write data faster, but it also helps your system boot faster. Thankfully, migrating your operating system to an SSD is an easy process.

    First, you’ll need to clone your current system onto the SSD. There are a variety of cloning software options available, but we recommend EaseUS, as it’s free and easy to use. Once the clone is complete, you’ll need to direct your computer to boot from the SSD instead of the previous drive.

    To do this, go into your BIOS settings and select the SSD as your primary boot drive. Voila! Your operating system should now run much faster and smoother than before. Remember to also transfer any other important files and applications to the new SSD for optimized performance.

    Choose SSD as Your System Boot Drive in BIOS

    If you’re looking to speed up your computer, you should consider choosing an SSD as your system boot drive in BIOS. This will allow your computer to boot up faster and give you quicker access to your files and applications. To set your SSD as your boot drive, you’ll need to enter your computer’s BIOS settings and change the boot order.

    Make sure you prioritize your SSD over any other drives that may be connected to your computer. With your SSD set as the primary boot drive, you’ll notice a significant improvement in performance and overall speed. So go ahead and make the switch to an SSD – you won’t regret it.

    Conclusion

    Migrating your OS to an SSD is like giving your computer a shot of caffeine – it will be fast, responsive and ready to tackle any task you throw at it. So, if you’re tired of waiting for your computer to boot up, load files or launch applications, it’s time to make the change and give your old hard drive some new life. With the right tools and a little patience, you’ll soon be enjoying the benefits of lightning-fast load times and increased productivity.

    Just remember to take a break and enjoy that cup of coffee while your computer does the heavy lifting.”

    FAQs

    What are the benefits of migrating my OS to an SSD?
    Migrating your OS to an SSD can significantly improve the speed and performance of your system. It can also reduce boot and load times, increase overall responsiveness, and provide faster access to your files and programs.

    Is it difficult to migrate my OS to an SSD?
    Depending on your level of technical expertise, migrating your OS to an SSD can range from relatively simple to somewhat challenging. However, there are many tutorials available online that can guide you through the process step-by-step.

    Can I migrate my OS to an SSD without losing any data or programs?
    Yes, it is possible to migrate your OS to an SSD without losing any data or programs. However, it requires careful planning and execution, and it is recommended that you backup all important data and files prior to the migration process.

    Are there any specific requirements for migrating my OS to an SSD?
    Yes, to migrate your OS to an SSD, you will need the following: an SSD with sufficient capacity to store your operating system and data, a SATA III or NVMe compatible interface, a cloning software to transfer your OS and data, and a backup drive for your existing data and OS.

  • Maximizing Your Computer’s Performance: A Guide to Saving Files Directly to Your SSD

    Are you tired of slow file transfers and long loading times on your computer? It may be time to upgrade to an SSD (solid-state drive). Not only do SSDs provide faster speeds and improved performance, but they also offer increased durability and longevity compared to traditional hard disk drives. However, making the switch to an SSD can be intimidating.

    Fear not – in this complete guide, we will walk you through the process of saving to your SSD, from selecting the right drive to setting it up and transferring data. By the end of this guide, you will feel confident in your ability to make the switch and enjoy the benefits of an SSD.

    Why Save to SSD?

    If you’re wondering how to make your computer save to your SSD, there are several reasons why you should do so. First of all, solid-state drives are much faster than traditional hard drives, which means your computer will boot up and load programs more quickly. Additionally, SSDs are more reliable and durable, as they have no moving parts that can break down over time.

    Saving to your SSD will also free up space on your hard drive, which can become cluttered and slow down your computer over time. While SSDs may be more expensive than regular hard drives, the benefits they offer are well worth the investment in the long run. So if you want to speed up your computer and ensure it runs smoothly for years to come, consider saving to your SSD.

    Faster speed and better performance

    If you’re tired of waiting long minutes for your computer to boot up, lagging when multitasking, or slowing down while performing resource-intensive tasks, then it’s time to consider upgrading to an SSD. SSDs are faster and more reliable than traditional hard drives, and they can help improve the overall performance of your system. With an SSD, you can expect faster boot times, quicker file transfers, and smoother multitasking capabilities.

    No more waiting around for applications to load, or for your computer to catch up to your typing speed. Think of an SSD like upgrading from a bike with training wheels to a sleek and fast sports car – they both get the job done, but one does it much more efficiently. So if you’re looking for a faster, more efficient computer experience, it’s time to save to SSD.

    how do i make my computer save to my ssd

    Long-term reliability

    If you’re looking for long-term reliability in your storage device, it’s a good idea to save to SSD. SSDs, or solid-state drives, have no moving parts, making them less susceptible to physical wear and tear than traditional hard drives. This means that SSDs have a significantly longer lifespan, making them a more reliable option for long-term storage.

    Additionally, SSDs have faster read and write speeds, meaning you can access your files more quickly and efficiently. This makes them a great choice for gamers, filmmakers, and anyone who needs to store and access large files regularly. So if you want a storage device that will last for years to come, consider saving to an SSD.

    Step-by-Step Process

    If you’re wondering how to make your computer save to your SSD, it’s actually a fairly straightforward process. First, you’ll need to ensure that your SSD is properly installed and recognized by your computer. Once you’ve done that, you can begin transferring files to your SSD.

    There are a few ways you can do this, depending on your preferences. One option is to manually move files to your SSD by dragging and dropping them from your hard drive. Another option is to set your SSD as your default storage location for new files.

    This can be done by going into your computer’s settings and changing the default save location to your SSD. Whichever method you choose, be sure to take the time to organize your files so that you can easily find what you’re looking for in the future. By following these steps, you’ll be able to take advantage of the increased speed and performance that SSDs offer.

    Locate the SSD on your computer

    When it comes to locating the SSD on your computer, it can be a bit tricky, especially if you have never done it before. However, with the help of this step-by-step process, you will be able to find your SSD in no time. First, you need to shut down your computer and unplug any cables.

    Once you’ve done that, you need to locate the SSD. Typically, it is installed near the bottom of the computer, next to the hard drive. You can identify it by its rectangular shape, and it may have a label stating “SSD” or “Solid State Drive.

    ” If you can’t locate it, you can consult your computer manual or do an online search for images of SSDs. Once you have found it, you can start the process of replacing it or upgrading it. By following these steps, you will be able to locate the SSD on your computer without any hassle and complete any necessary upgrades or replacements.

    Set the SSD as default storage location

    Setting the SSD as the default storage location on your computer is a simple and effective way to improve its overall speed and performance. Here’s how you can do it: Step 1: First, you need to ensure that your SSD is correctly installed and detected on your computer. You can do this by checking your storage settings or opening your computer case and physically checking the connections.

    Step 2: Next, you need to select the default storage location on your computer. This can usually be done through your computer’s system settings or your file explorer. Step 3: Once you have located the default storage location setting, select your SSD as the default storage option.

    This will ensure that any new files and applications installed on your computer will be saved to your SSD by default. Step 4: Finally, make sure to move any existing files and applications from your old storage drive to your new SSD storage drive. This way, you can experience all of the benefits of using an SSD without losing any of your important data.

    By following these steps, you can quickly and easily set your SSD as the default storage location on your computer and enjoy a significant boost in system performance. So why wait? Give your computer the boost it deserves today!

    Move existing files from HDD to SSD

    Moving files from a hard disk drive (HDD) to a solid-state drive (SSD) can significantly improve your computer’s performance. Fortunately, the process is easy to accomplish, and you can do it yourself in just a few simple steps. Firstly, connect your SSD to your computer and make sure it’s recognized by the system.

    Next, choose the files you would like to move to the SSD and create a backup, just in case. Then, simply drag and drop the files or copy and paste them from your HDD to your SSD. Once the transfer is complete, make sure to update your computer’s settings so that it recognizes the new location of your files.

    It’s also important to note that you should avoid moving system files to your SSD as it may cause compatibility issues or slow down your computer. With a little patience and know-how, moving files from your HDD to your SSD is an easy way to extend the life of your computer and enjoy faster speeds for years to come.

    Tips and Tricks

    If you want to make sure that your computer saves files and data to your SSD, there are several ways to do so. The first step is to make sure that your SSD is properly installed in your computer and that it is functioning correctly. Once you have confirmed that your SSD is working, you can start adjusting your computer settings to save files to your SSD.

    One common way to do this is to change the default save location for files, downloads, and applications to your SSD. This can usually be done by going into your computer settings and finding the option to change the save location. Another way to ensure that your computer saves to your SSD is to manually select the location each time you save a file.

    When you select the save option, you should be able to choose where you want the file to be saved, and you can select your SSD as the desired location. By taking the time to adjust your settings and manually select the save location, you can ensure that your computer is saving to your SSD and taking advantage of its fast speeds and reliable storage capabilities.

    Regularly backup your SSD

    Regularly backing up your SSD is critical for protecting your valuable data. You never know when your hard drive may fail or become corrupted, and losing important files could be devastating. By regularly backing up your SSD, you can ensure that all your files are safely stored, and you can quickly retrieve them if necessary.

    There are many ways to back up your SSD, including using cloud storage services, external hard drives, and even USB drives. However, the most important thing is to make sure you have a backup system in place that works for you and is easy to use. Don’t put off backing up your data! It only takes a few minutes each week or month, and the peace of mind you’ll have knowing your data is safe is priceless.

    Remember, prevention is always better than cure, so backup your SSD regularly to avoid unexpected data loss that might otherwise be irreversible.

    Keep your SSD optimized

    SSD optimization Keeping your SSD optimized can greatly improve its performance and lifespan. Here are some tips and tricks on how to do just that! Firstly, avoid filling up your SSD beyond 75% of its capacity. This will prevent the drive from slowing down and will allow for more efficient storage.

    Secondly, enable TRIM, a command that clears out unused blocks of data and frees up space for new data to be written. This can be done through your computer’s settings or through third-party software. Thirdly, disabling indexing can help speed up your SSD, as the constant indexing of files can use up valuable resources.

    This can also be done through your computer’s settings. Fourthly, regularly defragment your SSD. Although it may seem counterintuitive, defragmenting can actually improve the lifespan of your SSD by preventing excessive wear and tear on certain sectors.

    Finally, keep your SSD updated with the latest firmware. This can improve functionality and fix any bugs or glitches that may be slowing down your drive. By following these simple tips and tricks, you can keep your SSD performing at its best for years to come.

    Conclusion

    Congratulations on choosing to save your files to an SSD! It’s a wise decision that will boost your computer’s speed and performance. To make sure you do it right, simply follow these steps: locate your SSD, select it as the destination for your files, and voila! You’re now on your way to enjoying a lightning-fast computer. Happy saving!”

    FAQs

    What is an SSD and how is it different from a regular hard drive?
    An SSD (solid-state drive) is a type of storage device that uses flash memory instead of spinning disks to store data. It is much faster and more reliable than a regular hard drive.

    How do I check if my computer recognizes my SSD?
    To check if your computer recognizes your SSD, go to the “Device Manager” and look for the SSD under “Disk Drives” or “Storage Controllers.”

    How do I transfer my operating system (OS) to my SSD?
    You can transfer your OS to your SSD using cloning software like EaseUS Todo Backup or Macrium Reflect. These programs will create an exact copy of your existing OS and transfer it to the SSD.

    How do I make sure my computer is booting from the SSD?
    To make sure your computer is booting from the SSD, go to the BIOS settings and set the SSD as the primary boot device. You can usually access the BIOS by pressing a key (like F2 or Delete) during startup.

  • Step-by-Step Guide: Migrating Your OS from HDD to SSD like a Pro!

    If you’re tired of slow boot-up times and sluggish performance, it might be time to migrate your operating system from your old mechanical hard drive to a shiny new solid-state drive (SSD). SSDs are faster, more reliable, and have faster data access speeds compared to traditional mechanical hard drives. But how exactly do you go about the process of migrating your OS? It can seem like a daunting task, but fear not – we’re here to guide you through it step-by-step.

    Firstly, you’ll need to make sure you have the right hardware and software for the job. This includes your SSD, a cloning software, and a USB to SATA adapter. Once you have everything you need, it’s time to get started.

    We’ll take you through the process of cloning your old hard drive to your new SSD, including transferring all your files, operating system, and settings. We’ll also cover what to do if you encounter any issues or errors along the way. In this easy-to-follow guide, you’ll have your operating system migrated to your new SSD in no time.

    Say goodbye to slow boot-up times and enjoy lightning-fast performance with your new SSD. Let’s get started!

    Backup Your Data

    If you’re looking to transfer your operating system from an HDD to an SSD, the first step is to backup all of your important data. You don’t want to risk losing any files during the transfer process, so it’s essential to have a reliable backup. There are a few different options for backing up your data, including using an external hard drive, using cloud storage, or using backup software.

    Once you have your backup in place, you can start the process of migrating your OS. This can be done using software like EaseUS Todo Backup, which simplifies the process for you. Keep in mind that migrating your OS can take some time, so be patient and make sure you follow all the steps carefully to avoid any issues.

    With the right preparation, however, transferring your OS to an SSD can improve your computer’s speed and performance, making it well worth the effort.

    Using a Cloud Storage Service

    One effective way to backup your data is by using a cloud storage service. With cloud storage, you can upload your important files and documents to a remote server that is maintained by a third-party provider. This means that your files are stored offsite and can be accessed from anywhere with an internet connection.

    Cloud storage providers typically offer a range of plans, so you can choose the amount of storage that meets your needs. Some providers even allow you to schedule regular backups, so you don’t have to manually upload your files every time. Additionally, cloud storage can provide an extra layer of security in case your local computer or storage device fails, as your files will still be accessible from the cloud.

    Overall, cloud storage is a simple and reliable option for backing up your data and ensuring that you always have access to your important information.

    how do i migrate the os from hdd to ssd

    Using an External Hard Drive

    Backing up your data is crucial, and one way to ensure you don’t lose anything important is by using an external hard drive. These devices are great for storing large amounts of data, including documents, photos, videos, and music. External hard drives come in different sizes and are easy to use.

    Simply plug them into your computer’s USB port, and you’re ready to go. The best part about using an external hard drive is that your data is always with you, even if your computer crashes. You can also store your external hard drive in a safe place, which will protect your data from theft or damage.

    Overall, investing in an external hard drive is a smart way to backup your data and keep it secure.

    Prepping Your SSD

    So, you have decided to upgrade your system and make the switch from an HDD to an SSD. Congratulations! You will undoubtedly see a significant improvement in your system’s performance. However, migrating your operating system from the HDD to the SSD can be a daunting task.

    But don’t worry; it’s not as complicated as it may seem. The first thing you should do is ensure that your SSD is prepped and ready for use. To do this, ensure that it is properly connected to your system and that it has adequate power supply.

    You should also make sure that your SSD is formatted to the appropriate file system and that it has the latest firmware installed. Once you have completed these steps, you can proceed with migrating your OS from the HDD to the SSD. Using software such as EaseUS Partition Master or Macrium Reflect can make this process a breeze.

    Simply clone your OS from the HDD to the SSD, and you’re good to go! So, in summary – prep your SSD, ensure it’s properly connected, formatted, and has the latest firmware, and use software to migrate your OS. With these simple steps, you’ll be enjoying the benefits of your new SSD in no time!

    Formatting Your SSD

    Formatting your SSD properly is vital to its overall performance. Before you start formatting your SSD, it’s important to ensure that you’ve backed up any important files. Once you’ve done that, make sure your SSD is connected and accessible to your computer.

    Next, you’ll need to select the formatting option that suits your needs. The two most common formatting options are Quick Format and Full Format. Quick Format will erase your SSD’s contents instantly, while Full Format will go through your entire SSD, checking for bad sectors, and may take a significant amount of time.

    Keep in mind that Full Format is highly recommended for new SSDs to ensure no errors or bad sectors exist that may affect your SSD’s performance. Once you’ve formatted your SSD, you can now reinstall your operating system and other software to enjoy faster boot times and more efficient data processing. Remember to maintain regular backups of your files to avoid losing important data in the future.

    Updating Your SSD Firmware

    Updating the firmware on your SSD is essential to its performance and longevity. You’ll need to follow certain steps to prepare your SSD for the firmware update. Prepping the SSD involves backing up important files and data as it’s necessary to erase the contents of the drive during the firmware update process.

    Removing the SSD from your computer is highly recommended to avoid accidental data loss or damage. It is also crucial to check the manufacturer’s official website for the latest firmware update and download it onto your computer. Following these steps ensures that your SSD is ready for the firmware update and avoids any potential issues that may occur during the process.

    By taking these simple precautions, your SSD will last longer, and you’ll continue to enjoy its stellar performance.

    Cloning Your HDD to SSD

    If you’re looking to upgrade from an HDD to an SSD, one of the key steps is migrating your operating system (OS) from your old drive to the new one. Thankfully, this process is relatively straightforward and can be completed using a cloning tool. Essentially, cloning your HDD to SSD involves copying all of your data, from your OS to your files and applications, and transferring it over to your new drive.

    This ensures that you have an exact replica of your old system, but with the added speed and efficiency of an SSD. To do this, you’ll need a cloning tool like Acronis True Image or Macrium Reflect. Simply connect your new SSD to your computer, install the cloning software, and follow the prompts to transfer your data over.

    Once the process is complete, you can disconnect your old HDD and start using your faster, more reliable SSD. With a bit of patience and know-how, you can enjoy the benefits of an SSD without losing any of your precious data.

    Using a Cloning Software

    Cloning your HDD to SSD can be a daunting task, but with the right software, it can be a breeze. By using cloning software, you can easily transfer all of your files and system settings from your HDD to your new SSD without having to reinstall everything from scratch. This saves you time and effort, allowing you to jump right into using your new SSD.

    One of the best cloning software options on the market is EaseUS Todo Backup. This program allows you to clone your entire HDD to your SSD with just a few clicks. It also offers features such as incremental backups, which can make future backups faster and more efficient.

    When using cloning software, it’s important to note that you should only use a program from a reputable source. This will ensure that your data is kept safe and secure, and that the cloning process goes smoothly. Additionally, it’s a good idea to create a backup of your files before starting the cloning process, just in case anything goes wrong.

    Overall, by using cloning software, you can simplify the process of transferring your files to a new SSD. With the right program and a bit of preparation, you can have your new drive up and running in no time.

    Using Windows Backup and Restore

    Cloning your HDD to SSD using Windows Backup and Restore can be a game-changer for your device’s performances. This process allows you to transfer all your files, programs, and settings from your old hard drive to your new solid-state drive without losing any data. The cloning process takes some time, but it will save you even more time because you won’t need to reinstall and reconfigure your operating system or programs from scratch.

    To start, connect your new SSD to your computer and make sure to back up your data before starting the cloning process. Next, launch Windows Backup and Restore and select the System Image option. Choose the location where you want to save your backup and start the cloning process.

    Once finished, replace your old HDD with the new SSD, and you’re good to go. By following these simple steps, you can increase your device’s speed and improve your overall experience with your computer.

    Switching to the SSD

    Are you ready to switch from an HDD to an SSD but not sure how to migrate your operating system? No problem! There are a few different methods you can use to transfer your OS, files, and applications over to your new SSD. One option is to use a disk cloning tool, which creates an exact copy of your HDD and transfers it to your SSD. Another method is to use migration software, which can selectively transfer your OS, files, and applications to your SSD without copying over any unnecessary data.

    Whichever method you choose, make sure to backup your data beforehand and double check that your SSD has enough storage space to accommodate everything you want to transfer over. With a little bit of patience and know-how, you’ll be up and running on your speedy new SSD in no time!

    Changing Boot Order in BIOS

    If you’ve recently added a new SSD to your PC, it’s essential to switch to it as the primary boot device. The process involves changing the boot order in the BIOS. BIOS (Basic Input Output System) is the firmware that initializes hardware components in a computer during the startup process.

    To access the BIOS, you need to restart your PC and press the respective key (usually Delete or F2) during the boot-up process, taking note of the instructions on the screen. Once in the BIOS menu, navigate to the Boot tab, where you can specify the boot order by listing the devices’ priority. Move the SSD to the top of the list, making it the first device to boot.

    Save your changes and exit the BIOS; your PC will now boot from the SSD. This process is crucial for better performance and faster load times, so don’t wait to make the change.

    Wrapping Up

    If you’re thinking of migrating your operating system (OS) from a hard disk drive (HDD) to solid-state drive (SSD), there are a few things you should know before getting started. First and foremost, backing up your data is crucial to avoid losing any important files or information. You can use a variety of migration tools available online, such as EaseUS Todo Backup or Acronis True Image, to seamlessly transfer your OS to your new SSD.

    Once you’ve successfully migrated your system, be sure to configure your system settings to optimize your SSD’s performance, including disabling disk defragmentation, enabling TRIM support, and adjusting your power settings. Lastly, don’t forget to dispose of your old HDD securely and properly, as it may contain sensitive data that could be at risk if not disposed of correctly. With these tips in mind, you’ll be well on your way to enjoying the improved speed and performance offered by your new SSD.

    Verifying Your Migration Process

    As you wrap up your migration process, it’s important to ensure that everything has gone smoothly and all data has been transferred successfully. This final step in the migration process is important because it can prevent any future issues and ensure that your new system is up and running as expected. One way to verify your migration process is by conducting a thorough system check.

    This will involve testing the new system and comparing the results to your old system to ensure that everything is working as expected. You can also conduct a data validation process to verify that all data has been transferred correctly. It’s essential to take the time to verify your migration process to avoid any system failures or data loss that could damage your business.

    With careful attention to detail and a thorough testing process, you can rest assured that your migration process was successful and that your data is safe and secure.

    Tips for a Smooth Transition

    As we come to the end of our discussion on preparing for a smooth transition, it’s important to take some time and reflect on the journey we’ve been through. We’ve covered a lot of ground, from setting clear goals and expectations to communicating with team members and delegating tasks effectively. But the work doesn’t stop here; transitioning can be a complex and nuanced process, and one that requires ongoing attention and effort.

    However, armed with the tips and strategies we’ve discussed, and with a focus on remaining flexible and adaptable, you can navigate this period of change with confidence and success. Remember, the key is to stay organized, stay positive, and stay connected with your team throughout the process. Good luck!

    Conclusion

    In summary, migrating your operating system (OS) from a hard disk drive (HDD) to a solid-state drive (SSD) is like swapping out your old clunker for a sleek sports car. Not only will your computer run faster and smoother, but it will also operate more efficiently. While the process may seem daunting at first, with the right tools and a bit of patience, you can easily make the upgrade and enjoy the benefits of a top-performing SSD.

    So don’t wait, make the switch and upgrade your digital ride to the next level!”

    FAQs

    What is the process to migrate the OS from HDD to SSD?
    There are a few steps involved in migrating the OS from HDD to SSD. Firstly, you need to connect the SSD to your computer and make sure it is recognized. Next, use migration software to clone the OS from your HDD to your SSD. Once the cloning process is complete, you can replace the HDD with the SSD and reboot your computer.

    What are the benefits of migrating the OS from HDD to SSD?
    Migrating the OS from HDD to SSD can provide several benefits, such as faster boot times, faster application load times, and improved overall system performance. SSDs are also more reliable than HDDs, have lower power consumption, and are less prone to damage from physical shock.

    Is it possible to migrate only the OS from the HDD to the SSD while keeping all the other files intact?
    Yes, it is possible to migrate only the OS from the HDD to the SSD while keeping all the other files intact. During the migration process, make sure to select only the OS partition to clone onto the SSD. This will ensure that all your personal data and files remain intact on the HDD.

    What kind of migration software is recommended for migrating the OS from HDD to SSD?
    There are many migration software options available, both free and paid. Some popular choices include EaseUS Todo Backup, Macrium Reflect, and Acronis True Image. It’s recommended to research and choose software that suits your needs and supports your specific operating system.

  • Step-by-Step Guide: Effortlessly Migrate Windows 10 to SSD

    Are you tired of slow boot times, sluggish performance, and long wait times for data transfer? If you’re nodding your head, then you’re in the right place. Upgrading to an SSD is one of the simplest and most effective ways to speed up your computer, and in this beginner’s guide, we’re going to show you how to migrate Windows 10 to an SSD. Think of an SSD as a flash drive on steroids.

    It uses nonvolatile flash memory to store and retrieve data, in contrast to a traditional hard disk drive (HDD) that uses spinning platters and mechanical read/write heads. This means that an SSD can perform read and write operations in a fraction of the time it takes for an HDD to do the same task. But how do you migrate your existing Windows 10 installation to this blazing-fast SSD? Don’t worry, we’ve got you covered.

    We’ll walk you through the process step-by-step and provide all the necessary information and guidance you need to make the switch. By the end of this guide, you’ll have learned how to clone your existing drive, transfer your data, and configure your new SSD for optimal performance. So, get ready to say goodbye to sluggish load times and hello to lightning-fast speeds.

    Let’s get started!

    Preparing for Migration

    So, you’re ready to upgrade and wondering how do I migrate Windows 10 to SSD? First, it’s important to backup all your important data and files before starting the migration process. You can use Windows built-in backup and restore features or third-party software for this task. Now it’s time to clone your existing Windows 10 installation to the new SSD.

    You can use free software like Clonezilla or paid options like Acronis True Image to do this easily. Once you have cloned your Windows 10 to the SSD, it’s time to change the boot order settings in your BIOS to boot from the SSD. Make sure everything is working fine before you erase your old installation from your hard drive.

    Finally, you can erase the old Windows 10 installation from your hard drive to free up space. And with that, you now have successfully migrated your Windows 10 to SSD, and you’ll feel the difference in improved performance in no time!

    Backing up Your Data

    One of the most important steps to take before migrating your data is to back it up properly. It’s crucial to safeguard your sensitive data and ensure that you don’t lose any of it during the migration process. This means making copies of all your files, software, applications, and settings and saving them to a safe and secure location.

    That way, if anything goes wrong during the migration or something is lost or corrupted, you’ll still have a backup to rely on. There are many ways to backup your data, but cloud storage and external hard drives are two of the most common. Whichever method you choose, make sure to regularly update your backups, test them to make sure they work properly, and keep them in a different location than your main computer or device.

    By taking the time to properly backup your data before migration, you’ll have peace of mind knowing that your valuable information is protected.

    how do i migrate windows 10 to ssd

    Check for Compatibility

    When preparing for migration, it’s important to check for compatibility with your new platform or system. This involves ensuring that all of your existing hardware, software, and data can effectively work with the new technology. Compatibility issues can be a major stumbling block for migrations, so it’s important to thoroughly test and identify any areas that may present problems.

    This can involve conducting compatibility tests or running simulations to identify any potential issues. Ensuring compatibility also involves checking for any necessary updates or patches to existing systems, as well as ensuring that any vendor or third-party applications are compatible as well. By taking the time to check for compatibility ahead of time, you can avoid major headaches down the road and ensure a smooth migration process.

    Cloning Windows 10 to SSD

    If you’re thinking about upgrading your gaming rig, then moving to a solid-state drive (SSD) can be an excellent decision. But how do you migrate Windows 10 to SSD without breaking anything? The process involves cloning the operating system (OS) from your existing drive to the new storage device, and you can use software like Clonezilla, Macrium Reflect, or EaseUS Todo Backup to do it. Once you have the software, connect your new SSD to your computer, and start the cloning process by selecting the source and destination drives.

    After the process is complete, you’ll need to adjust the boot priority in your BIOS to the SSD, and you’re ready to go. Remember to backup your data before you start the cloning process to avoid losing any essential files. With a new SSD and your OS successfully migrated, you’ll notice a significant boost in performance, and your PC will boot up and shut down much faster than before.

    Creating a Bootable Drive

    Cloning Windows 10 to SSD can be a helpful and efficient way to speed up your computer. The first step in this process is to create a bootable drive. This can be done by downloading a free tool such as Rufus or Windows 10 Media Creation Tool.

    Once you have the tool, insert a blank USB drive into your computer and run the tool. Follow the prompts to create a bootable drive. This will allow you to start your computer from the USB drive and install Windows 10 onto your new SSD.

    Cloning your old hard drive to the SSD is a simple process that will copy over all of your data and settings. This will save you time and hassle when it comes to setting up your new system. With a new SSD and a cloned version of Windows 10, you will notice a significant improvement in the speed and performance of your computer.

    So why wait? Give cloning Windows 10 a try and see the difference for yourself!

    Connect the SSD

    Now that you have gotten your hands on an SSD, it’s time to transfer over your operating system. The process of cloning Windows 10 to SSD isn’t as complicated as most people might think. You’ll need an external USB enclosure, which is essentially a hard drive case that connects your SSD to your computer via USB.

    Once you’ve installed your SSD into the enclosure, connect it to your computer and download a cloning software like Clonezilla. Boot up Clonezilla and select the option to clone your current Windows installation to your SSD. It’s important to note that this process might take some time, depending on the size of your SSD and the amount of data you have on your old hard drive.

    But once the cloning process is complete, you can swap out your old hard drive for your new SSD and enjoy a faster, more responsive Windows 10 experience. Remember to ensure your computer is properly shut down and unplugged before opening it up to do any hardware work!

    Select a Cloning Software

    When it comes to upgrading to a faster SSD on your Windows 10 system, cloning your existing drive can save you a lot of time and hassle. Fortunately, there are plenty of cloning software options available, both free and paid. One popular choice is EaseUS Todo Backup, which offers a straightforward interface and reliable performance.

    Another option is Macrium Reflect, which has a variety of advanced features for power users. Whichever software you choose, the process of cloning your Windows 10 system involves creating a full backup image of your current drive and then transferring that image to the new SSD. This ensures that all your files and settings are preserved and ready to go on the new drive, without needing to reinstall the operating system or any of your programs.

    With the right cloning software and a bit of patience, upgrading to an SSD can be a breeze, vastly improving your system’s speed and performance.

    Finishing Touches

    If you’re wondering how to migrate Windows 10 to SSD, there are a few finishing touches to consider once you’ve completed the actual migration process. First and foremost, make sure you’ve enabled TRIM on your new SSD. This will allow the operating system to quickly and efficiently manage the storage of data on the drive, improving its overall performance.

    Next, disable hibernation, as this feature is not necessary on an SSD and can take up valuable space. Additionally, make sure your power settings are optimized to conserve energy and avoid unnecessary strain on your new SSD. Lastly, consider installing and regularly running a disk cleanup utility to keep your SSD in top condition.

    With these finishing touches, you’ll be able to fully enjoy the benefits of a faster, more efficient computer with Windows 10 running on your new SSD.

    Confirming Boot Order

    Confirming boot order is a vital step to ensure that your computer boots up correctly. It’s essential to arrange your boot order in such a way that your system checks the primary storage device, usually your hard drive, first before attempting to boot from any other devices such as CDs, DVDs, or USB drives. Once you have made your changes to the boot order settings, you should save and exit your BIOS setup utility.

    This will then restart your computer and boot it up with the new settings you made. In summary, always remember to double-check the boot order before leaving the BIOS setup utility to avoid any potential boot issues.

    Testing the Cloned Drive

    Once you have successfully cloned your drive, it’s essential to run some tests to ensure that everything is in working order. The last thing you want is to rely on a backup drive that doesn’t function correctly when you need it the most! Start by booting up your computer using the cloned drive and ensure that all your applications and programs are functioning as normal. Check for any error messages, broken links, or missing data.

    It’s also a good idea to test the read and write speeds of your drive to ensure that there are no issues with data transfer. Another critical test to perform is to check your computer’s performance when running more complex tasks, like gaming or video editing, to ensure that the cloned drive can handle the load without any lag or hiccups. By performing these tests, you can be confident that your cloned drive is a reliable and functional backup solution to keep your data secure in case of a system failure.

    Conclusion

    In conclusion, migrating Windows 10 to an SSD can be a daunting task for those who are not tech-savvy. But fear not, with the right tools and knowledge, you can make the transition seamlessly. It’s like moving your entire living room to a new and improved space – yes, it takes some effort, but once you settle in, you’ll wonder how you ever lived without it.

    So don’t wait – give your computer a much-needed upgrade and enjoy faster performance like never before!”

    FAQs

    What are the benefits of migrating Windows 10 to an SSD?
    Migrating your Windows 10 operating system to an SSD can significantly improve the overall performance of your computer by reducing boot times and increasing the speed of file transfers and software operations.

    What are the requirements for migrating Windows 10 to an SSD?
    To migrate Windows 10 to an SSD, you will need to ensure that your SSD has enough storage space to accommodate your operating system and all of your files, as well as a USB drive for creating a bootable installation media.

    Can I migrate Windows 10 to an SSD without losing my data?
    Yes, it is possible to migrate your Windows 10 operating system to an SSD without losing any of your data by using a tool such as EaseUS Todo Backup or Clonezilla to clone your entire hard drive to the new SSD.

    How long does it take to migrate Windows 10 to an SSD?
    The time it takes to migrate Windows 10 to an SSD will depend on a variety of factors, including the size of your hard drive, the speed of your computer, and the tools you use for the migration process. Typically, the process can take anywhere from a few hours to a full day.