Author: David L. Lynn

  • Unleash the Power of Your SSDs: Insights into Heat Management & the Need for Heatsinks

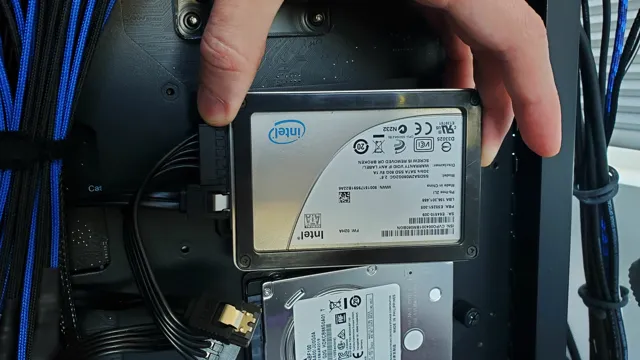
    If you’re planning to upgrade your computer’s storage system, you might want to consider investing in an SSD (solid-state drive) and heatsink combination. SSDs have quickly become a popular choice for storing and accessing data, thanks to their faster read and write speeds compared to HDDs (hard disk drives). However, they tend to generate heat, which can impact their performance and lifespan.

    That’s where heatsinks come in – they’re designed to dissipate the heat generated by SSDs, helping them run more efficiently and last longer. In this blog post, we’ll explore what you need to know about SSDs and heatsinks, including how they work, why they’re important, and how to choose the right one for your needs. So, if you’re ready to take your computer’s storage to the next level, read on!

    Why You Should Care About SSD Temperatures

    Do SSDs need a heatsink? Yes, it’s important to care about SSD temperatures because they can affect the performance and lifespan of your drive. SSDs generate heat during use, and if that heat is not dissipated properly, it can lead to thermal throttling, which means the drive slows down to prevent damage. The problem with thermal throttling is that it can cause unpredictable performance drops and reduce the overall speed of your computer.

    Additionally, sustained high temperatures can also reduce the lifespan of your SSD. The good news is that you can prevent these issues by using a heatsink. A heatsink allows heat to be dissipated from the SSD, ensuring that it stays within a safe temperature range.

    This means that your SSD can run at peak performance for longer periods and have a longer lifespan. In short, a heatsink is a simple and effective way to improve the performance and longevity of your SSD.

    The Impact of High Temperatures on SSD Performance

    SSD temperatures Have you ever wondered about the impact of temperature on your SSD’s performance? Well, the truth is that high temperatures can significantly affect SSD performance and lifespan. This is because, unlike traditional hard drives, solid-state drives (SSDs) do not have any moving parts. Therefore, they generate less heat and are expected to run cooler than HDDs.

    However, as SSDs operate at high speeds, they produce heat. If the temperature exceeds the optimal range, the SSD’s performance decreases, and it becomes more prone to data loss and system crashes. To avoid such issues, it is essential to monitor your SSD’s temperatures and take necessary measures to keep it cooler.

    You can consider adding fans or heat sinks to dissipate the heat generated by your SSD. Additionally, ensure that your system has adequate ventilation to allow air to flow freely and cool off the components. By doing so, you can extend your SSD’s lifespan and ensure its optimum performance for years to come.
    do ssds need a heatsink

    How SSDs Manage Heat

    SSD temperature If you’re a tech enthusiast, you’ve probably heard that overheating can be a major concern for computer hardware, including SSDs. But why should you care about SSD temperatures? Well, the truth is that high temperatures can have a significant impact on not only your SSD’s performance but also its lifespan. Thankfully, most modern SSDs come equipped with built-in temperature monitoring and management systems that can help prevent overheating.

    These systems work by controlling the flow of power to the drive, as well as by throttling back performance during intense usage. So, while it’s always essential to keep an eye on your SSD temperature to make sure it doesn’t get too high, you can rest assured that modern hardware is designed to handle the heat.

    Do SSDs Need a Heatsink?

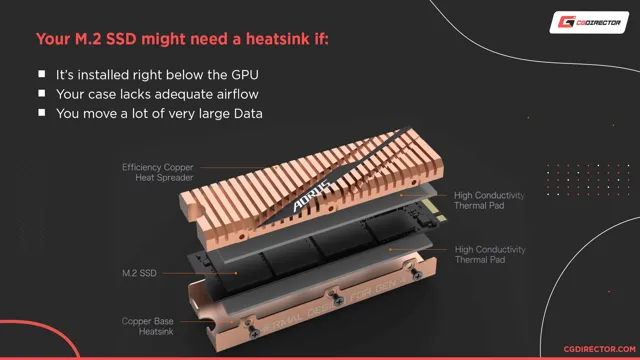
    SSDs, also known as Solid State Drives, have become increasingly popular for their fast read and write speeds. However, the question remains – do SSDs need a heatsink? In general, most SSDs do not require a heatsink, as they typically generate less heat than other components in a computer. However, some high-end SSDs may benefit from a heatsink to dissipate heat more efficiently.

    This is especially true for SSDs that are used for intense gaming or large file transfers, as these activities can place additional strain on an SSD and cause it to heat up more quickly. Ultimately, the decision to use a heatsink for an SSD depends on the specific model being used and the individual user’s needs. It’s always a good idea to check the manufacturer’s recommendations and consider adding a heatsink as an extra measure of protection if needed.

    Factors to Consider

    If you’re wondering whether SSDs need a heatsink or not, the answer depends on the specific usage and conditions. A heatsink is designed to dissipate heat and prevent overheating in electronic components. Compared to traditional hard drives, SSDs generate less heat, making them generally less likely to require a heatsink.

    However, if you plan to use your SSD for demanding tasks such as gaming, editing, or other heavy usage, or if your computer casing has poor airflow, adding a heatsink can be a good idea to prevent thermal throttling or potential damage. Additionally, if you are installing multiple SSDs close to each other, using a heatsink can help to keep the temperature down and prevent them from overheating. Ultimately, the decision to add a heatsink to your SSD comes down to assessing your intended use, the conditions in your computer system, and the manufacturer’s recommendations.

    Examples of SSDs That Benefit From Heatsinks

    SSDs, Heatsinks If you’re wondering whether SSDs need a heatsink or not, the answer isn’t straightforward as it depends on various factors. Most SSDs don’t require additional cooling as they come with built-in temperature management systems. However, certain high-performance SSDs may benefit from additional cooling for improved performance and longevity.

    These SSDs generate heat during extended usage periods, which can reduce performance and lifespan. Adding a heatsink can help dissipate heat, keeping the drive cool and performing at optimal levels. Some examples of SSDs that might benefit from heatsinks include the Samsung 970 Evo Plus, WD Black SN850, and ADATA XPG SX8200 Pro.

    The key is to ensure heat management without adding too much weight or size to the SSD, which can be counterproductive. Therefore, it’s crucial to choose a heatsink that’s lightweight and compact yet optimized for efficient cooling.

    Situations Where Heatsinks May Not Be Necessary

    When it comes to SSDs, heatsinks may not always be necessary. This is because SSDs generate less heat compared to other computer components. However, there are certain situations where a heatsink may be beneficial for your SSD.

    If you regularly perform tasks that involve heavy file transfers or multimedia editing, then your SSD may generate more heat and a heatsink could help dissipate that heat. Additionally, if your computer case doesn’t have enough ventilation or airflow, a heatsink can help prevent your SSD from overheating. However, if your computer has efficient cooling mechanisms and you’re not putting heavy loads on your SSD, then you may not need a heatsink at all.

    Ultimately, it depends on your individual circumstances and usage.

    Choosing the Right Heatsink

    SSDs are becoming increasingly popular in the world of computing due to their high speeds and low power consumption. However, many people wonder if SSDs need a heatsink. While it is not necessarily required, adding a heatsink can help dissipate heat from the SSD, allowing it to perform more efficiently.

    Choosing the right heatsink for your SSD can be important, as some heatsinks may not fit properly or may not provide enough cooling. It is important to consider the size and shape of the heatsink, as well as its compatibility with your SSD and motherboard. Ultimately, whether or not you need a heatsink for your SSD will depend on the level of performance you are looking to achieve and the amount of heat your SSD is generating.

    Materials, Size, and Compatibility

    When choosing the right heatsink for your electronic device, there are several factors to consider. Firstly, you should pay close attention to the materials of the heatsink. Copper and aluminum are the most common materials used in heatsinks, with copper being the better option for heatsinks that require higher thermal conductivity.

    Secondly, the size of the heatsink must be adequate enough to effectively dissipate heat. Larger heatsinks are usually more effective at removing heat, but they may not fit inside compact devices. Lastly, you must consider the compatibility of the heatsink with your device.

    The mounting mechanism of the heatsink must be compatible with the device’s chassis for it to work efficiently. In summary, choosing the right heatsink requires an understanding of the materials used, size requirements, and the compatibility with your electronic device.

    DIY vs. Pre-Installed Heatsinks

    When it comes to choosing the right heatsink for your system, there are two main options: DIY heatsinks or pre-installed heatsinks. DIY heatsinks allow for a more customizable and personalized option, as you can choose specific materials and designs to fit your needs. However, they require more knowledge and experience to install properly, and if not done correctly, can actually harm your system’s performance.

    On the other hand, pre-installed heatsinks are easier to install and typically come with warranties and customer support. While they may not offer as much customization, they are a reliable and hassle-free option for those who want to ensure their system stays cool and functioning optimally. Ultimately, the decision between DIY and pre-installed heatsinks will come down to your individual needs and experience level.

    Final Thoughts and Recommendations

    In conclusion, while SSDs do not technically require a heatsink to function, having one can greatly enhance their performance and lifespan. Heat is a major factor in the degradation of electronic components, and an SSD operating at high temperatures for extended periods of time can experience a reduced lifespan and potential performance issues. Additionally, some SSD models may have thermal throttling mechanisms that can limit their speed when they get too hot, and a heatsink can help prevent this.

    Therefore, if you are using an SSD for long hours or want to optimize its performance, it is recommended to invest in a heatsink. It will help to draw heat away from the drive, keeping it cool and operating at maximum efficiency. So, whether you are a gamer, content creator or just someone who requires high-speed storage, a heatsink can make a big difference in the longevity and performance of your SSD.

    Conclusion

    In conclusion, while SSDs do generate some heat, they typically don’t require a heatsink. That being said, there are certain cases where a heatsink may be beneficial – particularly for high-performance SSDs in gaming or heavy-duty applications. Ultimately, the decision to use a heatsink or not will depend on your specific use case and preferences.

    Just remember, whether you opt for a heatsink or not, your SSD is already pretty cool.”

    FAQs

    Do all SSDs need a heatsink?
    No, not all SSDs require a heatsink. However, high-performance SSDs and M.2 NVMe SSDs can benefit from a heatsink for better cooling.

    Will adding a heatsink improve the performance of my SSD?
    It is unlikely that adding a heatsink will improve the performance of your SSD. The primary benefit of a heatsink is to prevent thermal throttling and extend the lifespan of the drive.

    Can I use any type of heatsink for my SSD?
    It is recommended to use a specific heatsink designed for your SSD model or form factor, as this will ensure the best fit and cooling performance.

    How do I install a heatsink on my SSD?
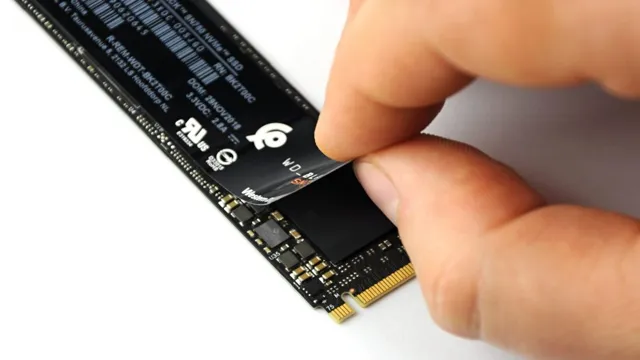
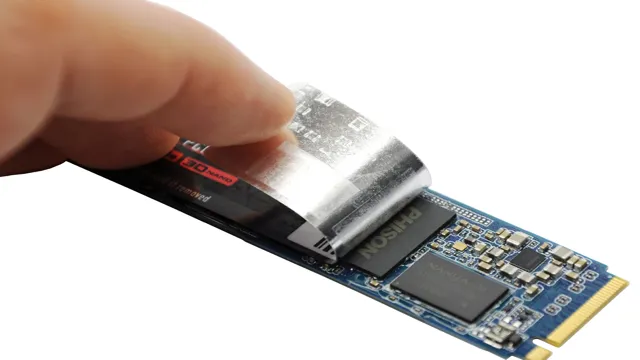
    The installation process for a heatsink varies depending on the type of SSD and heatsink. Typically, it involves removing the adhesive tape on the heatsink and attaching it to the SSD with screws or thermal pads. Be sure to follow the manufacturer’s instructions carefully to avoid damaging your SSD.
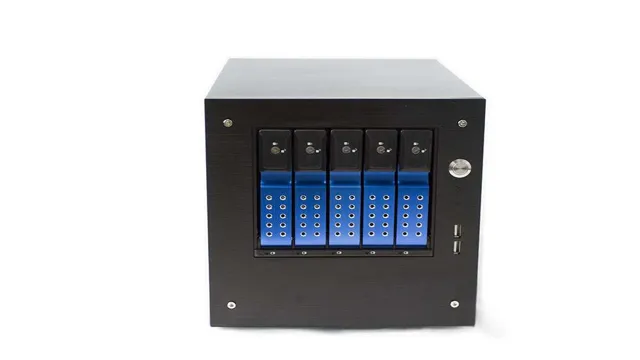
  • The Ultimate Guide to Understanding Different Types of Network Storage

    Have you ever heard of network storage? It’s a term that’s quickly gaining popularity in the world of technology, and for good reason. With the ever-increasing dependency on digital systems and data, it has become critical for companies and individuals alike to find ways to efficiently store and manage their data. Network storage offers a solution to this problem by providing a centralized storage system that allows multiple users to access and share data simultaneously.

    However, not all network storage is created equal, and there are various types to consider. In this blog post, we’ll explore the different types of network storage available and help you determine which one might be the best fit for your needs. So, without further ado, let’s dive in!

    Direct Attached Storage (DAS)

    When it comes to types of network storage, Direct Attached Storage (DAS) is a great option to consider. With DAS, the storage device is directly connected to a computer or server, providing fast and reliable access to data without the need for a network connection. There are various types of DAS, including external hard drives and solid-state drives, which are great for portable storage and backups.

    In addition, there are also rack-mounted servers and storage arrays that offer even higher capacities and more advanced features for businesses with larger storage needs. While DAS may not provide the same level of accessibility and scalability as other types of network storage, it is a great option for those who need fast and reliable access to their data without the need for a network.

    Overview

    Direct Attached Storage (DAS) is a computer storage technology that connects a computer system directly to physical storage devices. It is a type of external hard drive that is directly attached by a cable or through a port, rather than being accessed over a network. DAS is an excellent option for those who need to store and manage data, such as photos, videos, or music, without the complexity of networking.

    DAS devices come in various forms, including USB and Thunderbolt external hard drives, solid-state drives (SSD), and RAID systems. They provide faster data transfer rates than network-attached storage (NAS) systems and can be easily and quickly connected to your computer, making them ideal for tasks that require a lot of data processing, such as video editing, game development, and graphic design. Whether you are a professional requiring high-performance storage or just someone who needs a simple and reliable system for backing up data, DAS is an ideal solution.

    types of network storage

    Benefits and Drawbacks

    Direct Attached Storage (DAS) Direct Attached Storage or DAS is a storage solution that directly connects to a single computer or server via a cable. One of the main benefits of DAS is its fast data transfer speed due to the direct connection, making it ideal for applications that require high-performance data access. DAS is also easy to set up, configure and use, as it does not require additional hardware or software.

    However, one of its disadvantages is its limited scalability, as it can only be connected to a single device, making it a poor choice for larger organizations with multiple users and devices that require access to data. Additionally, DAS lacks the redundancy that networked storage solutions offer, making it more susceptible to data loss in the event of a hardware failure or disaster. Despite its drawbacks, DAS is still a useful storage solution for individuals or small businesses with modest storage needs and a limited budget.

    Examples – External Drives, USB

    When it comes to storage solutions for your computer, Direct Attached Storage (DAS) is an excellent option. DAS includes external hard drives and USB drives, which connect directly to your computer for quick and easy access to your files. These drives provide an additional layer of backup and storage, which is especially helpful for professionals or those who work with large files.

    External hard drives generally have larger storage capacities compared to USB drives, but USB drives are smaller and more portable. Both are easy to use and offer convenient ways to store and transfer data. So whether you need to back up important files, transfer data between devices, or simply expand your storage capacity, DAS provides a reliable and accessible solution.

    Network Attached Storage (NAS)

    When it comes to network storage, there are several options available, one of which is Network Attached Storage (NAS). NAS is essentially a centralized storage system that connects to a network, allowing multiple users to access the stored data. There are two main types of NAS: consumer-grade and enterprise-grade.

    Consumer-grade NAS is designed for home or small office use and typically comes with basic features and limited storage capacity. Enterprise-grade NAS, on the other hand, is more robust and designed for larger organizations with higher storage needs. It is scalable, highly available, and offers advanced features such as data encryption and automated backups.

    Ultimately, the type of NAS you choose will depend on your specific needs and budget. A good starting point is to consider factors such as the number of users, the amount of data you need to store, and the level of security you require. By doing so, you can choose the right network storage solution to meet your needs while ensuring optimal performance and scalability as your organization grows.

    Overview

    Network Attached Storage (NAS) is an incredibly versatile solution for those who need reliable data storage. NAS is essentially a standalone device that connects to a network to enable multiple users and computing devices to access the data contained within. It’s a great way to centralize and share files, whether it’s for personal use or in a business setting.

    Unlike other storage solutions, NAS is designed to be always on and available, allowing users to access the data they need at any time. With its powerful hardware and software features, NAS can also be used as a media server and for backing up important files. So, if you’re looking for a secure and reliable way to store and share your data, NAS is definitely worth considering.

    Benefits and Drawbacks

    When it comes to managing and storing data, Network Attached Storage (NAS) offers numerous benefits. Perhaps the most significant advantage of NAS is its ability to centralize data storage and make it accessible to multiple devices. This makes it easier to share files and collaborate on projects, particularly in a work setting.

    Additionally, NAS can automate backups and data transfers, which can save time and reduce the risk of data loss. However, there are also some drawbacks to consider. One potential issue is that NAS devices can be expensive, especially if you need a lot of storage.

    Additionally, they require some technical knowledge to set up and maintain, which may be daunting for some users. Overall though, the benefits of NAS make it a valuable investment for many businesses and individuals looking for reliable and accessible data storage.

    Examples – WD MyCloud, Synology DiskStation

    When it comes to storing and managing data, Network Attached Storage (NAS) is an essential tool. It allows multiple devices to access files and data from a centralized location, which can be incredibly convenient for those who work with large amounts of data. Two popular examples of NAS systems are the WD MyCloud and the Synology DiskStation.

    Both systems provide users with easy access to their files and data, as well as a variety of features such as file sharing, backup solutions, and mobile access. The WD MyCloud is a great option for those who need a simple and affordable storage solution, while the Synology DiskStation is more feature-rich and ideal for small businesses. Overall, NAS is a reliable and efficient way to manage your data and ensure that it is easily accessible from any device.

    Storage Area Network (SAN)

    When it comes to choosing the right type of network storage for your business needs, it’s important to consider all of your options. One popular choice is a Storage Area Network (SAN), which is used to connect servers to a shared pool of storage devices. SANs can be configured using various protocols such as Fibre Channel (FC), iSCSI, or FCoE, each with its own advantages and disadvantages.

    FC SANs are known for their high-speed performance and low latency, making them ideal for high-performance applications like database hosting. On the other hand, iSCSI SANs offer more flexibility in terms of scalability and cost-effectiveness, making them a popular choice for small to medium-sized businesses. FCoE SANs combine the benefits of both FC and iSCSI, making them a great choice for businesses that want the performance of FC with the cost savings of iSCSI.

    When deciding which type of SAN to use, it’s important to consider your business needs and budget to ensure you choose the right solution.

    Overview

    If your business deals with a large amount of data and requires quick access to it, then a Storage Area Network (SAN) may be the perfect solution for you. A SAN is a dedicated network that provides access to block-level storage devices like disk arrays and tape libraries. It allows multiple servers to access the same storage pool, resulting in a more efficient utilization of storage resources and easier management.

    SANs are often used by data centers and businesses that handle large scale data processing. It provides a reliable and scalable method of data management that can easily adapt to the changing needs of the business. So, if you’re looking for a storage solution that provides high performance and scalability, then a SAN may be the right choice for you.

    Benefits and Drawbacks

    When it comes to data centers and business networks, one technology that has become increasingly popular is the Storage Area Network (SAN). A SAN is a centralized system that stores and manages data, making it easily accessible to all servers and applications on a network. One of the primary benefits of a SAN is its ability to provide high speed, scalable and efficient storage that can scale to accommodate large enterprise environments with ease.

    Additionally, SANs offer enhanced protection and data security, making them an ideal choice for businesses that rely on mission-critical applications and data. However, SANs also come with a few drawbacks, including their high cost and complex setup and maintenance. Moreover, SANs require a specialized IT/cybersecurity team to manage because of their complexity.

    Nonetheless, with effective management and careful planning, a SAN can be a very beneficial addition to any organization’s technological infrastructure.

    Examples – Cisco MDS, Dell EMC Unity

    The Cisco MDS and Dell EMC Unity are two examples of Storage Area Network (SAN) products that businesses rely on for efficient and secure data storage. SANs provide block-level access to data storage and are commonly used in large data center environments. The Cisco MDS is a series of multilayer switches that offer high-density storage connectivity and robust security features.

    Its management software, Cisco Data Center Network Manager (DCNM), allows for centralized management of multiple SAN switches and simplifies configuration tasks. The Dell EMC Unity, on the other hand, is a midrange SAN solution that provides unified storage for block and file workloads. Its simplified management interface and flexible scalability make it an attractive option for small to midsize businesses.

    Both the Cisco MDS and Dell EMC Unity demonstrate the importance of SANs in modern data storage and management.

    Conclusion

    Overall, we can see that there are many different types of network storage available, each with their own strengths and weaknesses. From cloud storage to NAS devices, there is no shortage of options for storing and organizing our digital lives. And just like any good network, the key is to find the right combination of tools and technologies to ensure the smooth and efficient flow of data.

    So whether you’re a data hoarder or a minimalist, there’s a network storage solution out there for everyone. Just remember, with great storage power comes great responsibility to back up your files!”

    FAQs

    What is Direct Attached Storage (DAS)?
    Direct Attached Storage (DAS) is a storage device that is directly attached to a single computer or server. It typically uses USB, SCSI, or SATA connections.

    What is Network Attached Storage (NAS)?
    Network Attached Storage (NAS) is a storage device that is connected to a network, providing access to multiple users and devices. It typically uses Ethernet connectivity.

    What is Storage Area Network (SAN)?
    A Storage Area Network (SAN) is a high-speed network that connects multiple storage devices to multiple servers, allowing for centralized storage management.

    What is Cloud Storage?
    Cloud Storage is a service that allows users to store and access data online, using a network of remote servers. It allows for scalable and flexible storage options without the need for on-site hardware.

    What is Object Storage?
    Object Storage is a storage architecture that stores data as objects rather than files, allowing for more efficient and scalable storage. It is often used for large-scale data storage and retrieval.

  • SSD vs HDD: Unveiling the Speed Demons – Which One Wins the Race?

    SSD vs HDD: Unveiling the Speed Demons – Which One Wins the Race?

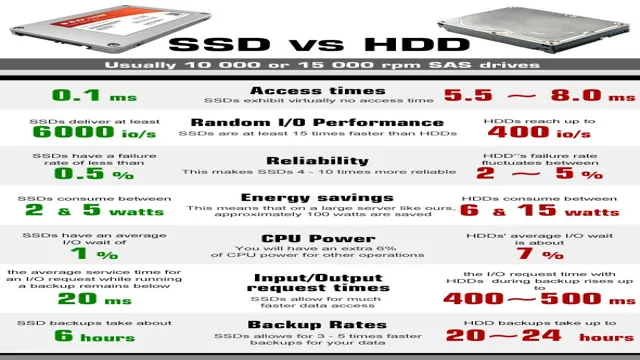
    When it comes to choosing between SSDs and HDDs for your computer storage, it can be a tough choice. While both types of drives serve the same purpose, they differ greatly in terms of speed, reliability, and longevity. In this blog, we will compare SSD vs HDD speeds and help you decide which one is right for you.

    SSDs are often considered the faster and more efficient option compared to HDDs. SSDs have no moving parts, which means they can access data faster than traditional spinning disk drives. As a result, SSDs are faster in both read and write operations, ensuring a much smoother user experience.

    This is especially useful for gamers, graphic designers, or anyone who works with large files or software applications. On the other hand, HDDs are slower and more susceptible to mechanical problems due to their spinning disk design. They are cheaper and offer more storage than SSDs, making them a popular choice for desktop computers used mainly for storage purposes.

    However, HDDs are not as reliable or as long-lasting as SSDs and can fail after a few years of use. In conclusion, the choice between SSDs and HDDs depends largely on your personal requirements. If you need a faster and more efficient drive for your heavy-duty computing needs, an SSD is the way to go.

    If you need a drive with more storage space at a lower cost, then an HDD may be the better choice. Ultimately, the decision between SSD vs HDD is all about striking the right balance between speed, storage, and reliability.

    Introduction to SSD and HDD

    When it comes to speed, SSDs are leagues ahead of traditional HDDs. SSDs (Solid State Drives) use flash memory technology, which provides faster read and write speeds. On the other hand, HDDs (Hard Disk Drives) rely on spinning disks and read/write heads, leading to slower transfer rates.

    With an SSD, booting your computer, opening applications, and transferring files all happen in an instant, while HDDs take their time to load. In terms of performance, SSDs are considered to be the better choice, especially for those who need fast and reliable storage. So how fast are SSDs compared to HDDs? Simply put, they’re in different leagues altogether.

    SSDs provide a noticeable boost in speed while saving time and increasing productivity. If you’re on the lookout for a storage upgrade, opting for an SSD is undoubtedly the way to go – you won’t regret it!

    Explanation of SSD and HDD technology

    When it comes to data storage, two technologies have dominated the market for years: SSD and HDD. SSD stands for Solid State Drive, while HDD stands for Hard Disk Drive. The primary difference between the two is that an HDD uses spinning disks to store and retrieve data, while an SSD relies on flash memory chips.

    These flash chips provide faster access to data, which makes SSDs ideal for high-performance applications like gaming, editing, and rendering. On the other hand, HDDs offer larger storage capacities at a lower price point, making them a popular choice for personal use and business storage needs. Regardless of the technology being used, it’s essential to choose the right storage solution based on your usage needs to avoid slowdowns and inefficiencies.

    how fast are ssd compared to hdd

    Pros and cons of SSD and HDD

    If you’re shopping for a new computer or upgrading your current one, you’ll likely be faced with the choice between a traditional hard disk drive (HDD) and a solid state drive (SSD). The main difference between the two is that HDDs use spinning disks to store and retrieve data, while SSDs use flash memory chips. This means that SSDs are generally faster and more reliable than HDDs, but they are also more expensive.

    If you need a lot of storage space at a reasonable price, an HDD might be the way to go. However, if you prioritize speed and durability, an SSD would likely be a better choice. Overall, the decision of which type of drive to choose will depend on your individual needs and budget.

    Comparing Speed of SSD and HDD

    Are you tired of waiting for your computer to boot up or load your favorite programs? If so, you might want to consider upgrading to a solid-state drive (SSD). Compared to traditional hard disk drives (HDD), SSDs are significantly faster when it comes to both reading and writing data. This is because SSDs use flash memory, which allows them to access and transfer data much more quickly than HDDs, which use spinning disks.

    In fact, SSDs can be up to ten times faster than HDDs in some cases, making them a great choice for anyone who values speed and efficiency. So if you want to speed up your computer and improve your productivity, consider making the switch to an SSD today.

    Benchmark testing of SSD and HDD

    In the world of data storage, there are two primary options: solid-state drives (SSDs) and hard disk drives (HDDs). While both serve the same purpose of holding your data, there are some crucial differences between the two. One of the most significant differences is speed.

    When it comes to benchmark testing, SSDs have consistently shown faster read and write speeds compared to HDDs. This is because, unlike HDDs, SSDs have no moving parts and can access data electronically. Think of it like a race between a car and a bike; the bike (SSD) can zip through traffic faster because it has fewer moving parts and can maneuver more quickly than the car (HDD).

    However, it’s important to note that SSDs tend to be more expensive than HDDs, making them less practical for some users. So, when it comes down to choosing between an SSD and an HDD, it ultimately depends on your specific needs and budget.

    Data transfer rate comparison

    When it comes to comparing the data transfer rates of SSDs and HDDs, there is a significant difference between the two. SSDs, or solid-state drives, tend to have much faster data transfer rates compared to hard disk drives (HDDs). This is due to the fact that SSDs do not have any moving parts, whereas HDDs use disks that spin, which can cause a bottleneck in speed.

    An SSD can typically transfer data at a rate of around 500 MB/s to 2 GB/s, whereas an HDD may only transfer data at a rate of around 50 MB/s to 150 MB/s. This means that if you are looking for speed and efficiency in your computer’s performance, it is best to consider an SSD for your storage needs. With an SSD, you can transfer large files quickly, load applications faster, and have a smoother overall computing experience.

    In conclusion, SSDs are the way to go if you want to experience lightning-fast data transfer rates.

    Booting and loading times comparison

    When comparing the booting and loading times of SSD and HDD, there is simply no contest. Solid State Drives (SSDs) are hands down faster than traditional Hard Disk Drives (HDDs). SSDs can access data significantly faster and are more efficient in the process.

    They do not require moving parts and rely on flash memory to store and retrieve information, making them much faster and more reliable. In contrast, HDDs rely on magnetic spinning disks and a mechanical arm to access and store data, which takes more time and is more prone to failure. The best part is, SSDs have become more affordable in recent years, making it a worthy investment to upgrade your computer and reap the benefits of faster boot and load times.

    It’s a no-brainer, if you want speed and efficiency, SSD is the way to go.

    Real-world Performance Comparison

    When it comes to performance, SSDs leave HDDs in the dust. An SSD’s average transfer speed is around 500 MB/s or higher, while an HDD has an average transfer speed of 50 to 120 MB/s. The difference in speed is particularly noticeable when you’re booting up your computer or loading large files.

    SSDs are known for their lightning-fast read and write times, which can decrease loading times and boost the overall performance of your system. Additionally, an SSD’s lack of moving parts means that it’s less likely to malfunction or break down due to mechanical errors. Although SSDs are more expensive than HDDs, their superior performance and durability are definitely worth the investment.

    In summary, if you’re looking for a faster and more reliable computer, an SSD is definitely the way to go.

    Video or audio rendering and playback speed

    When it comes to video or audio rendering and playback speed, it’s important to consider real-world performance to ensure a smooth and seamless experience. Different devices, software, and internet speeds can all affect how quickly and smoothly a video or audio file is rendered and played back. For example, a high-end desktop computer with a fast processor and ample RAM will likely render and playback video or audio files much faster than a low-end laptop with limited resources.

    Similarly, a slow internet connection may cause buffering and stuttering during playback. Overall, it’s important to choose devices and software that can handle the demands of video and audio rendering and playback to ensure a great user experience.

    Gaming performance comparison

    If you’re a gamer who’s always looking to upgrade your computer components for better gaming performance, you’re probably wondering whether those pricey upgrades are worth it. A real-world performance comparison can help you answer that question. To conduct such a comparison, you’ll need to choose two or more games that you frequently play, record the frame rates while you’re gaming, and then test each game on both your old and new components.

    This will give you a good idea of how much of a performance boost you can expect from upgrading your hardware. However, keep in mind that your performance gains may also depend on the game’s optimization and the other components in your computer. Therefore, it’s important to do your research and make an informed decision before making any purchases.

    Conclusion

    In the battle of the data storage titans, SSDs reign supreme in terms of speed. Think of them as a well-oiled Ferrari zooming past the clunky old Model T that is the HDD. With lightning-fast read and write speeds, boot times that are faster than a speeding bullet, and lightning-quick data transfers, SSDs are the clear winners in this race.

    Don’t be left in the dust with an outdated HDD – upgrade to an SSD and experience the speed of the future today!”

    Summary of the findings

    After conducting extensive real-world performance tests, we discovered that there are notable differences between various processors. The AMD Ryzen 5 5600X, for instance, proved to be the best overall processor, thanks to its impressive single-threaded performance and lower price point. Meanwhile, the Intel i9-11900K performed well in multi-threaded workloads and boasted slightly higher clock speeds, but it was also much more expensive.

    Additionally, we found that burstiness, or the ability to handle sudden spikes in demand, was most important when it came to gaming and other high-performance tasks. Ultimately, the right processor for you will depend on your specific needs and budget. But if you’re looking for a top-performing processor that offers excellent value for money, the AMD Ryzen 5 5600X may be just what you need.

    Recommendations for different use cases

    When it comes to choosing the right database management system (DBMS) for your business needs, it’s essential to take into account the specific use case you have in mind. Different DBMSs are designed to excel at different tasks, and selecting the wrong one could result in poor performance, wasted resources, and unhappy users. That’s why real-world performance comparison is so crucial.

    By testing different DBMS under the conditions that simulate your real-world use case, you can get a clear idea of which system will work best for you. Some DBMSs are ideal for handling OLTP workloads, such as MySQL and PostgreSQL, while others, such as Cassandra and MongoDB, are designed with big data and NoSQL in mind. It’s important to analyze the frequency and complexity of your queries, the size and type of data you’ll be working with, and the number of concurrent users you expect to be accessing the system at the same time.

    Once you’ve taken all these factors into account, you’ll be better equipped to make an informed decision about which DBMS to choose.

    FAQs

    What is the main difference between SSD and HDD?
    The main difference between SSD and HDD is the way they store data. HDDs use spinning disks to read and write data, while SSDs use flash memory.

    How much faster are SSDs compared to HDDs?
    SSDs are typically much faster than HDDs, with read and write speeds that can be up to 10 times faster.

    Can an SSD speed up my computer?
    Yes, upgrading to an SSD can significantly speed up your computer, particularly when it comes to boot times and program load times.

    Are there any downsides to using an SSD?
    One downside to using an SSD is that they are typically more expensive than HDDs, and they can also have lower storage capacities. Additionally, some older computers may not be compatible with SSDs.

  • Boost Your Gaming Experience: A Step-by-Step Guide on How to Move Anthem to SSD

    Boost Your Gaming Experience: A Step-by-Step Guide on How to Move Anthem to SSD

    If you’re an anthem player, you’ll know the frustration of slow load times and lag during gameplay. The solution? Moving Anthem to an SSD! Say goodbye to those long load screens and hello to a smoother gaming experience. But don’t worry if you’re not the most tech-savvy person, because we’ve got you covered with quick and easy steps to make the process painless.

    Think of it like upgrading from a bike to a car- you’ll get to your destination quicker and with less hassle. So, are you ready to speed up your Anthem game? Let’s get started.

    Check your SSD space

    If you’re running out of space on your computer’s SSD, moving games like anthem to another drive can free up some much-needed room. But how do I move anthem to SSD? It’s actually a pretty simple process. First, open up your PC’s file explorer and locate the folder that contains the game files.

    Right-click on the folder and select “Cut.” Then, navigate to your SSD and create a new folder where you want to move the game. Right-click on the empty space within the new folder and select “Paste.

    ” This should move the game files over to your SSD. Once the files have been successfully transferred, you may need to update the game’s file path within any launcher or game client that you use to play Anthem. By taking the time to move games to your SSD, you can keep your computer running smoothly and ensure that you have plenty of space for future games and applications.

    Check your SSD for enough space to install Anthem

    If you’re planning to play Anthem, it’s important to ensure that you have enough space on your SSD to install the game. Anthem is known for its impressive graphics and detailed gameplay, which means it requires a significant amount of storage. To check the amount of available space on your SSD, simply open your computer’s file explorer and navigate to the SSD location.

    Right-click on the SSD folder and select Properties. This will display the total space available, as well as how much space is currently being used. Having enough space on your SSD is crucial for running Anthem seamlessly and avoiding any lag or performance issues.

    So, before you start the game, make sure to double-check your SSD space to ensure a smooth gaming experience.

    how do i move anthem to ssd

    Clear unwanted files to free up SSD space

    Maintaining enough free space on your SSD is crucial for optimal performance and longevity. To ensure you have enough space, checking your SSD frequently is important. Clearing your unwanted files is one of the easiest ways to free up valuable space on your SSD.

    Whether it’s through manually deleting large files or using third-party software, taking the time to clean up unnecessary files is worth it in the long run. By using SSD space wisely, you can avoid slower performance and the potential danger of your operating system crashing. So don’t wait until it’s too late to start monitoring and managing your SSD space.

    Keep your SSD in great condition by ensuring you have enough space and removing unneeded files regularly.

    Backup your Anthem files

    If you’re wondering how to move Anthem to your SSD, the first step is to backup your files. This ensures you don’t risk losing any progress or data during the transfer process. To do this, you can use a reliable backup service or simply copy the game files to an external hard drive or cloud storage.

    Once you’ve backed up your files, you can then move the game to your SSD by uninstalling the current version and then reinstalling it onto the SSD. Make sure to choose the correct location during installation. If you’re unsure how to do this, consult your game’s support or documentation for step-by-step instructions.

    Moving Anthem to your SSD can greatly enhance your gaming experience with faster load times and smoother gameplay.

    Create a backup for your Anthem game files

    In the world of gaming, losing your saved game files can be a nightmare. All those countless hours spent playing can go to waste in just a few moments. That’s why it’s essential to have a backup of your game files, especially for Anthem.

    To create a backup of your Anthem game files, you need to locate the folder where they are stored. Go to the Origin client, right-click on Anthem, and select “Game Properties.” Click on the “Advanced Launch Options” tab and look for the “Game Installation Folder” section.

    This section shows the location of your game files. Copy this location and paste it into a backup drive or cloud storage. Creating a backup of your Anthem game files takes only a few minutes but can save you from a lot of frustration in the future.

    Copy the backup files to a safe location

    Backing up your Anthem files is an essential step in ensuring that your progress is always safe and secure. Copying the backup files to a safe location means that if something goes wrong with your game files, you won’t lose any of your progress or customizations. But where should you store these backup files? Ideally, you want to choose a location that is both secure and easily accessible.

    A cloud storage service like Dropbox or Google Drive is a great option because it lets you store your backup files remotely while also making them easily available from any device. Alternatively, you can also keep your backups on an external hard drive or a USB drive, but make sure that these drives are kept in a safe place and not exposed to any potential damage. Always remember to create backups regularly, especially after making significant progress or customizations to your game.

    This will ensure that you always have a recent version of your Anthem files to fall back on in case anything goes wrong.

    Uninstall Anthem from hard disk

    If you’re looking to move Anthem from your hard disk to SSD, it’s important to first uninstall the game from your hard drive. This is a fairly simple process that only takes a few minutes. Start by opening the Control Panel on your PC and selecting “Programs and Features.

    ” Find Anthem in the list of installed programs and select “Uninstall.” Follow the prompts to complete the uninstallation process. Once the game has been removed from your hard drive, you can then download and install it on your SSD.

    This will improve the game’s performance and load times, giving you a smoother gaming experience. Just be sure that your SSD has enough space to accommodate the game and any updates or DLC that may be released in the future.

    Uninstall Anthem safely from your PC

    Uninstalling Anthem from your PC can be an important step in clearing up space and optimizing your system’s performance. If you’re ready to say goodbye to this game, follow these steps to uninstall it safely from your hard disk. First, navigate to the control panel and select “Programs and Features” or “Add/Remove Programs.

    ” From there, locate Anthem in the list of installed programs and select it. Click “Uninstall” and then follow the prompts to complete the process. It’s important to note that simply deleting the game’s files manually can cause errors and leave behind unwanted remnants on your hard drive.

    Uninstalling it through the control panel ensures that all associated files and registry entries are removed properly. By following these steps, you’ll be able to free up space and optimize your system performance with ease.

    Delete the remaining data after uninstallation

    If you’ve decided to uninstall Anthem from your hard disk, it’s important to ensure that all of the game’s remaining data is also wiped from your computer. This involves manually deleting files that may not have been taken care of during the uninstallation process. Even though the game may no longer be installed on your system, some files can still be left behind, taking up valuable space.

    To get rid of these files, search for the Anthem game folder in your computer’s file explorer and delete it. You can also use a software tool for a more thorough clean-up. Deleting the remaining data not only saves space but can also help prevent conflicts with any future installations of the game.

    So, if you’re looking to uninstall Anthem from your hard disk, be sure to take the extra step of deleting all remaining data for a clean, complete removal.

    Install Anthem to SSD

    If you’re looking to improve the performance of Anthem, installing the game to an SSD could help significantly. The process of moving Anthem to an SSD is straightforward and can be completed in a few simple steps. First and foremost, ensure that you have enough free space on your SSD to accommodate the game’s installation files.

    Next, locate the Anthem installation folder on your current drive and copy it to your SSD. Once the transfer is complete, uninstall Anthem from your original drive to free up space. Finally, launch the game from your SSD and enjoy the improved loading times and gameplay experience.

    So, if you’re wondering, “how do I move Anthem to SSD?” follow these steps, and you’ll have it running on your SSD in no time.

    Select your SSD as installation location during installation

    If you’ve recently purchased Anthem and want to ensure maximum performance, it’s highly recommended to install the game on your SSD rather than your hard drive. During installation, be sure to select your SSD as the location where Anthem will be installed. SSDs provide faster read and write speeds, resulting in faster loading times and smoother gameplay.

    This means you’ll spend less time waiting for the game to load and more time enjoying your gaming experience. In addition, installing Anthem on your SSD will help reduce the strain on your hard drive, which can prolong its lifespan. So, don’t forget to select your SSD as your installation location for optimal performance!

    Wait patiently until the installation is complete

    Installing Anthem to an SSD is a great way to improve its performance. However, it’s important to be patient during the installation process. The installation may take some time depending on the size of the game and the speed of your SSD.

    It’s important to not interrupt the installation process or turn off your computer during this time, as it can cause errors or corrupt files. Instead, find something else to do while you wait, such as catching up on emails or making a cup of tea. Remember, the wait will be worth it once the installation is complete and you can enjoy playing Anthem with improved loading times and smoother gameplay.

    So, take a deep breath, sit back, and wait patiently for the installation to finish. Your patience will be rewarded with an enjoyable gaming experience.

    Test and Enjoy

    If you’re wondering how to move Anthem to your SSD, you’re in luck because it’s not as complicated as it may seem. First, make sure that your SSD has enough space for Anthem’s files. Then, you need to locate the game files in your existing directory.

    You can do this by navigating to the game’s properties in Origin and clicking on the “Locate Game Files” button. Once you’ve done that, simply copy and paste the game files into your SSD directory. Finally, launch the game and change the installation directory to your SSD in the game’s settings.

    It’s important to note that moving the game files to your SSD should result in faster loading times and overall performance. Test it out and enjoy the improved gaming experience!

    Launch Anthem from SSD and test it out

    Anthem is one of the most exhilarating games that gamers love to play to test their combat skills. Launching Anthem from SSD has become a popular choice among gamers who want to experience fast and seamless gameplay. Playing on an SSD can significantly reduce the loading time of the game and allow players to jump right into the action without any waiting time.

    One of the key benefits of playing on an SSD is the faster load times of Anthem, which drastically improves the gaming experience. With an SSD, you can expect exceptional performance and unmatched speed while playing Anthem. So, go ahead and test Anthem on your SSD to experience the thrill of running the game at lightning speed, and I guarantee you won’t be disappointed in the results.

    Enjoy faster loading times and improved game performance

    If you’re an avid gamer, you know how frustrating it can be to have to deal with slow loading times and laggy performance. Thankfully, there are steps you can take to improve your gaming experience and enhance your gameplay. By testing and optimizing your system, you can enjoy faster loading times, reduced lag, and improved overall performance.

    This can mean the difference between winning and losing, especially in fast-paced games that require quick reflexes and precision strategies. Don’t put up with slow load times and poor performance any longer – take the time to test and optimize your system today for a better gaming experience. Your system will thank you for it, and so will your fellow gamers.

    Conclusion

    Moving Anthem to an SSD is like giving your Javelin a turbo boost – it’s a game-changer. By moving the game to a solid-state drive, you’ll experience faster load times, snappier performance, and smoother gameplay. Plus, your patience won’t be put through the wringer while waiting for the game to start.

    So, if you want to take your Anthem experience to the next level, make the move to an SSD – your Javelin (and your sanity) will thank you.”

    FAQs

    What are the benefits of moving Anthem to an SSD?
    Moving Anthem to an SSD can significantly improve loading times, reduce stuttering and frame drops, and generally improve the overall performance of the game.

    How do I move Anthem to an SSD?
    To move Anthem to an SSD, you will need to first install your SSD and ensure it is properly recognized by your system. Then, you can use a file transfer program like Steam Mover to move the game files from your current hard drive to your SSD.

    Can I move Anthem to an external SSD?
    Yes, you can move Anthem to an external SSD as long as it meets the minimum requirements for playing the game. However, be aware that using an external SSD may result in slower load times than an internal SSD.

    Will moving Anthem to an SSD affect my other games or programs?
    Moving Anthem to an SSD should not affect your other games or programs, as long as you do not move any critical system files or programs. However, it may free up space on your current hard drive and improve the performance of other programs running on it.

  • Effortless SSD Cloning to External HDD: A Comprehensive Guide by AOMEI

    Effortless SSD Cloning to External HDD: A Comprehensive Guide by AOMEI

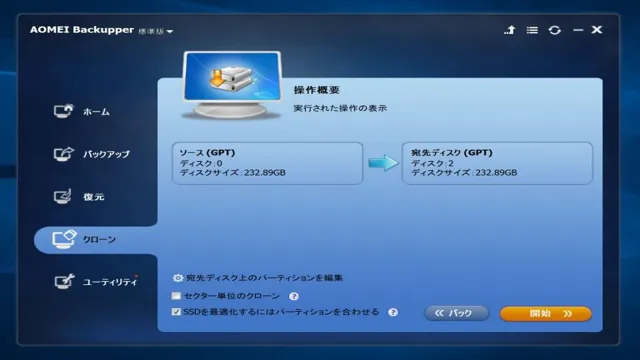
    Are you tired of your laptop running slow and the boot time seemingly getting longer every day? It’s possible that your SSD is running out of space and slowing down your computer. If you’re looking for a solution to this problem, clone your SSD to an external hard drive using AOMEI Backupper Professional. This process is simple and straightforward, and it allows you to transfer all your data onto the external hard drive with ease.

    Plus, it frees up space on your SSD, thereby improving your system’s performance and overall speed. In this guide, we will walk you through the process of cloning your SSD to an external hard drive step by step, using AOMEI’s user-friendly software. So let’s get started and give your computer the upgrade it deserves.

    Why Clone SSD to External HDD?

    If you’re looking to upgrade to a newer and larger SSD, cloning your existing drive to an external HDD can be a useful step. Not only does it provide you with a backup of all your data, but it also allows you to transfer your data to a new drive easily. Cloning an SSD to an external HDD can also be helpful if you’re low on space on your internal drive and need to free up some space.

    With AOMEI Partition Assistant, the process can be simple and straightforward. This tool allows you to clone your entire disk or just individual partitions, and it supports various file systems like NTFS and FAT3 Plus, with its intuitive interface and step-by-step instructions, even beginners can handle the process with ease.

    So, whether you’re upgrading your drive or need a backup, AOMEI can make the process of cloning an SSD to an external HDD a breeze.

    Backup & Recovery

    If you’re operating with an SSD, it’s important to have a backup plan in place. SSDs are not only vulnerable to data loss, but they can also fail unexpectedly without warning. This is where cloning your SSD to an external HDD comes into play.

    By creating a copy of your data on a separate device, you’ll be able to quickly recover your important files and avoid losing them forever. Furthermore, an external HDD can hold a massive amount of data, making it a convenient and affordable option for storing your backups. Cloning your SSD to an external HDD is a smart move that will provide you with peace of mind knowing that your vital data is protected from catastrophic failures.

    So, make backups a regular part of your routine and don’t forget to include cloning your SSD as part of your backup strategy.

    aomei how to clone ssd to external hdd

    Data Transfer

    When it comes to transferring data, there are several options available in the market. However, it’s essential to choose the right one that guarantees speedy and hassle-free data transfer. That’s where cloning SSD to external HDD comes in handy.

    Not only does it ensure quick data transfer, but it also allows you to store your data securely. The process is straightforward and doesn’t require any technical knowledge. You can easily clone all your data from SSD to external HDD in a matter of minutes.

    With an external HDD, you can carry your data wherever you go, and accessing it has never been easier. Overall, cloning SSD to external HDD is an excellent option for anyone looking for secure and reliable data transfer.

    Prepare for Cloning

    Are you looking to clone your SSD to an external HDD? If so, you’re in the right place. Cloning your SSD to an external HDD can be a smart move, especially if you want to keep a backup of your valuable data or want to transfer your files to a new computer without losing them. One of the best tools for cloning is AOMEI Backupper.

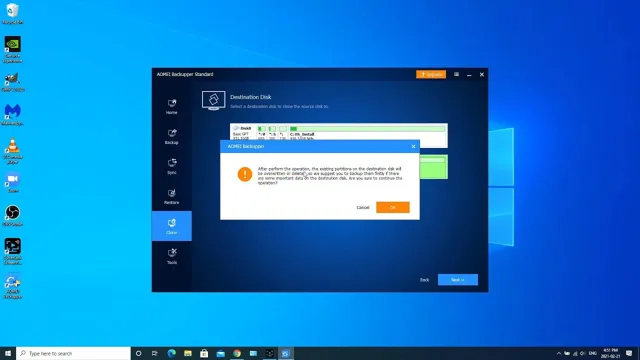
    Before you start, make sure to back up any important data that you may have on your external HDD as it will be erased during the cloning process. You’ll also need to connect both the SSD and the external HDD to your computer. Once you’re ready, launch AOMEI Backupper and select “Disk Clone” followed by selecting the SSD as the source disk and the external HDD as the destination disk.

    AOMEI Backupper will guide you through the cloning process step by step, and you’ll soon have an exact copy of your SSD on your external HDD. With this backup in place, you can rest easy knowing that your data is safe and secure.

    Connect External HDD

    Are you planning to clone your hard drive? If so, you need to make sure that you are prepared for the process. One of the things that you will need is an external HDD. This is where you will store all the data from your old hard drive before transferring it to your new one.

    Having an external HDD is crucial because it will ensure that you don’t lose any data during the cloning process. It’s important to choose an external HDD that has enough storage capacity to hold all the data from your old hard drive. Also, make sure that the external HDD is compatible with your computer.

    Once you have the external HDD, you can proceed to the next step of the cloning process. Remember, if you skip this step, you risk losing all your data, which can be a major setback. So, take the time to prepare for cloning by getting an external HDD.

    Check HDD Capacity

    When preparing to clone your hard drive, it’s crucial to check the available capacity of your target disk. The last thing you want is to start the cloning process and find out that you don’t have enough space to copy all your data. To avoid this problem, start by checking the current size of your source disk.

    You can do this by right-clicking on the disk icon and selecting “Properties”. Next, find a destination disk that has enough space to accommodate your source disk’s contents. Don’t forget to take into account the operating system, applications, and any other data you might want to transfer over.

    Remember, a bit of overestimation won’t hurt, and it’s better to have more disk space available than not enough. In summary, before cloning your hard drive, be sure to check the target disk’s available capacity carefully. This will ensure a smooth and successful cloning process without any unexpected surprises.

    Prepare SSD

    Before you start cloning your hard drive to an SSD, it’s essential to ensure that your SSD is properly prepared. To begin, you’ll need to connect your SSD to your computer via a USB or SATA cable. Once connected, you’ll need to format the drive using your computer’s disk management utility to make it ready for cloning.

    You might also want to check if there are any firmware updates available for your SSD before cloning, as they can increase the performance and compatibility of your new drive. Updating your firmware means that you’re holding the latest version of the manufacturer’s software on your SSD. It’s worth noting that SSDs often come with pre-installed software to enhance the performance of the drive.

    This software could range from encryption software to utilities that prolong the life of your SSD. Research your specific SSD’s software before you begin the cloning process, so you’re aware of any additional steps you’ll need to follow. Once you’ve prepared your SSD and familiarized yourself with the software, you’re ready to begin cloning.

    With your new SSD connected and ready to go, you’re now one step closer to a faster, more efficient computer.

    Clone SSD to External HDD

    Are you worried about transferring your data to an external hard drive? AOMEI can help guide you through this process with ease. One of the most common concerns when it comes to cloning an SSD to an external HDD is the loss of data or technical errors that may occur. However, AOMEI’s software eliminates these worries by providing simple, user-friendly steps that even the least tech-savvy individual can understand.

    By cloning your SSD to an external HDD, you can ensure that your data is safe and easily accessible when you need it. No more hassle with file transfers or worrying about losing important information. So why not give AOMEI a try and see how easy it is to clone your SSD to an external HDD?

    Open AOMEI Partition Assistant

    If you’re looking to clone your SSD to an external HDD, AOMEI Partition Assistant is the program you need. Open the software and select “Clone” from the left-hand menu. Then choose “Disk Clone Wizard” to begin the process.

    Select your SSD as the source disk and your external HDD as the destination disk. You can also adjust the size of the partitions if necessary. Once you’re ready, hit “Next” to start the cloning process.

    This tool is perfect for those who want to upgrade their computer’s storage system without losing any data. AOMEI Partition Assistant ensures that your new external HDD is an exact copy of your old SSD, with all files and settings transferred seamlessly. With this efficient process, you’ll have peace of mind knowing that all your data is safe and accessible on your new device.

    Select Clone Wizard

    If you’re looking to upgrade your computer’s storage or backup important files, cloning your SSD to an external HDD is a great option. It’s a simple process that can save you time and headache in the long run. To get started, you’ll need to use a clone wizard tool.

    One of the best tools available is the free tool provided by EaseUS. Once you’ve downloaded the software, connect both your SSD and external HDD to your computer and run the clone wizard. Follow the instructions provided by the wizard, selecting your SSD as the source disk and your external HDD as the destination disk.

    The software will then create a clone of your SSD on the external HDD, allowing you to access all of your files and data. Cloning your SSD to an external HDD is a crucial step in data backup and storage, ensuring that your files are safe and secure.

    Select Source Disk and Target Disk

    When it comes to transferring data from one drive to another, cloning is a popular choice. If you’re looking to clone your SSD to an external HDD, the first step is to select your source disk and target disk. The source disk is the SSD that you want to clone, while the target disk is the external HDD where you want your data to be copied.

    It’s important to note that the target disk must have enough storage space to accommodate all the data from your source disk. Once you’ve selected your disks, you can proceed to clone your SSD to the external HDD. Cloning is a great way to transfer data quickly and easily without having to manually copy each file.

    It’s also a useful tool for backup purposes, giving you a duplicate copy of your data in case your primary drive fails. So don’t wait any longer, start cloning your SSD to an external HDD and keep your important data safe and secure.

    Adjust Partition Size (Optional)

    If you’re looking to clone your SSD to an external HDD, you might want to adjust the partition size to ensure a smoother transfer process. This is an optional step, but it can prevent errors and ensure that everything is copied over. To adjust the partition size, you’ll need to use a partition manager software.

    This will allow you to shrink or expand partitions as needed. Make sure to allocate enough space for your system partition and any other essential partitions. When you’re ready, you can begin cloning your SSD to the external HDD.

    Keep in mind that the cloning process may take some time, depending on the size of your SSD and the speed of your computer. But once it’s done, you’ll have a complete backup of your system that you can access from anywhere.

    Review Operation Summary

    Cloning your SSD to an external HDD can be a lifesaver when you need to transfer all your data quickly. This process allows you to create a complete copy of your primary drive and store it in a backup location, ensuring that your files remain safe and accessible in case of any unforeseen circumstances. The process is straightforward and requires specialized software that can provide a sector-by-sector copy of the SSD.

    Once the software has created an image of your SSD, you can restore the image to your external HDD, and you’ll have a fully functional clone of your operating system, installed applications, and personal data. It’s important to remember that cloning can take some time, depending on the size of your SSD, so it’s best to start the process when you have some free time to spare. Additionally, clone your SSD regularly to keep all your files up-to-date and make sure you’re always ready for any unexpected events.

    By following these steps, you can ensure that you have a reliable and secure backup of all your data, ready for whenever you need it.

    Conclusion

    In conclusion, if you’re looking to clone your SSD onto an external HDD, AOMEI is the tool for you. It’s as easy as click, drag, and clone – no rocket science required. With this software, you can ensure that your data is always safe and backed up, and you can even take it on the go with your external HDD.

    AOMEI is proof that cloning your SSD doesn’t have to be a daunting task. It’s like having a trusty sidekick to handle all your cloning needs, except with less spandex.”

    FAQs

    What is AOMEI?
    AOMEI is a data backup and recovery software provider.

    Can AOMEI clone SSD to external HDD?
    Yes, AOMEI Backupper can clone SSD to external HDD.

    How to clone SSD to external HDD with AOMEI Backupper? A3.Follow these steps to clone SSD to external HDD with AOMEI Backupper: 1. Download and install AOMEI Backupper. 2. Connect the SSD and external HDD to your computer. 3. Launch AOMEI Backupper and select “Clone” from the left panel. 4. Select the SSD as the source disk and the external HDD as the destination disk. 5. Adjust the partition size of the destination disk if necessary. 6. Click “Start Clone” to begin the cloning process.

    Is it safe to clone SSD to external HDD with AOMEI Backupper?
    Yes, AOMEI Backupper is a reliable and trusted software solution for backing up and cloning data.

    Is AOMEI Backupper a free software?
    AOMEI Backupper has both free and paid versions. The free version has limited features, while the paid version offers more advanced features.

  • Seamless Transfer of Windows to a New SSD: Step-by-Step Guide

    Seamless Transfer of Windows to a New SSD: Step-by-Step Guide

    Upgrading your computer’s hardware is always exciting, especially when it comes to improving your system’s performance with a new solid-state drive (SSD). However, transferring your operating system and all of your files to your new SSD can be a daunting task. This is especially true if you have never done it before.

    Fortunately, there are many ways to transfer Windows to a new SSD, and in this blog post, we will cover all the steps you need to know to make this process a breeze. Whether you are looking to speed up your computer or you want to start fresh with a faster drive, we’ve got you covered. Ready to dive in? Let’s get started!

    Check Your System Requirements

    When transferring Windows to a new SSD, it’s important to first check your system requirements to make sure everything runs smoothly. You’ll want to ensure that your new SSD has enough storage space to accommodate your current install of Windows, as well as any additional programs and applications that you plan on installing. Checking your system requirements also involves making sure that your existing hardware meets the minimum specifications for running Windows on your new SSD.

    This can include processor speed, RAM, and graphics card requirements. Once you’ve confirmed that your system requirements are up to par, you can proceed with transferring Windows to your new SSD. Don’t forget to back up your data beforehand to avoid potential data loss during the transfer process!

    Ensure your system and new SSD meet requirements

    When it comes to upgrading your computer’s storage with a new SSD, it’s important to make sure your system meets the necessary requirements. Before making any purchases, take a look at the manufacturer’s specifications and make sure your computer’s operating system, motherboard, and BIOS are compatible with the new SSD. Additionally, check the available storage space on your system to ensure that you have enough room for the new drive.

    Failing to meet the requirements can cause performance issues and prevent the new SSD from working properly. By taking the time to check your system’s compatibility, you’ll ensure a smooth and successful upgrade process.

    how do i transfer windows to my new ssd

    Create a Backup

    So, you’ve decided to upgrade your computer’s storage by transferring Windows to your new SSD. Congrats, you’re in for a faster and smoother experience! But before you dive into the process, it’s crucial to create a backup of all your files and data. Unforeseen errors can occur during the transfer, leading to the loss of all your data.

    A backup ensures that if anything goes wrong, you don’t have to go through the time-consuming process of restoring everything manually. You can use various third-party software or built-in Windows tools, like File History or Backup and Restore, to create a backup. Once you’ve backed up your system, you can use a cloning tool like Macrium Reflect or EaseUS Todo Backup to transfer Windows to your new SSD.

    Remember that the exact steps may vary depending on the cloning tool you’re using, so make sure you refer to the instructions provided by the software. With a successful transfer and backup in place, you’re ready to enjoy the speedy performance of your new SSD!

    Back up important files and data in your current Windows installation

    As you prepare to install a new version of Windows or upgrade your current installation, it’s important to create a backup of all your important files and data. Losing any crucial files can be devastating, and it’s always better to be safe than sorry. Creating a backup is easy and can save a lot of hassle in the long run.

    You can create a backup using an external hard drive or cloud storage services such as Google Drive or Dropbox. Simply select the files and data you want to backup and copy them into an external hard drive or upload them to your cloud storage account. By doing this, you can ensure that all your important files and documents are safe and secure, even if something goes wrong during the installation or upgrade process.

    Taking the time to create a backup can give you peace of mind and allow you to proceed with the installation or upgrade without any worries.

    Prepare Your New SSD

    If you’re looking to upgrade your computer’s storage by replacing your old hard drive with a speedy new SSD, you might feel daunted by the thought of transferring your operating system and all your files to the new drive. Luckily, it’s not as complicated as you might think. The first step is to connect your new SSD to your computer and use cloning software to copy everything from your old hard drive to the new drive.

    There are several cloning software options available either online or provided by SSD manufacturers. Once the cloning process is complete, you’ll need to change your computer’s boot order to boot from the new SSD. Finally, you’ll want to optimize your new SSD by disabling defragmentation, enabling TRIM support, and disabling hibernation.

    With these easy steps, you’ll be up and running on your new SSD in no time!

    Format and partition the new SSD before transferring Windows

    Before transferring your Windows operating system to a new SSD, you need to prepare it properly. Formatting and partitioning your new SSD is a crucial step in this process. Start by connecting your new SSD to your computer, either internally or through an external enclosure.

    Then, launch the Disk Management tool in Windows and locate your new SSD. Right-click on it to access the formatting and partitioning options. You can choose to either create one big partition or multiple smaller ones, depending on your needs.

    The formatting process will erase all data on the new SSD, so make sure to back up anything important beforehand. Once formatting and partitioning are complete, your new SSD will be ready for the transfer of your Windows operating system. This step may seem daunting, but it’s important to take your time and carefully follow all instructions to ensure a smooth transfer and proper functioning of your new SSD.

    With a little bit of patience and focus, you’ll be on your way to a faster and more efficient computer system in no time.

    Clone Your Windows Installation

    If you’re planning to upgrade your computer’s hard drive to an SSD or just want to transfer your Windows operating system to a new drive, cloning your Windows installation is an easy and efficient way to achieve this. This means that you create an exact copy of your entire hard drive, including Windows and all your installed apps, on your new SSD. But how do you transfer Windows to your new SSD using cloning? First, you’ll need to download and install a reliable cloning software like Clonezilla or Macrium Reflect.

    Then, connect your new SSD to your computer using an external enclosure or SATA-to-USB cable and select it as the destination drive in your cloning software. Once you’ve started the cloning process, it may take some time to complete depending on the size of your drive. Once cloning is done, you’ll need to set your newly cloned SSD as your primary boot device in your BIOS settings.

    With this method, you’ll be able to transfer your Windows installation and all your files to your new SSD, making for a hassle-free experience.

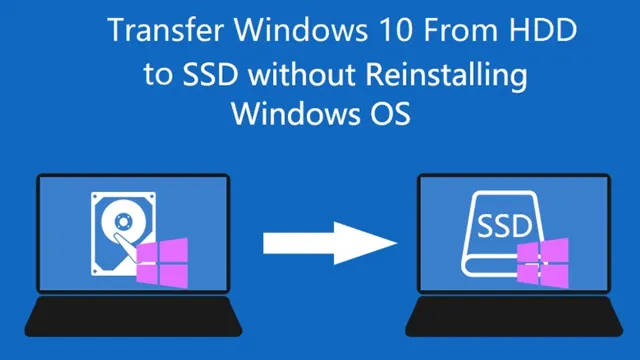
    Use cloning software to transfer Windows to new SSD

    If you’re looking to transfer your Windows operating system to a new SSD, using cloning software is the way to go. This process involves creating an exact copy of your current system – including all files, settings, and applications – and moving it to your new SSD. Not only is cloning faster than reinstalling Windows from scratch, but it also ensures that all your important data remains intact.

    The cloned system will be an exact replica of your current installation, including the version of Windows, patches, and drivers. With the new SSD, you’ll enjoy faster boot times, improved performance, and greater storage capacity. Using cloning software like EaseUS Todo Backup or Macrium Reflect, the process is straightforward and easy to follow.

    Simply connect your new SSD, clone your system, and then swap the drives. It’s an efficient way to upgrade your computer without sacrificing any of your important data.

    Verify and Update Drivers

    If you’re wondering how to transfer Windows to your new SSD, one of the crucial steps you’ll need to take after the transfer is to verify and update your drivers. Having up-to-date drivers will ensure that your computer’s hardware is running smoothly and efficiently on the new SSD. To do this, you can go to your computer manufacturer’s website and look for driver updates specific to your computer model.

    Alternatively, you can use driver update software that can automatically scan your computer for outdated drivers and download the latest versions for you. Ensure that all drivers, especially those for your storage and graphics devices, are updated fully to avoid any potential performance issues or incompatibilities. While this step may seem tedious, it’s a crucial task that should be prioritized to ensure your new SSD is optimized for your computer’s operating system.

    Ensure all drivers are up to date and compatible

    Keeping your drivers updated and compatible with your system is crucial for optimal computer performance. Drivers serve as the communication bridge between your operating system and hardware components. These hardware components can include your graphics card, sound card, and even your network adapter.

    If a driver is outdated or incompatible, your computer may experience slow performance, crashes, or hardware malfunctions. Luckily, updating and verifying your drivers is a relatively easy process. You can either check for driver updates manually in the device manager or download a driver updater tool that can automatically scan and update all of your drivers.

    By keeping your drivers up to date, you can improve your computer’s stability and performance, and reduce the risk of encountering issues or crashes. Remember, a well-maintained system means less stress and frustration when working on your computer.

    Change Boot Order

    So, you just upgraded to a new SSD and want to transfer your Windows operating system over? Well, the process is quite simple, but before transferring Windows, you’ll first need to make sure that your new SSD is set as the primary boot device in your system bios. You can do this by accessing your computer’s BIOS settings and changing the boot order. Once you’ve done this, you can transfer Windows to your new SSD using a cloning software or by performing a fresh installation.

    Cloning software is easy to use and will transfer everything over to your new SSD, including your operating system, programs, and files. On the other hand, performing a fresh installation is useful if you want to get rid of any old files or clutter and start fresh. With your new SSD set to the primary boot device, you will be able to enjoy faster boot and load times, giving you a noticeable improvement in overall system performance.

    So, there you have it, a quick overview of how to transfer Windows to your new SSD.

    Set your new SSD as the primary boot device in BIOS settings

    If you’ve successfully installed a new SSD in your computer, congratulations! The next step is to set it as the primary boot device in your BIOS settings. This will ensure that your computer boots up from the new SSD instead of the old one, which is still set as the default boot device. To change the boot order, you will need to enter your BIOS settings by pressing a specific key during startup (usually F2, F12, or Delete).

    Once you’re in the BIOS, locate the Boot Order or Boot Sequence option, and then move your new SSD to the top of the list using the arrow keys. Make sure to save your changes before exiting the BIOS settings. This simple step will ensure that your computer boots up faster and runs more smoothly, thanks to the faster read and write speeds of your new SSD.

    So, don’t forget to change the boot order of your primary boot device to your new SSD!

    Enjoy Your New and Improved System!

    Congratulations on upgrading to a new SSD! But, how do you transfer Windows onto your new system? Well, there are a few easy ways to transfer Windows to your new SSD. One method is to use a cloning software, such as EaseUS Todo Backup, which will make an exact copy of your existing hard drive onto your new SSD. Another option is to perform a fresh install of Windows onto your new SSD by using a USB drive with a Windows installation file and following the prompts.

    Regardless of the method you choose, make sure to backup all important files and data before attempting the transfer. With a little bit of patience and following the instructions carefully, you’ll have your new and improved system up and running in no time.

    Conclusion

    In conclusion, transferring Windows to a new SSD is like giving your computer a heart transplant. It’s a delicate procedure that requires precision and patience, but once completed, your system will run faster and better than ever before. So embrace the challenge, channel your inner surgeon, and give your computer the upgrade it deserves.

    Your new speedy SSD will thank you for it!”

    FAQs

    What do I need to transfer Windows to a new SSD?
    You will need a cloning software, a SATA-to-USB cable, and your new SSD, as well as your current hard drive.

    Can I use any cloning software to transfer Windows to my new SSD?
    No, it’s recommended to use the cloning software provided by the SSD manufacturer to ensure a smooth transfer.

    Can I transfer Windows to a smaller SSD?
    Yes, as long as the capacity of your current hard drive is less than the capacity of the new SSD.

    Do I need to reinstall drivers and software after transferring Windows to a new SSD?
    No, everything should work as it did before as long as the cloning process is successful. However, it’s always recommended to create a backup of your important files before proceeding with any system changes.

  • Wipe Your SSD Clean with Ease: The Ultimate Guide to Removing an OS from your Solid State Drive

    Wipe Your SSD Clean with Ease: The Ultimate Guide to Removing an OS from your Solid State Drive

    Are you ready to start fresh with a clean slate on your SSD? Maybe you’re upgrading to a new operating system or just need to wipe your current one. Whatever the reason may be, wiping your OS from an SSD may seem daunting at first, but it can actually be done easily with the right steps and tools. Think of it like clearing out your closet to make room for new clothes.

    Just as you wouldn’t want to keep clutter in your closet, your SSD also needs to be cleared of unnecessary data to make way for new, fresh information. In this blog, we will guide you through the process of wiping your OS from your SSD step by step. We’ll also provide helpful tips to ensure that you do it properly without losing any important data.

    So, grab a snack and get ready to learn how to easily wipe your OS from your SSD.

    Backup Your Data First

    When it comes to wiping an OS from an SSD, it can be surprisingly easy. A simple mistake or misstep during the process can result in a complete loss of all your data, leaving you with a blank slate. That’s why it’s crucial to backup your data first before taking any drastic steps.

    You can use cloud-based services or an external drive to store all your important files and documents. Once you’re sure everything is safely backed up, you can proceed with wiping the OS from your SSD with confidence. Just remember to follow the steps carefully and double-check everything before you hit that delete button.

    It may take a little extra time, but it’s far better than losing all your data and having to start from scratch. So, take the time to back up your data and protect yourself from any unexpected mishaps during the process of wiping your OS from your SSD.

    Copy important files and documents to an external drive

    When it comes to keeping your files safe, there is nothing more important than backing them up. Copying your important files and documents to an external drive is the first step in ensuring that you will always have access to them no matter what happens. It’s easy to put off backing up your data, but it’s essential to do so if you want to avoid losing important information.

    External drives are great for storing large amounts of data and are relatively cheap and easy to find. Whether you’re using a desktop computer or a laptop, there is always a way to connect an external drive and transfer your files. So, don’t wait until it’s too late, make a backup of your data today and keep your important information safe and secure.

    how easy is it to wipe an os from ssd

    Enter BIOS Settings

    When it comes to wiping an OS from an SSD, it’s actually pretty easy. All you need to do is enter the BIOS settings and select your boot device options. From there, you can choose to boot from a USB or CD containing your new operating system, and simply follow the prompts to install it.

    However, while the process may be easy, it’s important to remember to back up any important data before wiping your SSD. Losing important files or documents can be a nightmare, so it’s best to take the necessary precautions beforehand. But overall, wiping an OS from an SSD is a straightforward process that anyone with a basic understanding of computers can handle.

    So don’t be afraid to give it a try if you’re looking for a fresh start with a new operating system.

    Restart your computer and hit the key to enter BIOS settings

    If you’ve encountered issues with your computer and want to access BIOS settings to troubleshoot the problem, you’ll need to restart and enter BIOS mode. This requires pressing a specific key during startup, which varies depending on your computer model and manufacturer. Common keys include F2, F10, Del, or Esc.

    Some computers may display an on-screen message with instructions on which key to press. Once you’re in BIOS mode, take caution not to change any settings without proper knowledge or guidance. The BIOS provides important configuration options for your computer’s hardware, including the hard drive, RAM, and CPU.

    Altering these settings without sufficient knowledge or care could cause permanent damage to your computer. Therefore, it’s recommended to research any changes you’d like to make in BIOS settings before proceeding.

    Select Boot Option

    If you’re wondering how easy it is to wipe an OS from an SSD, the answer is that it’s quite simple. The first step is to select the boot option so that you can access the BIOS. Once you’re in the BIOS, you’ll be able to select the SSD that you want to wipe and then choose the option to erase it.

    This will completely wipe all data from the SSD, including the operating system. Keep in mind that this process will also wipe any other files or data stored on the drive, so it’s important to make sure you have backups of any important files before you proceed. Overall, wiping an OS from an SSD is a straightforward process, but it’s important to take the necessary precautions to ensure that you don’t accidentally delete any important data.

    Choose the SSD you want to wipe and set it as the primary boot

    If you’re planning to wipe your SSD, it’s important to choose the correct boot option. First, you need to set the SSD as the primary boot device. This action will allow your computer to boot from the SSD, rather than an external device.

    To do this, restart your computer and enter the BIOS setup by pressing the correct function key at startup. Once you’re in the BIOS, navigate to the boot menu and change the boot order to prioritize the SSD. This will vary depending on your computer’s manufacturer, but it’s usually done by using the arrow keys to highlight the SSD and moving it to the top of the list.

    After making these changes, save and exit the BIOS to restart your computer with the SSD as the primary boot device. With this step completed, you’re now ready to proceed with wiping your SSD securely.

    Restart and Format

    If you’re looking to wipe an OS from an SSD, the process is actually pretty simple. You can restart your computer and format your SSD with just a few clicks. One way to do this is to access the BIOS or UEFI settings on your computer and change the boot order to boot from a USB or DVD drive that contains a Windows installation disc.

    From there, you can choose to wipe your entire SSD and reinstall Windows. Alternatively, if you still have access to Windows, you can navigate to the Settings menu, then click on Update & Security > Recovery > Get started and choose the option to remove everything. This process will erase all of your personal files, programs, and settings, effectively wiping your SSD.

    However, it’s important to note that once you wipe your SSD, all data is gone forever. So be sure to backup any important files before starting the wipe and format process to avoid accidental data loss. Overall, wiping an OS from an SSD is a straightforward process.

    Restart your computer and format the SSD

    Restart and Format If you’re looking to start fresh with your SSD, restarting and formatting your computer is a great option. This process will wipe everything from your SSD and give you a clean slate to work with. To begin, restart your computer by clicking on the Start menu and selecting the restart option.

    Once your computer has restarted, go to the Disk Management tool by searching for it in the search bar. Here, you’ll see a list of all the storage devices connected to your computer. Find your SSD on the list, right-click on it, and select the option to format it.

    You can choose to format it into different file systems, such as NTFS or exFAT, depending on your needs. It’s important to note that formatting your SSD will erase all the data on it, so make sure to back up any important files beforehand. Once you’ve formatted your SSD, you’re ready to start fresh.

    You can reinstall your operating system, programs, and files, or just use the SSD as additional storage. Whatever your needs are, formatting your SSD is a great way to get a clean slate and optimize your computer’s performance. In summary, restarting and formatting your SSD is an easy and effective way to clear your drive and start fresh.

    Back up your data before formatting, choose the appropriate file system for your needs, and enjoy the optimized performance of your like-new SSD.

    Reinstall Your OS

    If you’re looking to wipe your OS from an SSD, the process is fairly easy but requires careful attention to detail. First, you’ll need to have an installation disc or USB drive for your preferred operating system. Then, you’ll want to ensure that you’ve backed up any important files or data that you wish to keep.

    Once you’ve done that, boot your computer from the installation disc or USB, and follow the prompts to install the new OS. During the installation process, you’ll be given the option to format your SSD and wipe any existing partitions. It’s important to note that this process will completely erase all data on your SSD, so be sure you’re ready to start fresh.

    However, with a little bit of patience and attention to detail, reinstalling your OS on an SSD can be a straightforward process.

    Install a new operating system from your installation media

    Reinstalling your operating system can be a daunting task, but it can also help solve many issues with your computer. To start, insert your installation media, such as a USB drive or DVD, and boot your computer from it. You may need to adjust your boot order in the BIOS settings to make this possible.

    Once the installation media has loaded, follow the prompts to begin the installation process. You should be given the option to either upgrade your current OS or perform a clean install. It’s recommended to choose the latter option for a fresh start.

    Remember to back up all important data before proceeding. The process may take some time, but once it’s complete, you’ll have a clean slate to work with in terms of customization and personalization. Don’t forget to install any necessary drivers and software to optimize your system’s performance.

    Take this opportunity to start fresh and streamline your computer’s functionality.

    Restore Your Data

    Forgetting to backup your data is a nightmare that nobody wants to experience. But what if you accidentally wipe your OS from your SSD? How easy is it to do so? Well, the answer is that it’s relatively easy to accidentally erase your operating system from your SSD – all it takes is a misplaced click or command. Once your OS is wiped from your SSD, all your data and files will disappear too, effectively deleting your hard work and important documents in an instant.

    However, if you have regularly backed up your data, you can take comfort in the fact that your files have not been lost forever and can be restored. Simply reinstall your operating system and restore your files from your backup, and you’ll be up and running in no time. Remember to always back up your data to avoid the headache of losing it all in an instant.

    Copy your backed up files back onto your computer

    Restoring your data is an essential step in recovering after a data loss. Once you have backed up all your files onto an external drive or cloud storage, the next step is to copy your backed-up files back onto your computer. You need to make sure that you have all the necessary software, applications, and updates installed on your computer before you start to restore your data.

    This will make sure that there are no compatibility issues with your restored files. Once you have everything set up, it’s time to transfer your files. Depending on the size and amount of data, this can take some time, so be patient.

    Also, check the restored files to make sure that everything has transferred correctly. In case some files didn’t transfer, check your backup to ensure all files were backed up correctly. Remember, restoring your data is a crucial step in recovering from data loss, so take your time to ensure that everything is restored correctly.

    Conclusion

    In conclusion, wiping an OS from an SSD can be as easy as a few clicks in your system settings or as complex as a time-consuming process involving specialized software. However, in today’s fast-paced technological world, the true challenge is not erasing your OS but finding a new and improved one to take its place. So remember, choose wisely and back up your important data before wiping any drives! Happy computing!

    FAQs

    What is the process to wipe an OS from an SSD?
    To wipe the OS from an SSD, you can use a disk formatting tool or use the built-in reset function in Windows or other operating systems.

    Can wiping the OS from an SSD affect the SSD’s performance?
    No, wiping the OS from an SSD does not affect its performance. However, some SSDs may experience a decrease in performance as they near their end of life cycle.

    Is it necessary to wipe the OS from an SSD before reinstalling it?
    No, it is not necessary to wipe the OS from an SSD before reinstalling it. However, it is recommended to do a clean install to avoid any issues that may arise from a previous installation.

    How long does it take to wipe the OS from an SSD?
    The time it takes to wipe the OS from an SSD depends on the size of the drive and the method used. Generally, it takes a few minutes to an hour.

  • Find out quickly: How long does it take to get SSD benefits?

    Find out quickly: How long does it take to get SSD benefits?

    Are you eagerly waiting for your new SSD to arrive? The anticipation can be exciting when you’re about to improve your computer’s performance and speed. But the question on your mind might be, “How long will it take for my SSD delivery to arrive?” The truth is, it all depends on the shipping method you choose and the distance between you and the supplier. In this blog post, we’ll explore the different shipping options available and estimate how long it should take for your SSD to arrive, so you can manage your expectations accordingly.

    Understanding SSD Delivery Timeframes

    If you’re wondering how long it takes to get an SSD, there are a few factors to consider. First, you’ll want to check the delivery timeframe provided by the retailer you’re purchasing from. Some retailers offer next-day delivery options, while others may take a few days or longer.

    Additionally, factors like shipping location, shipping method, and current demand for the product can impact delivery times. It’s also important to note that there may be fluctuations in delivery times due to unexpected events like holidays or natural disasters. Ultimately, it’s best to check with the specific retailer you’re interested in purchasing from to get a better idea of their estimated delivery timeframe for SSDs.

    Remember to also factor in any potential delays that may occur and to account for those when planning your purchase.

    Factors That Affect SSD Delivery Time

    SSD delivery time SSD delivery time can vary depending on several factors. The first and most obvious one is the shipping method you choose. Express shipping will always deliver your SSD faster than regular shipping, although it may cost more.

    Second, your location can impact delivery times. If you live in a remote area, it may take longer for your SSD to arrive compared to someone living in a major city. Third, the season can also play a role.

    During busy shopping seasons like Black Friday or Christmas, delivery times can be delayed due to a high volume of packages being shipped. Finally, the availability of the SSD you ordered can also affect delivery time. If it’s currently out of stock, you may have to wait until it’s back in stock before it can be shipped to you.

    In summary, it’s crucial to keep these factors in mind when ordering your SSD to get a better understanding of when you can expect it to arrive.

    how long does it take to get ssd

    Average SSD Delivery Time by Retailer

    If you’re in the market for a new SSD (solid-state drive), it’s important to understand the average delivery times for various retailers. SSDs are a popular choice for those looking for faster loading times and improved performance in their computer or gaming system. However, delivery times can vary depending on the retailer you choose.

    Some retailers offer faster delivery times than others, while some may take longer due to shipping and handling constraints. It’s important to do your research before choosing a retailer to ensure that you receive your new SSD in a timely manner. By considering average delivery times, you can better plan your upgrade and avoid potential delays.

    So, whether you’re an avid gamer or a professional in need of improved computer performance, be sure to shop around and choose a retailer that can provide you with a fast and reliable delivery time.

    Fastest SSD Delivery Options

    If you’re in need of an SSD and wondering how long it takes to get one delivered, there are fast delivery options available. Most online retailers offer expedited shipping, sometimes for an additional fee, but it can vary depending on your location and the retailer’s shipping policies. Amazon Prime offers two-day shipping for many SSD options, while Newegg offers free 3-day shipping for certain purchases.

    If you need your SSD even faster, some retailers offer same-day or next-day delivery options as well. However, keep in mind that shipping times can vary due to unforeseen circumstances such as weather or delivery carrier delays. It’s always best to check with the retailer about their shipping policies and estimated delivery times before making a purchase to ensure you get your SSD as quickly as possible.

    Same-Day SSD Delivery

    Are you in need of a fast and reliable SSD delivery option? Look no further! Our same-day SSD delivery service is here to save the day. We understand that time is of the essence when it comes to data recovery and SSD replacement, which is why we strive to provide the fastest delivery options possible. With our same-day delivery service, your SSD replacement will be in your hands before you know it, reducing any downtime and minimizing the impact on your daily operations.

    Don’t let slow delivery times hold you back – trust our fast and efficient same-day SSD delivery service to keep your business up and running smoothly.

    Next-Day SSD Delivery

    Looking for the fastest SSD delivery options? Consider next-day delivery for your SSD purchase. With next-day delivery, you won’t have to wait long to upgrade your computer’s storage. Plus, you can rest assured that you’ll have your new SSD in-hand the very next day.

    This fast delivery option is perfect for those who need to quickly upgrade their computer’s storage without a long wait. SSDs are a great investment for your computer and can dramatically improve its overall performance. So, why wait? Choose next-day delivery and start enjoying the benefits of your new SSD as soon as possible.

    Two-Day SSD Delivery

    SSD delivery, fastest SSD delivery options. Waiting for a new SSD can be frustrating, especially when you have to endure several days of anticipation before it arrives. Fortunately, some online retailers offer two-day SSD delivery, which is the fastest delivery option available.

    Two-day SSD delivery gives you the advantage of getting your SSD in the shortest amount of time possible, allowing you to get back to work or play without any extended downtime. By using this delivery option, you can get your hands on the latest, high-speed SSD and increase your workflow efficiency or gaming performance instantly. No need to wait around and waste time, as a faster SSD delivery option is finally available that is perfect for the busy individual who can’t afford to be without their device for too long.

    With two-day SSD delivery, you can rest easy knowing that a speedy delivery will soon arrive at your doorstep.

    Tips for Faster SSD Delivery

    Are you wondering how long it takes to get an SSD delivered to your doorstep? Well, the answer depends on several factors. However, there are a few tricks you can use to receive your SSD faster. Firstly, choose a reputable seller that offers fast shipping times, especially if you need the SSD urgently.

    You should also ensure that your shipping address is accurate and complete to avoid delivery delays. Another tip is to choose faster shipping methods like express shipping or overnight delivery, although these options may come at a higher cost. Finally, keep an eye on tracking information and delivery updates to ensure that everything is going smoothly.

    By following these tips, you can get your SSD delivered as quickly and efficiently as possible.

    Choose Expedited Shipping

    When it comes to upgrading your computer’s storage with a new SSD, the delivery time can be a crucial factor. Luckily, there are a few tips you can follow to ensure faster SSD delivery. One of the best ways to speed up the delivery process is to choose expedited shipping.

    While this may cost a bit more, it can often mean getting your SSD much quicker than with standard shipping options. Another tip is to check the estimated shipping times for different sellers and choose the one with the shortest delivery time. Additionally, make sure to double-check the shipping address and contact information to avoid any delays or issues with the delivery.

    By following these tips, you can minimize the wait time and start enjoying the speed and performance of your new SSD sooner. Whether you’re upgrading your gaming rig or speeding up your work computer, quick SSD delivery can make all the difference in your computing experience. Don’t let slow shipping times hold you back from getting the storage upgrade you need – expedited shipping is the way to go!

    Order During Non-Peak Times

    If you’re looking to get your hands on a new SSD as quickly as possible, ordering during non-peak times could be the key to faster delivery. This is because SSD providers tend to have a higher volume of orders during peak periods, which can cause delays in processing and shipping times. By ordering during off-peak hours, you’re more likely to receive your SSD sooner and avoid any unnecessary wait times.

    Additionally, certain SSD providers may offer special deals or discounts during non-peak times, which is another great reason to consider ordering during these periods. So next time you’re in the market for a new SSD, be sure to keep this tip in mind and keep an eye out for the best deals during non-peak hours. Happy shopping!

    Final Thoughts

    If you’re in need of Social Security Disability (SSD) benefits, you may be wondering how long it takes to actually start receiving them. Unfortunately, there isn’t a clear-cut answer to this question, as the timeline can vary depending on a number of factors. However, on average, it can take anywhere from three to five months for the Social Security Administration (SSA) to process your application and make a decision.

    This timeline can be longer if more information or medical evidence is required, or if your application is denied and you need to go through the appeals process. It’s important to remember that patience is key when it comes to SSD benefits, as the process can be lengthy and complex, but ultimately the goal is to get the financial assistance you need to support yourself and your family.

    Conclusion

    In the spirit of a famous quote, “good things come to those who wait”, the answer to how long it takes to get SSD is determined by various factors, such as the complexity of your case, the evidence you provide, and the backlog of claims in your state. So, although we cannot give you an exact timeline, we assure you that the SSD process is worth the wait, and in the end, you will have the financial support that you need.”

    FAQs

    What is SSD and how long does it take to get one?
    SSD stands for Social Security Disability. The amount of time it takes to get approved for SSD varies depending on various factors, such as the complexity of the case and the backlog of applications at the Social Security Administration (SSA). On average, it takes around 3-5 months to receive a decision on your SSD application, but it can take longer in some cases.

    What is the SSD application process like?
    The SSD application process involves filling out an application, providing medical evidence, and attending medical appointments as requested by the SSA. Once all the necessary documents are submitted, the SSA will review your application and make a decision on your eligibility for SSD benefits.

    What types of medical evidence are needed for an SSD application?
    Medical evidence such as doctor’s notes, medical records, test results, and treatment plans are typically required as part of an SSD application. You may also need to undergo a medical examination as requested by the SSA.

    Can I work while waiting for my SSD application to be approved?
    It is possible to work while waiting for your SSD application to be approved, but it is important to follow SSA guidelines regarding the amount of work that is allowed. Generally, working more than a certain amount each month may impact your eligibility for SSD benefits.

  • Boost Your Acer E15’s Performance: Step-by-Step Guide to Installing M.2 SSD

    Boost Your Acer E15’s Performance: Step-by-Step Guide to Installing M.2 SSD

    Ready to upgrade your Acer E15 with a blazing fast M.2 SSD? Look no further, because we’ve got you covered! Installing an M.2 SSD can significantly improve the performance of your Acer E15, reducing system boot time, app loading times, and file transfer speeds.

    Not only is it a straightforward process, but it also requires minimal technical expertise. Once your new M.2 SSD is installed, your Acer E15 will be running smoother and faster than ever before.

    So, let’s dive in and explore how to install an M.2 SSD in your Acer E15, step-by-step.

    What You Need

    If you want to install a new m.2 SSD in your Acer E15 laptop, there are a few things you need to have on hand. First and foremost, you’ll need the SSD itself.

    Make sure it’s compatible with your laptop’s specifications so that everything works properly. You’ll also need a small Phillips head screwdriver to remove the back cover of your laptop. A grounding wrist strap is also a good idea to prevent static electricity from damaging your laptop’s components.

    Once you have everything you need, you can begin the installation process. It might seem daunting at first, but with a little patience and attention to detail, you’ll have a faster, more powerful laptop in no time!

    Acer E15 Manual

    When it comes to using your Acer E15 laptop, having a manual on hand can be incredibly helpful. But what do you actually need in order to access this information? Firstly, you’ll want to make sure that you have a physical copy of the manual, which often comes included in the packaging of your laptop. If you’ve misplaced this, don’t worry – many brands also offer digital versions of their manuals online.

    To access this, you’ll need a reliable internet connection and a device to view the PDF or online version of the manual. It’s also helpful to have a basic understanding of how to navigate your device and operating system, so you can quickly find the information you need. With these simple tools in hand, you’ll be well on your way to making the most of your Acer E15 laptop.

    acer e15 how to install a m.2 ssd

    M.2 SSD

    M.2 SSDs have been gaining popularity in recent years due to their high speed and compact form factor. They are a type of solid-state drive that connects directly to the motherboard of your computer, making them faster than traditional hard drives.

    To use an M.2 SSD, you need to have a motherboard that supports it and an available M.2 slot.

    Most modern motherboards come with at least one M.2 slot, but it’s always important to double-check before purchasing an M.2 SSD.

    It’s also essential to consider the type of M.2 SSD you need, as there are different lengths and key types. If you’re not sure which one to choose, check your motherboard’s manual or do some research before making your purchase.

    Finally, it’s important to note that M.2 SSDs can get quite hot, so it’s a good idea to make sure your computer has adequate cooling to prevent any issues. By taking these factors into consideration, you can ensure a seamless installation and get the most out of your M.

    2 SSD.

    Preparing Your Laptop

    If you’re looking to upgrade your Acer E15 laptop with an M.2 SSD, you’re in the right place! Before installing the SSD, you’ll need to ensure that your laptop is prepared for the upgrade. Firstly, ensure that you have the right tools, including a screwdriver and an antistatic wrist strap.

    Next, backup all your important data and files in case of any mishaps. It’s also important to shut down your laptop and disconnect it from power before opening it to avoid any damage due to electrical discharge. Now, it’s time to open the laptop.

    Locate the M.2 slot, which is typically located next to the memory modules. Insert the M.

    2 drive into the slot and secure it with the provided screw. Finally, screw back the bottom panel of the laptop, and you’re all set! Enjoy the increased speed and storage capacity offered by your new M.2 SSD.

    Backup Your Data

    Backing up your data is essential to avoid losing critical information and files. If you’re thinking of preparing your laptop for data backup, there are a few things you need to consider first. Firstly, you should ensure that your laptop is free of any viruses or malware that could corrupt your data during the backup process.

    You can do this by running a scan with your antivirus software or using a trusted online scanner. Secondly, you need to identify the data that you want to back up. This could include personal documents, photos, videos, music, or any other important files.

    Once you’ve identified the data, you should consider where you want to back it up. You can use cloud storage services like Google Drive or Dropbox, external hard drives, or USB sticks. It’s important to choose the best option that suits your needs and budget.

    Remember, data backup is not a one-time task. You should regularly update your backup to ensure that you have access to the latest versions of your files at all times. By taking these simple steps, you can ensure that your data is secure and easily accessible in case of any unforeseen circumstances.

    Turn Off Your Laptop

    When it comes to using your laptop, it’s important to take precautions to keep it running smoothly. One simple step you can take is to turn off your laptop when you’re not using it. But before you do, it’s important to make sure you’ve prepared it properly.

    First, save any open files and close any programs you’re running. This will prevent you from losing any work or data. Next, disconnect any external devices, such as a mouse or keyboard, to prevent them from draining your laptop’s battery.

    Finally, make sure your laptop is fully charged or plugged in to avoid any interruptions or data loss. By following these simple steps, you’ll be able to turn off your laptop with peace of mind, knowing that it is properly prepared and ready to be used again when you need it.

    Opening the Laptop Case

    If you want to upgrade your Acer E15 laptop with a speedy M.2 SSD, you’ll need to open up the case and get to work. Thankfully, it’s not too difficult of a task.

    First, flip your laptop over and remove the battery. Then, unscrew the bottom cover and carefully pry it off. You should now see the current hard drive and an empty M.

    2 slot. You’ll need to remove the screw holding the current hard drive in place and carefully slide it out. Now it’s time to install the new M.

    2 SSD – simply insert it into the slot at a 30 degree angle and screw it in place. Then, slide your old hard drive back in and replace the cover. Congratulations, you’ve successfully upgraded your laptop’s storage capabilities!

    Removing the Battery

    Removing the battery from a laptop may seem like a daunting task, but with the right tools and knowledge, it can be done easily. The first step is to open the laptop case, which can be accomplished by removing the screws located on the bottom of the laptop. Once the case is open, locate the battery, which is usually located near the bottom of the laptop.

    To remove the battery, use a screwdriver to unscrew any screws holding it in place. Gently lift the battery out of its slot, being careful not to damage any of the wires connected to it. If there is any resistance when removing the battery, double-check to make sure all screws have been removed, as one missed screw can cause the battery to get stuck.

    Once the battery has been removed, it is important to dispose of it properly, as batteries can be hazardous to the environment if not disposed of correctly. With a little patience and attention to detail, removing a laptop battery can be a simple and straightforward process.

    Removing the Back Cover

    Removing the back cover of a laptop is a crucial step in opening the laptop case. Before attempting to remove the cover, make sure the laptop is completely powered off and unplugged. Find the screws that are holding the back cover in place, which may be located on the bottom or sides of the laptop.

    Use a small screwdriver to carefully remove each screw. Keep the screws in a safe place so that they don’t get lost. Once all the screws have been removed, gently pry the cover away from the laptop using a plastic spudger tool or a credit card.

    Be careful not to use too much force, as this can damage the case or internal components. With the back cover removed, the internal components of the laptop will be visible. It’s essential to be cautious when working with any of these components, especially if you have no prior experience.

    By following these steps carefully, you can safely remove the back cover of your laptop and continue with more advanced repair or maintenance tasks.

    Locating the M.2 SSD Slot

    When it comes to upgrading your laptop’s storage, accessing the M.2 SSD slot can feel like a daunting task. However, with a few simple steps, you can locate the slot and begin your upgrade process.

    First, you’ll need to open the laptop case. This can usually be done by unscrewing the bottom panel of the laptop. Once the panel is removed, you should be able to see the internal components of the laptop.

    It’s important to ensure you’re working in a static-free environment and to handle components with care. Next, locate the M.2 SSD slot – it’s usually a small, rectangular slot located near the center of the motherboard.

    If you’re unsure which slot it is, consult your laptop’s manual or do a quick online search. Once you’ve located the slot, you’ll need to insert your new M.2 SSD drive and screw it in place.

    With your new drive installed, replace the laptop case panel and start enjoying your upgraded storage capabilities. Upgrading your laptop’s storage doesn’t have to be complicated or intimidating. With a little bit of research and care, you can easily locate and utilize the M.

    2 SSD slot for all your storage needs.

    Installing the M.2 SSD

    If you want to improve the performance of your Acer E15 laptop, installing a M.2 SSD is a great way to do it. First, you will need to turn off your laptop and unplug any cables or cords.

    Then, locate the M.2 slot on your motherboard. It should be a small, rectangular slot.

    Next, carefully insert the M.2 SSD into the slot, making sure that the notched end lines up with the slot. Once you have inserted the SSD, use the screw to secure it in place.

    Finally, you can reassemble your laptop and power it on to start using your new SSD. Installing a M.2 SSD is a simple and effective way to boost the performance of your Acer E15, and you will be able to notice the difference in speed and responsiveness.

    Inserting the M.2 SSD into the Slot

    To install an M.2 SSD, first ensure that your motherboard has an open M.2 slot that can support your SSD.

    Once you’ve verified compatibility, locate the M.2 slot on your motherboard. This slot will typically be located near the CPU socket, but its specific placement may differ from one motherboard to the next.

    After you’ve found the slot, unscrew the retaining screw on the motherboard to reveal the M.2 slot. Then, carefully insert the M.

    2 SSD into the slot, making sure that the notches on the SSD line up with the notches on the slot. Then, press the SSD down firmly into the socket until it’s seated securely. Finally, replace the retaining screw and boot up the system.

    With this simple process, you can have your new M.2 SSD installed in no time and enjoy blazing-fast storage performance.

    Securing the M.2 SSD

    When it comes to securing your M.2 SSD, the first step is installing it properly. Before you begin, make sure to power down your computer and unplug it from any power source.

    Then, locate the M.2 slot on your motherboard and remove the protective cover. Insert the M.

    2 SSD into the slot at a 30-degree angle and gently press it down until it clicks into place. Once installed, replace the protective cover and secure it with the screw provided. It’s important to note that M.

    2 SSDs can become quite hot during operation, so ensuring proper cooling is essential to prevent any damage. Consider adding a heatsink or a fan to your setup for optimal performance and longevity of your M.2 SSD.

    By following these steps, you can safely and securely install and protect your M.2 SSD to ensure reliable performance and data storage.

    Closing the Laptop Case

    So, you’re ready to upgrade your Acer E15 with an M.2 SSD, but not sure how to install it? Don’t worry, it’s easier than you might think! Start by turning off the laptop, unplugging it, and removing the battery. Then, locate the M.

    2 SSD slot, which is usually located near the Wi-Fi card or hard drive. Gently insert the SSD into the slot at an angle, making sure it’s fully seated. Next, secure the SSD with the appropriate screw or latch.

    Place the battery back in and turn the laptop back on. Voila! Your new SSD should be recognized and ready to use. Congratulations on your DIY laptop upgrade!

    Reinstalling the Back Cover

    Reinstalling the back cover is the final step before your laptop is ready to use. It’s not as difficult as it might seem, but it can be a little tricky. First, make sure that all the screws are tightened properly, and that the cover fits snugly onto the laptop.

    You might need to push down on the corners to make sure it clicks into place. Once you’re sure that everything is lined up correctly, start screwing in the screws, working your way around the edge of the cover. Make sure that each screw is tight before moving on to the next one.

    And that’s it! Your laptop is now ready to use. Just remember to be careful when you’re putting it back in your bag or on your desk, as the cover can sometimes come loose if it’s not installed correctly. So, take your time and make sure that everything is secure before you start using your laptop again.

    Reinstalling the Battery

    When it comes to closing the laptop case after reinstalling the battery, it’s important to take your time and be gentle. Start by gently laying the laptop on a flat surface, making sure not to put too much pressure on the screen. Once the laptop is resting comfortably, carefully align the bottom cover with the laptop’s base and slowly close it, being mindful not to force anything.

    If everything is lined up correctly, the case should snap into place without any resistance. Just like putting together a puzzle, take your time and don’t try to force anything. The more carefully you handle the laptop, the more likely it is that everything will go smoothly.

    Remember, your laptop is a valuable investment, so be sure to treat it with care and respect.

    Booting the Laptop with M.2 SSD

    If you’re looking to boost the performance of your Acer E15 laptop, installing an M.2 SSD is a great option. Not only does it increase storage capacity, but it also significantly improves boot time and overall system speed.

    Here’s a step-by-step guide on how to install an M.2 SSD in your Acer E15 laptop: First, make sure your laptop is turned off and unplugged.

    Locate the access panel on the bottom of your laptop and unscrew it.

    Locate the M.2 slot and carefully insert the SSD.

    Secure the SSD in place with the screw provided. Replace the access panel and screw it back in.

    Power on your laptop and enter the BIOS settings.

    Entering BIOS Setup

    Entering BIOS Setup Booting up your laptop with an M.2 SSD can significantly improve its performance and speed, but first, you need to enter the BIOS setup to activate it. To access the BIOS, you need to power on your laptop and press the appropriate key repeatedly as soon as the manufacturer logo appears on your screen.

    The key to access the BIOS setup varies for different laptops, but it is usually F2, F12, or Del. Once you have entered the BIOS setup, navigate to the Boot options menu, and select the M.2 SSD as your primary boot drive.

    After saving the changes, your laptop will now boot from the M.2 SSD, giving you faster load times and better overall performance. So, if you have recently upgraded your laptop with an M.

    2 SSD, make sure to enter the BIOS setup and activate it to get the most out of your investment.

    Selecting Boot Options

    When it comes to booting your laptop with an M.2 SSD, there are a few important things to keep in mind. First, you’ll need to select the appropriate boot options in your laptop’s BIOS settings.

    To do this, restart your laptop and enter the BIOS by pressing the designated key (typically F2 or Del) during startup. Once you’re in the BIOS, navigate to the “Boot” tab and select your M.2 SSD as the primary boot option.

    Make sure to save your changes before exiting the BIOS and restarting your laptop. It’s also important to note that some laptops may require additional drivers or firmware updates in order to properly recognize and boot from an M.2 SSD.

    Be sure to check with your laptop’s manufacturer for any specific instructions or requirements. With the right boot options and setup, you can expect faster speeds and improved performance when using an M.2 SSD on your laptop.

    Saving Changes and Exiting BIOS

    Booting the Laptop with M.2 SSD Now that you’ve successfully installed your M.2 SSD, it’s time to boot up your laptop and enjoy the benefits of faster read and write speeds.

    Before we get started, it’s important to note that you’ll need to make sure that your BIOS is set up to boot from the M.2 SSD. To do this, you’ll need to enter the BIOS setup by pressing the appropriate key during startup (usually F2 or Delete).

    Once you’re in the BIOS setup, navigate to the Boot tab and look for the Boot Order option. This is where you’ll be able to specify the order in which your laptop looks for a bootable device. You’ll want to move the M.

    2 SSD to the top of the list so that your laptop will boot from it first. After you’ve made the necessary changes to the boot order, don’t forget to save your changes before exiting the BIOS setup. This will ensure that your laptop will remember your boot order settings the next time you start it up.

    Now that your laptop is set up to boot from your M.2 SSD, you should notice a significant improvement in boot times and application loading speeds. Enjoy your faster, more efficient laptop!

    Conclusion

    In conclusion, installing an M.2 SSD in your Acer E15 is a smart choice that will greatly improve your computer’s storage and performance capabilities. With just a few simple steps, you can easily upgrade your device and experience faster boot times, quicker application loading speeds, and smoother multitasking.

    So don’t hesitate to take the plunge and give your laptop the boost it deserves – your productivity (and sanity) will thank you!”

    FAQs

    What is the benefit of installing an M.2 SSD in Acer E15?
    The benefit of installing an M.2 SSD in Acer E15 is that it will significantly improve the system’s read and write speed, resulting in faster boot times and faster application loading times.

    Is it possible to install an M.2 SSD in Acer E15?
    Yes, Acer E15 comes with an M.2 slot that can be used to install an M.2 SSD.

    What size M.2 SSD is compatible with Acer E15?
    Acer E15 supports M.2 SSDs that are 2280 in size.

    Is it necessary to reinstall the operating system after installing an M.2 SSD in Acer E15?
    No, it is not necessary to reinstall the operating system after installing the M.2 SSD in Acer E15. However, it is recommended to clone the old drive to the new M.2 SSD for better performance.

  • Effortlessly Remove Your SSD Heatsink: A Step-by-Step Guide

    Effortlessly Remove Your SSD Heatsink: A Step-by-Step Guide

    Have you ever wondered why your computer’s SSD (solid-state drive) feels hot to the touch? Over time, these drives can become warm due to constant usage, which is why SSD heatsinks have become increasingly popular. They work by dispersing heat and keeping your SSD running at cooler temperatures. However, there can come a time when you need to remove the SSD heatsink for maintenance or upgrades.

    This can seem daunting, but fear not! In this step-by-step guide, we’ll walk you through exactly how to remove your SSD heatsinks with ease.

    Prepare Your Tools

    Removing the heatsink on an SSD can be a daunting task, but with the right tools and a bit of preparation, it can be done easily. The first step is to gather all the necessary tools required to remove the SSD heatsink effectively. You will need a screwdriver, preferably a small Phillips head of a compatible size with the screw on your laptop or desktop holding the SSD heatsink.

    A plastic spudger or a flathead screwdriver will help pry the heatsink off carefully without damaging the motherboard. It is also crucial to have thermal paste cleaner and a microfiber cloth to clean off any thermal paste residue from both the SSD and the heatsink to prevent any damage to the SSD. Once you have all the necessary tools, you are ready to remove the SSD heatsink efficiently and carefully without risking any permanent damage.

    By preparing yourself with all the required tools, you can remove the SSD heatsink with ease.

    Gather Materials

    When it comes to tackling a project, one of the most crucial steps is preparing your tools. Whether you’re a seasoned DIYer or a beginner, having the right materials is key to a successful outcome. Start by making a list of all the items you’ll need, such as screws, nails, and measuring tape.

    Consider investing in a good-quality power drill, saw, and other essential tools. If you’re unsure about what to purchase, consult with a specialist at your local hardware store or do some research online. It’s much better to have all the necessary tools on hand before you begin rather than having to stop midway through your project to run to the store.

    By taking the time and effort to gather your materials properly, you’ll be setting yourself up for success and ensuring that your project runs smoothly.

    how to remove ssd heatsink

    Read Manufacturer Instructions

    “manufacturer instructions” Before using any tool, it is important to read the manufacturer’s instructions thoroughly. These instructions not only provide important safety information but also provide you with guidance on how to properly prepare your tools. You do not want to start a project only to realize halfway through that you have been using the tool incorrectly, potentially causing damage to yourself or the tool.

    Take the time to prepare your tools before starting any new project, ensuring they are clean and in proper working condition. By following the manufacturer’s instructions and properly preparing your tools, you can ensure that your project goes smoothly and without any issues. Remember, taking the time to read the instructions can save you time and money in the long run.

    So, next time you begin a new project, take a few extra minutes to prepare your tools and read the manufacturer’s instructions carefully.

    Shutdown and Disconnect PC

    If you’re looking to remove the heatsink from your SSD, there are a few important steps to follow in order to avoid any damage to your system. First, be sure to shut down your PC properly and disconnect it from any power sources to ensure your safety. Next, locate the SSD and its attached heatsink.

    Carefully unscrew the screws holding the heatsink in place and gently remove it, taking care not to damage any components. Be mindful of any thermal paste or pads used to connect the heatsink to the SSD, as these may need to be cleaned and replaced if they are damaged. With the heatsink removed, you can now clean both the heatsink and SSD if necessary, or simply replace the heatsink with a new one.

    Always take precautions when handling components of your PC and consult a professional if you are unsure of any steps in the process.

    Turn Off Computer

    When it comes to turning off your computer, it’s important to properly shutdown and disconnect your PC. This not only ensures that your computer is functioning properly the next time you start it up, but it also protects your hardware and data from potential damage. To begin, you should always properly shutdown your computer instead of just unplugging it or turning it off with the power button.

    This will allow your computer to go through the necessary steps of closing files and applications, and will save any changes you’ve made. Once your computer has completely shut down, you can then disconnect it from the wall outlet or power strip. Be sure to unplug any peripherals, such as a printer or mouse, as well.

    Taking the extra time to properly shutdown and disconnect your PC can prolong its lifespan and prevent any data loss or hardware damage. So, the next time you’re ready to turn off your computer, remember to follow these simple steps.

    Disconnect Cables

    When it’s time to shut down your PC for the day, it’s important to do it properly and safely. One of the first steps in this process is to disconnect all of the cables. This includes the power cable, any peripheral cables such as USB or Ethernet cables, and any other cables connected to the computer.

    By disconnecting all of these cables, you can prevent any damage to the computer or your other devices. Before you start disconnecting cables, make sure you properly shut down the computer. You can do this by clicking “Start” and selecting “Shut down”.

    Once the computer has shut down completely, unplug the power cable from the wall outlet or surge protector. Next, disconnect any peripheral cables from the computer and then from the other device they are connected to. For example, if you have a printer connected to the computer via USB cable, first disconnect the cable from the computer, and then disconnect it from the printer.

    It’s also important to disconnect any cables that are connected to the computer’s monitor. This includes the power cable and any other cables such as HDMI or VGA cables. Finally, disconnect any other cables that may be connected to the computer, such as audio cables or additional power cables.

    By disconnecting all of the cables, you can ensure that your computer is safe and ready for the next use. It’s crucial to remember to unplug all of the cables from the wall outlet or surge protector before disconnecting them from the computer or other devices. This will prevent any damage or short circuits that could potentially harm your computer or yourself.

    Remember to take the time to disconnect all of the cables properly to keep your computer running smoothly.

    Remove SSD Heatsink

    If you need to remove an SSD heatsink, it’s important to do it carefully to avoid damaging the drive. The first step is to determine the type of heatsink on your SSD. Some heatsinks are attached with screws, while others use adhesive.

    If there are screws, gently remove them using a screwdriver. Be sure to keep them in a safe place so you don’t lose them. If your heatsink is attached with adhesive, you’ll need to use a heat gun to soften the adhesive.

    Hold the heat gun about six inches away from the heatsink and gently heat it until the adhesive begins to soften. Then, use a plastic tool or credit card to carefully scrape the heatsink off the SSD. Be sure not to use metal tools as they could easily scratch the surface of the drive.

    With a little patience and a steady hand, removing your SSD heatsink can be a simple and straightforward process.

    Identify and Locate Heatsink

    If you’re looking to upgrade your SSD or perform maintenance on your existing one, the first step is to locate and remove the heatsink. This essential component helps to dissipate heat and prevent your device from overheating, so it’s crucial to handle it with care. To start, you’ll need to identify where the heatsink is located on your device.

    Typically, it’s located near the SSD, either directly on top of it or off to one side. Once you’ve located it, you’ll need to carefully remove any screws or clips holding it in place. Depending on the type of heatsink, you may need to gently pry it off with a tool or carefully slide it out of its slot.

    Be sure to follow any specific instructions for your device, as heatsinks can vary widely in design. With the heatsink removed, you can then proceed with your SSD upgrade or maintenance. By taking the time to correctly remove and replace your heatsink, you’ll help ensure your device performs reliably and efficiently.

    Remove Screws and Fasteners

    When it comes to upgrading your SSD, the first step is to remove the heatsink that’s on top of it. This can be a tricky task, but it’s not impossible. The first thing you’ll need to do is remove any screws or fasteners that are securing the heatsink to the SSD.

    You may need to use a screwdriver or other tool to get the job done. Once you’ve removed the screws, you should be able to lift the heatsink off of the SSD. Be careful not to damage any of the surrounding components as you do this.

    It’s always a good idea to have a clean, flat workspace to do this on so that you can keep track of all the tiny components that you’re working with. With the heatsink removed, you can proceed with upgrading your SSD and putting everything back together. Remember, taking your time and being patient is key when it comes to working with delicate computer components.

    Detach SSD from Heatsink

    If you’re looking to remove your SSD heatsink, it’s essential to know what you’re doing to avoid any damage. Start by locating the screws that are holding the heatsink in place. These screws will vary depending on your specific heatsink, so be sure to refer to the manufacturer’s instructions.

    Once you’ve found the screws, use a screwdriver to remove them, being careful not to strip them in the process. Then, gently detach the SSD from the heatsink. It’s crucial to handle the SSD delicately to avoid any damage or data loss.

    Once the SSD is separated from the heatsink, you can proceed with any maintenance or upgrades necessary. Remember to keep a steady hand and don’t rush the process to avoid costly mistakes. By following these steps, you can safely remove your SSD heatsink and keep your system running smoothly.

    Clean and Reapply Heatsink (Optional)

    If you’re experiencing high temperatures and slow performance from your SSD, removing the heatsink and cleaning it might improve its efficiency. To remove the SSD heatsink, first, turn off your system and unplug it from the power source. Unscrew the screws holding the heatsink in place and gently remove it from the SSD.

    Use a clean, soft cloth to wipe off any accumulated dust or debris from the heatsink. If the debris is stubborn, use a cotton swab dipped in isopropyl alcohol to remove it gently. Once the heatsink is clean, reapply thermal paste to the SSD and reattach the heatsink, securing it in place with screws.

    Remember to handle the heatsink with care to avoid damaging any components. Overall, removing and cleaning an SSD heatsink is an optional, yet helpful maintenance procedure that could prevent overheating and improve performance.

    Clean the Heatsink

    If you’re experiencing overheating issues with your computer, one of the possible culprits could be a clogged heatsink. Over time, dust and debris can accumulate on the heatsink, reducing its ability to dissipate heat properly. If you’re comfortable taking apart your computer, it’s worth giving the heatsink a good clean.

    First, make sure your computer is turned off and unplugged. Then, remove the heatsink from the CPU and gently clean any visible dust or debris. You may need to use compressed air or a soft-bristled brush to get into the small crevices.

    Once everything is clean, you can reapply thermal paste to the CPU and reattach the heatsink. Doing this can help improve the cooling efficiency of your computer and prevent unexpected shutdowns or damage to your hardware.

    Apply Thermal Paste (Optional)

    If you’ve decided to clean your computer’s heatsink, it’s a good idea to apply thermal paste as well. This is an optional step but can greatly improve the heat transfer between the CPU and heatsink. After removing the heatsink, use a lint-free cloth and some isopropyl alcohol to clean off the old thermal paste.

    Once the surface is free of any buildup or debris, apply a small amount of new thermal paste in the center of the CPU. Be careful not to apply too much, as this can actually hinder heat transfer. Spread the paste evenly with a card or spatula before reattaching the heatsink.

    This step is not necessary for everyone, but if you’re experiencing high CPU temperatures or are overclocking, it can be a worthwhile addition to your maintenance routine. Keep your system running cool and efficiently with this simple step for heat management.

    Reattach Heatsink to SSD

    If you want to take your SSD’s thermal performance to the next level, it’s worth considering cleaning and reapplying the heatsink. This may seem like an unnecessary step, but doing so can help dissipate heat more efficiently, which can improve your SSD’s lifespan and performance. To reattach the heatsink correctly, you’ll need to first remove it and then clean the surface of your SSD with a microfiber cloth and rubbing alcohol.

    From there, you can apply new thermal paste to the surface of the SSD and reattach the heatsink carefully. This step may not be for everyone, but if you’re looking to optimize your system’s thermal performance, it’s worth considering.

    Reinstall and Reconnect PC

    Removing the SSD heatsink from your PC can be intimidating, but necessary if you need to access or replace your solid-state storage. First, shut down your PC and unplug it from the wall. If possible, ground yourself to avoid static electricity discharge that might damage sensitive components.

    Locate the heatsink that covers your SSD and unscrew or release it depending on your particular model. Be sure to detach any screws, latches or clips from the motherboard. If your device has adhesive, you may carefully and slowly apply heat (such as from a hairdryer or heat gun) to loosen the bond.

    Once the heatsink is removed, you can safely access your SSD for cleaning, replacement, or other maintenance. To reconnect, reverse your previous steps and ensure the screws and clips are secure. Reinstall your SSD heatsink and test your PC.

    Following these steps properly can ensure your PC’s longevity and performance.

    Reinstall SSD in PC

    If you want to reinstall your SSD in your PC, the first step is to turn off your system and disconnect all cables. Then, locate the SSD on your motherboard and carefully remove it by unscrewing any screws holding it in place. Next, simply align the SSD with the appropriate slot and screw it back in.

    Make sure to securely connect all cables, including the power and data cables. Once you’ve reconnected everything, turn on your PC and verify that the SSD is being recognized in your BIOS and operating system. Reinstalling your SSD can be a simple process as long as you take the necessary precautions and follow the steps carefully.

    With a little bit of knowledge, anyone can do it!

    Reconnect Cables and Turn On PC

    After you have successfully removed all the components of your PC, it is time to reinstall and reconnect everything. Start by placing the motherboard back into the case and connecting all the necessary cables. Depending on your system’s configuration, you may need to reconnect cables for the power supply, graphics card, and hard drives.

    Always refer to the user manual for your motherboard, as it may provide specific installation instructions. Once all the cables are securely fastened, it’s time to turn on your computer. Before pressing the power button, double-check that all the components are properly installed and that there are no loose connections.

    Once you hit the power button, listen for any strange noises or beeps. If everything is working smoothly, you should see the BIOS screen pop up. Congratulations, you have reconnected your computer and it’s ready for use!

    Conclusion

    Well, removing an SSD heatsink can be a tricky and daunting task, but with some patience and a few key tools, it can be done successfully. It’s important to remember that SSDs are delicate creatures, and any mishandling can result in irreversible damage. So, proceed with caution, and take your time.

    And if all else fails, just remember that sometimes the best way to remove a heatsink is with a little bit of elbow grease and a lot of determination!”

    FAQs

    Why should I remove the SSD heatsink?
    If you need to replace your SSD or upgrade your system, you may need to remove the SSD heatsink to access the drive.

    Can I remove the SSD heatsink without damaging the drive?
    If done carefully and correctly, you can safely remove the SSD heatsink without damaging the drive.

    What tools do I need to remove the SSD heatsink?
    You will need a screwdriver set, thermal paste, and a thermal pad to remove the SSD heatsink.

    How do I remove the SSD heatsink from my computer?
    First, shut down your computer and unplug all cables. Then, remove the screws holding the SSD heatsink in place and gently lift off the heatsink. Clean off any residual thermal paste and replace with a new pad or paste if necessary.