Author: David L. Lynn

  • Stay Cool and Efficient: The Ultimate Guide to Deciding Whether Your M.2 Needs a Heatsink

    Stay Cool and Efficient: The Ultimate Guide to Deciding Whether Your M.2 Needs a Heatsink

    Are you wondering if your M.2 SSD needs a heatsink? As the latest generation of solid-state drives, M.2 SSDs offer excellent performance with their small size.

    However, there are also concerns that come with it, such as the potential risks of heating. Heat is one of the main factors that can affect the lifespan and performance of your SSD, and that’s where heatsinks come in. They are an essential solution to prevent overheating of your storage device and ensure optimal performance.

    Think of it like running a marathon without proper hydration or rest stops. You can do it, but it won’t be easy and may result in damage to your body. Similarly, your M.

    2 SSD can’t perform optimally if it’s overheating due to lack of adequate cooling measures. But, do all M.2 SSDs require heatsinks? The answer depends on the type of M.

    2 SSD you have and your usage patterns. Generally, if you use your drive for long periods of time or engage in activities that stress your SSD, such as gaming or video rendering, a heatsink can help dissipate heat and improve performance. In this blog, we’ll dive deeper into the factors that affect M.

    2 SSD performance, whether heatsinks are necessary, and how to choose the right heatsink for your needs. So, whether you’re a gamer, content creator, or just an avid computer user, keep reading to learn about the importance of heatsinks for your M.2 SSD.

    What is an M.2 SSD?

    If you’re putting together a gaming PC or high-performance build, you’ve probably heard of M.2 SSDs. These tiny solid-state drives are popular for their fast read and write speeds and low power consumption.

    But do M.2 SSDs need a heatsink? The answer is, it depends. Some M.

    2 SSDs can run hot, especially when under heavy load for extended periods of time. In these cases, a heatsink can help dissipate the heat and keep the drive running smoothly. However, not all M.

    2 SSDs need a heatsink, so it’s important to check the manufacturer’s specifications before deciding whether or not to purchase one. Ultimately, it’s up to your specific build and usage needs whether or not a heatsink for your M.2 SSD is necessary.

    Definition and usage

    An M.2 SSD, or solid-state drive, is a type of storage device that is becoming increasingly popular in technology today. It is a small form factor drive that is smaller than the traditional

    5-inch SSD. M.2 SSDs are commonly used in laptops, ultrabooks, and other small devices due to their compact size.

    They offer fast read and write speeds and an exceptional overall performance when compared to traditional hard drives. M.2 SSDs use the PCIe interface or the SATA

    0 interface to connect to the computer’s motherboard, which in turn allows for faster data transfer speeds. Overall, an M.2 SSD is an excellent choice for anyone who wants to improve their computer’s performance and increase storage space without compromising on size and weight.
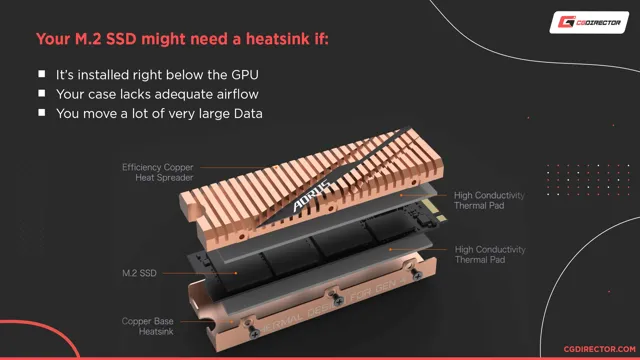
    do m.2 need heatsink

    Why might an M.2 SSD need a heatsink?

    If you’re building a PC or upgrading your existing one, you may have come across M.2 SSDs and wondered if they need a heatsink. The answer is not straightforward, as it depends on various factors.

    M.2 SSDs can generate a considerable amount of heat while operating, and if they get too hot, their performance can suffer, or worse, they can malfunction. Therefore, manufacturers often design M.

    2 drives with a cooling system, including thermal pads and heatsinks, to prevent overheating. However, not all M.2 SSDs require a heatsink, and it depends on factors such as the drive’s speed, the workload you’ll be running, and the airflow inside your PC case.

    If you plan on running demanding applications or using your PC for extended periods, a heatsink may be necessary to keep your M.2 drive cool and performing optimally.

    Thermal throttling issues

    If you’re experiencing thermal throttling issues with your M.2 SSD, you might be wondering why adding a heatsink could help. The answer lies in how M.

    2 SSDs work and generate heat. M.2 SSDs use NAND flash memory to store data, and as you use it, the memory cells heat up, causing the SSD to slow down.

    A heatsink can dissipate heat more efficiently than the tiny surface area of the SSD itself, helping to keep temperatures in check. Think of it like a chef cooking a hot meal in a small kitchen. Without proper ventilation, the kitchen would quickly become too hot to cook efficiently.

    Similarly, without a heatsink, your M.2 SSD can quickly become too hot to perform at its best. Adding a heatsink can help prevent thermal throttling, allowing your SSD to operate at its full potential and extending its lifespan.

    High-performance computing needs

    An M.2 SSD might need a heatsink due to the high-performance computing needs of modern systems. Advanced gaming and professional workloads place a substantial demand on hardware, which can lead to overheating and throttling.

    Without proper cooling, SSDs can suffer from performance degradation or even permanent damage. M.2 SSDs, in particular, generate a significant amount of heat due to their compact size and high-speed transfer rates.

    Installing a heatsink can help dissipate the heat, allowing the drive to operate at peak performance and prolonging its lifespan. The heatsink works by absorbing the heat and distributing it across a larger surface area to promote airflow. Overall, a heatsink can significantly improve the performance and reliability of an M.

    2 SSD, making it a worthwhile investment for those who require top-notch computing power.

    How to determine if your M.2 SSD needs a heatsink

    As technology continues to advance, more and more devices are being designed with efficiency in mind. One such device is the M.2 SSD.

    This tiny yet powerful storage solution has revolutionized the way we store and access our data. However, with its small size comes the risk of overheating, especially for high-performance SSDs. The question then becomes, do M.

    2 SSDs need heatsinks? The answer is not a simple yes or no. Ultimately, it depends on your usage and the specifications of your particular M.2 SSD.

    If you use your SSD for basic tasks such as web browsing or word processing, then a heatsink may not be necessary. However, if you are a gamer or use demanding applications such as video editing software, a heatsink may be highly beneficial. When deciding whether or not to install a heatsink, consider the operating temperature of your SSD.

    If it regularly reaches temperatures above 70°C, a heatsink is likely necessary to prevent damage to the drive over time. Additionally, if your SSD has an NVMe controller, it may generate more heat than SATA-based models and also benefit from a heatsink. Overall, adding a heatsink to your M.

    2 SSD is a simple and affordable way to potentially improve its performance and lifespan. Keep in mind that not all M.2 SSDs require a heatsink, so it is advised to research your specific model and usage before making any modifications to your system.

    Checking your SSD specifications

    If you’re looking to upgrade your computer’s storage with an M.2 SSD, it’s important to check the specifications of your chosen drive to determine if it needs a heatsink. Heatsinks help dissipate the heat generated by the SSD’s components, preventing overheating and potential performance issues.

    Not all M.2 SSDs require a heatsink, so it’s important to consult the manufacturer’s specifications and look for the thermal tolerance rating. If it’s less than 70°C, a heatsink is recommended.

    Additionally, if you plan on using your M.2 SSD for intense workloads such as content creation or gaming, a heatsink can offer added peace of mind and performance benefits. Overall, it’s worth the extra effort to ensure your SSD remains cool and running at its optimal speed and efficiency.

    Monitoring temperatures during use

    Monitoring temperatures is crucial for M.2 SSDs as they are prone to heating up during use. But how can you determine if your M.

    2 SSD needs a heatsink? One indication is the performance of your drive. If you notice a drop in performance or slower response times, it could be a sign that your drive is overheating. Another way to determine if your M.

    2 SSD needs a heatsink is by monitoring its temperatures. If the temperature stays consistently high during use, a heatsink can help dissipate the heat more efficiently and prevent damage to your SSD’s internal components. By investing in a heatsink, you can prolong the lifespan of your M.

    2 SSD and prevent potential performance issues.

    Types of M.2 SSD heatsinks

    “Do M.2 SSDs need heatsinks?” is a common question that many computer enthusiasts ask themselves when building or upgrading their PCs. The answer is that it depends on a variety of factors, including the type of M.

    2 SSD you have, the amount of airflow in your case, and how much you plan on using your SSD for tasks that generate a lot of heat. If you have a high-performance M.2 SSD, such as a PCIe

    0 model, it might be a good idea to invest in a heatsink to help dissipate heat and improve overall performance. There are several types of M.2 SSD heatsinks available on the market, including aluminum, copper, and graphite, each with its own advantages and disadvantages.

    Ultimately, whether or not you need a heatsink for your M.2 SSD will depend on your specific setup and usage requirements, but it’s worth considering if you want to get the most out of your SSD.

    Passive heatsinks

    Passive heatsinks are a popular solution for cooling M.2 SSDs, especially for enthusiasts who want to overclock their drives. There are several types of M.

    2 SSD heatsinks available in the market, including the simple and elegant aluminium heatsinks, copper heatsinks for better heat dissipation, and even liquid-cooled heatsinks. The most common type of heatsink is the aluminium variant, which is lightweight and easy to install. Copper heatsinks, on the other hand, are more durable and efficient at dissipating heat but come with a higher price tag.

    Some manufacturers offer liquid-cooled heatsinks that use a thermal paste to spread the heat across a larger surface area, resulting in better cooling performance. Whatever type you choose, make sure it is the right size for your M.2 SSD and matches your PC’s aesthetics.

    Overall, investing in a passive heatsink can prolong your SSD’s lifespan and improve its performance under heavy workloads.

    Active heatsinks

    When it comes to M.2 SSD heatsinks, there are a variety of options to choose from. One of the most popular types of heatsinks is the active heatsink.

    Active heatsinks use a fan or other form of active cooling to dissipate heat from the M.2 SSD. This type of heatsink can be especially effective at keeping temperatures low, even under heavy load.

    However, they can be louder and more expensive than passive heatsinks. It is important to consider your specific needs and usage when choosing between active and passive heatsinks for your M.2 SSD.

    Ultimately, both types of heatsinks can provide effective cooling for your storage device, but active heatsinks may be best suited for those who need the highest levels of performance.

    Final thoughts and recommendations

    So, do M.2 SSDs need heatsinks? The short answer is that it depends on the specific model of your M.2 SSD and how you are using it.

    Some M.2 SSDs generate more heat than others, especially when they are performing intensive tasks. In these cases, a heatsink can be very helpful in dissipating the heat and preventing your SSD from overheating, which could lead to potential data loss or hardware failure.

    However, not all M.2 SSDs need a heatsink, and some manufacturers already include built-in heatsinks to their models. Additionally, if you are using your M.

    2 SSD for less demanding tasks like browsing the web or checking emails, you may not need a heatsink at all. Regardless of whether your M.2 SSD needs a heatsink or not, it’s always a good idea to monitor the temperature and make sure that it stays within safe operating levels to keep your SSD running smoothly.

    Conclusion

    To heat sink or not to heat sink, that is the question. But in reality, the answer ultimately depends on the intended use and level of performance desired. The M.

    2 drive itself is capable of generating some heat, but whether it needs a heat sink to dissipate that heat effectively is a matter of personal preference. So, if you’re pushing your system to its limits or simply looking for a little extra insurance, a heat sink might be worth considering. But if you’re primarily using your M.

    2 drive for everyday tasks, it may not be necessary. Either way, it’s always better to have options and make informed choices. Just remember, keep your cool and keep on computing!”

    FAQs

    Do all M.2 SSDs require a heatsink?
    No, not all M.2 SSDs require a heatsink. However, some high-end models may benefit from a heatsink to prevent overheating during heavy usage.

    Can I use a heatsink from a different M.2 SSD brand on my current SSD?
    It is not recommended to use a heatsink from a different M.2 SSD brand as the size and shape may not match and could cause compatibility issues.

    How do I know if my M.2 SSD needs a heatsink?
    You can check the manufacturer’s website or product specifications to see if a heatsink is recommended. Additionally, if your M.2 SSD is experiencing high temperatures during heavy usage, a heatsink may be necessary.

    Does adding a heatsink to my M.2 SSD improve performance?
    Adding a heatsink to your M.2 SSD may improve sustained performance over longer periods of heavy usage by preventing throttling due to heat buildup. However, it will not directly increase the maximum speed or performance of the SSD.
  • Heatsink SSDs: Keeping Your Data Cool and Your System Fast

    Are you tired of your SSD’s performance being lackluster? Despite the benefits of SSDs over traditional hard drives, high temperatures can cause SSDs to throttle, resulting in reduced performance. Luckily, there is a simple solution that can help maximize your SSD’s performance: heatsinks. Heatsinks have long been used to cool down computer components such as CPUs and GPUs.

    However, people often overlook the importance of heatsinks for SSDs. Adding a heatsink can help dissipate heat more effectively, reducing the risk of thermal throttling and allowing your SSD to operate at its maximum potential. Think of a heatsink like a cooling pad for your laptop.

    By drawing heat away from your SSD, a heatsink can help prevent slowdowns and crashes caused by overheating. And just like how a cooling pad can help extend the lifespan of your laptop, a heatsink can also help prolong the lifespan of your SSD by keeping it operating at a cooler temperature. Overall, if you’re looking to maximize your SSD’s performance, investing in a quality heatsink is a no-brainer.

    Not only can it help improve your computer’s overall speed and stability, but it can also help protect your valuable data by keeping your SSD running smoothly for years to come.

    What are Heatsinks?

    Heatsink SSD, or solid-state drive, is a type of heat sink designed to dissipate heat generated by SSDs. The heatsink’s primary function is to prevent overheating, which can cause damage to the SSD. SSDs generate less heat than traditional hard drives, but they still produce a level of heat that can affect performance and lifespan.

    A heatsink SSD helps the drive maintain a consistent temperature, which in turn helps to avoid sudden temperature fluctuations. It’s essential to consider a heatsink SSD if you plan to use your SSD for high-performance tasks such as gaming or video editing. A heatsink SSD will help keep your SSD running smoothly and efficiently, and extend its lifespan.

    So, if you want to ensure your SSD stays cool, consider investing in a heatsink SSD.

    Understanding Heat Dissipation

    When it comes to understanding heat dissipation, heatsinks are an important component to consider. Heatsinks are essentially devices designed to absorb and dissipate excess heat generated by other components in a system. These devices are commonly used in electronic devices such as computers and mobile phones to prevent damage to sensitive components caused by overheating.

    Heatsinks work by utilizing thermal mass to absorb and transfer the heat away from the component and then use the surrounding air to dissipate it into the atmosphere. This process helps to maintain a stable temperature within the system and improve performance as a result. There are several types of heatsinks available in the market, and each type is designed to cater to specific requirements.

    Overall, these essential devices help to keep systems running smoothly and prevent damage due to excess heat.

    heatsink ssd

    How Heatsinks Improve Performance

    Heatsinks are essential parts of any electronic device that produces heat, such as computer chips, power transistors, and LED lights. They work by increasing the surface area of the device and absorbing heat radiation, thereby releasing it into the surrounding environment through conduction, convection, or radiation. By doing so, heatsinks help to prevent damage to the internal components, increase the longevity of the device, and improve its overall performance.

    If the device is not properly cooled, the excess heat may cause it to slow down, malfunction, or even shut down completely. Heatsinks come in various shapes and sizes, depending on the device’s requirements, and are typically made of materials like aluminum or copper because of their high thermal conductivity.

    Benefits of Using Heatsinks for SSDs

    If you’re planning to build a gaming PC or upgrading your computer with a new SSD, you might want to consider using a heatsink. The main purpose of a heatsink is to dissipate heat away from the component, and SSDs can generate heat that affects their performance and lifespan. The benefits of using a heatsink for your SSD include better cooling, lower temperatures, improved stability, and longer usage.

    Some high-end SSDs come with built-in heatsinks, but you can also buy aftermarket heatsinks that are easy to install. A good heatsink should have a solid build quality, efficient heat transfer, and compatibility with your SSD’s form factor. By using a heatsink, you can ensure that your SSD runs optimally and lasts longer, saving you money and improving your gaming experience.

    So, if you want to get the most out of your SSD, investing in a heatsink is a wise decision.

    Improved Read and Write Speeds

    If you’re looking to improve the read and write speeds of your SSD, then using heatsinks is a great option. Heatsinks are designed to dissipate the heat from your SSD, allowing it to operate at a lower temperature. This may seem simple, but it can actually have a big impact on the speed and performance of your SSD.

    When an SSD gets too hot, the controller inside the drive may throttle performance to prevent overheating. By using heatsinks, you can keep the temperature of your SSD under control, allowing it to operate at its full potential. Not only does this result in faster read and write speeds, but it also extends the lifespan of your drive.

    So if you’re looking to boost the performance of your SSD, a heatsink is definitely worth considering.

    Enhanced Longevity and Durability

    Heatsinks for SSDsoffer numerous benefits, including enhanced longevity and durability. These small metal fins help to dissipate heat generated by the NAND flash memory chips, CPU, and other components of the solid-state drive. By reducing the heat levels, the SSDs can operate optimally, avoiding unwanted crashes and malfunctions.

    Additionally, heatsinks can protect the delicate components from excessive heat, which can greatly reduce the longevity of the drive. With a heatsink, the SSDs can withstand high temperature environments and maintain their performance levels for longer periods. Overall, heatsinks for SSDs are an excellent investment, providing improved stability, reliability, and longevity for your system.

    Reduced Risk of Overheating

    Heatsinks are a must-have for anyone who wants to keep their SSDs cool and protected from overheating. By dissipating the excess heat generated by your SSD, heatsinks help improve its performance and prolong its lifespan. With a heatsink installed, you don’t have to worry about your SSD slowing down due to thermal throttling.

    Plus, you’ll enjoy the peace of mind knowing that your SSD is running at optimal temperatures. Although other cooling solutions are available, heatsinks are one of the most popular options for their ease of use and cost-effectiveness. So, whether you’re a gamer, content creator, or just a casual computer user, adding a heatsink to your SSD is a smart investment that can pay off in the long run.

    Types of Heatsinks for SSDs

    If you’re a gamer or a power user, you know the importance of keeping your SSD cool and functioning efficiently. One key component to achieving this is a heatsink. There are various types of heatsinks available for SSDs, including passive, active, and hybrid heatsinks.

    Passive heatsinks rely on passive cooling methods, such as heat dissipation through metal fins or ceramic plates. Active heatsinks, on the other hand, use a fan or water-cooling system to actively dissipate heat. Hybrid heatsinks combine the benefits of both passive and active cooling methods.

    When choosing a heatsink for your SSD, it’s important to consider factors such as cost, compatibility, and performance needs. Keep in mind that some heatsinks may not be compatible with your SSD or may require additional hardware for installation. Overall, a heatsink can help prolong the lifespan of your SSD and improve its performance.

    So, whether you’re a gamer or a professional, investing in a good heatsink is definitely worth considering to keep your SSD running at its best.

    Passive Heatsinks vs. Active Heatsinks

    When it comes to SSDs, there are two main types of heatsinks that can be used – passive and active heatsinks. Passive heatsinks are basically just pieces of metal that are designed to absorb and dissipate heat without any additional power or cooling mechanisms. These are typically less expensive and more compact than active heatsinks, but may require an additional fan for proper cooling in some cases.

    Active heatsinks, on the other hand, utilize supplementary cooling techniques such as fans or liquid-based cooling systems to actively regulate temperature and ensure optimal performance. Ultimately, the choice between these two types of heatsinks comes down to individual preferences, budget, and specific use cases. Whether you’re an avid gamer looking to keep your SSD cool during intense gaming sessions, or a casual user looking for a cheaper solution without sacrificing performance, there are numerous options available to suit your individual needs.

    Airflow Heatsinks vs. Thermal Conductivity Heatsinks

    Heatsinks for SSDs When it comes to selecting a heatsink for your SSD, there are two main types: airflow heatsinks and thermal conductivity heatsinks. Airflow heatsinks use a fan or other airflow-based cooling system to dissipate heat, while thermal conductivity heatsinks use a conductive material like copper or aluminum to transfer heat away from your SSD and into the surrounding air. Which one you choose will depend on your specific needs and preferences.

    Airflow heatsinks are often preferred by gamers and other high-performance users who need powerful cooling for their systems. These heatsinks are typically larger and may come with multiple fans, allowing them to create a powerful flow of air to keep your SSD and other components cool. While airflow heatsinks can be effective, they can also be quite loud and may use more power than their thermal conductivity counterparts.

    On the other hand, thermal conductivity heatsinks use materials that are highly efficient at transferring heat. These heatsinks are often smaller and more compact than airflow heatsinks, making them a good choice for those looking to save space in their computer case. Additionally, they tend to be quieter than airflow heatsinks and may use less power, making them a good choice for those who prioritize energy efficiency.

    Ultimately, the choice between an airflow heatsink and a thermal conductivity heatsink will depend on your specific needs and preferences. Whether you prioritize performance, space-saving, or energy efficiency, there is a heatsink out there that can meet your needs. Whichever you choose, just make sure to install it properly to ensure that your SSD stays cool and runs at optimal performance.

    Choosing the Right Heatsink for Your SSD

    Heatsink SSD If you are using an SSD (Solid-State Drive) for your computer, you should consider investing in a heatsink to keep it cool and prevent damage from overheating. Overheating can cause your system to crash, reduce performance, and decrease the lifespan of your SSD. Choosing the right heatsink for your SSD can be tricky, but it’s important to make the right choice.

    Consider the size and shape of your SSD, as well as the airflow in your computer case, when selecting a heatsink. A heatsink that is too large or too small for your SSD won’t be effective. Opt for a heatsink made from high-quality materials, such as aluminum, which is a good conductor of heat.

    Finally, look for a heatsink that is easy to install and won’t interfere with other components in your computer. With the right heatsink, you can ensure your SSD runs smoothly and lasts longer.

    Conclusion

    In conclusion, heatsink SSDs are the perfect marriage of form and function – not only do they provide top-of-the-line performance and blazing-fast data transfer speeds, but they also look pretty cool doing it. So when you’re looking to upgrade your system, opt for a heatsink SSD and watch your computer go from zero to hero in no time flat. Because after all, who said tech couldn’t be stylish?”

    FAQs

    What is a heatsink and how does it work with an SSD?
    A heatsink is a device that disperses heat from a component to the surrounding area, allowing it to cool down. When using an SSD, a heatsink helps to prevent the device from overheating, which can cause damage and reduce performance.

    Is it necessary to use a heatsink with an SSD?
    While it is not strictly necessary to use a heatsink with an SSD, it can be beneficial in keeping the device running smoothly and at optimal performance levels.

    How do I choose the right heatsink for my SSD?
    When choosing a heatsink for your SSD, look for one that is designed specifically for your device, as well as one that fits the size and form factor of your SSD.

    Can a heatsink improve the speed of my SSD?
    While a heatsink may not directly improve the speed of your SSD, it can help to prevent overheating and other issues that can cause the device to slow down and underperform.

  • Boost Your Speed: A Step-by-Step Guide on How to Set Up Your Boot on SSD

    Have you ever experienced that annoyingly slow startup time when you turn on your computer? It’s frustrating, right? Well, what if I told you that there’s an easy solution to this problem: setting up your boot to SSD! By doing this, you’ll significantly speed up your computer’s startup time and overall performance. Think of it like upgrading from a bicycle to a car; it’s an absolute game-changer. In this blog, we’ll dive into everything you need to know about setting up boot to SSD, including what it is, why you should do it, and how to do it.

    So, grab your favorite beverage, sit back, and let’s get started on this journey of transforming your computer’s performance.

    Check Compatibility

    Setting up your boot to SSD can significantly boost your computer’s speed and overall performance. However, before doing so, it’s important to check if your computer is compatible with an SSD. One way to do this is by checking if your motherboard has a SATA III port, which is required for the most recent SSDs.

    You can also check if your computer’s BIOS supports booting from an SSD. Another crucial factor to consider is the operating system you are running. The most recent operating systems, such as Windows 10, come with built-in support for SSDs, while older versions may require additional drivers.

    Ensuring compatibility before making the switch will save you time and potential headaches in the long run. Once you have checked for compatibility, you can follow the manufacturer’s instructions to install the SSD and set it up as your boot drive, which will significantly improve your computer’s performance.

    Is Your System Compatible with SSD?

    If you’re thinking of upgrading your hard drive to an SSD, the first thing you need to do is to check if your system is compatible with it. SSDs are different from traditional hard drives, and not all computers can accommodate them. One important factor to consider is the type of interface your computer uses for storage.

    Most new computers use SATA III interface, which means they are compatible with modern SSDs. However, if your computer is a bit older, it may use SATA II or even IDE interface, which means you may need to upgrade your motherboard or processor to use an SSD. Another thing to check is the size of your drive bay, as SSDs come in different sizes, and you want to make sure you get one that fits.

    Overall, it’s important to check your system’s compatibility before buying an SSD, to avoid wasting money on a product that won’t work with your computer.

    how do i set up my boot to ssd

    Clone Your System to SSD

    Are you looking to upgrade your computer’s performance by cloning your system onto an SSD? Setting up your computer to boot from an SSD involves a few simple steps. First, install your SSD and connect it to your computer. You can then use a cloning software tool to copy your HDD files and operating system to your new SSD.

    Once your cloning is complete, restart your computer and access your BIOS settings. In the boot order menu, select your new SSD as the first boot device. Save your changes and exit the BIOS.

    Congratulations! Your computer should now boot up from your newly installed SSD, resulting in a significant boost in speed and performance. Remember to keep your old HDD as a backup or for additional storage. With these easy steps, you can easily set up your computer to start using the high-speed benefits of an SSD.

    Install OS Migration Software

    When it comes to upgrading your computer’s storage system, cloning your existing system to an SSD is a great way to transfer everything over quickly and easily. But before you can start the cloning process, you’ll need to install OS migration software on your computer. This software will create a copy of your existing operating system, applications, and files and transfer them to your SSD, creating an exact replica of your old system on the new drive.

    Some popular OS migration software options include EaseUS Todo Backup, Acronis True Image, and Macrium Reflect. Using one of these programs is a straightforward process that can save you a lot of time and hassle compared to manually transferring all your files over to the new drive. With the right software and a bit of patience, you’ll have a speedy, reliable system with plenty of storage space!

    Connect SSD to the System

    Connecting an SSD to your system is a relatively easy process that can lead to a significant boost in your computer’s performance. However, before you can start enjoying lightning-fast transfer speeds and reduced loading times, you need to clone your system to the SSD. This means creating an exact copy of your current operating system, including all files, settings, and applications, and transferring it to the new drive.

    There are several software options available that can help you with this process, such as Clonezilla or EaseUS Todo Backup. Once you have your cloning tool of choice, follow the step-by-step instructions to transfer your system to the SSD. When the process is complete, you can connect the SSD to your system and set it as the primary drive.

    With your new SSD in place, you can enjoy a more responsive and faster computer experience, with faster boot times and lightning-fast application loading. So, what are you waiting for? Upgrade your system with an SSD today and experience the difference it can make!

    Clone Data to SSD

    Are you looking to upgrade your computer’s performance? One of the best ways to do that is by cloning your system to an SSD (solid-state drive). This process involves copying all the data from your current hard drive to the new SSD. Not only does an SSD help speed up your computer, but it also has fewer moving parts, making it more durable than a traditional hard drive.

    To clone your system, you’ll need to use software such as Clonezilla, Acronis True Image, or EaseUS Todo Backup. These programs will help make sure all your data is properly transferred to the new drive. Make sure to back up your data first and have a proper plan before starting the cloning process.

    Once it’s complete, you’ll have a faster, more efficient computer. So, don’t let a slow computer hold you back; clone your data to an SSD and enjoy a snappier computing experience!

    Changing Boot Order

    So, you’ve installed your new SSD and you’re ready to set it as the primary boot drive for faster boot times and improved performance. To do this, you need to change the boot order in your computer’s BIOS settings. When you turn on your computer, press the key (usually F2, F10, or Delete) to enter the BIOS.

    Look for the Boot menu or tab and find the option to change the boot order. You’ll want to move your SSD to the top of the list, so it’s the first device the computer looks for when booting up. Save your changes and exit the BIOS.

    Restart your computer and it should now boot from the SSD. It’s as simple as that! Now you can enjoy faster boot speeds and improved system performance with your new SSD as the primary boot drive.

    Enter BIOS Settings

    Entering BIOS settings can be a confusing and overwhelming experience, especially for those who are not technologically savvy. However, changing the boot order in BIOS can be very beneficial, allowing you to boot your computer from external devices like USB drives or CD-ROMs. To do this, you need to access the BIOS settings by pressing a specific key during startup — typically F2 or Delete.

    Once you’re in the BIOS settings, you need to navigate to the Boot menu and look for the Boot Priority option. Here, you can change the order in which your computer searches for bootable devices, making sure that the device you want to boot is at the top of the list. Don’t forget to save your changes before exiting BIOS! Overall, changing the boot order in BIOS can be a straightforward process once you know where to find the Boot Priority option.

    It can be a valuable tool for troubleshooting your computer, as well as for running utilities or installing new operating systems from external devices. So, next time you need to boot your computer from a USB drive or CD-ROM, don’t hesitate to enter the BIOS settings and change the boot order. It could save you a lot of time and effort in the long run!

    Set Boot Priority to SSD

    Changing the boot order on your computer is a crucial step in ensuring that your system starts up as quickly and efficiently as possible. One important aspect of this process is setting the boot priority to your SSD. An SSD, or solid-state drive, can significantly improve the overall performance of your computer by speeding up boot times and reducing load times for programs and files.

    To set the boot priority to your SSD, you’ll need to access your computer’s BIOS settings. This can typically be done by pressing a key, such as F2 or Del, during startup. Once in the BIOS, you’ll need to navigate to the Boot menu and then select your SSD as the first boot option.

    This will ensure that your computer boots from your SSD first, rather than your slower traditional hard drive. By doing so, you’ll notice a significant improvement in the speed and responsiveness of your computer. So if you’re looking to get the most out of your SSD, be sure to set the boot priority accordingly in your computer’s BIOS.

    Verify Boot to SSD

    If you’ve recently installed an SSD in your computer, setting it up as your boot drive can greatly improve performance. To verify that your system is booting to the SSD, you’ll need to go into your computer’s BIOS settings and make sure the boot order is correctly configured. First, restart your computer and immediately press the key to enter your BIOS settings (this may vary depending on your computer, but it’s usually F2, Delete, or one of the Function keys).

    Once you’re in the BIOS, find the Boot Order section and make sure your SSD is listed as the first option. If it’s not, use the arrow keys to move it to the top of the list. Save your changes and exit the BIOS, and your computer should now automatically boot from the SSD.

    Checking your boot drive is an important step to make sure you’re getting the most out of your new SSD, and it’s a quick and easy process to do so.

    Reboot Your System

    If you want to give your system a fresh start and improve its overall performance, verifying boot to SSD is a crucial step. After all, an SSD is faster and more reliable than an HDD, and it can significantly reduce boot and load times. To check if your system is booting from an SSD, you can access the BIOS or UEFI firmware settings and look for the boot order or boot menu.

    Make sure that the SSD is listed as the first boot option, and save the changes before exiting the settings. You can also use system information tools or disk management utilities to confirm that the SSD is recognized and functioning correctly. By ensuring that your system boots from an SSD, you can enjoy faster and smoother operations, especially when it comes to running resource-intensive applications or multitasking.

    Check if Your System Boots to SSD

    When you upgrade your computer to an SSD, you want to make sure your system is actually booting from the SSD and not your old hard drive. So, how do you check? First, you can look for indications during startup that your system is using the SSD. If your computer boots up quickly and applications run smoothly, that’s a good sign.

    You can also look in your computer’s settings to see which drive is listed as the boot drive. Another option is to physically disconnect the old hard drive and attempt to boot up your computer. If it boots up successfully, you can be confident that your system is booting from the SSD.

    Remember to make sure your data is backed up before attempting any of these steps, and if you’re not comfortable working with computer hardware, it’s best to seek help from a professional.

    Conclusion

    In conclusion, setting up your boot to SSD is like shifting into high gear on the highway of computer performance. It’s a simple process that can make a world of difference in the speed and responsiveness of your system. So dust off that screwdriver, roll up those sleeves, and get ready to unleash the full power of your computer!”

    FAQs

    What is SSD?
    SSD stands for Solid State Drive and it is a type of storage device used in computers.

    Why should I use an SSD as my boot drive?
    Using an SSD as your boot drive can significantly improve the speed and performance of your computer.

    How do I check if my computer supports SSD?
    You can check your computer’s specifications or consult with your manufacturer to see if your computer supports SSD.

    How do I physically install my SSD?
    The installation process varies depending on your computer, but generally involves opening the computer case, connecting the SSD to a power supply and SATA port, and mounting it securely.

    How do I set up my computer to boot from my SSD?
    You can change the boot order in your BIOS settings to prioritize booting from your SSD. Consult with your manufacturer’s instructions or a professional if you are unsure how to do this.

  • Upgrade Your PC in Minutes: A Comprehensive Guide on How to Add an SSD to Your Computer

    Are you tired of slow boot-up times and sluggish performance on your computer? Adding an SSD (Solid-State Drive) can give your PC the boost it needs to run smoothly and efficiently. But if you’re new to the world of hardware upgrades, you might be wondering where to start. Don’t worry, we’ve got you covered! In this step-by-step guide, we’ll show you how to add an SSD to your PC, from choosing the right drive to installing it correctly.

    Think of it like upgrading your car’s engine to a high-performance one – once you’ve made the switch, you’ll wonder how you ever lived without it. So, let’s get started!

    Check compatibility

    If you’re looking to add an SSD to your PC, the first step is to check compatibility. You’ll need to ensure that your computer has an available SATA port and that it can support the size and type of SSD you’re looking to install. Most modern computers should have no problem with this, but it’s always best to double-check before making any purchases.

    Additionally, you’ll need to take into account the power requirements of your SSD. Some models may require more power than your current setup can provide, so be sure to do your research before upgrading. Overall, adding an SSD can be a great way to improve your computer’s performance and speed up load times, but it’s important to make sure everything is compatible before making any changes.

    Ensure motherboard and SSD are compatible

    When building a computer, it’s important to make sure that all the components are compatible with each other, including the motherboard and SSD. The motherboard is the foundation of your entire system, connecting all the different parts and allowing them to work together. If you choose a motherboard that isn’t compatible with your SSD, you may run into issues with speed, performance, or even functionality.

    To avoid this, it’s important to do some research before making a purchase to ensure that your components are compatible. You can typically find compatibility information on the manufacturer’s website or by consulting with a computer building expert. By taking the time to check compatibility, you can help ensure that your computer runs smoothly and efficiently, providing you with the best possible experience.

    how do i add a ssd to my pc

    Check if you have an open SATA port

    If you plan on upgrading or adding a new hard drive to your computer, it’s important to check if your system is compatible with the new hardware. One thing to consider is whether you have an open SATA port available to connect your new drive. SATA (Serial ATA) is the most common interface used to connect storage devices in modern computers.

    Before purchasing a new hard drive, take a look inside your computer and check if there are any open SATA ports on the motherboard. If all the ports are taken up, you may want to consider replacing an old drive instead of adding a new one. It’s important to make sure the hardware you plan on adding is compatible with your system to avoid damaging any hardware or losing data.

    Take the time to do your research and make sure your upgrades are the right fit for your computer.

    Back up your data

    If you’re looking for a way to boost your PC’s performance, adding an SSD is a great option. The process might seem daunting at first, but it’s actually pretty straightforward. First, make sure you have an available slot in your motherboard and purchase an appropriate SSD for your system.

    Then, shut down your PC, unplug everything, and open up the case. Find the slot where you’ll be installing the SSD and attach it securely. Once you’ve done that, you’ll need to configure your BIOS to recognize the new drive.

    Finally, you’ll need to transfer your operating system and files to the new SSD. There are different methods to do this, but most involve cloning your existing drive onto the SSD using software like Macrium Reflect or EaseUS Todo Backup. With your new SSD installed and properly configured, you’ll enjoy faster boot times, quicker application load times, and overall improved system performance!

    Save your important files to a separate drive or cloud storage

    Backing up your data is crucial in today’s digitally-focused world. It’s essential to save your important files to a separate drive or cloud storage to prevent loss in case of any unforeseen circumstances. With cybercrime and hardware failure becoming more frequent, it is crucial to have a backup plan in place.

    In the event of a cyber attack, data loss, or accidental deletion, having a backup can save you time, money, and heartache. A separate drive or cloud storage ensures that your data is secure and easily accessible from any device. It’s like having a spare tire in your car.

    You may not need it every day, but you’ll be glad you have it when you experience a flat. In conclusion, backing up your data is non-negotiable. Take the time to save your important files to a separate drive or cloud storage and minimize the risk of losing critical data.

    Install the SSD physically

    If you’re looking to speed up your computer, adding a solid-state drive (SSD) can make a huge difference to your system’s performance. But how do you add an SSD to your PC? First, you need to physically install the SSD. The process is relatively simple if you have a desktop computer, as you’ll need to find an available drive bay to place the SSD in.

    You’ll then need to connect the power and data cables from the SSD to the motherboard and power supply. If you have a laptop, the process may be a bit trickier, as you’ll need to open up the laptop and locate the hard drive bay. Once you’ve found the bay, you’ll need to remove the current hard drive and replace it with the SSD.

    If you’re not comfortable with opening up your laptop, it may be best to enlist the help of a professional. Regardless of whether you have a desktop or laptop, installing an SSD can greatly improve your computer’s performance, making it a worthwhile upgrade.

    Turn off the PC and unplug all cables

    Before installing an SSD into your PC, it’s important to turn it off and unplug all of the cables. This will ensure that there is no power running through the system, and you won’t risk damaging any of the components. Once that’s done, you can begin the physical installation process.

    First, locate the area where your current hard drive is installed. It’s usually situated near the bottom-front of your PC. Carefully remove the screws holding the mounting bracket in place, and gently pull the hard drive out of the bay.

    Next, insert the SSD into the same bay, ensuring that it’s aligned correctly and snugly in place. Finally, secure the mounting bracket back onto the SSD, using the same screws you removed earlier. Congratulations, you’ve just installed an SSD! The speeding up of your PC and the faster load times will now be a lot more enjoyable.

    Remove the case cover and locate the drive bays

    To physically install your SSD, you’ll need to remove the case cover and locate the drive bays. This is typically a pretty straightforward process, but it’s important to be gentle and careful so you don’t damage any of the delicate components inside your computer. Once you have the drive bays in sight, you’ll want to carefully slide your SSD into place.

    Make sure it’s securely fastened into the slot before you put the case cover back on and power your computer back on. By physically installing your SSD, you’ll be well on your way to improving your computer’s overall performance and speed. Remember to be patient and take your time to ensure that everything is installed properly.

    With a little bit of effort, you can upgrade your computer and enjoy its improved performance in no time.

    Mount the SSD in an open drive bay

    If you’re looking to upgrade your computer’s storage to an SSD, the physical installation is relatively straightforward. First, you’ll need to mount the SSD in an open drive bay. This is typically done by removing a blank panel from the case and screwing in the SSD bracket.

    Make sure to consult your case manual to ensure you’re mounting the SSD in the proper location. Once you have the SSD secured in place, you’ll need to connect it to your motherboard. This is done by plugging in a SATA cable and power cable from your power supply.

    It’s important to ensure that the SSD is properly connected so that you can enjoy the benefits of faster boot and load times. Overall, the physical installation of an SSD is a quick and easy process that can greatly improve your computer’s functionality and performance.

    Connect the cables

    So you’ve decided to add an SSD to your PC to speed things up and improve performance. Excellent choice! Adding an SSD is relatively easy, and once you’ve done it, you’ll wonder why you didn’t do it sooner. First, power down your computer and unplug it from the wall.

    Open your PC case and locate an empty drive bay, then connect the SATA and power cables to the SSD. Make sure you connect the cables securely, so your SSD doesn’t come loose. Next, you’ll want to mount the SSD in the drive bay.

    This is usually done by screwing it in place with a couple of screws. Once you’ve secured your SSD in place, connect the other end of your SATA cable to the motherboard and your power supply. Close up your case, power your PC back on, and voila! You now have a super speedy SSD installed in your PC.

    Enjoy the faster boot-up times and snappier performance for years to come. All in all, adding an SSD is an easy way to breathe new life into your trusty old PC, and it’s definitely worth the investment.

    Connect the SATA cable to the motherboard and SSD

    When building your own PC, it’s important to connect the SATA cable to both the motherboard and SSD to ensure that your system can interface with the storage device correctly. The SATA cable is most commonly used for connecting storage devices like hard drives and SSDs, so it’s important to connect it properly to get the full benefits of your storage device’s speed. First, locate the SATA port on your motherboard, which will be located near the other ports on the board.

    Then, attach one end of your SATA cable to this port, ensuring that it is inserted correctly and securely. Next, locate the SATA port on your SSD and repeat the same process of attaching the other end of the cable. The connection will fit snugly and stay securely in place.

    Remember to tighten all the screws to make sure the connection is stable. Following these straightforward instructions is all you need to do to connect your SATA cable to your motherboard and SSD.

    Plug in the power cable to the SSD

    When it comes to installing an SSD into your computer, connecting the cables can be a crucial step in making sure it works effectively. One of the most important connections to make is the power cable, which provides the necessary energy to your SSD. You’ll need to locate the power supply in your computer, then plug in the power cable to connect to the designated slot on the SSD.

    This will usually involve a series of pins or sockets where you’ll need to line up the cable with the appropriate connector. Once you’ve secured the connection, you should be able to boot up your computer and begin using your SSD. Keep in mind that it’s important to handle your cables with care to avoid any damage or disconnection, and always be sure to follow any additional instructions or safety guidelines provided by the manufacturer.

    By properly connecting your power cable to your SSD, you can enjoy faster performance, better storage capacity, and an overall smoother computing experience.

    Configure the SSD

    Adding an SSD to your PC can significantly improve its performance, especially in terms of boot time and application loading speed. Before installing the SSD, you need to configure it properly. First, ensure that your motherboard has an available SATA port to connect the SSD to.

    Then, connect a SATA cable from the SSD to the motherboard and ensure it is secure. Next, access your computer’s BIOS to enable the SSD. In the BIOS settings, locate the “Boot Order” settings and prioritize the SSD as the primary boot device.

    Once you’ve saved the changes, restart your computer, and it should now boot from the SSD. To further optimize the SSD’s performance, you can also ensure that it has the latest firmware and update your operating system’s storage drivers. With these steps, you can enjoy the full benefits of your new SSD and improve your PC’s performance.

    So, how do I add an SSD to my PC? Follow these simple steps and enjoy a faster and smoother computing experience!

    Access the BIOS and ensure SSD is recognized

    When it comes to upgrading your computer’s storage, one of the first steps is configuring the new SSD. But before you do that, you need to ensure that the computer’s BIOS recognizes the SSD. You can access the BIOS by pressing a specific key during start-up, depending on your computer’s brand and model.

    Once you’re in, navigate to the storage settings and check to see if the SSD is recognized. If it is, you’re ready to configure it. If not, double-check the connection between the SSD and the motherboard, and make sure the power and data cables are securely connected.

    If it still isn’t recognized, you may need to update the BIOS or check for compatibility issues. Once you’ve confirmed that the SSD is recognized, you can configure it to your liking, such as setting it up as the boot drive or partitioning it for specific purposes. Overall, configuring the SSD can be a straightforward process as long as you ensure that it’s properly connected and recognized by the computer.

    Format and partition the SSD

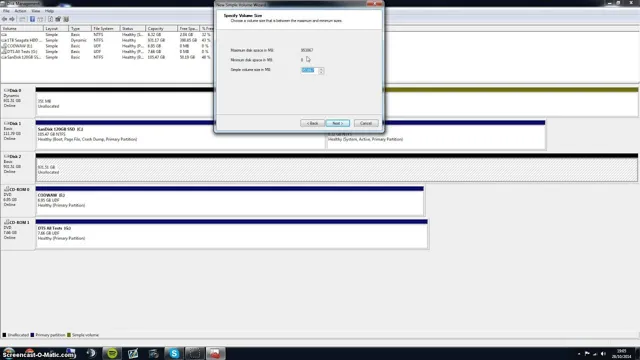
    When configuring your new solid-state drive (SSD), one of the first steps you need to undertake is formatting and partitioning it. This process involves setting up a file system on the SSD so that your computer’s operating system can interact with it, as well as creating one or more partitions for organization purposes. To do this, you will want to use a tool like Disk Management on Windows or Disk Utility on macOS, both of which are built into their respective operating systems.

    Once you open the disk management tool, you can right-click on the SSD and select “Format” to choose the file system you want to use and configure any additional settings. From there, you can create one or more partitions by right-clicking on the unallocated space and selecting “New Simple Volume” (Windows) or “Partition” (macOS). By having properly formatted and partitioned drives, you can ensure that your computer is able to use your SSD efficiently and effectively.

    Transfer files to the SSD

    So you’re ready to add an SSD to your PC and boost its speed and efficiency. Great! Now it’s time to transfer your files to the new drive. The process is fairly straightforward, but it’s important to have a plan and take precautions to avoid losing any data.

    First, decide which files you’d like to transfer. You may want to move all your files to the SSD, or just certain ones that you frequently use. Next, make sure you have a backup of your files, either on an external hard drive or in the cloud.

    This is crucial in case something goes wrong during the transfer process. Then, you can use built-in Windows tools like File Explorer or external software like EaseUS Todo PCTrans to move your files to the SSD. Depending on the size of your files and the speed of your connections, the transfer process may take a while.

    Once complete, don’t forget to double-check that all your files have transferred successfully and are intact. Congratulations! You’ve successfully added an SSD to your PC and transferred your important files.

    Transfer important files from backup to the new SSD

    If you’ve recently upgraded to a new SSD, it’s essential to transfer all your important files from your backup to your new storage device. Doing so will ensure that you can access all your essential data and files without any issues. There are several methods you can use to transfer your files to your new SSD, including cloning your hard drive or manually copying and pasting your files.

    However, the easiest and most straightforward option is to use a data migration software such as EaseUS Todo Backup or Acronis True Image. These tools allow you to transfer your files quickly and efficiently, ensuring that you don’t lose any data in the process. Overall, transferring your files to your new SSD is a crucial step in upgrading your computer, and it’s essential to take all necessary measures to ensure a smooth process.

    Enjoy the speed boost!

    If you’re looking to give your PC a significant speed boost, adding an SSD is a great option. But, how do you do that? Well, the process may vary depending on your PC’s configuration, but there are a few basic steps that you can follow. First, you need to choose the right SSD that fits your specific needs and budget.

    Then, you need to locate the SATA ports on your motherboard and connect the SSD to one of them. After that, you need to ensure that your SSD is recognized in the BIOS and configure it as your primary boot device. Once everything is set up, you can install your operating system and other programs on the SSD to enjoy lightning-fast boot and load times.

    Adding an SSD to your PC is a relatively straightforward process that can make a significant difference in performance. So, don’t hesitate to give it a try!

    Conclusion

    Adding an SSD to your PC is like giving your old clunker a nitro boost. It’s a quick and effective way to improve your computer’s performance and take your experience to the next level. Whether you’re a gamer looking for lightning-fast loading times or a professional needing to multitask with ease, adding an SSD is a smart investment that will pay dividends.

    So what are you waiting for? Upgrade your rig and embrace the power of SSDs today!”

    FAQs

    What are the benefits of adding an SSD to my PC?
    Adding an SSD to your PC can significantly improve its performance by reducing boot times and improving file transfer speeds. It also offers greater durability and reliability than traditional hard drives.

    What kind of SSD should I get for my PC?
    The type of SSD you need will depend on several factors, including the interface your PC supports (e.g., SATA, M.2), the form factor of your SSD slot, and your budget. It’s a good idea to do some research and read reviews before making a purchase.

    Can I install an SSD in addition to my existing hard drive?
    Yes, you can install an SSD in addition to your existing hard drive. This will give you the best of both worlds – fast boot and load times from the SSD, and plenty of storage space (and potentially cheaper storage) from the hard drive.

    Do I need to reinstall my operating system when I add an SSD to my PC?
    It’s not strictly necessary to reinstall your operating system when adding an SSD, but it’s recommended. A fresh install of Windows or macOS on your new SSD will ensure that you get the full benefits of its speed and performance, and avoid any potential compatibility issues.

  • Maximize Your PC’s Performance with the Ultimate M.2 Cooler: The Solution to Overheating and Slowdowns!

    Are you looking to improve the performance of your computer’s storage system? One component that can make a significant difference is the M.2 cooler. M.

    2 SSDs are becoming increasingly popular due to their compact size and high-speed performance, but they can also generate a lot of heat. This heat can cause throttling and reduce the overall lifespan of your SSD. That’s where an M.

    2 cooler comes in, helping to dissipate heat and improve overall performance. But with so many options available, choosing the right M.2 cooler can be overwhelming.

    That’s why we’ve put together the ultimate guide to M.2 coolers. In this guide, we’ll cover everything you need to know about M.

    2 coolers, from how they work to the different types available. We’ll also provide you with tips on how to choose the best M.2 cooler for your needs and give you some of the top M.

    2 coolers on the market. Whether you’re a gamer looking to optimize your system’s performance or a professional who needs the fastest speeds possible, an M.2 cooler can be a game-changer.

    What is an M.2 cooler?

    An M.2 cooler is a small cooling device specifically designed to be used with M.2 SSDs.

    These coolers help to keep the temperature of M.2 SSDs in check and prevent throttling and performance degradation. M.

    2 SSDs are known to generate a lot of heat, especially during heavy usage. Without proper cooling, these temperatures may rise to levels that can damage the drive or affect its performance. M.

    2 coolers come in different shapes and sizes, and they usually attach directly to the SSD or the motherboard. The most common types of M.2 coolers are passive and active coolers.

    Passive coolers use a heatsink to dissipate heat generated by the SSD, while active coolers use fans or water cooling to keep temperatures low. If you have an M.2 SSD that tends to get hot, you may want to consider investing in an M.

    2 cooler to ensure its longevity and performance.

    Explanation of M.2 SSDs and their heating issues

    M.2 SSDs have become increasingly popular in recent years due to their compact size and fast performance. However, one issue that many users have encountered is the overheating of these SSDs, which can cause performance throttling and even permanent damage.

    This is where an M.2 cooler comes in. An M.

    2 cooler is a small heatsink that is designed to fit onto an M.2 SSD and dissipate heat away from it. It works by absorbing the heat generated by the SSD and transferring it to a larger surface area, such as a computer case or another heat sink.

    This helps to keep the temperature of the SSD within safe limits, ensuring that it can operate at peak performance without any issues. So, if you’re experiencing heating problems with your M.2 SSD, consider investing in an M.

    2 cooler to keep it running smoothly and efficiently.

    m.2 cooler

    Importance of maintaining proper temperature

    Maintaining the proper temperature of your computer components is crucial in keeping them working efficiently and prolonging their lifespan. One piece of hardware that can benefit from an efficient cooling system is an M.2 SSD, which can easily overheat when running at high speeds.

    This is where an M.2 cooler comes in – it is a small but effective component that can help regulate the temperature of your M.2 SSD and prevent it from overheating.

    Think of an M.2 cooler as a mini air conditioning unit for your computer’s hard drive. It works by dissipating the heat generated by the M.

    2 SSD, which can reach high temperatures due to the high speeds at which it operates. By keeping the temperature of your M.2 SSD in check, an M.

    2 cooler can help prevent damage to the drive, increase its read and write speeds, and ensure it operates at maximum efficiency. In addition, an M.2 cooler is easy to install and does not take up much space inside your computer.

    It also operates silently, so you won’t even notice it’s there. Overall, if you want to ensure the longevity and optimal performance of your M.2 SSD, an M.

    Types of M.2 coolers

    M.2 coolers may come in different types depending on their designs and functions. One type is the passive M.

    2 cooler which does not require any power to function. It is designed to absorb and dissipate heat using heat sinks and thermal pads. Another type is the active M.

    2 cooler which has a built-in fan to blow air onto the M.2 SSD, effectively reducing its temperature. This type is ideal for high-performance systems that require consistent and reliable storage speeds.

    Furthermore, there are also hybrid M.2 coolers that combine both passive and active cooling methods. They provide a more comprehensive cooling solution, but they may take up more space and require additional power to function.

    Ultimately, the type of M.2 cooler that is suitable for a system depends on various factors such as the type of M.2 SSD, the level of system performance desired, and the available space in the system.

    Active vs passive cooling systems

    M.2 coolers M.2 SSDs are known for their fast data transfer rates but they also emit heat.

    To ensure optimal performance, it’s important to keep them cool. There are two types of cooling systems for M.2 SSDs- active and passive.

    Passive cooling systems use heatsinks to dissipate the heat generated by the SSD. These heatsinks are made from different materials such as aluminum and copper which absorb the heat and transfer it away from the SSD. On the other hand, active cooling systems use fans to cool down the M.

    2 SSD. These fans blow cool air across the heatsinks, providing faster heat dissipation. There are also hybrid cooling systems that use both heatsinks and fans.

    When choosing a cooler, consider the space available in your system, your budget and how much noise you are willing to tolerate. M.2 coolers come in different shapes and sizes, so it’s important to choose one that is compatible with your motherboard and M.

    2 SSD. With the right cooler, you can increase the lifespan of your M.2 SSD and prevent crashes caused by overheating.

    Comparison of popular M.2 cooler brands

    When it comes to cooling your M.2 SSD, there are a variety of options available on the market today. One common type of M.

    2 cooler is the heatsink, which attaches directly onto your SSD to dissipate heat away from the component. Heatsinks come in a range of materials, such as aluminum or copper, and can even feature built-in fans for added cooling. Another type of M.

    2 cooler is the thermal pad. These are adhesive pads that you can attach directly onto your SSD, providing a low-profile and simple cooling solution. While both heatsinks and thermal pads can be effective at cooling your M.

    2 SSD, the best option for you will depend on the specific details of your PC setup and preferences. Ultimately, whether you choose a heatsink or a thermal pad, investing in an M.2 cooler can help extend the lifespan and performance of your SSD by regulating temperatures and preventing thermal throttling.

    Features to consider when choosing an M.2 cooler

    When it comes to choosing an M.2 cooler, the type of cooler you choose is an important consideration. There are several types of M.

    2 coolers available on the market, each with its own unique set of features and benefits. One popular type of M.2 cooler is the passive heatsink.

    This type of cooler is designed to passively dissipate heat from the M.2 SSD without any fans or moving parts, making it an excellent choice for users who want a silent system. Another type of M.

    2 cooler is the active heatsink. This type of cooler uses a fan to actively cool the M.2 SSD, which can be more effective in keeping temperatures down.

    Finally, there are also M.2 coolers that come with both passive and active cooling options, providing users with the best of both worlds. When choosing an M.

    2 cooler, it’s important to consider what type of cooling would be best suited for your needs.

    Installation and maintenance tips

    When it comes to installing and maintaining an M.2 cooler, there are a few things to keep in mind. First and foremost, make sure that the cooler you choose is compatible with your motherboard and the type of M.

    2 drive you have installed. You don’t want to end up with a cooler that doesn’t fit or doesn’t provide enough cooling for your specific setup. Additionally, it’s important to properly install the cooler, making sure that it is securely attached to the M.

    2 drive and that any included thermal pads or paste are used correctly. This will help to ensure that the cooler is able to effectively dissipate heat and keep your drive running at optimal temperatures. Finally, regular maintenance is key to ensuring that your M.

    2 cooler continues to function properly over time. This can include cleaning any dust or debris from the cooler and fan, as well as periodically checking the thermal paste to make sure it is still providing adequate cooling. By taking these steps, you can help to prolong the life of your M.

    2 drive and ensure that it operates smoothly and reliably for years to come.

    Step-by-step guide to installing an M.2 cooler

    When it comes to installing an M.2 cooler, it’s essential to follow specific steps and maintenance tips to keep your computer running smoothly. First, you need to make sure that your M.

    2 drive is compatible with the cooler you’re planning to install. Secondly, you need to identify a suitable location where you can fix the cooler effectively. It’s essential to choose an area with good ventilation to prevent heat buildup.

    Before starting the installation process, make sure that your computer is unplugged, and all components are static-free. When attaching the M.2 cooler, ensure that it’s secured tightly to the motherboard, and the thermal paste is evenly distributed to maximize performance.

    Don’t forget to follow the manufacturer’s guidelines when it comes to maintenance, as this will ensure that your cooler lasts longer and functions efficiently. In summary, installing an M.2 cooler is a simple process as long as you follow the appropriate steps and maintenance guidelines.

    How to clean and maintain an M.2 cooler

    Cleaning and maintaining an M.2 cooler is essential to ensure your computer runs efficiently and reliably. To begin, make sure you have the proper tools for installation, including a screwdriver and thermal paste.

    When cleaning the M.2 cooler, it’s essential to remove any dust and debris buildup carefully. You can use a can of compressed air, a soft-bristled brush, or microfiber cloth to clean it.

    Be sure not to use any liquids as it may damage the cooler. Once the cooler is clean, you can apply a small amount of thermal paste to help distribute heat evenly. When installing the cooler, make sure it’s firmly secured and properly aligned to avoid any vibrations or noise.

    Finally, it’s essential to perform regular maintenance and check the cooler periodically to ensure it’s working correctly. By following these simple maintenance tips, you can extend the lifespan of your M.2 cooler and keep your computer running at optimal performance.

    Conclusion and Final Thoughts

    Cooling your M.2 drive is like giving it an icy cold drink on a hot summer day. It keeps it refreshed and prevents it from overheating.

    So, if you want to ensure a long life for your M.2 drive, an M.2 cooler is a wise investment.

    Keep your drive cool, calm, and collected with a reliable cooler, and you’ll have a speedy and efficient system that’s ready to handle whatever tasks you throw at it.”

    FAQs

    What is an M.2 cooler?
    M.2 cooler is a cooling solution designed specifically to cool M.2 SSDs.

    Why would I need an M.2 cooler?
    You might need an M.2 cooler if you notice your M.2 SSD is running hot, causing reduced performance and a shorter lifespan.

    How do I install an M.2 cooler?
    Installing an M.2 cooler is usually a simple process that involves attaching the cooler to the M.2 SSD with screws or an adhesive.

    Are all M.2 coolers compatible with my computer?
    Not all M.2 coolers are compatible with every computer. Some M.2 coolers require specific motherboard types or form factors, so it’s important to check compatibility before purchasing.

  • Upgrade your System: Easy Steps to Transfer OS from HDD to SSD

    If you’re looking to upgrade your computer’s performance, transferring your operating system from your hard disk drive (HDD) to a solid state drive (SSD) is one of the best things you can do. Not only does it boost your computer’s speed, but it also has a tremendous impact on your system’s overall performance. However, many people are hesitant to make the switch because they are unsure of the process.

    Fear not, as we have got you covered. In this step-by-step guide, we will take you through everything you need to know about transferring your operating system from HDD to SSD. By the end of this article, you’ll be ready to make the switch and enjoy a lightning-fast computer.

    Assessing Your HDD and SSD

    If you’re considering transferring your operating system from an HDD to an SSD, you’re probably well aware of the benefits that come with doing so. But before you dive into the process, it’s important to assess both your HDD and SSD to ensure that the transfer is worth your investment of time and money. Firstly, take a moment to check the available space on your existing HDD.

    If you’ve only used a small portion, it might not be worth the hassle of transferring your OS to an SSD. Additionally, if your HDD is in relatively good health with no significant errors or bad sectors, you may not see a significant performance boost from switching to an SSD. Conversely, if your HDD is showing signs of wear and tear and slow boot times, upgrading to an SSD can work wonders.

    When it comes to selecting an SSD, opt for one that offers sufficient storage space and an appropriate price point that matches your budget. By taking these factors into consideration, you’ll be able to make an informed decision that results in a faster, more efficient and a smoother running system that better meets your needs.

    Determine the Capacity of Both Drives

    Assessing the capacity of your HDD and SSD is essential before making any upgrades. HDDs are known for their high capacity storage, while SSDs have relatively less storage space but offer faster speeds. To determine the capacity of your drives, check the physical size and available space on each drive.

    You can also check the specifications to see the amount of storage each drive offers. Remember that the capacity varies depending on the manufacturer and the model of the drive. It’s important to assess your storage needs and choose the drive that best suits you.

    If you’re someone who needs a lot of storage for multimedia files, then HDDs might be the best option for you. However, if you’re someone who requires fast application and boot-up times, then SSDs might be a better fit. Make sure you take a closer look at your requirements before making a final decision on which type of drive to choose.

    how do i transfer os from hdd to ssd

    Ensure that Your SSD is Compatible with Your PC

    When it comes to upgrading your computer’s storage, the most important thing to consider is compatibility with your PC. Assessing your current hard disk drive (HDD) and solid-state drive (SSD) is essential in ensuring a smooth transition to a new storage device. You need to take note of your current drive’s specifications, such as its interface type, form factor, and capacity.

    It’s also crucial to check your motherboard’s compatibility with the new SSD you plan to purchase. Make sure that you have the necessary connections, firmware, and drivers to support the SSD. Remember that not all SSDs are created equal, and choosing the wrong one could result in sluggish system performance or even incompatibility issues.

    By carefully assessing your HDD and SSD and ensuring their compatibility with your PC, you can be confident that you’re making the right investment in your computer’s storage system.

    Backing Up Your Important Data

    If you’re looking to transfer your operating system from an HDD to an SSD, the first step is to create a backup of all your important data. This includes your documents, music, videos, and any other files that you don’t want to lose in the migration process. To do this, you can use a variety of different backup tools, such as Windows Backup and Restore, or third-party software like Acronis True Image or EaseUS Todo Backup.

    Once you’ve backed up your data, you’ll need to clone your HDD onto your new SSD. This can be done using software like Clonezilla or Macrium Reflect. After the clone is complete, you’ll need to set your SSD as the primary boot drive in your computer’s BIOS settings.

    With your new SSD up and running, you’ll enjoy much faster boot times and application load times, making for an all-around smoother computing experience. Don’t forget to securely wipe your old HDD before disposing of it!

    Create a System Image of Your HDD

    Backing up your important data is an essential task that should not be ignored. One effective way to ensure that all your data is secure and protected is by creating a system image of your HDD. A system image is an exact copy of your hard drive, including all the files, settings, and programs installed on it.

    In case your hard drive crashes or gets infected by a virus, having a system image can make it easier to restore your PC to its previous state. Creating a system image is relatively easy, and you can use the built-in Windows tool or a third-party software to do it. One important thing to note is that you need to save the system image in a separate location, preferably an external hard drive or cloud storage, to ensure that your backup is not affected in case of a hardware failure.

    Overall, creating a system image is an excellent way to protect your important data and ensure that you can quickly recover from any unexpected data loss.

    Transfer Your Data to an External Drive

    Backing up your important data is crucial to ensure that you don’t lose it in case of a system crash or other unexpected events. One of the best ways to accomplish this task is by transferring your data to an external drive. This process involves copying your important files, documents, and folders onto a hard drive or other storage device that can be carried around with you.

    By doing so, you can keep your data safe and secure, knowing that you have a backup copy available in case you need it. Additionally, transferring your data to an external drive is easy and straightforward. You can connect the storage device to your computer via USB, and then drag and drop your files onto it.

    With this simple process, you can create multiple backup copies of your data, giving you added peace of mind. So, take the time to back up your important data today, before it’s too late!

    Disconnect Your External Drive and HDD

    Backing up your important data is vital to ensure that you don’t lose your valuable information in case of a hardware failure, virus attack or other catastrophic events. One of the easiest and most efficient ways to perform this task is by using an external hard drive or an HDD. However, once you have finished copying your files to your external medium, you need to make sure that you safely disconnect your device before unplugging it.

    Doing so will prevent any damage to your files or data corruption that can occur if you don’t complete the proper process. So, always make sure that you eject the device from your computer before physically removing it to avoid any potential issues. Remember, a small safety step can go a long way in preserving your important data!

    Transferring the OS from HDD to SSD

    If you’re looking to speed up your computer’s performance, then transferring your OS from an HDD to an SSD is a great place to start. The process of transferring the OS isn’t as complicated as it may seem. You can do it using various software available online free of cost.

    Firstly, you need to choose an SSD with enough storage to hold your entire system. Then, connect the SSD to your computer using a cable or a dock. Next, download a cloning software and start the software.

    Select your HDD as the source disk and your SSD as the target disk. Follow the cloning software’s prompts to begin the transfer process. Once everything is done, shut down your computer and disconnect the HDD.

    Now, boot up your device, and you’ll notice a significant increase in speed and performance. With this quick and easy process, you can experience an improved system without having to purchase a whole new computer.

    Connect the SSD to Your PC

    When it comes to upgrading your PC’s performance, transferring the OS from HDD to SSD can make a significant difference. To start the process, you’ll want to first connect the SSD to your PC. This can typically be done by opening up your computer and attaching the SSD to an available SATA connector or through an external USB connection.

    Once connected, you’ll want to use software such as EaseUS Todo Backup or Acronis True Image to clone your existing OS onto the SSD. This process ensures that your new SSD will have the same files, programs, and settings as your old HDD, ultimately allowing for a seamless transition and improved performance. Keep in mind that transferring your OS from HDD to SSD is not always a straightforward process, so it’s important to do your research and follow step-by-step instructions carefully.

    With patience and attention to detail, you can upgrade your PC’s performance and enjoy faster load times and improved system functionality.

    Migrate the OS to the SSD Using a Cloning Tool

    Transferring the OS from HDD to SSD can be a game-changer for your computer’s performance. One effective way to do this is by using a cloning tool to migrate the OS data to the SSD. Before starting the process, you should ensure that the SSD is properly connected to your computer.

    Once that is done, you can select the cloning tool of your choice and follow the steps provided. The tool will then create a copy of the OS data, including the system files, drivers, and settings onto the SSD. This process can take some time, depending on the size of the data being transferred, so it’s important to have patience.

    Once completed, you can safely boot your computer using the new SSD and enjoy the faster load times and improved overall performance. Overall, transferring your OS to an SSD can be a game-changer for your computer’s speed, making it a worthy investment.

    Confirm That Your New SSD is Bootable

    Transferring the operating system (OS) from your old hard disk drive (HDD) to your new solid-state drive (SSD) may seem like a daunting task, but it’s a great way to improve your computer’s overall performance. However, before you start the process, it’s important to confirm that your new SSD is bootable. This means that your computer is capable of reading the Windows operating system from your new SSD, allowing it to start up and run smoothly.

    To check this, you can enter your computer’s BIOS settings and ensure that the new SSD shows up as a bootable device. If you’re unsure how to do this, check the manufacturer’s website for instructions. By transferring your OS to your new SSD, you’ll enjoy faster boot times, quicker application loading, and overall improved performance.

    Final Steps

    If you’re planning to transfer your operating system from an HDD to an SSD, there are a few steps you need to follow. First things first, you need to make sure that the SSD has enough space to accommodate all the data currently stored on your HDD. Once you’ve ensured this, you can start cloning your drive.

    There are many cloning software available online, but we recommend using a reliable one. Simply download and install the software, then create a bootable USB drive. Shut down your computer and replace your HDD with the SSD.

    Boot up your computer using the bootable USB drive, and follow the prompts to clone your drive. Once this process is complete, shut down your computer and remove the bootable USB drive. Restart your computer, and you should now be running your operating system from your SSD.

    Remember to go into your BIOS settings to ensure that your computer boots from your new SSD instead of your old HDD. With these final steps, you’re now ready to enjoy faster boot times and improved performance with your newly transferred operating system!

    Change the Boot Sequence in Your BIOS

    The final steps of changing the boot sequence in your BIOS involve saving your changes and exiting the BIOS menu. Once you have adjusted your boot order by moving your preferred device to the top of the list, navigate to the option to “Save and Exit” or “Exit Saving Changes.” This will prompt your computer to restart, and it will begin booting from the device you designated as the primary boot option.

    It’s important to note that not all BIOS menus will have the same options or layout, so if you are unsure of how to navigate or adjust settings, consult the documentation for your specific computer or motherboard. By taking the time to change your boot sequence, you can ensure that your computer boots from the device you want every time you power on your machine, saving you time and frustration in the long run.

    Connect Your External Drive Again

    Now that you have successfully recovered your lost data, it’s time to wrap things up by reconnecting your external drive. Make sure to do this step with care to avoid any potential data loss or damage to your device. Connect the drive back to your computer, and wait for it to properly mount before accessing any data on it.

    Double-check that all your files and folders are intact and in the correct locations. This is also a great opportunity to back up your recovered data to another location, such as your computer’s internal hard drive or a cloud storage service. Once you are confident with your data’s integrity, safely eject your external drive and pat yourself on the back for a job well done! Congratulations, you are now a data recovery expert.

    Format Your HDD for Additional Storage

    Once you have prepared your new hard drive and connected it to your computer, it’s time to format it for additional storage. This process involves creating a new partition on the drive and formatting it according to your preferences. To begin, access the Disk Management tool on your computer, which can usually be found in the Control Panel.

    From there, you can select your new hard drive and create a partition using the unallocated space. Once the partition has been created, you can format it in a file system of your choice, such as NTFS or FAT3 This format will enable your computer to read and write data to the drive, giving you plenty of extra storage space for all your needs.

    Remember to name the partition and assign a drive letter for easy access. With these final steps completed, you can enjoy the benefits of having additional storage space for media, documents, and whatever else you need to store.

    Enjoy Your Speedy New SSD!

    Congratulations on your new SSD! You’re about to experience lightning-fast speed like never before. But before you get too excited, there are a few final steps to take care of before you can fully enjoy your new hardware. First, make sure to transfer all your important files from your old hard drive to your new SSD.

    This is a crucial step as it ensures you don’t lose any important data. Secondly, don’t forget to uninstall any unnecessary programs and software from your old hard drive to free up space and allow your new SSD to perform at optimal levels. Finally, ensure that your operating system is installed on your new SSD to fully utilize its potential.

    With these final steps taken care of, you’re all set to enjoy the speed and efficiency of your new SSD.

    Conclusion

    In conclusion, transferring your operating system from an HDD to an SSD is like upgrading your car from a beat-up old sedan to a sleek sports car. It may seem daunting at first, but with the right tools and know-how, it’s a straightforward process that can greatly improve your computer’s performance. Plus, your computer will thank you for the upgrade with faster boot times, quicker application launches, and smoother overall operation.

    It’s a win-win situation, just like upgrading your ride to something a bit more exciting.”

    FAQs

    What are the benefits of transferring the OS from HDD to SSD?
    The benefits include faster boot and load times, improved overall system performance, and reduced power consumption.

    Is it possible to transfer the OS from HDD to SSD without losing data?
    Yes, it is possible to transfer the OS without losing data through cloning or imaging the HDD onto the SSD.

    What software is required to transfer the OS from HDD to SSD?
    There are many software options available, such as Macrium Reflect, Acronis True Image, and EaseUS Todo Backup, to name a few.

    Can I transfer the OS from a larger HDD to a smaller SSD?
    Yes, it is possible to transfer the OS from a larger HDD to a smaller SSD, but you need to make sure that the amount of data on your HDD will fit on the SSD before starting the transfer process.

  • Game On: Learn How to Effortlessly Move Games from SSD to HDD

    Game On: Learn How to Effortlessly Move Games from SSD to HDD

    Are you an avid gamer? Do you find yourself running out of space on your SSD while trying to download all the latest and greatest games? Fear not, as this blog will guide you on how to move games from your SSD to your HDD, providing you with more space on your primary drive without losing access to all your beloved games. Moving games from an SSD to an HDD may seem daunting, but it is a simple process that can significantly benefit your computer’s overall performance. SSDs are known for their lightning-fast read and write speeds, but they tend to have smaller storage capacities than their HDD counterparts.

    Moving games to your HDD is a surefire way of freeing up space while ensuring that your games run smoothly without any lag or hiccups. Moreover, moving your games from your SSD also allows you to prioritize your most used applications and data on one drive while storing other files, games, and programs on another. This process can save you time and hassle, especially when it’s time for a computer upgrade.

    So, are you ready to get started on moving games from your SSD to your HDD? Stay tuned for our next blog post, where we will provide a comprehensive guide on how to transfer games from one drive to another using various methods. With just a few clicks, you’ll be well on your way to gaining more storage space and better computer performance.

    Step 1: Locate the Game Files

    If you’re running out of space on your SSD, you may want to move some of your games over to your HDD. The first step in this process is locating the game files. This can typically be done through your game launcher.

    For example, if you use Steam, you can right-click the game in your library and select “Properties”. From there, go to the “Local Files” tab and click “Browse Local Files”. This will take you to the folder where the game is installed.

    Once you’ve located the game files, you can begin the process of moving them to your HDD.

    Open ‘File Explorer’ and navigate to the SSD

    When it comes to locating your game files on your SSD, the first step you need to take is to navigate to the directory where they are saved. To do this, you need to open the File Explorer by clicking on the Windows logo on the taskbar or pressing the Windows key + E on your keyboard. Once the File Explorer opens, look for your SSD under the “This PC” section on the left-hand side of the window.

    Click on it to expand the folder and see the contents inside. If you have installed your game on the SSD, you should be able to see its files and folders listed under the appropriate directory. From here, you can easily locate the game files you need and make any necessary changes or modifications to them.

    By following this simple yet essential process, you can quickly access your game files on your SSD and start gaming without any hassle.

    how to move games from ssd to hdd

    Find the folder with the game you want to move

    To move a game to a different location on your computer, you need to first find the game files. This may seem like a daunting task, but with a little bit of exploration, you should be able to locate the necessary folder. Start by opening your file explorer and searching for the game’s name.

    If you have recently played the game, it may appear in your recently used files or in your gaming library. Once you have found the game folder, you can easily move the files to a new location on your computer. This process can be helpful if you need to clear up storage space on a particular drive or if you want to consolidate your gaming library to one location.

    By taking the time to locate the game files, you can continue to enjoy your favorite games without worrying about storage space or disorganization.

    Step 2: Copy the Game Files

    Now that you have identified which games take up too much space on your SSD, it’s time to move them over to your HDD. To start, you’ll need to copy the game files from your SSD to the desired location on your HDD. You can do this manually by locating the game folder in your SSD’s file explorer and dragging it to the designated folder in your HDD.

    Alternatively, you can use the game distribution platform’s built-in backup and restore feature to move the game files effortlessly. Once the copying process is finished, you’ll need to ensure that the game is properly installed on your HDD and running smoothly. It’s essential to note that some games may require additional configurations, such as updating drivers or adjusting settings, to work correctly on your HDD.

    With your game files safely transferred to your HDD, you’ll have more room on your SSD for essential files and faster load times for the games you have installed there.

    Select the game folder and right-click to copy

    Now that you know where your game folder is located, it’s time to make a copy of it. Right-click on the game folder and select “copy” from the drop-down menu. This will create a duplicate of your game files that you can save to another location, such as an external hard drive or cloud storage.

    Copying your game files is important because it serves as a backup in case something happens to your original files, such as a hard drive failure or accidental deletion. Plus, having a copy of your game files makes it easier if you want to transfer the game to another device or share it with a friend. So be sure to complete this step before moving on to the next one.

    Navigate to the HDD and create a new folder

    After downloading the game files, the next step is to copy them to your HDD. Start by navigating to the HDD and creating a new folder. This will serve as the destination folder for the game files.

    You can name the folder anything you like, but make sure it’s easy to remember and locate. Once you’ve created the new folder, go back to the downloaded game files and select them all. Then, use the copy function to copy the files to the new folder you just created on your HDD.

    This step is critical as it ensures that the game files are stored in a safe and secure location. It also helps to keep your computer organized and free from clutter. When games are installed on your computer’s C drive, it can slow down your system and take up valuable space.

    By storing game files on your HDD, you free up space on your C drive, making your computer run smoother. When copying files, it’s essential to ensure that you have enough space on your HDD. Games can be large, and if you don’t have enough space, the copying process may fail.

    Therefore, it’s best to check the available space on your HDD before starting the copying process. If you need more space, consider deleting existing files or transferring them to an external drive. In summary, copying game files to your HDD is a straightforward process.

    Create a new folder, select the downloaded files, and copy them to the new folder on your HDD. By doing so, you save space on your C drive, keep your computer organized, and ensure that the game files are stored in a safe and secure location.

    Right-click in the new folder and select ‘Paste’

    To move a game file, the first step is to create a new folder. This is where you’ll be storing the game files before moving them to their final destination. To create a new folder, right-click on your desktop, select “New” and then select “Folder”.

    Give the folder a name that you’ll remember, and then open it up to start copying your game files. To copy a file, simply locate the file on your computer, right-click on it and select “Copy”. Once you’ve done that, go back to the new folder that you created and right-click in the folder.

    Next, select “Paste” to copy the game file into the new folder. This step may seem simple, but it’s essential if you want to move your game files successfully. By creating a new folder, you’re ensuring that all of the files you need are in one place, making it easier to move them to their next destination.

    Step 3: Delete the Original Game Files

    Now that you have successfully copied your games from your SSD to your HDD, it’s time to delete the original game files from your SSD. You can simply right-click on the game folder and select “Delete,” or you can use a third-party application to uninstall the game and all its associated files. This step will free up space on your SSD, allowing it to perform better and extend its longevity.

    Keep in mind that you should only delete the game files from your SSD if you are sure that they are working properly on your HDD. You don’t want to accidentally delete important files or corrupt your game data. By following these steps, you can easily move your games from your SSD to your HDD and free up valuable space on your SSD for other applications and files.

    Go back to the SSD and delete the original game folder

    After successfully transferring your game files to the new SSD, it’s time to part ways with the old game folder. Deleting the original game files is an important step in ensuring you have enough storage space and avoiding any confusion with duplicate files. However, before hitting the delete button, make sure that you have backed up any important files you may have missed during the transfer process.

    When you’re sure that everything is safely transferred, go ahead and delete the original game folder to free up some space on your old storage device. It might be tempting to keep the old files as a backup, but if you’re sure that the transfer was successful, then it’s best to delete them to avoid confusion and to save valuable storage space on your old hard drive. Remember, a cluttered hard drive can slow down your computer’s performance, so it’s essential to maintain a tidy storage system.

    Conclusion

    Moving games from SSD to HDD is like relocating a house – you want to make sure everything important comes with you, while the rest gets left behind. With a few simple steps, you can effectively and efficiently transfer your games to an HDD, ensuring they are safe, organized, and accessible in all the right ways. Your SSD may have been your trusty nest egg, but sometimes you need to spread your wings and make room for more.

    So go ahead and say goodbye to your old gaming home, as your HDD is ready to welcome your games with open arms.”

    FAQs

    What is the benefit of moving game files from SSD to HDD?
    Moving game files from SSD to HDD can save space on your SSD and make room for other important files. It can also improve the longevity of your SSD by reducing the frequency of read and write operations on it.

    How do I move game files from SSD to HDD?
    To move game files from SSD to HDD, go to the game’s installation folder and cut the entire folder. Then, paste it into the desired location in your HDD. After that, you may need to create a new shortcut for the game on your desktop.

    Will moving game files from SSD to HDD affect the game’s performance?
    Moving game files from SSD to HDD may slightly affect the game’s loading times and overall performance. However, this largely depends on the speed and specifications of your HDD.

    Can I move game files from SSD to HDD and still play the game normally?
    Yes, moving game files from SSD to HDD should not affect your ability to play the game normally. However, it may take slightly longer for the game to load and launch.

  • Unlocking Optimal Performance: The Ultimate Guide to Determining the Perfect SSD Partition Size

    Have you ever wondered how to size SSD partitions? When it comes to setting up a new computer or upgrading your existing one, deciding on the size of each partition is an important step to ensure optimal performance. SSDs are faster and more reliable than traditional hard drives, offering faster read and write speeds. This means that partitioning your SSD correctly can help to maximize its performance.

    In this article, we will provide you with all the information you need to know about sizing SSD partitions, covering everything from the benefits of SSDs to partitioning software and tips for optimizing your partition setup. Whether you are a beginner or an experienced user, this guide will help you make the right choices when it comes to partitioning your SSD.

    Assess Your Storage Needs

    When it comes to deciding how big to make your SSD partition, it’s important to assess your storage needs. Consider how much data you currently have and how much you expect to accumulate in the future. Are you a heavy user of multimedia files such as photos, videos, and music? Do you primarily use your computer for work-related documents? These factors will impact how much storage you need.

    Additionally, it’s important to leave some space for updates and software installations. If you’re unsure how much space you need, it’s better to err on the side of caution and allocate more space than you think you’ll need. Remember, it’s always possible to allocate more space later on, but reducing the size of a partition can be more challenging.

    Ultimately, finding the right balance between too much and too little space will depend on your individual needs and usage patterns.

    Evaluate Current Data Size

    When it comes to assessing your storage needs, the first step is to evaluate your current data size. This involves taking inventory of all the digital assets your organization possesses and analyzing the amount of space they occupy. By doing this, you can determine the amount of storage space you require to manage your data effectively.

    Keep in mind that data storage needs can grow quickly due to the complexity and unpredictability of modern data. Therefore, it’s essential to factor in perplexity and burstiness while estimating your storage requirements. Perplexity refers to the degree of unpredictability in data, while burstiness refers to the irregularity of data growth over time.

    By considering both these factors, you can develop a more accurate understanding of your storage needs and plan accordingly. Remember, it’s better to have excess storage than to run out of space when you need it the most. So, plan wisely and choose a scalable storage solution that can adapt to changes in your data needs over time.

    how big to make ssd partition

    Consider Future Growth

    When considering future growth, it’s crucial to assess your storage needs. Your business may be small today, but as it expands, you’ll need to accommodate more files and data. It’s important to figure out the type of storage that works best for you.

    For example, you may choose cloud-based storage if you have employees who work remotely or off-site. Or you may need a physical server if you deal with sensitive data. You should also consider the scalability of your storage solution.

    Will it be easy to upgrade if you need more space in the future? One aspect to keep in mind is that data can grow exponentially. Make sure that your storage solution can handle an increase in data volume. Investing in a storage system that can attractively meet your business’s growing needs is a smart decision in the long term and can help to avoid efficiency and accessibility issues.

    Determine Type of Files to Store

    Assessing your storage needs is the first step in determining the types of files you should store. It’s important to consider factors like the size and frequency of the files you will be storing, as well as the purpose of the files. For example, if you’re storing large media files like videos or high-resolution images, you’ll need a lot of space and possibly higher performance storage.

    On the other hand, if you’re storing smaller files like documents or spreadsheets, you may be able to get away with lower performance storage. It’s also important to consider the frequency with which you’ll be accessing these files – if you need to access them frequently, you’ll want them stored in a location that’s easily and quickly accessible. By taking the time to assess your specific needs, you can choose the right types of files to store and ensure that your storage solution is efficient and effective.

    Calculate Available Space

    When it comes to deciding how big to make an SSD partition, the first step is to calculate the available space. This can be done by opening the Disk Management tool on Windows or the Disk Utility tool on macOS. Once you are there, you can see the amount of available space on your drive and decide how much space you want to allocate for your SSD partition.

    It’s important to note that you should never allocate the entire drive to your SSD partition, as this can lead to performance issues. Instead, you should leave a portion of the drive unallocated for overprovisioning, which helps to maintain consistent performance over the life of the drive. The amount of overprovisioning needed varies depending on the specific SSD and its manufacturer, so it’s recommended to check the manufacturer’s guidelines for the recommended amount.

    Once you have determined the appropriate amount for overprovisioning, you can then allocate the remaining space to your SSD partition. In addition to considering the amount of available space and overprovisioning, it’s also important to think about your specific needs and usage habits. If you plan on using your SSD primarily for storing large media files, such as videos or photos, you may want to allocate more space to the partition.

    On the other hand, if you primarily use your computer for everyday tasks such as web browsing and document editing, a smaller partition may be sufficient. By taking the time to calculate the available space and consider your specific needs, you can ensure that your SSD partition is appropriately sized for optimal performance and usability.

    Check SSD Capacity

    If you’re planning to buy a new SSD for your computer, one of the first things you need to check is the capacity of the drive. The capacity of an SSD refers to the amount of storage space that it has available for data. However, you need to keep in mind that the actual capacity of the SSD may differ from its advertised capacity.

    This is because some of the space is reserved for system purposes and for overprovisioning, which is used to improve the drive’s performance and lifespan. To calculate the actual available space on the drive, you can use disk management tools or third-party software that can tell you how much space is taken up by the operating system and other files. Remember to take into account the size of files you’ll be storing on the SSD and consider getting a drive that has more capacity than you currently need to ensure that you don’t run out of space in the future.

    With careful consideration and planning, you can pick an SSD that has the right capacity for your needs and will give you fast and reliable storage for years to come.

    Account for Operating System and Programs

    When calculating the available space on your computer’s hard drive, it’s important to account for both the operating system and programs installed on it. These factors can take up substantial amounts of space, limiting the amount of storage available for your personal files and documents. To determine the available space, you’ll need to first check the total size of your hard drive.

    Next, you can check the size of your operating system by navigating to your computer’s settings and looking at the storage section. Finally, you can check the size of each individual program by going to the control panel and selecting “programs and features.” By adding up the total size of your operating system and all installed programs, you can subtract this amount from the total size of your hard drive to determine how much space is available for your files.

    Remember to regularly clear out any unnecessary programs or files to keep your hard drive functioning smoothly and maximize available space.

    Allocate Space for Files and Folders

    Allocating space for files and folders is crucial when it comes to managing your computer system efficiently. To do this, you first need to calculate the available space on your device. This is important because if your storage is almost full, it can cause your system to slow down, malfunction, and even crash.

    To avoid this, go to your settings and check your storage capacity, which can be found under the “Storage” tab. Here, you can see the amount of space available, as well as what is already being used by your files and applications. Once you know how much space you have to work with, you can begin to allocate it accordingly by organizing your files and folders.

    This can be done by creating individual folders for specific file types or organizing them chronologically. By doing this, you can free up space and make it easier to access and manage your files. Remember, keeping track of your available space is essential, and regularly deleting any unwanted files is also a good habit to ensure your system stays functioning correctly.

    Optimize Performance

    When it comes to optimizing the performance of a SSD, deciding how big to make the SSD partition is an important consideration. While it may be tempting to allocate as much space as possible to the SSD, it’s important to remember that overloading the SSD can actually lead to decreased performance. A good rule of thumb is to allocate about 75% of the SSD’s capacity to the system partition, while the remaining portion can be used for data storage.

    Additionally, it’s important to ensure that the SSD is properly aligned to maximize its performance. This involves making sure that the partition begins at the correct location on the drive, and that the partition’s cluster size is compatible with the SSD’s page size. By taking these steps, you can ensure that your SSD performs optimally and remains reliable over time.

    Leave Room for Overprovisioning

    When optimizing your system’s performance, it’s essential to consider overprovisioning. Overprovisioning is the act of allocating more resources than initially required to ensure availability during unexpected peaks in demand. Leaving room for overprovisioning is crucial because it enables your servers to handle sudden spikes in traffic without causing downtime or sluggishness.

    This technique is especially important for mission-critical applications that require seamless operation at all times. By proactively overprovisioning, you can avoid costly downtime, lost revenue, and reputation damage. To achieve optimal performance, balance between allocating the right amount of resources and leaving room for overprovisioning.

    By doing so, you can ensure that your system can handle both expected and unexpected demands with ease.

    Avoid Small Partitions

    When it comes to optimizing database performance, it’s important to avoid small partitions. Small partitions can lead to performance issues, as each individual partition requires indexing and processing overhead. This can lead to slow queries and decreased overall performance.

    Instead, consider consolidating small partitions into larger ones to reduce overhead and improve performance. By doing so, you can achieve better query performance and improve the efficiency of your database. Remember, small partitions can lead to big headaches, so take the time to optimize and consolidate for better performance.

    Final Thoughts

    When it comes to maximizing the performance of your SSD, one important factor to consider is the size of the partition. You want to find the sweet spot between not allocating enough space and having to constantly manage your storage, and allocating too much space and wasting valuable resources. The key is to think about how you plan to use your computer and what kind of data you’ll be storing.

    If you’re primarily using the computer for heavy-duty tasks like video editing or gaming, then it’s a good idea to allocate a larger partition for the operating system and applications. On the other hand, if you’re primarily using your computer for basic web browsing and email, then a smaller partition will suffice. Ultimately, there’s no one-size-fits-all answer to the question of how big to make your SSD partition.

    It all depends on your individual needs and usage patterns. The key is to strike a balance between enough space to store your important files and not allocating too much space that could otherwise be used for other important things on your computer.

    Conclusion

    In the end, the size of your SSD partition depends entirely on your own needs and preferences. Do you need a lot of space for gaming or video editing? Are you trying to conserve space for a sleeker, more streamlined setup? Remember, no matter how big or small your SSD partition may be, what truly matters is how you use it.”

    FAQs

    What factors should be considered when determining the size of an SSD partition?
    When determining the size of an SSD partition, factors such as the operating system requirements, installed applications, and anticipated data storage needs should be considered.

    How much space should be reserved for the operating system on an SSD partition?
    Generally, it is recommended to reserve at least 20-25% of the total SSD capacity for the operating system to ensure optimal performance and stability.

    Can the size of an SSD partition be changed after installation?
    Yes, the size of an SSD partition can be changed after installation using partition management software or built-in tools in the operating system.

    Is it better to have one large SSD partition or multiple smaller ones?
    It depends on individual needs and preferences. Having multiple smaller SSD partitions can provide more organization and flexibility, while having one large partition may be more convenient for larger files and programs.

  • Boost Your Alienware Aurora’s Performance: Step-by-Step Guide to Installing an Additional SSD Hard Drive

    Are you seeking to enhance your Alienware Aurora’s storage capacity? If you’re engaging in high-definition gaming or operating resource-intensive applications, you’ll need extra space to store your files. Fortunately, Alienware Aurora allows you to add an additional hard drive to your system to maximize your storage capacity. However, installing a new hard drive on your own can be intimidating if you’re unfamiliar with the procedures.

    But don’t worry, we’ve got you covered! In this article, we’ll walk you through the steps of installing an additional hard drive in your Alienware Aurora. By the end of this guide, you’ll be able to take advantage of more storage space, improved system performance, and an increased gaming experience. So, let’s get started!

    Check System Compatibility

    If you’re looking to add an additional hard drive or SSD to your Alienware Aurora, one of the first things you need to do is check the system compatibility. Not all hard drives and SSDs will be compatible with your machine, so it’s important to do your research before making a purchase. One of the best ways to do this is to check the manual or online documentation for your system to see what types of hard drives and SSDs are compatible.

    You can also reach out to the manufacturer or a trusted computer repair technician for additional guidance. Once you have confirmed compatibility, you’ll need to physically install the drive into your system, which may require opening up the case and connecting cables. But with a bit of research and patience, you can successfully upgrade your Alienware Aurora with an additional hard drive or SSD, boosting its storage and performance capabilities.

    Confirm Available Drive Bays and Power Supply

    When building or upgrading your computer, you need to make sure that your components are compatible with each other. Specifically, you want to confirm that there are available drive bays and sufficient power supply for your system. Before purchasing any components or starting the build process, it’s crucial to check your motherboard, case, and power supply unit (PSU) specifications.

    Look for the type and number of drive bays available, as well as the maximum power output supported by your PSU. This will help ensure that you can install all the necessary components and that your system will run safely and efficiently without any power bottlenecking or overheating issues. By doing this, you can save yourself time, money, and stress from having to replace incompatible parts or dealing with system failures caused by insufficient power supply.

    With careful planning and confirmation of system compatibility, you can build a high-performing and reliable computer that meets all your needs.

    alienware aurora how to install additional harddrive ssd

    Choose and Purchase Compatible Drive

    When it comes to upgrading your system with a new hard drive, it’s important to make sure that the drive you choose is compatible with your system. A simple method to do this is to check the specifications of both your PC and the hard drive to ensure they match. Some essential components to examine include the interface type, storage capacity, rotational speed, and form factor.

    Typically, the majority of modern hard drives promote compatibility with multiple operating systems, including Windows, MacOS, and Linux. When it comes to purchasing a compatible hard drive, it’s crucial to ensure that it meets your storage and performance needs, at an affordable cost. With a bit of research and comparison of various drive models, you can choose the best drive that matches your system requirements, providing you with reliable and efficient performance for years to come.

    Preparing for Installation

    Installing an additional hard drive or SSD on your Alienware Aurora can be a great way to boost your computer’s performance and storage capacity. However, before you begin the installation process, it’s important to take a few steps to prepare your computer. First, make sure you have all the necessary components, including any mounting brackets or cables, and check your computer’s documentation to determine the best location for your new drive.

    You’ll also want to back up any important data, just in case something goes wrong during the installation process. Finally, be sure to power off your computer and unplug all cables before you begin working inside the case. By taking these simple steps, you’ll be well on your way to adding an extra hard drive or SSD to your Alienware Aurora.

    Shut Down and Unplug Computer

    When it’s time to install new hardware or software on your computer, proper preparation is key. One important step to this preparation is shutting down and unplugging your computer. This might seem like a no-brainer, but it’s important to remember that doing so ensures the safety of both you and your computer.

    Before starting any installation process, make sure to save any open documents or programs and shut down your computer completely, not just putting it to sleep or in hibernation mode. Then, unplug the power cord from the wall outlet as well as any peripherals such as a monitor, keyboard, or mouse. This will protect your computer from any power surges or unexpected outages that could harm your device or corrupt your system files.

    Keep in mind that leaving your computer plugged in during an installation process could lead to unpredictable results such as software corruption or data loss. Taking the time to shut down and unplug your computer ensures a more successful and smooth installation process.

    Open Computer Case and Ground Yourself

    Before installing any new components into your computer, it’s important to take the necessary precautions to protect your equipment. One of the first things you should do is to open up the case and ground yourself. This is important because it helps prevent any electrostatic charges from damaging your computer’s components.

    To ground yourself, simply touch a metal object, like the case of your computer, to discharge any built-up static electricity in your body. It’s also a good idea to work on a clean, static-free work surface, and to wear an anti-static wrist strap. By following these simple steps, you’ll be able to protect your computer from any accidental damage during the installation process, and ensure that your new components work properly.

    Install Mounting Bracket in Available Drive Bay

    To begin preparing for installation of a mounting bracket in an available drive bay, the first step is to select a suitable location for the bracket. This can involve identifying an empty drive bay that is the correct size for the bracket, or clearing space in an existing drive bay. Once the location has been chosen, it is time to proceed with installing the bracket.

    This process typically involves securing the bracket to the sides of the drive bay using screws or other fasteners. It is important to ensure that the bracket is firmly attached and level, as any looseness or instability could result in damage to the installed hardware or file system. By following these steps and carefully preparing the drive bay for the installation, you can create a stable and secure environment for your hardware and data storage needs.

    Installing the Drive

    If you’re looking to upgrade your Alienware Aurora’s storage space, installing an additional hard drive or SSD is a great option. The process is relatively straightforward, and shouldn’t take too long even for beginners. First, make sure you have the necessary tools, such as a screwdriver, and the additional drive you want to install.

    Start by shutting down your computer, and unplug all cables and cords. Open the computer case, and locate an empty drive bay. Carefully slide the new drive into the bay, and use screws to secure it in place.

    Next, connect the necessary cables to the drive, such as the SATA data and power cables. Finally, reattach the computer case, and plug in all cables. Boot up your computer, and your new hard drive or SSD should be recognized instantly! With your added storage, you can easily store more games, movies, and files without worrying about running out of space.

    Attach Drive to Mounting Bracket

    When it comes to installing a new drive, one of the first steps is to attach it to a mounting bracket. This is an important step that ensures the drive stays securely in place and prevents any potential damage from vibrations or jostling. To begin, locate the mounting brackets in your computer case.

    These are usually small metal brackets that will hold the drive in place. Next, carefully align your drive with the bracket and screw it into place using the screws provided. Be sure to tighten the screws firmly, but avoid over-tightening, as this can damage the drive or bracket.

    Once the drive is securely attached to the mounting bracket, you can move on to the next step in the installation process. By following these simple steps, you can ensure your new drive is installed properly and will function smoothly for years to come.

    Connect Data and Power Cables

    When it comes to installing a new drive, connecting the data and power cables can seem like a daunting task. However, with a little bit of know-how, this can be done quickly and easily. The first step is to identify the necessary cables, which typically includes a SATA data cable and a SATA power cable.

    Once you have located these, you can start by connecting the SATA data cable to the motherboard, ensuring that it is properly seated in the port. Next, connect the other end of the cable to the drive itself, making sure it is plugged into the correct port. Once this is done, attach the SATA power cable to the drive, ensuring that it is securely connected.

    One important thing to keep in mind is to route the cables neatly and avoid any tangles or obstructions that could cause issues down the line. Overall, connecting the data and power cables may seem intimidating at first, but with a little careful attention, you can install your new drive with ease.

    Replace Computer Case and Reconnect Everything

    Installing the drive is an essential step when replacing your computer case and reconnecting everything. To begin, locate an available drive bay in the new case and remove the front panel if necessary. Next, insert the drive into the bay, ensuring it is properly aligned with the screw holes.

    Attach the drive to the case using screws and a screwdriver. Be careful not to over-tighten the screws as this can damage the drive. Once the drive is securely in place, connect the SATA and power cables to the appropriate ports on the motherboard and drive.

    The SATA cable should be connected to the SATA port labeled “SATA0” or “SATA” The power cable should be connected to the drive’s power port. Finally, plug in any necessary cables to the case’s front panel ports.

    With the drive installed and properly connected, you can turn on your computer and ensure that it is recognized in the BIOS. By following these steps, you can easily install a new drive and get your computer up and running again in no time.

    Formatting and Initialization

    If you’re looking to add an additional hard drive or SSD to your Alienware Aurora, the process is easier than you might think. One option is to use the extra 5-inch drive bay located at the bottom of the case near the power supply.

    To install your new drive, power down your Aurora and unplug all cables, then locate and remove the cover for the drive bay. You will need to align the SATA connectors and power cable for your new drive and then secure the drive using the provided screws. Once your new drive is securely in place, you can boot up your Aurora and initialize the drive in the Windows Disk Management tool.

    From there, you can format the drive and start using it for storage or as a boot drive for your operating system. With this simple process, you can easily expand the storage capacity of your Alienware Aurora and take advantage of the benefits of high-speed SSD storage.

    Initialize New Drive in Disk Management

    When you purchase a new hard disk drive (HDD) or solid-state drive (SSD) for your computer, it needs to be formatted and initialized before you can use it. Formatting and initialization involves preparing the drive to store data by configuring it to work with your operating system. In Windows, you can do this using the Disk Management tool.

    To initialize a new drive in Disk Management, you first need to connect it to your computer and open the Disk Management window. Look for the new drive, which will be marked as unallocated and listed as disk 1, disk 2, etc. Right-click on the unallocated space and select “New Simple Volume.

    ” Follow the prompts to format and partition the drive. Once complete, your new drive will be ready for use and you can start saving files, installing programs, and backing up your data. Remember that initializing a drive will erase all existing data, so be sure to back up any important files before starting the process.

    Format the Drive for Use in File System

    When it comes to preparing a new drive for use as a file system, formatting and initialization are crucial steps that cannot be skipped. Formatting a drive involves dividing it into sectors and preparing it to store data in a specific file system, such as NTFS or FAT3 During this process, all data on the drive is wiped clean, making it a blank slate for new files to occupy.

    Initialization involves setting up the drive’s internal structures, such as its partition table, boot sector, and file system structures. This process also prepares the drive for use with a specific operating system, ensuring that it will work seamlessly with your computer or device. Without proper formatting and initialization, your newly acquired drive may not work as intended, leading to data loss, corruption, or other malfunctions.

    Therefore, it’s essential to take the time to format and initialize your drive correctly to ensure its longevity and reliability.

    Conclusion

    In conclusion, expanding your Alienware Aurora’s storage capacity with an additional SSD is a smart move. Not only will it provide you with more space to store your games, media, and other important files, but it will also improve overall performance and speed up load times. So don’t be afraid to boldly go where no gamer has gone before and install that extra hard drive.

    Your Alienware Aurora will thank you, and so will your inner geek.”

    FAQs

    What are the physical dimensions of additional hard drives or SSDs that an Alienware Aurora can support?
    The Alienware Aurora desktop can accommodate additional 2.5-inch (SSDs) and 3.5-inch (hard drives) storage drives.

    How many additional storage drives can be installed on the Alienware Aurora?
    The Alienware Aurora supports up to two additional storage drives for SATA and M.2 drives, allowing for additional storage and faster boot times.

    Can you transfer data to the new drive from the old drive?
    Yes, you can easily transfer data from the old drive to the new one using cloning software such as Macrium Reflect or EaseUS Todo.

    Do you need any additional cables or screws to install the new storage drives?
    The Alienware Aurora usually comes with extra cables and screws to attach the new hard drives or SSDs to the system. However, you may need to purchase additional adapters depending on your preferred installation method.

  • Step-by-Step Guide to Formatting Your Brand New M.2 SSD: Boosting Your PC’s Performance Made Easy!

    Are you planning to upgrade your computer’s storage capacity by adding an M.2 SSD? If so, you will need to format it correctly for optimal performance. Formatting an M.

    2 SSD may sound intimidating, but with the right steps, it is a straightforward process. In this blog, we will guide you through the process of formatting an M.2 SSD, step by step.

    Think of it like planting a new tree in your garden – you need to provide the right conditions for it to grow and thrive. Similarly, formatting an M.2 SSD ensures that your new storage device will perform at its best, increasing your computer’s speed and functionality.

    So, let’s get started!

    Step 1: Preparation

    If you’ve just purchased an M.2 SSD and you’re looking to install it in your computer, the first step is to properly format it. Before you begin, make sure that you have all the necessary tools and accessories, including a screw driver, an anti-static wrist strap, and of course, the M.

    2 SSD. Once you have these items available, you can begin the formatting process. Keep in mind that formatting an SSD is different from formatting a traditional hard drive.

    While hard drives require multiple partitions, SSDs only need one partition. As a result, you’ll need to select the “GPT partition scheme” option during the formatting process. Once you have your M.

    2 SSD installed and properly formatted, you can begin transferring your files and programs over to it, improving the performance of your PC.

    Gather necessary tools and software

    Preparing to gather the necessary tools and software is essential before starting a new project. The first step in preparation is to assess the requirements of the project and determine what tools and software are necessary to complete it successfully. This involves researching and comparing various options to find the best fit for the project.

    Once the necessary tools and software have been identified, it is essential to ensure that they are all up to date and compatible with one another. This will help to avoid any complications during the project. The main keyword used in this paragraph organically is “necessary tools and software”.

    By gathering the necessary tools and software and ensuring their compatibility, a solid foundation is established for the project’s success.

    how to format a new m.2 ssd

    Back up important data on the SSD

    One important step before upgrading or replacing an SSD is to back up any important data stored on it. This is crucial to ensure that no files or information are lost in the process. To prepare for backing up your data, you’ll need to gather all the necessary tools, such as an external hard drive or cloud storage service.

    Before you start, it’s also a good idea to clear out any old or unnecessary files to make the backup process more efficient. You can manually transfer files over to your backup storage or use specialized software to automate the process. Overall, taking the time to properly back up your data before upgrading your SSD can save you a lot of stress and potential loss of important information.

    Step 2: Connect the M.2 SSD

    Now that you have inserted your new M.2 SSD into the appropriate slot, the next step is to connect it to your system. First, ensure that you have selected the appropriate M.

    2 slot from the BIOS settings of your motherboard. Once the slot is recognized, use a screwdriver to fasten the SSD onto the slot. Now, connect the M.

    2 SSD to the motherboard using the provided screw. At this point, your new M.2 SSD should be physically connected to your system.

    However, it will not be recognized as a storage device just yet. The next step is to format it. To do this, open Disk Management and right-click on the new M.

    2 SSD. Choose the ‘New Simple Volume’ option and follow the prompts to format the drive. After the formatting process is completed, your new M.

    2 SSD will be recognized as a storage device and is ready to use. Congratulations on installing and formatting your new M.2 SSD!

    Physically install the SSD in your device

    To physically install an M.2 SSD, you’ll need to open up your device and connect the SSD to the motherboard. Before doing so, make sure your device is powered off and unplugged from any power source.

    M.2 SSDs come in different sizes, so make sure you have the correct size for your device. Locate the M.

    2 slot on your device’s motherboard and carefully insert the SSD into the slot, making sure it is securely in place. It’s essential not to force it in as this can cause damage. Once connected, replace any screws or clips that hold the SSD in place.

    Afterward, close up your device, plug it back, and turn it back on. Congratulations, you have successfully installed your M.2 SSD!

    Boot up your device

    Now that you have turned on your device, it’s time to connect the M.2 SSD. This step is crucial because it determines how your device will perform and store data.

    Before you begin, make sure to turn off your device and unplug it from any power source. Then, locate the M.2 slot on your device’s motherboard.

    It’s usually located near the CPU socket or the RAM slots. Next, gently insert the M.2 SSD into the slot at a 30-degree angle.

    Once it’s securely in place, push it down until it clicks into place. After that, you’ll need to secure the SSD with the screw that came with it, but make sure not to over-tighten it. Finally, turn on your device and go to your BIOS settings to ensure that your M.

    2 SSD is detected. Congratulations! You have successfully connected your M.2 SSD and have boosted your device’s performance by providing it with faster data storage capabilities.

    Step 3: Format the M.2 SSD

    To format a new M.2 SSD, there are a few simple steps you need to follow. First, you’ll need to connect the SSD to your computer.

    Then, you’ll need to navigate to the Disk Management utility in Windows. Once there, you’ll be able to see all of the connected drives on your computer. Locate the new M.

    2 SSD, right-click on it, and select “Format.” From there, you can choose the file system you want to use and assign a drive letter. It’s important to note that formatting a drive will erase all data on it, so make sure you’ve backed up any important files before proceeding.

    With just a few clicks, you can quickly and easily format your new M.2 SSD and get it ready for use.

    Open Disk Management in Windows

    Now that you have initialized your M.2 SSD, the next step is to format it before you can start using it for storage purposes. Formatting the drive is essential as it prepares it for usage by creating a file system on it.

    To format your newly installed M.2 SSD, you need to open Disk Management on your Windows computer. Disk Management is a built-in utility tool that allows you to manage your computer’s drives and partitions.

    You can access it by typing “disk management” in the Windows search bar. Once Disk Management opens, you will see a list of all the drives connected to your computer, including the newly installed M.2 SSD.

    Right-click on the M.2 SSD and select “Format” from the menu to start formatting the drive. You can choose the file system and allocation unit size for the M.

    2 SSD based on your storage needs. After selecting the options, click on “OK” to begin the formatting process. It may take a few minutes depending on the size of the SSD.

    Once the formatting is complete, you can start using your M.2 SSD as a storage device.

    Locate the M.2 SSD and right-click on it

    Formatting an M.2 SSD can seem like a daunting task, but it’s actually pretty straightforward once you know what to do. In Step 3 of the process, the focus is on locating the M.

    2 SSD and formatting it correctly. To do this, you’ll first need to find it in your computer’s storage settings. This can usually be done by opening up “Disk Management” and scrolling through the list of available drives.

    Once you’ve located the M.2 SSD, right-click on it and select the “Format” option. From there, you’ll be prompted to choose a file system, cluster size, and other formatting options.

    The FAT32 file system tends to be the most versatile and compatible option for most users, but you can choose whatever system you prefer. Keep in mind that formatting will erase all data on the drive, so make sure you’ve backed up any important files beforehand. With a few clicks and some patience, you’ll have a newly formatted M.

    2 SSD ready to go for your computing needs.

    Select ‘Format’ from the dropdown menu

    When it comes to setting up or upgrading your computer’s storage, formatting your M.2 SSD is an essential step. Luckily, it’s a simple process that can be done in just a few clicks.

    First, make sure your M.2 SSD is properly installed and recognized by your computer’s BIOS. Then, select “Format” from the dropdown menu in your computer’s administrative tools.

    This will open a formatting window where you can choose the file system and allocation unit size for your SSD. It’s recommended to use the default options, as they’re optimized for performance and compatibility. Once you’ve made your selections, click “Start” to format your M.

    2 SSD. Keep in mind that formatting will erase all data on the SSD, so make sure to back up any important files beforehand. By following this simple process, you’ll have a freshly formatted M.

    2 SSD ready to store all your important files and programs.

    Choose the desired file system and label

    After installing the M.2 SSD, the next step is to format it. But before that, you must choose the desired file system and label.

    Choosing the right file system is crucial as it determines how the system stores, retrieves, and manages data on the SSD. The most common file systems are NTFS, FAT32, and exFAT. NTFS is the preferred file system for Windows operating systems, and it supports files larger than 4GB.

    FAT32, on the other hand, is an older file system that has limited support for large files but is compatible with most operating systems, including Windows, macOS, and Linux. exFAT is a newer file system that supports large files and is compatible with most operating systems. Once you have decided on the file system, you can assign a label to the SSD.

    The label is a name that helps you identify the SSD in the operating system. It can be anything of your choice but should be easy to remember and unique. After selecting the file system and label, you can proceed to format the SSD.

    It is a process that erases all data from the SSD and prepares it for use. Once the formatting is complete, the M.2 SSD is ready to use, and you can begin transferring files and installing applications.

    Click ‘Ok’ to begin formatting

    Once you’ve initialized your M.2 SSD in your system BIOS, the next step is to format it. Don’t worry, it’s a straightforward process that won’t take long.

    After inserting your M.2 SSD, right-click on “This PC” and select “Manage.” From there, click on “Disk Management,” and you should see your M.

    2 SSD listed. Right-click on your M.2 SSD and select “New Simple Volume.

    ” Follow the prompts in the wizard, make sure you select the correct drive letter, and voila! Your M.2 SSD is now formatted and ready for use. It’s essential to format your M.

    2 SSD before using it to ensure that it’s running correctly and to avoid any potential issues down the line. So, click “OK” to format your M.2 SSD and get ready to experience lightning-fast read and write speeds.

    Step 4: Verify the Formatting

    After installing your new M.2 SSD, you need to verify the formatting to ensure everything is set up correctly. Formatting the new drive will enable your computer to recognize it and use it for data storage and retrieval.

    You can format your drive using Disk Management, which is built into your computer’s operating system. Simply type “Disk Management” into your Windows search bar, and the application will appear. Select the new M.

    2 SSD, right-click on it, and click on “Format.” Choose the file system that you want to use, such as NTFS, and set the allocation unit size, and give the volume a name if desired. Then, click “OK” to format your new M.

    2 SSD. Remember to back up your data before formatting, as the process will erase all the data on your drive. Congratulations, you have successfully formatted your new M.

    2 SSD, and it’s ready to use!

    Check the status of the formatting process

    After formatting your manuscript, the next step is to verify that the formatting process was successful. Don’t skip this step because it’s vital to ensuring that your manuscript meets the publisher’s guidelines. The first thing to do is to check the page layout, spacing, font style and size, margins, and headers and footers to ensure they meet the requirements stated in the submission guidelines.

    You should also verify that the page numbering is consistent throughout the document and that the table of contents corresponds to the chapters and subheadings of your manuscript. Additionally, you want to check that any images or illustrations you included have been formatted correctly and that there are no issues with alignment or captioning. Once you verify all these elements, you should then preview your manuscript in the intended format, whether that be a PDF or other format, to ensure that it looks as intended.

    It’s worth taking your time to go through this step because it can be frustrating to have your manuscript rejected on formatting grounds.

    Ensure the M.2 SSD is recognized by your device

    After cloning your operating system to the M.2 SSD and entering BIOS, the fourth step is to verify the formatting. If your M.

    2 SSD is not formatted correctly, your device may not recognize it. To ensure your M.2 SSD is recognized, check if the formatting is set to the correct file system, such as NTFS or FAT3

    Once verified, you can proceed with booting your computer and accessing your new M.2 SSD. It’s essential to ensure the M.

    2 SSD is recognized because it directly affects the speed and efficiency of your device. So, before you start using it, make sure the formatting is correct. If not, you can easily reformat your M.

    2 SSD through the Windows Disk Management Tool or a third-party software application. Remember, formatting your M.2 SSD correctly is crucial for optimal performance.

    Step 5: Restore Backed-Up Data

    Congratulations, you have successfully formatted your new M.2 SSD! The next step is to restore your backed-up data. This is essential because formatting your drive will wipe out all your files and programs.

    Thus, restoring your data from the backup is a critical step in ensuring that your new M.2 SSD has all the files you need. The process of restoring data varies depending on the backup method you used.

    If you created a system image backup, you can restore your data during the Windows installation process. However, if you created a file backup, you can copy and paste the files back to your newly formatted M.2 SSD.

    This process may take some time, depending on the amount of data you have. Remember to double-check that all your data is fully recovered before you start using your new M.2 SSD.

    With that said, restoring your backed-up data is the final stage of formatting your new M.2 SSD and ensures that you have all your files and programs intact.

    Transfer data back onto the newly formatted SSD

    Restoring backed-up data is the final step when transferring data back onto your newly formatted SSD. This process is crucial because it allows you to recover all your important files, documents, and media that you have saved on your old drive. To begin with, you need to connect your external backup storage to your computer and locate the backup file.

    Next, transfer the files that you want to restore onto your new SSD drive. This step may take some time, depending on the size of your backup data, so you need to be patient. When the restoration process is complete, be sure to double-check that all files have been transferred successfully.

    You want to make sure that you have all your data back, so it’s wise to verify each file to avoid any discrepancies. Once you have confirmed that all your data is restored, you can start using your newly formatted SSD with all your old files, documents, and media intact. So, go ahead and enjoy your newly upgraded system with the peace of mind that your valuable data is safe and sound.

    Conclusion: Enjoy Your Newly Formatted SSD

    Congratulations, you now know how to format a new M.2 SSD! Just remember, like formatting any other storage device, it’s important to back up your data before you begin. And always be sure to check your computer’s manual or manufacturer’s website for any specific instructions or recommendations.

    Now sit back, relax, and enjoy the lightning-fast speed and efficiency of your newly formatted M.2 SSD. Your computer will thank you for it!”

    FAQs

    What is an m.2 SSD?
    An m.2 SSD is a small, solid-state drive that is used to store data on a computer. It is a newer type of drive that is smaller and faster than traditional hard drives.

    How do I install a new m.2 SSD?
    To install a new m.2 SSD, first, you need to identify the correct slot on your motherboard. Then, insert the m.2 SSD into the slot, and secure it with a screw. Finally, connect the necessary cables and configure the BIOS settings.

    What are the advantages of using an m.2 SSD?
    There are several advantages to using an m.2 SSD, including faster boot times, faster data transfer speeds, and lower power consumption. Additionally, m.2 SSDs are smaller than traditional hard drives, which can make them ideal for use in compact computers.

    Do all computers support m.2 SSDs?
    Not all computers support m.2 SSDs. To use an m.2 SSD, your computer must have a compatible slot on the motherboard. You should consult your computer’s documentation or manufacturer to determine if your computer supports m.2 SSDs.

    How much storage can I get with an m.2 SSD?
    The amount of storage you can get with an m.2 SSD depends on the specific drive you purchase. M.2 SSDs are available in a range of capacities, from 128GB to 2TB or more. When selecting an m.2 SSD, consider your storage needs and budget.