Author: David L. Lynn

  • Step-by-Step Guide: Setting Up SSD to Load Windows Like a Pro

    Are you running a slow Windows operating system? Does your computer take ages to boot up or run basic applications? If so, then it’s high time to upgrade to a Solid State Drive (SSD) to improve your system’s overall performance. An SSD can provide you with lightning-fast data transfer speeds and can even make your old PC feel like brand new again. But setting up an SSD for Windows can seem a bit daunting, especially if you’re not familiar with the technicalities involved.

    Don’t worry, though. In this blog post, we’ll guide you through the process of setting up an SSD for Windows step-by-step, ensuring that your PC is up and running in no time!

    Requirements for using an SSD

    “Setting up an SSD to load Windows” can improve your computer’s overall speed and performance significantly. To get started, you will need to ensure that your computer’s motherboard supports SATA III, the fastest connection available for SSDs. Next, you will need to create a bootable USB drive with Windows OS using Microsoft’s Media Creation Tool.

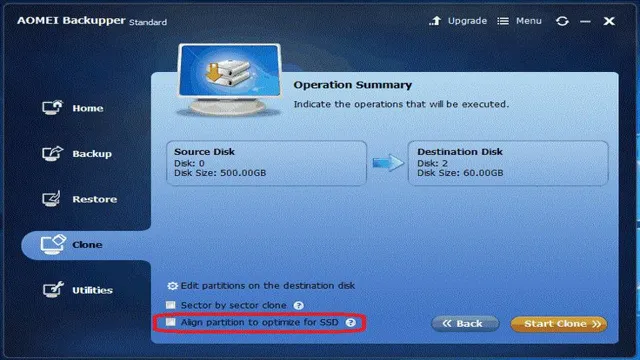
    With the SSD connected, go into your computer’s BIOS settings and change the boot order to prioritize the USB drive. Then, follow the on-screen instructions to install Windows on your SSD. Once installation is complete, you can transfer your files and programs from your old hard drive to the SSD manually or by using cloning software.

    It is important to note that while SSDs do not require defragmentation, enabling TRIM in your operating system’s settings can help maintain its performance and longevity. Overall, setting up an SSD to load Windows involves a few extra steps than using a traditional hard drive, but the benefits of improved speed and performance make it well worth the effort.

    Compatibility of SSD with your computer

    When it comes to using an SSD on your computer, there are a few requirements you need to keep in mind. First and foremost, you need to ensure that your computer has a suitable interface for SSD, which typically includes SATA and M.2 ports.

    Additionally, you need to check the maximum capacity your computer can handle, as some older models may have limited storage options. Another factor to consider is the type of operating system you are using, as different OS versions have different requirements for SSD compatibility. For instance, Windows 7 may require additional drivers to support SSDs, while newer versions like Windows 10 have built-in support.

    In conclusion, if you want to enhance your computer’s performance by installing an SSD, check these factors to ensure that your computer is compatible with this type of storage device.
    how do i set up an ssd to load windows

    Tools required for setting up SSD

    When it comes to setting up an SSD, there are a few tools that you’ll need in order to do it properly. Firstly, you’ll need a screwdriver to open up your computer and install the SSD into the correct drive bay. You’ll also need a SATA or USB cable, depending on whether you want to clone your existing hard drive or install a fresh copy of your operating system onto the new SSD.

    Additionally, you’ll need a cloning or installation software, which can either be downloaded online or provided by the SSD manufacturer. It’s important to make sure that your computer is compatible with your new SSD, so be sure to check its specifications before purchasing. By having these tools on hand and following proper installation procedures, you can ensure that your SSD will run smoothly and provide the fast boot and load times that it’s known for.

    Backup your data before proceeding

    If you’re planning to upgrade your hard drive by installing an SSD, you’ll need to set it up to load Windows. Before you proceed, it’s essential to back up your data, just in case anything goes wrong during the installation. Once you’ve backed up your data, you can connect your SSD to your computer using a SATA cable or USB enclosure.

    Then, you’ll need to open the Disk Management tool in Windows and format the SSD. After formatting, you can clone your existing hard drive to the SSD using software like Clonezilla or EaseUS Todo Backup. Alternatively, you can perform a clean installation of Windows on the SSD by creating a bootable USB drive using the Media Creation Tool from Microsoft.

    Once you’ve set up the SSD to load Windows, you’ll be able to enjoy faster boot times and improved overall performance. Remember to double-check your backup before proceeding with the installation to avoid losing any important data.

    Why it’s important to backup first

    Before proceeding with any software or hardware updates, it is crucial to backup your data. Whether you are updating your laptop or installing a new software, there is always a risk of losing important files, documents, and media. Moreover, some updates may go wrong, leading to system crashes or software malfunctions that could wipe out your data.

    Therefore, it is always advisable to create a backup of your data before proceeding with any change. That way, even if something goes wrong, you can always restore your data back to its original state. In essence, backing up your data is like having an insurance policy against unforeseen data loss.

    So, make sure to take some time to backup your important files before making any major changes to your system or software. Trust me, it could save you a lot of hassle and stress in the long run.

    How to backup your files and data

    Backing up your data is crucial to ensure that you don’t lose any important files or information. There are several methods you can use to backup your data, depending on your needs. One popular option is to use an external hard drive to copy your files onto.

    This can be done manually, or you can choose from a range of software options that will automate the process for you. Another option is to use cloud storage services, which store your data on remote servers. This means that your files can be accessed from anywhere with an internet connection, and you don’t have to worry about losing your data if your computer is lost or stolen.

    Whichever method you choose, it’s essential to make sure that you backup your data on a regular basis to ensure that you always have access to your critical files. Don’t wait until it’s too late – start backing up your data today!

    Physically installing SSD in your computer

    If you’re looking to set up an SSD to load Windows, it’s a relatively simple process. First, you’ll need to physically install the SSD in your computer. This involves finding an available slot, often located on the motherboard or under a panel on the back of the tower.

    Once you’ve found the proper slot, simply attach the SSD to it using the screws provided. Once you’ve completed the physical installation, you’ll need to make some changes to your computer’s settings in order to utilize the SSD for booting up Windows. This involves going into the BIOS and changing the boot order to prioritize the SSD over your previous primary storage device.

    You’ll also need to download and install Windows onto the SSD, either via USB or a disc drive. Once these steps are completed, you should be all set up to start using your new SSD.

    Step-by-step guide to installing SSD

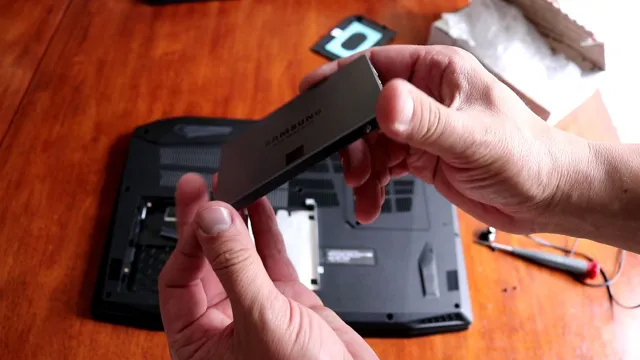
    Installing an SSD in your computer can be a game-changer when it comes to speed and performance. To physically install an SSD, the first step is to locate the hard drive bay in your computer. This is typically found on the lower front or side of the tower or laptop.

    Once located, unscrew the mounting bracket and remove the hard drive from the bay. Then, attach the SSD to the mounting bracket using screws. Slide the SSD into the hard drive bay and secure it with screws.

    Finally, reconnect any cables or connectors that were removed and power on the computer to ensure the SSD is recognized. With a properly installed SSD, your computer’s boot-up time will be faster, programs will load quicker, and overall performance will be greatly improved. So why not make the upgrade today?

    Configuring BIOS settings for SSD

    If you’ve recently purchased an SSD for your computer, one of the most important steps is configuring BIOS settings to ensure that it’s running as smoothly and efficiently as possible. First, you’ll need to physically install the SSD inside your computer by opening up the case and finding an available slot. Make sure to take proper precautions and ground yourself before handling the SSD to avoid any damage from static electricity.

    Once you’ve installed the SSD, you’ll need to enter BIOS and change the boot order so that the computer boots from the SSD instead of the hard drive. You may also need to adjust settings such as AHCI and SATA mode to optimize the SSD’s performance. By taking the time to properly configure BIOS settings for your SSD, you can ensure that it runs smoothly and provides a noticeable improvement in your computer’s speed and performance.

    Installing Windows on the SSD

    If you’re looking to improve the performance of your computer, installing Windows on your SSD is a fantastic place to start. Not only will it be faster, but it will also give you more storage space for files and applications. The first step in setting up an SSD to load Windows is making sure it’s properly connected to your motherboard.

    Once you’ve done that, you’ll need to go into your computer’s BIOS settings and change the boot order so that your SSD is the primary boot drive. From there, you can install Windows onto your SSD by following the on-screen prompts. It’s important to note that you’ll need a valid Windows license key to complete the installation process.

    Once the installation is complete, you can start enjoying the fast and efficient performance of your new SSD.

    Creating a bootable USB for Windows installation

    Installing Windows on the SSD can be a little tricky, but with a few steps, you’ll be up and running in no time. First, you’ll need to ensure that your bootable USB, which you created earlier, is plugged into your computer. Before starting the installation process, you should go into your BIOS settings and make sure that your computer is set to boot from the USB.

    Once you’ve configured your BIOS settings, you can click “Install Now” and select the version of Windows you want to install. Next, you’ll need to select the partition where you want to install Windows. Make sure you select your SSD as the location for the installation.

    Now, all you need to do is sit back and wait for the installation process to complete. Once it’s finished, you should have Windows up and running smoothly on your brand new SSD. With this simple process, you’ll be enjoying the benefits of faster speeds and quicker load times in no time!

    Step-by-step guide to installing Windows on SSD

    If you’re looking to install Windows on your SSD, the process is pretty straightforward. First, you’ll need to make sure your SSD is properly installed and recognized by your system. Then, you’ll want to create a bootable USB drive with the Windows installation files.

    This can be easily done with the Windows Media Creation Tool. Once you’ve created your bootable USB drive, you’ll want to boot from it and follow the prompts to install Windows on your SSD. It’s important to make sure you select your SSD as the destination drive during the installation process to ensure that Windows is installed on the correct drive.

    Overall, the process of installing Windows on your SSD is fairly simple and can significantly improve system performance and boot times. With these easy steps, you’ll be up and running with Windows on your new SSD in no time!

    Optimizing SSD performance

    Setting up an SSD to load Windows can significantly boost your computer’s performance. First, you need to ensure that your BIOS is set up to recognize your SSD as the primary boot device. Next, you can optimize the performance of your SSD by disabling disk defragmentation and turning off superfetch.

    These actions enhance the SSD’s wear-leveling technology and reduce unnecessary disk activity. You might also consider enabling TRIM, a feature that helps keep your SSD functioning optimally by clearing unused cells. Finally, make sure that you have the latest firmware updates and drivers installed.

    With these optimizations, you’ll be able to enjoy lightning-fast loading times and seamless performance from your Windows system.

    Enabling TRIM command for SSD

    If you want to optimize the performance of your SSD, enabling the TRIM command is an essential step that you should not overlook. TRIM is a function that operates in the background, cleaning up blocks of data that have been marked as unused by your operating system. This process helps to prevent SSD devices from becoming sluggish over time, as it ensures that they are only writing and storing active data.

    In essence, TRIM helps to ensure that your SSD runs faster and lasts longer, increasing its lifespan and reducing the need for disk defragmentation. To enable TRIM, you can use a command-line tool or a utility such as Trim Enabler if you have a macOS device. Once enabled, you should notice a marked improvement in your SSD’s performance, making it well worth the effort.

    So, if you haven’t yet enabled TRIM on your SSD, now is the time to do it!

    Disabling hibernation and indexing for SSD

    If you want to optimize the performance of your SSD, disabling hibernation and indexing can be beneficial. Hibernation is a feature that saves the current state of your computer to the hard drive. While it can be useful, it can also take up valuable space on your SSD and decrease its lifespan.

    Disabling hibernation not only frees up space but also prevents unnecessary writes on the drive, which can extend its life. Similarly, indexing is a feature that helps you find files faster by creating a searchable database. However, it also continually writes and reads data from the drive, which can slow down your computer and cause unnecessary wear and tear on the SSD.

    Turning off indexing will not only improve performance but also increase the lifespan of your SSD. By disabling hibernation and indexing, you can optimize your SSD’s performance and extend its lifespan.

    Other tips to improve SSD performance

    Optimizing SSD performance can greatly improve the overall speed and responsiveness of your computer. Aside from upgrading to a faster SSD, there are other tips you can follow to get the most out of your drive. One helpful technique is to enable TRIM, a command that allows the operating system to inform the SSD which unused blocks of data can be wiped clean.

    This can help prevent performance degradation over time. Additionally, make sure your SSD is properly aligned and partitioned to avoid unnecessary write amplification. You can also disable unnecessary services and background programs to reduce the amount of unnecessary disk activity.

    Regularly cleaning up files and moving large files to an external drive can help free up space and ensure optimal performance. By implementing these optimization techniques, you can optimize your SSD’s performance and get the most out of it for years to come.

    Conclusion

    In conclusion, setting up an SSD to load Windows is not rocket science, but it does require some technical know-how. However, with the right tools and patience, you can speed up your computer’s boot-up time and make it run smoother than a freshly shaved dolphin. So, don’t be intimidated – take the plunge and install that SSD.

    Your computer (and your sanity) will thank you!”

    FAQs

    What are the benefits of using an SSD for loading Windows?
    Using an SSD can significantly improve the boot and load times of your operating system, as well as increase overall system responsiveness.

    Do I need to do anything special when setting up an SSD to load Windows?
    Yes, you will need to format the SSD and ensure that it is properly configured as the primary boot device in your system’s BIOS settings.

    Can I clone my existing Windows installation onto my new SSD?
    Yes, there are several tools available that can help you clone your existing Windows installation onto your new SSD, including popular options like Acronis True Image and Macrium Reflect.

    How much storage space do I need on my SSD for Windows?
    The minimum recommended amount of storage space for a Windows installation on an SSD is 128GB, although you may want to consider getting a larger drive if you plan on installing additional software or storing a large amount of data on your system.
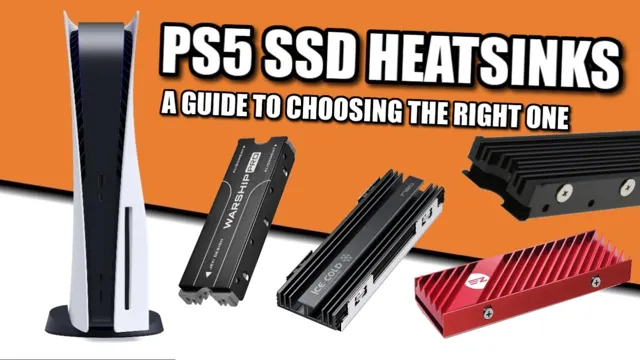
  • Heat Up Your Knowledge: Understanding the Need for a Heatsink for PS5 M.2 Storage Upgrade

    Heat Up Your Knowledge: Understanding the Need for a Heatsink for PS5 M.2 Storage Upgrade

    Are you planning to upgrade your PS5 storage with an M.2 SSD? If yes, then you might be wondering whether or not you need a heatsink for it. Well, the answer is, it depends.

    M.2 SSDs tend to generate a significant amount of heat, which can affect the performance and lifespan of the drive. A heatsink can help dissipate this heat and ensure the longevity of your M.

    2 SSD. However, not all M.2 SSDs require a heatsink.

    If you’re planning to install an M.2 SSD with a high capacity and performance, such as a PCIe Gen4, then it’s recommended to use a heatsink. This is because they generate more heat and require better cooling to operate optimally.

    On the other hand, if you’re going for a lower-end M.2 SSD, with less heat generation, you might not need a heatsink. Additionally, some motherboards come with built-in heatsinks for M.

    2 SSDs, which can also eliminate the need to purchase an external one. In conclusion, while not all M.2 SSDs require heatsinks, it’s always good to have one, especially if you’re going for a high-performance drive.

    What is a Heatsink?

    When it comes to upgrading your PS5’s storage with an M.2 SSD, you may be wondering if a heatsink is necessary. The short answer is yes, a heatsink is highly recommended.

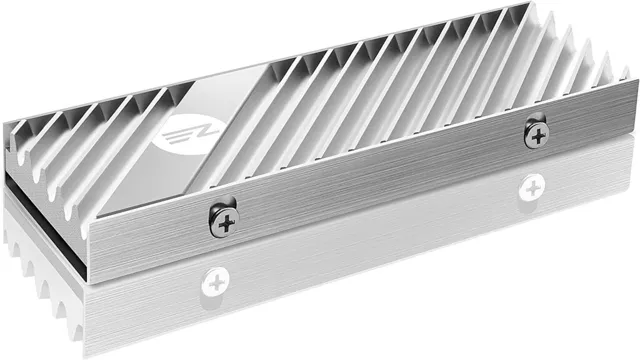
    A heatsink is a piece of metal that dissipates heat away from components like the M.2 SSD. Without a heatsink, the M.

    2 SSD’s performance may suffer due to excessive heat, leading to slower load times and potential damage to the drive over time. However, not all heatsinks are created equal, and it’s important to choose a heatsink that is specifically designed for the PS5’s M.2 slot to ensure proper fit and optimal cooling.

    So, while a heatsink isn’t necessarily required, it’s a wise investment if you want to get the most out of your PS5’s upgraded storage.

    Thermal Dissipation

    Heatsink A heatsink is an essential component of a computer or any other device that generates heat. It is a passive cooling device that helps dissipate heat and maintain safe operating temperatures by transferring the heat generated by electronic components to the surrounding air. Heatsinks come in different shapes and sizes and are made of different materials, such as aluminum, copper, or other alloys.

    They feature microstructures that increase their surface area, allowing for better transfer of heat into the surrounding air. Without a good heatsink, the device’s electronic components can become too hot, leading to performance degradation, instability, or even failure. It’s crucial to choose the right heatsink for your device and ensure that it is installed correctly to provide effective thermal dissipation.

    A properly functioning heatsink can significantly extend the lifespan and performance of your device, making it a worthwhile investment in the long run.

    does ps5 m.2 need heatsink

    PS5 M.2 Overview

    One of the most talked-about features of the PS5 is its M.2 expansion slot, which allows users to add additional storage to their console. While this is definitely an exciting prospect for many gamers, there has been some confusion about whether or not a heatsink is necessary for the M.

    2 SSD. The simple answer is that, while not strictly necessary, a heatsink is highly recommended if you want to get the most out of your SSD. The reason for this is that M.

    2 SSDs can get quite hot when running, which can lead to thermal throttling and decreased performance over time. A heatsink helps to dissipate this heat and keep the SSD running at optimal temperatures, which can significantly improve its lifespan and performance. So while you could technically use an M.

    2 SSD without a heatsink, it’s definitely not recommended if you want to get the most out of your investment.

    Installation Requirements

    If you’re looking to expand your PS5’s storage capacity, installing an M.2 drive is an excellent option. However, there are some requirements you need to consider before proceeding with the installation.

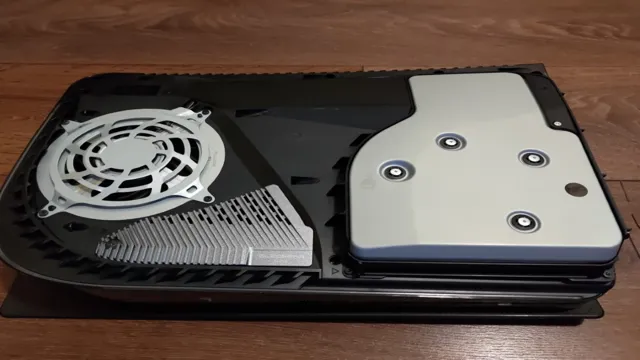
    First, the M.2 drive needs to be compatible with the PS5, which means a PCIe Gen4 x4 M.2 NVMe SSD with a storage capacity between 250GB and 4TB.

    Second, the M.2 drive should have a heatsink to prevent overheating, and it should not exceed 22mm wide and 125mm tall when mounted.

    Finally, make sure you have the latest PS5 firmware update installed before installing the M.2 drive. Once you have all the requirements, installing the M.

    2 drive is relatively straightforward. Simply remove the PS5’s side panel, locate the M.2 drive slot, attach the heatsink to the drive, and insert it into the slot.

    Then, secure the screw to keep it in place and close the panel. With this simple upgrade, you can enjoy more storage space for all your favorite games and media files.

    Thermal Considerations

    When it comes to the PS5 M.2, one of the biggest considerations is thermal management. With a console that’s designed for high-performance gaming, it’s essential to make sure that the M.

    2 drive can handle the heat generated by intense gameplay. Sony has provided guidelines for the types of drives that are compatible with the PS5 M.2 slot, and they also recommend using a heatsink to prevent overheating.

    This is because, during intense gameplay, the M.2 drive can generate a significant amount of heat, and if not properly managed, can lead to performance issues and even damage the drive over time. It’s vital to keep in mind that many M.

    2 drives on the market don’t come with a built-in heatsink, so it’s crucial to choose one that’s compatible with the PS5 M.2 slot and ensure it will keep the drive cool during gameplay. In conclusion, thermal management is critical when considering the PS5 M.

    2 drive, and by following the guidelines provided by the manufacturer, gamers can ensure optimal performance and longevity of their hardware.

    Does the PS5 M.2 Need a Heatsink?

    Gamers are always looking for ways to optimize their gaming experience, and with the launch of the PS5, the addition of an M.2 drive has been a popular topic of discussion. One question that often comes up is whether or not the PS5 M.

    2 drive needs a heatsink. The answer is that it depends on a few factors. Firstly, the type of M.

    2 drive you are using can make a difference. If you opt for a faster NVMe drive, it is recommended to use a heatsink to help dissipate the heat generated during use. Additionally, the airflow in your system can also play a role.

    If your PS5 already has good airflow, then a heatsink may not be necessary. However, if your system is prone to overheating or you plan on using the M.2 drive heavily, then a heatsink can be a worthwhile investment to ensure optimal performance and longevity.

    Ultimately, it is up to the individual user to decide whether or not a heatsink is necessary for their PS5 M.2 drive.

    Benchmark Tests

    The PS5 M.2 is a highly debated topic among gamers, and many are wondering if it needs a heatsink. Benchmark tests have shown that the M.

    2 SSD can reach high temperatures, which can affect its performance and longevity. While a heatsink is not a necessity, it can help to dissipate heat and improve overall performance. However, not all heatsinks are created equal, and it’s essential to choose one that’s compatible with the PS5’s design.

    A well-designed heatsink will help to cool the M.2 SSD without interfering with other components’ airflow. So, while a heatsink may not be mandatory, it’s definitely worth considering if you want to get the most out of your PS5 M.

    2 SSD.

    Manufacturer Recommendations

    The answer to whether or not the PS5 M.2 needs a heatsink is a bit complicated. While Sony has not explicitly stated that a heatsink is required, many manufacturers recommend using one to prevent overheating and potential damage to the system.

    A heatsink helps to dissipate the heat generated by the M.2 NVMe SSD, allowing it to operate at optimum performance levels without causing any damage to the system. You can find many types of heatsinks on the market that are specifically designed for the PS5 M.

    2 slot, but make sure to choose one from a reputable manufacturer and that it is compatible with your SSD. It is always better to err on the side of caution and use a heatsink to protect your investment and ensure optimal performance.

    Final Thoughts

    Many gamers are wondering if the PS5 M.2 needs a heatsink. The answer may vary depending on the specific M.

    2 SSD you plan to use. Some SSDs come with heatsinks already attached, while others do not. If your chosen SSD does not come with a heatsink, it is highly recommended that you add one yourself.

    A heatsink will help dissipate the heat generated by the SSD during intensive gaming sessions, preventing it from overheating and potentially causing damage to your PS While it is not mandatory to have a heatsink, it is generally considered a wise investment to ensure the longevity and performance of your system. Additionally, it can improve the speed and overall performance of your SSD, ensuring that you get the most out of your gaming experience.

    So, if you are planning to add an M.2 SSD to your PS5, don’t forget to consider the need for a heatsink to keep your gaming experience enjoyable and long-lasting.

    Conclusion

    In conclusion, the question of whether the PS5 M.2 needs a heat sink is a complex one. Like many things in life, it depends on a variety of factors, such as the specific M.

    2 drive being used, the conditions under which the PS5 is being operated, and even the user’s personal preference. However, one thing is clear: if you want to ensure optimal performance and longevity for your PS5 M.2 drive, adding a heat sink may be a wise choice.

    Not only will it help dissipate heat, but it will also give you bragging rights among your fellow gamers and prove that you’re serious about your gaming setup. So, if you’re looking to take your PS5 gaming to the next level, don’t skimp on the heat sink! After all, keeping things cool is always hot.”

    FAQs

    What is an M.2 SSD and why is it important for the PS5?
    M.2 SSD is a type of storage device that is faster and more efficient than traditional hard drives. It is important for the PS5 as it allows for faster load times and improved performance in games.

    Does the PS5 M.2 SSD need a heatsink?
    Yes, it is recommended to install a heatsink for the PS5 M.2 SSD to prevent overheating and ensure optimal performance.

    Can I install any M.2 SSD in my PS5?
    No, not all M.2 SSDs are compatible with the PS5. The PS5 requires an M.2 SSD that meets specific requirements, such as PCIe Gen4 and a minimum capacity of 250GB.

    Is it easy to install an M.2 SSD in the PS5?
    Installing an M.2 SSD in the PS5 requires some technical skills and the right tools. It is recommended to follow the manufacturer’s instructions carefully and to seek professional help if needed.

  • Unlocking the Power: Step-by-Step Guide to Connect SSD to Motherboard

    Have you recently upgraded your hardware and need to connect your SSD to your motherboard? Are you unsure of how to proceed with the installation process? Well, fear not! In this step-by-step guide, we will walk you through the process of connecting your SSD to your motherboard. With just a few simple steps, you can have your SSD up and running in no time, taking advantage of faster boot times and improved application loading speeds. Think of connecting your SSD to your motherboard like building a puzzle – once all the pieces are in place, everything will run smoothly.

    The process itself is relatively straightforward, but it’s important to take the necessary precautions and follow the steps correctly. We’ll be discussing everything from the tools you’ll need to how to ensure that your SSD is properly mounted and connected to the motherboard. Whether you’re a gaming enthusiast looking to maximize your machine’s potential or a creative professional in need of speedy editing, connecting your SSD to your motherboard is an essential step in ensuring that your computer is running at its full potential.

    With our guide, you’ll be able to navigate the installation process with ease, leaving you more time to enjoy the benefits of your newly installed SSD. So grab your screwdriver, and let’s get started!

    Check Compatibility

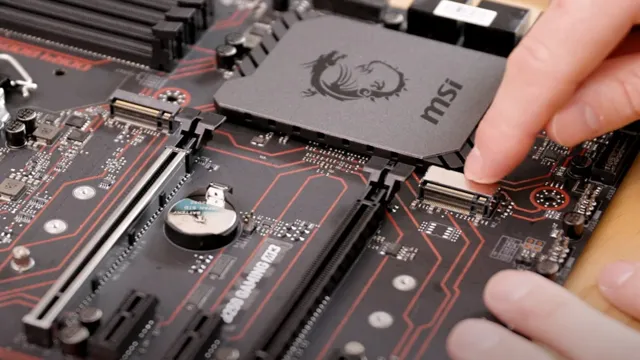
    If you’re looking to upgrade your computer’s storage and wondering how to connect your SSD to your motherboard, it’s important to first check compatibility. Make sure your motherboard has an available M.2 slot or SATA port that your SSD can fit into.

    Depending on the type of SSD you have, you may need to also check the interface type. SATA SSDs use a SATA interface while NVMe SSDs use an M.2 interface.

    Once you’ve confirmed compatibility, it’s a matter of attaching the SSD to the slot and securing it with screws. Remember to consult your motherboard’s manual for specific instructions and to handle all components with care to avoid any damage. With a successful installation, you’ll enjoy faster boot times and smoother operation with your new SSD.

    Make Sure Motherboard Has Suitable Slot

    When selecting a motherboard, one of the most important things to consider is the compatibility with your system components, particularly your CPU and graphics card. However, it’s also important to ensure that the motherboard has a suitable expansion slot for any additional hardware you may want to add in the future. For example, if you’re looking to include a dedicated sound card, you’ll need to ensure that the motherboard has an available PCI or PCIe slot.

    On the other hand, if you’re planning to install multiple graphics cards for gaming or video rendering, you’ll need to check if the motherboard supports SLI or Crossfire technology. Failing to check the compatibility of expansion slots on your motherboard can result in a waste of time and money, so make sure to do your research beforehand to avoid any complications.

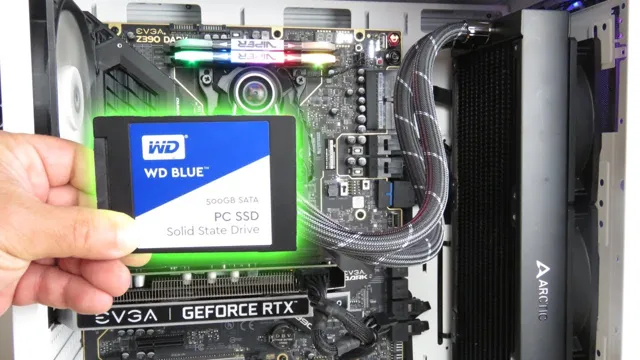
    how do i connect my ssd to my motherboard

    Verify SSD Connection Type

    SSD Connection Type When upgrading your computer’s storage system, it’s essential to ensure that your new SSD is compatible with your computer’s connection type. A solid-state drive (SSD) can either use a SATA or an NVMe connection. SATA is an older, slower interface common in older computers, while NVMe is a faster, more modern interface that newer computers use.

    Before purchasing an SSD, check your computer’s manual or specifications to determine which connection type it uses. If your computer uses SATA, you can still upgrade to an SSD, but you may not receive the full speeds the SSD is capable of. On the other hand, if your computer uses NVMe, you’ll want to purchase an NVMe-compatible SSD to take full advantage of the faster interface.

    It’s crucial to verify the SSD connection type to ensure that your investment will work correctly with your computer and provide optimum performance.

    Prepare Your SSD

    If you’re looking to install an SSD into your computer, the first step is to make sure it’s properly connected to your motherboard. The most common method of connection is through SATA cables, which will need to be plugged into both the SSD and the motherboard. Make sure your motherboard has an available SATA port and power cable that you can use.

    If not, you may need to purchase additional hardware such as a SATA expansion card. Once the SSD is connected, you’ll need to format it to prepare it for use. This can typically be done through your computer’s operating system.

    Don’t forget to set your SSD as the primary boot drive in your computer’s BIOS settings to ensure it’s being properly utilized. With proper preparation, your SSD will bring a significant boost to your computer’s performance.

    Disconnect Power and Open Casing

    When it comes to upgrading your computer’s storage, it’s important to properly prepare your SSD before installing it. The first step is to disconnect all power sources and open up your computer’s casing. This will allow you to access the internal components of your computer and safely install your new SSD.

    Before handling any components, it’s important to ground yourself to prevent any static discharge that could damage your new drive. This can be done by touching a metal object in your computer’s casing, such as the power supply unit. Once you’ve safely grounded yourself, you can proceed with the rest of the installation process.

    By taking these simple precautions, you can ensure that your new SSD is properly installed and ready to use for years to come.

    Insert SSD into Mounting Bracket

    If you’re planning to upgrade your computer to an SSD, you’ll need to know how to insert it into a mounting bracket. First, make sure you have everything you need, including the SSD, the mounting bracket, and the necessary tools. Then, carefully attach the SSD to the bracket, making sure it’s secure.

    It’s important to be gentle when handling the SSD, as it’s a delicate piece of technology. Once the SSD is securely attached to the bracket, you can proceed with installing it in your computer. This will greatly improve your computer’s performance, as SSDs are faster and more efficient than traditional hard drives.

    With a little patience and care, you can easily install an SSD and enjoy all the benefits it has to offer.

    Connect SSD to Motherboard

    Connecting your SSD to your motherboard is a straightforward process that can be accomplished in just a few simple steps. The first thing you’ll need to do is locate the SATA ports on your motherboard. Typically these ports are located near the bottom of the board and are labeled accordingly.

    Once you’ve found the SATA ports, you’ll need to plug your SSD into one of them. Make sure to align the SATA connector on the SSD with the port on the motherboard. After you’ve connected the SSD to the motherboard, you’ll need to attach the power cable.

    Most SSDs require a standard SATA power cable, which can be found in your power supply bundle. Simply plug one end of the cable into the SSD and the other end into the power supply. Once you’ve connected both the SATA data cable and the power cable, your SSD is ready to go! Now you can enjoy faster boot times and lightning-fast application load times.

    Identify SATA Connections

    When connecting a solid-state drive (SSD) to your motherboard, it’s important to know which cable to use. SATA connections are the way to go for SSDs, specifically SATA III for the best speed. These connections can be found on your motherboard and are usually labeled.

    To connect your SSD, simply attach one end of the SATA cable to the SSD and the other end to one of the SATA ports on the motherboard. Then, connect the power cable to the SSD. It’s as easy as that! Now your SSD is ready to be recognized by your system and used to its full potential.

    Plug SATA Cable into Motherboard

    Connecting your SSD to your motherboard is a critical step in building your computer. To connect your SSD, you’ll need to plug in the SATA cable into the motherboard. The SATA cable, short for Serial ATA, transmits data between the motherboard and the SSD.

    The SATA cable is easy to identify as it has two L-shaped connectors on either end. One end plugs into the SSD while the other plugs into the motherboard. Before plugging the SATA cable into your motherboard, make sure to identify the correct SATA port.

    The SATA ports are usually located near the bottom of the motherboard and are labeled SATA0, SATA1, SATA2, and so on. Once you find the right port, plug in the SATA cable and fasten both connectors securely. Remember to handle the SATA cable gently to avoid damaging the pins or ports.

    With the SSD connected to the motherboard, you’re ready to power up your computer and start installing your operating system!

    Attach SATA Power Cable to PSU

    After connecting the SATA power cable to your PSU, the next step in installing your SSD is to connect it to your motherboard. To do this, first locate the SATA port on your motherboard. It is usually located near the center of the board and marked with the word “SATA” or a symbol that looks like an “L” or a “7”.

    Once you have identified it, use the included SATA data cable to connect your SSD to the motherboard. The SATA data cable has two flat connectors on either end: one for the motherboard and the other for the SSD. Carefully align the connectors and push them into place until they click.

    Make sure not to force them or bend any of the pins. Once your SSD is connected, you may need to enable it in your BIOS settings to ensure that it is recognized by your system and that you can begin using it. Overall, connecting your SSD to your motherboard is a straightforward process that plays a crucial role in ensuring that your system operates at peak performance.

    Conclusion

    In the world of technology, connecting your SSD to your motherboard may seem like a daunting task, but fear not! With the right tools and a little bit of know-how, it’s as easy as fitting a square peg into a square hole – which is to say, very easy indeed. So grab your screwdriver and get ready to show that SSD who’s boss, because with this newfound knowledge, you’ll have it up and running in no time!”

    FAQs

    What type of cable is needed to connect an SSD to a motherboard?
    To connect an SSD to a motherboard, you will typically need a SATA cable.

    Where do I plug in the SATA cable on the motherboard for my SSD?
    Look for a SATA port on the motherboard and connect the cable to it. The specific location may vary depending on the motherboard model.

    Can I connect my SSD to any SATA port on the motherboard?
    In most cases, you can connect your SSD to any available SATA port on the motherboard. However, it is recommended to refer to the motherboard manual to ensure optimal performance.

    How do I check if my SSD is properly connected to the motherboard?
    You can check if your SSD is properly connected by checking the BIOS settings or through the disk management tool in your operating system. Make sure the drive is recognized and visible in the system.

  • Unleashing the Power of Your SSD: A Comprehensive Guide to Accessing Your New Storage Space

    Ready to expand your storage options? As the demand for larger storage space continues to soar, SSDs have become the go-to solution for users seeking faster and more reliable storage. Accessing new SSD space can unlock a world of possibilities, from running more intensive applications to storing your favorite media files. The good news? It’s easier than ever to expand your SSD storage.

    In this article, we’ll give you the rundown on how to access new SSD space, so you can get more out of your computer. Whether you’re upgrading your current hardware or purchasing a new computer, keep reading for some essential tips and tricks.

    Check SSD Installation

    If you’ve recently installed a new SSD on your computer, you might be wondering how to access your new space. The good news is that gaining access shouldn’t be too difficult. First, you’ll want to make sure that your computer recognizes the new drive.

    You can check this by going to your computer’s settings and clicking on “Storage.” If your new drive is recognized, you should see it listed there. Once you’ve confirmed that your new drive is recognized, you can start moving files over.

    One thing to keep in mind is that your operating system and any programs you have installed will still be on your old drive. To make the most of your new space, you’ll want to make sure you’re moving files that take up a lot of space, like photos, videos, and large documents. With a little bit of setup, you’ll be able to take advantage of your new SSD’s speed and storage capacity to make your computer run faster and more efficiently.

    Verify SSD Is Detected

    If you have just installed a new SSD into your computer, it’s essential to ensure that it’s detected by the system. First, turn on the computer and enter the BIOS settings by pressing a key specified on the screen (usually F2 or Del). Then, navigate to the “Advanced” or “Storage” tab and check if the SSD is listed among the connected devices.

    If it isn’t, double-check that the SATA power and data cables are securely plugged in. Additionally, you can try switching the SATA port that the SSD is connected to. Once the SSD is detected, make sure it’s set as the primary boot device in the BIOS.

    This will enable the operating system to load from the SSD for faster boot times. So, take a few minutes to check if your computer has detected the newly installed SSD to ensure everything is running smoothly.

    how do i gain access to my new ssd space

    Allocate SSD Space

    Allocate SSD Space When it comes to checking your SSD installation, one important task is to allocate the available space to suit your needs. Allocating space on your SSD may require some maneuvering, depending on your usage requirements. The first step is to open up your disk management tool and check if your SSD is listed there.

    Once you’ve located your SSD, you can create a new partition for it and then allocate the desired amount of space. This process allows you to manage the space usage on your SSD and optimize it for your system needs. It also allows you to use your SSD as a primary drive and install apps and software that require faster access speeds.

    Allocating space on your SSD is an essential measure to ensure optimal performance and long-term durability of your storage drive.

    Format SSD for Use

    If you’ve recently upgraded your computer’s storage with a new SSD, you’re probably wondering how to gain access to the new space. The first step is to format the SSD so that it’s compatible with your system. To do this, you’ll need to open your computer’s Disk Management tool.

    From here, you can locate your new SSD and format it with the NTFS file system. This will allow your computer to recognize the drive and use it effectively. Before formatting, be sure to back up any important data that’s currently on the drive, as formatting will erase everything.

    Once the formatting is complete, you can begin using your new SSD for storage, installing programs, and running your operating system. With the extra speed and storage capacity of your new SSD, you’ll be able to work more efficiently and enjoy a smoother overall computing experience.

    Back Up Important Data

    If you’re looking to format your SSD for use, it’s important to back up your important data first. Formatting an SSD erases all of the data on it, so you won’t be able to retrieve your files if you haven’t made a backup. A backup helps ensure that you don’t lose any crucial data if something goes wrong during the formatting process.

    There are different methods of backing up data, from using an external hard drive to cloud-based solutions. It’s crucial to choose a backup method that works best for your needs and preferences. Once you have backed up all of your important data, you can proceed to format your SSD for use, which involves preparing the drive to store information and allocating space for the operating system and other software programs.

    Formatting an SSD can help improve its performance and extend its lifespan.

    Format SSD

    Formatting an SSD is an essential step when setting up a new drive or preparing it for reuse. It involves wiping all the data stored on it and resetting it to its original state. This process is particularly important for those who plan on using the drive as their primary storage device for their operating system.

    The first step in formatting an SSD is to back up any critical data stored on it. Once the backup is complete, you can connect the drive to your computer and use the built-in formatting tool found in the Disk Management utility in Windows or Disk Utility on Mac. Select the drive, choose the appropriate file system, and hit format.

    Depending on the size of the drive, the process may take some time to complete. Once the format is complete, you’re left with a fresh, clean drive ready for use. Remember to always handle SSDs with care and follow the manufacturer’s instructions for optimal performance.

    Using the SSD

    So you’ve just upgraded your computer by adding a new SSD (Solid State Drive) and you’re probably wondering how to access the extra space. Don’t worry, it’s pretty simple. First, you’ll need to make sure that your SSD is recognized by your computer.

    You can do this by opening your device manager and checking if it’s listed under “Disk Drives”. Once you’ve confirmed that your SSD is recognized, you can partition the drive and format it to make it usable. You can do this by right-clicking on your computer icon and selecting “Manage”.

    From there, navigate to “Disk Management”. You should see your new SSD listed there. Right-click on it and select “New Simple Volume”.

    Follow the prompts to partition and format the drive. And voila! You now have access to your new SSD space.

    Set Up Storage Options

    If you want lightning-fast boot times and snappy performance, using an SSD (Solid State Drive) as your primary storage is an excellent choice. Compared to traditional HDDs (Hard Disk Drives), SSDs have no moving parts, so they’re incredibly fast, quiet, and reliable. Plus, SSDs consume less power, so they’re perfect for laptops if you’re looking to extend your battery life.

    To set up your SSD, you’ll first need to check if your PC or laptop has an SSD slot available. If it does, then you can install the SSD by connecting it to your motherboard using a SATA cable and a power cable. Once you’ve installed the SSD, you’ll need to migrate your operating system and programs to the new drive.

    This step can be a bit tricky, but there are many software tools available for free on the internet that can help you with the migration. Finally, once all your data has been transferred to the new drive, you’ll need to update your BIOS settings to set the SSD as your primary boot option. With these steps completed, you’ll be ready to enjoy the blazing-fast performance and reliability of your SSD!

    Optimize Performance

    If you’re looking to optimize your computer’s performance, upgrading to an SSD (Solid State Drive) is a great place to start. Unlike traditional hard drives, SSDs use flash memory to store data, which allows for faster read and write speeds. This means that your computer will load programs and files much quicker than it would with a traditional hard drive.

    Additionally, SSDs tend to be more reliable than HDDs, as they don’t have any moving parts that can wear out over time. Upgrading to an SSD is a relatively simple process, and it can make a noticeable difference in your computer’s performance. So if you’re tired of waiting for your computer to boot up or load programs, consider upgrading to an SSD.

    Troubleshooting

    So, you’ve just installed a new SSD and you’re ready to start utilizing all that extra space. The first thing you need to do is make sure your computer recognizes it. To gain access to your new SSD, you’ll need to go into your computer’s Disk Management tool.

    You can do this by right-clicking on your Start menu and selecting “Disk Management” from the list of options. From there, you should see your new SSD listed as a drive that has not yet been initialized. Right-click on the drive and select “Initialize Disk,” then choose the partition style you’d like to use.

    Once you’ve done this, you’ll need to create a new volume by right-clicking on the unallocated space on the SSD and selecting “New Simple Volume.” Follow the prompts to set up the volume, and once you’re done, you should have full access to your new SSD and all the space it provides. It’s that easy!

    Common Issues

    When it comes to troubleshooting common issues, it can be frustrating not knowing where to start. Luckily, there are some simple steps you can take to identify and fix the issue. Firstly, check for any error messages or warning signs that may give you a clue as to what the problem is.

    It’s also worth checking if any updates need to be installed or if there are any conflicting programs running. If the issue persists, try restarting your device or even resetting it to its default settings. Another useful tip is to seek help from online forums or support pages, as there may be others who have experienced the same problem and found a solution.

    By taking these simple steps, you can save yourself a lot of time and stress in the long run.

    Solutions

    When it comes to troubleshooting, it’s important to first identify the problem before finding a solution. This can involve asking questions and gathering information about the issue at hand. Once you have a clear understanding of what’s going on, you can then start exploring possible solutions.

    It’s important to approach troubleshooting in a methodical and systematic way, so that you can eliminate potential causes and narrow down the problem. In some cases, the solution may be simple, such as restarting a device or updating software. Other times, it may require more advanced troubleshooting techniques, like digging into a system log or running diagnostic tests.

    Whatever the case may be, staying calm and focused is key when it comes to troubleshooting. By taking the time to identify and address the issue, you can help prevent further problems down the line.

    Conclusion

    In conclusion, gaining access to your new SSD space is as easy as making a cup of coffee. You just need to follow a few steps, pour in the right ingredients and voila – you have a freshly brewed cup of Joe. Similarly, all you need to do is connect your new SSD, format it, and transfer your files to enjoy the benefits of faster storage and more space.

    So, don’t let your SSD sit there unused – go ahead and brew up some more space today!”

    FAQs

    What is the process to install my new SSD?
    To install your new SSD, follow these steps: 1. Shut down your computer. 2. Open your computer case. 3. Locate the existing hard drive. 4. Disconnect the cables from the hard drive. 5. Remove the hard drive from the computer. 6. Insert the new SSD into the same slot. 7. Connect the cables to the SSD. 8. Close the computer case. 9. Start your computer and check that your new SSD is recognized.

    How do I transfer files to my new SSD?
    To transfer files to your new SSD, follow these steps: 1. Connect your new SSD to your computer. 2. Open your file explorer. 3. Locate the files you want to transfer. 4. Right-click on the files and select “Copy.” 5. Navigate to your new SSD folder. 6. Right-click in the new SSD folder and select “Paste.” 7. Wait for the files to transfer.

    Do I need to format my new SSD before using it?
    Yes, you need to format your new SSD before using it. To format your new SSD, follow these steps: 1. Connect your new SSD to your computer. 2. Open Disk Management. 3. Locate your new SSD. 4. Right-click on your SSD and select “Format.” 5. Choose the file system and allocation unit size. 6. Name your new SSD drive. 7. Click “OK” to format your new SSD.

    Why is my new SSD not showing up on my computer?
    Your new SSD may not be showing up due to various reasons, such as: 1. The SSD is not connected correctly. 2. The SSD needs to be initialized. 3. The SSD needs to be formatted. 4. The SSD driver needs to be updated. To troubleshoot this issue, check the connection and try initializing or formatting the SSD. If the issue persists, try updating the driver.

  • Effortlessly Boost Startup Speed: The Ultimate Guide on How to Transfer Your Startup to SSD

    Ready to step up your computer game and upgrade your hard drive? Do you want to make the switch to a faster and more efficient SSD? Don’t worry, transferring your startup files to an SSD is easy and we’ve got your back with this step-by-step guide. Switching to an SSD can be a game-changer for your computer, allowing you to boot up and launch applications in mere seconds. However, transferring your startup files can seem daunting.

    With this guide, you can easily make the switch and enjoy the benefits of lightning-fast speed. We’ll guide you through the process, from choosing the right SSD to transferring your files and making sure everything is working smoothly. You’ll be able to transfer your startup files in no time and enjoy a faster, more efficient computer.

    So grab your computer and let’s get started on this exciting upgrade. The days of waiting for your computer to start up are over. It’s time to take your computing to the next level with an SSD.

    Backup Your Data

    If you’re looking to transfer your startup to an SSD, you’ll need to ensure that you back up all of your data beforehand. This is a crucial step to avoid losing any important files or information during the transfer process. There are a few different ways to back up your data, such as using an external hard drive or cloud storage.

    Once you’ve successfully backed up your data, you can start the process of transferring your startup to the SSD. This can be done through cloning software that will essentially replicate your startup onto the new drive. It’s important to note that the process may vary slightly depending on your specific operating system and the tools you’re using, so it’s always a good idea to do some research or reach out for professional help if you’re unsure.

    With proper preparation and the right tools, transferring your startup to an SSD can be a smooth and successful process that brings improved speed and performance to your device.

    Make Sure to Save all your important Data before you proceed

    When it comes to making any changes to your computer or device, it’s always important to take the necessary precautions to ensure your data is safely backed up. This means creating a backup of all your important files and documents, as well as any personal media such as photos, videos, and music. Losing data can be a frustrating and stressful experience, and it can be especially devastating if you lose something that can’t be replaced.

    Making a backup ensures that your data will be safe in case something goes wrong during the process. So before you start making any changes to your device, make sure you take the time to backup your data. It’s always better to be safe than sorry!

    how do i tr4ansfer my startip to ssd

    Cloning the Startup Drive

    If you’re looking to upgrade your computer’s performance, transferring your startup to an SSD is an excellent option. Cloning your startup drive can save you time and effort in re-installing all of your applications and files. To make the transfer, you’ll need a cloning software and a compatible SSD.

    Once you have everything ready, connect the SSD to your computer, launch the cloning software, and select your startup drive as the source. You’ll then choose the SSD as the target destination and let the software do its job. The process might take a couple of hours, depending on the size of your startup drive.

    After the cloning is complete, shut down your computer, disconnect the old startup drive, and ensure the SSD is in the proper position. You now have a faster and more reliable startup. With just a few steps, you can enjoy a smoother and faster performance, all thanks to transferring your startup to an SSD.

    Use a Cloning software like Carbon Copy Cloner or SuperDuper!

    Cloning your startup drive is an essential task that every Mac user should be aware of. When it comes to cloning software, Carbon Copy Cloner and SuperDuper! are two popular options to consider. These programs make the process of cloning your startup drive simple and straightforward.

    By cloning your startup drive, you have the freedom to backup your data and restore it in case of system failure. It’s also helpful if you’re looking to transfer your data to another computer or when upgrading your current system. With Carbon Copy Cloner or SuperDuper!, you can create a complete backup as well as choose the specific files and folders you want to clone.

    This makes the process more efficient, so you’re not storing unnecessary data. Overall, cloning your startup drive is an essential task that can save you time and hassle in the long run.

    Install SSD

    If you’re still using a traditional hard drive and looking to upgrade to a faster, more efficient SSD, transferring your startup to the new drive is essential. The process can be a bit daunting for those without much technical experience, but with some basic knowledge, it’s a doable task. The first step is to make sure you have enough space on the SSD to move your startup files over.

    You can do this by cloning your existing operating system to the new drive using cloning software. Next, you’ll need to set the SSD as the primary boot device in your computer’s BIOS. This will ensure that your computer boots from the SSD instead of the old hard drive.

    Once this is complete, you should be able to enjoy faster boot times and improved overall performance from your new SSD. Remember to back up all important data before making any changes to your system. With proper planning and execution, transferring your startup to an SSD can be a significant upgrade that will make your computer run smoother and faster than ever before.

    Swap the Hard Drive that came with your computer with the SSD

    If you’re looking to speed up your computer and improve its overall performance, you might want to consider swapping out the hard drive that came with it with a solid-state drive (SSD). SSDs are faster, more reliable, and can drastically reduce load times for your operating system and applications. However, the installation process can seem like a daunting task for those who are unfamiliar with computer hardware.

    First, you need to ensure that the SSD you purchase is compatible with your computer. Once you have the right SSD, you will need to back up your files and shut down your computer before opening up the case. Then, gently remove the hard drive from its slot and replace it with the SSD, being sure to secure it in place.

    Finally, close up the case, boot up your computer, and install your operating system onto the new SSD. Voila! Your computer is now running on an SSD, and you’ll notice a significant improvement in speed and performance.

    Boot from the SSD

    If you’re looking to upgrade your computer’s performance, transferring your startup to an SSD is a great place to start. To do this, you’ll need to clone your current startup drive, such as your hard drive, onto your new SSD. First, you’ll need to connect the SSD to your computer, either by using an external adapter or by installing it internally.

    Then, you can use a cloning tool such as EaseUS Todo Backup or Clonezilla to copy everything from your old drive to your new SSD. Once the cloning process is complete, you can set your computer to boot from the new SSD. This will significantly improve your computer’s startup times and overall performance.

    With this simple upgrade, you can give your old computer a new lease on life and enjoy a faster, smoother computing experience.

    Hold down the Option key while booting up to select the SSD to boot from

    boot from the SSD. If you’ve recently upgraded your Mac’s hard drive to an SSD, congratulations! An SSD can significantly boost your Mac’s performance. However, after installing the SSD, you need to make sure you’re booting from it.

    The good news is that this is a relatively simple process. To do this, you need to hold down the Option key while your Mac starts up. This will bring up the Startup Manager, which allows you to choose the drive to start up from.

    You should see all the drives that are available, including the new SSD. Simply click the SSD and hit Enter. Your Mac will then startup using the SSD.

    Remember that you only need to do this once. After you’ve booted from the SSD, your Mac will remember your preference and boot from it every time you turn your computer on. If you’re using an external SSD, you’ll need to make sure it’s connected before booting up your Mac, or it won’t show up in the Startup Manager.

    In conclusion, upgrading to an SSD is a valuable investment for any Mac user. However, you need to make sure you’re booting from it to reap the full benefits. By holding down the Option key while your Mac starts up, you can easily select the SSD to boot from.

    It’s a simple process that only takes a few seconds, and it ensures that your Mac is running at top speed.

    Update Startup Disk

    Are you looking to upgrade your startup disk onto a new SSD? If so, you’re in luck because the process is fairly straightforward. The first step is to clone your existing startup disk onto the SSD. This can be done using various cloning software or disk management tools, depending on your OS.

    Once the cloning process is complete, you’ll need to set the SSD as your boot drive in the BIOS. After rebooting, your computer should automatically boot from the new SSD startup disk. It’s important to note that if your SSD is smaller than your existing startup disk, you will need to remove some files to make it fit.

    However, if your SSD is larger, you can use disk management tools to allocate more space to your boot drive. With these steps completed, you’re now ready to enjoy a faster, more efficient startup on your upgraded SSD.

    Go to System Preferences > Startup Disk > Select SSD as the startup Disk

    Updating the startup disk on your Mac is a simple process that can be completed in just a few clicks. To get started, go to your System Preferences and select Startup Disk. From here, you can choose the SSD as your new startup disk.

    This is an important step because it ensures that your computer starts up quickly and efficiently every time you turn it on. By updating your startup disk, you’ll be able to enjoy faster boot times, more responsive applications, and a smoother overall user experience. It’s important to note that if you have multiple drives installed on your Mac, you’ll want to choose the one that contains your operating system and all of your important files.

    Overall, updating your startup disk is a quick and easy way to improve the performance of your Mac. So if you’re experiencing slow boot times or other performance issues, be sure to give it a try and see the difference it can make.

    Conclusion

    In conclusion, transferring your startup to an SSD is like giving your computer a performance upgrade. It’s like replacing a horse-drawn carriage with a sports car. Your computer will run faster, smoother, and with greater reliability.

    So, if you want to take your startup to the next level, switch to an SSD and watch your business soar to new heights!”

    FAQs

    Can I transfer my startup to SSD without losing any data?
    Yes, you can transfer your startup to SSD without losing any data by cloning your current drive to the new SSD using software like EaseUS Todo Backup.

    What is the difference between cloning and migrating a startup to SSD?
    Cloning involves copying all data from the existing startup to the new SSD, while migrating involves moving system files and programs only. Cloning is a more complete solution, while migrating may result in some files being left behind.

    Do I need to reinstall my operating system after transferring my startup to SSD?
    No, you do not need to reinstall your operating system after transferring your startup to SSD. Cloning or migrating your current system to the new SSD will keep your operating system and files intact.

    Can I transfer my startup to SSD on my own or do I need professional help?
    You can transfer your startup to SSD on your own using software like EaseUS ToDo Backup, but if you’re not comfortable with the process, it’s best to seek professional help to avoid any potential issues.

    How long does it take to transfer a startup to SSD?
    The time it takes to transfer a startup to SSD depends on the amount of data being transferred and the speed of your computer. On average, transferring a startup to SSD can take anywhere from 30 minutes to a few hours.

  • Make an Informed Decision: A Beginner’s Guide on Choosing the Right SSD for Your Desktop

    SSD or Solid State Drive is a technological wonder that promises faster data storage and quick boot-up time in desktops. However, not all SSDs are created equal. Some are more suitable for gaming, while others are better for office use.

    Understanding the technicalities and finding the right SSD for your desktop requires careful considerations. But fret not, I’m here to help you make sense of all the technical jargon. In this blog, we’ll delve into the factors that you should keep in mind while choosing an SSD for your desktop, and how to find one that is perfect for your needs.

    So let’s get started!

    Consider Your Needs

    When it comes to upgrading your desktop with an SSD, there’s no one-size-fits-all answer. It all depends on your unique needs and budget. To start, consider the size of your current hard drive and how much storage you need.

    If you’re a heavy user who frequently works with large files or plays graphics-intensive games, you’ll likely want a larger SSD with faster transfer speeds. On the other hand, if you only use your desktop for web browsing and basic tasks, a smaller, slower SSD may be sufficient. When making your decision, also take into account your budget and any brand preferences you may have.

    Take your time to do your research and read plenty of reviews before making your final decision to ensure you get the perfect SSD for your desktop.

    Determine Your Storage Capacity Requirements

    When determining your storage capacity requirements, it’s important to consider your individual needs. What are you storing? How much of it do you have? Will you be adding more in the future? These are all important questions to ask yourself. For example, if you’re a small business owner who primarily deals with digital files and documents, you may not need as much storage space as someone who runs a large manufacturing plant.

    Similarly, if you’re an avid photographer or videographer, you’ll need more storage space to hold all of your high-quality images and videos. It’s important to think ahead and plan for growth as well. You don’t want to run out of storage space as soon as you’ve invested in a system.

    So, take some time to assess your current needs and future growth potential before making a decision.

    how do i know which ssd to buy for desktop

    Understand Your Workload and Usage

    When it comes to understanding your workload and usage, it’s important to consider your unique needs. This means taking into account the type of work you do, the amount of time you spend on different tasks, and the resources you have available. For example, if you’re a graphic designer who frequently works with large files and high-resolution images, you’ll need a computer with plenty of processing power and storage space.

    On the other hand, if you’re a writer who primarily works with text documents, you may not need as powerful a machine. By understanding your needs, you’ll be able to choose the right equipment and software to help you work efficiently and effectively. Remember, everyone’s workload and usage patterns are different, so what works well for one person may not be the best solution for you.

    Check Your Desktop Compatibility

    When considering purchasing a desktop computer, it is important to check for compatibility with your needs. Are you a gamer, a graphic designer, or simply looking for a standard computer for daily use? Each of these activities requires a different type of desktop, so take time to assess what functions you need. For example, a gamer might want a computer with a powerful processor, a high-quality graphics card, and a large amount of storage space.

    On the other hand, a graphic designer might need a computer with a high-resolution monitor and specialized design software. By identifying your needs, you can ensure that the desktop you choose is compatible with the tasks you need it to accomplish. Don’t just buy any computer without considering whether it will meet your demands- take the time to research and make an informed decision.

    Look at the SSD Performance

    When it comes to purchasing an SSD for your desktop, there are a few key factors to consider. One of the most important is SSD performance. You’ll want to look at factors such as read and write speeds, as well as how the SSD handles large files and multitasking.

    A high-performing SSD can help ensure that your computer runs smoothly and quickly, even when you’re running multiple applications or working with large files. When shopping for an SSD, be sure to compare different brands and models to find one that meets your performance needs as well as your budget. By taking the time to research and compare your options, you can find the perfect SSD for your desktop system, and enjoy faster, more efficient computing for years to come.

    Focus on the Read and Write Speeds

    When it comes to choosing the perfect SSD for your computer, it is crucial to focus on the read and write speeds. SSD performance can vary drastically depending on these speeds, so it is important to look out for them. Read speed refers to the amount of time it takes for the SSD to read data from your computer, while write speed refers to the amount of time it takes for the SSD to write data to your computer.

    Of course, you want both of these speeds to be as fast as possible, so your computer can run smoothly and efficiently. When selecting an SSD, it is important to consider what type of tasks you will be using your computer for. For example, if you are frequently transferring large files or running programs that use a lot of memory, you will want an SSD with high read and write speeds.

    On the other hand, if you mainly use your computer for basic tasks like browsing the internet and checking email, you might be able to get away with a slower SSD. Overall, SSD performance is vital to the overall functioning of your computer. By focusing on the read and write speeds, you can ensure that your computer runs smoothly and quickly, no matter what tasks you are performing.

    So when it comes to selecting an SSD, make sure to do your research and choose one that meets your specific needs.

    Consider the IOPS

    When it comes to choosing the perfect SSD for your device, it’s important to consider the IOPS or Input/Output Operations Per Second. This simple metric can quickly tell you how fast your device’s storage can read and write data. Generally, the higher the IOPS, the better the performance.

    However, keep in mind that other factors such as the type of SSD, the controller, and your device’s hardware will also play a role. Alternatively, you can also look at the sequential read and write speeds, which are great for large file transfers. Always ensure that you choose an SSD with good performance to ensure that your device runs smoothly and efficiently.

    Compare SSD Prices and Brands

    When it comes to buying an SSD for your desktop, there are various factors you need to consider, including pricing and brand reputation. You’ll want to compare prices and features from different brands to ensure you get the best deal possible. You can start by looking at the various leading brands such as Samsung, SanDisk, and Kingston, among others.

    However, keep in mind that some lesser-known brands may offer similar or even better features at a lower price point. You can always check reviews and ratings from users to help you make your decision. Ultimately, you need to determine what you need in an SSD and which brand offers the most suitable features for your requirements.

    When looking at the pricing, make sure to consider the cost per gigabyte, as some SSDs may offer a better overall value even if they are more expensive upfront. By taking these factors into account, you can be confident in selecting the ideal SSD for your desktop. So, keep it simple, find the right balance between features and price, and you’ll be good to go with your SSD purchase.

    Set a Budget

    When it comes to buying a new SSD, one of the most important factors to consider is your budget. The good news is that there are plenty of options available, ranging from budget-friendly drives to high-end models with all the bells and whistles. However, it’s important to be realistic about what you can afford, as the prices of SSDs can vary widely depending on the brand and specifications.

    To get the best value for your money, you’ll want to compare prices and brands to find the one that fits your needs and budget. Look for sales, promotions, and deals that can help you save money, and don’t be afraid to shop around to find the best price. Remember, setting a budget and sticking to it can help you avoid overspending and ensure that you get the most bang for your buck.

    Read Reviews

    If you’re looking to upgrade your computer’s storage, then you’re probably wondering which SSD brand and model to choose. One of the best ways to make a decision is by reading reviews from customers who have already purchased and used the product. This can give you a better idea of the pros and cons of a particular SSD and how it performs in real-world scenarios.

    Additionally, checking out prices for different SSDs can help you determine which brand offers the best value for your money. When comparing prices, keep in mind that different capacities and performance levels will affect the price. Overall, doing your research and comparing prices and reviews can help you make an informed decision when purchasing an SSD for your computer.

    Make Your Final Decision with Confidence

    If you’re wondering how do I know which SSD to buy for my desktop computer, you’re not alone. With so many options on the market, it can be overwhelming to make a decision. The first thing to consider is the size of the SSD you need.

    Look at your current storage usage and determine the capacity you require. Next, consider the transfer speeds of the SSD. Faster read and write speeds will improve overall system performance.

    If you’re planning on using the SSD as a boot drive, then a higher-end option would be best. Finally, take into account the reliability and durability of the SSD, as well as the warranty and customer support offered by the manufacturer. With these factors in mind, you can make your final decision with confidence and find the perfect SSD for your desktop computer.

    Conclusion

    In the end, choosing the right SSD for your desktop comes down to finding the perfect balance between cost, speed, and storage capacity. It’s important to consider your specific needs and usage habits when making this decision. But fear not, with a little research and consideration, you’ll be well on your way to finding the SSD of your dreams – the one that will make your desktop run faster and smoother than ever before!”

    FAQs

    What factors should I consider when buying an SSD for my desktop?
    The factors to consider when buying an SSD for your desktop include capacity, speed, interface, and price.

    Is it better to buy a high-capacity SSD or a fast one?
    It depends on your needs. If you need to store a lot of data, go for a high-capacity SSD. If speed is your priority, go for a fast SSD.

    What is the difference between SATA and NVMe SSDs?
    SATA SSDs are slower than NVMe SSDs but are more affordable. NVMe SSDs are faster but more expensive.

    Can I replace my desktop’s hard drive with an SSD?
    Yes, you can replace your desktop’s hard drive with an SSD. However, you may need to transfer your operating system and files to the new SSD.

  • Supercharge Your Acer Nitro 5: A Step-by-Step Guide to Installing an SSD

    Looking to boost your Acer Nitro 5’s storage and performance? Installing an SSD can significantly improve your computer’s speed and responsiveness. However, if you’re not particularly tech-savvy, the idea of opening up your laptop and tinkering with its internals might seem a bit daunting. But fear not, as this guide will walk you through the step-by-step process of installing an SSD on your Acer Nitro

    Whether you’re upgrading a new or old Nitro 5 laptop, this guide covers everything you need to know to get it done in no time. So, grab your tools and let’s get started!

    What You’ll Need

    If you’re looking to upgrade your Acer Nitro 5 with an SSD, you’ll need a few things to get started. The most important item you’ll need is, of course, the SSD itself. Make sure to get one that’s compatible with your laptop, taking into consideration its size and interface.

    You’ll also need a SATA cable to connect the SSD to your laptop’s motherboard. A screwdriver set will come in handy for opening up the back panel and removing the hard drive. If you don’t have one, consider investing in an anti-static wristband to avoid any damage due to static electricity.

    With these items on hand, you’ll be ready to install your new SSD and enjoy faster performance on your Acer Nitro

    SSD

    If you’re looking to upgrade your computer’s storage speed and performance, an SSD is the way to go. But before you go and buy one, there are a few things you need to consider. First, make sure your computer is compatible with SSDs.

    Most modern computers are, but if you have an older model, you may need to do some research or ask a professional to check. Second, decide how much storage space you need. SSDs tend to be more expensive than traditional hard drives, so you don’t want to overspend on storage you won’t use.

    Finally, consider the brand and model of SSD you want to purchase. There are many different options out there, each with their own pros and cons. Do your research and read reviews to ensure you’re getting the best SSD for your needs.

    With a little bit of planning and research, you can upgrade to an SSD and enjoy faster speeds and improved performance on your computer.

    acer nitro 5 how to install ssd

    SATA Cable

    If you’re building your own PC or looking to upgrade your hard drive, you’re going to need a SATA cable. A SATA cable is what connects your hard drive or SSD to your motherboard and allows data to flow between the two. It’s a vital component of any computer build, and without it, your storage won’t work.

    SATA cables come in different lengths and colors, but the important thing is that they’re compatible with your motherboard and storage device. When choosing a SATA cable, look for one that’s labeled as “SATA 3” or “SATA 6,” which refers to the data transfer rate. The faster the transfer rate, the faster your storage will be.

    So, if you want to get the most out of your hard drive or SSD, make sure you have a high-quality SATA cable that’s built to handle the job.

    Screwdriver

    When it comes to DIY projects, a screwdriver is a must-have tool. There are different types of screwdrivers available in the market, including flathead screwdrivers, Phillips screwdrivers, and Torx screwdrivers. Before you start your project, make sure you have the appropriate screwdriver for the job.

    Apart from the screwdriver, you’ll also need a few other tools to complete your project. A measuring tape, hammer, level, and pliers are some of the essential tools you should have on hand. Depending on the project, you may also need a drill, saw, or sandpaper.

    It’s essential to have a secure and reliable grip to prevent slipping and falling while using the screwdriver. A rubber grip is an excellent option that helps you maintain a firm grip while using the screwdriver. Remember to keep your work area clean and organized while working on any project.

    This will help you avoid losing small parts and make the project go smoothly. In summary, the screwdriver is an essential tool for DIY projects. Make sure you have the right screwdriver, other necessary tools, and a secure grip to get the job done right.

    Don’t forget about organization to make the project run efficiently.

    Step 1: Prepare Your Laptop

    If you’re looking to improve your Acer Nitro 5’s performance, installing an SSD is a great way to speed up your PC. However, before you begin, there are a few things you need to do to prepare your laptop for installation. Firstly, make sure you turn off your laptop and unplug it from any power sources.

    Then, remove the screws from the bottom panel of your laptop and gently pry it open. Be careful not to damage any components as you do this. Once the panel is open, locate the hard drive bay and remove the screws holding the hard drive in place.

    After you’ve removed the hard drive, you can then install your SSD, making sure it’s properly inserted into the bay. Finally, you’ll need to screw in the SSD and put the panel back on your laptop. Once you’ve completed these steps, you’re ready to start using your Acer Nitro 5 with your new SSD.

    Shut It Down and Unplug It

    When it comes to shutting down your laptop, there are a few steps you should take to properly prepare it. First, make sure you save any unsaved work and close all programs. This will ensure that your laptop is not running any processes that could interfere with the shutdown process.

    It’s also a good idea to disconnect any external devices, such as a mouse or USB drive, to avoid potential damage during shutdown. Once everything is saved and closed, you can properly shut down your laptop. To do this, head to the Start menu and select “Shut down.

    ” This will initiate the shutdown process and power off your laptop. Giving your laptop a few seconds to rest before unplugging it is also recommended. This will allow any residual electrical current to dissipate before you remove the power source.

    Remember, taking these steps will help ensure the longevity and proper functioning of your device.

    Remove Battery and Power Cord

    Preparing your laptop for repairs or maintenance is crucial for the longevity and functionality of your device. The first step in preparing your laptop is to remove the battery and power cord. This step ensures that there is no power running through the laptop while you work on it, which eliminates the risk of electric shock and protects your device from any power surges.

    To remove the battery, locate the release button or switch and push or slide it in the appropriate direction. Gently lift the battery out of the compartment. For the power cord, unplug it from the outlet and laptop.

    It’s essential to follow these steps correctly, especially if you are not a tech-savvy person. Not doing so may result in severe damages to your laptop. By removing the battery and power cord, you’re taking the first step in ensuring safe and effective repairs or maintenance to your laptop.

    Step 2: Open the Laptop

    If you want to install an SSD in your Acer Nitro 5 laptop, you’ll need to open it up first. Before we get into that, make sure you have all the necessary tools, including a screwdriver and an anti-static wrist strap. Once you have everything ready, flip the laptop over and remove the screws from the bottom panel.

    Gently lift the panel off to reveal the internals. You may need to disconnect the battery and remove a few more screws before you can access the hard drive bay. Once you’re there, simply unscrew the hard drive and slide it out.

    Then, replace it with your new SSD and screw it in place. Don’t forget to reconnect the battery and put the bottom panel back on before firing up your laptop! With these simple steps, your Acer Nitro 5 will benefit from improved performance and faster boot times thanks to your new SSD.

    Remove the Screws on the Back Cover

    Once you have located all the screws on the back cover of your laptop, it’s time to remove them. This is a crucial step in opening up your device and accessing its components. You’ll need a screwdriver that fits the size of the screws, and it’s important to be gentle and not force the screws out.

    Once you have removed all the screws, carefully lift the back cover upward and away from the laptop. Be mindful of any cables or connections that may be attached to the cover and gently disconnect them if necessary. Remember, opening up your laptop can be tricky, so take your time and don’t rush the process.

    With this step complete, you’re one step closer to accessing the inner workings of your laptop and making any necessary repairs or upgrades.

    Open the Back Cover and Locate the HDD

    To upgrade or replace your laptop’s HDD, the first step is to open the back cover. Start by turning off your laptop and unplugging it from the power source. Locate the screws that hold the back cover in place and use a screwdriver to remove them.

    Gently lift the cover to avoid damaging any internal components. Once you have access to the inside of the laptop, it’s time to locate the HDD. Most laptops have the HDD located in a slot or bay that is easily accessible.

    Some laptops require you to remove additional screws or components to access the HDD. This may be a bit tricky, but with a little patience and careful attention, you can easily open your laptop and locate the HDD. Remember to handle the parts with care and to keep track of screws and other small parts to ensure easy reassembly later on.

    Step 3: Remove the HDD

    Now that the back cover has been removed, it’s time to remove the old HDD and make room for the new SSD. Locate the HDD and unscrew the small screws that are holding it in place. Once these screws have been removed, gently slide the HDD out of its bay and disconnect the SATA and power cables from the back.

    Be sure to handle the HDD carefully as it is a delicate piece of hardware. Now that the HDD has been removed, set it aside and get ready to install the new SSD. This part of the process is crucial for upgrading your Acer Nitro 5’s storage capacity and increasing its overall performance.

    So, take your time, be careful, and follow the steps closely to ensure a smooth installation.

    Unplug the SATA Cable from the HDD

    If you want to remove your HDD, you need to unplug the SATA cable. This is a crucial step in the process. The SATA cable is what connects your HDD to the motherboard, and you cannot remove the HDD if it is still connected.

    Make sure to unplug the cable gently and slowly. If you pull too hard, you risk damaging the cable or the connector. You might need to wiggle the cable slightly to get it out of its socket.

    Once you have unplugged the SATA cable, you can safely remove the HDD from your computer. Remember, this step is necessary to ensure that you don’t cause any damage to your PC.

    Remove the Screws Holding the HDD in Place

    To remove the HDD, the next step is to remove the screws holding it in place. These screws are what keep the hard drive securely attached to the computer’s chassis. Use a screwdriver to carefully unscrew each screw, taking care not to damage the HDD or the surrounding components.

    Once all screws have been removed, gently slide the hard drive out of its compartment, being mindful not to tug or pull too hard on any cables that may be attached. It’s essential to ensure that the HDD is not damaged during this process, as any physical damage to the drive can result in data loss or corruption. Remember to keep the screws in a safe place as they will be needed to reattach the HDD or any other component that was removed.

    The process of removing the HDD may seem daunting but remain calm and take your time, and soon it will be completed.

    Gently Pull the HDD out of the Slot

    Removing a hard drive can be a daunting task, but it’s actually quite simple. The third step is to gently pull the HDD out of the slot. This can be done by taking a firm grip on the HDD and pulling it straight out, without twisting or jerking it.

    It’s important to be gentle, as any sudden movements could damage the drive or the connector. Once the HDD is out of the slot, it can be set aside. It’s important to remember that hard drives are delicate and should be handled with care.

    By following these simple steps, you can safely remove a hard drive from your computer. So next time you need to replace or upgrade your hard drive, don’t be intimidated. With a little bit of knowledge and care, you can do it yourself!

    Step 4: Install the SSD

    Now that you’ve prepared your Acer Nitro 5, it’s time to install your SSD. First, make sure your laptop is unplugged and powered off. Locate the compartment for your SSD and open it up.

    You may need to use screws to secure the SSD in place, so make sure you have a screwdriver handy. Gently and carefully insert the SSD into the designated slot, making sure it’s securely in place. Once the SSD is in place, secure it with the screws provided.

    Finally, close up the compartment and power on your laptop. Your Acer Nitro 5 should automatically detect the new SSD and you’re all set to enjoy faster read and write speeds with your new upgrade. Congrats on a successful installation!

    Plug the SATA Cable into the SSD

    When it comes to installing your SSD, one of the crucial steps is plugging the SATA cable into the device. But before you do that, make sure that you properly mount your SSD in its allocated area. Once your SSD is securely in place, grab the SATA cable and connect it to the empty SATA port on your motherboard.

    This is typically located near the area where your HDD (Hard Disk Drive) is plugged into. If you’re unsure which port is the right one, you can always refer to your motherboard’s manual. After connecting the cable, make sure that it’s firmly connected to both the SSD and the port.

    This will ensure that data can pass through the connection without any interruptions, allowing your system to fully recognize the new SSD. With this step done, you’re almost ready to use your new SSD to boost your computer’s performance and storage space.

    Screw the SSD in Place

    Now that you have prepared your computer and removed the old hard drive, it’s time to install the new SSD. The first thing you should do is screw the SSD in place. This will ensure that it is secure and won’t move around inside your computer case.

    It’s important to note that every computer case is different, so the exact location of the SSD will vary. You can refer to your computer’s manual or do an online search for instructions specific to your make and model. Once you have located the correct spot, use the screws provided with your SSD to secure it in place.

    Make sure that it is flush with the bracket and that you don’t overtighten the screws. Once you have done this, you are ready to move on to the next step in your SSD installation process.

    Step 5: Replace the Back Cover

    Now that you’ve installed your new SSD on your Acer Nitro 5, it’s time to replace the back cover. Before doing so, double-check that your SSD is properly secured and connected to your motherboard. Once you’re confident in that, place the cover back onto your laptop and gently press it down.

    You should feel it snap back into place. Be sure to tighten any screws that were removed during the installation process, and turn your laptop back on to make sure everything is working smoothly. With your new SSD installed, you’ll be able to enjoy lightning-fast boot-up times and improved overall performance on your Acer Nitro

    Congratulations on a successful installation!

    Put the Back Cover Back On

    Replacing the back cover of a device may seem like a simple task, but it is an essential step in ensuring the safety and functionality of your device. Once you have completed any necessary repairs or cleaning, it’s time to put the back cover back on. Start by lining up the cover with the device’s body, making sure all the edges and corners match up perfectly.

    Gently snap the cover in place, making sure it’s secure and flush with the device’s frame. Avoid using too much force as this could damage the cover or the device’s internal components. Finally, give the cover a quick once-over to make sure it’s properly attached and free of any gaps or loose areas.

    With the back cover back in place, your device should now be fully functional and protected.

    Replace the Screws

    Now that we have successfully reattached all the necessary cables and components, it’s time to replace the screws and secure the back cover back in its place. Ensure that you have placed all the screws back in their respective holes on the back cover and use the right tool to firmly tighten them. Be careful not to apply too much pressure on the screws as it may damage the cover or the device.

    Double-check to make sure that all screws are in the correct position and securely fastened. Once you have tightened all the screws, give the back cover a gentle press to ensure it’s firmly attached, and you’re done! Your device should now be working well, and your repairs have been successfully completed. With the back cover replaced, you can now enjoy using your device without any issues.

    Step 6: Turn It On and Check Your New SSD!

    Once you have installed your new SSD in your Acer Nitro 5 laptop, it’s time to turn it on and make sure everything is working properly. Before doing so, double-check that all the screws are tightened and that the SSD is securely placed in its slot. When you turn on your laptop, you should go straight to the BIOS to make sure that the new SSD has been detected.

    If it’s not, try unplugging and plugging it back in, and if that doesn’t work, you may need to consult the user manual for further troubleshooting. Assuming everything looks good, check the amount of available storage on your new SSD and ensure that your operating system is installed on it. If not, you’ll need to clone your old hard drive or install a fresh copy of your OS.

    Congratulations, you’ve successfully installed a new SSD in your Acer Nitro 5 – enjoy the improved performance and quicker load times!

    Conclusion

    In conclusion, upgrading your Acer Nitro 5 with an SSD is like adding a turbocharger to a race car. It supercharges your laptop’s performance and allows it to reach new speeds. With a little bit of technical know-how and patience, installing an SSD in your Nitro 5 can be done easily and quickly.

    So don’t be afraid to take the plunge and give your laptop the boost it deserves!”

    FAQs

    What type of SSD is compatible with Acer Nitro 5?
    Acer Nitro 5 is compatible with NVMe M.2 SSDs. Make sure to check the size compatibility before purchasing.

    How do I install an SSD in Acer Nitro 5?
    To install an SSD in Acer Nitro 5, you need to remove the back cover and locate the M.2 SSD slot. Insert the SSD correctly and secure it in place. Then, replace the back cover and boot up the laptop.

    Can I install an SSD alongside the existing hard disk drive (HDD) in Acer Nitro 5?
    Yes, you can install an SSD alongside the existing HDD in Acer Nitro 5 to improve the performance and storage capacity. You can use the HDD as a secondary storage drive and install the operating system and frequently used applications on the SSD.

    Do I need to clone my existing drive data to the SSD before installation?
    It is not mandatory to clone the existing drive data to the SSD before installation. However, if you want to transfer your operating system, files, and applications to the new SSD, you can use a cloning software tool. Remember to backup your data before proceeding with the cloning process.

  • Upgrade to Lightning Speed: A Complete Guide on Moving Windows 7 from HDD to SSD

    Upgrading to a solid-state drive (SSD) is one of the best ways to improve your PC’s performance. Whether you’re gaming or just browsing the web, an SSD can significantly reduce load times and improve overall efficiency. However, moving Windows 7 to SSD can be quite intimidating for some users, especially if you’re not familiar with the process.

    In this blog post, we’ll cover everything you need to know about upgrading to an SSD, including the benefits of an SSD, how to prepare your computer, and the steps you need to take to successfully migrate Windows 7 to SSD. So, if you’re ready to give your PC a much-needed boost, let’s get started!

    Preparation: What You Need

    Moving Windows 7 from an HDD to an SSD can seem like a daunting task, but with the right preparation and tools, it can be done quickly and easily. Firstly, you will need to ensure that your SSD has enough storage space to accommodate all of your data and operating system files. You will also need a SATA to USB adapter or enclosure, as well as a cloning software, such as CloneZilla or Macrium Reflect.

    It is important to have a backup of all your important files and documents, as well as any installation media, such as drivers and software. You should also disable any unnecessary apps and services before cloning your HDD onto the SSD. This will ensure that your new system runs as quickly and efficiently as possible.

    Once you have all of these tools and have completed your backups, you are ready to begin the cloning process. It’s important to follow the cloning software’s instructions carefully, and to ensure that your new SSD is properly connected and recognized by your computer. With the right preparation and care, moving Windows 7 from an HDD to an SSD should be smooth sailing!

    SSD Drive and Cables

    If you’re planning to upgrade to an SSD drive, there are a few things you’ll need before you begin. Firstly, it’s important to choose the right type of SSD for your computer and ensure that it is compatible with your motherboard. You’ll also need cables to connect the SSD to your motherboard.

    The type of cable you’ll need will depend on the type of SSD you choose and the type of connection on your motherboard. It’s important to check the specifications of your motherboard and the SSD you’re purchasing to ensure they are compatible. Additionally, you may need a mounting bracket or adapter if the SSD is a different form factor than your computer’s current hard drive.

    It’s important to have all of these items on hand before you begin the installation process to ensure a smooth and successful upgrade. With the right preparation and tools, upgrading to an SSD can greatly improve the performance and speed of your computer.

    how do you move windows 7 from hdd to ssd

    Windows 7 Installation Disc

    If you’re planning to install Windows 7 on your computer, you’ll need to obtain an installation disc before you start. To do this, you’ll need a few things: a valid Windows 7 product key, an empty USB drive or DVD, and a PC that meets the minimum requirements for running Windows It’s important to note that not all PCs are capable of running Windows 7, so it’s a good idea to check your computer’s specifications beforehand.

    Once you have everything you need, it’s time to create an installation disc. There are several ways to do this, but the easiest method is to use the Windows USB/DVD Download Tool, which allows you to create a bootable USB drive or DVD using an ISO file. This tool is available for free from the Microsoft website and is compatible with Windows 7 and later versions.

    By following these simple steps, you’ll be ready to install Windows 7 on your computer in no time.

    Backup Your Files

    Backing up your files is an essential task that everyone should undertake to protect their important data from loss or damage. To prepare for this task, you’ll need a few things. Firstly, you’ll need an external hard drive or cloud storage service where you can save your data.

    It’s important to make sure you have enough storage space to accommodate all your files. Secondly, you’ll need to decide on a backup schedule. Will you backup your data weekly, monthly, or daily? Finally, you’ll need to select a backup software program to automate the backup process.

    This will ensure that your files are backed up regularly without any manual intervention. By having these elements in place, you can rest assured that your files are always safe from any unforeseen data loss events. So, take the first step towards protecting your data by preparing a backup plan today!

    Clone Your Windows 7 HDD to the SSD

    If you are looking to upgrade your computer’s performance by switching to an SSD, then you may be wondering how to move your Windows 7 operating system from your HDD to the new drive. Fortunately, it is possible to clone your entire hard drive and transfer it to the SSD. All you need is a cloning software program, a SATA to USB adapter cable, and of course, your new SSD.

    The process may take some time, depending on the size of your HDD and how much data you have stored on it. However, once the cloning process is complete, your new SSD should contain everything that was on your old HDD, including your operating system, programs, and files. You can then install the SSD in your computer, and it should boot up with your familiar Windows 7 operating system.

    With this simple process, you can enjoy faster load times, improved overall performance, and all the benefits that come with an SSD.

    Download and Install Software

    If you’re looking to speed up your Windows 7 system, upgrading to an SSD is a great way to do it. However, just buying an SSD and installing it won’t automatically give you the desired performance boost. You need to clone your existing Windows 7 HDD to the SSD to get all your apps, files, and settings migrated to the new disk.

    To do this, you’ll need a cloning software tool. There are various cloning software options available online that you can download and install, including Macrium Reflect, EaseUS Todo Backup, and Clonezilla. These tools allow you to easily clone your Windows 7 HDD onto the SSD, including the operating system, without having to reinstall anything.

    Once you have the cloning software installed, follow the step-by-step instructions and let it do its magic. With your new SSD up and running, you’ll have a noticeable improvement in your system’s startup times and overall performance.

    Connect Your SSD and HDD

    If you’re looking to boost your computer’s speed, installing a solid-state drive (SSD) along with your existing hard disk drive (HDD) can do wonders. The good news is that you don’t need to reinstall your operating system from scratch. By cloning your Windows 7 HDD to the SSD, you can transfer all your files, folders, programs, and operating system intact.

    Begin by getting a cloning software that suits you best. You can download a free version or purchase a more advanced version with additional features. Once you have your software, connect the SSD via SATA cable and ensure the hard drive measurements align properly.

    Then, launch the cloning software and select the source HDD as the source disk and the SSD as the target disk. Make sure you have checked the box corresponding to the option to copy the entire drive and initiate the cloning process. After the process has been complete, you can install the SSD in your computer’s drive bay, disconnect the HDD, and start your computer.

    Your computer will boot from the SSD, providing a significant boost in speed and performance. Keyword: cloning software, solid-state drive, operating system, hard disk drive.

    Clone Your HDD to the SSD

    If you’re upgrading to a new SSD, you’ll want to clone your current Windows 7 HDD to the new drive. This process allows you to transfer all of your current files, settings, and applications to the new drive. Not only does this save you the hassle of having to reinstall everything, but it also ensures that everything will work as it did before the upgrade.

    To clone your HDD to the SSD, you’ll need to use special software, which is often included with the SSD. One popular option is the Samsung Data Migration program. Once you’ve installed and opened the program, you’ll be prompted to select the disk you want to clone and the target location.

    After confirming these settings, the program will begin cloning your Windows 7 HDD to the SSD. Depending on the size of your drive, this process can take anywhere from a few minutes to several hours. Once the cloning is complete, you’ll need to restart your computer and select the SSD as your primary boot device in the BIOS.

    With your new SSD now up and running, you’ll be able to enjoy improved performance and faster load times.

    Update Your SSD with Windows Updates and Drivers

    If you are looking to move Windows 7 from an HDD to an SSD, you’ll want to make sure you update your Windows updates and drivers. This is because SSDs have different features and technologies that require newer drivers and updates to work properly. Windows 7, in particular, is an older operating system, so it’s important to ensure that all drivers and updates are up to date to optimize your SSD’s performance.

    You can use Windows Update to check for all necessary updates and drivers, and ensure that they are installed before transferring your data to the new SSD. By doing so, you’ll have a smoother transition and ensure that your SSD is operating at its best capacity. Remember, always take proper precautions when moving data from one drive to another and backup your files before transferring them.

    Connect to the Internet

    When setting up your new SSD, it’s important to ensure that you’re connected to the internet so that you can receive the latest Windows updates and drivers. These updates are crucial for keeping your system running smoothly and protecting it from security threats. To connect to the internet, you’ll need to have an internet service provider and either an Ethernet cable or a Wi-Fi connection.

    Once you’re connected, you can access the Windows update and driver settings and check for any available updates. It’s important to stay on top of updates and regularly check for them, as they can significantly improve the performance and security of your system. By keeping your SSD up to date, you’ll be able to enjoy a fast and reliable computer that’s always ready to meet your needs.

    Check for Windows Updates and Install Them

    If you’re running Windows on your computer, it’s important to keep your system updated with the latest software and drivers. One of the things you should do is check for Windows updates and install them. Updates not only provide new features, bug fixes, and enhanced security measures, but they can also ensure that your SSD is up-to-date and running smoothly.

    Operating with outdated drivers can cause performance issues and provoke system errors. Simply go to the Windows Update settings and choose the option to check for and install updates. This process will download and install the latest updates for your system, including any necessary drivers.

    Keeping your system updated will ensure that your computer runs smoothly and efficiently, and that you are providing optimal protection for your SSD.

    Update Drivers for Your SSD and Other Hardware

    If you’re experiencing slow loading times or other issues with your SSD, it might be time to update your drivers. One way to do this is through Windows updates, which can automatically provide new drivers for your hardware. You can also visit the website of your SSD manufacturer and download the latest drivers from there.

    Keep in mind that updating your drivers can often improve the overall performance and stability of your system, so it’s worth taking the time to do it. By staying up to date with the latest drivers, you can ensure that your hardware is running at its best, and your computer will be able to handle even the most demanding tasks without issue. So, next time you’re experiencing slow SSD speeds or other issues, consider updating your drivers for a quick and easy fix.

    Start Using Your New Windows 7 SSD

    Congratulations on upgrading to a new Windows 7 SSD! Now that you have it, it’s time to move your operating system from your old HDD. This process may seem daunting, but it’s actually quite simple. Start by connecting your new SSD to your computer and making sure it’s recognized by your system.

    Then, download and install a disk cloning software such as EaseUS Todo Backup. This will allow you to clone your old HDD onto your new SSD, preserving all of your files and settings. Once the cloning is complete, you can set your SSD as the primary boot drive in your computer’s BIOS settings.

    Finally, you can enjoy the lightning-fast speed of your new Windows 7 SSD. Don’t forget to keep your old HDD as a backup in case anything goes wrong during the migration process. With this quick and easy process, you’ll be up and running on your new Windows 7 SSD in no time!

    Boot from Your SSD

    If you’ve just installed a new SSD in your Windows 7 computer, you’ll want to make sure you’re getting the most out of it by booting from it. To do this, you’ll need to change your BIOS settings so that your computer boots from the SSD instead of your old hard drive. Restart your computer and enter your BIOS by pressing the key that appears on your screen (usually F2 or Delete).

    Navigate to the “Boot” menu and find the option for changing the boot order. Move your SSD to the top of the list and save your changes before exiting the BIOS. Now, when you restart your computer, it should boot up from your new SSD.

    This will give you faster boot times and faster access to your programs and files. So, go ahead and enjoy the benefits of your new SSD!

    Delete Old Windows 7 from Your HDD

    If you’ve recently upgraded to a new Windows 7 SSD, it’s time to clean up your hard drive and get rid of the old operating system. This will not only free up space on your HDD, but also improve the performance of your computer. To start using your new Windows 7 SSD, you’ll need to delete the old Windows 7 files from your HDD.

    This can easily be done using the Disk Cleanup tool, which will scan your hard drive for unnecessary files and give you the option to delete them. Simply select the option for “Previous Windows installation(s),” and the tool will remove all of the old Windows 7 files, freeing up valuable space on your hard drive. So go ahead and enjoy the speed and performance of your new Windows 7 SSD without any old operating system files bogging you down!

    Enjoy Your Faster System!

    Now that you have installed a SSD on your Windows 7 system, get ready to experience blazing-fast speeds and enjoy a more efficient workflow than ever before. The benefits of using a SSD are not limited to increased boot times and faster application launches, but will also give you a noticeable increase in overall system performance. With quicker read and write speeds, your system will run smoother, and switching between applications will be seamless.

    Say goodbye to frustrating lag times and freezing screens. You’ll also notice a significant difference in your system’s multitasking abilities, as you can run multiple applications without any slowdowns. Don’t hesitate to take advantage of your new hardware and enjoy your faster system!

    Conclusion

    In conclusion, moving Windows 7 from a HDD to an SSD can be a daunting task, but with the right tools and approach, it can be a breeze! Just remember that the key to success is to back up your important files, clone your operating system, and install any necessary drivers before you make the switch. With a little bit of patience and determination, your computer will be running faster than ever before – and you’ll never look back!”

    FAQs

    What is the process to move Windows 7 from HDD to SSD?
    The process involves cloning the HDD to the SSD using cloning software such as EaseUS or Macrium Reflect.

    Can I move Windows 7 from HDD to SSD without cloning?
    Yes, you can perform a clean installation of Windows 7 on the SSD and then transfer your data from the HDD manually.

    What are the benefits of moving Windows 7 to SSD?
    Moving Windows 7 to an SSD results in faster boot times, faster application launch times, and overall improved system performance.

    Do I need to purchase a new copy of Windows 7 for the SSD?
    No, you can use your existing copy of Windows 7 to install it on the SSD, as long as you have a valid license key. You may need to deactivate the license on the HDD to activate it on the SSD.

  • Effortlessly Upgrade your Windows 10 with a Cloned SSD: The Ultimate Guide

    If you own a Windows 10 PC and want to upgrade your hard drive to an SSD, you might think it’s a tedious process that requires in-depth technical knowledge. However, cloning your HDD to an SSD can be a straightforward task that even amateurs can complete with minimal effort. In this blog post, we will walk you through the process of cloning your HDD to an SSD on Windows

    We will explore the benefits of upgrading to an SSD, like faster boot times and improved overall system performance, and provide you with a step-by-step guide to prepare your computer and clone the hard drive. We understand that losing data or damaging your PC during the cloning process can be frustrating. That’s why we’ve included necessary precautions along with a detailed breakdown of the cloning process to help you avoid such pitfalls.

    By the end of this blog post, you will feel confident about cloning your HDD to an SSD and enjoy the speed and efficiency your new SSD brings to your Windows 10 PC. So let’s dive in and get started!

    Backup Important Data

    If you want to know how to clone HDD to SSD in Windows 10, you’ll need to use a backup program like Macrium Reflect or AOMEI Backupper. These programs allow you to create a backup image of your HDD, which you can then transfer onto your SSD. The process itself is fairly simple and straightforward, but it’s important to make sure you have all your important data backed up beforehand.

    This way, if anything goes wrong during the cloning process, you’ll still have all your data and won’t lose anything important. Once you’ve backed up your data and created the backup image, you can then use a cloning tool within the backup program to copy the image onto your SSD. It’s a bit of a time-consuming process, but it’s ultimately worth it if you want to upgrade to a faster and more reliable storage option.

    Create a Backup of Your Important Files

    Backing up your important files is crucial in ensuring their safety and availability. In today’s digital age, we store various types of data on our devices, including photographs, videos, documents, and music, among others. However, unforeseen circumstances such as malware attacks, hardware failures, or even accidental deletion can result in the loss of these precious files.

    Fortunately, you can use cloud storage services such as Google Drive or Dropbox to keep an encrypted copy of your data. Additionally, external hard drives or USB flash drives are also useful in creating backups. When you take the time to back up your important files, you can have peace of mind that you can restore them in case of any data loss.

    Remember, prevention is always better than cure.

    how clone hdd to ssd windows 10

    Copy Files to External Storage Device

    Backing up your important data is crucial if you want to ensure that you don’t lose any important files. One of the best ways to do this is by copying your data to an external storage device. External hard drives, USB drives, or even cloud storage services are good options to choose from.

    When it comes to copying your files to an external storage device, it’s important to choose a device that has enough storage capacity for all of your important files. Once you’ve chosen your device, you can begin the process of transferring your files. This can be done manually by simply dragging and dropping your files from your computer to the external device.

    Alternatively, you can use backup software to automate the process and schedule regular backups to ensure that your data is always safe and up to date. Don’t wait until it’s too late, back up your important data today!

    Clone HDD to SSD using Clonezilla

    If you’re looking to speed up your computer, upgrading to an SSD is a great way to go. However, transferring your entire Windows 10 operating system and programs from a HDD to an SSD can be a daunting task. That’s where Clonezilla comes in handy.

    This free and open-source software allows you to clone the entire contents of your HDD onto your new SSD without having to manually reinstall everything. First, download and create a bootable Clonezilla USB drive on a separate computer. Then, shutdown your computer and swap out the old HDD for the new SSD.

    Connect the USB drive and boot up the computer from the USB drive. Follow the prompts and select the disk-to-disk clone option. Choose the source disk (your old HDD) and the destination disk (your new SSD).

    Finally, confirm the clone operation and let Clonezilla do its job. In a few hours, your computer will be up and running on your new SSD, with all your files, programs, and settings just as they were before. It’s an easy and efficient way to switch to an SSD and get a faster computer without the hassle of reinstalling everything from scratch.

    Download and Install Clonezilla

    If you’re looking to upgrade your computer’s hard drive and clone your existing data to a new SSD, Clonezilla is a great tool to use for the job. Before you can get started, you’ll need to download and install Clonezilla onto a USB drive or CD. Once you’ve inserted the Clonezilla bootable drive into your computer, you can then follow the step-by-step guide to clone your HDD to SSD.

    It’s important to note that the process may take some time depending on the speed of your computer and the amount of data you’re transferring. However, the end result will give you a faster and more efficient computer with all your old files and applications intact. So why not give Clonezilla a try and see how easy it is to upgrade your computer’s hard drive?

    Boot Clonezilla from USB Drive

    If you’re looking to migrate your old hard drive to a new SSD, Clonezilla is a powerful tool that can get the job done with ease. To get started, you’ll need to boot Clonezilla from a USB drive. This process is fairly straightforward: first, you’ll need to download Clonezilla and create a bootable USB drive using a program like Rufus.

    Once your USB drive is ready, simply plug it into your computer and restart your system. You’ll need to access your BIOS settings and set your USB drive as the primary boot device. From there, you can follow Clonezilla’s step-by-step instructions to clone your old hard drive onto your new SSD.

    With Clonezilla, the process is fast and simple, and you’ll have your new SSD up and running in no time. So if you’re ready to upgrade your system, give Clonezilla a try and see just how easy it can be to clone your hard drive.

    Select Source and Destination Drive

    When it comes to cloning your HDD to an SSD, Clonezilla is a powerful tool that can get the job done. However, the process can seem daunting if you’re not familiar with it. The first step is to select your source and destination drives.

    Your source drive will be your HDD, which is the drive you want to clone. Your destination drive will be your SSD, which is where you want to copy all of your data. Once you’ve connected both drives, open Clonezilla and select “device-image.

    ” From there, you’ll select your source drive and destination drive, ensuring that you have the correct drives selected. After that, you’ll follow the prompts to begin the cloning process. It’s important to note that cloning can take some time, so be patient and make sure you have enough time to complete the process without interruption.

    By following these steps, you’ll be well on your way to cloning your HDD to your SSD and maximizing the performance of your computer.

    Start the Cloning Process

    Cloning a hard disk drive (HDD) to a solid-state drive (SSD) can provide a significant performance boost to your computer’s overall speed and responsiveness. One effective tool for achieving this is Clonezilla, an open-source disk cloning and imaging software. This software allows you to create a copy of your entire HDD and transfer it to an SSD, including the operating system, applications, and all your data.

    Once you have downloaded the Clonezilla ISO image file, you can create a bootable USB drive or CD/DVD and launch the program to begin the cloning process. Clonezilla will guide you through the necessary steps, including selecting the source and destination disks, partitioning, and cloning. You can also choose from different cloning modes to optimize the process for speed, accuracy, and data safety.

    With Clonezilla, cloning your HDD to an SSD is a straightforward and efficient process that can breathe new life into your aging computer system.

    Clone HDD to SSD using EaseUS Todo Backup

    Have you upgraded your PC with an SSD and are looking for ways to clone your HDD to the new drive? EaseUS Todo Backup is one of the best options available to help you with this task. With its easy-to-use interface, even novice users can clone their HDD to SSD with just a few clicks. First, download and install the software and then connect your SSD to your computer.

    Next, select the clone option and choose the source disk (HDD) and target disk (SSD). Finally, click “Proceed” and wait for the cloning process. This software has the ability to copy not only the operating system and all of your files and folders, but also the partition structure on your HDD to your SSD.

    With EaseUS Todo Backup, you can quickly and easily upgrade your computer to work more efficiently with an SSD without losing any of your data or settings. So, if you’re wondering how to clone HDD to SSD Windows 10, try using EaseUS Todo Backup.

    Download and Install EaseUS Todo Backup

    If you’re planning to upgrade your system’s storage and replace your old HDD with a modern SSD, cloning your HDD to your SSD can make the transition a lot smoother. With EaseUS Todo Backup, the process is quick and easy. To start, download and install the software on your computer.

    Once installed, launch the program and select the “Clone” option. From there, select your HDD as the source disk and your SSD as the target disk. Review the settings and start the cloning process.

    Once the process is complete, you can replace your old HDD with your new SSD, and your system should boot up exactly as it did before with a faster and more efficient drive. With its user-friendly interface and powerful features, EaseUS Todo Backup simplifies the cloning process and helps you get more out of your new storage device.

    Launch the Program and Select Clone

    If you’re looking to clone your HDD to your SSD, EaseUS Todo Backup is a great tool to use. Once you’ve downloaded and installed the program, launch it and select “Clone” from the main menu. From there, you can select your source disk (the HDD) and your target disk (the SSD).

    You’ll also have the option to choose the type of clone you want to perform, including sector-by-sector, optimized, or partition clone. Once you’ve made your selections, the program will guide you through the cloning process step-by-step. Be sure to have both your HDD and SSD connected to your computer before you begin, and make sure you have enough space on your SSD to accommodate all the data on your HDD.

    With EaseUS Todo Backup, cloning your HDD to your SSD can be a relatively painless process that can improve your computer’s performance and speed.

    Select the Source and Destination Drive

    When it comes to upgrading your computer hard drive, cloning your HDD to an SSD can dramatically boost your computer’s performance. One of the most popular tools for cloning your hard drive is the EaseUS Todo Backup software. To clone your hard drive, you need to select the source and destination drive.

    The source drive is the hard drive you want to clone, while the destination drive is the SSD where you want to store all of your data. It’s essential to make sure that the destination drive has enough available space to store all of your data. Once you’ve selected the source and destination drives, you can proceed to the cloning process.

    EaseUS Todo Backup streamlines the process, making it easy to clone your hard drive and enjoy faster performance. So, if you want to boost your computer’s performance, clone your HDD to an SSD using EaseUS Todo Backup.

    Start the Cloning Process

    If you’re looking to improve the overall performance of your computer, then cloning your HDD to an SSD is a great way to start. With the help of EaseUS Todo Backup, you can easily transfer all of your data and files from your old HDD to a new SSD. Not only will this process ensure a faster boot time, but it will also help reduce the overall lag on your computer.

    Plus, cloning your HDD to an SSD is a great way to ensure that all of your important files are easily accessible. With the reliable and intuitive software of EaseUS Todo Backup, you can easily start the cloning process and be on your way to experiencing faster and more efficient computer use. Give it a try and see the benefits for yourself!

    Final Thoughts

    In conclusion, cloning your HDD to an SSD in Windows 10 is a simple and effective way to improve your computer’s performance. Not only does it significantly reduce boot time and application loading times, but it also enhances overall system responsiveness and efficiency. By using reliable cloning software and following the step-by-step guide we’ve provided, you can ensure that your data is safely and effectively transferred to your new SSD without losing any important files or programs.

    So if you’re looking to take your PC to the next level, consider making the switch to an SSD with the help of this easy and straightforward cloning process. Don’t underestimate the power of upgrading to an SSD and the significant improvements it can bring to your daily computing experience.

    Conclusion

    In the world of technology, speed is everything. And when it comes to upgrading your computer’s hard drive, there’s no faster option than cloning your HDD to an SSD. Not only does it improve performance, but it also saves you the hassle of having to reinstall all your programs and files.

    So, if you’re looking to give your computer a much-needed boost, don’t hesitate to clone that HDD to an SSD – your PC will thank you for it!”

    FAQs

    What is the benefit of cloning HDD to SSD?
    Cloning HDD to SSD in Windows 10 results in a faster performance and responsiveness of the computer.

    Can I clone my HDD to SSD without losing data?
    Yes, it is possible to clone your HDD to SSD without losing any data. However, it is recommended to back up your important data before starting the cloning process.

    What software can I use to clone my HDD to SSD in Windows 10?
    There are various software options available to clone your HDD to SSD in Windows 10 such as Acronis True Image, EaseUS Todo Backup, and Macrium Reflect.

    Is it necessary to format the SSD before cloning the HDD to it?
    No, it is not necessary to format the SSD before cloning the HDD to it. However, it is recommended to check if there is enough space available on the SSD before starting the cloning process.

  • Revolutionize Your Electronics with Elecgear: Your Ultimate Online Destination!

    Has your outdoor adventure gear been lacking that extra spark lately? Do you find yourself yearning for the thrill of exploring nature with the aid of cutting-edge technology? Well, fear not, because you can now easily electrify your gear! By doing so, you can not only add convenience and efficiency to your trips but also contribute to preserving nature through eco-friendly energy sources. From backpacks and tents to coolers and stoves, there’s an array of gear that you can electrify and upgrade for your next excursion. Picture being able to charge your phone or electronic devices without relying on electricity or having a warm meal even in the middle of a secluded campsite, made possible with just a few additions to your gear.

    It’s not just the added convenience that makes this option attractive but also how environmentally friendly it is. With this technology, you can reduce your carbon footprint while indulging in your love for nature. Whether you’re a seasoned adventurer or new to the outdoor world, electrifying your gear can take your trips to a whole new level.

    Imagine being able to explore new places and take on more challenging expeditions with the confidence of having reliable technology at your fingertips. All it takes is some simple modifications to your gear to make this happen. With the right tools, you can enhance your gear’s performance and efficiency, while ensuring a fun-filled, eco-friendly experience.

    So, are you ready to add some electricity to your adventures? With the benefits that come with electrifying your gear, it’s hard not to be tempted. Whether you’re a tech enthusiast or a nature lover, the electrified gear will provide the perfect blend of technology and nature that you’ve been missing. So grab your gear, and let’s start electrifying!

    What is Elecgear?

    Elecgear is an online store that offers a wide selection of electronic gadgets and accessories. From charging cables to wireless earbuds, Elecgear provides high-quality products at affordable prices. What makes Elecgear unique is their commitment to customer satisfaction.

    They offer a 30-day return policy and a one-year warranty on all products. The website is user-friendly and easy to navigate, making it simple to find the perfect gadget for your needs. Elecgear also offers free shipping on orders over $25, making it an affordable choice for those looking to purchase electronic accessories.

    If you’re in the market for electronic gadgets or accessories, be sure to check out Elecgear and all that they have to offer.

    Upgrade Your Devices

    If you’re anything like me, you want all your devices to be top of the line. But with so many options out there, it can be difficult to determine which products are worth investing in. That’s where Elecgear comes in.

    Elecgear is a company that specializes in providing high-quality, durable electronic accessories, such as adapters, chargers, and cables. Their products are designed to be compatible with all your devices, from smartphones to laptops, and promise to last longer than other options on the market. By upgrading your devices with Elecgear accessories, you can ensure that you’re getting the best performance and longevity out of your technology.

    So if you’re ready to take your devices to the next level, check out Elecgear today.

    elecgear

    Transform Your Workspace

    If you’re looking for a way to transform your workspace, Elecgear might just be the solution you’ve been searching for. Elecgear is a company that specializes in providing ergonomic solutions for workspaces. They offer a wide range of products that can help you improve your posture, reduce neck and back pain, and increase productivity.

    From standing desks to monitor arms, Elecgear has everything you need to create a comfortable and efficient workspace. One of the most popular products offered by Elecgear is their electric sit-stand desk. This desk allows you to easily adjust the height of your workspace, so you can switch between sitting and standing throughout the day.

    This not only helps to improve your posture but also increases circulation and reduces the risk of developing health problems associated with prolonged sitting. So if you want to transform your workspace into a more comfortable and efficient environment, consider checking out what Elecgear has to offer.

    Top Picks for Elecgear

    If you’re in the market for some new electronics, Elecgear is definitely a brand worth considering. From wireless chargers to smart watches, they have a diverse range of products that are both stylish and functional. Here are some of our top picks: First up is their wireless charging pad.

    This sleek and slim pad is perfect for those who are tired of dealing with pesky cords and cables. With quick charging capabilities and compatibility with multiple devices, you’ll never have to worry about running out of battery again. Additionally, their smart watch is a must-have for those looking to stay on top of their fitness goals.

    With features such as heart rate monitoring and sleep tracking, it’s the perfect companion for any workout. Lastly, Elecgear’s noise-cancelling headphones are a game changer for anyone who wants to tune out the world around them. Whether you’re in a loud coffee shop or on a crowded flight, these headphones will create a bubble of calm that allows you to fully immerse yourself in your music or podcast.

    Overall, Elecgear offers products that are both high-quality and affordable. We highly recommend giving them a try.

    Smart Plugs for Convenience

    Smart plugs are a great way to add convenience and automation to your home. They allow you to control your appliances and devices from anywhere using your smartphone or voice assistant. At Elecgear, we offer a wide range of smart plugs to fit your needs and budget.

    Our top picks include the Wi-Fi Smart Plug and the Mini Smart Plug. The Wi-Fi Smart Plug allows you to control your devices using the Smart Life app or voice commands through Amazon Alexa or Google Assistant. The Mini Smart Plug is compact, making it perfect for travel or plugging in hard-to-reach outlets.

    It also has a built-in USB port, so you can charge your phone or other devices. Both plugs are easy to set up and use, and they come with features like scheduling and energy monitoring to help you save money on your energy bill. With Elecgear’s smart plugs, you can simplify your life and enjoy the benefits of automation without breaking the bank.

    Wireless Charging Pads for Simplicity

    Wireless charging pads have been gaining popularity in recent years due to their simplicity and convenience. Elecgear offers some top picks that stand out from the rest. One of the products that caught our attention is Elecgear’s Wireless Charging Pad.

    This is a sleek and compact device that can charge your smartphone quickly and efficiently. It comes in a variety of colors to match your preference and is compatible with most smartphones that support wireless charging. The device has an indicator that shows when it’s charging, and it automatically stops charging when your phone is fully charged.

    Another product that we recommend is the Elecgear Wireless Charging Stand. This device allows you to charge your phone while still being able to use it in landscape or portrait mode, making it perfect for video calls and watching movies. It also has an indicator light and is compatible with most smartphones that support wireless charging.

    If you’re looking for a wireless charging pad, we highly recommend checking out Elecgear’s products. With their sleek design and efficient charging capabilities, they are sure to make your life easier.

    Portable Chargers for On-the-Go

    Portable chargers have become a crucial accessory in our daily lives, especially for people who are always on the go and require their smartphones and other devices to be charged at all times. Elecgear is a known brand in the market that provides high-quality portable chargers. Let’s take a look at some of the top picks from Elecgear.

    First up is the Elecgear 65W Power Bank, which is a beast when it comes to charging multiple devices simultaneously. Its massive 26800mAh capacity can charge an average smartphone up to six times, and the dual USB-C and USB-A ports enable charging of up to three devices at once. It fast charges smartphones, tablets, laptops, and more.

    The second on the list is the Elecgear 45W Power Bank, which is a lightweight and compact charger for easy carrying. Its 20000mAh capacity can recharge your smartphone up to four times. It comes with a single USB-C and USB-A port and is also fast charging compatible with most devices.

    Lastly, the Elecgear 30W Power Bank is suitable for those who want a small and portable charger that can fit in their pockets. Its 10000mAh capacity is sufficient to recharge an average smartphone twice. It comes with a single USB-C and USB-A port and can fast-charge compatible devices.

    In conclusion, Elecgear provides a wide range of portable chargers suitable for every type of user, depending on their charging needs. These power banks provide efficient charging, are portable, and can keep your devices charged on the go.

    How Elecgear Can Improve Your Life

    Elecgear is a game-changer when it comes to improving your daily life. Imagine having a charger that can power up your phone in just minutes, or an ergonomic laptop stand that relieves your neck and shoulder pain while working. That’s precisely what Elecgear offers.

    Whether you’re an entrepreneur on the go or a student studying for exams, Elecgear has the technology to make your life easier. Their products are designed to cater to the needs of busy individuals who don’t want to compromise their productivity. With Elecgear, you can be confident that the gadgets you use will help you be more efficient and effective.

    Plus, not only will Elecgear make your life better, but it will also provide a more eco-friendly approach to technology. By using their products, you’re not only improving your daily routine but also helping the environment by promoting sustainable practices. Elecgear is undoubtedly a brand that you don’t want to miss out on!

    Save Time and Energy

    Are you constantly trying to juggle your busy schedule, feeling as though there aren’t enough hours in the day? Elecgear may be the solution you’ve been searching for. With their innovative products, you can save both time and energy. Whether you’re looking to streamline your work process or simplify your daily routine, Elecgear has the tools to make it happen.

    And the best part? You won’t have to sacrifice quality for convenience. Their products are designed to provide both efficiency and effectiveness, ensuring that you can get more done in less time. So why not take a step towards a more productive life with Elecgear? Trust us, your future self will thank you.

    Enhance Efficiency and Productivity

    Are you looking to enhance your efficiency and productivity? Look no further than Elecgear! With our innovative products, we can help you streamline your daily tasks and optimize your workflow. Say goodbye to the frustration of tangled cords and slow charging speeds with our high-quality charging cables and devices. Our ergonomic keyboards and mice will also alleviate any discomfort or strain from extended use, allowing you to work longer and more efficiently.

    Plus, with our sleek and stylish designs, your workspace will look more professional and polished than ever before. Trust us, with Elecgear, you’ll wonder how you ever lived without us!

    Get Your Elecgear Today

    Are you tired of searching for the perfect charging solution for your electronic devices? Look no further than Elecgear! Offering a wide range of products, Elecgear has everything from wireless charging pads to multi-port wall chargers that will make keeping your devices powered up a breeze. Not only are their products high-quality and reliable, but they are also designed with the latest technology to ensure efficient charging times. Plus, their compact designs make them easy to carry with you on-the-go.

    So why settle for subpar charging solutions when you can upgrade to Elecgear? Get your hands on their products today and never worry about running out of battery again.

    Conclusion

    In conclusion, Elecgear proves that electrical gear doesn’t have to be boring. With their innovative designs and high-quality products, they’ve brought excitement and creativity to the realm of electronics. Whether you’re looking for a stylish phone case or a powerful power bank, Elecgear has got you covered.

    So next time you need to charge up your devices, choose Elecgear and bring some spark to your life!”

    FAQs

    What is Elecgear?
    Elecgear is a company that specializes in designing and manufacturing electronic gadgets and accessories such as phone cases, screen protectors, charging cables, and more.

    What types of products does Elecgear offer?
    Elecgear offers a wide range of electronic products. The company’s products include phone cases, screen protectors, charging cables, car chargers, gaming accessories, laptop sleeves, and more.

    Are Elecgear’s products of good quality?
    Yes, Elecgear’s products are of good quality. The company focuses on developing high-quality products that are durable and reliable. Elecgear uses top-quality materials and has a strict quality control process to ensure that its products meet high standards.

    Does Elecgear offer any warranty or guarantee for its products?
    Yes, Elecgear offers a warranty or guarantee for its products. The warranty period varies depending on the product type. However, in general, Elecgear offers a 12-month warranty for its products. Customers can contact Elecgear’s customer support team if they have any issues with their products during the warranty period.