Author: David L. Lynn

  • Boost Your Computer’s Speed: A Simple Guide on How to Effortlessly Move Your OS onto an SSD

    Is your computer feeling sluggish and slow? Are apps and programs taking too long to load? Then it’s high time you moved your operating system onto a solid-state drive or SSD. It’s the easiest way to give your computer the boost it needs to perform at its optimal level. But, before you raise your eyebrows with confusion and ask, “how do I do that?” fear not! Moving your OS onto an SSD is much simpler than it sounds.

    With the right tools and basic knowledge, you can complete the process in just a few easy steps. Not only will this help you speed up your system, but it can also help prolong the lifespan of your computer and give you more storage space for your files and applications. So, roll up your sleeves, put on your favorite playlist, and let’s dive into the exciting world of solid-state drives.

    By the end, you’ll wonder why you didn’t make the switch sooner!

    Benefits of Moving OS to SSD

    Moving your OS onto an SSD has numerous benefits that can be easily achieved. One of the most significant advantages of transferring your OS to an SSD is the significant boost in performance. SSDs are much faster than traditional hard drives, making your system much snappier.

    The speed increase is noticeable, especially when you’re booting up the system, running programs, or transferring files. Additionally, SSDs are more reliable than traditional hard drives because they have no moving parts. This means that they’re less likely to fail, saving you the time and cost of data recovery.

    It’s also essential to note that SSDs can extend the life of your computer, allowing you to use it for several more years. Overall, moving your OS to an SSD is an easy process that can provide significant benefits such as improved speed and reliability, making it a worthy investment for any computer user.

    Faster Boot Time

    Moving your operating system to a solid-state drive (SSD) can bring numerous benefits, one of which is faster boot time. Traditional hard disk drives (HDDs) take time to spin up their disks and locate the necessary files to launch your system, resulting in a slow startup process. In contrast, SSDs have no moving parts and use flash memory to store data, allowing them to quickly access the required files and launch your OS in a matter of seconds.

    This means no more waiting around for your computer to start up, and a quicker access to your applications and files once you’re logged in. Additionally, using an SSD as your primary drive can also lead to smoother performance when opening and running programs, copying files, and performing other operations that rely on disk access speeds. So, if you haven’t yet considered upgrading your system’s drive to an SSD, you may be missing out on a significant boost in overall performance.
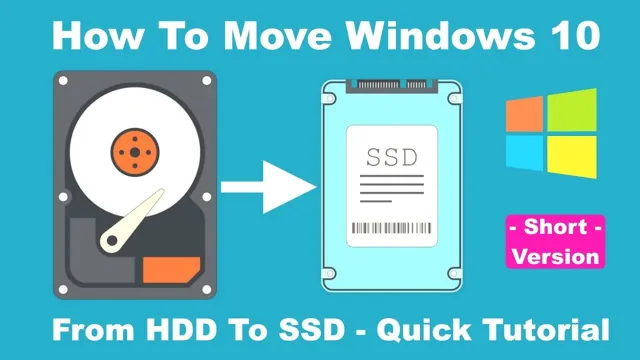
    how easy to move os onto ssd

    Increased Responsiveness

    Moving your operating system (OS) from a traditional hard drive to a solid-state drive (SSD) can provide a significant increase in responsiveness. This is because SSDs use flash memory, which has considerably faster read and write speeds compared to traditional hard drives that rely on spinning disks and mechanical components. As a result, your computer boots up faster and applications launch more quickly.

    This is particularly useful if you’re someone who frequently toggles between different programs or deals with large files and documents. Additionally, transferring files and accessing data can also be done much quicker with an SSD, saving you time and increasing productivity. The benefits of moving your OS to an SSD are numerous and are a great investment for those looking to improve their computer’s overall performance.

    Higher Data Transfer Rates

    One of the major benefits of moving your operating system (OS) to a Solid State Drive (SSD) is the higher data transfer rates. SSDs provide significantly faster read and write speeds compared to traditional Hard Disk Drives (HDDs). This means that your computer will boot up faster, applications will load more quickly, and you will experience shorter wait times for data to process.

    With an SSD, data is transferred at lightning-fast speeds, making for a smoother and more efficient computing experience. The increased data transfer rates can make a significant difference in your productivity, especially if you rely heavily on your computer for work, gaming, or other demanding tasks. By upgrading to an SSD, you can enjoy improved speed and performance, which ultimately translates to a more enjoyable and productive computing experience.

    Requirements for Moving OS to SSD

    When it comes to moving your operating system (OS) onto a solid-state drive (SSD), the process can be relatively simple or more complex depending on a few requirements. First, you’ll need to ensure that your SSD has enough storage space to accommodate your current system files. You may also need to create a bootable USB drive, as some operating systems require this to install onto a new drive.

    Additionally, you’ll want to backup any important files and programs before making the switch, as the installation process will likely require wiping your current hard drive. Overall, while moving your OS to an SSD may require some technical expertise, the benefits in terms of increased speed and improved system performance are definitely worth it. So if you’re looking to give your computer a boost, it’s time to consider making the switch to an SSD.

    Compatible SSD

    If you’re planning to move your operating system to an SSD, it’s important to ensure that your hardware is compatible. The requirements for a compatible SSD depend on your computer’s motherboard and its available connection ports. Most modern motherboards support SATA III, which is a standard interface for connecting SSDs.

    However, if your computer is older, it might only support SATA II or even SATA I, which are slower than SATA III. In this case, you’ll need to check the SSD’s specifications to ensure it’s compatible with your motherboard’s available connection ports. Additionally, you should also check your computer’s BIOS settings to ensure that it recognizes the new SSD and that it’s set as the primary boot device.

    Making sure your SSD is compatible with your hardware is crucial when moving your operating system to avoid compatibility issues and maximize performance.

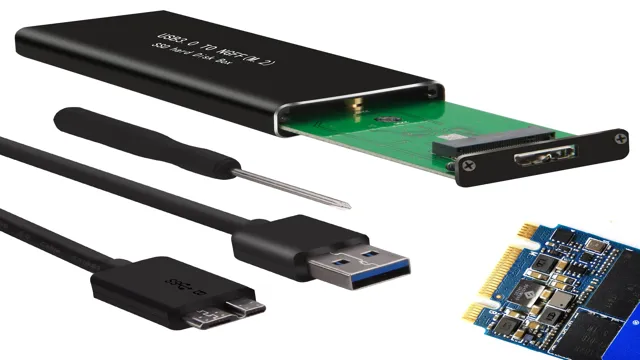
    External SSD Enclosure or SATA to USB Adapter

    Moving your operating system (OS) to an SSD is a great way to significantly boost your computer’s speed. However, there are a few requirements that you need to be aware of before getting started. One of the things you will need is an external SSD enclosure or SATA to USB adapter.

    These accessories are essential because they provide a way for you to transfer data from your old hard drive to the new SSD. The external SSD enclosure allows you to install your new SSD and connect it to your computer via a USB port. With this accessory, you can clone your operating system, applications, and data from your old hard drive to the new SSD.

    On the other hand, a SATA to USB adapter connects your computer’s SATA port to a USB port. This adapter converts the SATA signals into USB signals, allowing you to connect any SATA drive to your computer via a USB port. Before transferring your OS to an SSD, ensure that your computer’s BIOS is set up to boot from the USB port.

    You will also need to check the size of your old hard drive and ensure that your new SSD is bigger than or equal to the size of the old hard drive. Additionally, you should make sure your computer has enough RAM to run your OS and applications smoothly without relying on the page file. In conclusion, to transfer your operating system to an SSD, you will need an external SSD enclosure or SATA to USB adapter.

    These accessories provide a way to clone your data from your old hard drive to the new SSD. Furthermore, before transferring your OS, ensure that your BIOS is set up to boot from the USB port and that your new SSD is bigger than or equal to the size of your old hard drive. Finally, make sure your computer has enough RAM to run your OS and applications smoothly.

    Cloning Software

    When it comes to moving your operating system to a new Solid State Drive (SSD), cloning software can make the process a lot easier. However, there are a few requirements that you should be aware of before you get started. First, you’ll need a cloning software that is compatible with your computer’s operating system and the type of SSD you plan to use.

    Next, you should make sure that your SSD has enough space to accommodate all of your files and data. In some cases, you may need to remove unnecessary files or upgrade to a larger SSD. Additionally, you’ll want to ensure that your computer has enough RAM and processing power to handle the cloning process.

    By taking these steps and using reliable cloning software, you can smoothly transfer your OS to an SSD and enjoy faster boot times and improved performance.

    Steps to Move OS to SSD

    If you’re wondering how easy it is to move your OS to an SSD, the answer is that it’s actually quite simple! There are a few steps you’ll need to take, but with the right tools and a bit of patience, you can make the transition in no time. First, you’ll need to clone your existing hard drive onto the new SSD. This can be done using a variety of software programs, such as Acronis True Image or Clonezilla.

    Once your data has been copied over, you’ll need to adjust the boot order in your BIOS to ensure that your system starts up from the SSD rather than the hard drive. Finally, you may want to uninstall any unnecessary programs or files to maximize the available space on your new drive. With these steps complete, you’ll be up and running on your new SSD in no time, enjoying faster boot times and improved overall system performance.

    Connect SSD to Computer

    If you’re looking to speed up your computer’s performance and move your operating system to a faster SSD, you’re in the right place. The first step is to connect the SSD to your computer, which is a straightforward process. Depending on your computer’s specifications, you can connect the SSD to a SATA port on your motherboard or use a USB to SATA adapter to connect the SSD externally.

    Once connected, you’ll need to transfer your operating system and files to the SSD. This process can be done using cloning software, and there are plenty of options available, such as Clonezilla or EaseUS Todo Backup. By moving your OS to an SSD, you’ll notice a significant boost in your computer’s speed and overall performance.

    With faster boot times and quicker access to files, you’ll wonder how you ever lived without an SSD. So why not take the plunge and connect an SSD to your computer today? Your computer (and sanity) will thank you.

    Install Cloning Software

    Moving your operating system onto a new SSD can significantly improve your computer’s performance and speed. One important step before doing so is to install cloning software. This software allows you to copy your current OS onto the new SSD without having to manually reinstall it.

    There are various cloning software options available, and some of them are free. Once you have installed the cloning software, the next step is to connect the new SSD to your computer. However, it is important to note that some computers may require an adapter to connect the SSD.

    Once connected, you can then use the cloning software to copy the OS onto the new SSD, which may take a few hours depending on how much data needs to be transferred. After completion, you can then replace the old hard drive with the new SSD, and your computer should be running much faster and smoother. Remember to backup your important files before starting the clone process, just in case.

    Clone OS to SSD

    Moving your operating system to an SSD can significantly improve your computer’s speed and performance. Thankfully, cloning your OS to an SSD is a simple process that requires only a few steps. First, back up all your data to avoid losing any important files.

    Next, download a disk imaging software that can clone your current OS to the new SSD. Once you have the software installed, connect your SSD to your computer and begin the cloning process. This process could take a few hours, but once it’s complete, you’ll be able to boot up your computer from the new SSD.

    In no time, you’ll experience lightning-fast speeds that will make you wonder how you ever used a traditional hard drive. So why not give it a try and see the difference for yourself? Your computer will thank you!

    Change Boot Order in BIOS

    Moving an operating system to an SSD can significantly speed up your computer’s performance. To do so, you first need to change the boot order in BIOS. This process is simple and varies depending on the computer manufacturer.

    First, access BIOS by pressing the necessary key during startup (usually F1, F2, F12, or Delete). Then, navigate to the “Boot” tab and look for the “Boot Order” option. Use the arrow keys to select the SSD as the first boot device.

    Finally, save the changes and exit BIOS. Keep in mind that if you have multiple drives, you may also need to change the boot partition. This can be done through the Disk Manager in Windows.

    Overall, moving your operating system to an SSD can greatly improve your computer’s performance and changing the boot order in BIOS is an essential step in the process.

    Conclusion

    In conclusion, moving your operating system onto an SSD is as easy as swapping out your loafers for sneakers – it’s a quick and painless process that can greatly improve your overall performance. Just take a few simple steps, and before you know it, you’ll be moving at lightning speeds. So put on your running shoes, err, I mean, grab your SSD, and let’s hit the ground running!”

    Moving OS to SSD is Easy and Worth the Effort

    If you’re seeking to speed up your computer’s operating system by migrating it to a new SSD, it’s important to know that the process is straightforward and worth doing. The main keyword “move OS to SSD” can seem like a daunting task, but it’s simpler than you think. Here are the easy steps to transfer your system to an SSD.

    First, obtain your new SSD and ensure that it has the capacity to hold your OS and other system files. Before that, make sure to back up your important data to an external drive or cloud service. Then, use migration software to copy your existing OS files and transfer them to the new SSD.

    Finally, to complete the move to your new SSD, shut down your system, remove the old drive, and install the new SSD. As a result, you’ll experience faster boot and load times, which is well worth the effort. In conclusion, moving your OS to an SSD is a wise investment, and it’s something you can quickly complete with these simple steps.

    FAQs

    What is an SSD?
    SSD stands for Solid State Drive which is a kind of storage device similar to a hard disk drive but uses NAND-based flash memory to store data instead of spinning disks.

    How do I know if my computer can support an SSD?
    If your computer has a SATA interface, it should be able to support an SSD with similar interface. You can check the specifications of your computer’s motherboard to see if it has an available SATA connector.

    Can I transfer my operating system (OS) onto an SSD?
    Yes, it is possible to transfer your OS from a hard disk drive to an SSD. There are several ways to do it, such as using cloning software or a fresh installation of the OS.

    What are the benefits of moving my OS onto an SSD?
    Moving your OS onto an SSD can significantly improve your computer’s boot-up time, application loading speed, and overall system performance. It also reduces the risk of data loss due to faults in mechanical hard drives.
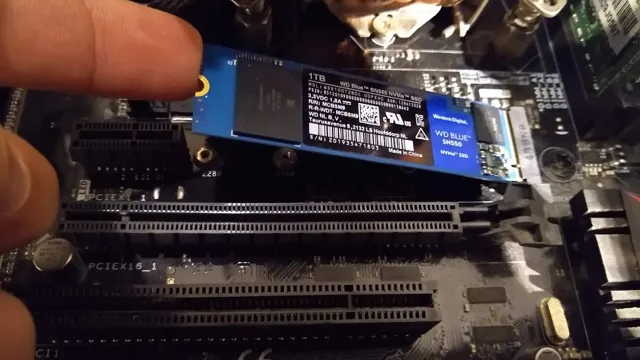
  • Rev Up Your System with Lightning-Fast Speed: Harness the Power of SATA SSDs

    If you’re in the market for a new storage solution, you may be wondering why you should choose a SATA SSD over other options. Well, let me tell you – investing in a SATA SSD can be one of the best decisions you make for your computer or laptop. First off, let’s define what a SATA SSD is.

    SATA stands for Serial ATA, which is a type of interface used to connect storage devices to your computer’s motherboard. SSD, on the other hand, stands for Solid State Drive – essentially, a type of storage that uses flash memory technology instead of spinning disks (which is what traditional hard drives use). So, why choose a SATA SSD specifically? For starters, they offer incredibly fast read and write speeds compared to traditional hard drives.

    This means your computer can boot up faster, programs can load quicker, and files can be transferred in a matter of seconds. Trust us, once you switch to an SSD, you’ll wonder how you ever lived without it. But that’s not all – SATA SSDs also use less power than traditional hard drives, which can lead to longer battery life for laptops.

    Plus, they’re less likely to fail due to the lack of moving parts, so you can rest assured that your data is safe and sound. In short, choosing a SATA SSD can lead to a faster, more reliable, and more efficient computer experience overall. And with prices dropping on these types of drives in recent years, there’s never been a better time to make the switch.

    So what are you waiting for? Upgrade your storage game with a SATA SSD today.

    Faster Performance

    If you’re looking to improve the performance of your computer, a SATA SSD is one of the best investments you can make. Unlike traditional hard drives, which use spinning disks to read and write data, SATA SSDs use flash memory for faster access times and transfer speeds. This means that applications will load faster, files will transfer more quickly, and your entire system will feel more responsive and snappy.

    In fact, many users report that switching from a traditional hard drive to a SATA SSD can make their computer feel like an entirely new machine. So if you’re tired of waiting for programs to load and files to transfer, consider upgrading to a SATA SSD today.

    Boost your computer’s speed with a SATA SSD

    If you’re looking to give your computer a performance boost, then installing a SATA SSD is a wise investment. Unlike traditional hard drives, SATA SSD (solid-state drives) use flash memory to store data, resulting in faster read and write speeds, which can lead to significantly improved performance. With an SSD installed, you’ll notice faster boot times, quicker application launches, and smoother overall performance.

    It’s like upgrading from a bicycle to a sports car – everything just runs faster and smoother than before. So, if you’re tired of waiting for your computer to load up or frustrated with sluggish performance, consider investing in a SATA SSD – your computer will thank you for it!

    sata ssd

    Load games and applications faster than ever before

    In today’s world, digital content is becoming more demanding by the minute, and it’s essential to have devices that can handle them efficiently. With faster performance, load games and applications faster than ever before; bandwidth and data transfer speeds improve, delivering better productivity and seamless user experiences. Matching this in mind, manufacturers of processors and storage are continuously innovating to meet the demands of the users, resulting in devices that can keep up with the increasing workload.

    Without an efficient device, the user experience can become frustratingly slow, reducing productivity and causing headaches and boredom. Faster load speeds not only improve our digital experiences but also improve our mental state, as we don’t have to wait around for tasks to complete, allowing us to achieve more in less time. Remember, faster is better, and with the advancements we have today, it’s achievable with ease.

    Reliability and Durability

    If you’re looking for a reliable and durable storage option, a SATA SSD is definitely worth considering. While traditional hard drives rely on spinning disks to read and write data, SSDs use flash memory. This means that they have no moving parts, making them less prone to failure or damage.

    In addition, the lack of moving parts means that SSDs can operate much faster than traditional hard drives, and can handle heavy workloads without issue. While they may be a bit more expensive than traditional hard drives, their reliability and durability make them a great investment for anyone who values their data. Overall, if you’re looking for a storage option that can keep up with your needs, a SATA SSD is definitely worth considering.

    Less prone to hardware failures compared to traditional hard drives

    When it comes to digital storage, the reliability and durability of the hardware is always a concern. One advantage of using solid state drives (SSDs) over traditional hard drives is that they are less prone to hardware failures. Unlike the moving parts in a hard drive that can wear out or break down over time, SSDs have no mechanical parts to fail.

    This means that they can handle more physical shock and vibration without risking damage to the drive. Additionally, since there are no read/write heads to physically touch the disk surface, there is less risk of data loss due to disk scratches or corruption. Overall, investing in an SSD can provide peace of mind knowing that your data is not only fast and secure but also backed by a more reliable and durable hardware solution.

    So, if you value your data and want to ensure its protection, it’s definitely worth considering upgrading to an SSD.

    Protect your data with a SATA SSD’s shock-resistant design

    If you’re someone who values data reliability and durability, then investing in a SATA SSD with shock-resistant design is a no-brainer. These drives are built tough to ensure ultimate protection from physical damage, ensuring that your data stays safe and secure no matter what. Whether you’re constantly on the move or just need a dependable storage solution, an SSD’s shock-resistant design is the perfect choice.

    With its sturdy construction, it can withstand even the most unpredictable physical shocks and vibrations, ensuring that your data is safe at all times. So if you’re worried about data loss due to drops or impacts, a SATA SSD with a shock-resistant design will provide you with the peace of mind that you need.

    Improved Power Efficiency

    SATA SSDs are known for their improved power efficiency, making them a popular choice for those looking to save on energy costs. Unlike traditional hard drives that require a significant amount of power to spin its mechanical components, SATA SSDs use semiconductor chips, allowing them to operate with less power consumption and generate less heat. This not only reduces electricity bills but also results in a longer lifespan for the drive, as it operates cooler than mechanical hard drives.

    In addition, the improved power efficiency of SATA SSDs provides faster boot times, quicker application launches, and seamless multitasking. With these advantages, replacing your old hard drive with a SATA SSD can be a smart investment both financially and functionally. So if you’re looking for a faster and more energy-efficient solution, consider making the switch to a SATA SSD.

    Save power with a SATA SSD’s efficient energy consumption

    SATA SSDs are becoming increasingly popular not just because of their speed and performance but also because of their impressive energy efficiency. Compared to traditional HDDs, SATA SSDs consume much less power, which is a critical factor for laptops and other portable devices. Because SSDs rely on flash memory instead of continuously spinning disks, they use fewer moving parts that require energy.

    As a result, users can experience a longer battery life, meaning that they can work or play on the go longer without needing to recharge their devices as frequently. So, if you care about using your device for an extended period, choosing a SATA SSD is the way to go!

    Extend battery life on your mobile devices

    Mobile devices have become an integral part of our daily lives, but their limited battery life can sometimes be frustrating. Fortunately, there are ways to extend the battery life of your devices through improved power efficiency. One way to do this is by reducing the brightness of your screen.

    Brightness consumes a lot of power, and reducing it could make a significant impact on your device’s battery life. Another way to improve power efficiency is by using Wi-Fi instead of cellular data whenever possible. Cellular data consumes more power than Wi-Fi, and using Wi-Fi, especially when available, could help prolong your device’s battery life.

    Additionally, closing running apps that you’re not using could help save battery power, as well as enabling power-saving mode when your battery is low. By incorporating these habits into your routine, your mobile device’s battery life could significantly improve, giving you more time for your daily activities without worrying about running out of power.

    Affordability

    When it comes to upgrading your computer’s storage, a SATA SSD is a great option to consider. Not only does it offer faster transfer speeds and improved performance, but it can also be surprisingly affordable. Prices for SATA SSDs have come down significantly in recent years, making them a viable option for budget-conscious buyers.

    While they may not offer quite the same performance as more expensive NVMe SSDs, SATA SSDs are still a great way to breathe new life into an older machine without breaking the bank. Plus, with more and more manufacturers offering SATA SSDs in a variety of sizes and capacities, there’s never been a better time to upgrade your storage. So if you’re looking for an affordable way to improve your computer’s speed and performance, a SATA SSD might just be the answer you’ve been looking for.

    Get the benefits of an SSD without breaking the bank

    Are you tired of slow loading times on your computer? Are you looking for an affordable way to boost its speed? Look no further than a solid-state drive (SSD)! SSDs offer lightning-fast speeds compared to traditional hard drives, making them a great choice for anyone looking to improve their computer’s performance. And the best part? You don’t have to break the bank to get one! With more and more options becoming available on the market, SSDs have become very affordable. You can find a variety of reliable SSD brands that won’t break the bank, making it easy and affordable to upgrade your computer’s speed.

    With this simple upgrade, you’ll notice a significant improvement in your computer’s performance, making it feel like a brand new machine. Don’t let slow load times bog you down anymore – get the benefits of an affordable SSD today!

    Upgrade your computer’s storage without investing too much

    Upgrading your computer’s storage can be expensive, but there are a few affordable options that can make a big difference. One option is to replace your current hard drive with a solid-state drive (SSD). SSDs provide faster read and write speeds and are more reliable than traditional hard drives.

    Another option is to use an external hard drive for additional storage space. While external hard drives may not be as speedy as SSDs, they are still a cost-effective way to store your files and media. Cloud storage can also be an affordable option for those who would rather not invest in physical hardware.

    By choosing an affordable storage option, you can upgrade your computer’s storage capacity without breaking the bank.

    Conclusion

    In this fast-paced world, where time is of the essence, SATA SSDs provide a lightning-fast storage solution that can keep up with our demanding digital lifestyles. With their impressive read and write speeds, they offer the ultimate convenience, speed, and reliability. So, whether you’re a gamer, a creative professional, or simply looking to improve your computer’s performance, a SATA SSD is an investment you won’t regret.

    Simply put, it’s like having a Ferrari engine in your computer, except faster, more efficient, and without the need for gas.”

    FAQs

    What is a SATA SSD?
    A SATA SSD (Solid State Drive) is a type of storage device that uses the Serial Advanced Technology Attachment (SATA) interface to connect to a computer’s motherboard. It provides much faster read and write speeds compared to traditional hard disk drives (HDDs).

    How does a SATA SSD improve performance?
    A SATA SSD improves performance by eliminating the mechanical latency associated with traditional HDDs. It provides faster read and write speeds, which translates to faster boot times, faster application loading times, and faster data transfer rates.

    What are the advantages of using a SATA SSD?
    The advantages of using a SATA SSD include faster performance, longer lifespan, improved energy efficiency, and reduced noise levels compared to traditional HDDs. It also allows for more reliable data storage because it has no moving parts.

    What factors should I consider when choosing a SATA SSD?
    When choosing a SATA SSD, you should consider factors such as storage capacity, read and write speeds, budget, and durability. You should also look for reputable brands and check reviews to ensure the SSD meets your specific needs and requirements.

  • Upgrading Your PC’s Speed: A Step-by-Step Guide to Installing an SSD to Your Existing HDD

    If you’re feeling like your computer is a bit sluggish, the solution might just be installing an SSD to your existing HDD. While it might sound overwhelming, it’s actually a lot easier than you think. With a little bit of knowledge and the right tools, you can have your computer running as smooth as butter in no time.

    In this blog post, we’ll walk you through the steps to install an SSD to your existing HDD so you can enjoy a faster and more responsive computer. Trust us, it’s worth the investment!

    Prepare Your Computer

    If you’re looking to upgrade your computer’s performance, installing a solid-state drive (SSD) to your existing hard disk drive (HDD) is a great way to go. But before you begin, there are a few things you should keep in mind. First, make sure you have the right tools on hand.

    You’ll need a Phillips screwdriver and possibly a SATA data cable. Before opening up your computer, it’s also a good idea to back up all your important files and create a recovery disk, just in case anything goes wrong during the installation process. Once you’re ready to begin, turn off your computer completely and disconnect all cables.

    Then, locate the existing HDD and use the screws to remove it from its bay. Next, insert your new SSD into the same bay and connect the SATA data cable. Once the SSD is secure, reconnect all cables and turn your computer back on.

    Your computer should now recognize the new SSD as the main storage device, boosting your computer’s speed and performance significantly.

    Check Compatibility of Your Hardware

    Before you start preparing your computer for a new installation or upgrade, it’s important to check the compatibility of your hardware. This includes your CPU, RAM, storage devices, graphics card, and any other components you have installed in your system. To ensure a smooth installation process and to avoid potential issues, make sure that your hardware meets the minimum system requirements for the operating system or software you plan to install.

    Additionally, you may want to check for any compatibility issues between hardware components. For example, some graphics cards may not be compatible with certain motherboards, causing compatibility problems during installation. By taking the time to check your hardware compatibility beforehand, you can avoid headaches and ensure a successful installation process.

    how do you install a ssd to your prexisiting hdd

    Gather Necessary Tools and Components

    When preparing your computer for a project, it’s important to gather all the necessary tools and components needed to ensure it runs smoothly. First, make sure you have the correct software installed, as this will be crucial for completing the task at hand. Also, make sure your computer meets the necessary hardware requirements.

    Do you have enough RAM or storage space? It’s important to make sure your computer has enough resources to handle the project. Additionally, check that all the cables and connectors are in good working order and that you have any necessary adapters or converters. Lastly, make sure you have a clean working space and a comfortable chair to minimize distractions and increase productivity.

    Preparing your computer may seem like a small step, but it can make all the difference in the success of your project. So take the time to gather the necessary tools and components, and create a comfortable work environment to help you achieve your goals.

    Clone Your HDD to the SSD

    If you’re looking to enhance the speed of your computer, installing an SSD can significantly improve its performance. However, the thought of reinstalling everything on a new drive can be daunting. But don’t worry, there’s a solution.

    The best way to install an SSD to your existing HDD is to clone the hard drive onto the new SSD. This means that all your data, installed programs, and settings are copied over to the new drive, which makes the transition process much more manageable. It’s important to note that before you start cloning your hard drive, you need to ensure that the SSD is compatible with your system.

    Once you have confirmed this, you’ll need to connect the SSD to your computer and download cloning software. The software will then guide you through the process, which involves selecting the source drive (your HDD) and destination drive (the SSD) and starting the cloning process. Once completed, you can shut down your computer and remove the HDD, replacing it with the SSD.

    Restart your computer and you’ll be good to go with your faster, more efficient system. So, don’t let the thought of transferring everything from your HDD to your new SSD overwhelm you – cloning is a simple and easy solution!

    Download and Install Cloning Software

    If you are upgrading your computer with a new SSD, the best way to transfer your data is to clone your existing HDD. To do this, you first need to download and install cloning software. There are many options available online, but you should choose one that is compatible with your computer and easy to use.

    Once you have chosen the software, follow the instructions to install it on your computer. Once installed, connect your SSD to your computer using a USB cable or other connection method, and open the cloning software. Follow the on-screen instructions to clone your HDD to the SSD.

    This process may take some time depending on the size of your HDD and the speed of your computer. Once the clone is complete, you can remove the old HDD and start using your new SSD. Remember to back up your data before you begin the cloning process to ensure that you don’t lose any important files.

    By cloning your HDD to your SSD, you can ensure that your new computer has all the same data and settings as your old one, making for a seamless transition.

    Connect Your SSD to the Computer

    If you want to upgrade your computer’s storage to a faster Solid State Drive (SSD) and keep all your data, the best way is to clone your Hard Disk Drive (HDD) to the new SSD. The first step is to connect your SSD to the computer using a USB to SATA adapter or a docking station. Once your computer recognizes the SSD, you’ll need cloning software like Clonezilla, Macrium or EaseUS Todo to transfer all your data from the HDD to the SSD.

    The cloning process can take a while, depending on the size of your HDD, so be patient and wait for it to finish. Make sure to back up your important files before starting the cloning process, just in case anything goes wrong. After the cloning process is complete, you can disconnect your HDD and boot from your new SSD.

    With the faster read and write speeds of an SSD, your computer will work faster and more efficiently. So, why not upgrade your storage to an SSD today and enjoy a better computing experience?

    Initialize and Format Your SSD

    Once you have initialized and formatted your SSD, it’s time to clone your HDD onto your new SSD. This will ensure that all the files, settings, and programs from your old drive are transferred onto the SSD, so you don’t lose any data or have to reinstall anything. There are a few different ways you can clone your HDD, but one of the easiest and most straightforward methods is to use cloning software.

    This software can copy the entire contents of your HDD onto the SSD, so you don’t have to manually transfer each file and program. One popular cloning software is Acronis True Image, which allows you to easily clone your drive and even schedule automatic backups for future peace of mind. Overall, cloning your HDD to your SSD is a crucial step in upgrading your system and enjoying faster speeds and better performance.

    Physically Install the SSD

    Installing a solid-state drive (SSD) alongside an existing hard disk drive (HDD) is a great way to boost your computer’s performance and speed. The process of physically installing an SSD is relatively straightforward, but it does require a bit of technical know-how. First, you’ll need to open up your computer’s case and locate the SATA cables and power cables that are currently connected to your existing hard drive.

    Then, you’ll need to connect the SATA and power cables to your new SSD, making sure that they are securely fastened into place. Once you’ve done that, you can mount your SSD in an available drive bay inside your computer case and secure it with screws. Depending on your computer’s configuration, you may also need to adjust your BIOS settings to recognize your new SSD as the boot device.

    Overall, physically installing an SSD is a simple process that can have a big impact on your computer’s performance.

    Open Your Computer Tower or Laptop

    Installing an SSD in your computer can significantly improve its overall performance and reduce boot times. One of the first steps in the process is to physically install the SSD. This involves opening up your computer tower or laptop and locating the storage drive bays.

    In a desktop computer, the tower can typically be opened by removing screws or latches on the back or side panel. Once the panel is removed, you can usually access the storage drive bays by removing additional screws or sliding out a panel. Laptops can be a bit more tricky and may require removing the entire bottom panel or keyboard to access the storage drive bay.

    It’s important to consult your computer’s manual or online resources for specific instructions before attempting any disassembly. Once you have located the storage drive bay, you can install the SSD by connecting the SATA or m.2 interface to the appropriate port and securing it with screws or latches.

    With the SSD physically installed, you can move on to the next steps of cloning or installing your operating system. By taking the time to properly install your SSD, you can enjoy faster and more efficient computing for years to come.

    Locate and Connect the SSD

    To physically install your SSD, you’ll need to locate and connect it correctly. Firstly, ensure you have unplugged your computer and taken any necessary safety precautions. Once you have done this, open up your computer’s case and locate an available drive bay.

    Your motherboard’s manual should be of help here. Align your SSD with the bay and ensure the screw holes on your SSD align with those on the bay. Once you have done this, secure the SSD in place by fixing the screws.

    Now, locate an available power SATA cable and connect it to the small port on the side of your SSD. Similarly, attach a SATA data cable from your computer’s motherboard to the corresponding port on your SSD. You have successfully physically installed your SSD!

    Secure the SSD in Place

    Now that you have prepared the SSD and removed the old hard drive, it’s time to physically install the SSD. Look closely at the tray or bracket where the old hard drive was located. You will see that it has screw holes that match up with the screw holes on the SSD.

    Take four screws and gently screw them into each of the screw holes, making sure they are in tightly and securely. Next, slide the SSD into the tray or bracket and push it in gently until you feel it click into place. Remember that the SSD is a sensitive piece of equipment, so be gentle when inserting it into the computer.

    Once it’s securely in place, you can move on to installing the operating system and any other software you need on your new, speedy SSD. Congrats, your installation process is nearly complete!

    Test the SSD

    Are you thinking of upgrading your computer by adding a solid-state drive (SSD) to your existing hard disk drive (HDD)? Well, installing an SSD with an HDD is a common and straightforward process. Firstly, you need to back up all your data on the HDD to an external drive or cloud server. Next, open the computer case and locate the HDD and the storage drive bay for the SSD.

    Slide the SSD into the bay and connect it with a SATA cable and a power connector. Once you have installed the SSD, you will need to test it. Testing an SSD involves running system benchmarks and comparing the results to those of your existing HDD.

    This will give you a better understanding of the improvement in speed and performance that the SSD has to offer. You can use benchmarking software like CrystalDiskMark or AS SSD Benchmark to check the read and write speeds of the SSD. To sum it up, installing an SSD to an existing HDD is not just an easy but also affordable way to boost the performance of your computer.

    And by testing the SSD, you can make sure it is working efficiently and providing the desired speed increase. So, if you’re looking to optimize your computer, installing an SSD is definitely a great idea.

    Check BIOS Settings

    When it comes to ensuring that your SSD is running at its best, checking your BIOS settings is essential. The BIOS, or Basic Input/Output System, is responsible for managing hardware settings and communicating with your system’s operating system. This means that tweaking certain settings in your BIOS can have a significant impact on how well your SSD performs.

    One crucial setting to check is the SATA mode. Most SSDs are designed to work with the AHCI, or Advanced Host Controller Interface, mode. AHCI enables features like hot-swapping and Native Command Queuing, which can help improve your SSD’s performance.

    However, some older motherboards may default to IDE, or compatibility mode, which can limit your SSD’s capabilities. So, make sure to check your SATA mode and change it to AHCI if necessary. Another setting to keep an eye on is the boot order.

    If you have multiple storage devices installed, such as an HDD and an SSD, you’ll want to make sure that your system is set to boot from your SSD first. This will ensure that your system boots up quickly and that your operating system and other programs load from your SSD, which is typically much faster than an HDD. In conclusion, taking the time to check your BIOS settings is crucial if you want your SSD to perform at its best.

    Simple tweaks like changing your SATA mode and adjusting your boot order can make a significant difference in your system’s overall speed and performance. By implementing these changes, you can ensure that your SSD is living up to its full potential.

    Boot Up and Check SSD Functionality

    Once you’ve installed your SSD, it’s important to test that it’s functioning correctly. The easiest way to do this is by booting up your computer and checking the drive’s performance. One way to check the SSD’s functionality is to use your computer’s built-in diagnostic tool.

    This will allow you to check the drive’s health and make sure that all components are working correctly. Another great way to test your SSD is to run a benchmark test. This will give you a good idea of how fast your drive is, and if it’s performing up to its potential.

    In addition to these tests, you can also check to make sure that your operating system recognizes the SSD and that you’ve properly configured it for optimal performance. By taking the time to test your SSD, you can ensure that it’s working correctly and that you’re getting the most out of your computer.

    Conclusion

    In conclusion, installing an SSD to your existing HDD is like adding a turbocharger to your car – it gives your system a much-needed boost and speeds up your computing experience. With just a few simple steps, you can easily install an SSD alongside your HDD and take advantage of all the benefits that solid-state technology has to offer. So go ahead, rev up your computer’s performance and feel the difference for yourself – you won’t regret it!”

    FAQs

    What tools do I need to install an SSD to my existing HDD?
    You will need a screwdriver set, an anti-static wrist strap, and possibly a SATA-to-USB adapter.

    Can I install an SSD alongside my existing HDD?
    Yes, you can install an SSD alongside your existing HDD by connecting it to an available SATA port on your motherboard.

    How do I transfer my files from my HDD to my new SSD?
    You can either clone your existing HDD to your new SSD using specific software or manually copy and paste files from your old drive to your new drive.

    Is it necessary to reinstall the operating system after installing an SSD?
    It is not necessary to reinstall the operating system after installing an SSD, but it is recommended for optimal performance and to take advantage of the SSD’s features.

  • Streamline Your Tech: A Beginner’s Guide to Installing an SSD Card

    Are you tired of slow computer performance? Do you want to boost your computer’s speed and overall performance? One solution that technology enthusiasts rave about is installing an SSD card. An SSD card can offer significant benefits, such as faster boot times and improved program loading times. Not to mention, it can make your computer feel like new again.

    In this blog post, we will guide you on the process of installing an SSD card in your computer. From selecting the right SSD card to transferring your operating system, we’ve got you covered. Stay tuned to learn more about this exciting upgrade that can transform your computer’s performance.

    Preparation

    If you’re considering installing an SSD card in your computer, you might be nervous about how hard the process is. Thankfully, it’s not as challenging as you might think! There are a few things you’ll need to do to prepare for the installation, but once you have those sorted, the actual installation process is straightforward. The first step is to make sure you have all the necessary tools, including a screwdriver and SATA cables.

    Then, you’ll need to ensure that you have the right SSD card for your computer and that it’s compatible with your motherboard. Once you have those sorted, you’ll need to back up your data and shut down your computer before opening it up and finding the right slot for your SSD. While it might seem intimidating, the truth is that most people can handle the installation with ease, as long as they take their time and read the instructions carefully.

    By the end of the process, you should have a new and improved computer that runs faster and smoother than ever before thanks to your new SSD card!

    Check compatibility with your device

    Before purchasing any new device or downloading any app, it’s important to check its compatibility with your existing device. This will save you a lot of time and money, and prevent any frustration that may arise from incompatibility issues. Firstly, you should check the device requirements stated by the manufacturer or app developer, ensuring that your device meets or exceeds those requirements.

    This may include things like software version, storage space, processing power, and RAM. It’s also wise to check user reviews and forums to get insights from other users who have already tested the compatibility for you. By doing so, you’ll be able to determine if your device is compatible or not, avoid any unpleasant surprises, and feel confident in your purchase decision.

    In short, always do your research and due diligence before jumping into any new technology.

    how hard is it to install an ssd card

    Backup your important data

    Backing up your important data is one of the most important steps you can take to protect your information. Whether you’re a business owner or an individual, it’s crucial to ensure that any valuable and confidential data is always secured. Preparation is key.

    Before you start backing up, take an inventory of all the data you have. What kind of files do you have, and where are they located? This will help you determine the best way to back up your important data. You can use online backup services, external hard drives, or even cloud-based storage.

    The choice is yours, but the most important thing is to get started. Don’t wait until it’s too late and you lose all your data to realize the importance of backing up. Invest the time and resources into protecting your information and you’ll have peace of mind knowing that your valuable data is safe and secure.

    Tools You Need

    Installing an SSD card may seem like a daunting task, but it’s actually quite simple with the right tools. The first thing you’ll need is an SSD card, of course. You’ll also need a screwdriver, either a Phillips or Torx depending on your computer model, and an external housing or adapter if you need to migrate data from your old hard drive.

    The actual installation process involves opening up your computer, locating the hard drive bay, removing the screws, and replacing the hard drive with the SSD card. Some models require more steps, such as moving a bracket or removing parts to access the bay. However, with a little research and patience, most users can easily install an SSD card without any professional help.

    So, don’t let the fear of the unknown hold you back from its superior performance and speedy boot times – go ahead and try installing an SSD card yourself!

    Screwdriver set

    If you’re ready to start fixing things around your house, then a good screwdriver set is a must-have. With a set of screwdrivers, you can tackle almost any household repair, whether it’s fixing a loose door handle, tightening a leaky faucet, or assembling a piece of furniture. Screwdrivers come in various sizes and types, each suited to a specific task, so it’s essential to have a variety of them to hand.

    The main types of screwdrivers you’ll need are a flat-head and a Phillips-head screwdriver. The flat-head has a straight tip that can fit into slotted screws, while the Phillips-head has a cross-shaped tip and is best for Philips screws. It’s also worth getting a set with magnetic tips, as they can help keep screws in place while you work.

    Other types of screwdrivers you may need include Torx and square-drive screwdrivers. With the right screwdriver set in your toolbox, you’ll be well-equipped to tackle any DIY project that comes your way.

    Anti-static wristband

    If you’re planning on building or repairing a computer, there are a few essential tools that you’ll need, one of which is an anti-static wristband. When working with computer components, it’s essential to protect them from static electricity. Static electricity can build up in your body and discharge when you touch a component, potentially damaging it.

    An anti-static wristband connects you to a grounded object, such as the PC case, and dissipates the static electricity. This clever tool is inexpensive and easy to use, and using it can help ensure that your computer components stay safe during the building or repair process. So, don’t forget to add an anti-static wristband to your list of essential tools and keep your components protected from static electricity!

    Installation Process

    If you’re wondering how hard it is to install an SSD card, the good news is that it’s actually quite simple! In fact, you can typically replace your old hard drive with a new SSD in just a few simple steps. First, you’ll need to make sure you have the necessary tools and equipment, including a screwdriver and the proper cables for your specific computer model. Then, you’ll need to open up your computer case and locate the existing hard drive.

    From there, it’s just a matter of disconnecting the old hard drive and connecting the new SSD, making sure everything is securely in place. Depending on your computer and the type of SSD you’re installing, you may also need to adjust some settings in your BIOS to ensure optimal performance. Overall, installing an SSD can be a quick and easy process that can greatly improve your computer’s speed and performance.

    So if you’re considering upgrading your storage, don’t be intimidated – with a little bit of know-how, you can have your new SSD up and running in no time!

    Open your device

    Open your device and get ready to begin the installation process! This step is crucial as it allows you to access the inner workings of your device, which is necessary for installing any software or apps. Depending on the device, the process can differ slightly, but it usually involves unlocking your screen and navigating to the settings menu. Once you’ve accessed the settings, you’ll be able to select options such as security, permissions, and developer settings that are necessary for installing software outside of the official app store.

    It’s important to follow the instructions carefully to avoid any potential issues or security risks. Remember, by opening your device, you’re giving yourself the freedom to customize and optimize your experience to your liking. So don’t be afraid to take this first step and unlock the full potential of your device!

    Locate the storage drive bay

    When it comes to installing a storage drive, the first step is to locate the storage drive bay in your computer case. This can vary depending on the model and type of case you have. In most cases, you will find the drive bay near the front or bottom of the case.

    It’s important to check your computer’s manual or look for the bay’s location online if you have trouble finding it. Once you locate the bay, make sure to remove the covering or mounting bracket as necessary, and align your drive in the bay with the screw holes. Then, securely screw the drive in place.

    It’s essential to be gentle with your drive as you handle and install it. Remember that a secure installation is crucial for the safety and longevity of your drive. So, take your time, follow the guidelines, and your installation will be a success.

    Remove existing drive (if applicable)

    If you’re upgrading your hard drive, the first step is to remove the existing drive (if applicable). This means opening up your computer or laptop and disconnecting any cables or screws connected to the drive. It’s important to handle your existing drive with care to avoid any damage that could cause data loss.

    If you don’t feel comfortable doing this yourself, it’s a good idea to seek professional help to ensure a smooth installation process. Removing your existing drive also means backing up your data beforehand so you don’t lose any important files or documents. By taking these precautionary steps, you can ensure a successful upgrade without any hiccups along the way.

    Insert the SSD into the bay

    Congratulations! You have purchased an SSD for your computer, and now it’s time to install it. The first step of the installation process is to insert the SSD into the bay, which may sound easier said than done. The SSD bay is typically located near the hard drive bay and usually has a metal bracket with screw holes to hold the SSD in place.

    To insert the SSD, carefully slide it into the bay, making sure it lines up with the connectors. Once it is in place, screw the SSD onto the bracket using the screws provided with the SSD. It is essential to make sure the SSD is firmly fastened to the bracket and that the connections are secure to prevent any potential damage or data loss.

    After successfully inserting the SSD into the bay, it’s time to move onto the next step in the installation process.

    Attach the SSD with screws

    When upgrading your computer’s storage, attaching an SSD with screws is an important step in the installation process. This will ensure that the drive is securely fastened within the computer case, preventing any unwanted movement or damage to the drive. Before attaching the SSD, it’s important to locate the correct mounting points within the case.

    Once you’ve identified these areas, you can use the screws that came with your drive to attach the SSD firmly to the case. It’s important to be gentle when screwing in the screws, as overtightening could result in damage to the drive or case. With the SSD securely attached, you can move on to connecting it to the power and data cables within the computer.

    Taking the time to properly attach the SSD will ensure a smooth and reliable computing experience, with faster boot times and improved performance. So, don’t rush through this step – take the time to attach your SSD with care and precision for optimal results.

    Reassemble your device

    After successfully replacing the faulty parts, it’s time to reassemble your device. Flip it over and start by carefully placing the motherboard back into its slot. Carefully connect the cables and wires back into their respective ports and make sure everything is firmly in place.

    Next, gently place the back panel onto the device and use the screws to secure it into place. Once you’ve made sure everything is screwed in tightly, power on the device and check to make sure everything is functioning properly. Don’t forget to take your time during the reassembly process and follow the steps in reverse order to avoid any mishaps.

    Congratulations on successfully replacing the faulty parts and reassembling your device!

    Conclusion

    So, in conclusion, installing an SSD card is like solving a tricky puzzle – it may seem daunting at first, but with the right tools and guidance, it can be easily achieved. With a bit of patience and determination, you can experience lightning-fast speeds and improved performance on your device. And if all else fails, you can always call upon the trusty tech support or a tech-savvy friend to lend a helping hand.

    SSD installation may not be a cakewalk, but it’s definitely worth the effort!”

    FAQs

    What tools are required to install an SSD card?
    Generally, you’ll need a screwdriver, an anti-static wrist strap, and the necessary cables to connect the SSD to your motherboard.

    What considerations should I keep in mind before selecting an SSD card?
    You’ll need to know the size of your computer case, the maximum height of the SSD that can fit in it, and which type of drive connector your motherboard uses.

    Do I need to reinstall my operating system when I install an SSD card?
    If you plan to clone your existing hard drive to your new SSD, you do not need to reinstall the operating system. However, if you plan to perform a clean installation, you will need to reinstall your operating system.

    Can I install an SSD card in a laptop?
    Yes, in most cases you can install an SSD in a laptop. However, the process can be more complicated than on a desktop and may require specific tools or techniques. It’s best to check with your laptop manufacturer or a professional technician for guidance.

    What are the benefits of installing an SSD card?
    Installing an SSD will significantly improve your computer’s performance, including faster boot times, faster file transfers, and faster load times for applications and games. Additionally, SSDs offer better reliability and durability than traditional hard drives.

  • How to Step-by-Step Install SSD in Acer Aspire E15 and Boost Your Laptop’s Performance

    If you’re constantly dealing with slow boot times, lagging programs, and general sluggishness, it might be time to consider upgrading your Acer Aspire E15 with a solid-state drive (SSD). An SSD can significantly improve your computer’s performance, making it faster, smoother, and more efficient. However, if you’re not familiar with this type of upgrade, you might be wondering “how do I install an SSD in my Acer Aspire E15?” Don’t worry, it’s actually easier than you might think.

    With the right tools and a little bit of patience, you can make this upgrade yourself and breathe new life into your computer. In this blog, we’ll go through the steps you need to follow to install an SSD in your Acer Aspire E15, starting from backing up your data to installing the SSD and cloning your old hard drive. So, let’s get started!

    Check the compatibility of SSD with Acer Aspire E15

    Looking to upgrade your Acer Aspire E15 with a solid-state drive (SSD)? Well, you’re in luck! Most Acer Aspire E15 models are compatible with SSDs, providing faster boot times and improved performance compared to traditional hard drives. Before purchasing an SSD, ensure that the drive’s specifications, such as its form factor and interface, match those of your Acer Aspire E1 Additionally, make sure that your laptop’s BIOS supports booting from an SSD.

    Installing an SSD into your Acer Aspire E15 is a fairly straightforward process, as long as you’re comfortable with opening up your laptop. If you’re not confident in your technical abilities, consider seeking a professional’s help to avoid damaging your device. Otherwise, enjoy the improved speed and performance of your Acer Aspire E15 with a new SSD installed!

    Research and select an SSD that is compatible with Acer Aspire E15

    If you’re looking to upgrade your Acer Aspire E15 by installing an SSD, one of the most important factors to consider is compatibility. You will need to find an SSD that is compatible with the SATA connector and interface of your laptop’s motherboard. To do this, you can refer to the user manual or specification sheet of the Acer Aspire E15 to check for the type of SATA interface it uses.

    Additionally, you can consult with the manufacturer of the SSD to ensure that their product is compatible with your laptop. Some popular SSD brands that are compatible with Acer Aspire E15 include Samsung, Crucial, Western Digital, and Kingston. Remember, finding the right SSD that is compatible with your laptop will not only improve its performance but also increase its lifespan.

    acer aspire e15 how to install ssd

    Create backup of existing data on Acer Aspire E15

    If you’re looking to upgrade your Acer Aspire E15 with an SSD, the first step is to create a backup of your existing data. This ensures that all your files and documents are safe and can be easily transferred over to the new drive. You can do this by using an external hard drive or cloud-based backup service to store your files.

    Simply connect the drive or sign up for a backup service, and follow the instructions provided. Once your backup is complete, you’re ready to install the SSD. This process may involve opening up your laptop, so it’s important to follow the manufacturer’s instructions carefully.

    With your new SSD up and running, you should notice a significant boost in performance and speed, making it well worth the effort.

    Backup your data on an external drive or cloud-based storage solution

    Creating a backup of your important data is a crucial step that every computer user needs to take in order to avoid potential data loss. If you own an Acer Aspire E15, there are various ways to create a backup of your existing data. One of the easiest methods is to use an external drive.

    You can connect an external hard drive or a USB flash drive to your Acer Aspire E15 and copy your important files and folders to it. This will ensure that you have a copy of your data in case something goes wrong with your computer. Additionally, a cloud-based storage solution is also a great option.

    You can choose from a variety of cloud storage services that offer different amounts of storage capacity and subscription plans. By selecting a suitable subscription plan, you can easily backup your data to the cloud and access it from anywhere and anytime you want. So, don’t wait until you lose your important data to regret not taking a backup.

    Make it a habit to regularly backup your data to an external drive or a cloud-based storage solution to stay safe.

    Unbox and Install the SSD

    If you’re running out of space on your Acer Aspire E15, it’s time to upgrade to an SSD. The good news is that installing an SSD is easy and doesn’t take much time. First, you need to unbox the SSD and make sure you have a screwdriver on hand.

    Once you’ve opened the package, take the SSD out carefully and locate the open compartment on the bottom of your laptop. Remove the screws securing the cover and gently lift it up to expose the hard drive bay. Next, simply disconnect the cables connecting the old hard drive to the motherboard and gently slide it out of the bay.

    Place the SSD in the same spot and connect the cables to the motherboard. Finally, replace the cover and screws and you’re done! Boot up your laptop and enjoy the lightning-fast speeds of your new SSD. By following these simple steps, you can easily upgrade your Acer Aspire E15 and increase its performance without breaking the bank.

    Remove the back cover and battery of Acer Aspire E15

    If you recently got your hands on a new Acer Aspire E15, you might be looking to upgrade its storage with an SSD. To do this, the first step is to remove the back cover and battery of your laptop. This process is straightforward and requires minimal tools.

    You’ll need a small screwdriver to remove the screws that hold the back cover in place. Once you remove them, gently lift the back cover and locate the battery. You can then slide the battery out to remove it.

    This will give you access to the HDD and RAM slots. You can now unbox your new SSD, and slide it into the available slot. Make sure that it is correctly aligned with the connector and push it in firmly.

    Once you’ve installed the SSD, slide the battery back into the laptop and replace the back cover. Screw the cover back into place, and you’re done! With this simple upgrade, you can now enjoy faster read and write speeds, improved boot times, and better overall performance. Keep in mind that it’s always important to back up your data before undertaking any hardware changes.

    Insert the SSD into the empty slot and secure it with a screw

    Unboxing and installing an SSD is an easy process that can greatly improve the speed and performance of your computer. The first step is to locate the empty slot where you will insert the SSD. This is typically found near the other storage devices on your computer and may be labeled as a SATA slot.

    Once you have located the slot, you can unbox your SSD and carefully insert it into the slot. Make sure the gold connectors are facing towards the slot and that the SSD is securely in place. You can then use a screw to fasten the SSD in place.

    This will ensure that it doesn’t move around or become loose during use. Overall, installing an SSD is a simple process that can have a major impact on the speed and performance of your computer. Main Keyword: SSD

    Clone the existing system drive onto the SSD

    Installing an SSD in your Acer Aspire E15 can dramatically improve your computer’s performance. To take full advantage of the SSD’s speed, you’ll want to clone your existing system drive onto the new drive. This process involves copying everything from your current hard drive, including the operating system, all installed programs, and your personal files.

    There are several software tools available that can help you with this task, such as Macrium Reflect, EaseUS Todo Backup, and Clonezilla. Once you’ve installed the software and connected the new SSD to your computer (either through an external enclosure or by directly inserting it into your computer), simply follow the instructions provided by the software. Keep in mind that the process may take some time depending on the size of your current hard drive and the speed of your computer.

    But once everything is copied over, you’ll be able to enjoy lightning-fast speeds from your new SSD.

    Download and install cloning software (e.g. EaseUS Todo Backup, Acronis True Image)

    cloning software, clone system drive, SSD. One of the most effective ways to give your computer a performance boost is by upgrading to a solid-state drive (SSD). However, if you don’t want to reinstall your operating system and apps from scratch, you can use cloning software such as EaseUS Todo Backup or Acronis True Image to clone the existing system drive onto the SSD.

    This will ensure that all your programs and files remain intact, but you’ll have the added benefits of faster boot times and improved overall performance. To get started, you’ll need to download and install the cloning software of your choice and then connect your SSD to your computer. Next, open the software and choose the option to clone your system drive.

    Follow the prompts to select the source drive (your existing hard drive) and the destination drive (your new SSD), and then start the cloning process. Depending on the size of your drive and the speed of your computer, this could take anywhere from a few minutes to several hours. Once the process is complete, you can remove your old hard drive and boot up your computer from the new SSD.

    With the help of cloning software, upgrading to an SSD is a relatively simple process that can provide a significant performance boost to your computer.

    Follow the cloning software instructions to clone the current drive to the SSD

    Cloning software makes it easy to migrate your existing system drive to a new SSD. However, it’s essential to follow the software instructions carefully to ensure a successful, error-free cloning process. Begin by connecting your SSD to your computer through a USB enclosure or adapter, and ensure it’s detected by your PC.

    Then, launch the cloning software and select the option to clone your current drive to the SSD. The software will guide you through the steps, which typically involve selecting the source and target disks, verifying the cloning process, and transferring the data. During this process, ensure that you don’t interrupt or disconnect either drive, as this may cause data loss or corruption.

    Depending on the size of your system disk, the cloning process may take several hours to complete, so be patient and avoid using your computer for other tasks during this time. Once the cloning process is complete, you can disconnect your old system drive and set up your new SSD as the primary drive in your computer. With the perfect cloning experience, you can now enjoy faster boot-up times, reduced latency, and improved overall system performance.

    Replace the system drive with the SSD

    If you’re looking to upgrade your Acer Aspire E15’s performance, installing an SSD might just be the way to go. Not only is it relatively easy and affordable, but it can make a world of difference in terms of speed and efficiency. To get started, you’ll need to replace the system drive with the SSD.

    First, make sure to back up any important data you have on your current drive. Then, remove the back panel of your laptop and locate the existing hard drive. Disconnect it and carefully remove it from its bay.

    Next, insert the SSD into the same bay and connect it properly. Don’t forget to Format the SSD and install a fresh copy of your operating system on it. Once you’ve completed these steps, replace the back panel and start up your computer.

    You should now be able to experience fast boot times and quick app loading thanks to your shiny new SSD.

    Replace the back cover and screw it in place

    Now that you have successfully removed the back cover and disconnected the system drive, it’s time to replace it with the SSD. Before doing so, make sure to read the manufacturer’s instructions carefully to ensure that you don’t damage any components of your computer. Once you are familiar with the installation process, carefully connect the SSD to the SATA slot and secure it in place with screws.

    Remember to be gentle and avoid applying too much force. Once the SSD is firmly attached, connect the power and data cables. Finally, replace the back cover and screw it in place.

    Congratulations! You have successfully installed an SSD on your computer, which should provide faster performance and quicker boot times.

    Boot up Acer Aspire E15 from the SSD

    Looking to give your Acer Aspire E15 an upgrade by installing an SSD? It’s a smart move, and it’s possible to do it yourself – no need to take it to a professional. To get started, you’ll need to purchase an SSD that is compatible with your Aspire E15 model. Once you have your hands on one, shut down your laptop and unplug it.

    You’ll need to remove the battery, unscrew and remove the hard drive cover, and then unscrew the hard drive itself. Next, disconnect the hard drive from the connector and connect the SSD in its place. Once secure, replace the hard drive cover and battery, and then turn your Aspire E15 on.

    You should be greeted with a faster, more responsive laptop! Remember to reinstall any programs you had stored on your previous hard drive and transfer any sensitive data to the new SSD. With these steps, you can easily install an SSD on your Acer Aspire E15 and enjoy a faster, more powerful computer experience.

    Restart the laptop and enter the BIOS setup by repeatedly pressing F2 or Del

    Are you looking to boot up your Acer Aspire E15 from the SSD? Follow these simple steps to get your laptop up and running in no time. First, restart your laptop and enter the BIOS setup by repeatedly pressing F2 or Del. Once you’re in the setup, navigate to the Boot menu and select the SSD as your primary boot device.

    It’s that easy! Now, why would you want to do this? Well, an SSD (Solid State Drive) offers faster boot times and improved overall performance compared to a traditional Hard Disk Drive (HDD). So if you’re looking for a speed boost, switching to an SSD is definitely the way to go. It’s like upgrading from a bicycle to a sports car! And trust me, you won’t regret it.

    So go ahead and make the switch, your laptop (and your patience) will thank you.

    Change the boot order to boot from the SSD

    If you’ve recently upgraded your Acer Aspire E15 with an SSD, you’ll want to change the boot order to ensure that your laptop starts up from the ultra-fast new storage device. To do this, start by shutting down the computer and restarting it. During the boot process, you’ll need to press the specific key that takes you to the BIOS menu.

    This key varies depending on the computer brand, but for Acer laptops like the Aspire E15, it’s usually the F2 key. Once inside the BIOS, navigate through the menu until you find the Boot tab. Here, you’ll see a list of all available boot devices.

    Use the arrow keys to highlight the SSD and move it to the top of the list, just above the previous boot device. Finally, save your changes and exit the BIOS. Now, your Acer Aspire E15 will boot up from the SSD, enabling you to enjoy lightning-fast speeds and improved performance.

    So, why wait? Follow these simple steps today to experience the ultimate in laptop speed and reliability!

    Save and exit the BIOS setup

    Once you have made the necessary changes in the BIOS setup to boot up Acer Aspire E15 from the SSD, it’s time to save and exit the setup. Saving the changes is crucial because it updates the BIOS with the new settings, and exiting the setup saves the changes and restarts the computer. To save the changes, you need to navigate to the “Save and Exit” option in the BIOS menu and select it.

    You can do this by using the arrow keys on your keyboard to move to the option and then pressing enter. The BIOS will prompt you to confirm whether you want to save the changes. Select “Yes” and then press enter once more to exit the setup.

    Your computer will now restart, and when it does, it should boot up from the SSD. Congratulations! You have successfully configured your Acer Aspire E15 to boot up from the SSD and can now enjoy faster and more reliable performance.

    Verify the SSD is working properly

    If you’ve just installed a new SSD in your Acer Aspire E15, you’re probably eager to make sure everything is working properly. To verify that your SSD is functioning as it should, there are a couple of things you can do. Firstly, you can check your computer’s system information to make sure it recognizes the SSD as the primary storage device.

    You can also run a benchmarking tool like CrystalDiskMark to test the read and write speeds of your new SSD. This will give you an idea of the performance improvements you can expect to see compared to your old hard drive. Another way to ensure smooth operation is to update your BIOS to the latest version.

    This can improve stability, reduce power consumption, and fix any bugs that may be causing issues. By taking these simple steps, you can be confident in the performance and reliability of your new SSD on your Acer Aspire E1

    Check the storage capacity and ensure the data has been migrated

    When dealing with SSDs, one of the most critical things to check is the storage capacity and whether the data has been migrated correctly. It’s essential to ensure that the SSD is functioning correctly to avoid any potential data loss or performance issues down the line. To verify the SSD is working correctly, you can use tools like CrystalDiskInfo or Samsung Magician to check the drive’s health and performance.

    These tools can also help identify any potential problems that the drive may be facing. Additionally, it’s essential to do some research on the storage capacity to ensure that you’re getting the appropriate amount of storage for your needs. SSDs have varying amounts of storage, and it’s crucial to get one that meets your requirements.

    It’s always a smart idea to go for higher storage capacity if you can afford it to ensure that there’s plenty of space for future data storage needs. In summary, always verify the storage capacity and data migration when working with SSDs and ensure that the drive is working correctly before putting it to use.

    Run benchmark tests on the SSD to benchmark transfer speeds

    SSD When investing in a new SSD, it’s important to verify that it is working properly. One way to do this is by running benchmark tests to measure transfer speeds. Benchmark tests assess the SSD’s performance and can identify any issues that may need addressing.

    There are numerous benchmark tools available online, but some popular ones include CrystalDiskMark and ATTO Disk Benchmark. These tools are easy to use and provide detailed information on transfer speeds, including read and write speeds. It’s recommended to run these tests on a clean SSD without any other applications open to obtain accurate results.

    By verifying the SSD’s performance through benchmark testing, you can ensure that it’s working optimally and experiencing the highest possible speed and performance.

    Conclusion

    In conclusion, upgrading your Acer Aspire E15 with an SSD is a no-brainer. Not only will it give your laptop a much-needed performance boost, but it will also reduce load times and improve overall efficiency. So, if you’re tired of waiting for your computer to catch up with you, follow these simple steps and let the SSD revolution begin!”

    FAQs

    What type of SSD is compatible with Acer Aspire E15?
    Acer Aspire E15 is compatible with 2.5-inch SATA III SSDs.

    How to open Acer Aspire E15 to install an SSD?
    To install an SSD in Acer Aspire E15, you need to remove the bottom cover by unscrewing the screws and then locate the HDD or SSD bay to install the new SSD.

    Is it difficult to install an SSD in Acer Aspire E15?
    It is not difficult to install an SSD in Acer Aspire E15 if you have the right tools and follow the instructions carefully.

    How to transfer the OS to the new SSD installed in Acer Aspire E15?
    You can use software like Macrium Reflect or EaseUS Todo Backup to clone the OS from the existing HDD or SSD to the new SSD installed in Acer Aspire E15.

  • Revive Your Bought Used SSD: Essential Cleaning Guide for Optimum Performance

    Everyone loves a good bargain and when it comes to computer hardware, getting your hands on used items can be a cost-effective solution. However, just like with any second-hand item, when buying a used SSD, there is always the looming question of how clean it is. SSDs are a crucial component of a computer system, storing all of your data, applications, and operating system.

    Imagine inheriting someone else’s junk and clutter, it is the same with an SSD that you are buying second-hand. In this blog post, we will provide you with the necessary information to help you ensure that your used SSD is clean, and ready for optimal performance. So you can enjoy that technical upgrade without any worries.

    Check the Health

    If you’ve recently purchased a used SSD, you’re undoubtedly eager to take advantage of the many benefits that come with owning such a powerful piece of hardware. However, before you dive in, there’s one important step that you absolutely cannot skip: checking the health of your used SSD. There are a few different approaches you could take, but a good place to start is by using a reputable benchmarking tool to test your drive’s read and write speeds.

    This can give you a basic idea of how your SSD is performing and whether it’s still in good working order. You may also want to check the SMART data on your drive, which can provide additional insights into the health of your drive. Finally, if you’re still unsure whether your used SSD is safe to use, consider running a full system scan with a trusted anti-virus program.

    By taking these steps, you can ensure that your used SSD is clean and performs as you need it to, giving you the peace of mind you need to get the most out of your new purchase!

    Use SSD Utility Software

    If you want to ensure your SSD is functioning optimally, using SSD utility software is a must. This type of software is specifically designed to help you maintain and monitor the health of your SSD. By using it, you can check the health of your drive, identify any performance issues, and get diagnostic information that can help you avoid potential problems.

    With the help of SSD utility software, you’ll be able to see how much space is being used on your drive, whether it’s experiencing any errors, and what the temperature of the drive is. This information is crucial to ensuring your SSD stays healthy, lasts as long as possible, and performs as well as it can. Just be sure to use trusted and reliable software to avoid any potential issues.

    bought used ssd how to clean

    Analyse SMART Data

    When it comes to checking the health of your computer’s hard drive, there’s nothing quite like analysing the SMART data. SMART, which stands for Self-Monitoring, Analysis and Reporting Technology, is an important feature in modern hard drives that provides crucial data about how well the drive is functioning. By accessing this data, you can get a better understanding of the health of your drive and whether it might be time to replace it.

    Some of the key things to look for when examining SMART data include the overall health of the drive, the number of bad sectors, and the amount of time the drive has been in use. By taking a closer look at this information, you can make a more informed decision about whether your hard drive is still up to the task or whether it’s time to start shopping for a replacement. So, if you’re concerned about the health of your computer’s hard drive, be sure to analyse the SMART data and take the necessary steps to keep your data safe and secure.

    Remove Existing Data

    If you’ve recently bought a used SSD and you’re concerned about the previous owner’s data, there are a few things you can do to ensure your new drive is clean and secure. The first step is to remove any existing data that may be on the drive. This involves formatting the SSD, which means deleting all the files and partitions on it and setting it up as a fresh storage device.

    One way to do this is to use a disk management tool such as Disk Utility on Mac or Disk Management on Windows. Make sure to select the correct SSD and follow the prompts to format it. Keep in mind that formatting will wipe everything on the drive, so make sure you have backups of any important data before proceeding.

    Once you’ve formatted the drive, it should be free of any previous data, and you can start using it with peace of mind.

    Backup Important Data

    When it comes to protecting your important data, backup is key. But before you start backing up, it’s important to clear out any existing data you no longer need. This not only ensures that your backup doesn’t include unnecessary files, but it also helps free up space on your device.

    So, where do you start? First, go through your files and delete any duplicates or old versions of documents. Then, consider removing any personal files or sensitive information that you no longer need. This could include old tax documents, bank statements, or medical records.

    Just make sure to properly dispose of them by shredding or securely deleting them from your device. By taking the time to remove existing data before backing up, you’ll have a more streamlined and secure backup process.

    Securely Erase the Drive

    If you’re looking to sell or donate your old device, it’s important to remove all the existing data from the drive securely. Simply deleting files or formatting the drive is not enough, as some data can still be recovered using specialized software. One effective way to ensure that all the data is permanently erased is by using a secure erasure tool.

    These tools wipe out all the data on the drive and overwrite it multiple times to make sure that it’s irretrievable. It’s essential to use a reliable and trusted tool to avoid any data leaks or breaches. By securely erasing the drive, you can protect your personal data and prevent any unauthorized access to it.

    So, if you’re planning to get rid of your old device, make sure to securely erase the drive using a reputable tool. It’s a simple but crucial step in safeguarding your privacy and security.

    Format the Drive

    If you’re looking to sell or donate your computer, or simply want to start with a clean slate, formatting the hard drive is an excellent option. Doing this removes all the data from the drive, making it impossible for anyone to access it. However, before you jump right in, remember to back up any important information you may need later.

    Once you’re ready, the process is pretty straightforward, but it can take some time depending on the size of your hard drive. To start, go to your computer’s settings and find the option to format your hard drive. Follow the prompts, and be patient as it can take a few minutes to complete.

    Remember to choose the appropriate formatting option, as there are a few different types. Once it’s finished, your drive will be completely wiped, so be sure it’s what you want before you proceed. By taking this step, you can ensure that your data remains confidential, giving you peace of mind.

    Test the Drive

    You might be wondering how to clean a used SSD that you just bought. The first thing you need to do is check the drive carefully for any physical damage or wear and tear. Next, you should test the drive to make sure it is functioning properly.

    You can do this by running diagnostic software to check for errors and ensure that the drive is not damaged or corrupted. Once you have verified that the drive is in good condition, you can go ahead and wipe it clean. There are various software programs available that can help you securely erase all data from the SSD, making it like new again.

    Just be sure to follow the manufacturer’s instructions carefully to avoid any damage to the drive. In summary, buying a used SSD can be a great way to save money, but it’s important to take a few precautions to ensure that you’re getting a quality product. By carefully checking and testing the drive, you can feel confident that it will work well for you for years to come.

    Check for Bad Blocks

    When it comes to testing your hard drive for bad blocks, it’s important to take the necessary precautions before storing your valuable data. One way to test your drive is by using diagnostic tools specifically designed for this purpose. These tools work by scanning for any bad blocks on the hard drive, which are essentially damaged areas that are no longer usable for storing data.

    If left unchecked, bad blocks can lead to data corruption and permanent loss of files. By running regular checks, you’ll be able to identify and isolate any bad blocks, ensuring that your data remains secure and accessible. It’s important to note that if a drive has a significant number of bad blocks, it’s best to replace the drive altogether to avoid any future problems.

    So, don’t wait until it’s too late, take the necessary steps to keep your data safe from harm.

    Test the Read/Write Speed

    When it comes to testing the speed of your hard drive, there are a few things to consider. The first is whether you want to test the read speed or the write speed. Both are important, as they can affect how quickly your computer can perform certain tasks.

    To test the drive, you can use a program such as CrystalDiskMark or HD Tune. These programs will give you a readout of how quickly your drive can read or write data. It’s important to note that the results may vary depending on the type of drive you have, as well as other factors such as the age of the drive and the type of data being read or written.

    Overall, testing the read and write speed of your hard drive can help you determine whether it’s time to upgrade to a faster drive, or whether you need to optimize your computer in other ways.

    Final Thoughts

    If you’ve bought a used SSD, it’s important to clean it thoroughly before using it to ensure that there are no malicious files or viruses lurking on its drive. Start by wiping the drive clean using the manufacturer’s recommended software, which can typically be downloaded from their website. This will erase all existing data and restore the drive to its original state.

    However, if you suspect that the drive may have been infected with malware, it’s crucial to use a reliable anti-virus software to scan the whole drive. Once you’ve completed the cleaning process, you can then format the drive to the desired file system such as NTFS or exFAT before using it. Keep in mind that using a used SSD carries a higher risk of data failure, so it’s always important to backup your data frequently.

    Overall, while buying a used SSD can be a cost-effective choice, it’s important to take caution and clean the drive properly for the sake of your data and system security.

    Conclusion

    Well, it looks like you’ve got a case of ‘previously loved’ storage on your hands. But fear not! With a bit of cleaning, your used SSD can be just as good as new. Just be sure to securely erase any old data and give it a good wipe down before putting it to work.

    After all, a little TLC goes a long way in keeping your digital life running smoothly.”

    FAQs

    Can I clean a used SSD before using it?
    Yes, you can clean a used SSD before using it by formatting it. Keep in mind that this will erase all data on the drive, so make sure to back up any important files first.

    What is the best way to format a used SSD?
    The easiest way to format a used SSD is to use a formatting tool provided by the SSD manufacturer. You can usually find this tool on their website. Alternatively, you can format the drive using your computer’s built-in formatting tool.

    Are there any risks associated with buying a used SSD?
    Yes, there are some risks associated with buying a used SSD. The drive may have hidden defects or damage that is not immediately apparent. Additionally, the previous owner may have used the drive for intensive tasks, causing it to wear out faster.

    How can I check the health of a used SSD?
    You can check the health of a used SSD by using a free tool like CrystalDiskInfo. This software will analyze the drive’s attributes and provide you with a health report. It’s important to note that no tool can guarantee the health of a used drive, so there is always a risk involved when buying used.

  • Revolutionize Your Gaming Experience with the ElecGear PS5 – The Ultimate Gaming Companion

    Welcome to the ultimate guide to ElecGear PS If you’re a gamer, you’ve probably heard about the hype surrounding the PS5 – and for good reason! The PS5 is the latest gaming console released by Sony, and it’s packed with features that make it a must-have for gamers everywhere. However, with so many different companies producing accessories for the PS5, it can be challenging to figure out which ones are worth investing in and which ones are simply a waste of your hard-earned money.

    That’s where ElecGear comes in. With a wide selection of PS5 accessories, from cooling fans to controller chargers, ElecGear is a trusted brand that is well-known in the gaming community for producing high-quality products that enhance the gaming experience. In this guide, we’ll be taking an in-depth look at some of the best ElecGear PS5 accessories on the market, including their features, benefits, and potential drawbacks.

    Whether you’re a casual gamer or a hardcore enthusiast, this guide will provide you with everything you need to know about ElecGear PS5 accessories and help you make an informed decision about which ones are right for you. From improving your console’s performance to enhancing your overall gaming experience, we’ve got you covered. So, buckle up and get ready to dive into the world of ElecGear PS5 accessories.

    What is Elecgear PS5?

    If you’re a PS5 owner looking for a new accessory, Elecgear PS5 is a great option to consider. It’s essentially a cooling fan that attaches to the back of your console, helping to regulate its temperature and prevent it from overheating during extended gaming sessions. But what really sets Elecgear PS5 apart from other cooling fans on the market is its design.

    It’s sleek and unobtrusive, so it won’t be an eyesore in your gaming setup. And it’s also easy to install – no tools required. Additionally, it has a built-in LED light that provides a cool blue glow, adding a nice touch of ambiance to your gaming space.

    So if you want to keep your PS5 running at its best and add a stylish accessory to your setup, Elecgear PS5 is definitely worth checking out.

    Discover specs, design & features of Elecgear PS5

    If you’re looking for a new gaming device, you might want to check out the Elecgear PS It’s the fifth installment in the PlayStation series, released in late 2020. This next-gen console boasts of various features and improvements that would make your gaming experience more enjoyable and personal.

    The Elecgear PS5’s hardware is impressive, with a custom AMD Zen 2 processor, custom RDNA 2 GPU, and SSD storage. This allows the console to render high-definition graphics and run seamless games without any lag or delay. The design is sleek and modern, with a two-tone color scheme of black and white that will surely catch your eye.

    Additionally, the controller of the Elecgear PS5 has also been updated with haptic feedback, adaptive triggers, and a built-in microphone that allows for voice chat. Overall, the Elecgear PS5 is one console that you should consider if you’re looking for a cutting-edge gaming device that will take your gaming experience to the next level.

    elecgear ps5

    Benefits of choosing Elecgear PS5

    Elecgear PS5 is the ultimate gaming accessory that is specifically crafted to enhance your gaming experience. It is a cooling fan that is compatible with the PS5 console. One of the significant benefits of choosing Elecgear PS5 is that it keeps your console cool, preventing any damage to the internal components caused by overheating.

    This feature ensures that your gaming sessions are uninterrupted, and you can enjoy your games without worrying about any technical difficulties. Additionally, Elecgear PS5 is designed to reduce the noise level of your PS This means that you can play games without being disturbed by the loud noise of the console’s internal fan.

    With Elecgear PS5, you can immerse yourself in the world of gaming without any distractions. The fan is easy to install and comes with a user manual that ensures seamless installation. Furthermore, Elecgear PS5’s sleek and stylish design enhances the aesthetic appeal of your PS5 setup.

    It is undoubtedly an excellent investment for avid gamers who want to optimize their gaming experience. Choose Elecgear PS5 to experience the benefits of a top-of-the-line accessory that will take your gaming to the next level.

    Where to Buy Elecgear PS5

    If you’re looking to buy the Elecgear PS5, you’ll be happy to know that this console is available at a variety of retailers both online and in-store. Some of the best options for purchasing this sought-after console include major retailers like Amazon, Best Buy, Walmart, and GameStop. These retailers often offer great deals and discounts, so it’s worth keeping an eye out for any promotions that may be available.

    Additionally, you can also purchase the Elecgear PS5 directly from the manufacturer’s website. No matter where you decide to purchase your new console, be prepared for high demand and limited availability. With such a popular and highly anticipated gaming system, it’s no surprise that it has been selling out quickly.

    So, act fast and don’t miss out on your chance to enjoy all the incredible features and capabilities of the Elecgear PS5!

    Top online stores to purchase Elecgear PS5

    Looking to purchase the Elecgear PS5? Well, you’ve come to the right place! Here are some of the best online stores to get your hands on this incredible gaming console. Amazon is a popular option, as they have a wide variety of options and their delivery is generally quick. Best Buy is another good choice, as they often carry limited edition consoles and you can do a store pick-up instead of waiting for delivery.

    GameStop is also a great option, as they specialize in gaming products and often have exclusive deals. And of course, don’t forget about the official Sony PlayStation store, where you can get not only the Elecgear PS5, but also a wide range of games and accessories. Whatever your preference, there are plenty of reliable options to choose from when it comes to purchasing your Elecgear PS

    How to ensure that you get an original Elecgear PS5

    If you’re on the hunt for an Elecgear PS5, you’ll want to make sure you’re buying an original and authentic product. The best place to buy an Elecgear PS5 is through the official Elecgear website or trusted retailers like Amazon. Avoid purchasing from unauthorized sellers or second-hand retailers as they may be selling fake or refurbished products.

    When purchasing through the Elecgear website, make sure to check for the official logo and branding, as this indicates the product is genuine. It’s important to do your research and be cautious in order to ensure you’re getting a high-quality, original Elecgear PS Don’t be tempted by suspiciously low prices or flashy deals, as these may be too good to be true and could result in disappointment.

    Overall, there are many ways to ensure you get an authentic Elecgear PS5, but the most important thing is to be diligent and informed before making your purchase.

    Pricing ranges of Elephant PS5 in various countries

    If you’re in the market for a new gaming device and looking to purchase the Elecgear PS5, you may be wondering where to buy it and what the pricing ranges are in different countries. Well, you’re in luck because we’ve got the details for you! In the United States, the Elecgear PS5 is priced at around $499, while in the United Kingdom, it’s around £44 In Australia, you can expect to pay around AUD750.

    As for where to buy the Elecgear PS5, you can find it at various retailers, including Amazon, Best Buy, Walmart, and more. It’s always a good idea to compare prices and deals across different retailers before making a purchase, so you can get the best value for your money. No matter where you buy your Elecgear PS5 from, you’re sure to enjoy a top-of-the-line gaming experience on this powerful and visually stunning device.

    So, go ahead and treat yourself to this amazing gaming console and elevate your gameplay to the next level!

    How to Set Up and Use Elecgear PS5

    Setting up and using the Elecgear PS5 is an easy process that can be done without any technical knowledge. To begin, connect the power cord to an outlet and insert the HDMI cable and Ethernet cable into the back of the console. Next, turn on your TV and select the HDMI input that the PS5 is connected to.

    Now you can turn on the console and follow the on-screen instructions to set up your user profile and internet connection. Once that’s done, you’re ready to start gaming with your Elecgear PS5! The Elecgear PS5 has many features that can enhance your gaming experience. Its fast load times and improved graphics make gameplay smoother and more vibrant than ever before.

    The console also has a built-in microphone that allows you to chat with friends and a high-speed SSD that reduces loading times. With the added benefits of haptic feedback and adaptive triggers, the Elecgear PS5 provides a truly immersive gaming experience. So why wait? Set up and start using your Elecgear PS5 today for endless hours of fun and entertainment!

    Step-by-step process of setting up Elecgear PS5

    If you have recently purchased the Elecgear PS5, setting up and using it is a relatively simple process. First, you will need to remove the console and connecting cables from the packaging. Once removed, connect the power cable to the console and plug it into a power outlet.

    Next, connect your HDMI cable to the back of the console and then connect the other end to your TV’s HDMI port. If you have an Ethernet cable, you can connect it to the console and then to your modem to ensure a stable internet connection. Alternatively, you can connect to Wi-Fi through the console’s settings.

    Finally, turn on your TV and console, and follow the on-screen prompts to complete the setup. With just a few easy steps, you can start enjoying your Elecgear PS5 and all of the latest games it has to offer.

    Tips on using Elecgear PS5 like pro

    If you’re looking to get the most out of your Elecgear PS5, the first step is setting it up properly. Start by unboxing the console and connecting all the necessary cables and components, including the HDMI cable, power cord, and controller. Next, follow the on-screen instructions to connect to Wi-Fi, create a user profile, and download any necessary updates.

    Once the console is set up, you can start exploring all the features and functionality it has to offer. Make sure to take advantage of the built-in microphone and camera for voice and video chat, and use the customizable controller settings to adjust to your preferences. With the Elecgear PS5, you’ll be able to play all your favorite games and enjoy a seamless gaming experience unlike any other.

    Final Thoughts

    In conclusion, the Elecgear PS5 is a standout accessory for any avid gamer. This portable cooling fan attaches directly to your PS5, alleviating any concerns of overheating during those long gaming sessions. Not only does it enhance the console’s performance, but it also boasts a sleek design that seamlessly integrates with the PS5’s aesthetic.

    The fan’s quiet operation ensures that it won’t disrupt your gaming experience and its customizable LED lights add a cool touch. Overall, the Elecgear PS5 is a must-have addition to any gaming setup and proves to be a worthwhile investment for taking your PS5 gaming to the next level. Don’t let overheating slow you down – invest in the Elecgear PS5 and unleash your gaming potential.

    Conclusion

    In conclusion, the Elecgear PS5 is the ultimate gaming console for those who demand nothing but the best. With advanced hardware, lightning-fast load times, and breathtaking graphics, it’s no wonder that this console has taken the gaming world by storm. Whether you’re a casual gamer or a hardcore enthusiast, the Elecgear PS5 is sure to elevate your gaming experience to the next level.

    So sit back, relax, and let this console take you on a wild ride through the world of gaming, because with the Elecgear PS5, the possibilities are endless.”

    FAQs

    What is ElecGear PS5?
    ElecGear PS5 is a charging station designed for PS5 DualSense wireless controllers and manages your game space efficiently.

    Is ElecGear PS5 compatible with other controllers?
    No, ElecGear PS5 is not compatible with other controllers except for PS5 DualSense wireless controllers.

    Can I charge my PS5 controller when it is inside my console?
    Yes, you can charge the PS5 controller when it is inside the console, but you will need to connect it with the USB cable that came with the console.

    How many controllers can I charge at the same time with ElecGear PS5?
    ElecGear PS5 allows you to charge up to two PS5 DualSense wireless controllers at the same time.

  • Unleash Lightning Fast Speeds with SSD M2 1TB: The Ultimate Solution for Your Storage Needs

    Welcome to the world of high-speed data transfer! Are you tired of waiting endlessly for your computer to fire up? Do you feel like you’re wasting your time staring at a blue progress bar that moves at a glacial pace? Fear not, because there’s a solution to your problems. Introducing the 1TB SSD M2 Storage, the ultimate storage solution for blazing-fast speeds! Imagine having lightning-quick access to your files, applications, and games. With the 1TB SSD M2 Storage, you can say goodbye to long loading times and hello to lightning-fast performance.

    This game-changing storage technology uses a fast flash memory that can transfer data at speeds up to six times faster than traditional hard drives. It’s like having your own personal rocket booster for your computer! Not only does the 1TB SSD M2 Storage provide lightning-fast speeds, but it also boasts a massive storage capacity. With 1TB of storage, you can keep all of your important files, photos, music, and videos in one place.

    No more worrying about running out of storage space or having to constantly shuffle files to external hard drives. In summary, the 1TB SSD M2 Storage is a game-changer in the world of data storage. It provides lightning-fast speeds, a massive storage capacity, and is the perfect upgrade for anyone looking to boost their computer’s performance.

    So why wait? Upgrade to the 1TB SSD M2 Storage today and unleash the true potential of your computer!

    What is an SSD M2 Drive?

    An SSD M2 Drive is the latest type of form factor for solid-state drives, providing ultra-fast storage capabilities for modern devices. The “M2” part of the name refers to the connector type used by the drive, with “1TB” referring to the storage capacity. The M2 form factor offers some advantages over traditional hard disk drives and even traditional SSDs.

    For one, M2 drives are more compact, which allows manufacturers to build smaller devices. The M2 drive format also allows for faster read and write speeds, providing faster boot times and the ability to quickly load programs and files. Additionally, because there are no moving parts, M2 drives are less prone to failure, making them ideal for use in laptops and other mobile devices.

    If you’re in the market for a new storage solution, then an SSD M2 1TB drive may be just what you need for faster performance and increased reliability.

    Compact Size and High Performance

    If you’re in the market for an upgrade to your computer’s storage drive, you’ve probably come across the term “SSD M2” at some point. So what is an SSD M2 drive? Essentially, it’s a type of solid-state drive (SSD) that’s designed to fit in the M.2 slot on your motherboard.

    These drives are typically much smaller than traditional 5-inch SSDs, which makes them ideal for use in smaller form factor devices like ultrabooks and tablets. Despite their compact size, however, SSD M2 drives are known for their high performance and speedy data transfer rates.

    That’s because they connect directly to the motherboard through the PCIe bus, which offers significantly faster speeds compared to the SATA interface used by traditional SSDs. So if you’re looking for a high-performance storage solution that won’t take up too much space in your device, an SSD M2 drive might be just what you need.

    ssd m2 1tb

    Faster Multitasking, Quick Load Times

    An SSD M2 drive is a type of solid-state drive that uses M.2 slots to connect to the computer’s motherboard. These drives are becoming increasingly popular due to their quick load times and faster multitasking capabilities.

    They are significantly faster than traditional hard drives, as they don’t use spinning disks to read and write data. Instead, they rely on flash memory, which allows for faster data access and transfer rates. The use of M.

    2 slots means that the drive takes up less physical space in the computer, making it an excellent choice for smaller laptops and ultrabooks. Overall, an SSD M2 drive is an ideal addition to any computer looking to boost its performance and productivity.

    Why Choose a 1TB SSD M2 Drive?

    If you’re in the market for a new SSD M2 drive, you might want to consider a 1TB option. With 1TB of storage, you’ll have plenty of space to store all of your files, programs, and games without worrying about running out of space anytime soon. 1TB SSD M2 drives are also incredibly fast, which means your computer will boot up and load programs in no time.

    The transfer speeds of an SSD M2 1TB drive can reach up to 3,500MB/s, which is much faster than a traditional hard drive. Not only that, but SSD M2 drives generate less heat and consume less power compared to traditional hard drives, making them an all-around more efficient choice. Overall, choosing an SSD M2 1TB drive is a great investment for anyone looking to upgrade their computer’s performance and storage capacity.

    More Storage for Your System

    Are you tired of your computer running out of storage space? Upgrading to a 1TB SSD M2 drive can provide you with a solution to this problem. Not only is it a more efficient and faster way to store data compared to traditional hard drives, but it also saves space in your system. With a 1TB SSD M2 drive, you’ll have plenty of space to store all your necessary files, program installations, and media without worrying about cluttering up your computer’s hard drive.

    SSD M2 drives use flash memory, making them more durable and reliable than traditional hard drives, which have moving parts that can wear down over time. So, if you want to increase your computer’s storage and speed up its performance, upgrading to a 1TB SSD M2 drive is a great choice.

    Ideal for Gamers and Creators

    If you’re a gamer or creator looking for lightning-fast storage that won’t bottleneck your system, a 1TB SSD M2 drive is the way to go. With its compact size, high performance, and low power consumption, it’s an ideal choice for those who demand the best. SSDs deliver lightning-fast read and write speeds that far surpass those of traditional hard drives, making them ideal for gamers and creators who need quick access to large files and applications.

    Plus, with the 1TB capacity, you won’t have to worry about running out of storage space. The M2 form factor makes installation a breeze with no messy cabling to worry about. With an SSD, your games and applications will launch in seconds, and file transfers will be lightning fast.

    So if you’re looking for the ultimate gaming or creator experience, consider upgrading to a 1TB SSD M2 drive.

    Upgrade Your Laptop or Desktop

    Upgrading your laptop or desktop can be a game-changer if you are in need of more storage space and faster performance. One option you could consider is a 1TB SSD M2 drive. This type of drive provides many benefits compared to traditional hard drives.

    For starters, it has no moving parts, making it faster and more reliable. Additionally, it requires less power, resulting in longer battery life for your laptop. The 1TB capacity also provides ample space for storing your files, photos, and videos, without worrying about running out of storage.

    Furthermore, the M2 interface ensures faster data transfer speeds, resulting in quicker boot and load times, and faster application launches. Whether you’re a student, entrepreneur, gamer, or creative professional, upgrading to a 1TB SSD M2 drive can significantly enhance your computing experience. Plus, you can breathe new life into your old computer and avoid costly replacements.

    Top SSD M2 Drives to Consider

    Are you looking for a reliable and fast SSD M2 1TB drive? Look no further than the Western Digital Black SN750 NVME SSD. It offers lightning-fast read and write speeds, making it an ideal choice for gamers, content creators, and professionals who demand high performance from their drives. The Samsung 970 EVO Plus is another excellent option for those who want a fast and reliable SSD.

    It delivers impressive sequential speeds and endurance, making it an excellent choice for intensive workloads. If you’re on a budget, consider the Crucial P1 1TB NVMe SSD, which offers impressive performance at an affordable price point. No matter which option you choose, upgrading to a high-end SSD M2 1TB drive will significantly improve your system’s overall performance and speed up your workloads.

    Samsung 970 EVO Plus

    If you are looking for a high-performing SSD drive for your PC, the Samsung 970 EVO Plus M.2 might be a great option to consider. This drive offers blazing-fast speeds, making loading times for your favorite games and applications extremely quick.

    With its PCIe Gen 0 x 4 interface and NVMe 3 protocol, it can read and write files at incredible speeds of up to 3,500 MB/s and 3,300 MB/s, respectively.

    This makes it a great choice for content creators, gamers, and professionals who need extreme speed and reliability. The Samsung 970 EVO Plus is also available in a variety of sizes (ranging from 250GB to 2TB), so you can choose the right capacity for your needs. Overall, this drive is a top choice for anyone in need of a fast and reliable SSD.

    Western Digital Blue SN550

    When it comes to upgrading your computer’s storage, SSD M2 drives are a great choice. Not only do they provide faster boot and load times, but they also take up less space than traditional hard drives. So what should you look for when choosing an SSD M2 drive? One top option is the Western Digital Blue SN550.

    With its NVMe interface and PCIe Gen3 x4 support, the SN550 can deliver read speeds of up to 2,400 MB/s and write speeds of up to 1,750 MB/s. Plus, it comes in various storage sizes ranging from 250 GB to 1 TB, giving you plenty of options to meet your needs. Whether you’re a gamer or simply looking to improve your computer’s performance, the Western Digital Blue SN550 is definitely a solid choice for an SSD M2 drive that won’t break the bank.

    Conclusion

    In a world where traditional hard drives reign supreme, the SSD M2 1TB is the up-and-coming technological superhero that’s here to save the day. With lightning-fast speed and ample storage space, the SSD M2 1TB is the perfect solution for those looking to upgrade their system and take their computing experience to the next level. So whether you’re a gamer, a content creator, or simply someone in need of more storage space, the SSD M2 1TB is the hero you’ve been waiting for.

    FAQs

    What is an M.2 SSD?
    An M.2 SSD is a solid-state drive that uses the M.2 interface and form factor. It offers faster speeds and smaller sizes compared to traditional hard drives.

    What are the advantages of using an M.2 SSD?
    M.2 SSDs offer faster read/write speeds compared to traditional hard drives, as well as smaller sizes, which make them ideal for use in laptops and other compact devices. They also consume less power, which can help increase battery life.

    What is the difference between SATA and NVMe M.2 SSDs?
    SATA M.2 SSDs use the SATA interface, which is slower than the NVMe interface used by NVMe M.2 SSDs. NVMe M.2 SSDs offer faster speeds and are more expensive than SATA M.2 SSDs.

    What is the storage capacity of a 1TB M.2 SSD?
    A 1TB M.2 SSD offers a storage capacity of 1 terabyte, which is equivalent to 1,000 gigabytes. This is a large amount of storage that can hold a significant amount of data and files.

  • Battle of the Titans: Seagate FireCuda 530 vs Samsung 980 Pro – Which NVMe SSD Reigns Supreme?

    Are you in the market for a new solid-state drive (SSD) and wondering whether to choose the Seagate FireCuda 530 or the Samsung 980 Pro? Both of these high-end SSDs offer lightning-fast speeds, but there are some differences that could impact your final decision. First, let’s take a closer look at the Seagate FireCuda 530. This SSD boasts sequential read/write speeds of up to 7300/6900 MB/s and random read/write speeds of up to 1,000,000/1,000,000 IOPS.

    It also features a heat sink to help maintain its performance during intensive use and comes with a five-year limited warranty. On the other hand, the Samsung 980 Pro offers sequential read/write speeds of up to 7000/5000 MB/s and random read/write speeds of up to 1,000,000/1,000,000 IOPS. It has a thinner design than the FireCuda 530 and a slightly lower power consumption.

    It also comes with a five-year limited warranty. So, which of these SSDs is better for you? That ultimately depends on your specific needs and preferences. If you need the absolute fastest speeds and don’t mind a larger footprint, the FireCuda 530 is a great choice.

    However, if you prefer a slimmer design and lower power consumption, the Samsung 980 Pro might be a better fit. Either way, you can’t go wrong with either of these top-of-the-line SSDs. Consider your needs and budget, and make your selection with confidence.

    Speed

    Are you looking to upgrade your computer’s speed with a new NVMe SSD? The Seagate FireCuda 530 and Samsung 980 Pro are two of the fastest options on the market. Both drives offer lightning-fast read and write speeds, but there are a few key differences to consider. The FireCuda 530 boasts sequential read speeds up to 7,300 MB/s and write speeds up to 6,900 MB/s, while the Samsung 980 Pro offers slightly faster read speeds at up to 7,000 MB/s and write speeds up to 5,000 MB/s.

    However, the Samsung drive has more consistent performance across different workloads and features a longer warranty. Ultimately, the choice between these two drives will come down to your specific needs and budget.

    Seagate FireCuda 530: Read speed up to 7300 MB/s, Write speed up to 6900 MB/s

    Seagate FireCuda 530 SSD is the perfect solution for those who demand ultra-high speed and performance from their storage devices. With incredible read speeds of up to 7300 MB/s and write speeds of up to 6900 MB/s, this SSD is designed for professionals, gamers, and power users who need lightning-fast access to their data. Its impressive performance is due to the technology used in its construction, which includes a PCIe Gen4 x4 interface and a Phoenix controller, which together provide faster data transfer rates than ever before.

    Bursting with power, the Seagate FireCuda 530 SSD has a 5-year limited warranty and exceptional endurance that can handle even the most demanding workloads. In terms of perplexity, it is easy to install and use, with a simple, plug-and-play design. All in all, the Seagate FireCuda 530 SSD is a game-changing device that delivers unmatched speed and performance in the world of storage devices, and is a must-have for anyone looking to push the limits of their hardware.

    seagate firecuda 530 vs samsung 980 pro

    Samsung 980 Pro: Read speed up to 7000 MB/s, Write speed up to 5000 MB/s

    Speed Speed is a crucial factor when it comes to choosing a solid-state drive (SSD) for your computer. If you’re looking for a blazing-fast SSD, then the Samsung 980 Pro might be what you need. It boasts impressive read speeds of up to 7000 MB/s and write speeds of up to 5000 MB/s, making it one of the fastest SSDs on the market.

    With its PCIe 0 interface, the Samsung 980 Pro is designed to handle the most demanding tasks, from editing 4K videos to playing the latest AAA games. The high speeds of this SSD also mean that you can transfer large files quickly, improving productivity and efficiency.

    Not only is the Samsung 980 Pro fast, but it’s also reliable. It uses Samsung’s proprietary V-NAND technology, which ensures sustained performance even under heavy workloads. It also comes with an advanced thermal control solution that keeps the temperature of the drive low, preventing thermal throttling that can slow down the performance.

    In conclusion, if you’re looking for an SSD that can provide you with lightning-fast speeds, the Samsung 980 Pro is an excellent choice. Its impressive read and write speeds, combined with its reliability and advanced features, make it a top pick for anyone in need of a high-performance drive. So, if you want to take your computing experience to the next level, consider upgrading to the Samsung 980 Pro.

    Capacity

    If you’re in the market for a high-capacity SSD, you’ve likely come across the Seagate FireCuda 530 and the Samsung 980 Pro. While both drives offer impressive speeds, they differ in their capacities and price points. The Seagate FireCuda 530 comes in capacities ranging from 500 GB to 4 TB, whereas the Samsung 980 Pro is available in 250 GB to 2 TB.

    As such, the FireCuda 530 may be a better choice for those looking for more storage space on their SSD. However, it’s important to note that the higher capacity options for the FireCuda 530 are significantly more expensive than the Samsung 980 Pro. Ultimately, the decision between the two will come down to the storage capacity needed and the budget of the buyer.

    Seagate FireCuda 530: Available in 500GB, 1TB, 2TB, and 4TB

    The Seagate FireCuda 530 is an impressive piece of tech with a wide range of options to ensure it meets all your data needs. One of the most essential aspects of choosing a hard drive is the capacity, which determines how much data you can store. Luckily, the FireCuda 530 is available in 500GB, 1TB, 2TB, and 4TB sizes, giving you plenty of options.

    Whether you need to store a few important documents or vast amounts of multimedia files, the FireCuda 530 can handle it all. Plus, with its exceptional speed and durability, it’s an excellent choice for anyone looking for a high-performance storage device. So, if you’re looking for a dependable and fast hard drive, the Seagate FireCuda 530 is definitely worth considering.

    Samsung 980 Pro: Available in 250GB, 500GB, and 1TB

    The Samsung 980 Pro NVMe SSD comes in three different sizes: 250GB, 500GB, and 1TB. This means that regardless of your storage needs, you can find a version of the 980 Pro that works for you. The 250GB option is perfect for those looking for a more budget-friendly option or those who don’t need a ton of storage space.

    The 500GB option is great for those who have a lot of files, but don’t necessarily need an entire terabyte. Finally, the 1TB option is perfect for power users who need a lot of storage for things like gaming, video editing, or running intense programs. Regardless of which size you choose, each one comes packed with features like the PCIe

    0 interface and blazing-fast read and write speeds. The Samsung 980 Pro is a must-have for anyone looking for a high-performing SSD that can handle whatever tasks they throw at it.

    Endurance

    When it comes to high-performance NVMe SSDs, the Seagate Firecuda 530 and the Samsung 980 Pro are two of the best options available in the market. Both these drives are designed for top-level gaming and heavy workloads, offering lightning-fast speeds and impressive storage capabilities. However, one factor that sets these SSDs apart is their endurance.

    The Seagate Firecuda 530 boasts an endurance rating of up to 8 PBW (Petabytes Written), while the Samsung 980 Pro comes with an endurance rating of up to 2 PBW.

    This means that the Firecuda 530 has a longer lifespan, making it an excellent investment for those who are looking for a high-performance SSD that can withstand heavy use. Although both drives are great options, if endurance is your priority, the Seagate Firecuda 530 is your best bet.

    Seagate FireCuda 530: Endurance rating of up to 5100 TBW (Terabytes Written)

    The Seagate FireCuda 530 is a high-performance solid-state drive that has an impressive endurance rating of up to 5100 TBW (Terabytes Written). Endurance rating is the measure of how much data an SSD can write before it fails, and the FireCuda 530 is one of the most robust SSDs available in the market today. This rating is a testament to the quality of the components and the design of the SSD, ensuring that it can handle even the most challenging workloads.

    In other words, it means that you can write up to 5100 terabytes of data to the drive before it fails. To put this number into perspective, it is equivalent to writing 5 terabytes of data per day for five years straight.

    This level of endurance is especially essential for high-end gaming, professional video editing, and other demanding applications that require frequent read and write operations. The Seagate FireCuda 530 is undoubtedly a top-of-the-line SSD that shows no signs of slowing down any time soon.

    Samsung 980 Pro: Endurance rating of up to 600 TBW (Terabytes Written)

    The Samsung 980 Pro is a solid state drive (SSD) boasting incredible endurance. With an endurance rating of up to 600 TBW (terabytes written), this device is built to last. Endurance refers to the amount of data that can be written to the drive before it starts to fail.

    The higher the endurance rating, the longer the lifespan of the drive. This is important for users who rely on their SSDs for heavy workloads such as video editing or gaming. The Samsung 980 Pro can handle the demands of these activities with ease, providing a reliable and long-lasting storage solution.

    Whether you’re a professional or a casual user, this SSD is a top contender for those seeking endurance and performance.

    Price

    When it comes to price, the Seagate FireCuda 530 and Samsung 980 PRO have differences that are worth noting. The FireCuda 530 tends to be more affordable than the 980 PRO, but the difference isn’t drastic. Depending on the storage capacity, the FireCuda 530 can be around $20-30 cheaper than the 980 PRO.

    However, it’s important to keep in mind that both of these drives belong to the high-end segment. This means that they won’t be as cheap as some of the more budget-oriented options. That being said, both the FireCuda 530 and 980 PRO come with advanced features, such as PCIe

    0, which can justify the higher pricing. Ultimately, the decision between these two drives should be based on what your needs are and what type of features you’re looking for.

    Seagate FireCuda 530: Starts from $140 for 500GB and goes up to $950 for 4TB

    Seagate FireCuda 530 When it comes to storage solutions, the Seagate FireCuda 530 is a high-performing option that won’t break the bank. The price range for these drives starts from $140 for the 500GB model and goes up to $950 for the 4TB variant. This price range offers great value for money considering the speed and efficiency of the FireCuda 530.

    With faster read and write speeds than some of its competitors, this drive is perfect for those who need a reliable solution for their storage needs. Additionally, with the option to use Seagate’s free DiscWizard software, users have the ability to install this drive in any system with ease. Overall, the Seagate FireCuda 530 is an affordable and reliable storage solution that is perfect for consumers who require high-performance drives without blowing their budget.

    Samsung 980 Pro: Starts from $90 for 250GB and goes up to $230 for 1TB

    If you’re on the lookout for a high-performance SSD that won’t break the bank, the Samsung 980 Pro has got you covered. With its fast read and write speeds, this NVMe SSD is perfect for gaming and other intensive applications. But one of the best things about the Samsung 980 Pro is its price.

    Starting at just $90 for the 250GB model, it offers an excellent value for money. For those who want more storage, the 1TB variant costs $230. So whether you’re a budget-conscious gamer or a power user in need of lots of storage, the Samsung 980 Pro has a model that fits your needs and budget.

    With great performance and a wallet-friendly price tag, it’s no wonder the Samsung 980 Pro is one of the most popular SSDs on the market.

    Conclusion

    In the battle of Seagate FireCuda 530 vs Samsung 980 Pro, one thing is for sure – there’s no clear winner. Both drives have their strengths and weaknesses, and it ultimately comes down to what you prioritize in a drive. If you’re looking for lightning-fast sequential speeds for transferring large files or gaming, the Samsung 980 Pro may be the better choice.

    But if you’re looking for a drive with more endurance and durability, the Seagate FireCuda 530 is the way to go. Ultimately, both drives offer impressive performance and are great options for anyone looking for a high-speed NVMe SSD. So whichever one you choose, you can’t go wrong – just don’t forget to back up your data!”

    FAQs

    What is the difference between Seagate FireCuda 530 and Samsung 980 Pro?
    Seagate FireCuda 530 and Samsung 980 Pro are both high-performance NVMe SSDs, but they differ in terms of their maximum sequential read and write speeds, endurance rating, and pricing. The Samsung 980 Pro offers faster read and write speeds and a higher endurance rating, but it is also more expensive than the FireCuda 530.

    Which is better for gaming, Seagate FireCuda 530 or Samsung 980 Pro?
    Both the Seagate FireCuda 530 and Samsung 980 Pro are excellent choices for gaming due to their high speed and low latency. However, the Samsung 980 Pro has slightly faster read and write speeds, so it may provide slightly better performance in certain games.

    Can Seagate FireCuda 530 or Samsung 980 Pro be used as a boot drive?
    Yes, both the Seagate FireCuda 530 and Samsung 980 Pro can be used as boot drives. In fact, because of their high speed and low latency, they are excellent choices for use as a boot drive.

    Which SSD is more durable, Seagate FireCuda 530 or Samsung 980 Pro?
    Both the Seagate FireCuda 530 and Samsung 980 Pro are designed to be durable, but the Samsung 980 Pro has a higher endurance rating, which means it can withstand more read and write cycles over its lifetime. However, in practical terms, both SSDs are likely to last for many years of normal use.

  • Effortlessly Transfer Your PC to SSD: Discover How Long It Takes to Clone Your System with Ease

    Are you tired of waiting ages for your PC to boot up and load your programs? Upgrading to a solid-state drive (SSD) can greatly improve your computer’s speed and response time. But the thought of transferring your entire system to a new drive can be daunting. How long will it take to clone a PC to an SSD? Well, the answer depends on a few different factors.

    But fear not, we’ll break it down for you and give you an idea of what to expect. So grab a cup of coffee, sit back, and let’s dive into the world of SSD cloning.

    Factors Affecting the Cloning Time

    When it comes to cloning your PC to an SSD, the time it takes can vary depending on various factors. Firstly, the size of the hard drive you’re cloning can have a huge impact on the duration of the process. Larger drives can take hours to clone, whereas smaller ones may only take a few minutes.

    Additionally, the speed of both your hard drive and SSD can affect how long it takes. Faster reading and writing speeds will obviously equate to a faster cloning process. The software you use to clone your drive also plays a part.

    Some programs may have features that expedite the process, while others may be slower and use more system resources. Lastly, the overall performance health of your computer can have an impact. A slow or underperforming computer can slow down the cloning process, whereas a computer running at optimal speed can help speed things up.

    In all, while there’s no definitive answer to how long it’ll take to clone your PC to an SSD, the factors above can give you an idea of what to expect and adjust your timeframe accordingly.

    PC specifications

    When it comes to cloning time, PC specifications are a critical factor to consider. The type and speed of the processor, the amount and speed of the RAM, and the capacity and speed of the hard drive all play a role in determining how fast a cloning process can be completed. A faster processor and more RAM mean that data can be processed more quickly.

    Additionally, a solid-state drive with high-speed writing and reading capabilities can significantly reduce the time required to clone a hard drive compared to a traditional hard disk drive. It’s essential to ensure that your PC specifications match your cloning requirements to enable faster and smoother cloning times. By optimizing your PC specifications, you can ensure that every cloning process completes as quickly and efficiently as possible, saving you valuable time and effort.

    So, make sure to check your PC specifications before you embark on cloning to avoid any unnecessary chaos.

    how long dose it take to clone pc to ssd

    Amount of data being cloned

    When it comes to cloning data, the amount of data being cloned is a crucial factor that affects the cloning time. The more data being cloned, the longer it will take to complete the process. This is because the cloning process involves copying data from one storage device to another, and the more data there is, the longer it will take to copy it all.

    However, there are other factors that can also affect the cloning time, such as the speed of the cloning tool being used, the speed of the storage devices, and the speed of the computer system itself. For example, if the cloning tool is slow, it will take longer to clone the data, regardless of how much data is being cloned. Likewise, if the storage devices are slow, the cloning process will be slower, even if the cloning tool and computer system are fast.

    In addition, the type of data being cloned can also affect the cloning time. For instance, if the data is compressed or encrypted, it may take longer to clone it because the cloning tool will need to first decompress or decrypt the data before copying it. On the other hand, if the data is already in an uncompressed or unencrypted format, the cloning process will be faster.

    Overall, when it comes to cloning data, the amount of data being cloned is just one of many factors that affects the cloning time. It’s important to consider all of these factors when cloning data to ensure that the process is completed as quickly and efficiently as possible.

    Transfer speed of the SSD and the hard drive

    When it comes to cloning an SSD or a hard drive, the transfer speed is one of the most important factors that affects the time it takes to complete the process. SSDs are generally faster than hard drives, so they can complete a cloning process much quicker. But other factors such as the interface type, the size of the files being transferred, and the amount of data being transferred can also impact the speed of the transfer.

    The type of interface that the drive uses can have a major impact on the speed of the cloning process. For example, transferring data through a USB 0 interface will be much slower than transferring through a USB

    0 interface. Similarly, using a SATA III interface will result in a faster transfer than using a SATA II interface. The amount of data being transferred also plays a role in the speed of the cloning process.

    Larger files take longer to transfer than smaller files, so copying a single large file that’s hundreds of gigabytes in size will take much longer than transferring several smaller files that add up to the same amount of data. In summary, the transfer speed of the SSD and the hard drive are crucial factors that can significantly affect the cloning time. While the transfer speed of SSDs is generally faster than hard drives, other factors such as interface type and the amount of data being transferred can also impact the speed of the cloning process.

    So, it’s important to consider these factors before starting the cloning process to ensure the quickest possible transfer time.

    Average Time for Cloning PC to SSD

    If you’re planning to clone your PC to an SSD, one of the questions you may have is how long it can take. The answer is that it largely depends on several factors. If you have a lot of data to transfer, for example, it might take longer than if you only have a few files to move.

    Additionally, the speed of your computer’s processor can play a role in determining how quickly the cloning process will complete. As a general rule, however, it shouldn’t take more than a few hours to clone your PC to an SSD. With that said, it’s always a good idea to set aside plenty of time for the process, especially if you’re working with particularly large amounts of data.

    Overall, while the length of time it takes to clone a PC to an SSD can vary, you should typically be able to complete the process without too much trouble.

    Small amount of data (less than 100GB)

    If you’re dealing with a small amount of data (less than 100GB), cloning your PC to an SSD should be a quick and easy process. On average, it takes around 20-30 minutes to clone a PC to an SSD. This process involves copying and transferring all the data from your old hard drive to the new SSD, including the operating system and all your files, programs, and settings.

    It’s important to ensure that your new SSD has enough space to accommodate all your data before you start the cloning process. Additionally, you should back up all your important files and data before you begin to avoid any data loss. Once you’ve finished cloning your PC to your new SSD, you can enjoy faster boot times, improved performance, and more storage space.

    With a little patience and a good SSD cloning software, you can have your new system up and running in no time!

    Medium amount of data (100GB-500GB)

    If you’re working with a medium amount of data (around 100GB-500GB), the time it takes to clone your PC to an SSD can vary. Generally, it takes about an hour or two to clone a 100GB hard drive, and up to four or five hours for a 500GB hard drive. However, this can also depend on various factors such as the speed of your computer, the quality of your SSD, and the complexity of your data.

    Cloning your PC to an SSD can be a great way to increase speed and performance, but it’s important to properly prepare before starting the process. Organizing your files, backing up important data, and selecting the right software for your needs can all contribute to a successful PC clone. So, if you’re looking to upgrade your computer’s performance, consider cloning your PC to an SSD and enjoy the benefits of faster load times and improved functionality.

    Large amount of data (more than 500GB)

    Cloning a PC with a large amount of data, more than 500GB, to an SSD can be a time-consuming process. The exact time it takes will depend on the speed of your computer, the size of your files, and the quality of your SSD. On average, the cloning process can take anywhere from a few hours to a full day to complete.

    However, the benefits of an SSD make the effort well worth it. An SSD provides faster boot and load times, increased data transfer speeds, and improved overall system performance. So, if you are looking to maximize the potential of your PC’s speed and performance, cloning to an SSD is the way to go.

    Just be patient with the process, and know that the end result will be worth it.

    Tips for Faster Cloning

    If you’re looking to clone your PC to an SSD, you may be wondering how long the process will take. While the speed of the cloning process can depend on various factors, such as the size of your hard drive and the speed of your computer, there are a few tips that can help you speed up the process. First, make sure you have enough free space on your SSD to accommodate all of your data.

    Additionally, consider using a high-quality cloning software that is specifically designed for SSDs. This can help ensure that the cloning process is as efficient as possible and that all of your data is transferred correctly. Finally, be sure to close any unnecessary programs or applications while the cloning process is running.

    This can help free up system resources and speed up the transfer of data to your new SSD. Overall, with the right tools and a little patience, you can quickly and easily clone your PC to an SSD and enjoy faster, more responsive performance.

    Transfer data to the SSD before cloning

    If you’re looking to clone your hard drive onto an SSD for faster performance, there are a few things you can do to make the process even smoother. One tip is to transfer any important data from the hard drive onto the SSD before the cloning process begins. This will help ensure that the SSD has enough space to store all of the necessary files and programs, which can speed up the overall cloning process.

    Additionally, it’s important to make sure that the SSD is properly formatted and ready for use before starting the cloning process. This can help prevent any errors or complications that may arise during the cloning process. By taking these steps, you can ensure that your cloning process is as fast and efficient as possible, helping you get the most out of your new SSD.

    So whether you’re upgrading your computer or simply looking for a performance boost, these tips can help you get the results you’re looking for.

    Clean up your PC before cloning

    Before cloning your PC, it’s crucial to tidy up your system to ensure faster transfer speeds and smoother performance afterward. Over time, your computer can accumulate a lot of unnecessary files, software, and other clutter that can slow down the cloning process. Start by uninstalling any programs and apps that you no longer need, including bloatware that came pre-installed on your machine.

    Also, remove temporary files, cache, and cookies, which can take up valuable space on your hard drive. Running a disk cleanup tool or a third-party software like CCleaner can help automate this process, and it’s recommended that you run a full virus scan as well. By taking these steps, you’ll not only speed up your cloning process but also improve your PC’s overall performance in the long run.

    Conclusion

    In the end, the amount of time it takes to clone a PC to an SSD is a tricky query to answer. Like many tech-related tasks, the speed will depend on the size of your data, the speed of your connection, and a whole host of other factors. It could take minutes for a small amount of data, or hours for an entire hard drive.

    But one thing is for sure; whatever the time frame, cloning that PC to an SSD is a savvy move that will give your computer a new lease of life.”

    FAQs

    What is the process of cloning a PC to an SSD?
    The process of cloning a PC to an SSD involves creating a backup of all your data on the existing hard drive and transferring it to the new SSD. This process can take anywhere from a few hours to a whole day, depending on the amount of data you have to transfer.

    Can I clone my PC to an SSD without losing any data?
    Yes, you can clone your PC to an SSD without losing any data. This process involves creating a backup of all your data and transferring it to the new SSD. When done correctly, all your data should be transferred seamlessly without any loss.

    How do I know if my PC is compatible with an SSD for cloning?
    To know if your PC is compatible with an SSD for cloning, you first need to check the compatibility of your existing hard drive. If your hard drive is compatible with an SSD, then your PC will be compatible as well. You can also check your PC’s specifications to see if it has an SSD slot.

    What are the benefits of cloning my PC to an SSD?
    Cloning your PC to an SSD can provide numerous benefits, such as faster boot times, faster file transfer rates, and improved system performance. It can also help extend the life of your existing hardware and improve your overall computing experience.