Author: David L. Lynn

  • Upgrade your Windows 11 Performance: Step-by-Step Guide on Adding SSD!

    Have you ever felt like your Windows 11 PC is running sluggishly even though it’s relatively new? The sudden decrease in computer speed could be attributed to the traditional hard drive that comes with most PCs. If you tend to multitask frequently, your computer’s hard drive may not be fast enough to keep up with the demands of modern applications. However, all hope is not lost as you can add a Solid State Drive (SSD) to your Windows 11 PC to improve its performance significantly.

    Think of it like trading in your bicycle for a Ferrari. An SSD is more expensive compared to a traditional hard drive, but its reliability and rapid performance make it a worthwhile investment. It comes equipped with faster read and write speeds, which makes booting up, launching applications, and processing multiple tasks smoother and faster.

    Not only does it accelerate your PC’s performance, but it also saves you time and spares you from frustration. In this article, we’ll delve deeper into the benefits of adding an SSD to your Windows 11 PC and guide you through the process of installing one. We’ll also tackle frequently asked questions surrounding SSDs and address potential challenges in setting them up.

    By the end of this article, you’ll know why adding an SSD is the best decision you could make for your Windows 11 PC. So, buckle up, and let’s get started!

    Check Compatibility

    Adding an SSD to your Windows 11 computer can offer a significant boost in performance, but it’s essential to check compatibility before making the upgrade. Firstly, you need to make sure that your PC has an open slot for an additional SSD and that it is compatible with the type of drive you want to install. Secondly, you need to ensure that your motherboard supports the proper interface for your SSD, whether it is SATA, M.

    2, or NVMe. Once you have verified compatibility, the next step is to open your computer case carefully and install the SSD securely into the open slot. Finally, you need to configure the SSD properly in your Windows 11 settings and transfer data to the new drive for optimized performance.

    With these simple steps, you can successfully add an SSD to your Windows 11 computer for faster boot times, better application performance, and an overall smoother computing experience.

    Review system requirements for SSDs

    If you’re planning to upgrade to an SSD, one important consideration is compatibility. Before purchasing an SSD, make sure to check your device’s system requirements, including the form factor or size, interface type, and capacity limits. Some SSDs are designed for specific devices or operating systems, so it’s worth doing some research to ensure that the one you choose is compatible with your device.

    Additionally, some older devices may not support the latest SSD technology, so consider choosing an older or more basic SSD if that’s the case. By taking the time to check compatibility, you can ensure that your SSD upgrade will be successful and enhance your device’s performance.
    how to add ssd to windows 11

    Select SSD

    If you’re looking to speed up your Windows 11 computer, adding an SSD is an excellent option. SSDs are faster and more reliable than traditional hard drives, and they’ll significantly improve your computer’s performance. Here’s how to add an SSD to Windows 11: First, you need to determine the type of SSD that’s compatible with your computer.

    Some other important factors to consider are the size and capacity of the SSD. Then, you need to open your computer case and locate an available drive bay. Carefully remove any screws or brackets that secure the drive bay.

    Gently slide your SSD into the bay, making sure it’s properly aligned. Secure it with screws or brackets if necessary. Next, verify that your computer recognizes the new SSD.

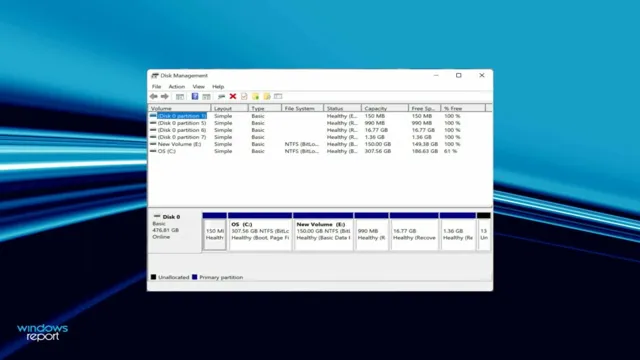
    Launch Disk Management in Windows 11 and look for the SSD. Right-click on it, and then select ‘New Simple Volume’ from the context menu. Follow the prompts to format the SSD and assign a drive letter.

    Finally, you need to clone your existing hard drive to the SSD. This is an important step because it will transfer all your existing data, operating system, and settings to the new drive. There are a few tools available for cloning drives, such as EaseUS Todo Backup, Macrium Reflect, and Acronis True Image.

    Once you’ve cloned the drive, you can switch your computer off and remove the old hard drive. Your new SSD should now be the primary drive, and your computer should boot up much faster. Adding an SSD to your computer can be a bit intimidating, but it’s worth doing.

    Choose an SSD based on storage needs and budget

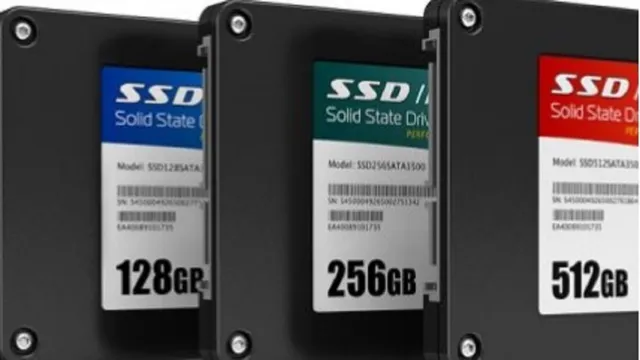
    SSD, storage, budget When it comes to choosing an SSD for your computer, the first consideration is the storage capacity you need based on your usage. If you are using your computer for basic tasks such as browsing the internet and using office applications, a smaller capacity SSD such as 120GB or 240GB would suffice. However, if you are a gamer, content creator, or store a lot of data, you may need to opt for higher capacities such as 500GB or 1TB.

    Another important consideration is your budget. SSDs can range from affordable to expensive, and you should choose one that fits your budget without compromising on quality. Research the different brands, read reviews, and compare prices to make an informed decision.

    Ultimately, choosing an SSD that fits both your storage needs and budget will ensure a fast and reliable computer experience.

    Install SSD

    Adding an SSD to your Windows 11 computer can be a game changer when it comes to speed and performance. To add an SSD to your PC, you’ll first need to acquire the SSD, either by purchasing it or salvaging it from another computer. Once you have the SSD in hand, you’ll need to connect it to your computer.

    This can usually be done by connecting the SSD to your computer’s SATA port. You’ll then need to configure the SSD in your operating system to make the most of its benefits. This process can vary depending on your specific computer and operating system, but a quick Google search should provide all the necessary instructions.

    Overall, adding an SSD to your Windows 11 machine is a fairly simple process with enormous benefits in terms of speed and performance. So if you’re looking to breathe new life into your PC, an SSD could be just the thing you need.

    Open your computer and insert the SSD

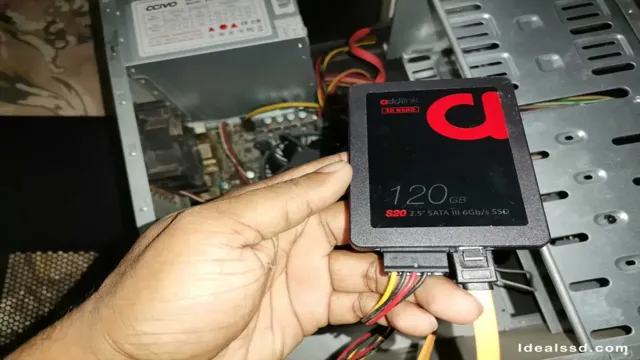
    When it comes to boosting the performance of your computer, installing a solid-state drive (SSD) is the way to go. The first step in the process is to physically install the SSD into your computer’s storage drive bay. To do this, you’ll need to open up your computer’s case and locate the storage bay.

    Once you find it, carefully insert the SSD into the bay, making sure it’s securely in place. If you’re not sure where the storage bay is located or how to insert the SSD correctly, consult your computer’s manual or reach out to a professional for assistance. By taking this first step in the installation process, you’re well on your way to experiencing the speed and efficiency benefits of your new SSD.

    Remember, a properly installed SSD can make all the difference in your computer’s performance.

    Initiate SSD Setup

    If you’re wondering how to add an SSD to your Windows 11 system, it’s a relatively simple process to get started. The critical first step is to ensure you have the right hardware components and tools on hand. You’ll need a compatible SSD drive, a SATA cable, and a screwdriver.

    Once you have the necessary components, shut down your PC and open up the case. Locate an open drive bay and install the SSD drive, using your SATA cable to connect it to your motherboard. Then, power on your system and head into your system’s BIOS to confirm the drive is properly installed.

    From there, you can initialize the drive, format it, and partition it according to your needs using Windows 11’s Disk Management tool. With your SSD set up and ready to go, you’ll notice a significant improvement in your system’s speed and performance.

    Access Windows 11 Disk Management

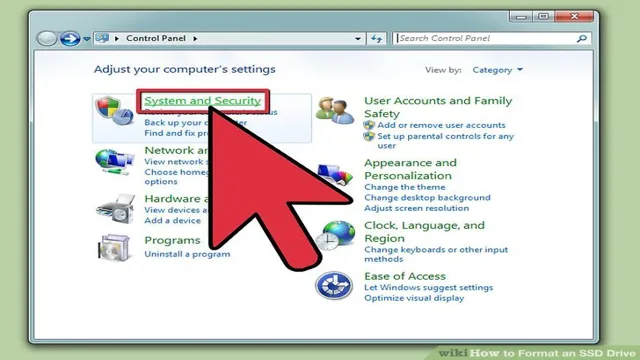
    If you’re looking to set up your SSD on Windows 11, you’ll need to access the Disk Management tool. This can be done by right-clicking on the Start button and selecting Disk Management from the context menu. Once you’re there, you’ll see all of your hard drives and partitions listed.

    To initiate the SSD setup process, you’ll need to locate the unallocated space on your hard drive and right-click on it. Then, select the “New Simple Volume” option and the wizard will guide you through the rest of the setup process. It’s essential to ensure that your SSD is set up correctly so that it can perform at its maximum capacity.

    By following these steps, you’ll be well on your way to getting the most out of your SSD.

    Format and partition your new SSD

    Before you can start using your newly purchased SSD, you’ll need to format and partition it. Luckily, this process is relatively straightforward and doesn’t require any specialized technical skills. The first step in initiating SSD setup is to connect your SSD to your computer.

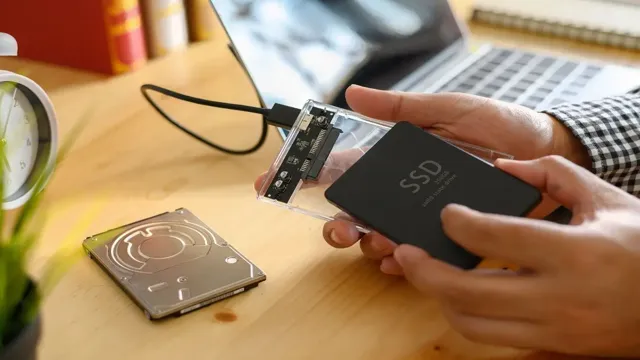
    You can do this using either a SATA-to-USB adapter or by opening up your computer’s case and installing the SSD directly. Once your SSD is properly connected, you can open up your computer’s “Disk Management” tool. From there, you can initialize your SSD, create partitions, and format it using either the NTFS or exFAT file systems.

    It’s important to note that formatting your SSD will remove any data that’s currently on it, so make sure you backup any important files before you proceed. With your SSD formatted and partitioned, you’ll be ready to start using it to store and access your files at lightning-fast speeds.

    Transfer Data

    Adding an SSD to your Windows 11 device can be a great way to speed up your computer and improve its performance. Once you’ve installed the SSD in your device, you may need to transfer your data from your old hard drive to your new SSD. There are several ways to transfer your data, including using a cloning software or manually transferring your files.

    The easiest and most efficient way to transfer data is to use a cloning software. This software will transfer all your old files, programs, and operating system to the new SSD, making it look exactly like the old hard drive. However, if your new SSD is smaller than your old hard drive, you may need to manually transfer your files to ensure all your important data is saved.

    Whether you choose to use a cloning software or manually transfer your files, adding an SSD to your Windows 11 device is a great way to improve its performance and speed up your computer.

    Transfer data from the old hard drive to the new SSD

    Transferring data from an old hard drive to a new SSD can seem like a daunting task, but it doesn’t have to be. One option is to use a data migration software, such as EaseUS Todo Backup, which can make the process quick and easy. First, ensure that both the old hard drive and new SSD are both connected to your computer.

    Then, open the migration software and choose the source (old hard drive) and destination (new SSD) drives. Next, select the data you want to transfer, which can include everything or just selected files and folders. Finally, initiate the transfer and let the software do the rest.

    Once the transfer is complete, you can disconnect the old hard drive and start using your new SSD with all your old data intact. Overall, transferring data may seem complicated, but with the right tools, it can be a stress-free process.

    Test and Optimize

    Adding an SSD to your Windows 11 computer can improve its performance, making it run faster and smoother. Here’s how you can do it. First, you need to buy an SSD that is compatible with your computer’s motherboard.

    Once you have the SSD, you can open up your computer tower, insert the SSD into the vacant slot, and connect it to the motherboard. Next, you need to format the SSD, and then clone your existing hard drive onto the new SSD using a cloning software program. Once the cloning process is complete, you should adjust the boot order in the computer’s BIOS settings so that it boots from the SSD.

    Finally, once you have successfully migrated your operating system to the SSD, you need to optimize it for peak performance by disabling any unnecessary services, updating drivers, and tweaking power settings. With these simple steps, you’ll be able to add an SSD to your Windows 11 computer and experience a significant boost in its overall performance.

    Run performance and optimization tests on the new SSD

    Now that you’ve upgraded your storage with a new SSD, it’s important to test and optimize its performance to ensure you’re getting the most out of it. One way to do this is by running a benchmark test on the drive. This test will measure the drive’s read and write speeds, as well as its random access times.

    You can use software such as CrystalDiskMark or AS SSD Benchmark to run these tests. Once you have the results from the benchmark test, you can begin optimizing the drive’s performance. One way to do this is by enabling the TRIM command, which ensures that the drive’s performance stays consistent over time.

    To enable TRIM on Windows, simply open the Command Prompt and type in “fsutil behavior set DisableDeleteNotify 0”. On macOS, TRIM is typically enabled automatically. Another way to optimize your SSD’s performance is by disabling any unnecessary services or applications that may be running in the background.

    This can help reduce the load on your system and free up resources for your SSD to use. You can also ensure that your SSD is being used as your primary drive for your operating system and any frequently used applications. In conclusion, testing and optimizing your new SSD will help ensure that you’re getting the best performance possible.

    By running benchmark tests, enabling TRIM, and optimizing your system settings, you can help maximize your SSD’s speed and lifespan. So be sure to take the time to fine-tune your new drive to get the most out of your investment.

    Conclusion

    In summary, adding an SSD to Windows 11 is like giving your computer a much-needed turbo boost. By simply following a few easy steps, you can improve the speed, efficiency, and overall performance of your system. Just remember to back up your important data, choose the right SSD for your needs, and have fun enjoying all the benefits that come with a faster and sleeker computer!”

    FAQs

    What is an SSD and why is it beneficial to add one to a Windows 11 computer?
    SSD stands for solid-state drive, and it provides faster read and write speeds than a traditional hard drive. It can significantly improve overall system performance, reducing boot times and enhancing the responsiveness of applications and file transfers.

    Can any computer be upgraded with an SSD?
    Most desktop and laptop computers can be upgraded with an SSD, as long as they have an available drive bay or an external enclosure interface. However, some older systems may not support modern SSDs or may have compatibility issues with certain models.

    How do I physically install an SSD into my Windows 11 computer?
    Installing an SSD typically involves opening the computer case, locating an empty drive bay, installing the SSD using screws or slide-in brackets, and connecting the power and data cables. It is important to follow the manufacturer’s instructions and precautions to avoid damage to the drive or the computer.

    What software tools do I need to clone my existing hard drive to the new SSD?
    There are several popular disk cloning and migration tools available, including Acronis True Image, EaseUS Todo Backup, and Macrium Reflect. These tools can help you transfer all the data, settings, and applications from your existing hard drive to the new SSD, so that you can continue using your computer without reinstalling everything from scratch.
  • Discover How to Easily Monitor Your SSD Temperature: Simple Steps to Ensure Optimal Performance

    As computer enthusiasts, we all know the importance of keeping our system running smoothly. One major component that often gets overlooked is the SSD temperature. The health of your SSD can directly impact the overall performance of your computer.

    Therefore, it’s crucial to regularly check the temperature of your SSD and ensure it stays within safe operating limits. In this blog post, we’ll discuss why it’s important to check your SSD temperature, the consequences of running your SSD too hot, and some steps you can take to maintain a healthy temperature for your SSD. So, let’s dive in and explore the world of SSD temperature monitoring!

    Introduction

    If you are someone who uses a Solid State Drive (SSD), then you may be wondering how to check the temperature of your SSD. There are several ways to do this, and it is important to keep in mind that high temperatures can lead to decreased performance and a shorter lifespan for your SSD. One way to check the temperature is through your computer’s BIOS settings.

    This will give you a general idea of the temperature, but it may not be precise. Another option is to use a third-party software program specifically designed for monitoring SSD temperatures. These programs offer real-time monitoring and alerts for high temperatures.

    In addition, you can improve the overall temperature of your system by ensuring proper ventilation and airflow within your computer case. By being proactive and monitoring your SSD’s temperature, you can help ensure a longer lifespan for your valuable storage device.

    Why Temperature is Important for SSDs?

    Temperature is a critical factor when it comes to SSDs, and it can significantly impact their performance and lifespan. Just like any other electronic device, SSDs generate heat during operation, and excessive heat can cause various issues ranging from data loss to complete SSD failure. That’s why it’s essential to ensure that SSDs are operating within their recommended temperature range to minimize the risk of failure and ensure optimal performance.

    In this blog post, we’ll explore why temperature is crucial for SSDs and how you can monitor and control it to keep your SSDs functioning properly.

    how to check ssd temp

    Ways to Check SSD Temperature

    If you’re concerned about the temperature of your SSD, there are several ways to check it. One of the easiest methods is to use a monitoring tool that comes with your computer’s operating system or motherboard. For example, Windows 10 has a built-in feature that allows you to view the temperature of your SSD.

    Simply open the Task Manager, then click on the “Performance” tab and select your SSD. Another option is to use a third-party program like HWMonitor or Core Temp, which can provide more detailed information about your system’s hardware. These programs typically display temperature readings in real-time and can even send you alerts if temperatures exceed a certain threshold.

    Some SSD manufacturers also offer their own monitoring software, which can provide specific information about your drive’s performance and temperature. Ultimately, the most important thing is to keep your SSD within the recommended temperature range to avoid any damage or data loss.

    Method 1: Using Third-Party Software

    If you’re concerned about the performance of your SSD or want to make sure it’s not overheating, monitoring its temperature is a good idea. Luckily, there are several ways to check SSD temperature. One of the easiest ways is to use third-party software.

    There are many free and paid options available online, such as CrystalDiskInfo and HWMonitor. These programs can give you a wealth of information about your SSD, including its temperature in real-time. Some also have alerts that can notify you if the temperature exceeds a certain threshold.

    It’s important to note that regularly monitoring your SSD’s temperature can help prolong its lifespan and ensure optimal performance. So if you want to keep your SSD healthy, it’s definitely worth checking its temperature from time to time using reliable third-party software.

    Method 2: BIOS Settings

    SSD temperature. Another way to check the temperature of your SSD is by accessing the BIOS settings of your computer. Once you turn on your computer, press the necessary key to enter the BIOS settings.

    The key varies from computer to computer, but it is usually either F2, F10, or Delete. Once you are in the BIOS settings, navigate to the system monitoring or hardware monitoring section. Here, you should be able to see the temperature of your SSD along with other hardware components, such as the CPU and motherboard.

    Keep in mind that accessing the BIOS settings can be complicated and confusing for some users, so it’s always best to do some research beforehand and proceed with caution. Overall, checking SSD temperature via BIOS settings can be a handy method, especially for those who want to monitor their SSD’s health regularly.

    Method 3: SSD Manufacturer’s Tool

    SSD temperature Have you ever wondered how to check the temperature of your SSD? One way is to use the manufacturer’s tool. Most SSD manufacturers provide a software tool that allows you to monitor the temperature of your drive, among other things. You can usually download this software from the manufacturer’s website for free.

    Once you have it installed, you can check the temperature of your SSD by opening the tool and looking for the temperature reading. This method can be particularly useful if you’re having performance issues with your SSD, as high temperatures can slow down the drive. By monitoring the temperature, you can take steps to cool your SSD and improve performance.

    So, if you want to keep an eye on your SSD temperature, consider using the manufacturer’s tool.

    Ideal Temperature Range for SSDs

    If you’re concerned about your SSD’s temperature, there are a few things you can do to check its current temperature. One option is to use a software program that can monitor and report on your SSD’s temperature. These programs are usually free and can be easily found with a quick online search.

    Another option is to check your computer’s BIOS, which should show you the current temperature of your SSD. In general, the ideal temperature range for an SSD is between 0° and 70°C. However, it’s important to note that your specific SSD may have its own unique temperature range, so it’s always a good idea to check the manufacturer’s recommendations.

    If you notice that your SSD is consistently operating at a temperature outside of its recommended range, it may be time to replace it or consider other cooling options, such as additional fans or a liquid cooling system. By keeping an eye on your SSD’s temperature and taking steps to regulate it, you can extend the life of your device and ensure that it continues to perform at its best.

    What is Normal Temperature for SSDs?

    As solid-state drives (SSDs) become increasingly popular, it’s important to know what temperatures they should be operating at. The ideal temperature range for SSDs typically falls between 0 and 70 degrees Celsius (32 to 158 degrees Fahrenheit), with the preferred temperature being around 25 degrees Celsius (77 degrees Fahrenheit). While SSDs are built to handle varying temperatures and can operate in higher or lower temperatures, keeping them within this ideal range can help optimize their longevity and performance.

    It’s important to note that sustained high temperatures can lead to faster wear and tear on the drive, potentially reducing its lifespan. On the other hand, extremely cold temperatures can cause performance issues and may even result in data loss. By keeping your SSD within the recommended temperature range, you can ensure that it’s operating optimally and avoid any potential issues in the future.

    What is Safe Temperature for SSDs?

    The ideal temperature range for SSDs is an important consideration for those who want to maximize the lifespan and performance of their storage devices. While SSDs are generally more resilient than traditional hard drives and can operate at higher temperatures, it is best to keep them within a safe range to prevent damage and ensure optimal performance. The recommended temperature range for most modern SSDs is between 0 and 70 degrees Celsius.

    However, it is best to avoid extreme fluctuations in temperature, as this can cause thermal stress and potentially shorten the lifespan of the device. One way to monitor the temperature of your SSDs is by using software that provides real-time temperature readings. By keeping an eye on the temperature and ensuring that it stays within the recommended range, you can ensure that your SSDs operate at their best for years to come.

    How to Keep SSD Temperature within Safe Limits

    Checking the temperature of your SSD is an essential aspect of keeping it safe and secure. When an SSD overheats, it may cause damage to the device, resulting in data loss, system crashes, or a shorter lifespan. To check the temperature of your SSD, you can use software programs, such as CrystalDiskInfo or HWInfo, that allow you to monitor the temperature in real-time.

    Most SSDs have a safe temperature range of 0°C to 70°C, and exceeding this limit can cause irreversible damage. Therefore, keeping your SSD at room temperature or using hardware cooling like fans or liquid cooling systems can help control the temperature. Another way to prevent overheating is to limit the write and read speeds of the SSD, as excessive usage can cause temperature spikes.

    By monitoring your SSD’s temperature, you can ensure that it stays within the safe range and, consequently, maintain its optimal performance and longevity.

    Tip 1: Optimize Airflow

    If you’re concerned about keeping your SSD temperature within safe limits, optimizing airflow is a simple and effective tip to keep in mind. Proper ventilation can help dissipate heat from your drive and keep it from overheating under heavy loads. This means positioning your system in a way that allows hot air to flow away from your computer, and making sure that any fans are working efficiently and are positioned to direct air over hot components.

    Another important factor to consider is your computer case. A well-ventilated case with adequate room for components and cables can help improve airflow and keep your SSD from overheating. By making sure your system is cool and well-ventilated, you can ensure your SSD stays within safe temperature limits and avoid damage to your drive.

    Tip 2: Use Thermal Pads and Heatsinks

    SSD temperature When it comes to keeping your SSD temperature within safe limits, it’s important to consider using thermal pads and heatsinks. With the power that SSDs are capable of, they can become rather hot, which can affect their performance and lifespan. A thermal pad acts as a conductor between your SSD and heatsink, helping to transfer heat away from your device and onto the heatsink.

    This prevents your SSD from overheating and ensures that your device runs smoothly. Heatsinks are also great for keeping your SSD temperature under control since they dissipate the heat away from your SSD, reducing the risk of damage due to high temperatures. Plus, they’re easy to install and can help extend the lifespan of your SSD.

    So, if you’re looking to keep your SSD running cool and at peak performance, utilizing thermal pads and heatsinks should be a top priority.

    Tip 3: Avoid Overclocking and Overuse

    To keep your SSD temperature within safe limits, it’s essential to avoid overclocking and overuse. Overclocking is a risky practice where you increase the clock speed of your SSD beyond its recommended limit. It may give you a performance boost, but it will also generate excessive heat that could damage your SSD in the long run.

    Similarly, overusing your SSD can lead to overheating, especially when you’re running intensive applications that demand a lot of resources. The constant read and write operations generate heat, and if you don’t give your SSD enough time to cool down, it could suffer from thermal damage. To avoid these issues, you should use your SSD judiciously and ensure that you’re not pushing it too hard.

    Make sure you’re not running multiple resource-intensive applications simultaneously, as this can cause your SSD to overheat. When you’re not using your SSD, you should let it cool down before using it again. Additionally, you should ensure that your computer case has proper ventilation to prevent heat buildup.

    In summary, overclocking and overuse can cause your SSD to overheat, leading to performance degradation and, in the worst-case scenario, complete failure. Therefore, it’s crucial to use your SSD responsibly and avoid overclocking and overuse to keep the temperature within safe limits. By following these simple tips, you can ensure the longevity and durability of your SSD and keep it running smoothly for years to come.

    Conclusion

    Checking your SSD temperature is like checking for a fever in a computer. With a quick and simple sensor check, you can keep your system healthy and avoid any potential damage or malfunctions. So, avoid any overheating mishaps and make sure to check your SSD temperature regularly – after all, prevention is always better than a cure!”

    FAQs

    Why is it important to monitor SSD temperature?
    Monitoring SSD temperature can help prevent overheating and potential damage to the drive. It can also improve overall performance and lifespan of the drive.

    How can I check the temperature of my SSD?
    There are several software programs available that can monitor your SSD temperature, such as CrystalDiskInfo and HWMonitor. You can also check the temperature in your computer’s BIOS.

    What is a safe temperature for my SSD?
    Generally, a safe temperature range for SSDs is between 0-70 degrees Celsius. However, it’s recommended to check with your SSD manufacturer for specific temperature guidelines.

    What should I do if my SSD temperature is too high?
    If your SSD temperature is consistently running too high, you may need to improve airflow in your computer case, apply thermal paste or pads to the SSD, or consider upgrading to a more efficient cooling system.

  • Battle of the Best: Silicon Power A55 vs Crucial MX500 – Which SSD is the Ultimate Winner?

    When it comes to upgrading your computer’s storage, choosing the best SSD can make quite a difference in terms of performance. Two popular options are the Silicon Power A55 and Crucial MX500, both offering impressive features and fast speeds. But which one is the better choice for your specific needs? In this blog post, we’ll compare the two SSDs to help you make an informed decision.

    Whether you’re a gamer, graphic designer, or simply looking to improve your computer’s overall speed, we’ve got you covered. So, buckle up and let’s dive in!

    Overview

    When it comes to choosing between the Silicon Power A55 and Crucial MX500, it ultimately comes down to your personal preferences and needs. Both solid-state drives (SSDs) offer great performance and reliability, but there are some differences to consider. The A55 has a slightly lower price point and faster write speeds, making it a good option for budget-minded users who need to transfer files quickly.

    The MX500, on the other hand, has a higher endurance rating and better overall performance, making it a better choice for heavy workloads and demanding applications. So, if you’re looking for a more affordable option with fast write speeds, the A55 may be the way to go. But if you want a more durable and high-performing SSD, the MX500 is likely the better choice.

    Similarities and Differences

    In any comparison, it’s important to identify both the similarities and differences between the topics at hand. This allows for a more thorough understanding of both sides and can even highlight unexpected connections. When it comes to comparing two things, it’s common to focus on their differences first.

    However, it’s equally important to recognize the shared traits between them. These commonalities can often offer insight into why two things might be compared in the first place. At the same time, it’s essential to acknowledge the distinctions between them, as this information is critical for anyone seeking to understand the unique qualities of each.

    By exploring both similarities and differences, we gain a more nuanced and complete understanding of the subjects in question.

    silicon power a55 vs crucial mx500

    Speed and Performance

    Speed and performance are two key factors that greatly impact a website’s success. Slow page loading times can lead to high bounce rates, as users become impatient and move on to other sites. In fact, studies have shown that even a one-second delay in page load time can lead to a significant drop in conversions.

    On the other hand, a fast and responsive website can greatly improve user engagement and lead to increased conversions. This is especially important for businesses that rely on their website to generate leads and sales. That’s why it’s essential to focus on optimizing website speed and performance, using techniques like caching, minification, and efficient coding practices.

    By doing so, you can ensure that your website delivers the best possible user experience, and ultimately drives more revenue to your business.

    Price

    When comparing the Silicon Power A55 and Crucial MX500, price is definitely a factor to consider. Currently, the Silicon Power A55 is priced lower than the Crucial MX500. However, it’s important to keep in mind that the price difference isn’t significant.

    While the Silicon Power A55 may be more budget-friendly, it’s important to consider the overall value and performance of both SSDs. In terms of read and write speeds, the Crucial MX500 outperforms the Silicon Power A5 Additionally, the Crucial MX500 has a longer warranty period of five years compared to the Silicon Power A55’s three-year warranty.

    At the end of the day, it all comes down to what you prioritize more – price or performance. If you’re on a tight budget and can sacrifice a bit on performance, the Silicon Power A55 may be the better option. However, if you’re willing to spend a bit more for better performance and a longer warranty, the Crucial MX500 may be worth the investment.

    Cost Comparison

    When it comes to comparing the costs of various products or services, price is always a critical factor to consider. For instance, if you’re on a budget, you would want to choose a product or service that offers the best value for your money. However, it’s important to note that price alone isn’t always the best indicator of quality or value.

    Sometimes, a higher price might be a sign of superior quality, while a lower price might indicate inferior quality or poor customer service. Therefore, it’s important to research and compare prices from various providers, taking into account other factors such as customer reviews, warranties, and satisfaction guarantees. By doing so, you can make an informed decision and choose a product or service that meets your needs and budget.

    Value for Money

    When it comes to making purchases, we all want to get the best value for our money. And one of the main factors that impacts value for money is the price of the product or service. While some may think that the cheapest option is always the best, it’s important to remember that price doesn’t always equal quality.

    Sometimes, paying a little extra can result in a better product or experience overall. That being said, it’s also important to consider our own budgets and financial situations. Just because a product or service is expensive doesn’t necessarily mean it’s worth the cost for everyone.

    It’s all about finding the balance between price and quality that works for us. When shopping, it’s important to research and compare prices to ensure that we’re getting a fair deal. This can involve looking at multiple retailers or providers, checking for sales or promotions, and reading reviews from other customers to gauge the product’s value.

    Ultimately, the price of a product or service plays a crucial role in determining its overall value for money. But it’s important to consider other factors as well, such as quality, features, and personal needs and preferences. By finding the right balance between price and value, we can make purchases that leave us satisfied and feeling like we’re getting our money’s worth.

    Reliability

    When it comes to choosing a reliable SSD for your computer, two popular options are the Silicon Power A55 and the Crucial MX500. Both offer impressive read and write speeds, but how do they compare in terms of reliability? The Silicon Power A55 has a MTBF (mean time between failures) of 5 million hours, whereas the Crucial MX500 has a slightly higher MTBF at

    8 million hours. Additionally, the Crucial MX500 is backed by a 5-year limited warranty compared to the Silicon Power A55’s 3-year limited warranty. While both SSDs are known for their durability and long lifespan, if you’re looking for that extra peace of mind, the Crucial MX500 may be the better choice.

    Ultimately, it’s important to carefully consider your needs and priorities when making a decision on which SSD to go for.

    Warranty and Endurance

    Reliability When it comes to purchasing a product, one of the most important factors to consider is reliability. You want to know that the product you are investing in will last and perform as promised. This is where warranty and endurance come into play.

    A reliable product will often come with a strong warranty, giving you peace of mind that any issues that arise will be taken care of. Additionally, a reliable product will have a track record of endurance, meaning it can withstand wear and tear over an extended period of time. Think of it like a car – you want a vehicle that can handle the long haul, and any car manufacturer worth their salt will offer a warranty to back up their claims of reliability.

    When considering a purchase, take the time to research the warranty and endurance of the product to ensure you are making a wise investment.

    User Feedback

    User feedback is an essential element in determining the reliability of a product or service. Gathering feedback from users can help identify issues or areas for improvement, and help companies make data-driven decisions. When it comes to reliability, user feedback can provide insight into whether a product or service delivers consistent results over time.

    For example, if multiple users report experiencing an error or outage at the same time, it may indicate a reliability issue that needs to be addressed. Thus, companies should actively seek user feedback and use it to continuously improve the reliability of their offerings. Ultimately, reliability is key in building trust with users, and user feedback is a valuable tool in achieving that trust.

    Conclusion

    In the battle of Silicon Power A55 vs Crucial MX500, it’s clear that both are solid choices for anyone looking to upgrade their storage. It ultimately comes down to personal preference and priorities. Are you looking for raw speed and performance? The MX500 may be the way to go.

    Or are you more concerned with durability and longevity? The A55’s focus on heavy-duty protection may win out. Whatever your needs, both options will provide reliable and efficient storage for all your data needs. So, whether you choose the sleek and speedy MX500 or the rugged and resilient A55, you can rest easy knowing your data is in good hands.

    Which is Better?

    When it comes to choosing between reliability and other factors, it is crucial to understand the importance of reliability. Reliability ensures that the system or the product works as intended, without any failure or errors. In contrast, other factors such as cost and performance may seem appealing, but they may not necessarily guarantee reliability.

    Cost may be reduced by using cheaper components, but that can lead to poor performance and more frequent breakdowns. Similarly, performance may be improved by pushing the system to its limits, but that can decrease system life and increase the risk of failure. Therefore, it is essential to prioritize reliability over other factors to ensure the long-term stability and functionality of the product or system.

    So, when choosing between reliability or something else, keep in mind that the benefits of reliability far outweigh any short-term gains from other factors.

    FAQs

    What is the difference between Silicon Power A55 and Crucial MX500?
    Silicon Power A55 and Crucial MX500 are both popular options for solid state drives. The main difference between them is the type of NAND flash memory they use. While the A55 uses TLC (Triple-Level Cell) NAND, the MX500 uses faster and more reliable MLC (Multi-Level Cell) NAND. Additionally, the MX500 has a higher endurance rating and a longer warranty period compared to the A55.

    Which one is faster, Silicon Power A55 or Crucial MX500?
    In terms of read and write speeds, Crucial MX500 is slightly faster than Silicon Power A55. The MX500 has read speeds of up to 560MB/s and write speeds of up to 510MB/s, while the A55 has read speeds of up to 520MB/s and write speeds of up to 500MB/s.

    What is the price difference between Silicon Power A55 and Crucial MX500?
    The price difference between Silicon Power A55 and Crucial MX500 can vary depending on the capacity of the SSD. However, in general, the MX500 is slightly more expensive than the A55. For example, at the time of writing, a 500GB MX500 costs around $67, while a 512GB A55 costs around $60.

    Which one should I choose, Silicon Power A55 or Crucial MX500?
    The choice between the two SSDs ultimately depends on your specific needs. If you are looking for a budget-friendly option with decent performance, the A55 might be a good choice. However, if you want faster speeds, better endurance, and a longer warranty, the MX500 is a better option. Additionally, if you plan to use the SSD for a heavily-loaded system, the MX500 would be a better option due to its reliability and durability.

  • A Step-by-Step Guide on How to Clone Windows from HDD to SSD: Ensure Faster Processing and Improved Performance!

    Are you fed up with your slow and outdated HDD? Do you want to upgrade to a lightning-fast SSD without losing all your precious files saved on your current hard drive? Look no further as we have just the solution for you! Cloning Windows from HDD to SSD is the perfect way to transfer all your files, applications, and settings to your new SSD without having to start from scratch. Cloning a hard drive may sound daunting, but it’s actually a straightforward process that can save you a lot of time and effort. By replicating your current hard drive’s contents onto your solid-state drive, you can enjoy the faster read and write speeds of an SSD while retaining your familiar software environment.

    While some people opt to perform a fresh Windows install on their new SSD, cloning is a better option as it ensures that all your programs, drivers, and settings are transferred exactly as they were on your old hard drive. Additionally, cloning is a hassle-free way of upgrading your computer without having to reinstall everything or reconfigure your personal settings. So, if you want to enjoy the benefits of an SSD without losing your valuable data, consider cloning Windows from HDD to SSD.

    In our upcoming blog, we’ll guide you through the process of cloning, step-by-step, and show you how to make the most out of your new solid-state drive. Stay tuned!

    Requirement for Cloning HDD to SSD

    If you’re upgrading from a traditional hard disk drive (HDD) to a faster solid-state drive (SSD), then you’ll want to clone your Windows operating system and all your data to the new drive. Cloning your hard drive to an SSD provides several benefits, such as faster boot times, improved performance, and better responsiveness. However, it’s important to remember that your SSD needs to be large enough to accommodate all your data, otherwise, you’ll need to free up some space before you can clone your disk.

    To clone your HDD to an SSD, you’ll need cloning software, such as Macrium Reflect, Acronis True Image, or EaseUS Todo Backup. Once you’ve backed up everything, simply connect your SSD, run the cloning software and follow the step-by-step instructions to clone your hard drive to your new solid-state drive. Once the cloning process is complete, shut down your computer, disconnect the HDD, and connect the SSD to your computer.

    You should be good to go with your faster, more responsive new SSD.

    SSD with enough storage

    When it comes to cloning your HDD to an SSD, having a sufficient amount of storage is crucial. You don’t want to run into the issue of your new SSD not having enough space to hold all of your files and data. That’s why it’s recommended to get an SSD with enough storage to accommodate all of your needs.

    But how do you determine what “enough storage” is? Well, it really depends on the size of your current HDD and how much of it is being used. A general rule of thumb is to get an SSD with at least double the capacity of your current HDD. For example, if your HDD is 500GB and you’re using 250GB of it, you should get an SSD with at least 500GB of storage.

    This will give you enough space to clone your HDD and leave room for future files and programs. Making sure you have enough storage when cloning your HDD to an SSD will ensure a smooth transition and prevent any headaches down the road.

    how do i clone windows from hdd to ssd

    External dock or USB enclosure

    If you’re looking to upgrade your computer’s storage capacity or speed, one of the best things you can do is to clone your existing hard drive onto a new SSD. However, before you can do that, you’ll need to have an external dock or USB enclosure that can hold both the old HDD and the new SSD at the same time. This will allow you to transfer all of the data from the old drive to the new one without having to install either of them inside the computer.

    Using an external dock or USB enclosure is a relatively simple process. First, you’ll need to remove the old hard drive from your computer and install it into the dock or enclosure (which will connect to your computer via USB). Then, you’ll need to install the new SSD into the same dock or enclosure.

    Once both drives are in place, you can use cloning software to copy the contents of the old HDD onto the new SSD. It’s important to note that not all external docks or USB enclosures are created equal. You’ll want to make sure that the one you choose can handle both the size and type of drives you’ll be using, and that it has enough bandwidth to allow for speedy data transfer.

    Additionally, you’ll want to make sure that the cloning software you use is compatible with your setup, as different docks and enclosures may require different software. In summary, an external dock or USB enclosure is a crucial component when it comes to cloning your old HDD onto a new SSD. By taking the time to choose the right one and following the proper steps, you can seamlessly upgrade your computer’s storage and performance.

    Step by Step guide on cloning Windows

    If you’ve recently upgraded to an SSD and want to transfer your Windows operating system from your old HDD to your new drive, cloning your Windows system is the way to go. Cloning your Windows system is essentially duplicating your existing system onto your new SSD, and with the right software, it’s a fairly straightforward process. Firstly, you need to ensure that your SSD is connected to your computer.

    Next, you’ll need to download cloning software like EaseUS Todo Backup, Macrium Reflect, or Clonezilla. Once the software is installed, you can follow the simple steps provided by the software to clone your Windows system. This process can take some time depending on the size of your system and how much data needs transferring, but once completed, you can use your new SSD with your old Windows system.

    Cloning your Windows system is a great way to make sure you don’t lose any data or settings, making your upgrade process much more seamless. So, if you’re wondering how do I clone Windows from HDD to SSD, don’t worry, it’s a quick and easy process that you can handle with ease.

    Connect SSD to the system via dock

    Cloning Windows can be a daunting task for many especially if you’re doing it for the first time. One of the key steps in the cloning process is to connect the SSD to the system via dock. First, ensure that your system is turned off, then connect the SSD to the dock and connect the dock to your system using a USB cable.

    Once it’s connected, turn on the system, and it should recognize the SSD as an external storage device. It’s always best to ensure that your dock and cable are reliable before proceeding with cloning. You don’t want to risk losing your data during the process.

    Additionally, it’s crucial to have cloning software such as EaseUS Todo Backup or Clonezilla, making it easier to clone your Windows. Overall, cloning Windows is a straightforward process, and with this step-by-step guide, you can easily and efficiently clone your Windows system.

    Download and install a reliable cloning software

    Cloning your Windows operating system can be a useful tool for many different situations, whether it’s upgrading your hard drive or transferring your system to a new computer. A reliable cloning software is essential for a successful clone process, and there are many great options available online. Once you’ve downloaded and installed your chosen software, follow these simple steps to clone your Windows system.

    First, connect the target drive to your computer. Then, open the cloning software and select the source and target drives. Next, choose your desired cloning method and adjust any settings as necessary.

    Finally, start the cloning process and wait for it to complete. It’s important to note that cloning can take some time, so be patient and let the software do its job. With this guide, you’ll have no problem cloning your Windows system and maintaining all your important files and settings.

    Launch the cloning software

    As you begin the process of cloning your Windows operating system, the first step is to launch the cloning software. This can typically be done by inserting a USB drive or CD with the cloning software into your computer and choosing to boot from it. Once the software is launched, you will be prompted to choose your source drive (the drive that has the operating system you want to clone) and your destination drive (the drive where you want to copy the operating system to).

    It is important to make sure that the destination drive is of equal or greater size than the source drive to ensure that all data is properly copied. Once you have selected your drives and chosen any necessary settings, the cloning process can begin. This is an essential step in transferring your operating system to a new computer or upgrading to a larger hard drive, and following these steps carefully can ensure a successful and seamless transition.

    Select the Source Disk – HDD

    When it comes to cloning your Windows operating system, choosing the right source disk is crucial. In this step-by-step guide, we’ll cover how to select the source disk – the HDD – for your cloning process. First, it’s essential to ensure that your HDD is in good working order before starting the cloning process, as any potential issues could cause problems during the transfer.

    Once you’ve confirmed that your HDD is in good condition, you’ll need to connect it to your computer and boot it up. From there, you can access the cloning software, select the HDD as your source disk, and begin the cloning process. It’s crucial to note that the cloning process could take anywhere from a few minutes to several hours, depending on the size and speed of your HDD.

    However, with patience and attention to detail, you can successfully clone your Windows operating system onto a new drive and ensure that your data remains safe and secure throughout the process. So, take your time and follow the steps carefully to ensure a successful and stress-free cloning experience.

    Select the Destination Disk – SSD

    When it comes to cloning Windows onto a new SSD, one of the first steps is to select the destination disk where the clone will be placed. An SSD (solid-state drive) is often recommended for its speed and reliability, compared to traditional HDD (hard disk drive) options. Once you have your SSD ready, connect it to your computer and ensure it is recognized by the system.

    Then, use cloning software to begin the process of copying everything from your old disk to the new SSD. During this process, you’ll be prompted to select the destination disk, which should be your new SSD. It’s important to double-check that you’ve chosen the correct disk, as any data on that disk will be overwritten during the cloning process.

    Once you’ve made your selection, simply follow the on-screen prompts to complete the cloning process. With your new SSD fully set up and cloned, you’ll be able to enjoy improved performance and faster system speeds.

    Start the Cloning process

    Cloning Windows can be a daunting task, but with the right guidance, it’s a breeze. Here’s a step-by-step guide on how to clone Windows. The first step is to choose a cloning software that suits your preferences.

    There are many options out there, but we recommend using Macrium Reflect. Once you’ve installed it on your computer, connect the destination drive to your computer. Then, click “Clone this disk” and select the source disk you want to copy.

    Next, choose the destination disk. Make sure it has enough space to accommodate all the data from the source disk. After that, select the partitions you want to clone.

    If you want to clone the entire disk, select all partitions. Finally, click “Finish” and let the cloning process begin. This may take some time, depending on the size of the disk.

    Once it’s done, your destination drive should boot your computer just like the source disk did. Congratulations, you’ve successfully cloned your Windows!

    Booting from the Cloned SSD

    If you want to improve the performance of your computer, cloning Windows from an HDD to an SSD is the way to go. Once you have completed the cloning process, you may wonder how to boot your computer from the new cloned SSD rather than the old HDD. This process is relatively simple and can be done in a few quick steps.

    First, make sure your computer is turned off and the new SSD is installed. Next, turn on your computer and enter the BIOS settings by pressing F2 or DEL, depending on your computer. Once in the BIOS settings, navigate to the boot order settings and select the cloned SSD as your primary boot device, save the changes and exit the BIOS.

    Finally, your computer will reboot from the new cloned SSD and you can enjoy the improved speed and performance that comes with it. By following these simple steps, you can easily switch to your cloned SSD and enjoy a faster, more efficient computer.

    Shutdown the system

    When it comes to cloning your SSD, it’s always a good idea to ensure that your system settings are properly configured for a successful boot-up process. One of the most crucial steps before switching to the cloned SSD is to properly shut down the system. Powering down your system improperly can cause damage to the cloned SSD and result in data loss.

    Once you have performed a safe shutdown, you can then switch to booting up from the cloned SSD to test its functionality. To ensure that the cloned SSD is working correctly, you can check the BIOS settings and configure the boot order to prioritize the new SSD. By doing so, your system will boot up smoothly and quickly without any issues.

    Overall, following these steps will enable you to enjoy a seamless and error-free experience when using your cloned SSD.

    Disconnect the HDD and connect the SSD

    After successfully cloning your HDD onto your new SSD, it’s time to disconnect the old hard drive and connect the new one. But what happens now? How do we boot from the cloned SSD and start using it as our primary storage? Firstly, make sure you’ve properly disconnected the old hard drive and connected the new SSD. Double-check all cables and connections to avoid any issues.

    Now, power up your computer and press the BIOS key while it is booting (this key is usually displayed on the manufacturer’s splash screen). Once you’re in the BIOS, you should see a list of bootable devices. Move your SSD to the top of the list to ensure that your computer boots from it first.

    Save any changes and exit the BIOS. Your computer should now boot from the newly cloned SSD. It may take a little longer to boot up the first time, as your computer is configuring drivers and settings specific to the new hardware.

    But don’t worry, this is perfectly normal. Now that you’re booted up on the new SSD and everything seems to be working properly, it’s time to enjoy the enhanced speed and overall improved performance. Congratulations, you’ve successfully cloned your HDD onto your SSD and are now ready to reap the benefits of lightning-fast storage!

    Boot-up the system and select SSD boot option

    When you’ve successfully cloned your operating system onto your new SSD, the next step is to boot the system from this new drive. To do this, first, shut down your computer and install the SSD into its proper slot. Once you turn the computer back on, immediately enter your computer’s BIOS settings by pressing the designated key (usually F2, F12, or Delete).

    In the BIOS settings, navigate to the boot options and select your new SSD as the primary boot device. This will ensure that the computer boots up using the cloned operating system saved on your new SSD. Once the setting is saved, restart the system, and your computer should boot up on the cloned SSD.

    A word of caution is that don’t forget to remove the previous boot device from the motherboard to prevent any confusion between the two drives. Following these simple steps will allow you to enjoy the benefits of faster speeds and improved performance from your new SSD.

    When it comes to wrapping up your thoughts and ideas, nothing speaks better than a good conclusion. That’s right! The conclusion is where you, as a writer, get to leave a lasting impression on your readers. It’s that final paragraph that brings together all the key points and summarizes everything that’s been discussed.

    But how do you go about writing a great conclusion? In this article, we’ll dive into the world of conclusions, discussing what they are, why they’re important and how to write a perfect one. Whether you’re a student, a blogger, or content writer, this guide will provide you with everything you need to know to master the art of crafting compelling conclusions that resonate with your audience. So, let’s get started!

    Cloning Windows is an easy process.

    If you are looking to clone Windows from HDD to SSD, you have come to the right place. Cloning Windows is an easy process that can save you a lot of time and effort. With the help of specialized software, you can transfer all your data, settings, and preferences from your old hard drive to the new SSD.

    This means that you won’t have to reinstall all your applications and configure them from scratch. To get started, you will need to acquire a good cloning software, such as EaseUS Todo Backup, Macrium Reflect, or Acronis True Image. Once you have installed the software, you can connect your new SSD to your computer and launch the cloning tool.

    Follow the on-screen instructions to select the source drive (your HDD) and the destination drive (your SSD), and start the cloning process. It may take a few hours to clone your entire hard drive, depending on the size of your system, but once it’s done, you can reboot your computer and start using your new, faster drive. Overall, cloning Windows from HDD to SSD is a straightforward process that can give your old computer a new lease on life.

    So why not give it a try?

    Cloning provides the same windows version, installed application, and data.

    If you’re looking to upgrade your old hard drive to a faster solid-state drive, you may be wondering how to clone Windows from HDD to SSD. Cloning your hard drive creates an exact copy of all the data, applications, and operating system present on your existing hard drive onto the SSD. This ensures that you can continue using the same applications, settings, and files without any interruption.

    Cloning is also much faster than manually transferring files, as it automatically duplicates everything in one go. Simply connect the SSD to your computer, open the cloning software, select your old hard drive as the source and the new SSD as the destination, and begin the cloning process. Once it’s done, you can replace the old hard drive with the new SSD, set it as your computer’s boot drive, and start enjoying faster load times, better performance, and improved durability.

    So get your cloning software ready and start the process of upgrading your system today!

    Cloning provides an efficient way to transfer windows from HDD to SSD.

    If you’re looking to upgrade your computer by transferring your Windows operating system from a hard disk drive (HDD) to a solid-state drive (SSD), cloning is the way to go. Cloning provides an efficient way to transfer all of your data, files, and settings from one drive to another without having to start from scratch. To clone your Windows operating system, you’ll need a cloning software.

    There are many cloning software options available online, but some of the most popular ones include EaseUS Todo Backup, Clonezilla, Macrium Reflect, and AOMEI Backupper. Once you’ve downloaded and installed your cloning software of choice, follow the prompts to clone your HDD to your SSD. Once the process is complete, your Windows operating system will be installed on your SSD, allowing for faster boot times and overall improved performance.

    With this simple cloning process, you can enjoy the benefits of an SSD without having to sacrifice your data or start from scratch.

    Conclusion

    In conclusion, cloning your Windows operating system from an HDD to an SSD is like giving your computer a new lease on life. It’s like giving your sluggish four-door sedan a souped-up engine and racing stripes. With the seamless transfer of data and lightning-fast boot and load times, you’ll be cruising down the digital highway in style.

    So, go ahead and pull off that cloning heist with confidence – you’ll be the envy of the PC world. And who knows, you might even get some street cred from your fellow tech-savvy buddies.”

    FAQs

    What software do I need to clone Windows from HDD to SSD?
    There are several software options, including Macrium Reflect, Acronis True Image, and EaseUS Todo Backup.

    How long does it take to clone Windows from HDD to SSD?
    The time it takes varies depending on the size of the drive and the speed of your system, but generally it can take several hours to complete.

    Can I clone only the Windows partition to my SSD?
    Yes, many cloning software options allow you to select specific partitions to clone, so you can choose only your Windows partition if desired.

    Can I use a USB drive to clone Windows from HDD to SSD?
    Yes, some software options allow you to create a bootable USB drive to use for the cloning process.

    Do I need to reinstall Windows after cloning to a new SSD?
    No, if the cloning process was successful, your system should boot up as normal and you should not need to reinstall Windows.

  • Unleashing the Potential of Your Devices: A Comprehensive Guide on How to Connect External SSD to SATA6

    Hey there, tech enthusiasts! Are you looking to boost the speed and capacity of your computer? If so, you might be considering an external SSD (solid-state drive). With its lightning-fast read and write speeds, an SSD can make your operating system and applications run faster than ever before. But how do you connect an external SSD to your computer? In this blog, we’ll explore the process of connecting an external SSD to a SATA6 port on your computer’s motherboard.

    So, grab your tech toolkit and let’s get started!

    Understanding SATA6 and External SSDs

    If you’re looking to connect an external SSD to a SATA6 port, it’s important to understand what SATA6 is. SATA6 is a type of data transfer technology that supports speeds of up to 6 Gbps. When it comes to external SSDs, there are a few ways to connect them to your computer via SATA

    One option is to use a SATA to USB adapter cable, which will allow you to connect the SSD to a USB port on your system. Another option is to use an external SATA enclosure, which will allow you to connect the SSD to a SATA port on your motherboard. Whichever method you choose, make sure to check whether your computer supports SATA6 and ensure that your SSD is compatible with the interface you are using.

    What is SATA6?

    SATA6, external SSDs SATA6 is the latest version of the Serial Advanced Technology Attachment, or SATA, interface. It’s a data transfer technology that allows data to be transferred between your computer’s motherboard and storage devices, such as hard drives and solid-state drives (SSDs). SATA6 is an improvement over the previous SATA3 technology, providing faster data transfer speeds and increased performance.

    When it comes to external SSDs, SATA6 plays a crucial role in their efficiency. Most external SSDs use the SATA6 interface to communicate with your computer, allowing for faster data transfer rates and higher read and write speeds. This is especially important if you regularly transfer large files, such as high-quality videos or graphics.

    External SSDs also offer several advantages over traditional hard drives, including faster boot times, lower power consumption, and greater durability. Additionally, they’re typically smaller and more portable than hard drives, making them an excellent choice for users who need to work on-the-go. In conclusion, SATA6 is an essential technology when it comes to external SSDs.

    It enables faster data transfer rates, which are especially important when you’re working with large files. If you’re in need of an external storage device, consider investing in an SSD that uses SATA6 technology for optimal performance.

    how can i connect external ssd to sata6

    What are External SSDs?

    External SSDs are a popular storage solution that serve as an alternative to traditional hard drives. The term “SSD” stands for solid-state drive, and it refers to a type of storage that uses flash memory to save and retrieve data. This differs from traditional hard drives, which use spinning disks to read and write data.

    External SSDs are portable, and they connect to a computer through a variety of ports. SATA6 is one of the most common ports used with external SSDs. It is a fast interface that allows data to be transferred quickly between the external SSD and the computer.

    When choosing an external SSD, it is important to consider the storage capacity, the transfer speed, and the interface type. External SSDs are a reliable and efficient way to store important files, and they are a popular option for those who need to work on the go or transport large amounts of data.

    Checking Compatibility

    If you’re wondering how to connect an external SSD to SATA6, the first thing you need to check is whether your computer has a SATA6 port. It’s also important to ensure that your SSD is compatible with SATA Assuming you have a compatible port and an appropriate cable, connecting an external SSD to SATA6 should be a straightforward process.

    Simply plug the cable from your SSD into the port on your computer, and you’re good to go! Just remember that if your SSD isn’t compatible with SATA6, you may need to look into other options for connecting it to your computer. Overall, though, with a little bit of research and the right equipment, connecting an external SSD to SATA6 shouldn’t be too difficult.

    Identifying the Type of SATA Connection

    When it comes to installing a new hard drive or upgrading your current one, it’s essential to identify the type of SATA connection you have on your motherboard. This will ensure compatibility with the new drive you plan on installing. There are generally three types of SATA connections: SATA 1, SATA 2, and SATA

    You can check which type of SATA your motherboard has by inspecting the physical ports on the motherboard. SATA 1 ports have a transfer speed of 5Gb/s, SATA 2 has a transfer speed of 3Gb/s, and SATA 3 has a transfer speed of 6Gb/s.

    It’s essential to note that newer motherboards will support all three types of SATA, whereas older motherboards may only have SATA 1 or SATA 2 ports. Once you have identified the type of SATA connection you have, you can then check which type of hard drive is compatible with your motherboard. If you have a SATA 1 port, you can still use newer SATA 2 or SATA 3 hard drives, but the transfer speed will be limited to that of the SATA 1 port.

    However, if you have a SATA 3 port, you can use any SATA hard drive that is compatible with the port. It’s important to note that while SATA 2 and SATA 3 hard drives are backward compatible with SATA 1 ports, SATA 1 hard drives are not compatible with SATA 2 and 3 ports. In summary, identifying the type of SATA connection on your motherboard is crucial for ensuring compatibility with any new hard drives you plan on installing.

    Make sure to inspect the physical ports on your motherboard and determine whether you have SATA 1, 2, or 3 connections. From there, you can choose a compatible hard drive that will work seamlessly with your motherboard to ensure optimal transfer speeds and storage capacity.

    Ensuring External SSD Compatibility

    When it comes to using an external SSD, there are a few important things to keep in mind to ensure compatibility with your device. One of the key factors is the interface used by both the SSD and your computer. The most common interfaces for external SSDs are USB and Thunderbolt, so it’s important to check which interface your computer has before purchasing an external SSD.

    Additionally, the compatibility of the file system used on the SSD is crucial. Most external SSDs come pre-formatted with either NTFS or exFAT file systems, which are compatible with both Windows and Mac systems. However, if you plan on using the SSD with a Linux-based system, you’ll want to make sure it’s compatible with the file system you plan to use, such as EXT4 or Btrfs.

    By checking these compatibility factors before making your purchase, you can ensure that your external SSD will work seamlessly with your device and provide the storage and speed you need.

    Connecting the External SSD to SATA6

    If you’re looking to connect your external SSD to SATA6, the process is actually quite simple. All you need is a SATA to USB adapter cable, which can be found at most electronics stores or online retailers. The first step is to plug the adapter cable into your external SSD’s USB port.

    Next, connect the other end of the adapter cable to one of your computer’s SATA6 ports. Make sure to double-check which port is SATA6, as there may be other types of SATA ports available. Once the cable is securely connected, turn on your computer and wait for it to recognize the external SSD.

    You should then be able to access the SSD’s files and folders just as if it were an internal hard drive. It’s important to note that while this method is a great way to transfer and access files quickly, it may not be the best option for long-term storage or backups. For that, you’ll want to consider other methods such as cloud storage or an external hard drive.

    But for transferring large files or accessing certain programs, connecting your external SSD to SATA6 can be a great solution.

    Locating the SATA6 Port

    Locating the SATA6 port on your computer is the first step to connecting your external SSD. This port is typically found on the motherboard and is identified by its blue color. Once you’ve located it, you can begin the process of connecting your SSD.

    It’s important to note that not all external SSDs are compatible with SATA6, so be sure to check your device’s specifications beforehand. To connect your external SSD, simply plug in the SATA cable to the port on both the motherboard and the SSD. Then, insert the power cable into the SSD and plug it into a power source.

    Once everything is connected, your computer should recognize the external SSD and you can begin transferring files. By connecting your external SSD to SATA6, you’ll benefit from faster data transfer speeds and improved performance overall.

    Connecting the External SSD

    Connecting an external SSD to SATA6 is a simple and straightforward process that can provide significant benefits in terms of data storage and transfer speed. First, ensure that your computer or laptop is powered off and disconnected from any power sources. Find the SATA6 port on your motherboard and connect one end of the SATA cable to it, taking care to line up the pins correctly.

    Then, connect the other end of the cable to the external SSD, again ensuring that the pins are properly aligned. Once connected, power on your computer and the external SSD should be recognized automatically. You can then begin transferring files and data to and from the external SSD at much faster speeds than with traditional hard drives.

    So, if you’re looking for a quick and easy way to increase your computer’s storage capabilities and improve its overall performance, consider connecting an external SSD to SATA

    Configuring the External SSD with SATA6

    Connecting an external SSD to SATA6 is a great way to increase your computer’s storage capacity and overall performance. To do this, you will need an external SSD enclosure that supports SATA First, make sure your computer’s SATA cable is disconnected, then insert the external SSD into the enclosure and secure it in place.

    Next, connect the SATA data cable to the enclosure and your computer’s motherboard. Finally, connect a power cable to the external SSD enclosure and plug it into an outlet. Your computer should recognize the new hardware and prompt you to install any necessary drivers.

    Once installed, you can use your external SSD just like any other internal drive, and enjoy faster read and write speeds and more storage space for your files and programs.

    Accessing the External SSD on Your Computer

    Configuring your external SSD with SATA6 is an essential step to access your SSD on your computer. First, make sure to connect your SSD to your computer using a SATA6 cable. Then, ensure that your computer’s BIOS recognizes the SSD.

    To do this, go to the BIOS settings and check if the SSD is present in the list of connected devices. Once the SSD is recognized, it’s time to format the external SSD, which will erase all the information present on the drive. To do this, go to the Disk Management option, and choose your SSD.

    Right-click and select the format option to complete the process. Now that your SSD is formatted, you can easily access it on your computer. Just connect the SSD to your computer using the SATA6 cable, and you are all set! With these easy steps, you can access your external SSD on your computer and enjoy faster data speeds and storage options.

    Optimizing Performance and Settings

    If you’re looking to optimize your device’s performance, configuring your external SSD with SATA6 is an excellent place to start. This can be done by connecting your drive to a SATA3 port on your computer’s motherboard, then adjusting the settings in your BIOS to enable SATA6 mode. Once this is done, you should see a significant improvement in your device’s read and write speeds.

    Additionally, it’s important to ensure that your device’s firmware is up to date, and that you’re using high-quality SATA cables to prevent any data transfer issues. By taking these steps, you’ll be able to get the most out of your external SSD and improve your device’s overall performance.

    Conclusion

    In conclusion, connecting an external SSD to a SATA6 port is a fairly straightforward process. With the right cable and a bit of technical know-how, you can enjoy lightning-fast data transfer speeds and an expanded storage capacity that will leave your friends green with envy. So go forth, intrepid tech adventurer, and boldly connect that external SSD to your SATA6 port.

    Your files will thank you!”

    FAQs

    Can an external SSD be connected to a SATA6 port?
    Yes, an external SSD can be connected to a SATA6 port using a SATA to USB adapter.

    What is the maximum data transfer speed of an external SSD connected to a SATA6 port?
    The maximum data transfer speed of an external SSD connected to a SATA6 port depends on the SSD’s read and write speeds and the quality of the adapter being used.

    Is it possible to daisy chain multiple external SSDs using SATA6 ports?
    Yes, it is possible to daisy chain multiple external SSDs using SATA6 ports as long as all the SSDs and cables being used are SATA6 compatible.

    Can a laptop connect to an external SSD using a SATA6 connection?
    No, most laptops do not have SATA6 ports. However, laptops can connect to external SSDs using USB or Thunderbolt ports.

  • Revolutionize your Raspberry Pi with GeekPi Cluster Case: The Ultimate Solution for High Performance Computing!

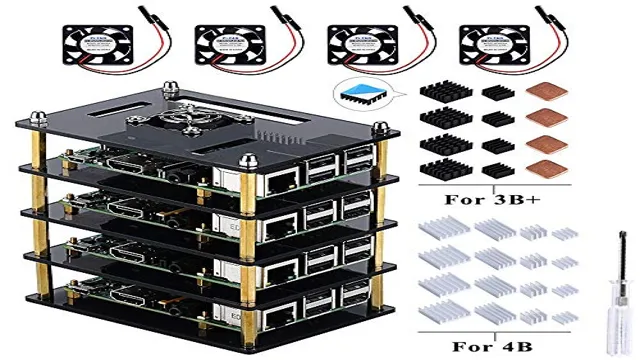
    If you’re looking to build your own cluster, you need a case that can handle it all without being bulky. Luckily, GeeekPi has created a compact and powerful cluster case that can easily house up to four Raspberry Pi boards. With its sleek design, it’s perfect for those who want to build a cluster without sacrificing style or performance.

    Plus, the possibilities for what you can achieve with a cluster are endless. Get ready to dive into the world of high-performance computing with the GeeekPi cluster case!

    A Perfect Case for Raspberry Pi Clusters

    The GeeekPi cluster case is a must-have for anyone looking to build a comprehensive Raspberry Pi cluster. This case is more than just a protective shell for multiple Pis; it is designed specifically for building clusters. One of the most significant advantages of using a cluster case is the improved cooling.

    With several Pis running together in a confined space, heat can become a significant issue. The GeeekPi cluster case has efficient cooling fans that keep temperatures down while also being silent. Another big plus is that it is incredibly modular, and the design allows for easy installation and maintenance.

    You can also stack these cases to have a larger cluster. Overall, the GeeekPi cluster case is the perfect solution for anyone looking to build a Raspberry Pi cluster, whether for research, gaming, or home automation.

    Introduction: The GeeekPi Cluster Case

    The GeeekPi Cluster Case is a great option for those looking to create a Raspberry Pi cluster. This cluster case comes in a sleek design and offers plenty of space to fit up to six Raspberry Pi boards, as well as other accessories. The best part about this cluster case is that it allows for optimal cooling, which is essential for keeping your devices running smoothly.

    With the GeeekPi Cluster Case, you can set up your Raspberry Pi cluster in no time and take advantage of its many benefits, such as improved performance and the ability to run multiple applications simultaneously. So, if you’re looking for a reliable and efficient case for your Raspberry Pi cluster, the GeeekPi Cluster Case is the perfect choice for you.

    geeekpi cluster case

    What is A Cluster and Why Do You Need It?

    A cluster is a group of computers connected together to work as a single system. Clusters increase processing power and provide redundancy, making them essential for applications that require high performance or continuous operation. Raspberry Pi clusters are an excellent option for those seeking low-cost, customizable solutions.

    A Raspberry Pi cluster is a collection of Raspberry Pi devices connected to each other through Ethernet cables. These clusters can be used for a variety of applications, such as web hosting, data processing, and even crypto-mining. Raspberry Pi clusters are becoming increasingly popular for their low power consumption and scalability, making them an ideal choice for hobbyists and small businesses.

    Additionally, Raspberry Pi’s easy-to-use interface and extendable hardware make it a perfect platform for experimenting and building your own cluster. So, whether you need more computing power for your projects or want to experiment with clustering technology, a Raspberry Pi cluster may be just what you need.

    Features and Benefits of GeeekPi Cluster Case

    The GeeekPi Cluster Case is an excellent piece of technology that offers several features and benefits. Firstly, this case is perfect for reducing clutter and neatly organizing multiple Raspberry Pis. It can house up to four Raspberry Pis, making it an excellent choice for individuals or organizations looking to create a cluster computing environment.

    Additionally, the GeeekPi Cluster Case is made from high-quality acrylic material, which means it is lightweight, sturdy and will not rust over time. This also makes it an ideal choice for mobile or outdoor projects that require durability. Finally, the GeeekPi Cluster Case is designed to effectively dissipate heat, which is crucial for ensuring the longevity of your Raspberry Pis.

    The case’s unique design allows for maximum airflow to help prevent overheating, which can significantly shorten the lifespan of your Raspberry Pis. Overall, the GeeekPi Cluster Case is an excellent investment for anyone looking to create a Raspberry Pi cluster computing environment, and its innovative features and benefits make it a top choice in the market.

    Compact Design and Easy to Assemble

    If you’re looking for a compact and easy-to-assemble cluster case, look no further than the GeeekPi Cluster Case. This innovative case is designed to provide users with a multitude of benefits, including compact design and ease of assembly. The compact design means that it takes up minimal space, making it perfect for use in small offices or homes.

    Additionally, the easy-to-assemble design means that users can quickly and easily set up their cluster without the need for any special tools or training. This makes the GeeekPi Cluster Case ideal for anyone looking to get started with clustering technology without investing a lot of time or money in the process. So, if you’re looking for a reliable and user-friendly cluster case, the GeeekPi Cluster Case is definitely worth considering.

    Improved Cooling and Reduced Noise

    When it comes to cluster computing, proper cooling is key. The GeeekPi Cluster Case is designed with improved cooling in mind, ensuring that your Raspberry Pi cluster operates at optimal temperature levels. This is achieved through the use of an innovative design that allows for efficient air circulation, reducing the risk of overheating and prolonging the lifespan of your hardware.

    What’s more, the case also helps to keep noise levels down, making it perfect for use in environments where silence is a priority. With the GeeekPi Cluster Case, you can enjoy the benefits of powerful computing without having to worry about excessive heat or noise. Its compact size and easy installation make it a great choice for anyone looking to build a Raspberry Pi cluster.

    So, if you’re looking for a high-quality case that offers superior cooling and noise reduction, the GeeekPi Cluster Case is definitely worth considering.

    Robust and Versatile Build

    The GeeekPi Cluster Case is a robust and versatile build that offers a multitude of features and benefits for those looking to create their own cluster or server. The case is made of high-quality acrylic material that not only imparts durability but also allows for easy customization. The design of the case ensures that it can accommodate up to four Raspberry Pi boards, which can be easily screwed into place, providing a secure and stable fit.

    One of the key features of the GeeekPi Cluster Case is its excellent ventilation system, ensuring that the boards are kept cool, even when running demanding applications. Additionally, the case comes with a 120mm fan that can be attached to the top of the case to enhance airflow further. The case also has an easy-to-open top and bottom, making it convenient for users to add or remove boards, as necessary.

    Another significant benefit of the GeeekPi Cluster Case is its unique design. The case is modular, which means that users can configure it in various ways, depending on their needs and preferences. The versatility of the case makes it suitable for a wide range of applications, from creating a home media center to building a high-performance computing cluster.

    In summary, the GeeekPi Cluster Case is a sleek and functional case that offers an ideal solution for those looking to build their own Raspberry Pi cluster or server. Its versatile design, robust build, and excellent ventilation system make it an excellent choice for users who want a reliable and secure home for their Raspberry Pi boards. Overall, the GeeekPi Cluster Case is an excellent investment for anyone seeking to create their own cluster and wants a case that can keep up with demanding applications.

    How to Build Your Cluster Using GeeekPi Case

    If you’re looking to build your own cluster for computing tasks, then the GeeekPi cluster case may be just what you need. This case is designed specifically for building a cluster with up to four Raspberry Pi boards, and comes with everything you need to get started. First, you’ll need to assemble the case by following the instructions provided.

    Once that’s done, you can install your Raspberry Pi boards into the designated slots. Then, you’ll need to connect the boards using a network switch, and configure them to work together using software like Kubernetes or Docker Swarm. With the GeeekPi cluster case, you’ll have a powerful computing cluster that can handle complex tasks in a variety of fields, from web hosting to machine learning.

    Step-by-Step Guide to Building Your Cluster

    If you’re interested in building your own cluster, the GeeekPi Case is a great place to start. This case makes it easy to assemble and organize your cluster, which is particularly important if you’re new to cluster-building. Here’s a step-by-step guide to building your cluster using the GeeekPi Case:

    Get all the necessary parts: In addition to the GeeekPi Case, you’ll need Raspberry Pi boards, a power supply, and cooling fans. You’ll also need microSD cards, Ethernet cables, and a network switch.

    Assemble the case: The GeeekPi Case comes with everything you need to put it together. Follow the instructions carefully to ensure that everything is assembled correctly.

    Install the Raspberry Pi boards: Slide the Raspberry Pi boards into the slots in the GeeekPi Case. Be sure to use a microSD card with each board.

    Connect the power supply: Connect the power supply to the cluster and plug it in. Install the cooling fans: Attach the cooling fans to the case to prevent overheating.

    Connect the Ethernet cables: Connect each Raspberry Pi board to the network switch using Ethernet cables.

    Tips and Tricks for Optimizing Performance

    Building a cluster using the GeeekPi case can significantly improve your system’s performance. Before starting, ensure that you have all the necessary components for your cluster. Once you have the components ready, building the cluster can be straightforward with the GeeekPi case.

    The case has a compact design that facilitates the consolidation of individual components into a cluster. The design also allows for optimized cooling, ensuring that the system remains cool, even under extended periods of usage. Additionally, the case supports easy cable management, which enhances the neatness of the system while increasing airflow, thus further enhancing the cooling effect.

    With all the components correctly installed in the case, your cluster is now ready to take on high-performance tasks, such as data mining, rendering, and even scientific computing. By building your cluster using the GeeekPi case, you’re not only optimizing your system’s performance but also promoting energy efficiency.

    Conclusion

    In conclusion, the GeeekPi Cluster Case is the brainchild of a true geek genius. This clever case is designed to turn your ordinary Raspberry Pi boards into a powerful computing cluster that can tackle any complex task you throw at it. With its compact size and sleek design, the GeeekPi Cluster Case is an excellent addition to any tech enthusiast’s arsenal.

    This case is more than just a container for your Pis; it’s a testament to the endless possibilities of ingenuity and innovation. So why settle for one Raspberry Pi when you can have a cluster of them all working together to achieve greatness? Get your hands on a GeeekPi Cluster Case today and discover the wonders that await!

    Maximize Your Raspberry Pi Cluster with GeeekPi Case

    Looking to maximize the potential of your Raspberry Pi cluster? The GeeekPi case might just be what you need. Made from transparent acrylic, this case allows you to stack up to 4 Raspberry Pi boards vertically, saving precious desk space. Its unique design also features grommets for easy cable management, as well as a switch for powering all boards on and off simultaneously.

    Building your cluster using this case is a breeze – simply start by stacking your boards and securing them with screws provided. There’s no need to worry about overheating either, as the case comes with a fan for efficient cooling. With the GeeekPi case, building a Raspberry Pi cluster has never been easier.

    So why not take your projects to the next level today?

    FAQs

    What is a Geekpi cluster case?
    A Geekpi cluster case is a compact and efficient case designed to house multiple Raspberry Pi clusters and facilitate their interconnectedness.

    What are the advantages of using a Geekpi cluster case?
    A Geekpi cluster case is an efficient and cost-effective solution that provides storage space for multiple Raspberry Pi boards and helps users to build a cluster of these boards. It also provides effective cooling and power management, hence extending the lifespan of the Raspberry Pi boards.

    Can I use other single-board computers with the Geekpi cluster case?
    Yes, the Geekpi cluster case is compatible with other single-board computers like the Banana Pi, Orange Pi, and NanoPi.

    What are the dimensions of the Geekpi cluster case?
    The Geekpi cluster case has dimensions of 185mm x 130mm x 90mm, with a weight of 0.65Kg. Its compact size makes it an ideal solution for cluster computing applications requiring high performance and low power consumption.

  • Effortlessly Clone Your SSD: Step-by-Step Guide to Copying Everything from One SSD to Another

    Upgrading your computer’s storage space is essential to ensure smooth performance. However, transferring large amounts of data from one storage device to another can be daunting for some. Have you ever asked yourself, “How can I copy an SSD to another with ease?” Worry not, we’ve got you covered.

    In this step-by-step guide, we’ll explain how to clone an SSD and make the process as simple as possible. We’ll provide analogies and examples to help you understand the technical terms better. So, grab a cup of coffee, sit back, and let’s get started!

    Use an External Drive for Backup

    If you’re looking to copy everything on one SSD to another, one option is to use an external drive for backup. By backing up the contents of your original SSD onto an external hard drive, you can then transfer those files to your new SSD. To do this, connect the external drive to your computer, open your backup software, and select the option to create a backup of your SSD.

    This will usually involve selecting the SSD as the source and the external drive as the destination. Once the backup is complete, you can then swap out the original SSD and insert the new one. With the external drive still connected, restore the backup you created earlier onto the new SSD.

    This process may take some time depending on the size of the backup, but it should result in an exact replica of your original SSD on the new drive. Overall, using an external drive for backup is a safe and convenient way to copy everything from one SSD to another.

    Connect the SSD and the External Drive

    Connecting an SSD and an external drive is essential for backing up your important data and ensuring it stays safe. Using an external drive for backup allows you to have an additional storage solution that is not connected to your computer. This way, you can have a backup that is not vulnerable to malware, ransomware, or other security threats that could potentially affect your device.

    To connect the SSD and external drive, you can use a USB cable or any other compatible cables that might be needed for your specific devices. Simply connect one end of the cable to the external drive and the other end to the USB port on your computer. Once connected, you can simply drag and drop files from your SSD to the external drive to create an easy-to-access backup.

    Keep in mind that it’s essential to regularly backup your data to ensure your files remain secure and easily accessible, even if your device malfunctions or gets lost.

    how do i copy everything on one ssd to another

    Clone the SSD to the External Drive

    Using an external drive for backup is an essential practice that should never be overlooked. Cloning your SSD to your external drive can be a lifesaver, especially when it comes to recovering important data in case of any mishap. It is always a good idea to have a backup of your important files and documents to avoid any data loss.

    With the help of software like Carbon Copy Cloner or SuperDuper, you can easily clone your SSD to your external drive. The process is straightforward and can be done in a few simple steps. By doing so, you can have peace of mind knowing that your important files are safe and secure.

    Plus, it is an excellent way to ensure that you don’t lose your data if your primary drive fails. So, don’t take any risks and start backing up your data today!

    Insert the New SSD

    If you’re looking to upgrade your computer’s storage, transferring everything from one SSD to another can seem like a daunting task. However, the process can be made much simpler by following a few key steps. Firstly, make sure you have the new SSD ready to go, and ensure that all necessary drivers are installed.

    Then, you can either use a cloning software such as EaseUS Todo Backup or simply copy and paste all of the files over to the new SSD manually. Once everything has been transferred, it’s time to physically insert the new SSD into your computer. This involves opening up your computer case and locating the SSD slot, which can vary depending on your computer model.

    Once you’ve inserted the new SSD, it’s important to check that it’s working properly in your computer’s BIOS settings. With these steps completed, you’ll be able to enjoy your new, upgraded storage space with confidence.

    Connect the New SSD

    To begin with, connecting the new SSD is a crucial step in upgrading your computer’s storage to improve its speed and performance. Inserting a new SSD may sound daunting, but it is a relatively simple process. Firstly, shut down your computer and unplug it from any power sources.

    Next, locate the hard drive bay and unscrew it using the necessary tools. Carefully remove the old hard drive and replace it with the new SSD. Make sure to securely fasten the SSD and reconnect any cables that were previously attached to the old hard drive.

    Finally, screw the bay cover back on and plug in the computer. Voila! You have successfully connected the new SSD, but remember to install the necessary drivers and migrate your data to the new drive for a seamless transition. Overall, connecting a new SSD is a straightforward process that can drastically improve your computer’s speed and performance.

    Use a Cloning Tool

    When upgrading to a new SSD, it’s important to properly transfer all of your data from the old drive. One way to do this is by using a cloning tool. This software will create an exact copy of your old SSD onto the new one, preserving all of your files, programs, and settings.

    Not only does this save you the hassle of having to reinstall everything manually, but it also ensures that everything on your computer will continue to work seamlessly. Once you have the cloning tool installed on your computer, it’s a simple matter of following the instructions to transfer the data. Having a new and faster SSD can greatly improve the speed and performance of your computer, so don’t hesitate to try this method if you’re looking to upgrade.

    With a few simple steps, you can have your new SSD up and running in no time.

    Check Your Cloned Data

    If you’ve bought a new SSD and want to copy everything on your old one to the new drive, the first thing you should do is check your cloned data. Before you start the cloning process, make sure you have a backup of all your important files, just in case. Once you’ve created the backup, use a reliable cloning software to copy all your data from the old SSD to the new one.

    There are a number of free and paid software options available online, so choose one that suits your needs and follow the instructions carefully. After the cloning process is complete, it’s crucial to check your cloned data for accuracy. Verify that all your files and folders have been transferred over and that there are no errors or formatting issues.

    Regularly backing up your files and monitoring your cloned data ensures that you won’t lose any important information during the transfer process. By doing so, you can be confident that your new SSD will have all the same files and settings as your original drive.

    Boot Your Computer from the New SSD

    Now that you have successfully cloned your old hard drive onto the new SSD, it’s time to check whether the cloned data is accurate and complete. Before you start using the new SSD as your primary storage device, it’s crucial to verify if everything has been transferred successfully to avoid any data loss. Start by checking whether the primary partitions, your operating system, and all your data are present and accessible from the SSD.

    In case you have any software or programs installed, you must ensure they still function correctly after the cloning process. If you encounter any issues, you should troubleshoot or reclone the data to ensure your new SSD performs as well as possible. Additionally, ensure that all your drivers and firmware are updated to maximize performance.

    By carefully verifying the data on your new SSD, you can eliminate any mistakes and set up a fast and reliable new storage drive for your computer.

    Check Your Files and Folders

    When you clone data from one device to another, it’s important to double-check your files and folders for accuracy and completeness. It’s not uncommon for files to get left behind or for errors to occur during the transfer process, so taking the time to review your cloned data is a crucial step in ensuring you have everything you need. Start by comparing your original files to those on your new device, looking for any discrepancies or missing information.

    You can use a file comparison tool to make this process easier and more efficient. Once you’ve verified the accuracy of your data, consider creating backups or additional copies to protect against future data loss. Remember, a little extra effort now can save you a lot of trouble down the line, so take the time to check your cloned data thoroughly.

    Final Steps

    If you’ve recently upgraded your SSD or you just want to clone everything onto a new one, there are a few steps you need to take to ensure that everything gets copied over properly. First, make sure you have enough space on your new SSD to accommodate all the data from your old one. You can do this by checking the capacity of your old SSD and making sure the new one is equal to or larger.

    Next, you will need to download software that will help you clone your old SSD onto the new one. Some popular programs include Clonezilla, Acronis True Image, and EaseUS Todo Backup. Once you have the software, simply follow the prompts and allow the program to do its thing.

    When it’s done, shut down your computer, remove the old SSD, and insert the new one. Turn your computer back on, and everything should look and feel just the same as it did before – but faster, since you’re using a new and improved SSD.

    Disconnect the External Drive

    Before simply unplugging the external hard drive from your computer, make sure to disconnect it first. This step helps prevent any chance of data loss or corruption since the drive may still be in use. It’s crucial to follow this precaution, especially when transferring or moving large files.

    To avoid any complications, simply locate the eject button and disconnect the drive safely. This process may take a few seconds, but it ensures that your hard drive has been removed from your computer properly. Remember, it’s crucial to exercise caution when handling any external device to ensure that your files remain safe and secure.

    By doing this, you can avoid the potential for any data loss or corruption, and you’ll be able to use your external hard drive for years to come.

    Conclusion

    Well, my dear friend, copying everything on one SSD to another is not rocket science. It’s a simple process that can be accomplished with the right tools and a little bit of patience. Whether you’re upgrading your computer or just looking to back up your important data, transferring files from one SSD to another can be a breeze.

    So, don’t stress yourself out over it. Just gather your tools, follow the steps, and in no time, you’ll be on your way with a new and improved SSD at your disposal.”

    FAQs

    What is the process to copy data from one SSD to another?
    There are several ways to copy data from one SSD to another. You can use software like EaseUS Todo Backup, Acronis True Image, or CloneZilla to clone the entire drive to another SSD.

    Can I copy only a certain folder or file to another SSD?
    Yes, you can copy a certain folder or file from one SSD to another by simply copying and pasting it or by using the drag and drop method. Alternatively, you can use file sync software like FreeFileSync or SyncBackFree to synchronize specific folders between two SSDs.

    How long does it take to copy everything from one SSD to another?
    The duration of copying everything from one SSD to another depends on several factors such as the size of the SSD, the amount of data to be copied, the method used for copying, and the speed of the SSD. On average, it can take anywhere from a few minutes to several hours to copy everything from one SSD to another.

    Can I copy a bootable SSD to another SSD?
    Yes, you can copy a bootable SSD to another SSD by creating a disk image file of the original SSD and then restoring it to the new SSD using software like AOMEI Backupper or Macrium Reflect. Make sure that the new SSD has the same or larger capacity as the original SSD.

    Do I need to format the new SSD before copying everything to it?
    If the new SSD is brand new, then you need to format it before copying everything to it. However, if the new SSD already has data on it, you need to make sure that you back up or transfer the existing data before formatting it.

  • Step-by-Step Guide to Swapping SSD on AcePC: Upgrade Your System in No Time!

    If you’re looking to upgrade the storage capacity of your ACEPC, swapping the SSD could be a great option. By doing this, you’ll also be able to improve the overall performance of your device. However, you might be wondering about the process involved in swapping an SSD in ACEPC.

    Don’t worry – we’ve got you covered! In this article, we’ll take a look at the steps involved in swapping an SSD in ACEPC. We’ll provide you with all the information you need to make the process as smooth and hassle-free as possible. So, let’s get started and dive into the world of SSD swapping for ACEPC!

    Prepare for the Swap

    If you’re looking to upgrade your Acepc mini PC’s storage, you’ll need to swap out the existing SSD. The first thing you should do is ensure you have the correct replacement SSD that’s compatible with your Acepc model. Once you have the new SSD, you’ll need to turn off your mini PC and unplug any cables attached to it.

    Then, unscrew the back panel and locate the existing SSD. Carefully remove it from its slot and replace it with the new SSD, making sure it’s securely in place. After reattaching the back panel and plugging in all the cables, you can turn on your mini PC and enjoy the increased storage capacity.

    Remember to back up your important data before making any hardware changes, just to be safe. With these simple steps, you’ll be able to upgrade your Acepc mini PC’s storage in no time!

    Backup Data

    Backing up your data is crucial before initiating a swap. This critical step ensures that all your valuable information will not be lost during the process. There are a variety of ways to backup your data, from using an external hard drive, online cloud storage, or even USB drives.

    Take the time to assess which method will work best for your needs. It is essential to back up data regularly to ensure that you have the most up-to-date information, ensuring that what you’ll be swapping will be the most accurate version. Don’t risk losing vital information, take the precautionary step to safeguard your data and ensure a seamless transition.

    Remember, it only takes one missed step to lose everything, so invest in backing up your data to avoid any significant problems and enjoy peace of mind.

    acepc how to swap ssd

    Power Off and Disconnect Cables

    Preparing for a hardware swap requires a few steps to ensure everything goes smoothly. First and foremost, it’s crucial to power off your device and disconnect all cables to avoid any risk of electric shock or damage. If you’re swapping a desktop computer or laptop, unplug the power cord from the outlet and remove the battery if possible.

    For servers or network equipment, turn off the power supply and detach all cables, including Ethernet, power, and peripherals. Once you’ve taken these steps, you can safely proceed with the hardware swap. Remember to handle all components with care and keep them free from static electricity.

    Taking these precautions will minimize the chances of technical issues and ensure a seamless transition to the new hardware.

    Get Replacement SSD

    If you’re looking to upgrade your computer’s storage capabilities, then getting a replacement SSD is a great option. However, before you make the swap, it’s important to prepare yourself and your system to ensure a smooth transition. First, make sure you have all the necessary tools and equipment, such as screwdrivers and SATA cables.

    Then, back up all of your important files and data in case there are any unforeseen issues during the process. Additionally, it’s a good idea to check the manufacturer’s website for any firmware updates or compatibility issues with your current system. By taking these steps, you can ensure a safe and successful SSD replacement that will boost your system’s performance and capabilities.

    Swap SSD

    If you’re looking to customize your ACEPC computer, swapping out the SSD is a great option. It provides more space for your files and can improve overall performance. The first step is to remove the cover on the bottom of the device.

    This can usually be done by removing a few screws. Once the cover is removed, locate the SSD and disconnect it from the device. You may need to unscrew it from its mount first.

    Once the old SSD is removed, you can insert the new one and fasten it in place. Finally, connect the new SSD to the device and replace the cover. It’s important to note that you should back up your data before attempting any hardware changes.

    With a little bit of technical know-how, swapping out the SSD on your ACEPC can be a great way to customize your computer.

    Remove Old SSD

    If you want to upgrade your computer’s hard drive storage, one option is to swap out your old SSD for a new one. However, before you can install your new SSD, you need to remove the old one safely. First, shut down your computer and unplug it from the power source.

    Then, locate the existing SSD inside your computer and disconnect all the cables attached to it. Depending on your computer’s design, you may need to remove screws or fasteners to get to the SSD. Carefully remove the old SSD and set it aside.

    Keep in mind that SSDs are delicate and sensitive to static electricity, so handle them with care. Once you’ve removed the old SSD, you’re ready to install your new one and enjoy increased storage capacity and faster speeds.

    Install Replacement SSD

    If you’re looking to upgrade your computer’s storage space and speed, swapping out your old SSD for a new one can provide a significant boost to your system’s performance. Installing a replacement SSD may seem daunting, but with some basic knowledge and the right tools, it’s a relatively straightforward process. First, make sure to back up all of your important data to an external drive or cloud storage.

    Then, shut down your computer and unplug all cables. Next, remove the back panel or casing to access the internal components of your computer. Locate the old SSD and carefully detach it from the motherboard.

    Insert your new SSD and securely fasten any screws or brackets. Finally, reattach the back panel or casing and reconnect all cables. Power up your computer and make sure the new SSD is recognized.

    With a few simple steps, you can enjoy the benefits of a faster and more spacious system.

    Reassemble ACEPC

    If you’re looking to swap out the SSD in your ACEPC, it’s actually a pretty straightforward process. First, you’ll need to gather your tools – a screwdriver and an external caddy for the old SSD. After shutting down and unplugging your ACEPC, remove the bottom panel and locate the existing SSD.

    Carefully unscrew and disconnect the old SSD, being mindful of any clips or cables. Once it’s completely removed, you can install the new SSD in its place and reattach any screws clips or cables. Place the old SSD into the external caddy for safekeeping or disposal.

    Finally, replace the bottom panel and power on your ACEPC to make sure it’s working properly. With a little bit of patience and the right tools, you can easily swap out an old SSD for a new one in your ACEPC.

    Reconnect Cables and Power On

    After completing any necessary upgrades or repairs to your ACEPC, it’s time to reassemble it. First, make sure all cables are correctly plugged back in, including any peripherals, such as a keyboard or mouse. Once everything is connected, it’s time to power on your ACEPC again.

    Don’t forget to turn on your monitor and any other devices that may need to be powered on. The process of reassembling your ACEPC can feel daunting, but with a little patience and attention to detail, it will be up and running again in no time. Remember to be gentle with your device and take your time to avoid any mistakes.

    By following these steps, you’ll have a fully operational ACEPC in no time.

    Restore Data from Backup

    To reassemble ACEPC after a malfunction, it’s important to restore data from your backup. This will make sure that all of your files and settings are the way they were before the issue occurred. Start by locating your backup and following the instructions for restoring the data.

    Once the data is restored, you can begin reassembling ACEPC. Begin by checking all of the cables and connections to ensure they’re secure and in the proper place. Verify that all of the components are in working order and not damaged.

    If any parts need to be replaced, do so before continuing. Finally, power on the device and test it thoroughly to make sure all of the components are working correctly. By following these steps, you can easily reassemble ACEPC and get it running like-new once again.

    Final Thoughts

    In conclusion, swapping the SSD on an ACEPC mini PC is a relatively easy process if you follow the necessary steps. Make sure to back up all your important data before you begin. Acquire the appropriate tools and use caution when opening up the device and removing the old SSD.

    Once you have installed the new SSD, remember to reattach all cables and screws properly. Finally, power on the device and reinstall your operating system and all necessary files. With a little bit of patience and attention to detail, you can seamlessly upgrade your ACEPC mini PC’s storage and enjoy a faster, more efficient computing experience.

    And don’t forget, if you have any issues or concerns during the process, you can always consult the manufacturer’s support resources or seek advice from the online ACEPC community.

    Conclusion

    In conclusion, swapping out the SSD in your AcePC is as easy as swapping out a lightbulb! With a few simple steps, you can upgrade your system’s performance and storage capacity in no time. So why settle for a dimly lit computer when you can shine bright like a diamond with a shiny new SSD? Don’t wait, swap it out and join the SSD revolution today!”

    FAQs

    How do I swap the SSD on my ACEPC computer?
    To swap the SSD on your ACEPC computer, first shut down and unplug the device. Remove the screws on the bottom panel and carefully lift it up to access the current SSD. Unscrew the SSD and gently remove it from its slot. Insert your new SSD and screw it into place before reattaching the bottom panel.

    What size SSD should I use for my ACEPC computer?
    The size of the SSD you can use for your ACEPC computer will depend on the specific model you have. Some may have an M.2 slot that supports different sizes of SSDs, while others may require a specific size. Check your computer’s specifications or manual to ensure compatibility.

    Is it easy to upgrade the SSD on an ACEPC computer?
    Depending on the model of your ACEPC computer, upgrading the SSD can range from easy to moderately difficult. If your computer has a removable bottom panel and easily accessible SSD slot, it should be a simple process. However, if the SSD is built-in or hidden under other components, it may require more technical skills and tools.

    Can I clone my current SSD to a new one for my ACEPC computer?
    Yes, you can clone your current SSD to a new one for your ACEPC computer using a data migration software such as EaseUS Todo Backup, Macrium Reflect, or AOMEI Backupper. These tools can make an identical copy of the contents of your existing SSD, including your operating system, files, and settings, to the new SSD.

  • Maximizing Your Crucial SSD Performance: A Step-by-Step Guide on Turning On TRIM

    Have you noticed that your Crucial SSD is running slower than usual? If you’re using an older model, it may not be optimized for the TRIM function, which can result in slower performance over time. But the good news is that enabling TRIM on your Crucial SSD is a relatively simple process. By allowing the drive to communicate with your operating system and optimize its storage space, TRIM can help improve the speed and longevity of your SSD.

    In this blog post, we’ll dive into the world of TRIM and guide you through the process of enabling it on your Crucial SSD. So, buckle up and get ready to give your computer a boost!

    What is TRIM?

    If you’re using a Crucial SSD, you may want to know how to turn TRIM on for optimal performance. But what exactly is TRIM? In short, it’s a command that helps maintain the speed and longevity of SSDs. When you delete a file on a traditional hard drive, the operating system simply marks the space as available, but the data is still physically there until something overwrites it.

    This can lead to slower read/write speeds over time. TRIM, on the other hand, informs the SSD which blocks of data are no longer in use and can be wiped, making space for new data. Enabling TRIM can improve your Crucial SSD’s performance and lifespan, so it’s recommended that you enable it.

    The process for turning TRIM on is simple, but will vary depending on your operating system. For example, on Windows, you can open the Command Prompt and enter “fsutil behavior set disabledeletenotify 0” to turn TRIM on.

    Definition and Importance

    TRIM is a term used to refer to the process of managing and optimizing storage performance in solid-state drives (SSDs). It helps to improve the speed and longevity of SSDs by making it easier for the drive to find and use data. Without TRIM, SSDs can become quite slow over time as they struggle to locate and organize all the data stored within them.

    This can lead to decreased performance and a shorter lifespan for the SSD. With TRIM, however, the SSD is able to run much more efficiently, allowing it to maintain its speed and responsiveness over time. Overall, TRIM is an essential tool for anyone looking to get the most out of their SSD and ensure that it lasts for as long as possible.

    crucial ssd how to turn trim on

    Checking for TRIM Support on Your Crucial SSD

    If you have a Crucial SSD, you may be wondering how to turn on TRIM support. TRIM is important for keeping your SSD running smoothly and avoiding performance degradation over time. The good news is that most modern Crucial SSDs come with TRIM support already enabled by default.

    However, it’s still a good idea to double-check and make sure it’s turned on. To do so, you’ll need to access your computer’s device manager and locate the SSD under the “Disk drives” category. From there, right-click on the drive and select “Properties.

    ” Next, click on the “Policies” tab and make sure that “Enable write caching on the device” and “Turn off Windows write-cache buffer flushing” are both unchecked. This will ensure that TRIM is enabled and doing its job to keep your Crucial SSD running at its best.

    Step-by-Step Guide

    If you’ve recently installed a Crucial SSD, you might be wondering whether it supports TRIM. TRIM is a command that helps an SSD maintain its performance over time by allowing the drive to clean up and organize unused data blocks. Checking for TRIM support on your Crucial SSD is quite easy.

    The first step is to open the Windows Device Manager and locate your SSD. Then, right-click on the SSD and select “Properties.” Next, go to the “Details” tab and select “Device instance path” from the drop-down menu.

    You should see the letters “TRIM” somewhere in the string of characters that appear in the value box. If you can see “TRIM” in the value box, it means that TRIM is supported on your Crucial SSD, and you can optimize it for better performance.

    Enabling TRIM on Your Crucial SSD

    If you’re using a Crucial SSD, you might want to enable TRIM to ensure optimal performance. TRIM is an essential maintenance command that helps prolong the lifespan of your SSD. By default, Crucial SSDs have TRIM support, but you might need to enable it manually if it’s not activated on your computer.

    The process of enabling TRIM on your Crucial SSD is pretty straightforward. The first step is to make sure that your operating system supports TRIM. If you’re using Windows 10, 8, or 7, TRIM is already supported.

    However, if you have an older version of Windows or a different operating system, you might need to check for compatibility. Once you’ve confirmed that your operating system supports TRIM, the next step is to enable it on your SSD. One way to do this is to use an application provided by Crucial called the Storage Executive.

    This software has a user-friendly interface that allows you to check your SSD’s health, temperature, and capacity. You can also enable TRIM from the Storage Executive by selecting the SSD and clicking on the “Momentum Cache” option. From there, you can toggle the TRIM option on and off.

    Another way to enable TRIM on your Crucial SSD is through the command prompt. This method is more technical and requires some basic knowledge of command-line interfaces. To enable TRIM through Command Prompt, you need to open the command prompt as an administrator, type “fsutil behavior set disabledeletenotify 0,” and hit enter.

    This command enables TRIM on your SSD. In conclusion, enabling TRIM on your Crucial SSD is essential for ensuring optimal performance and longevity. With the Storage Executive or Command Prompt, you can enable TRIM easily and effectively.

    Step-by-Step Guide

    Enabling TRIM on an SSD can significantly improve its overall performance, as it effectively helps free up unused memory blocks. This is especially important for Crucial SSDs, which are reliable and efficient storage devices that can last for years. Enabling TRIM is a simple process that can be done in a few easy steps.

    First, you will need to ensure that your operating system supports TRIM. Most modern operating systems do, but you can check by opening up the command prompt and typing “fsutil behavior query disabledeletenotify”. Then, you will need to enable TRIM on your SSD by opening up the Command Prompt as an administrator and typing “fsutil behavior set disabledeletenotify 0”.

    With TRIM enabled, your Crucial SSD will be able to clean up unused memory blocks more efficiently, resulting in a faster and smoother user experience.

    Using Windows Command Prompt

    Enabling TRIM on your Crucial SSD is essential to ensure the longevity and performance of your solid-state drive. TRIM is a command that allows the operating system to inform the SSD which blocks of data are no longer in use, thus allowing the SSD to erase them and free up space for new data. By enabling TRIM, you can prevent the SSD from slowing down over time and increase its lifespan.

    To enable TRIM on your Crucial SSD, you can use the Windows Command Prompt. First, open the Command Prompt by pressing the Windows key + R and typing “cmd” in the Run box. Then, type “fsutil behavior query DisableDeleteNotify” and press Enter.

    If the result is “DisableDeleteNotify = 0”, TRIM is already enabled on your SSD. If the result is “DisableDeleteNotify = 1”, TRIM is disabled on your SSD. To enable it, type “fsutil behavior set DisableDeleteNotify 0” and press Enter.

    You should receive a message stating: “The operation completed successfully.” It’s important to note that not all SSDs support TRIM, so it’s best to check with the manufacturer first. Additionally, enabling TRIM may reduce the lifespan of some older SSDs, so it’s recommended to only enable it on newer models.

    With TRIM enabled, you can ensure the optimal performance and longevity of your Crucial SSD.

    Using Third-Party Software

    If you’re looking to extend the lifespan of your SSD and improve its overall performance, enabling TRIM is a must. This feature helps your drive maintain its speed by efficiently managing unused data blocks. While some operating systems from Microsoft and Apple enable TRIM by default, others do not, which is where third-party software comes in.

    One such software is Crucial’s Storage Executive, which allows you to easily enable and schedule TRIM commands. Plus, it comes with other features like firmware updates and drive health monitoring. By activating TRIM, you’ll notice faster boot times, quicker app launches, and improved file transfer speeds.

    So, if you haven’t enabled TRIM on your Crucial SSD yet, give it a try and see the difference for yourself.

    Conclusion and Final Thoughts

    And with that, we come to the end of our journey on how to turn TRIM on to maximize the performance and longevity of your crucial SSD. Remember, TRIM is like a personal trainer for your SSD, helping it stay lean and efficient even with constant use. So, don’t forget to turn it on and give your SSD the love and care it deserves – After all, a happy SSD means a happy user!

    FAQs

    What is a crucial SSD and how does it differ from a regular hard drive?
    A crucial SSD is a solid-state drive that uses flash memory instead of traditional spinning disks to store data. This results in faster read/write times and higher reliability compared to regular hard drives.

    How do I turn on TRIM for my crucial SSD?
    To enable TRIM on a crucial SSD, you need to ensure that your operating system and motherboard support it. Once confirmed, you can turn on TRIM in your operating system settings or use a third-party tool to do so.

    Why is TRIM important for my crucial SSD?
    TRIM is important for a crucial SSD because it helps to maintain the drive’s performance and prolong its lifespan. Without TRIM, the drive can suffer from performance degradation and reduced longevity over time.

    Can I upgrade my existing hard drive to a crucial SSD?
    Yes, you can upgrade your existing hard drive to a crucial SSD as long as your computer supports it. You will need to clone your existing hard drive onto the SSD using a cloning tool or perform a fresh installation of your operating system onto the new drive.

  • Unlock Peak Performance with the Revolutionary Thermal Conductive Pad: Your Ultimate Solution!

    If you’ve ever worked on electronics projects, you’ve probably heard of thermal conductive pads. These small but mighty components play a critical role in keeping your devices cool and functioning properly. But what exactly are they, and why are they so important? Think of thermal conductive pads like the cooling system in your car.

    Just as your car needs a way to dissipate heat from the engine, your electronic devices need a way to release excess heat that can damage components or even cause a fire. Thermal conductive pads provide a direct heat transfer path between components and heat sinks, helping to keep temperatures regulated and prevent overheating. But not all thermal conductive pads are created equal.

    Some are made from silicone, others from graphite, and still others from ceramic materials. Each type has its own unique properties and benefits, making it important to choose the right type for your specific application. Whether you’re a DIY electronics enthusiast or a professional in the field, understanding the basics of thermal conductive pads is crucial for keeping your devices working smoothly.

    In this blog, we’ll dive deeper into what you need to know about thermal conductive pads, including how they work, the different types available, and tips for choosing the right one for your project. So buckle up and let’s get started!

    What is a Thermal Conductive Pad?

    If you’ve never heard of a thermal conductive pad before, you might be wondering what it is and what it’s used for. Simply put, a thermal conductive pad is a thin layer of material that helps transfer heat between two surfaces that are in contact with each other. These pads are typically made of a silicone-based or ceramic-based material that is highly heat-conductive, allowing them to absorb and distribute heat efficiently.

    Thermal conductive pads are commonly used in electronic devices, such as computers and smartphones, to help dissipate heat generated by the components inside. They can also be used in other applications where heat transfer is important, such as in the automotive and aerospace industries. Overall, thermal conductive pads are an important component in many modern technologies, helping to keep our devices cool and running smoothly.

    Definition and Benefits

    A thermal conductive pad, also known as a heat sink pad, is a material used to transfer heat generated by electronic components to a heat sink or a cooling system. Made from a variety of materials, including graphite, silicone, and ceramic, thermal conductive pads provide a low thermal resistance path for heat dissipation. These pads are commonly used in electronic devices, such as laptops, smartphones, and LED lights, to ensure that the components do not overheat and malfunction.

    One of the key benefits of using a thermal conductive pad is that it improves the overall performance and reliability of electronic devices. When electronic components generate heat, it can cause them to slow down or even release erratic signals, negatively impacting the device’s performance. By using a thermal conductive pad, the heat generated by these components is dissipated faster, preventing any overheating issues and improving the device’s overall performance.

    Additionally, thermal conductive pads are easy to install and offer a cost-effective solution for thermal management. In summary, a thermal conductive pad is a simple yet essential component for maintaining the proper functionality of electronic devices. By providing a low thermal resistance path for heat dissipation, these pads ensure that the components do not overheat, improve the overall device performance, and are a cost-effective and easy-to-install solution for thermal management.

    thermal conductive pad

    Types of Thermal Conductive Pads

    A thermal conductive pad, also known as a thermal pad, is a type of material used to minimize heat buildup in electronic devices. These pads serve as a connection between a heat source and a heat sink, allowing heat to flow freely between the two components. Thermal conductive pads are available in various materials, including silicone, graphite, and ceramic.

    Silicone pads are the most common and affordable, while graphite and ceramic pads provide better performance but come at a higher cost. Additionally, thermal pads can be either pre-cut or in rolls, depending on the application. With the rise of electronics development, selecting the right type of thermal conductive pad is crucial for optimum performance and durability.

    So, it is essential to consider the device’s specific requirements and environment before choosing the appropriate thermal conductive pad.

    How to Choose the Right Thermal Conductive Pad

    Thermal conductive pads play a crucial role in dissipating heat away from electronic components to prevent damage and ensure optimal performance. When choosing the right thermal conductive pad, there are a few key factors to consider. Firstly, it’s important to match the thermal conductivity of the pad to the specific application and the generated heat of the component it will be used for.

    Additionally, the size and thickness of the pad should be chosen to fit the surface area of the component. It’s also essential to consider the adhesive properties of the pad and whether it has the right durability and flexibility to withstand the intended usage. Ultimately, selecting the right thermal conductive pad can enhance the lifespan of electronic components and improve overall system performance.

    Factors to Consider

    When it comes to choosing the right thermal conductive pad, there are several factors that you should consider. Firstly, you need to look at the thermal conductivity of the pad. This will determine how well heat is transferred from one component to another.

    The higher the thermal conductivity, the better the heat transfer. Secondly, you need to consider the thickness of the pad. This will determine how much pressure is required to achieve optimum performance.

    A thicker pad will require more pressure, but it will also provide greater insulation. Thirdly, you need to look at the adhesive used on the pad. The adhesive needs to be strong enough to hold the pad in place, but it also needs to be easy to remove when necessary.

    Lastly, you need to consider the size of the pad. The size of the pad should be in proportion to the size of the components being cooled. By taking these factors into consideration, you can ensure that you choose the right thermal conductive pad for your needs.

    Examples of Applications

    When it comes to choosing the right thermal conductive pad, there are several factors to consider. One important factor is the application in which it will be used. Thermal conductive pads are commonly used in electronic devices such as computers, smartphones, and tablets, as well as in automotive and aerospace industries for heat dissipation.

    For example, in a computer, thermal conductive pads are used to transfer heat from the processor to the heat sink, preventing the processor from overheating and reducing the risk of damage. In the automotive industry, thermal conductive pads are used to transfer heat away from engine components, preventing them from malfunctioning due to excessive heat. When choosing a thermal conductive pad, it’s important to consider the specific application and its requirements, such as the desired thermal conductivity, thickness, and shape.

    By selecting the appropriate thermal conductive pad for your application, you can ensure optimum heat dissipation and protect your devices from damage.

    Comparing Thermal Conductive Pad vs Other Solutions

    When it comes to thermal management, choosing the right solution can be challenging. A key component in this process is selecting the right thermal conductive pad. One of the biggest advantages of using a thermal conductive pad is their ease of use and application as they require no additional hardware or assembly.

    Additionally, they offer high thermal conductivity and can accommodate uneven surfaces. Comparing them to other options like thermal grease or adhesive tapes, thermal conductive pads stand out as they do not require curing time, which can delay production. When choosing the right thermal conductive pad, consider factors such as the thermal conductivity rating, thickness, and size to ensure optimal performance.

    Lastly, be sure to choose a pad that is compatible with your specific application and has the necessary certifications for safety and quality assurance. Keep these considerations in mind to make an informed decision and optimize your thermal management solution.

    How to Install a Thermal Conductive Pad

    If you’re wondering how to install a thermal conductive pad, you’ve come to the right place! First, it’s important to understand the purpose of a thermal conductive pad – it’s designed to efficiently transfer heat from one surface to another, typically from a heat-generating component to a heat sink. To install a thermal conductive pad, make sure your surfaces are clean and dry. Cut the pad to the appropriate size, or use pre-cut pads if available.

    Peel off the protective backing and carefully align the pad with the component or heat sink. Press down firmly to ensure good contact. Some pads may require additional mounting hardware, so check the instructions carefully.

    When installed correctly, a thermal conductive pad can help improve heat dissipation and extend the life of your components. So if you’re experiencing thermal issues, consider giving one a try!

    Step-by-Step Guide

    Installing a thermal conductive pad involves a few simple steps that can be completed with basic tools and a little bit of patience. The first step is to clean the surface of the area where the pad will be installed to ensure that there is no dust or debris that could interfere with the transfer of heat. Once the surface is clean and dry, the next step is to carefully remove the protective backing from the pad, being careful not to damage the pad itself.

    It’s important to handle the pad gently to avoid any bending or tearing that could affect its effectiveness. The next step is to carefully align the pad with the surface, making sure that it is centered and covers the entire area that needs to be covered. Finally, gently press the pad down onto the surface, applying even pressure to ensure that it adheres properly.

    With these simple steps, you can install a thermal conductive pad with ease and enjoy improved heat transfer and cooling performance.

    Common Mistakes to Avoid

    Installing a thermal conductive pad is a necessary task for many electronic devices, but there are common mistakes to avoid to ensure its proper installation. One of the most important factors to consider is choosing the right size and shape of the pad. It should be the same size as the electronic component, and it should cover the majority of its surface area for efficient heat transfer.

    Another common mistake is not cleaning the surface before installation. Dust, oil, or any debris can affect the conductivity of the pad. Using a thermal adhesive tape instead of a thermal paste can also be a mistake.

    Thermal paste creates better contact and conductivity between the components. Finally, it is crucial to avoid over-applying pressure during installation, as this can damage the components or even break them. Ensuring a clean surface, using the correct size and shape of the pad, creating proper contact through thermal paste, and careful pressure control can guarantee safe and efficient installation, extending the life of the device.

    Where to Buy High-Quality Thermal Conductive Pads

    If you’re looking for high-quality thermal conductive pads, you might find yourself overwhelmed by the number of choices available. Fortunately, there are some key factors you can look for to ensure you’re getting a product that will meet your needs. One important consideration is the material the pad is made from.

    Good quality thermal conductive pads are usually made from materials like silicone or ceramic, which are both effective at transferring heat. You should also consider the thickness of the pad, as well as its overall size and shape, to ensure that it will fit your specific application. Finally, it’s a good idea to do some research on the manufacturer you’re considering buying from, to ensure that they have a reputation for producing reliable, high-quality products.

    By taking the time to carefully evaluate your options, you can find the ideal thermal conductive pad for your needs and ensure that your electronics stay cool and safe.

    Conclusion

    In closing, a thermal conductive pad is like a superhero cape for electronic devices, keeping them cool in the face of overheating villains like excessive use and high performance demands. It’s a key tool for any tech-savvy superhero, ensuring their gadgets stay in top working condition for all their world-saving needs.”

    FAQs

    What is a thermal conductive pad and what is its purpose?
    A thermal conductive pad is a type of material used to transfer heat between two surfaces. Its purpose is to improve the thermal management of electronic devices, by allowing heat to escape more efficiently.

    How do I choose the right thermal conductive pad for my application?
    The selection of a thermal conductive pad should be based on the target operating temperature, the size of the interface gap, and the mechanical requirements of the electronics system. Conductivity, thickness, and compressibility are also important factors to consider.

    How do I apply a thermal conductive pad to my device?
    First, clean both contact surfaces with alcohol or a similar cleaner to remove any residual oils or debris. Then, place the thermal conductive pad on the surface of one component and press it down until it adheres. Align the second component on top of the pad and fasten the two pieces together with screws, clips, or other hardware.

    How often should I replace the thermal conductive pad in my electronic device?
    The frequency of thermal pad replacement depends on several factors, including the operating temperature of the device, the duration of use, and the mechanical stress to which the pad is subjected. As a general rule, thermal pads should be inspected periodically and replaced if any signs of wear or damage are observed.