Author: David L. Lynn

  • Upgrade Your Computer’s Speed: A Step-by-Step Guide to Installing Samsung SSD 870 EVO!

    Are you looking to upgrade your computer’s storage system? Upgrading to an SSD is a great way to improve your computer’s performance. Samsung’s SSD 870 EVO is one of the best SSDs available right now, offering fast read and write speeds along with high reliability. However, if you’re not familiar with how to install an SSD, it can be a challenging and intimidating task.

    But fear not, installing Samsung SSD 870 EVO is much easier than you might think. In this blog, we’ll guide you through the steps to install your new SSD, and you’ll be up and running in no time. Whether you’re a techie or someone who’s afraid of opening up their computer case, we’ve got you covered.

    So, let’s get started!

    Check compatibility with your system

    If you’re planning to install a Samsung SSD 870 EVO, one of the first things you need to do is check compatibility with your system. Make sure that your computer’s motherboard has SATA III ports that support the SATA 6Gbps interface. This is crucial as the SSD can only perform at its highest potential when connected to a compatible system.

    Make sure to also verify the size of the SSD to ensure that it fits in your computer’s designated storage bay. Once you’ve checked on these factors and confirmed that your PC can accommodate the Samsung SSD 870 EVO, you can proceed with the installation process. Remember to follow the manufacturer’s instructions and handle the SSD carefully to prevent damage.

    With a little bit of patience, you can enjoy the impressive performance boost that this SSD can bring to your system.

    Refer to Samsung’s website for compatibility check tool

    If you are considering purchasing a Samsung product, it is critical to ensure that it is compatible with your system. Thankfully, Samsung has provided a compatibility check tool on its website to make this process simpler for customers. All you have to do is go to the Samsung website and search for the product you want to buy.

    From there, you can click on the “Compatibility” tab, which will take you to a page where you can enter your system’s specifications. This tool will search through the database to determine if the product is compatible with your system or not. This feature saves time and reduces the risk of wasting money on incompatible products.

    Be sure to check compatibility before making any purchases to ensure optimal performance and a seamless user experience.
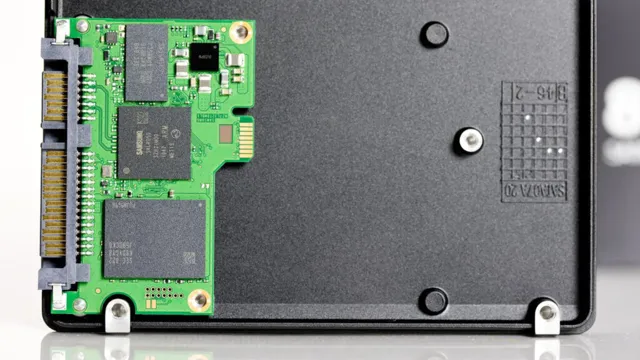
    how to install samsung ssd 870 evo

    Gather necessary materials

    If you’re looking to upgrade your computer’s storage with the Samsung SSD 870 EVO, you’re going to need a few things before you get started. Firstly, make sure you have a screwdriver handy, as you’ll need it to remove any existing hard drives and install the new SSD. You’ll also need the SSD itself, which you can purchase from a variety of retailers online or in-store.

    It’s important to make sure you have the right size and capacity for your needs before you buy it. Finally, you’ll need a SATA cable to connect the SSD to your computer’s motherboard. Once you have all of these materials ready, you can move on to the next step in the process of installing your new Samsung SSD 870 EVO.

    SATA cable, screws and screwdriver, mounting bracket

    Alright, so you’re ready to upgrade your computer’s storage capacity with a new hard drive. Before you dive in, make sure you gather the necessary materials to make the installation process as smooth as possible. You’ll need a SATA cable, screws and a screwdriver, and a mounting bracket.

    The SATA cable connects the hard drive to the motherboard, providing it with power and enabling the transfer of data. The screws and screwdriver secure the hard drive to the bracket or the case, preventing it from shifting or vibrating during operation. The mounting bracket cradles the hard drive and ensures that it fits properly inside the computer case.

    Make sure to select a bracket that’s compatible with the size and type of hard drive you’re installing. With everything on hand, you’ll be well-prepared to tackle the installation process and get your new hard drive up and running in no time.

    Power down and open computer case

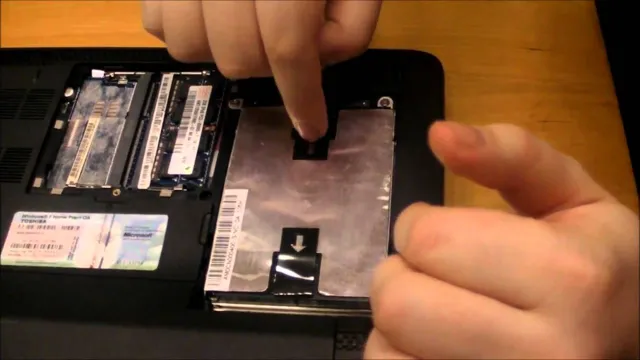
    If you’re planning to upgrade your computer’s storage, installing a Samsung SSD 870 EVO can be a great option. Before you begin, make sure to power down your computer and remove any external cables. Once you’re ready to open the case, locate the screws at the back and use a screwdriver to remove them.

    Then, gently slide off the cover to reveal the interior of the computer. Take care not to touch any exposed components as static electricity can damage them. Once you’re inside, locate the hard drive bay and carefully remove the old hard drive.

    Then, simply insert the Samsung SSD in its place and secure it with screws. Don’t forget to connect the cables to the SSD before closing your computer case. With these simple steps, you can easily install your Samsung SSD 870 EVO and enjoy faster and more reliable storage for your PC.

    Follow manufacturer’s instructions to prevent damage

    When you’re working on your computer, it’s essential to follow the manufacturer’s instructions to avoid damaging your device. One crucial step that can prevent damage is powering down the computer and opening the case. This procedure allows you to access and clean the internal components, such as the CPU, fan, and RAM.

    It’s also helpful if you need to replace a part, add more memory, or install a cooler. Before carrying out this task, make sure you review the instructions from the manufacturer or online forums. These resources provide critical information about safe practices and potential risks, such as electric shock or static discharge.

    Once you’re ready, disconnect any power sources and external devices, remove the screws that secure the case, and gently lift it off. With these precautions, you can protect your computer and enjoy a smoother and more efficient experience.

    Install the SSD

    If you’re looking to upgrade your computer’s storage and speed, the Samsung SSD 870 EVO is a great option to consider. Here’s how to install it: First, power down the computer and unplug it from the wall. Open up the case and locate the SATA ports on the motherboard.

    Find an empty slot and connect the SSD to the power and data cables. Make sure the SSD is secure in the slot before closing up the case and plugging the computer back in. Boot up the computer and go into the BIOS settings to ensure the SSD is recognized as a new drive.

    Once that’s confirmed, you can transfer your files and start enjoying faster speeds and increased storage capacity. Overall, the installation process is fairly simple and straightforward, making the Samsung SSD 870 EVO a solid choice for those looking to boost their computer’s performance.

    Attach mounting bracket, connect SATA cable and power

    To install an SSD, you’ll first need to attach the mounting bracket to your computer’s case. This will give your SSD a secure place to sit and prevent it from moving around. Once the bracket is attached, you’ll need to connect a SATA cable to the SSD and your motherboard.

    This cable will transmit data between your SSD and the rest of your computer. Finally, you’ll need to connect a power cable to your SSD to ensure it has the power it needs to function properly. When selecting a location for your SSD, consider how much airflow the area gets.

    You don’t want it to overheat, so choose a location with good ventilation. With these steps complete, your SSD is now ready to use! By taking the time to properly install your SSD, you’ll enjoy faster load times and a more responsive computer. Don’t forget to take care when handling your SSD, as it’s a delicate piece of equipment.

    With a little care and attention, you can ensure that your SSD functions reliably for years to come.

    Power up and initialize SSD

    If you’re wondering how to install Samsung SSD 870 EVO, it’s a relatively straightforward process. Once you’ve physically installed the SSD into your computer, you’ll need to power it up and initialize the drive. This involves going into your computer’s BIOS settings and making sure the SSD is recognized as a bootable device.

    From there, you can use Samsung’s Data Migration software to transfer your files and operating system from your existing hard drive to the new SSD. It’s important to note that you may need to adjust your computer’s storage settings to take full advantage of the SSD’s speed and performance. With a little bit of patience and know-how, you should be up and running with your new Samsung SSD in no time!

    Access BIOS to detect the new drive and initialize it

    To make full use of your new SSD, the first step is to access BIOS and initialize it. Start by powering on your PC, and then enter BIOS by pressing the designated key before the operating system boots up. This key will vary based on your manufacturer, so consult your manual or search online if you are unsure.

    Once in BIOS, navigate to the storage settings and check if the SSD is detected. If it is not, double-check all power and data connections and try again. Once the SSD is recognized, initialize it by selecting it and choosing the “initialize” option.

    This can take a couple of minutes depending on the size of the drive, but once it is done, your SSD will be ready to use with your operating system. Don’t forget to set the boot order to prioritize the SSD so that your PC will boot up faster than before. Congratulations, you now have a faster and more efficient operating system thanks to your new SSD.

    Configure and optimize the SSD

    If you’re wondering how to install a Samsung SSD 870 EVO, there are a few things you need to know in order to configure and optimize it properly. First, make sure your motherboard supports SATA III connectivity, which is necessary for the fastest transfer speeds. When installing the SSD, use the SATA cable and power cable that came with the drive to ensure compatibility.

    Once your drive is connected, be sure to enable AHCI mode in your system’s BIOS for optimal performance. Additionally, it’s important to update the firmware on your SSD to the latest version, which can improve stability and functionality. Finally, using Samsung’s Magician software can help you optimize your SSD’s performance by tweaking settings such as over-provisioning and rapid mode.

    With these steps, you’ll be able to get the most out of your Samsung SSD 870 EVO and enjoy lightning-fast speeds for years to come.

    Ensure the SSD is set as the boot drive and optimize its settings

    If you’re upgrading to an SSD, it’s important to configure and optimize it properly to make the most out of its lightning-fast speeds. First and foremost, make sure the SSD is set as the boot drive in your computer’s BIOS. This ensures that your operating system and key applications load up quickly.

    Additionally, check your computer’s power settings to make sure it’s not going into sleep mode too quickly, as this can slow down your SSD’s performance. You can also optimize your SSD’s performance by disabling disk defragmentation and disabling indexing. These settings were optimized for traditional spinning drives and can actually hurt the performance of SSDs.

    Finally, consider enabling TRIM support, which helps keep your SSD’s performance consistent over time. Overall, configuring and optimizing your SSD can significantly improve your computer’s performance and give you a lightning-fast computing experience.

    Congratulations!

    Congratulations on your new Samsung SSD 870 EVO! Installing your new SSD can seem daunting, but the good news is that it’s a straightforward process. First, make sure your computer is turned off and unplugged from any power source. Then, locate your computer’s hard drive and remove it from its slot.

    Insert your Samsung SSD 870 EVO into the empty slot and secure it with screws if necessary. Finally, connect the SSD to your computer’s motherboard using a SATA cable and power connector. Once you’ve completed these steps, you can turn your computer back on and start enjoying faster load times and increased storage capacity.

    Remember, if you have any questions or problems, Samsung offers excellent customer support to help you every step of the way. So, don’t hesitate to reach out if you need assistance with your new SSD setup.

    Your Samsung SSD 870 EVO is ready to use

    Samsung SSD 870 EVO Congratulations on your purchase of the Samsung SSD 870 EVO! You’ve made an excellent choice, and you’re now ready to experience lightning-fast data transfer speeds and improved overall performance. This SSD is one of the most advanced on the market, and its latest V-NAND and controller technologies make it faster than previous models and significantly more reliable. With sequential read and write speeds of up to 560MB/s and 530MB/s, respectively, you’ll be able to boot up your computer and access files quicker than ever before.

    The Samsung SSD 870 EVO has a lifespan three times longer than previous models, which means you won’t have to replace it anytime soon. It’s also highly secure, thanks to AES 256-bit encryption, which protects your data from unauthorized access. Another great feature of this SSD is its compatibility with macOS, Windows, and Linux operating systems, making it perfect for people who use multiple platforms.

    Overall, the Samsung SSD 870 EVO is an excellent investment for anyone who wants to improve their computer’s performance and reliability. So, connect the drive to your computer, transfer your files, and enjoy the benefits of lightning-fast data speeds and seamless performance.

    Conclusion

    And there you have it, the installation of the Samsung SSD 870 EVO! It’s faster than a cheetah on roller skates and more reliable than your favorite breakfast spot. So kick back, relax, and watch your computer fly with its newfound upgrade. It may seem daunting at first, but with a little patience and know-how, anyone can install this bad boy.

    Just remember to ground yourself, take your time, and bask in the glory of your upgraded computer. Happy computing, my friends!”

    FAQs

    What is the difference between the Samsung SSD 870 EVO and the 860 EVO?
    The Samsung SSD 870 EVO has a faster read and write speed and a longer warranty period than the 860 EVO.

    Can I install the Samsung SSD 870 EVO on a Macbook Pro?
    Yes, the Samsung SSD 870 EVO is compatible with Macbook Pro and can be used as an internal storage device.

    Is it necessary to clone my old hard drive before installing the Samsung SSD 870 EVO?
    Yes, it is highly recommended to clone your old hard drive’s data to the new Samsung SSD to avoid losing any important files or data.

    What is the maximum storage capacity available for the Samsung SSD 870 EVO?
    The Samsung SSD 870 EVO is available in capacities ranging from 250GB to 4TB.
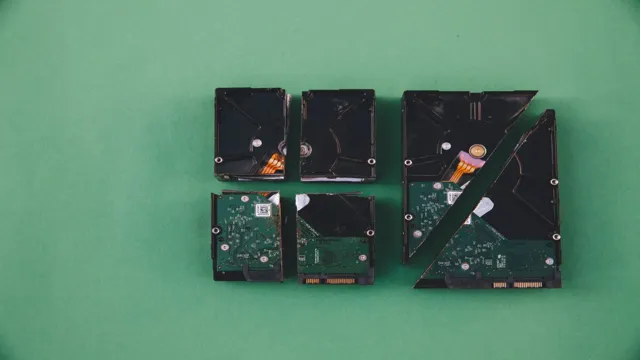
  • Unleashing the Power of Storage: Discover How Much Hard Drive Space 256GB SSD Equals

    If you’re considering upgrading your laptop or desktop computer’s hard drive, you may be wondering whether a 256GB SSD or HDD is the best choice. While both options have their pros and cons, one stands out as the clear winner when it comes to speed and reliability. An HDD, or hard disk drive, is the traditional storage device found in most computers.

    It uses a spinning disk to read and write data, which can lead to slower boot times and file transfers. On the other hand, an SSD, or solid-state drive, uses flash memory to store and retrieve data quickly, resulting in faster performance overall. But it’s not just about speed.

    SSDs are also more durable and less susceptible to damage from drops or impacts. Plus, they use less power and generate less heat, making them a greener and more energy-efficient option. Of course, there are some downsides to consider as well.

    SSDs can be more expensive than HDDs, especially when it comes to higher storage capacities like 256GB. And while data recovery is possible with both types of drives, it can be more difficult and costly with an SSD. So, which one wins? Ultimately, it depends on your needs and budget.

    If speed and reliability are your top priorities and you don’t mind paying a bit more, a 256GB SSD is the way to go. But if you need more storage space at a lower price point, an HDD may be the better choice.

    Capacity Comparison

    If you’re wondering how much storage a 256GB SSD is equal to in HDD terms, the answer can vary depending on the specific model and brand. Generally speaking, a 256GB SSD provides roughly the same amount of storage space as a 500GB or 1TB hard disk drive. However, SSDs tend to be faster and more durable, making them a popular choice for those looking for improved performance and reliability.

    That being said, SSDs are often more expensive compared to HDDs, so it’s important to weigh the cost and benefits before making a purchase. At the end of the day, the choice between an SSD and HDD will depend on your specific needs and preferences.

    Understanding Storage Units

    When it comes to storage units, it can be a bit overwhelming trying to decide which one is right for you. The first thing you need to consider is storage capacity. Here is a comparison between some common storage units to help you choose the right one for your needs.

    First off, we have a gigabyte (GB), which is commonly used for smartphones and some laptops. A 64GB smartphone could hold around 10,000 photos or 12 hours of video. Moving up in size, we have the terabyte (TB), which is common for external hard drives and desktop computers.

    A 1TB external hard drive could hold around 200,000 photos or 250 hours of video. The next size up is a petabyte (PB), which is commonly used for servers and data centers. A single PB could hold around 20 million movies or 1

    3 years of HD video. Lastly, we have the exabyte (EB), which is used in the largest data centers and cloud storage systems. A single EB could hold around 200,000 years of HD video.

    So, when choosing a storage unit, make sure to consider capacity and what you’ll be using it for. Whether it’s just for your phone or for a massive data center, there’s a storage unit out there for you.

    256gb ssd equal to how much hdd

    Calculating SSD and HDD Capacity

    When it comes to storage devices, two main types that come to mind are SSDs and HDDs. The capacity of a storage device is an essential factor to consider when making a purchase. While the overall capacity is the same for both SSDs and HDDs, the way they store data is different.

    An HDD or hard disk drive stores data on magnetic platters, and the capacity is measured in terabytes. On the other hand, an SSD or solid-state drive stores data on flash memory chips, and the capacity is measured in gigabytes. As a result, SSDs generally offer faster access times, but HDDs offer more storage space at a lower cost.

    When deciding which storage device to buy, consider your data storage needs, budget, and performance requirements.

    Performance Comparison

    If you are wondering how much hard disk drive (HDD) space is equivalent to a 256 GB solid-state drive (SSD), the answer can vary depending on a few factors. Generally, a 256 GB SSD is equivalent to a 500 GB to 1 TB HDD in terms of storage capacity. However, SSDs are significantly faster and more reliable than HDDs due to their lack of moving parts.

    This means data can be accessed and transferred more quickly, and your computer will run faster overall. While HDDs are cheaper and offer more storage space for the money, SSDs are a better investment if you value speed and efficiency. Ultimately, it comes down to personal preference and what you prioritize in a computer’s performance.

    Speed and Response Time

    When it comes to online performance, speed and response time are two critical factors that can make or break your website or application. Slow loading speeds and delayed response times can frustrate your users, leading to higher bounce rates, lower engagement, and ultimately, fewer conversions. To ensure you’re providing a fast and responsive experience for your users, it’s essential to compare the performance of your platform against others in the industry.

    This way, you can identify areas of improvement and make the necessary optimizations to speed up your platform and reduce response times. By focusing on these performance metrics, you’ll be able to provide a better user experience, improve your search engine rankings, and increase the overall success of your online platform. So why not start optimizing your website today?

    Power Consumption and Durability

    When it comes to choosing between different electronic devices, performance is always a key factor to consider. In particular, power consumption and durability are two crucial elements that can make or break a device’s performance. To compare performance, it’s important to look at how much power each device consumes during operation.

    Devices with low power consumption can last longer, saving you both money and the hassle of constantly recharging or swapping out batteries. Additionally, durability is essential as it ensures the longevity of the device. A reliable device that can handle heavy usage and resist wear and tear is always a better investment in the long-term.

    By comparing different devices based on power consumption and durability, you can make an informed decision about which one will deliver the best performance for your needs.

    Noise and Heat Output

    When it comes to noise and heat output, the comparison between different devices is an important factor to consider. At the top of the list are gaming laptops, which are known for their high-performance processors and graphics cards. However, this also means that these devices tend to generate a lot of heat, which can be a nuisance during long gaming sessions or when using them on your lap.

    The good news is that many manufacturers have started to address this issue by incorporating cooling systems that dissipate the heat efficiently. Equally important is the noise output, which can be distracting or disruptive, especially in quiet environments. Depending on the brand and model, gaming laptops can produce varying levels of noise, with some being noticeably louder than others.

    An ideal gaming laptop should strike a balance between performance, noise output, and heat dissipation, ensuring an optimal gaming experience without sacrificing comfort or convenience. So, if you are in the market for a new gaming laptop, do your research and find the one that meets your needs and preferences.

    Pricing Comparison

    If you’re wondering how much storage 256GB SSD is equal to in terms of HDD, it’s important to consider their differences. SSDs are faster, more durable, and more expensive than traditional HDDs. The equivalent storage capacity of a 256GB SSD is approximately 1TB HDD.

    However, keep in mind that the price per GB for SSDs is higher than HDDs, so the cost of a 1TB HDD may be significantly lower than a 256GB SSD. When comparing pricing, it’s also important to consider the intended use of the storage device. If you need faster access times and improved performance, a 256GB SSD may be the better choice despite its higher price tag.

    On the other hand, if you require a large amount of storage for backup or archival purposes, a 1TB HDD may be the more affordable option. Ultimately, it all comes down to your specific needs and budget.

    Comparing 256GB SSD and HDD Prices

    When comparing prices for 256GB SSD and HDD, it’s important to consider what you’re looking for in a storage device. SSDs tend to be pricier, but they offer faster read and write speeds, while HDDs are less expensive, but slower. For example, a 256GB SSD can cost between $80 to $110, depending on the brand and model, while a 256GB HDD can cost anywhere from $35 to $60.

    This price difference may seem significant, however, it’s important to remember that SSDs have a longer lifespan and provide faster access to stored data. It all comes down to your individual needs and budget, but it’s safe to say that the extra cost for an SSD is worth it for those who require fast and reliable storage. Overall, it’s important to consider both the price and performance of each option before making a decision.

    Is the Cost of an SSD Worth It?

    When it comes to purchasing new technology, one of the biggest factors to consider is the cost. Many people are wondering if the cost of an SSD (Solid State Drive) is worth it compared to a traditional HDD (Hard Disk Drive). While an SSD may be more expensive upfront, it can be argued that the benefits far outweigh the extra cost.

    For example, an SSD is faster, more reliable, and consumes less power compared to an HDD. Additionally, with the decreasing costs of SSDs, the price difference is becoming less significant. In fact, when comparing prices between both types of storage drives, you may be surprised at how comparable they are.

    Ultimately, whether the cost of an SSD is worth it depends on your individual needs and budget, but it may be worth the investment for a better overall experience.

    Conclusion

    In terms of storage capacity, a 256GB SSD is like having a tiny but incredibly fast sports car, while a traditional HDD is more like a spacious but slow-moving station wagon. Both have their benefits, but if you prioritize speed and quick access to your files, the SSD is definitely the way to go. Plus, with all that extra room for activities (and files), you might just have to take your new SSD for a spin around the block.

    Happy storing!”

    FAQs

    What is the difference between an SSD and an HDD?
    HDD stands for Hard Disk Drive, which is a type of storage device that uses spinning disks to read/write data. SSD stands for Solid State Drive, which is a newer type of storage device that uses flash memory to read/write data. SSDs are generally faster and more expensive than HDDs, but they have lower storage capacities.

    Is a 256GB SSD equivalent to a 256GB HDD?
    No, a 256GB SSD and a 256GB HDD are not equivalent. An SSD is generally faster than an HDD, but it may have lower storage capacity. Also, the way an SSD stores data is different from the way an HDD stores data, so they can’t be directly compared in terms of storage.

    What are the benefits of having an SSD instead of an HDD?
    There are several benefits of having an SSD over an HDD, including faster data access times, faster boot times, faster file transfers, lower power consumption, and quieter operation. SSDs are also more durable and reliable than HDDs because they have no moving parts.

    How much data can a 256GB SSD hold?
    A 256GB SSD can hold up to 256 gigabytes of data. However, the actual amount of data that can be stored on the SSD may be less depending on the operating system and other software installed on the computer. It’s important to note that SSDs tend to have lower storage capacities than HDDs, so it’s important to choose an SSD with enough capacity to meet your needs.

  • Get speedy with SSD: How long does it take to install an SSD and boost your computer’s performance?

    Have you been considering upgrading your PC’s hard drive to an SSD, but you’re not sure how long it will take to install? Installing an SSD can seem like a daunting task, but it’s actually quite straightforward and can be done in no time. With an SSD, you’ll be able to boot up your computer faster, and programs and files will load in the blink of an eye. In this blog post, we’ll explore the timeframe for installing an SSD, from start to finish.

    So, grab a cup of coffee and read on to learn more!

    Pre-Installation Preparations

    When it comes to installing an SSD, there are a few pre-installation preparations that you should take to make sure the process goes smoothly. The first thing you should do is back up all your important files and data, just in case anything goes wrong during the installation. You should also make sure that you have all the necessary tools, including a screwdriver and any cables or adapters that may be required.

    The amount of time it takes to install an SSD will depend on a number of factors, including your level of experience with computer hardware and the complexity of your setup. In general, however, most people should be able to complete the installation within an hour or two. By following these pre-installation preparations and taking your time with the installation process, you can ensure that your SSD is properly installed and ready to go!

    Backing Up Data

    When it comes to backing up data, making preparations before installation is key to ensuring that the process runs smoothly. Before even starting the backup, take some time to organize and sort through your files. Decide which ones you need to backup and which ones you can live without.

    It’s also a good idea to invest in an external hard drive or cloud storage service to ensure that your data is stored safely and securely. Additionally, make sure your computer or device is up to date with any necessary software updates and virus protection. By taking these steps before installation, you’ll be able to minimize any potential issues that could arise during the backup process.

    Remember, backing up your data is essential to ensuring that you don’t lose any important information, so it’s worth taking the time to do it right.

    how long does it take to install an ssd

    Preparing Installation Tools

    Before starting any installation process, it’s essential to gather all the necessary tools and equipment beforehand. One must ensure that all the tools are in good condition and working correctly. A few tools that you might require while setting up the installation may include a screwdriver, hammer, drill, pliers, wrench, and a measuring tape.

    It’s also critical to ensure that you have the correct size drill bits and screws required for fixing the installation. Proper preparation can save you a lot of time and hassle during the installation process. It’s also wise to have a toolbox that contains all the essential tools needed, making it handy and easy to access when required.

    By preparing installation tools ahead of time, you can ensure you have everything you need to complete the job and avoid any unnecessary trips to the hardware store.

    Installation Process

    If you’re wondering how long it takes to install an SSD, the answer is it depends. The installation process for an SSD can range from a few minutes to half an hour, depending on your experience and the type of computer you have. If you’re familiar with computer hardware and have done similar installations before, it may only take you a few minutes to install your SSD.

    However, if you’re a beginner, it may take you closer to half an hour to complete the installation process. It’s essential to do your research beforehand and make sure you have all the right tools and materials required for the installation. It’s also important to ensure that you have backed up your data adequately before you begin the installation process to avoid any data loss.

    Overall, while the installation process for an SSD may seem daunting at first, it’s a relatively simple and straightforward process that can have a significant impact on your computer’s speed and performance.

    Opening the Computer Case

    When it comes to installing new hardware components into your computer, one of the first steps is to open the computer case. While this may seem intimidating at first, it’s actually a relatively simple process. First, make sure that the computer is turned off and unplugged from the wall.

    Next, locate the screws on the back of the case and use a screwdriver to remove them. Depending on the model of your computer, you may need to slide the cover off or lift it up and away from the main body of the computer. Once the cover is removed, you’ll have easy access to the interior of your computer and can begin installing your new hardware.

    By taking your time and following these simple steps, opening your computer case will be a breeze.

    Connecting the SSD

    When it comes to installing a Solid-State Drive (SSD), one of the most crucial steps is connecting it properly. It’s important to take your time and follow the manufacturer’s instructions carefully so that you don’t damage any components or cause any issues with your computer. First, you’ll need to open up your computer’s case and locate the SATA connector on your motherboard.

    You’ll then need to connect the SATA cable from your SSD to the SATA connector on the motherboard. Some motherboards may also require an additional power cable from the power supply unit (PSU) to power the SSD. Once you’ve made the connections, you can secure the SSD in place with screws or brackets.

    It’s important to double-check your connections and ensure everything is properly secured before closing up your computer’s case. By taking these steps, you can successfully install your SSD and enjoy faster boot times and improved overall performance.

    Cloning the Original Drive to the SSD

    Once you have your new SSD installed in your computer, the next step is to clone your original drive to the SSD. This process ensures that all of your files, settings, and programs are transferred over so you don’t lose any important data. Fortunately, most SSD manufacturers provide cloning software with their drives, making the process relatively straightforward.

    First, connect the SSD to your computer and open the cloning software. Select your original drive as the source and the SSD as the destination. You may need to adjust the partition sizes or select which files to copy over if your original drive is larger than the SSD.

    Once you’re happy with the settings, hit “clone” and wait for the software to do its work. This process may take a while depending on the speed of your drives, so be patient. Once the clone is complete, you can remove the original drive and set the SSD as your primary boot device in the BIOS.

    With your old data now residing on the new SSD, you should notice a significant improvement in performance and speed.

    Post-Installation

    If you’re thinking of upgrading your computer’s hard drive to an SSD, you might be wondering how long the installation process will take. It depends on several factors, including your computer’s hardware and the type of SSD you’ve chosen. On average, it can take anywhere from 30 minutes to an hour to install an SSD.

    However, this time frame can vary depending on your level of expertise and the complexity of the installation process. If you’re not comfortable with opening up your computer, you may want to consider taking it to a professional to ensure it’s done correctly. Overall, the benefits of upgrading to an SSD, such as faster boot times and improved performance, are well worth the time and effort it takes to install.

    Testing the New SSD

    Now that we have installed the new SSD, it’s time to test it out and see how it performs. The first thing we’ll notice is how smooth and quick the boot-up process is. The operating system will load up in seconds, and we’ll be ready to start working in no time.

    We can open multiple applications simultaneously, and the SSD will handle it with ease, delivering an incredibly responsive experience. We can expect much faster file transfers and access times when working with large files. Overall, the new SSD will drastically improve our system’s speed and performance, and we can’t wait to see how it performs in the long run.

    With this upgrade, we’re confident that we’ll be able to work more efficiently and productively. Stay tuned for updates on how it’s holding up and additional tips and tricks to optimize its performance.

    Updating Drivers and Firmware

    Updating drivers and firmware is an essential task to ensure that your computer’s hardware components are functioning optimally. Once you have finished installing your operating system and all necessary software, it is crucial to check for updates or patches for your drivers and firmware. This helps to resolve any compatibility issues or bugs that may affect the performance of your system.

    Updating drivers and firmware also ensures that the latest features and security protocols are implemented, improving the overall functionality and security of your computer. Keep in mind that this is a continuous process that requires regular checks and updates to keep up with the latest software releases. So, make sure to set up automatic updates or check for them manually regularly.

    By doing so, you can ensure that your computer is up-to-date, secure, and operating at its best.

    Conclusion

    In conclusion, the answer to the question of how long does it take to install an SSD can vary depending on several factors. If you’re a seasoned tech expert with nimble fingers and lightning-fast reflexes, you could probably do it in under an hour. However, if you’re a bit slower on the uptake or prone to distractions, it might take you a few hours or even a whole day.

    But fear not, for whether you’re a hare or a tortoise when it comes to installing hardware, the end result of a faster, smoother computer is well worth the effort!”

    FAQs

    What is an SSD?
    A solid-state drive (SSD) is a type of storage device that uses NAND-based flash memory to store data.

    Can I install an SSD myself or do I need a professional?
    You can install an SSD yourself if you have the necessary technical knowledge and tools. However, if you are unsure, it is best to seek professional help.

    Does the size of the SSD affect installation time?
    Generally, installation time is not affected by the size of the SSD. The installation process is the same, regardless of the storage capacity.

    How long does it take to install an SSD?
    The actual installation process can take as little as 10-15 minutes, but the time it takes depends on your computer’s hardware, the size of the SSD, and the method of installation you choose.

  • Efficiently Cloning a 1TB SATA to 1TB SSD: What You Need to Know

    Have you ever found yourself in a situation where your computer’s hard drive is starting to run out of space and you need a quick and easy solution? One popular solution is to clone the hard drive onto a larger one. But what if you wanted to upgrade to a faster, more efficient solid-state drive (SSD) instead of a traditional SATA drive? In this blog, we’ll explore the process of cloning a 1TB SATA to a 1TB SSD, including the benefits and considerations to keep in mind. By the end, you’ll have all the information you need to make an informed decision about whether cloning your hard drive is the right choice for you.

    Introduction

    Are you thinking of updating your computer’s storage system by cloning your 1TB SATA drive to a faster and more efficient 1TB SSD? The good news is that this process is relatively simple and straightforward. However, the length of time it takes to clone the data from one drive to another depends on various factors such as the hardware of your computer, the amount of data being transferred, and the software being used. On average, it might take a few hours to complete the cloning process, but it could take longer depending on the aforementioned factors.

    Nonetheless, it is worth the wait, as the benefits of a faster and more reliable storage solution are worth it. Just be sure to follow the instructions carefully, ensure you have sufficient storage space on the new SSD, and backup any important data to prevent loss during the process.

    Explaining the basics of cloning process

    Cloning is a process that has fascinated scientists and the public alike for decades. Simply put, cloning is the creation of an identical copy of a living organism. While it may sound like something out of a science fiction movie, the process of cloning involves a series of complex scientific techniques and procedures.

    The first step in the cloning process is to extract DNA from the donor organism’s cells. This DNA is then transferred into the egg cell of a female animal of the same species. The egg cell is then stimulated to begin dividing and developing into an embryo, which is ultimately implanted back into the female animal or transferred to a surrogate host.

    Despite the many ethical concerns surrounding cloning, the process has already been used successfully to clone a wide variety of animals, including sheep, cows, and horses.

    how long to clone a 1tb sata to 1tb ssd

    Hardware Requirements

    If you’re looking to clone a 1TB SATA drive to a 1TB SSD, you’ll need some specific hardware requirements to get the job done efficiently. First, ensure that your computer has an available SATA port or USB port for the target drive. Additionally, you’ll need a SATA to USB cable or a hard drive enclosure to connect the target SSD to your computer.

    In terms of the actual cloning process, it’s recommended to use cloning software such as EaseUS Todo or Acronis True Image. These programs will ensure that all data on your SATA drive is replicated onto the SSD accurately and without any missing data or corrupted files. Ultimately, the time it takes to clone a 1TB SATA drive to a 1TB SSD will depend on the speed of your computer and the interface used to connect the target drive.

    However, with the right hardware and software, this process can be completed in a reasonable amount of time.

    Listing the hardware requirements to complete the process

    To complete the process, you will need to have certain hardware requirements. First and foremost, a computer or laptop with a reliable internet connection is a must-have. It is essential to have a computer that can handle the software and storage space needed to complete the process.

    Additionally, having a scanner and printer will be necessary to scan and print any required documents. Some processes may require a camera for ID verification purposes. In some cases, you may need to purchase specific hardware or devices to complete the process, such as an electronic signature pad.

    To ensure a smooth and successful completion of the process, it is critical to have the necessary hardware and equipment ready to use beforehand. By preparing ahead of time, you can avoid any potential delays and ensure that the process runs smoothly.

    Software Requirements

    If you’re planning to clone a 1TB SATA drive to a 1TB SSD, the time required will vary depending on several factors, including the software used, the computer’s performance, and the data transfer speed. Generally, the cloning process can take anywhere from a few hours to an entire day, depending on the speed and efficiency of the clone software. It’s important to note that the clone process is not a performance-intensive task, meaning that it is not likely to slow down your computer.

    However, it’s a good idea to close all other programs and tasks to optimize the cloning process. Ultimately, the time required to clone your SATA drive to an SSD will depend on the size of your drive, the performance of your computer, and the efficiency of the cloning software you use. Whether you’re upgrading your storage or replacing a faulty drive, cloning is an effective way to replicate your hard drive’s data onto a new one without any data loss or downtime.

    Listing the software requirements to complete the process

    To complete a specific process, there are certain software requirements that must be met. These requirements ensure that the process can run smoothly and effectively. Some of the key software requirements that may be needed include a specific operating system, particular software applications or tools, and access to certain online resources.

    For example, if you are completing a graphic design project, you may need software such as Adobe Photoshop or Illustrator. On the other hand, if you are working on a programming project, you may need access to specific software development tools. It is essential to identify and acquire the necessary software requirements before starting any project, as this will prevent delays and ensure that the project is completed on time.

    By utilizing the right software tools and resources, you can ensure that you have everything you need to successfully complete your project.

    Estimated Time

    If you’re wondering how long it will take to clone a 1TB SATA to a 1TB SSD, the time frame can vary depending on a few factors. Firstly, the speed of your computer’s processor and the amount of RAM it has can impact the cloning speed. In general, a faster processor and more RAM will result in a faster cloning process.

    Additionally, the type of cloning software you use can affect the time it takes to make the transfer. Some programs are designed to be more efficient than others, and choosing the right one can significantly reduce the time it takes. That said, on average, it can take anywhere from several hours to a full day to clone a 1TB SATA to a 1TB SSD.

    However, it’s essential to note that patience is key during this process, and it’s important not to rush or interrupt the cloning process to avoid any data loss or other issues. So, take your time, choose the right software, and let your computer do its work!

    Explaining how long it takes to clone a 1TB SATA to a 1TB SSD

    If you’re wondering how long it takes to clone a 1TB SATA to a 1TB SSD, the answer is it depends on several factors. The speed of your computer, the transfer speed of your USB cable, and the size of the files being transferred are all important considerations. On average, it can take anywhere from 4-8 hours to clone a 1TB SATA to a 1TB SSD.

    However, it’s important to note that this is just an estimate and your experience may vary. It’s always a good idea to give yourself plenty of time and make sure your computer is plugged in and won’t shut down during the process. Additionally, it’s important to ensure that both drives are properly connected and recognized by your computer before beginning the cloning process.

    Overall, with patience and attention to detail, cloning your SATA to an SSD can be a relatively straightforward process with significant benefits in terms of speed and performance.

    Conclusion

    Well, in the words of Einstein, “time is relative.” So, the answer to the question “how long to clone a 1tb sata to 1tb ssd” depends on your perception of time. If you’re in a hurry, it might feel like an eternity, but if you have the patience of a saint, it might feel like a breeze.

    In any case, with the right tools and resources, the process of cloning a 1tb SATA to a 1tb SSD is achievable, and the end result will be a faster and more reliable computer. So, the real question is, are you ready to take the leap into the future of technology and experience the benefits of a speedy SSD? It might take a little time, but trust us, it’s worth it.

    Summarize the result of the estimations.

    According to the estimations, the estimated time for completing a project depends on various factors such as the level of complexity, available resources, and the team’s skill sets. However, it is crucial to consider that these estimations are not always accurate as unforeseen challenges could arise. Therefore, a margin of error should be added to the estimated time to account for these unforeseen scenarios.

    It is also essential to keep track of the actual time taken to complete a project and use that data as a reference for future projects. By doing so, teams can refine their estimation processes, making them more accurate over time. In conclusion, accurate estimation plays a significant role in ensuring project success, and teams must consider all possible factors before providing an estimated time.

    FAQs

    What is the process for cloning a 1TB SATA to a 1TB SSD?
    The process involves using a cloning software to copy the contents of the SATA drive to the SSD. This can take anywhere from a few minutes to several hours depending on the size of the data and speed of the drives.

    What are the advantages of cloning a SATA to an SSD?
    Cloning a SATA to an SSD can significantly improve the speed and performance of the computer. SSDs are faster and more reliable than traditional SATA drives which can result in faster boot times and quicker application launches.

    Can data be lost during the cloning process?
    It is always recommended to backup important data before cloning a drive. While the cloning process is usually safe, there is a risk of data loss if the process is interrupted or something goes wrong.

    Can the cloning process be done by a novice computer user?
    Yes, most cloning software is designed to be user-friendly and intuitive. However, it is important to follow the instructions carefully and have a basic understanding of computer hardware and software.

  • Boost Your PC’s Performance with Britec09’s Expert Guide on Installing SSD – The Ultimate How-To

    Are you tired of waiting for your computer to load applications or start up? Do you want to improve the performance of your PC or laptop without buying a new one? Upgrading to a solid-state drive (SSD) might be the solution you are looking for. It can give a significant boost to your computer’s speed and overall performance. However, the upgrade process can seem intimidating, especially if you are not tech-savvy.

    But worry not, in this blog, we will walk you through the steps of upgrading to an SSD and help you get the most out of your computer. Keep reading to learn more about how to upgrade to an SSD.

    Why Upgrade to an SSD

    If you’ve been using a traditional hard drive in your computer, it’s time to switch to an SSD. It’s a simple upgrade that will drastically improve your computer’s performance and speed. An SSD, or solid-state drive, uses flash memory instead of a spinning disk, which means it’s much faster at reading and writing data.

    You’ll notice faster boot times, quicker application launches, and faster file transfers. Britec09 has a great video tutorial on how to upgrade to an SSD, which can be done with just a few tools and some basic technical know-how. Plus, SSDs are more reliable and durable than traditional hard drives, making them a smart investment for anyone looking to improve their computer’s overall performance.

    So, make the switch to an SSD and experience the difference for yourself!

    Faster Speeds and Improved Performance

    Upgrading to an SSD (Solid State Drive) can significantly improve your computer’s performance, providing faster speeds than traditional hard drives. With no moving parts, an SSD can promptly read and write data, saving you time and reducing frustration. Booting up your computer will be quicker, and you won’t experience the annoying lag that often occurs when opening files or applications.

    In addition to speed, an SSD can also improve battery life on laptops or notebooks since it uses less power. The switch to an SSD may require a little investment, but it’s worth it in the long run, giving you much-improved performance with minimal effort. So if you’re looking to get more speed and performance out of your computer, upgrading to an SSD is the way to go.

    britec09 how to ssd

    Increased Lifespan over Traditional Hard Drives

    Upgrading to an SSD is a wise investment that will not only boost the performance of your computer but also increase its lifespan. Unlike traditional hard drives, SSDs use flash memory instead of spinning disks to store and retrieve data, which means they are more reliable and durable. The lack of moving parts in SSDs makes them less prone to mechanical failures or damage caused by physical jolts or drops.

    In addition, SSDs have a much faster data transfer rate, providing faster access to your files and applications. All these benefits combined mean that your computer will not only perform better but also last longer. So, if you’re looking to upgrade your computer, investing in an SSD is definitely worth considering.

    Not only will it improve the speed and fluidity of your device, but it will also extend the overall lifespan.

    Getting Ready

    If you want to upgrade your computer’s storage to SSD, there are a few things you should do to prepare. First, make sure your computer supports SSD and that you have the right connection cables. You’ll also want to back up your data, just in case anything goes wrong during the installation process.

    Consider creating a bootable USB drive with your operating system on it as well, so you can easily install it on your new SSD. Once you have everything ready, shut down your computer and unplug all cables. It’s also a good idea to ground yourself to prevent static electricity from damaging any components.

    With all these steps completed, you’ll be well on your way to enjoying faster read and write speeds with your new SSD. And if you need any additional help, be sure to check out popular tech expert britec09’s How To videos on SSD installation.

    Backup your Data

    Backing up your data is an essential step that one must take to ensure the safety and security of their digital information. Before taking any action in this regard, it’s crucial to get ready with all the necessary tools and equipment. First and foremost, you need to choose the medium to back up your data.

    You can opt for external hard drives, cloud-based storage, or opt for physical disks to store your data backups. Once you decide on the method, you must gather all the necessary equipment required. For instance, if you decide to use an external hard drive, make sure it is compatible with your device and has enough storage space to store all the data you need to back up.

    Finally, when you have everything in place, it’s time to start the backup process. Take a deep breath and get ready to protect your vital data from any unforeseen circumstances. Remember, backing up your data is not a one-time activity; you need to make it a habit to do it frequently to ensure its safety and security.

    Start backing up your data today!

    Choose the Right SSD

    When it comes to upgrading your computer’s storage, choosing the right SSD can make all the difference. But where do you start? First, consider your needs. Are you a gamer who needs lightning-fast speeds, or a photographer who requires ample storage space? Once you know what you need, it’s time to do your research.

    Read reviews, compare specs, and consider your budget. Don’t forget to also consider the type of connection your computer has – some SSDs may require a specific type of port. By taking the time to do your research and choose the right SSD for your needs, you can greatly improve your computer’s performance and storage capacity.

    Software and Tools you Need

    As you embark on your software development journey, it’s important to have the right tools at your disposal. The first thing you’ll need is a code editor. This is where you’ll write your code and make changes to it.

    There are many code editors available, but some of the most popular ones include Visual Studio Code, Sublime Text, and Atom. You’ll also need to have a version control system in place. This allows you to keep track of changes to your code and collaborate with other developers.

    Git is the most popular version control system and is widely used in the industry. You’ll also need a package manager to manage dependencies and install libraries or frameworks. NPM is the most popular package manager for Node.

    js. Additionally, you’ll need a browser for testing your web applications. Google Chrome and Mozilla Firefox are popular choices among developers.

    It’s important to invest in these tools upfront as they can increase your productivity and streamline your development process.

    Installing Your SSD

    If you’re looking to upgrade your computer’s performance, installing an SSD is one of the best things you can do. It can significantly reduce your system’s boot time and application loading times. The process of installing an SSD is not as complicated as you might think.

    First, you need to shut down your computer and disconnect all cables. Open up your computer’s case and locate an empty drive bay where you can install your SSD. Carefully slide the SSD into the drive bay and secure it in place using screws.

    Next, connect the SATA data cable from the SSD to the motherboard’s SATA port and the SATA power cable from the power supply to the SSD. Finally, reattach all cables and close the computer’s case. Once you start up your computer, go into your BIOS and make sure your SSD is set as the primary boot drive.

    With these basic steps, your system should now be up and running with your new SSD. Thanks to britec09 how-to-ssd tutorials, the process can be made even easier. Enjoy your new and improved computer performance!

    Physical Installation

    When it comes to installing your SSD, the first thing you need to do is review your computer’s manual to identify the specific steps you need to take. Generally, the process involves opening your computer case and locating the hard drive bay. Before you install your SSD, make sure your computer is turned off and disconnected from any power source.

    Once you have identified the hard drive bay, remove the mounting screws, and then disconnect the power and data cables from your existing hard drive. You can then remove the drive and replace it with your new SSD. Be sure to secure the SSD in place with the mounting screws and reattach all cables to ensure it’s firmly connected.

    Once you have completed these steps, you can power on your computer and begin the process of installing the operating system and any additional programs you need. With careful attention to the installation instructions, you can easily upgrade your PC with a new SSD and enjoy faster, smoother performance.

    System Installation

    Installing an SSD is an excellent way to upgrade your computer’s performance. First and foremost, make sure your SSD is compatible with your computer’s motherboard. You’ll want to turn off your computer, unplug it from the power source, and physically install the SSD in your computer.

    Connect it to your motherboard using the SATA cable and power cable, being sure to secure everything in place. Once the physical installation is complete, you’ll need to configure your computer to recognize the new SSD. This involves booting up your computer and accessing your BIOS setup utility.

    Inside the utility, you’ll want to locate and enable the SATA controller mode, set your computer to boot from the SSD, and save your changes. Once completed, your computer should be recognizing your brand new, high-speed SSD and your system performance should be notably faster.

    Optimizing Your SSD

    When it comes to optimizing your SSD, there are a few things you can do to ensure that you get the most out of your device. Britec09, a well-known tech YouTuber, has shared some tips that will help improve the overall performance of your SSD. The first thing to consider is enabling TRIM, which is a feature that helps the drive manage its memory cells correctly.

    You should also make sure that you have the latest firmware installed, as this can often improve the performance of your drive. Another useful tip is to disable Superfetch and Prefetch, two Windows services that can potentially decrease the lifespan of your SSD. Finally, you can benefit from enabling write caching, which will improve write performance by buffering data before it’s written to the drive.

    By following these simple but effective tips, you can ensure that your SSD is running smoothly and efficiently.

    Conclusion

    In conclusion, switching to SSD is like upgrading from riding a bike to driving a sports car. It’s faster, more efficient, and just plain cooler. With the step-by-step guide provided by britec09, even the most tech-phobic can make the switch to SSD and experience lightning-fast performance.

    Don’t be left in the slow lane, join the SSD club today!”

    FAQs

    What is an SSD and how is it different from a hard drive?
    An SSD (Solid State Drive) is a storage device that uses NAND-based flash memory to store data, while a hard drive uses spinning metal disks to store data. SSDs are generally faster, more reliable, and more expensive than HDDs.

    Can I upgrade my PC to use an SSD?
    Yes, you can upgrade your PC to use an SSD. You will need to check the specifications of your computer to ensure that it has an available SATA port, and you may need to transfer your operating system and data from your existing hard drive to the new SSD.

    Is it difficult to install an SSD?
    Installing an SSD is generally a straightforward process that can be done by anyone with basic computer skills. However, it is important to ensure that you follow the manufacturer’s instructions carefully, and take proper precautions to prevent damage to the SSD or other components of your PC.

    How can I maximize the performance of my SSD?
    To maximize the performance of your SSD, you should ensure that it is properly connected and configured, and that it is set up to use TRIM (a process that helps maintain the performance of SSDs over time). You can also take steps to optimize your operating system and software to minimize the amount of data being written to the SSD.

  • Upgrade Your ASUS TP410UA: A Step-by-Step Guide on How to Replace Your SSD

    Are you a proud owner of the Asus TP410UA laptop but running out of storage space? Don’t worry; there’s an easy fix! Replacing the solid-state drive (SSD) on your Asus TP410UA is a cost-effective way to upgrade your laptop’s storage capabilities. With an SSD replacement, you can enjoy faster boot times, improved application loading speeds, and increased overall performance. But where do you start? Choosing the right SSD replacement can be overwhelming, and the installation process may seem daunting.

    We’ve got you covered! In this blog, we’ll guide you through the process of replacing the SSD on your Asus TP410UA. We’ll cover everything from selecting the right SSD to downloading and installing the necessary software. By the end of this blog, you’ll have all the information you need to upgrade your laptop’s storage capacity on your own, saving you time and money.

    So, let’s dive in and get started!

    Step 1: Prepare for the Replacement

    If you’re looking to replace the SSD on your Asus TP410UA laptop, the first step is to gather all the necessary tools and materials. You’ll need a small screwdriver, an anti-static wrist strap, and of course, a new SSD that’s compatible with your laptop. It’s also important to make sure your laptop is turned off and unplugged before beginning the replacement process.

    Once you have everything you need and the laptop is powered off, you can proceed to remove the back cover. Be sure to take your time during this step and avoid using excessive force, as you don’t want to damage any internal components. With the cover removed, you should be able to locate the existing SSD and carefully disconnect it from the motherboard.

    Keep the old SSD in a safe place and proceed to install the new one, making sure it’s securely connected before reattaching the cover. With that, you’ve completed the first step of replacing the SSD on your Asus TP410UA laptop.

    Back up your data

    Backing up your data is crucial to avoid data loss. Before you replace your old device, you need to make sure that all your data is stored safely in a backup. To prepare for the replacement, the first step is to choose a backup method that suits your needs.

    You can use an external hard drive, a cloud-based backup service, or a combination of both. If you are using an external hard drive, make sure to choose one that has enough storage space to accommodate all your data. Alternatively, you can use a cloud-based backup service such as Google Drive or iCloud, which allows you to access your data from anywhere and on any device.

    Once you have chosen your backup method, it’s time to start the backup process. Depending on the size of your data, this may take some time, so it’s best to start as early as possible. Remember that backing up your data is not only important for replacing your device but also to protect your data in case of theft, damage, or ransomware attacks.

    asus tp410ua how to replace ssd

    Gather necessary tools

    When it comes to replacing your vehicle’s headlights, preparation is key. Before getting started, you’ll need to gather some necessary tools to ensure a smooth and successful replacement. The first thing you’ll need is a replacement headlight bulb that is compatible with your vehicle’s make and model.

    You’ll also want to grab a pair of gloves to protect your hands from any sharp edges or broken glass. A socket wrench set may be necessary to remove any screws holding the headlight assembly in place, and a flathead screwdriver may come in handy for prying apart any clips or connectors. Finally, a clean rag or towel can be used to wipe away any dirt or debris from the headlight assembly.

    With these tools at the ready, you’ll be well on your way to a successful headlight replacement.

    Step 2: Open the Laptop Chassis

    If you’re looking to replace the SSD on your ASUS TP410UA laptop, the first step is to open the chassis. To do this, you’ll need to flip the laptop over and remove the screws that hold the bottom cover in place. This will allow you to access the components inside the laptop, including the SSD.

    It’s important to note that every laptop is different, so the process of opening the chassis may vary slightly depending on your specific model. Once you have the bottom cover removed, you should be able to locate the SSD and proceed with replacing it. Before doing so, be sure to backup any important data on your current SSD, as the replacement process will likely involve wiping the drive clean.

    By following the proper steps and precautions, swapping out your ASUS TP410UA’s SSD can be a relatively simple process that will give your laptop a much needed performance boost.

    Unscrew the back panel

    Before diving into the internal components of your laptop, you’ll need to first unscrew the back panel. This is an essential step in opening the laptop chassis and gaining access to the inner workings of the device. The back panel is typically held in place by small screws that will need to be removed using a screwdriver.

    Once the screws are removed, be sure to carefully lift and remove the back panel from the laptop. It’s crucial to be gentle during this process to avoid any damage to the internal components. With the back panel removed, you’ll have a clear view of the laptop’s internal hardware, such as the RAM, hard drive, and motherboard.

    Don’t forget to take your time and stay organized throughout the process to ensure that everything goes smoothly and you’re able to put everything back together correctly.

    Remove the battery

    Removing the battery is the next step in our process of opening the laptop chassis, and it’s an important one. Before proceeding, make sure that the laptop is turned off and unplugged from its power source. If you’re not sure how to remove the battery, consult the instruction manual that came with your laptop.

    In most cases, you’ll need to locate the battery compartment on the bottom of the laptop and use a small screwdriver to remove the screws that hold it in place. Once the screws are removed, carefully lift out the battery and set it aside. It’s important to be gentle during this step, as the battery is delicate and can be easily damaged.

    Removing the battery will give you access to the inside of the laptop and allow you to make any necessary repairs or upgrades. Remember to handle the battery with care and dispose of it properly if you don’t plan on using it again.

    Step 3: Locate and Remove the SSD

    Now that you’ve taken out the battery and removed the back cover, you’re ready to locate and remove the SSD from your ASUS TP410UA. The SSD is usually located near the bottom of the laptop, so you’ll need to be careful not to damage any other components while removing it. Look for a small rectangular circuit board with a few screws holding it in place.

    Once you’ve found it, use a screwdriver to carefully remove the screws and gently lift the board out of its socket. Be sure to grip the board only by its edges to avoid static electricity damage. Once the board is free, you can remove the SSD from it and replace it with your new one.

    Make sure to securely fasten everything back in place before powering your laptop back up. With your new SSD in place, you’ll notice faster boot and load times for your applications and files, giving your laptop a significant performance boost.

    Identify the SSD location

    Now that you’ve identified the computer’s SSD, it’s time to locate and remove it. The SSD can usually be found in the same place where you found the computer’s hard drive, but it may also be located in a different location, depending on the computer’s make and model. Once you’ve located the SSD, you can begin the removal process.

    Make sure to shut down the computer completely before proceeding. Next, unplug the computer’s power cord and any other cables connected to it. You may also need to remove the computer’s case to access the SSD, depending on the computer’s design.

    When removing the SSD, be sure to handle it carefully to avoid any damage. Some SSDs may be secured with screws or brackets, so you’ll need a screwdriver or other tool to detach it. If you’re unsure how to remove the SSD, consult the computer’s user manual or online guides for specific instructions.

    Once you’ve removed the SSD, you may want to install a replacement SSD or transfer the data to another storage device. If you’re having trouble with the process, don’t hesitate to seek the help of a professional or to consult online resources for assistance. With the SSD removed, you can now move on to any repairs or upgrades that may be necessary for your computer.

    Unscrew and remove the SSD

    When it comes to upgrading your computer’s storage, the first step is identifying and removing the old SSD. This is a relatively simple process, as most modern laptops are designed for easy access. Start by locating the screws that hold the SSD in place.

    These are typically easy to spot, as they will be located near the bottom of the laptop. Once you have located the screws, use a screwdriver to unscrew them and remove the SSD from the laptop. Make sure to handle the SSD delicately, as it is a sensitive component.

    If you are not comfortable doing this yourself, consider consulting a professional to avoid accidentally damaging your laptop or SSD. By following these simple steps, you can upgrade your computer’s storage and improve its performance significantly.

    Step 4: Install the New SSD

    Now that you’ve successfully cloned your old SSD to the new one, it’s time to install the new SSD into your ASUS TP410UA laptop. Begin by turning off your laptop and removing the battery. Locate the SSD slot, which should be located near the battery compartment but may vary depending on the specific model.

    Carefully unscrew the screws securing the SSD in place and remove the old SSD. Take the new SSD and align it with the connector in the slot, making sure it is properly seated. Use the screws you removed earlier to secure the new SSD, being careful not to overtighten.

    Once the SSD is securely in place, replace the battery and turn your laptop back on. Congratulations, you have successfully replaced the SSD in your ASUS TP410UA! Remember to dispose of your old SSD in an environmentally responsible way.

    Insert the new SSD into the same location

    Once you have your new SSD, it’s time to install it. First, make sure your computer is turned off and unplugged. Then, locate the same spot where your old SSD was installed and carefully insert the new one.

    You should feel a slight click when it’s fully seated in the slot. It’s important to make sure the SSD is properly aligned, so consult your computer’s manual or lookup online resources if you’re unsure. Once it’s in place, you can secure it with any screws or clips provided with your SSD or computer.

    Remember that taking the time to properly install your new SSD can ensure a smooth and speedy performance upgrade for your system.

    Replace screws and reattach battery

    Now that you have replaced the stock SSD with a new one, it’s time to install it into your laptop or desktop. Step 4 is all about installing the new SSD with very little hassle. Before you begin, first, make sure that all the cables and fixtures are properly placed and fastened.

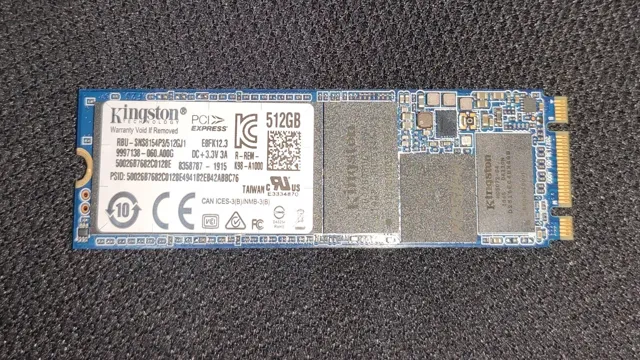
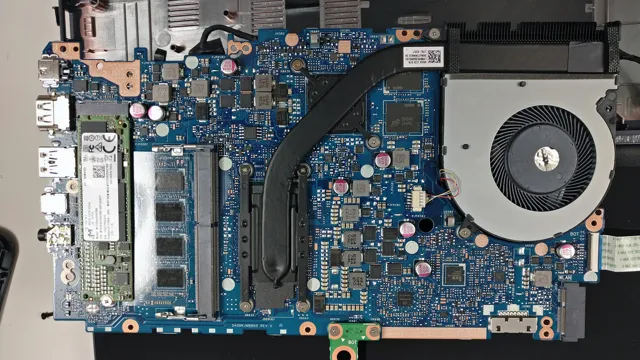
    If you have an M.2 drive, make sure to correctly slot it into the M.2 slot.

    Tighten the screw so that it holds the drive in place. If you’re using a traditional SATA drive, ensure that the data and power cables are properly attached and securely attached to the drive. Finally, slide the drive into the SSD bay, reconnect the power and data cables, and replace the cover.

    Tighten the screws and reattach the battery. Your new SSD is now installed, and you can start booting up your device and enjoying its faster speed and increased storage capacity. Just remember to handle your old SSD with care and dispose of it properly.

    Step 5: Reassemble the Laptop Chassis

    Asus TP410UA laptops are known for their versatility and high performance. If you want to replace the SSD on your Asus TP410UA, you’ll need to know how to reassemble the laptop chassis. Before you begin, make sure you have all the necessary tools and screws organized for easy access.

    Start by lining up the screws with their corresponding holes and securing them tightly. Be sure to double-check that all the components are properly aligned before tightening the screws. Once everything is secure, you can put the bottom cover back on and screw it into place.

    Don’t forget to test your new SSD to make sure it’s functioning correctly. By following these simple steps, you can easily replace the SSD on your Asus TP410UA and retain its high performance and versatility.

    Reattach the back panel

    After completing the necessary repairs, it’s time to put the laptop chassis back together. The final step is to reattach the back panel of the laptop. This step is crucial as it protects the internal components from external hazards.

    Begin by aligning the panel and securing it in place with the screws removed earlier. Make sure to apply even pressure while tightening the screws, avoiding over-tightening, which can damage the panel or the internal components. Once you’ve securely fixed the back panel, it’s time to turn on your laptop and test it.

    As you power it on, listen for any unusual sounds or observe any abnormal behavior. If everything appears to be working correctly, you can pat yourself on the back for a job well done. Congratulations, you’ve successfully reassembled your laptop chassis! Don’t forget to save your work while reassembling your laptop.

    Power on the laptop and reinstall OS

    As mentioned before, reinstalling the OS on your laptop can solve a variety of issues you may be facing. Once you have completed that process, it’s time to reassemble the chassis. This is where you put all the components back together and make sure that everything runs smoothly.

    It may seem like a daunting task, but if you took the time to carefully disassemble your laptop, putting it back together should be a breeze. Start by screwing in the motherboard, being careful to not overtighten the screws and damage the board. Once that is complete, attach the screen and keyboard and make sure they are properly connected to the motherboard.

    Finally, put the bottom cover back on and screw it into place. Once that is complete, power on your laptop and make sure everything is in working order. Congratulations, you have successfully reassembled your laptop!

    Conclusion

    In conclusion, replacing the SSD in an Asus TP410UA is a task that requires patience, precision, and a steady hand. It’s not a job for the faint of heart, but with the right tools and a bit of know-how, you can easily upgrade your system’s storage capacity. So go ahead and give it a shot, and soon you’ll be basking in the glow of a lightning-fast laptop that will turn heads and impress your colleagues.

    And who knows, you might even earn a few extra brownie points for your tech-savvy skills. Just remember, always proceed with caution and follow the manufacturer’s instructions carefully. Happy upgrading!”

    FAQs

    What type of SSD is compatible with ASUS TP410UA?
    ASUS TP410UA is compatible with M.2 SATA SSDs.

    How do I remove the old SSD from my ASUS TP410UA?
    First, turn off your laptop and unplug it. Then, remove the bottom cover and locate the SSD. Unscrew it and carefully remove it from the connector.

    Can I replace the SSD on my own, or do I need professional help?
    If you have experience with computer hardware, you can replace the SSD on your own by following tutorials or guides. However, if you’re not confident, it’s best to seek professional help to avoid damaging your laptop.

    Do I need to reinstall my operating system after replacing the SSD on my ASUS TP410UA?
    Yes, you will need to reinstall your operating system on the new SSD. You can either clone the old SSD onto the new one or perform a fresh install.

    How can I check if my new SSD is working correctly after replacing it on my ASUS TP410UA?
    You can go to your BIOS settings and check if the new SSD is recognized. You can also run diagnostic software to check for any issues with the new SSD.

  • Unleash Unmatched Storage Capacity with MX500 2TB – A Game-Changer in Data Storage

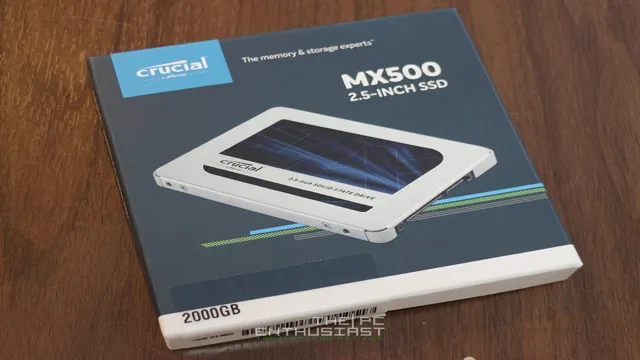
    When it comes to computer storage, more is always better. With the growing amount of digital data we accumulate daily, it’s essential to have enough space to store it all. That’s where the Crucial MX500 2TB comes in.

    This solid-state drive (SSD) is not only spacious but also incredibly fast and reliable. It’s an excellent investment for anyone looking to maximize their computer storage. If you’re tired of constantly deleting files to make room for new ones, or your computer’s hard drive is nearing full capacity, the MX500 2TB is the perfect solution.

    With its vast storage capacity, you’ll have plenty of room for all your music, movies, photos, and other files without worrying about running out of space anytime soon. On top of that, the MX500 2TB is blazing fast. It’s designed to deliver high-speed performance, so you can work, play, and create without any lag or delay.

    You’ll love how quickly it boots up, opens applications, and transfers files. Plus, it’s incredibly reliable, thanks to its advanced features, such as Error Correction Code (ECC) and Adaptive Thermal Protection. But that’s not all.

    The MX500 2TB is also cost-effective and energy-efficient. Compared to traditional hard drives, SSDs consume less power and generate less heat, which translates to lower energy bills and longer battery life. Plus, the MX500 2TB is built to last, so you won’t have to replace it anytime soon.

    In summary, if you’re looking for a spacious, fast, reliable, and cost-effective storage solution, the Crucial MX500 2TB is the way to go. It’s an investment that will pay off in the long run, as you’ll have all the space you need to store and access your files hassle-free. So, what are you waiting for? Upgrade to the MX500 2TB today and enjoy a better storage experience.

    Ultra-Fast and Reliable Performance

    The MX500 2TB is an incredibly powerful and reliable solid-state hard drive that boasts ultra-fast performance and impressive speed, making it a top choice for gamers, content creators, and power users alike. With read speeds of up to 560 MB/s and write speeds of up to 510 MB/s, this drive is designed to handle even the most demanding applications with ease. Plus, with a whopping 2TB of storage capacity, you’ll never have to worry about running out of space for your files, games, or media.

    Whether you’re editing high-res video, gaming for hours on end, or just need a drive that’s fast and reliable, the MX500 2TB is an excellent choice that won’t disappoint. So, if you’re looking for a drive with lightning-fast speeds, reliable performance, and tons of storage space, look no further than the MX500 2TB.

    Advanced 3D NAND Technology

    Advanced 3D NAND technology has revolutionized the world of electronic storage, offering incredible speed and reliability compared to traditional hard drives. With multiple layers of memory stacked on top of each other, 3D NAND SSDs can store more data in a smaller amount of space, making them ideal for high-performance computing and other data-intensive applications. The ultra-fast performance of 3D NAND technology means faster read and write speeds, reduced latency, and improved overall system performance, even under heavy loads.

    This makes it ideal for gaming, video editing, and other applications that require quick access to large amounts of data. Additionally, the reliability of 3D NAND is unmatched, with a longer lifespan and lower failure rates than traditional hard drives. These benefits make 3D NAND technology an ideal choice for anyone looking to upgrade their computer’s performance.

    Whether you’re a professional gamer, video editor, or just a casual user looking for a faster, more reliable storage solution, a 3D NAND SSD is guaranteed to provide the speed and performance boost you need. So why settle for a slower, less reliable hard drive? Upgrade to 3D NAND technology today and experience the future of electronic storage.

    mx500 2tb

    Up to 560MB/s Sequential Read Speed

    If you’re looking for lightning-fast performance and reliability, then you’ll be pleased with reading new tech devices that boast speeds of up to 560MB/s sequential read speed. That means you’ll be able to transfer large files, such as high-resolution images or videos, in a matter of seconds. Not only that, but this incredible pace is built to last, so you’ll be able to enjoy consistent and reliable speeds, even after prolonged usage.

    Think of it like a race car that’s not only speedy but durable enough to maintain its speed throughout the race. So if you’re in the market for a device that can keep up with your demanding workload without compromising on speed or performance, then be sure to consider those that are optimized for up to 560MB/s sequential read speed. You won’t regret it!

    Unrivaled Endurance

    The MX500 2TB is one of the most reliable and high-performance SSDs on the market today. With unparalleled endurance, it can handle even the most demanding workloads with ease. Whether you’re a gamer, a content creator, or a professional with intensive computing needs, this drive won’t let you down.

    Its 3D NAND technology ensures that your data remains secure and stable, even under heavy use, and its advanced features like dynamic write acceleration and error correction make sure that your files are stored and retrieved quickly and without errors. With a large capacity of 2TB, this drive is perfect for those who need plenty of space for large files and programs. The MX500 2TB is built to last, with a long operational life and a five-year warranty to give you peace of mind.

    Whether you’re upgrading an existing system or building a new one from scratch, the MX500 2TB is an excellent choice for anyone who needs reliable and high-performance storage.

    5-Year Limited Warranty

    When you purchase a product, you want to know that it’ll last for a long time. That’s why our company offers a 5-year limited warranty on all our products, ensuring unrivaled endurance for our customers. We believe in the quality of our products and want to give our customers peace of mind that their investment won’t go to waste.

    From the moment you purchase our products, we’re there to support you throughout the entire process. Our warranty covers any defects in materials or workmanship that may occur during the 5-year period. We understand that unexpected issues can arise, and we want to make sure our customers are taken care of.

    Our commitment to durability and reliability is unmatched and is backed by our exceptional warranty. You can trust that you are making a smart investment with our products that will last for years to come.

    TBW of up to 700 TB

    The endurance of a storage device plays a crucial role, especially in high-traffic applications. With the increasing amount of data being created and processed, a durable storage device is a must-have in any data center. That’s where TBW or Terabytes Written come in.

    Basically, the TBW rating indicates the amount of data that can be written to an SSD before it fails. And when you’re looking for an SSD with the highest endurance, the Kingston DC1000B 480GB SSD is a good option to consider. It boasts an excellent TBW of up to 700TB, which means you can write up to 700TB of data to the SSD before it hits end-of-life.

    That’s impressive! With a TBW rating like that, you don’t have to worry about running out of storage space too soon, even if you’re working with data-intensive applications. Whether you’re running a server, a database, analytics or a media asset management application, the Kingston DC1000B 480GB SSD proves to be an ideal choice for those who require extramural endurance from their storage devices.

    Easy Installation and Advanced Security

    Looking for an easy-to-install and secure option for your storage needs? Look no further than the mx500 2tb! With its user-friendly installation process, you can have your new storage solution up and running in no time. And when it comes to security, you won’t find a better option. The mx500 2tb is equipped with advanced security features to keep your data safe from threats such as hackers and viruses.

    So whether you’re looking for a new storage solution for your personal or professional needs, the mx500 2tb is sure to provide you with the security and reliability you need to keep your data safe and accessible. So, why wait? Give the mx500 2tb a try and experience the benefits of easy installation and advanced security for yourself!

    AES 256-bit Encryption

    If you’re looking for top-level security for your sensitive data, AES 256-bit encryption is your go-to. With easy installation and advanced security measures, AES 256-bit encryption is the perfect solution to safeguard your data. Unlike other encryption standards, AES 256-bit encryption is virtually impossible to break using brute-force attacks because of its sheer complexity.

    It’s like trying to crack a 256-digit combination lock! But just like any other encryption standard, as long as you keep your keys secure, you can breathe easy knowing your data is safe from prying eyes. So, if you’re looking for an impenetrable security solution, AES 256-bit encryption should be at the top of your list.

    User-Friendly Installation Process

    When it comes to installing software, ease of use and security are two key considerations. That’s why it’s important to choose a program that offers both. A user-friendly installation process can save time and hassle, especially for those who are not particularly tech-savvy.

    At the same time, advanced security measures ensure that your system stays protected from online threats. From simple setups to more complex installations, the right program should be easy to use without sacrificing important security features. That’s why it’s important to choose software that offers both an easy installation process and advanced security measures, like those found in our product.

    With our program, you don’t have to choose between convenience and safety. You can have both.

    Conclusion: Your Storage Solution is Here

    In conclusion, the mx500 2tb is like having a personal library at your fingertips. With its massive storage capacity, you can store all your important files, documents, photos, and even your favorite movies and TV shows. It’s like having a digital sanctuary where everything you need is organized and easily accessible.

    So whether you’re a student, a professional, or just someone who likes to keep everything in one place, the mx500 2tb is the perfect companion for your digital lifestyle. Don’t settle for less, give yourself the gift of limitless storage with the mx500 2tb.”

    FAQs

    What is the storage capacity of the Crucial MX500 2TB?
    The Crucial MX500 2TB has a storage capacity of 2 terabytes.

    What is the maximum read speed of the Crucial MX500 2TB?
    The Crucial MX500 2TB has a maximum read speed of up to 560 MB/s.

    Does the Crucial MX500 2TB come with any software for data management?
    Yes, the Crucial MX500 2TB comes with the Acronis True Image for Crucial cloning software to easily transfer data from your old drive to the new one.

    Is the Crucial MX500 2TB compatible with both desktop and laptop computers?
    Yes, the Crucial MX500 2TB is compatible with both desktop and laptop computers that have a SATA III interface.

  • Upgrade your PC’s Performance with Samsung’s 256GB PM991 NVMe M.2 SSD – A Compact Powerhouse!

    Upgrade your PC’s Performance with Samsung’s 256GB PM991 NVMe M.2 SSD – A Compact Powerhouse!

    Are you tired of your computer running at snail’s pace? Do you find yourself waiting for your applications to load endlessly? It might be time for an upgrade! One of the best ways to maximize your computer’s speed and performance is by switching to an SSD.In this blog, we will be discussing the Samsung SSD PM991 M.2 – a powerhouse that can take your computer to the next level.

    We’ll dive into what makes it different from traditional hard drives, its impressive features, and how it can help you get more out of your computer. So, sit back, relax, and get ready to learn how you can turbocharge your computer with the Samsung SSD 256GB PM991 M.

    Speed and Performance

    If you’re looking to boost your computer’s speed and performance, investing in a Samsung SSD 256GB PM991 M.2 2242 42mm PCIe 0 x4 NVMe MZALQ256HAJD MZ-ALQ2560 solid state drive might just be the solution you need.

    This cutting-edge SSD is designed to provide lightning-fast read and write speeds, allowing you to access your files and applications with lightning-fast speed. With a compact form factor that fits easily into most systems, this SSD is perfect for use in everything from desktops to laptops. So why wait? Upgrade your system today with a Samsung SSD 256GB PM991 M.

    2 2242 42mm PCIe 0 x4 NVMe MZALQ256HAJD MZ-ALQ2560 solid state drive and experience the speed and performance boost you’ve been looking for!

    Upgrade Your Storage

    If you’re looking to improve your computer or laptop’s speed and performance, upgrading your storage is a great place to start. Traditional hard disk drives (HDDs) can be slow and sluggish, especially if they’re older and have a lot of data stored on them. By switching to a solid-state drive (SSD), you can experience lightning-fast boot times, improved application performance, and faster file transfers.

    SSDs are also less likely to fail or become corrupted than HDDs, which can be a huge relief if you’ve ever lost important data due to a hard drive crash. Plus, SSDs are more energy-efficient and generate less heat than HDDs, which can help preserve the lifespan of your computer’s components. Overall, upgrading to an SSD is a straightforward and affordable way to give your computer a major performance boost.

    samsung ssd 256gb pm991 m.2 2242 42mm pcie 3.0 x4 nvme mzalq256hajd 
mz-alq2560 solid state drive

    PCIe 3.0 x4 NVMe Interface

    PCIe 0 x4 NVMe Interface When it comes to speed and performance, the PCIe 0 x4 NVMe Interface is among the best options available.

    This interface allows for extremely fast data transfer rates between the computer’s processor and storage devices. By utilizing four lanes of data transfer, with each lane capable of 8 gigabits per second, data can be transferred at an incredible speed. This makes it ideal for high-performance applications like gaming, video editing, and data processing.

    The PCIe 0 x4 NVMe Interface sees performance improvements in a number of areas, including higher sequential read and write speeds, lower latency, and better overall system responsiveness. For users who demand the best possible performance, this interface is the way to go.

    With its extreme speed and low latency, it can handle even the most demanding workloads with ease. In conclusion, the PCIe 0 x4 NVMe Interface is the interface of choice for users looking for speed and performance.

    Its high data transfer rates and low latency make it ideal for applications like gaming and video editing, where data needs to be processed quickly and efficiently. Whether you’re a professional content creator or a hardcore gamer, the PCIe 0 x4 NVMe Interface is the solution you’ve been looking for.

    Reliability and Endurance

    The Samsung SSD 256GB PM991 M.2 2242 42mm PCIe 0 x4 NVMe MZALQ256HAJD MZ-ALQ2560 Solid State Drive is a reliable and long-lasting storage option for your computer.

    With an endurance rating of up to 150 terabytes written (TBW), this SSD can handle heavy workloads and frequent use without slowing down or wearing out quickly. Additionally, Samsung’s advanced SSD technology ensures that your data is secure and protected, even in the event of sudden power loss. So if you’re looking for a high-performance and dependable SSD for your PC or laptop, the Samsung PM991 is a great choice.

    Samsung V-NAND Technology

    Samsung V-NAND technology is a breakthrough in digital storage that provides both reliability and endurance. Reliability refers to the ability of a device to perform consistently and accurately over time. With Samsung V-NAND technology, data can be stored and retrieved without errors or interruptions, giving users peace of mind that their information is safe.

    Endurance, on the other hand, is another key advantage of V-NAND technology. Endurance refers to the lifespan of a device and how long it can withstand frequent use and high demand. The advanced architecture of V-NAND technology enables devices to perform at a high level for longer periods of time, making it an ideal choice for professionals who rely on their devices to deliver performance day in and day out.

    With Samsung V-NAND technology, users can enjoy the reliability and endurance they need to get the job done.

    TRIM Support for Longevity

    In the world of data storage, reliability and endurance are paramount. That’s why TRIM support is so important. TRIM is a command that helps prolong the life of solid-state drives (SSDs) by efficiently managing their storage space.

    Basically, TRIM clears out data blocks that are no longer in use, which not only prevents unwanted data fragmentation, but also allows the SSD to work more effectively. When an SSD has TRIM support, it can function more efficiently over time and resist the wear and tear that comes with frequent use. This can help extend the lifespan of the drive and ensure that your data stays intact for as long as possible.

    So if you’re looking for a storage solution that’s both reliable and durable, choose an SSD with TRIM support.

    Dynamic Thermal Guard Protection

    Dynamic Thermal Guard Protection is an essential feature in modern storage devices that assures maximum reliability and endurance. It is designed to monitor and regulate the internal temperature of the device, ensuring it remains within a safe range. The excess heat generated during prolonged usage can result in device failure and data loss.

    Dynamic Thermal Guard Protection prevents such a scenario by automatically slowing down the device’s performance to prevent overheating. It also employs various other techniques like heat sink designs and ventilation to keep the temperature in check. This feature works like a security guard for your storage device, constantly monitoring its temperature and taking necessary measures to avoid any damage.

    It guarantees peace of mind for users who rely on their devices for critical tasks like gaming, video editing, or storing important data. Imagine your storage device as a car engine. Just as an engine requires oil to cool down its components and prevent burnout, Dynamic Thermal Guard Protection keeps your storage device cool, thereby increasing its lifespan and protecting your precious data.

    In short, this feature ensures maximum reliability and endurance for your storage device, making it a smart and reliable choice for tech-savvy users who value performance and durability.

    Easy Installation

    Are you looking for a speedy and efficient storage solution for your computer? Consider the Samsung SSD 256GB PM991 M.2 2242 42mm PCIe 0 x4 NVMe MZALQ256HAJD MZ-ALQ2560 solid state drive.

    Not only does this SSD offer lightning-fast data transfer speeds, but it also boasts an easy installation process. Simply connect the drive to your computer’s M.2 slot and secure it with the provided screws.

    No need for any additional cables or power sources! Plus, its compact size makes it an ideal upgrade for laptops or other portable devices. Don’t let a slow and outdated hard drive slow you down – upgrade to the Samsung SSD 256GB PM991 M.2 and experience the benefits of fast and reliable storage.

    M.2 2242 42mm Form Factor

    M.2 2242 42mm Form Factor If you’re looking for a quick and easy installation to upgrade your laptop’s storage, the M.2 2242 42mm form factor might just be the perfect solution for you.

    With its small size and convenient form factor, you can easily install it into your laptop without taking up too much space. This form factor is ideal for those who want to add extra storage and speed without having to disassemble their entire laptop. Plus, it’s much faster than traditional hard drives, making it an essential upgrade for gamers and professionals alike who demand lightning-fast load times and data transfer speeds.

    Whether you’re installing it for personal or professional use, the M.2 2242 42mm form factor is sure to provide you with the performance you need. So what are you waiting for? Upgrade your laptop’s storage with this powerful form factor today!

    Designed for High Compatibility

    One of the primary concerns when choosing software is compatibility. Fortunately, our software is designed with high compatibility in mind, meaning that it will work seamlessly with a wide variety of systems and applications. Easy installation is one of our top priorities, and we’ve taken great care to make sure that our software is user-friendly and straightforward to install.

    You won’t need a degree in computer science to get up and running, so you can start using our software right away. We understand that time is valuable, which is why we’ve made the installation process as quick and streamlined as possible. With our software, you can be confident that you’ll be able to get started quickly and without any headaches.

    So whether you’re a small business owner, an individual user, or an enterprise-level company, you can count on our software to work seamlessly with your existing systems and provide you with the functionality you need.

    Conclusion

    In conclusion, the Samsung SSD 256GB PM991 M.2 2242 42mm PCIe 0 x4 NVMe MZALQ256HAJD MZ-ALQ2560 Solid State Drive is like a high-performance athlete for your computer.

    It packs a punch and delivers lightning-fast performance, making your computing experience smoother and more efficient. Plus, with its compact size and advanced technology, it’s like having a mini rocket engine powering your device. So whether you’re a gamer, a designer, or a multitasking pro, the Samsung SSD 256GB PM991 M.

    2 2242 42mm PCIe 0 x4 NVMe MZALQ256HAJD MZ-ALQ2560 Solid State Drive is a must-have for anyone looking to take their computer game to the next level.”

    FAQs

    What is the interface of the Samsung SSD 256GB PM991 M.2 2242 42mm PCIe 3.0 x4 NVMe MZALQ256HAJD?
    The interface of the Samsung SSD 256GB PM991 M.2 2242 42mm PCIe 3.0 x4 NVMe MZALQ256HAJD is PCIe 3.0 x4.

    What is the maximum sequential read speed of the Samsung SSD 256GB PM991 M.2 2242 42mm PCIe 3.0 x4 NVMe MZALQ256HAJD?
    The maximum sequential read speed of the Samsung SSD 256GB PM991 M.2 2242 42mm PCIe 3.0 x4 NVMe MZALQ256HAJD is up to 3,100 MB/s.

    What is the maximum sequential write speed of the Samsung SSD 256GB PM991 M.2 2242 42mm PCIe 3.0 x4 NVMe MZALQ256HAJD?
    The maximum sequential write speed of the Samsung SSD 256GB PM991 M.2 2242 42mm PCIe 3.0 x4 NVMe MZALQ256HAJD is up to 1,400 MB/s.

    What is the storage capacity of the Samsung SSD 256GB PM991 M.2 2242 42mm PCIe 3.0 x4 NVMe MZALQ256HAJD?
    The storage capacity of the Samsung SSD 256GB PM991 M.2 2242 42mm PCIe 3.0 x4 NVMe MZALQ256HAJD is 256GB.

    Is the Samsung SSD 256GB PM991 M.2 2242 42mm PCIe 3.0 x4 NVMe MZALQ256HAJD compatible with laptops?
    Yes, the Samsung SSD 256GB PM991 M.2 2242 42mm PCIe 3.0 x4 NVMe MZALQ256HAJD is compatible with laptops that have an M.2 slot.

  • Keep Your PS4 Cool and Running Smoothly – The Ultimate Guide to Choosing the Best Cooling Fan

    Gamers, have you ever encountered your PS4 shutting down due to overheating? It can be quite frustrating to have your gaming session interrupted, especially when you’re in the middle of an intense battle. The good news is that this can be prevented by keeping your PS4 cool. Not only does it avoid such inconvenience but it also extends the lifespan of your console.

    There are several easy ways to keep your PS4 cool, such as placing it in a well-ventilated spot and regularly cleaning the vents. You can also invest in cooling accessories such as a fan or cooling stand. By reducing the temperature of your PS4, it prevents damage that may be caused by excessive heat.

    Think of it like driving a car: you wouldn’t want to keep the accelerator pedal down at full speed for too long without risking damage to the engine. Similarly, if you don’t take the necessary steps to keep your PS4 cool, it’s only a matter of time before it shuts down, leaving you with a hefty repair bill and lost time without your gaming console. So, if you want to avoid the frustration of overheating and potential damage to your PS4, take the necessary steps to keep it cool.

    Whether it’s placing it in a well-ventilated spot, using cooling accessories, or cleaning the vents regularly, your console will thank you. Happy gaming!

    Why You Need a Cooling Fan

    If you’re a gamer, specifically one who loves the PS4, then it’s highly likely that you’ve experienced the frustration that comes with overheating. This is where the ps4 cooling fan comes in. Not only can an external cooling fan prevent your console from shutting down unexpectedly, but it can also prolong its lifespan.

    The cooling fan works by circulating air around the console, preventing the internal temperature from rising to a dangerous level. It’s a small investment that can save you a lot of money in the long run, especially if you’re someone who spends a lot of time playing and puts their console to work. So, if you want to ensure that your PS4 runs smoothly and stays cool, a cooling fan is definitely something worth considering.

    Don’t let overheating ruin your gaming experience – invest in a cooling fan and enjoy uninterrupted gaming sessions.

    Prevent Overheating and Damage

    If you’re a tech enthusiast, you probably know the value of a cooling fan for your devices. Overheating can cause damage to your gadgets, and a cooling fan is a solution to this problem. It’s a simple yet effective gadget that helps regulate the temperature of your device.

    Without a cooling fan, the heat generated by your device can cause malfunctions and crashes, leading to permanent damage. Think of it like your body’s natural cooling system. When you get too hot, your body starts to sweat, and the sweat cools down your body’s surface.

    In the same way, a cooling fan helps to dissipate heat from your device, carrying it away to prevent overheating and damage. So, if you want your device to last longer and perform optimally, investing in a cooling fan is a great idea. Not only does a cooling fan protect your device from overheating, but it also helps to prevent discomfort caused by the heat generated by your device.

    Some devices, like laptops, can get uncomfortably hot, making it hard to use them on your lap or close to your body. A cooling fan solves this problem, making it possible for you to use your device without any discomfort. Overall, a cooling fan is a must-have gadget for anyone who values their tech devices.

    It helps prevent overheating and damage, prolongs the lifespan of your device, and increases your comfort while using it. So if you haven’t invested in a cooling fan yet, now is the time to do so.

    ps4 cooling fan

    Extend the Life of Your Console

    If you’re an avid gamer, you know how frustrating it can be when your console overheats and shuts down right in the middle of an intense gaming session. Fortunately, there’s a simple solution that can help extend the life of your console: a cooling fan. A cooling fan is an inexpensive and effective way to keep your console running smoothly by regulating its temperature and preventing it from overheating.

    This not only ensures a better gaming experience but also minimizes the risk of damage to your console’s internal hardware. It’s like having a personal fan on a hot summer day – it ensures that you stay comfortable and relaxed. So, if you want to keep your console in top working condition for as long as possible, invest in a good cooling fan – your console (and your gaming habits) will thank you for it!

    Factors to Consider

    When searching for a PS4 cooling fan, there are several factors to consider. First and foremost, you need to determine the size and style of fan that will fit your specific PS4 model. Additionally, you should look at the noise level of the fan, as some fans can be quite loud and distracting when in use.

    It’s also important to consider the overall quality of the fan, as a poorly made fan could potentially cause damage to your PS Other factors to keep in mind include the speed of the fan, the amount of air it can move, and its overall efficiency in keeping your PS4 cool. By taking these factors into consideration, you can make an informed decision and select the right PS4 cooling fan to meet your needs and keep your gaming sessions running smoothly.

    Compatibility with PS4 Models

    When it comes to buying a PS4 console, compatibility with different models can be a confusing factor to consider. It’s important to understand which models work with which games and accessories before making a purchase. The first thing to keep in mind is that the PS4 Pro, released in 2016, is a more powerful version of the standard PS4 and can display 4K resolution.

    However, not all games are optimized for the Pro, so it may not provide a noticeable difference for every game. Another important factor is the release date of the game itself. Some games may be exclusively designed for the newer PS4 models, while others will work on all models.

    It’s also important to check compatibility with any controllers or headsets you plan on using. Overall, it’s important to do your research and make sure you’re purchasing a PS4 and accessories that are compatible with the games you want to play.

    Noise Level

    When selecting a noise level for your home or business, there are several factors to consider. Firstly, consider the purpose of the space and who will be using it. For example, a quiet library will require a much lower noise level than a bustling restaurant.

    Secondly, consider the type of noise that will be present. If there will be sudden bursts of noise, such as a loud machine, a higher noise level may be acceptable as long as it doesn’t exceed safety regulations. On the other hand, if the noise will be continuous and monotonous, a lower noise level may be needed to avoid causing annoyance or distraction.

    It’s also important to consider the implications of noise pollution on the surrounding community or environment. By taking all these factors into account, you can make an informed decision about the most appropriate noise level for your specific situation.

    Ease of Installation

    When it comes to choosing an installation method for any product, there are several factors to consider. One of the most prominent factors is ease of installation. No one wants to spend hours struggling with installation instructions or tools that are difficult to use.

    Therefore, it is essential to consider the level of expertise required for installation, the time it would take to complete the installation, and the tools needed. Some products may require professional installation, while others can be easily installed by the consumer. Additionally, the type of surface or material on which the product will be installed plays a significant role as well.

    For instance, installing a product on a concrete surface is different from installing it on a wooden surface. It is important to keep these factors in mind when considering the ease of installation for any product. By doing so, you can make the best decision for your specific needs and ensure a successful installation process.

    Top PS4 Cooling Fans

    If you’re an avid PS4 gamer, you know how important it is to keep your console cool to prevent overheating and possible damage. This is where a PS4 cooling fan can come in handy. These fans are designed to circulate cool air above and beneath your console, reducing the temperature and allowing you to play for longer periods of time.

    One top option is the Kootek Vertical Stand with Cooling Fan for PS It not only cools your PS4 but also provides a convenient vertical stand to save space and prevent cable clutter. Another great cooling fan is the OIVO PS4/PS4 Pro/PS4 Slim Vertical Stand with Cooling Fan.

    It has dual fans to improve airflow and can charge two controllers simultaneously. These are just a couple of examples of the many PS4 cooling fans available on the market. So if you want to keep your PS4 running smoothly, investing in a cooling fan is definitely worth considering.

    1. Kootek Vertical Stand with Cooling Fan

    Looking for ways to keep your PS4 cool during extended gaming sessions? Look no further than the Kootek Vertical Stand with Cooling Fan. This stand not only keeps your console upright for better ventilation, but also has two built-in fans to prevent it from overheating. The stand also includes two controller charging ports and 14 game storage slots, making it a great all-around accessory for your gaming setup.

    And with its sleek design, it won’t detract from the look of your console. Say goodbye to overheating and hello to longer gaming sessions with the Kootek Vertical Stand with Cooling Fan.

    2. Linkstyle Cooling Fan for PS4

    The Linkstyle Cooling Fan for PS4 is a top-of-the-line option that keeps your console running at optimal temperatures. This compact and lightweight fan attaches directly to the back of your PS4 and provides additional cooling power to prevent overheating. Its design includes two adjustable fan speeds, making it easy to find the perfect setting for your individual needs.

    But not only is it effective, it’s also incredibly easy to use. With its simple plug-and-play design, all you need to do is plug it in and you’re good to go. Say goodbye to loud and distracting fan noises interrupting your gaming experience.

    The Linkstyle Cooling Fan for PS4 is efficient and quiet, allowing you to fully immerse yourself in your favorite games. So whether you’re a casual or hardcore gamer, this cooling fan is a must-have accessory for prolonging the life of your PS4 and keeping your gameplay smooth and uninterrupted.

    3. Zacro PS4 Vertical Stand Cooling Fan

    The Zacro PS4 Vertical Stand Cooling Fan is a great option for gamers who want to keep their PlayStation 4 cool while gaming for long periods. This cooling fan has two high-speed fans that provide efficient heat dissipation, preventing overheating and extending the lifespan of your PS4 console. The stand also has two controller charging ports, making it a convenient and functional addition to your gaming set-up.

    One of the standout features of this cooling fan is its vertical design, which not only saves space on your entertainment center but also improves the console’s stability. The Zacro PS4 Vertical Stand Cooling Fan is easy to install and use, making it a must-have accessory for avid gamers. With its sleek and ergonomic design, it’s the perfect complement to your PS4 console.

    Experience uninterrupted gaming sessions while keeping your console cool with this top-quality cooling fan.

    Final Thoughts

    In conclusion, ensuring proper cooling for your PS4 console is vital for preserving its longevity. The PS4 cooling fan performs a crucial role in keeping the console’s temperature in check during long gaming sessions. It’s important to regularly check the fan’s functionality to avoid issues such as overheating or console shut-downs.

    Upgrading the fan with a high-quality model may also be a worthwhile investment, providing improved cooling and performance. Overall, taking good care of your PS4’s cooling system will help you to prolong the lifespan of your console and ensure a smooth gaming experience. So, don’t forget to give your PS4’s cooling fan the attention it deserves!

    Conclusion

    In summary, the PS4 cooling fan is like the Batman of your gaming system. It’s always there, silently working to keep your console cool and ensuring that it can handle any challenge you throw its way. And just like the Caped Crusader himself, you don’t always notice it, but you sure would if it wasn’t there.

    So let’s all give a round of applause to the unsung hero of our gaming setup – the PS4 cooling fan!”

    FAQs

    How does the PS4 cooling fan work to prevent overheating?
    The PS4 cooling fan pulls in cool air and directs it over the internal components of the console to dissipate heat and prevent overheating.

    Are there any particular PS4 games that are known to cause excessive heat and make the cooling fan work harder?
    Yes, some of the more graphically intensive games like Red Dead Redemption 2 or The Last of Us Part II can cause the PS4’s cooling fan to work harder.

    Can I replace the PS4 cooling fan myself if it stops working properly?
    While technically possible, replacing the PS4 cooling fan requires opening the console and could potentially void the warranty. It’s recommended to have a professional handle any repairs.

    Is it normal for the PS4 cooling fan to make noise while in use?
    Yes, it’s normal for the PS4 cooling fan to make some noise while in use as it’s working to cool down the console. However, if the noise is excessively loud or changes in tone, it could indicate a problem.

  • Unlocking Your SSD: A Step-by-Step Guide on How to Get It to Show in BIOS

    Have you recently installed a new SSD in your system, but the BIOS doesn’t seem to acknowledge its presence? It can be frustrating to invest in new hardware only to encounter issues during the installation process. SSDs have become increasingly popular in recent years due to their fast read and write speeds, making them a preferred choice among gamers, editors, and programmers. However, ensuring that your SSD is recognized in BIOS can be a bit tricky.

    Don’t worry, though. In this blog post, we’ll discuss some troubleshooting steps you can take to get your SSD to show in BIOS and get your system up and running. So, grab a cup of coffee, get comfortable, and let’s dive in!

    Check SATA Cable

    If your SSD is not showing up in the BIOS, one possible issue could be a faulty SATA cable. This cable connects your drive to the motherboard and any defect could result in failure to detect the SSD. To check if the cable is the problem, you can try replacing it with a new one or simply disconnecting and reconnecting the existing cable.

    It’s important to ensure that the cable is plugged in securely and that there’s no damage to it before proceeding. If the issue persists, it could be a problem with the SSD itself, so it’s recommended to try it on a different machine to rule out other causes. In summary, a problem with the SATA cable is a common culprit when your SSD is not showing up in the BIOS, so checking and replacing it may help to solve the issue.

    Make sure cable is connected securely

    When it comes to troubleshooting computer problems, one of the simplest yet most common issues is a loose or improperly connected SATA cable. These cables are responsible for connecting your hard drive or SSD to your motherboard, and if they become even slightly dislodged, it can cause all sorts of problems, from slow performance to system crashes. So, if you’re experiencing issues with your computer, the first thing you should do is make sure your SATA cable is securely connected.

    Simply open up your computer case and locate the cable running from your drive to your motherboard. Give it a gentle tug to make sure it’s snugly in place, and if it’s not, unplug it and reattach it firmly. By taking this simple step, you can resolve many common computer issues and get your system back up and running smoothly.

    Remember, when it comes to fixing computer problems, it’s often the simplest solutions that are the most effective. So, if you’re experiencing issues with performance or stability, make sure to check your SATA cable. A loose connection can cause all sorts of issues, but by taking a few moments to ensure that it’s securely attached, you can avoid many headaches down the road.

    And by keeping your system running smoothly, you’ll be able to get the most out of your computer and enjoy a seamless computing experience. So, next time you encounter a problem, start with the basics and work your way up from there – you might be surprised at just how much of a difference it can make.

    how do i get my ssd to show in bios

    BIOS Settings

    If your SSD is not showing up in the BIOS, there are several things you can do to troubleshoot the issue. Firstly, you should ensure that the SSD is properly connected to your computer’s motherboard. Once you have confirmed this, check that your BIOS is set to detect the SSD.

    This setting can usually be found under your BIOS’s storage configuration. Additionally, you may need to update your BIOS to the latest version in order to utilize the SSD properly. Finally, if none of these solutions work, you may need to replace or reinstall the SSD entirely.

    In conclusion, by adjusting your BIOS settings, updating your BIOS firmware, and properly connecting your SSD, you should be able to get your SSD to show up in your BIOS without any issues.

    Enable SATA ports in BIOS settings

    If you’re experiencing issues with your SATA ports, it’s a good idea to check your BIOS settings to ensure they’re enabled. BIOS, or Basic Input/Output System, is a program stored on a chip on your computer’s motherboard that controls communication between your system and other hardware components. To enable SATA ports in BIOS settings, you’ll need to enter your computer’s BIOS menu, which you can usually access by pressing a specific key during the boot-up process.

    Once you’re in the BIOS menu, navigate to the SATA settings and make sure they’re set to “enabled.” This simple step can resolve many issues related to SATA connectivity, allowing you to use your hard drives and other SATA devices without any hiccups. With just a few clicks in your BIOS settings, you can ensure that your SATA ports are working optimally and that you’re getting the most performance out of your computer’s hardware.

    So, if you’re experiencing any SATA-related issues, be sure to check your BIOS settings and enable SATA ports to get everything back on track.

    Update BIOS Firmware

    If you’re having trouble getting your SSD to show up in BIOS, one possible solution is to update your BIOS firmware. BIOS, or Basic Input/Output System, is the software that runs on your computer’s motherboard and controls the hardware. Updating the BIOS firmware can sometimes fix compatibility issues between the motherboard and SSD, allowing the BIOS to recognize the SSD and make it available for use.

    To update your BIOS firmware, you’ll first need to identify the exact make and model of your motherboard, and then visit the manufacturer’s website to download the latest BIOS firmware update. Be sure to follow the manufacturer’s instructions for updating the BIOS, as incorrect installation can cause serious problems with your system. Finally, once the BIOS firmware has been updated, reboot your computer and check to see if the SSD is now visible in BIOS.

    Check if latest firmware is installed

    Updating the BIOS firmware is essential to ensure that your computer runs smoothly and without any errors. With each update, your computer’s performance and stability can improve dramatically. One way to check if you have the latest firmware is to access the BIOS setup utility during the boot process.

    The BIOS setup utility provides an option to check for the latest firmware updates available for your computer’s BIOS. Another way is to check the manufacturer’s website for the latest firmware update for your computer’s model. It’s crucial to keep your firmware up-to-date as this ensures that your computer has the latest security fixes and performance improvements.

    Therefore, it’s highly recommended to update your BIOS firmware regularly to avoid potential issues and keep your computer running optimally.

    Check Power Connection

    If you’re wondering how to get your SSD to show in BIOS, one of the first things to check is your power connection. Often, an SSD may not show up in BIOS if it isn’t getting enough power. Double-check that your power cable is securely plugged into your SSD and the power supply unit (PSU).

    If it’s loose, unplugged, or faulty, it could be the culprit behind your SSD not showing up. Additionally, make sure that your PSU is powerful enough to handle your SSD’s needs. Some SSDs require more power than others, so it’s important to verify that your PSU meets or exceeds those requirements.

    Once you’ve confirmed your power connection, you can move on to other troubleshooting steps to diagnose the issue.

    Ensure power cable is connected firmly

    One common issue that can arise when using electronic devices is a loose power cable. If you’re experiencing problems with your device, the first thing you should do is check that the power cable is connected firmly. A loose power cable can cause all sorts of issues, from frequent crashes to slow performance or even complete shut downs.

    Thankfully, this is an easy issue to fix. Simply unplug the cable and plug it back in, making sure that it’s securely attached. If you’re still experiencing issues, it’s possible that your power cable is damaged and needs to be replaced.

    Remember, a securely connected power cable is essential for any electronic device to function properly, so always double-check that it’s plugged in all the way before moving on to other troubleshooting steps.

    Check Compatibility

    If you are wondering why your SSD is not showing in your BIOS, there are a few things you can do to check compatibility. Firstly, make sure that your SSD is compatible with your motherboard’s BIOS. Check to see if your motherboard has the right SATA ports and connectors.

    Secondly, confirm that your motherboard supports the SSD’s storage capacity. It is also a good idea to see if there are any BIOS updates available for your motherboard. In some cases, updating your BIOS can fix compatibility issues and should be done with caution.

    Lastly, double-check that your SSD is properly installed and connected to your motherboard. This might require opening up your computer case and physically checking all connections. By taking these steps, you can ensure that your SSD is compatible and properly visible in your BIOS.

    Make sure SSD is compatible with motherboard

    When upgrading or building your PC, it’s important to make sure that all the components are compatible with each other. One thing that often gets overlooked is the compatibility between the motherboard and SSD. Checking the compatibility is crucial before making a purchase to ensure that the SSD will work with the motherboard and its chipset.

    It’s important to check the motherboard’s specs to see what kind of interface it has for storage devices such as SATA or PCIe. This will help you determine if the SSD you’re considering is compatible with your motherboard. Trying to install an incompatible SSD could lead to problems such as not being recognized or even damaging the drive or the motherboard.

    In short, always check compatibility before investing in a new SSD for your PC build or upgrade to ensure a smooth, hassle-free experience.

    Seek Professional Help

    If you’re having trouble getting your SSD to show in the BIOS, seek professional help. An SSD not showing up in the BIOS is a common issue, and the underlying problem can be caused by a variety of factors. For example, it could be due to a faulty cable or connection, or perhaps the drive is not getting enough power.

    In some cases, the problem may even be caused by a defective drive. Trying to troubleshoot the issue on your own can be frustrating, especially if you don’t have the technical expertise to do so. By seeking professional help, you’ll have access to experts who can diagnose the issue and provide an effective solution.

    Whether it’s a hardware problem or a software configuration issue, a professional can help you resolve the issue, ensuring that your SSD is up and running in no time.

    Get professional assistance if still not showing

    If you’ve tried everything and your website is still not showing up on search engines, it may be time to seek professional help. There are many factors that can affect your search engine rankings, from technical issues to content quality, and it can be difficult to pinpoint the exact problem on your own. A professional SEO expert can analyze your website and identify areas for improvement, as well as provide a comprehensive strategy for improving your visibility online.

    Hiring a professional is especially important if your website is a critical component of your business or brand. In today’s digital age, having a strong online presence can make or break your success, so it’s important to invest in the right resources and expertise. While it may seem daunting to add another expense to your budget, the long-term benefits of a successful SEO strategy are well worth it.

    Additionally, a professional SEO consultant can keep up to date with the latest trends and algorithms that affect search engine rankings. This means that you don’t have to worry about constantly adjusting your website strategy or falling behind your competitors. Instead, you can focus on your business goals and let the experts handle the technical details.

    In conclusion, seeking professional help is an excellent option if you’ve exhausted all other avenues for improving your search engine rankings. By hiring an SEO expert, you can receive targeted analysis, personalized strategy, and ongoing support for your website and brand. Don’t let the complexities of SEO hold you back from reaching your full online potential.

    Conclusion

    Well, my dear friend, if you’re having trouble getting your SSD to show up in your BIOS, it’s important to remember that even the most high-tech technology can still be a bit finicky at times. But fear not! With a little bit of troubleshooting and patience, you’ll have that speedy SSD up and running in no time. And who knows, maybe this experience will teach you a valuable lesson about the importance of perseverance and problem-solving.

    Or it could just be a minor inconvenience that you’ll soon forget about. Either way, happy computing!”

    FAQs

    Why is my SSD not showing up in the BIOS?
    This could be due to several reasons, such as a faulty or incompatible SSD, outdated BIOS, or incorrect SATA cable connection. Try checking these factors and re-installing the SSD if necessary.

    How can I update my BIOS to detect my SSD?
    Check your motherboard documentation for the correct steps to update your BIOS. You may need to download the latest BIOS version from the manufacturer’s website and use a USB drive to flash it.

    Can using an older SATA cable affect my SSD detection in BIOS?
    Yes, using an older SATA cable can lead to compatibility issues and prevent the SSD from showing up in the BIOS. Try using a newer cable or a different SATA port.

    What should I do if my SSD is detected but not booting up?
    You may need to check your boot order settings in the BIOS, and ensure that the SSD is set as the primary boot device. Additionally, check for any errors or corrupted files in the SSD and try repairing them using chkdsk or other tools.