Author: David L. Lynn

  • From NAS to Cloud: Understanding the Types of Network Attached Storage That Drive Your Data Storage Needs

    Ready to upgrade your storage game? Network Attached Storage (NAS) is an innovative solution that offers a convenient way to share and store data across multiple devices in a network. With a NAS, you can finally bid goodbye to the storage limitations of your devices and instead access your files from any device connected to the same network. But with so many options available in the market, choosing the right type of NAS can be a daunting task.

    In this blog, we will delve into the different types of network attached storage and help you make an informed decision. From personal NAS to enterprise-level NAS, we’ve got you covered. So, sit back and let’s explore the world of NAS!

    Single Drive NAS

    When it comes to types of network attached storage (NAS), one option to consider is a single drive NAS. As the name suggests, this type of NAS system includes just one hard drive within the device. While this may seem limiting, it can be a great choice for individuals or small businesses who only require a moderate amount of storage space.

    Single drive NAS systems are typically easy to set up and maintain and can be a cost-effective choice with lower upfront costs. However, it’s important to keep in mind that a single drive NAS does come with some potential downsides. For example, if the hard drive fails, all data stored on it could be lost.

    To mitigate this risk, it’s often recommended to set up a backup system for extra protection. Additionally, as your storage needs grow, you may need to add additional drives to your system or upgrade to a more advanced NAS setup.

    Compact and affordable option for data backup and sharing

    If you’re looking for a compact and affordable option for data backup and sharing, a single drive NAS (network-attached storage) might just be what you need. It’s a device that allows you to store and access your files from any device on your network, without the need for a dedicated server. With a single drive NAS, you can backup your important data on a regular basis and access it from your smartphone, tablet, laptop, or desktop computer.

    It’s a great option for small businesses or individual users who need to store and share data but aren’t ready to invest in a more advanced storage solution. Some of the benefits of a single drive NAS include ease of use, affordability, and flexibility. You can easily add more storage capacity as your needs grow, and many models come with built-in backup software to simplify the backup process.

    Plus, with a single drive, you don’t have to worry about managing and maintaining multiple drives, which can be a headache for some users. Overall, a single drive NAS is a practical and reliable solution for anyone who needs to store and share data without breaking the bank.
    types of network attached storage

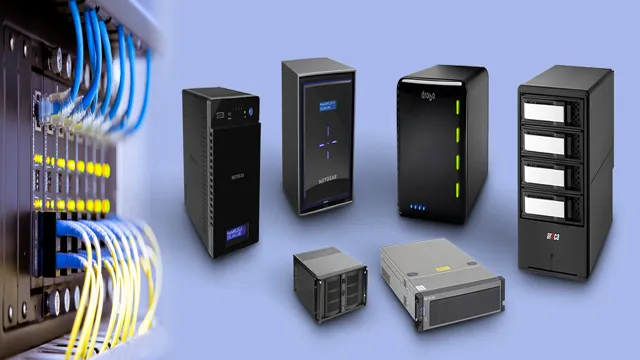
    Examples: Synology DiskStation DS120j, QNAP TS-128A

    Single Drive NAS devices are perfect for individuals or small home offices that need data storage solutions without the complexity of managing multiple disks. In the world of single-drive NAS options, Synology DiskStation DS120j and QNAP TS-128A are two of the most popular options. Both devices feature a single drive bay and are powered by a user-friendly interface that allows for easy integration with other devices.

    The Synology DiskStation DS120j, for instance, offers up to 16TB of data storage, has built-in media streaming capabilities, and features a custom software package with a range of useful applications. On the other hand, QNAP TS-128A provides a high-speed data transfer rate of up to 112 MB/s, has a HDMI output for media playback, and is compatible with different operating systems. These two devices have different features, but both are reliable options for those who need a single drive NAS with robust capabilities.

    Multi-Bay NAS

    When it comes to types of network attached storage, one option that might come up is a multi-bay NAS. This type of storage solution is ideal for businesses or individuals who require a lot of storage space for their data. Instead of being limited to just one hard drive, a multi-bay NAS allows users to install multiple hard drives, offering greater capacity and redundancy.

    With a multi-bay NAS, users can choose how many bays they need based on their storage needs and upgrade as necessary in the future. It’s important to note that while multi-bay NAS systems can be expensive, they provide reliability and scalability that is hard to match with other storage solutions. As a result, investing in a multi-bay NAS might be a wise choice for those needing the extra capacity and peace of mind.

    Ideal for home and business use with multiple users and high data needs

    A Multi-Bay NAS is the perfect solution for homes and businesses that require high-performance data storage and retrieval. The multi-bay term refers to the capability of the NAS to host several hard drives – two to four or even more – depending on the model and needs. Multi-bay NAS devices provide storage capacities that range from several terabytes to over 100 terabytes of data and can be configured in various RAID levels to ensure data protection and redundancy.

    These devices cater to high data needs and support several simultaneous users, making them ideal for sharing files, media, and other data-intensive applications. Multi-bay NAS devices provide significant benefits over traditional external hard drives, including faster speeds, reliability, backup options, and scalability. Whether for personal use or business requirements, Multi-Bay NAS drives cater to a broad audience, ranging from photographers, videographers, and content creators to remote working teams needing to collaborate and share work files.

    With such an abundance of storage space available, it is easy to save, share, and access vast amounts of data, which could otherwise be challenging with external hard drives or cloud storage options. Furthermore, NAS devices have built-in security measures, ensuring that data is safe from unauthorized access and cyber threats. Utilizing a multi-bay NAS drive is undoubtedly the best solution for those with significant data storage and accessibility needs.

    Examples: Western Digital My Cloud EX2 Ultra, Netgear ReadyNAS 424

    A multi-bay NAS (Network-Attached Storage) is a device that includes multiple bays or slots to house several internal hard drives, creating a storage solution that can be customized and scaled to meet your needs. These units typically offer a variety of RAID (Redundant Array of Inexpensive Disks) configurations for added redundancy and data protection. The Western Digital My Cloud EX2 Ultra and Netgear ReadyNAS 424 are multi-bay NAS devices that provide exceptional performance and features for small to midsize businesses and home users.

    These units offer advanced data management capabilities, including file sharing, backup, and cloud integration. With a multi-bay NAS, you can easily expand your storage capacity as your business grows without having to replace the entire system. If you are looking for a flexible, efficient, and reliable storage solution, consider a multi-bay NAS like the ones mentioned.

    It will not only provide scalability but also keep your data secure and accessible.

    Rackmount NAS

    When it comes to types of network attached storage (NAS), one option that is favored by many businesses and IT professionals is the rackmount NAS. This type of NAS is designed to be mounted in standard server racks, which can help save valuable floor space in data centers. Rackmount NAS devices are typically more durable and have better airflow management since they are built to withstand long-term operation within a data center environment.

    They often come equipped with multiple drive bays, which allow for high-capacity storage solutions, and can also support various RAID configurations for data redundancy and protection. Additionally, some rackmount NAS devices come with advanced security features like built-in firewalls, encryption, and access controls, making them an ideal choice for organizations that require secure data storage and management.

    Designed for enterprise-level IT storage solutions

    If you’re an enterprise-level IT manager looking for a robust storage solution, look no further than rackmount NAS. Designed specifically for the needs of large-scale businesses, rackmount NAS offers unparalleled speed, security, and scalability. By mounting multiple storage devices in a single rack, your IT team can easily access and manage your data, whether it’s on-site or in the cloud.

    Plus, with features like RAID, encryption, and hot-swappable drives, you can be sure that your data is always safe and accessible. So if you want to simplify your storage and ensure the highest levels of performance and security, consider rackmount NAS for your enterprise-level IT needs.

    Examples: Synology RackStation RS3617xs, QNAP TS-EC1280U-RP

    Rackmount NAS devices are an excellent addition to the server room setup. Synology RackStation RS3617xs and QNAP TS-EC1280U-RP are perfect examples of rackmount NAS models that offer superior performance and reliability to meet the high demands of modern business operations. With high-speed data transfer, advanced encryption, and advanced management features, these models provide faster and more efficient network storage compared to traditional file servers.

    The small footprint of the rackmount design makes it perfect for optimized space utilization in server rooms with larger storage requirements. Additionally, both models support expansion units enabling seamless scalability and expansion as business needs grow. In comparison to traditional file servers, rackmount NAS devices are an excellent upgrade to optimize data management while significantly reducing downtime and improving overall performance.

    Cloud NAS

    When it comes to network-attached storage, there are various types that you can choose from, one of them being the cloud NAS. This type of storage is becoming increasingly popular due to its convenience, accessibility, and flexibility. A cloud NAS allows you to store your data in an off-site location, making it easier for remote workers to access files and collaborate on projects.

    Additionally, cloud NAS provides an alternative to traditional on-premise NAS solutions, reducing the need for physical hardware and maintenance costs. This storage method is perfect for businesses that need to scale their data storage needs quickly, and it is also an excellent option for individuals who value convenience and accessibility. With a cloud NAS, you can streamline your workflow and keep your data safe and secure.

    Access data from anywhere with secure cloud storage

    Cloud NAS, cloud storage, access data, secure storage With cloud storage becoming increasingly popular, the need for secure and reliable storage solutions has become more important than ever. Cloud NAS, or network-attached storage, is an innovative solution that allows you to access your data from anywhere, all while keeping it secure. With cloud NAS, your data is stored remotely on servers that you can access from any device with an internet connection.

    This means that you can work from home, on the go, or anywhere else you choose and access your data with ease. With secure encryption and two-factor authentication, you can rest easy knowing that your data is safe. Plus, with cloud NAS, you won’t have to worry about storage space on your local hard drive, as you can store as much data as you need on remote servers.

    So if you’re looking for a secure and reliable storage solution that you can access from anywhere, cloud NAS may be the perfect choice for you!

    Examples: Dropbox Business, Google Drive for Work

    Cloud NAS solutions like Dropbox Business and Google Drive for Work are becoming increasingly popular in the business world as they offer cloud storage with network-attached storage functionality. Cloud NAS is essentially a centralized system that allows multiple users to access, share, and collaborate on files and documents stored in the cloud. It eliminates the need for local storage devices and enables seamless data sharing across remote teams.

    Users can access files from any device with an internet connection, and the centralization of data increases security and reduces the risk of data loss. Additionally, cloud NAS usually includes powerful features such as backup and recovery, file versioning, and access control, making it an ideal solution for businesses of all sizes. With the ability to scale and grow as the business expands, cloud NAS is an excellent investment for companies that want to remain competitive and keep up with the latest technological advancements.

    Conclusion

    In conclusion, when it comes to types of network attached storage, the options are abundant and varied. There’s the traditional NAS, the all-in-one solution of an NVR, the cloud-based convenience of a DAS, and the towering powerhouse that is a SAN. Each has their strengths and weaknesses, but ultimately, it’s up to you to determine which type of network attached storage best suits your needs.

    So whether you’re a home user looking for a simple way to store pictures and movies, or an enterprise in need of a robust data management system, there’s a NAS out there for you. Happy storage-ing!”

    FAQs

    What is a network attached storage (NAS) device?
    A NAS device is a type of storage device that allows multiple users to access files and data from a central location over a network.

    What are the benefits of using a NAS device?
    NAS devices offer several benefits, such as centralized storage, easy scalability, data backup and recovery, and remote access to files.

    What are the different types of NAS devices available?
    There are several types of NAS devices available, including desktop NAS, rackmount NAS, portable NAS, and cloud-based NAS.

    What is the difference between desktop and rackmount NAS devices?
    Desktop NAS devices are designed for home and small office use and are compact and easy to set up. Rackmount NAS devices, on the other hand, are larger and designed for enterprise-level storage needs.

    What is a portable NAS device?
    A portable NAS device is a type of storage device that can be easily carried around and offers a mobile solution for accessing and storing files and data.
  • Unleash the Full Potential of Your PS5 with Adata Premium SSD – A Game Changer

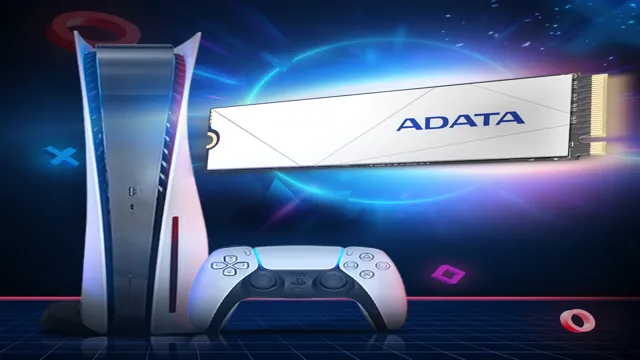
    Are you on the hunt for the perfect storage solution for your PS5? Look no further than the ADATA Premium SSD for PS The latest addition to ADATA’s external SSD lineup is tailor-made to enhance your gaming experience on the PS5, ensuring lightning-fast load times and buttery-smooth gameplay. Designed to meet the demanding needs of the latest gaming consoles, the ADATA Premium SSD features a sleek and versatile design that complements the PS5’s aesthetic.

    It boasts lightning-fast read and write speeds of up to 1000MB/s, making it the perfect choice for gamers who want to reduce load times, experience faster asset streaming, and enjoy seamless gaming on their PS Unlike other storage solutions, the ADATA Premium SSD is designed to withstand the rigours of intensive gaming sessions. Its robust aluminium shell dissipates heat efficiently, ensuring optimal performance even during extended gaming sessions.

    With up to 2TB of storage capacity, the ADATA Premium SSD provides ample storage space for all your favourite games, videos, and music. Plus, its compact design ensures that it seamlessly integrates with your PS5 setup without cluttering your gaming space. In conclusion, the ADATA Premium SSD for PS5 is the perfect choice for gamers who are looking to enhance their PS5 gaming experience.

    Its lightning-fast speed, durability, and ample storage capacity make it a must-have accessory for serious gamers. So, take your gaming to the next level with ADATA Premium SSD for PS5 and experience unparalleled performance and reliability today!

    What is an SSD?

    If you’re looking to upgrade your PS5 storage capabilities, consider the ADATA Premium SSD. But first, let’s talk about what an SSD is. SSD stands for Solid State Drive, which is a type of storage device that uses flash memory to store data.

    Unlike traditional hard drives, there are no moving parts in an SSD, which makes it faster and more durable. The ADATA Premium SSD specifically offers high-speed performance and large-capacity storage, perfect for gaming and multimedia applications. With up to 2TB of storage space, you can install more games, store more media files, and enjoy faster load times.

    And with its sleek and slim design, it’s easy to install and won’t take up too much space. Upgrade your gaming experience with the ADATA Premium SSD for PS

    Speed up Your Loading Times

    Are you tired of slow loading times? It’s time to upgrade to an SSD. An SSD, or Solid State Drive, is a storage device that uses flash memory to store data. Unlike a traditional hard drive, which uses spinning disks to access data, an SSD has no moving parts, which means it can read and write data at much faster speeds.

    This not only results in faster loading times for your applications and operating system, but it also makes your system overall more responsive. So if you’re looking for a simple and effective way to speed up your computer, consider investing in an SSD. Your patience (and sanity) will thank you.

    adata premium ssd for ps5

    Upgrade Your Storage Capacity

    If you’ve ever wondered how to upgrade your storage capacity, an SSD might be the solution you’re looking for. A Solid State Drive, or SSD, is a type of storage device that uses flash memory to store data, unlike traditional Hard Disk Drives (HDDs) that use spinning disks. An SSD has no moving parts, which makes it faster, more durable, and energy-efficient compared to an HDD.

    Since SSDs don’t have spinning disks, there’s less chance of sudden data loss or hardware failure due to mechanical failure. SSDs are also less prone to damage caused by falls or drops, which is great for users who are always on the move. In terms of performance, an SSD can load your operating system and applications quicker, which can improve productivity and reduce waiting times.

    Switching to an SSD is like upgrading to a sports car from an old clunky sedan, and once you experience the speed and reliability, you won’t want to go back.

    Why Choose ADATA?

    Thinking of upgrading your PS5 storage? Look no further than ADATA for a premium SSD solution. With lightning-fast speeds and durable construction, ADATA offers top-of-the-line storage that can keep up with even the most demanding gaming needs. But what sets ADATA apart from the competition? For starters, their commitment to excellence is evident in every product they make, from their efficient customer service to their rigorous testing standards.

    ADATA also prides themselves on their innovation and creativity, constantly pushing the boundaries of what SSD technology can do. So if you want a storage solution that can truly take your PS5 gaming experience to the next level, consider choosing ADATA. With their premium SSDs and commitment to excellence, you won’t be disappointed.

    Reliability and Performance Ensured

    When it comes to choosing the best storage solutions for your devices, reliability and performance are undoubtedly essential factors to consider. This is where ADATA stands out from the crowd. With over two decades of experience in the industry, ADATA has made a name for itself by providing high-quality storage solutions that deliver both reliability and performance.

    Whether you need a new RAM module, hard drive, or solid-state drive, ADATA’s products are built to last, ensuring that you can rely on them for years to come. What’s more, ADATA’s products are designed with speed in mind, meaning that you can expect blazing-fast data transfer speeds and lightning-fast load times. So, if you’re in the market for a reliable and high-performing storage solution, look no further than ADATA.

    Your devices will thank you!

    Designed for the PS5

    As a gamer, choosing the right storage device for your PS5 is crucial if you want to get the most out of your console. This is where ADATA comes in, with their state-of-the-art SSDs that are specifically designed to meet the demanding needs of the PS With lightning-fast read and write speeds, you can expect smoother gameplay and shorter loading times, giving you an immersive gaming experience that is second to none.

    The ADATA SSD also boasts high-reliability levels, ensuring that your data is safe and secure, even during intense gaming sessions. So why choose ADATA? Simply put, their SSDs are optimized for the PS5 and offer the perfect combination of speed, reliability, and performance. They are your best bet for taking your gaming experience to the next level.

    Easy Installation and Set Up

    As technology advances, installation and set up have become key deciding factors for consumers when it comes to choosing a product. This is where ADATA shines as a company that prioritizes user-friendly installation and setup processes. Choosing ADATA means choosing a solution that is easy to install and doesn’t require expert knowledge or technical support.

    With ADATA, you can quickly set up your device and start using it in no time. Whether you’re setting up a new computer system or upgrading an existing one, ADATA makes it simple by providing clear instructions and accessible interfaces. In short, ADATA offers an effortless installation and set up process that’s hassle-free and gets you up and running quickly, making it a top choice for consumers who want to maximize their productivity and minimize the time they spend on installation and setup.

    Choose ADATA and experience a seamless, streamlined setup process that will leave you feeling confident, stress-free, and ready to tackle any task that comes your way!

    Conclusion

    In conclusion, the ADATA Premium SSD for PS5 is like having a personal valet that effortlessly manages all your data storage needs with utmost efficiency and speed. It’s the perfect companion for gamers who are serious about maximizing their gaming experience. Like a high-performance sports car, this premium SSD gives gamers the power and speed they need to conquer any challenge that comes their way.

    So whether you’re a casual gamer or a hardcore enthusiast, with the ADATA Premium SSD for PS5, your gaming experience will be taken to a whole new level!”

    Take Your PS5 to the Next Level

    If you’re a gamer who wants to elevate their PS5 experience, then ADATA is the perfect choice for you. Why, you ask? Well, for starters, ADATA is a well-known brand when it comes to high-quality gaming accessories. They have a varied range of products that can enhance your gaming experience, such as lightning-fast SSDs, high-performance RAMs, and compact portable hard drives.

    Their products are optimized for gamers to elevate their gaming experience to the next level. Furthermore, ADATA products deliver unparalleled speed and superior performance that make them stand out from the rest. Their products are designed to help gamers play at their best without any lags or glitches.

    By choosing ADATA, you can be sure that you are getting your money’s worth, and your PS5 will be the gaming machine of your dreams. So, why settle for less when you can have the best gaming experience with ADATA?

    Buy Your ADATA Premium SSD Today

    If you’re in the market for a top-of-the-line SSD, ADATA should be at the top of your list. ADATA has been in the business of producing high-quality memory products for over a decade, and their expertise shows in their superior SSDs. Perhaps the most compelling reason to go with ADATA is their commitment to quality and reliability.

    ADATA SSDs undergo rigorous testing to ensure top-notch performance and durability, so you can rest easy knowing your investment will last. Moreover, ADATA SSDs are equipped with the latest technology, including NVMe and PCIe, for lightning-fast read and write speeds, making them a great choice for gamers, video editors or anyone who needs to work with large files. And with sizes ranging from 250GB to 2TB, there’s an ADATA SSD to suit any need.

    Don’t settle for an inferior SSD when you can buy an ADATA Premium SSD today.

    FAQs

    What is the price of the ADATA Premium SSD for PS5?
    The price of the ADATA Premium SSD for PS5 varies depending on the storage capacity. You can check the different variants and their respective prices on the official ADATA website.

    Is the ADATA Premium SSD compatible with other gaming consoles besides the PS5?
    Yes, the ADATA Premium SSD can be used with other gaming consoles and devices that have a USB port and support external storage devices, such as Xbox One, PC, and Mac.

    Can the ADATA Premium SSD improve the speed and performance of PS5 games?
    Yes, the ADATA Premium SSD can significantly improve the speed and loading times of PS5 games, as it provides faster data transfer rates compared to the internal storage of the console.

    How easy is it to install the ADATA Premium SSD on a PS5 console?
    Installing the ADATA Premium SSD on a PS5 console is straightforward and can be done without any technical expertise. All you need to do is connect the external drive to the USB port of the console and follow the on-screen instructions to format the drive for use.

  • Supercharge Your System with lightning-fast SSD SATA 3 Drives – The Ultimate Guide

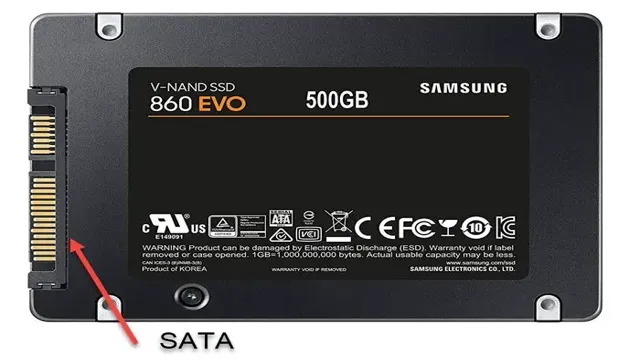
    If you’re someone who frequently uses a computer, you might have come across the term “SSD SATA 3” at some point. But what exactly does it mean? In simplest terms, SSD SATA 3 refers to a type of solid-state drive (SSD) that uses the SATA 3 interface to connect to a computer’s motherboard. An SSD is a type of storage device that uses flash memory to store data, making it faster than traditional hard disk drives (HDDs) that use spinning disks.

    SATA 3, on the other hand, is a type of interface that’s used for transferring data between a storage device and a computer. By combining SSD technology with the SATA 3 interface, computers are able to access and transfer data faster than ever before. But that’s not all there is to it.

    There are certain specifications and features that set SSD SATA 3 drives apart from other types of storage devices. In this blog post, we’ll dive deeper into what exactly makes SSD SATA 3 drives so special, and why they might be the right choice for your needs. So, if you’re curious to know more about this topic, keep reading!

    Benefits of SSD SATA 3

    SSD SATA 3 is a game-changer. With its lightning-fast speed, it has become the ultimate solution for those who are looking to upgrade their computer or laptop’s storage system. Unlike its predecessor, SSD SATA 2, which was limited to a data transfer speed of 3 Gbps, SSD SATA 3 has a blazing-fast speed of 6 Gbps, making it twice as fast as its earlier version.

    The benefits of using SSD SATA 3 are numerous, including an extremely fast data transfer speed, faster boot time, and an overall better performance that can make your computer run much smoother and more efficiently. In addition to that, SSD SATA 3 consumes less power, generates less heat, and is much more durable than a regular hard drive, making it a cost-effective and long-lasting solution for all your storage needs. Overall, if you’re looking for a storage solution that is fast, reliable, and efficient, then SSD SATA 3 is definitely the way to go.

    Fast Read and Write Speeds

    If you’re looking for a faster and more efficient storage solution for your computer, then you should definitely consider upgrading to an SSD SATA This type of solid-state drive offers lightning-fast read and write speeds, which means that you can access your files and applications in a fraction of the time it would normally take. This type of drive can also handle multiple tasks at once, making it a great choice for multitasking and demanding applications like gaming and creative work.

    With its superior performance and reliability, an SSD SATA 3 is an excellent investment for anyone who wants to improve their computer’s speed and productivity. So if you’re ready to say goodbye to slow load times and sluggish performance, then it’s time to upgrade to an SSD SATA

    ssd sata 3

    Improved Boot and Load Times

    SSD SATA 3 If you’re tired of waiting for your computer to boot up or applications to load, then upgrading to an SSD SATA 3 drive could be the solution you’re looking for. The benefits of using an SSD SATA 3 drive are numerous but perhaps the most noticeable improvement is in the speed of boot and load times. With read and write speeds significantly faster than traditional HDDs, an SSD SATA 3 can access data almost instantly, making accessing your files a breeze.

    Plus, with no moving parts, an SSD SATA 3 is more reliable and durable than HDDs, reducing the likelihood of data loss due to wear and tear. So, if you’re in need of an upgrade, a SATA 3 SSD may be just what you need to give your computer a much-needed speed boost.

    Lower Power Consumption

    SSD SATA 3, power consumption, benefits One of the most significant benefits of an SSD SATA 3 is its lower power consumption. SSDs are designed to consume less power than traditional hard drives, and the latest SATA 3 standard takes it up a notch. This is because SATA 3 SSDs use a smaller form factor, which means they require less power to operate.

    The lower power consumption not only means that your computer will run cooler and consume less power, but it also means that your laptop’s battery life will be greatly improved. This is particularly beneficial for those who frequently travel or use their laptops on the go, as it allows for longer periods of use without having to recharge. Overall, the lower power consumption of SSD SATA 3 drives is a significant factor that should not be overlooked when considering upgrading your storage solution.

    Reliability and Durability

    SSD SATA 3 When it comes to reliability and durability, SSD SATA 3 drives stand out from the crowd. These drives use solid-state technology, meaning they have no moving parts, which makes them less susceptible to wear and tear. Not only that, but they also have a much lower failure rate compared to traditional hard drives.

    This is because they use an integrated circuit to store data rather than a spinning disk which is prone to damage. They can also operate at a much higher temperature range, making them ideal for use in harsh environments. In terms of durability, SSD SATA 3 drives are designed to withstand extreme shock and vibration, making them ideal for use in laptops or mobile devices where they may be subjected to frequent movement.

    Overall, the benefits of SSD SATA 3 drives in terms of reliability and durability make them a great investment for anyone in need of high-quality storage solutions.

    How to Choose the Right SSD SATA 3

    When it comes to choosing the right SSD SATA 3, there are a few things that you need to keep in mind to ensure that you are getting the most out of your investment. SSDs can be more expensive than traditional hard drives, so you want to make sure that you are selecting an SSD that will meet your needs. Consider the capacity of the drive, the speed and performance you need, and the overall quality of the brand before making a purchase.

    It’s also important to pay attention to the type of interface, as SATA 3 is faster than previous versions. When you choose an SSD SATA 3, you can expect faster boot times, quicker file transfers, and smoother overall performance. So, if speed and performance are important to you, investing in an SSD SATA 3 is definitely worth considering.

    Capacity and Price

    When it comes to choosing the right SSD SATA 3, there are two main factors to consider: capacity and price. The capacity of an SSD will determine how much data you can store on it, and you’ll want to choose one that’s large enough for your needs. As for price, SSDs are generally more expensive than traditional hard drives, so it’s important to find a balance between what you need and what you can afford.

    It’s worth noting that SSDs can offer significant performance improvements over hard drives, so the extra cost may be worth it. When choosing between different capacities and price points, it’s important to think about what you’ll be using the SSD for. If you’re a gamer or content creator, you might need a larger capacity and be willing to spend more money.

    If you’re just looking for a general storage solution, a smaller capacity and lower price point might be sufficient. Ultimately, the right choice will depend on your specific needs and budget.

    Form Factor and Compatibility

    When choosing the right SSD SATA 3 for your system, it’s important to consider both the form factor and compatibility. The form factor determines the physical size and shape of the SSD and whether it will fit into your system. There are two main form factors for SSDs:

    5-inch and M. If your system has a

    5-inch drive bay, you’ll need a 5-inch SSD, while an M.2 SSD can slot directly into the motherboard.

    Compatibility, on the other hand, refers to whether your system supports the SSD you’re considering. Not all systems support all types of SSDs, so it’s important to check your system’s specifications and ensure that the SSD is compatible. Additionally, you’ll want to check that the SSD is compatible with your system’s operating system and any software you plan to use.

    In terms of speed, SATA 3 SSDs offer faster read and write speeds than traditional hard drives, which can significantly improve your system’s performance. While NVMe SSDs offer even faster speeds, they are often more expensive and may not be necessary for everyday use. Ultimately, when choosing the right SSD SATA 3, it’s important to consider both form factor and compatibility, as well as your specific system’s needs and your budget.

    With the right SSD, you can significantly improve your system’s performance and reduce load times for applications and files.

    Performance

    When it comes to choosing the right SSD SATA 3, performance should be your top priority. The first thing to consider is the read and write speeds. The faster the read and write speeds, the better the overall performance of your computer.

    Another important factor is the cache size. A larger cache will ensure that frequently used data is readily available, which will improve the speed of your system. Additionally, the type of flash memory used in the SSD is also crucial.

    SLC (Single-Level Cell) flash memory is the fastest and most durable, but it’s also the most expensive. MLC (Multi-Level Cell) flash memory is more affordable but not quite as fast or durable as SLC. Finally, when it comes to choosing the right SSD SATA 3, consider the brand and warranty.

    Opt for a reputable brand with a good warranty to ensure you’re getting a reliable and long-lasting product. Overall, taking these factors into account will help you choose the right SSD SATA 3 for your needs.

    Top SSD SATA 3 Brands

    SSD SATA 3 is a type of solid-state drive that uses the SATA III interface which supports data transfer rates of up to 6Gbps. When it comes to top SSD SATA 3 brands, there are several options available in the market that offer excellent performance and reliability. Samsung, Kingston, and SanDisk are some of the most popular brands that are known for their high-quality SSDs.

    Samsung SSDs are known for their superior performance and durability, making them ideal for gamers and power users. Kingston SSDs, on the other hand, are known for their affordability and reliability, making them a popular choice for budget-conscious consumers. SanDisk SSDs are also known for their reliability, with some models offering high-capacity storage that’s perfect for storing large files and data-intensive apps.

    Overall, choosing a top SSD SATA 3 brand depends on your specific needs and budget, but you really can’t go wrong with any of the options mentioned here.

    Samsung

    When it comes to SATA 3 SSDs, Samsung is definitely one of the top brands out there. In fact, Samsung has been a leading provider of SSDs for several years now, and they offer some of the best options on the market. Their SSDs are known for their high performance, reliable durability, and excellent value for money.

    One of the best things about Samsung SSDs is that they use their own proprietary technology, ensuring that their SSDs are of the highest quality. Additionally, Samsung SSDs come with a range of features, such as advanced error correction, TRIM support, and AES 256-bit encryption. Whether you need an SSD for gaming, work, or everyday use, Samsung has got you covered.

    So if you’re looking for a top SATA 3 SSD brand, Samsung should definitely be on your list.

    Crucial

    When it comes to upgrading your computer’s storage, investing in a solid-state drive (SSD) is a game-changer. Not only do SSDs offer faster load times and improved performance, but they’re also less susceptible to physical damage and data loss. Among the top brands in the market is SanDisk, which offers a range of SATA 3 SSDs that are ideal for both personal and professional use.

    Another great brand is Crucial, whose MX500 and BX500 SSDs are renowned for their reliability and value for money. And let’s not forget about Samsung, whose 860 EVO SSD consistently outperforms other SATA 3 drives in terms of speed and endurance. All of these brands provide exceptional quality and performance, making them top contenders for anyone looking to upgrade their storage game.

    Whether you’re a gamer, creative professional, or simply looking to improve your computer’s speed and responsiveness, investing in an SSD from a reliable brand like SanDisk, Crucial, or Samsung is definitely worth considering.

    Intel

    If you are in search of a reliable and high-performance SATA 3 SSD, then you should definitely consider Intel. The brand has been known to deliver premium quality storage solutions to its customers for years. Among their top SSD SATA 3 brands are the Intel Solid State Drive 540S Series, Intel Solid State Drive Pro 5400s Series, and Intel Solid State Drive DC S4610 Series.

    These drives offer excellent read and write speeds, fast boot times, and high endurance. Plus, they are built to last, ensuring you can rely on them for years to come. So if you’re looking for an SSD that can handle intensive workloads and provide optimal performance, consider Intel’s SATA 3 drives.

    Conclusion

    In conclusion, if you’re looking for a storage solution that is lightning-fast, reliable, and efficient, then an SSD with SATA 3 connectivity is the way to go. With its advanced interface, superior speed, and ability to handle heavy workloads, it’s no wonder that more and more people are making the switch to this powerful technology. So why settle for anything less? Upgrade to an SSD with SATA 3 today and start enjoying the benefits of lightning-fast storage that will keep up with all your computing needs!”

    FAQs

    What is the difference between SSD and SATA 3?
    SSD stands for Solid State Drive, while SATA 3 stands for Serial Advanced Technology Attachment 3. SSD is a type of storage device that uses flash memory instead of spinning disks found in traditional hard drives, while SATA 3 is a type of interface used to connect storage devices like hard drives and SSDs to a computer’s motherboard.

    Can I use an SSD that supports SATA 2 with a SATA 3 interface?
    Yes, you can use an SSD that supports SATA 2 with a SATA 3 interface. The SSD will run at SATA 2 speeds since it can only transfer data at up to 3 Gb/s, while the SATA 3 interface supports data transfer speeds of up to 6 Gb/s.

    What are the advantages of using an SSD with a SATA 3 interface?
    There are several advantages of using an SSD with a SATA 3 interface, including faster data transfer speeds, better performance, and improved reliability. SATA 3 interfaces can transfer data at up to 6 Gb/s, which is twice as fast as SATA 2 interfaces. This means that SSDs with SATA 3 interfaces can read and write data much faster, resulting in better performance and faster system boot and shutdown times.

    Can I upgrade my computer to use a SATA 3 SSD?
    Yes, you can upgrade your computer to use a SATA 3 SSD. However, you need to make sure that your computer’s motherboard supports SATA 3 interfaces. You also need to make sure that your computer’s BIOS is set up correctly to recognize the SSD. Finally, you need to install the necessary drivers and software to ensure that your computer can fully utilize the capabilities of the SATA 3 SSD.

  • Step-by-Step Guide: The Ultimate Way to Format Your M.2 SSD Like a Pro!

    If you’re looking to upgrade your storage drive on your computer or perhaps build a new one from scratch, you may have come across the term M.2 SSD. M.

    2 SSDs are becoming more popular as they’re faster, more compact, and offer a high performance and storage solution. But one thing that is often overlooked is the formatting process of these drives. How do you format an M.

    2 SSD? In this article, we’ll guide you through the steps to format your M.2 SSD, so you can use it efficiently with your computer. So, let’s get started!

    Understanding M.2 SSDs

    If you’re looking to format a M.2 SSD drive, you’re in luck! It’s actually a pretty straightforward process. The first step is to make sure your computer recognizes the drive.

    You can check this by going into your BIOS settings and looking for the drive in the listed options. Once you’ve confirmed that the drive is recognized, you can move onto formatting it. There are a few different ways to do this, but one of the most common is through the Windows Disk Management tool.

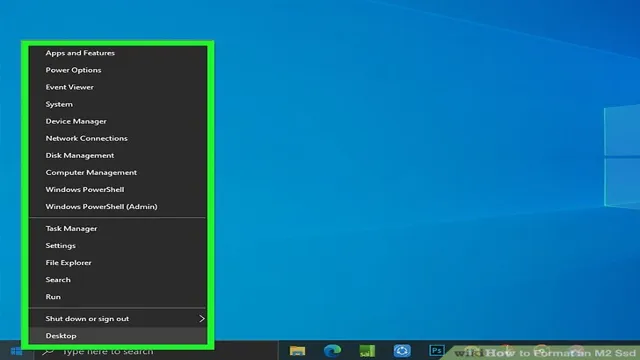
    Simply right-click on the M.2 SSD drive and select “Format.” From there, you can choose your desired file system and allocation unit size.

    Just keep in mind that formatting will erase all data on the drive, so make sure you have a backup if necessary. And with that, you should be all set with a newly formatted M.2 SSD drive ready for use!

    Difference between M.2 and other SSDs

    M.2 SSDs M.2 SSDs have gained popularity among tech enthusiasts due to their compact size and high-speed performance.

    M.2 SSDs are different from other SSDs in their form factor. They are smaller in size than traditional SSDs and connect directly to the motherboard through an M.

    2 slot, eliminating the need for cables. M.2 SSDs come in different lengths and widths, catering to the needs of different motherboards.

    Apart from the size, M.2 SSDs also offer faster read and write speeds. They use a different interface than other SSDs, such as SATA or PCIe, enabling them to transfer data at lightning-fast speeds.

    M.2 SSDs are ideal for gaming setups or computers that require high-speed data transfer. However, they can be a bit more expensive than traditional SSDs.

    In conclusion, M.2 SSDs are a great choice for anyone who wants a high-speed, compact storage option and has the budget to splurge on it.

    how to format a m.2 ssd

    Benefits and drawbacks of M.2 SSDs

    M.2 SSDs Understanding M.2 SSDs can greatly benefit those looking for faster storage solutions, but it also comes with some drawbacks.

    M.2 SSDs are a type of solid-state drive that uses the M.2 interface and can be installed directly onto the motherboard, allowing for faster data transfer rates and more efficient use of space.

    One of the main benefits of M.2 SSDs is the speed at which they can read and write data, which can greatly improve system performance and reduce load times. Additionally, M.

    2 SSDs are much smaller than traditional 5-inch SSDs, taking up less space in the computer. However, M.

    2 SSDs also have some drawbacks, such as the potential for overheating due to the lack of airflow in the slot they are installed in. They also tend to have a higher cost per GB compared to traditional SSDs. Overall, understanding the pros and cons of M.

    2 SSDs can help individuals make an informed decision when looking for a storage solution that meets their needs.

    Backup Your Data

    If you’re looking to format your M.2 SSD, it’s important to back up your data beforehand. When you format a drive, all of the data on it will be erased, so you want to make sure you have it all backed up in case you need it again later.

    One way to do this is to create a copy of your data on an external hard drive or online cloud storage service. Once you’ve backed up your data, you can proceed with formatting the M.2 SSD.

    The first step is to open Disk Management, which you can do by typing “diskmgmt.msc” into the Windows search bar. From there, find your M.

    2 SSD and right-click it, then select “Format.” Choose the file system you want to use, such as NTFS or FAT32, and decide whether you want to perform a quick format or not. Once you’ve made your selections, click “OK” to begin the formatting process.

    With a bit of patience, your M.2 SSD will be formatted and ready for use.

    Why it’s important

    Losing precious data can be a nightmare for any individual or business. That’s why it’s crucial to back up your data regularly. Data loss can happen due to various reasons, such as hardware failure, malware attacks, human error, or natural disasters.

    Without a backup, all your important files and documents could be gone forever. However, by creating and maintaining a backup, you can ensure that your data is safe and secure. You can either use physical backups like external hard drives or opt for cloud-based solutions.

    Whatever your choice may be, it’s always better to be prepared for any contingencies rather than regretting it later. So, take action now, back up your data, and never worry about losing your precious files again.

    Ways to back up your data

    Backing up your data is an essential task that you should make a priority, especially if you store important files on your computer or other devices. Losing your valuable data due to a device crash or cyber attack could lead to a nightmare situation. However, there are several easy ways to back up your data and protect yourself from any unforeseen disaster.

    One of the most commonly used methods is Cloud Backup, which allows you to store your data in a remote location via the internet. Cloud services like Google Drive, Dropbox and OneDrive are some of the popular options you can use. You can also choose to back up your data on an external hard drive or USB drive, which you can store in a safe place to avoid theft or damage.

    Another option is to opt for a hybrid system, which involves using both cloud and local backups for your files. Remember that backing up your data is a simple and effective way to protect yourself from potential data loss.

    Format the M.2 SSD

    If you’re looking to format a M.2 SSD, you’ll need to follow a few simple steps to get the job done. First, you’ll want to make sure that your M.

    2 SSD is connected to your computer. Once you’re certain that it’s properly connected, you can begin the formatting process. It’s best to use a software program that’s designed specifically for formatting SSDs, as this will help ensure that you don’t accidentally delete any important files.

    Some popular software options include EaseUS Partition Master and AOMEI Partition Assistant. Once you’ve chosen your software, you can begin formatting your M.2 SSD by selecting the drive and choosing the format option.

    You’ll want to select the NTFS file system, as this is the most commonly used file system for Windows-based computers. After a few minutes, the formatting process should be complete, and you’ll be left with a freshly-formatted M.2 SSD that’s ready to store your data.

    It’s important to note that formatting will erase all data on the drive, so be sure to back up any important files before starting the process. With these simple steps, you can format your M.2 SSD and get it ready for all your storage needs!

    Step-by-step guide

    If you’ve recently purchased an M.2 SSD, the first thing you’ll need to do is format it to make it compatible with your system. Here’s a step-by-step guide to format your M.

    2 SSD. First, make sure your SSD is connected to your computer. You can do this by accessing your computer’s BIOS and verifying that it is recognized under the “Storage” or “Hard Drive” menu.

    Once you’ve confirmed its presence, you can move forward with the formatting process. Open “Disk Management” by typing “diskmgmt.msc” into the Windows search bar.

    Once you’ve located your SSD, right-click on it and select “Format”. From there, you can choose your file system format and assign a drive letter. Finally, click “OK” to initiate the formatting process.

    That’s it! Your M.2 SSD is now formatted and ready to use.

    Choosing the right format type

    When it comes to installing an M.2 SSD, it’s important to choose the right format type. The most common formats are SATA and PCIe, each with its own advantages and disadvantages.

    SATA is the slower of the two but is still faster than a traditional hard drive. It is also more widely available and tends to be less expensive. PCIe, on the other hand, is much faster and is the preferred format for high-performance systems and applications.

    However, it can be more expensive and may not be compatible with all systems. Once you have chosen the format type, it’s crucial to properly format the SSD before use. This ensures that the SSD will operate efficiently and reliably.

    Most commonly, you’ll want to format the SSD to the NTFS file system for use with Windows. It’s always a good idea to consult the manufacturer’s guidelines to ensure that you’re formatting your SSD correctly.

    Things to keep in mind while formatting

    Formatting your M.2 SSD is an important step if you want to make the most of its speed and performance. When formatting an M.

    2 SSD, there are a few things to keep in mind. Firstly, you should make sure that the drive is compatible with your system. Most modern computers support M.

    2 SSDs, but it’s always best to check to avoid any compatibility issues. Another thing to consider is the file system you want to use. Generally, it’s best to use the NTFS file system for your M.

    2 SSD, as it offers better performance and is more stable than other file systems. However, if you’re using your SSD on a Mac computer, you may want to consider using the HFS+ file system instead. Once you’ve determined the compatibility and file system, the next step is to format the drive itself.

    This can usually be done through the Disk Management utility on Windows or the Disk Utility app on a Mac. When formatting the drive, make sure to choose the right options, such as the partition style and allocation unit size. It’s also important to note that formatting your M.

    2 SSD will erase all data on it. So, make sure to back up any important files before proceeding with the formatting process. In conclusion, formatting your M.

    Conclusion

    In conclusion, formatting an M.2 SSD is a bit like giving your car a tune-up – it may seem daunting at first, but ultimately it will improve your device’s performance and prolong its lifespan. So, whether you’re a tech-savvy enthusiast or a casual user, taking the time to properly format your M.

    2 SSD is a smart way to keep your system running smoothly. Just remember to follow the manufacturer’s instructions and use a reliable formatting tool – after all, a little maintenance can go a long way!”

    FAQs

    What is the difference between SATA and NVMe M.2 SSDs?
    SATA and NVMe M.2 SSDs differ in terms of their interface and speed. SATA has a maximum speed of 600MB/s, while NVMe can reach up to 32GB/s. NVMe also uses the PCIe interface, whereas SATA uses the AHCI interface.

    Can a laptop use M.2 SSD?
    Yes, many modern laptops come equipped with M.2 SSD slots. However, it’s important to check your laptop’s specifications before purchasing an M.2 SSD to ensure compatibility.

    How do I install an M.2 SSD in my desktop computer?
    First, ensure that your motherboard has an M.2 slot. Then, insert the M.2 SSD into the slot and secure it with the screw provided. Finally, connect the M.2 SSD to the motherboard using the provided M.2 screw.

    Do I need to format my M.2 SSD before using it?
    If your M.2 SSD is new, you will need to format it before using it. Go to “Disk Management” in Windows, locate the M.2 SSD, right-click it, and select “Format”. Make sure to choose the correct file system and allocation unit size for your needs.

  • Unleash the Power of PS5 with Adata Premium SSD: The Ultimate Review

    Gamers are always on the lookout for ways to enhance their gaming experience on the PS With the release of the ADATA Premium SSD for the PS5, gamers can now increase the storage capacity of their console without losing out on performance. But how effective is this new storage solution, and is it worth the investment? In this blog post, we will take an in-depth look at the ADATA Premium SSD for the PS5 and provide you with a detailed review of its features, performance, and value for money.

    So, sit tight and get ready to learn whether this new SSD is the right choice for you and your gaming needs.

    Design and Features

    If you’re in search of reliable and high-speed storage for your PS5, you might want to check out the ADATA Premium SSD. This sleek and compact storage solution is designed specifically to work with the PlayStation 5 console and offers impressive features that make it stand out from the rest. With a capacity of up to 2TB, it provides ample space to store all your games, apps, and media files.

    Its high-speed read and write speeds ensure that your games load quickly, reducing wait times and allowing you to dive into gameplay faster. Additionally, its compact size makes it easy to carry around, giving you the convenience of playing your favorite games on-the-go. The ADATA Premium SSD also comes with a rugged exterior that provides robust protection against shocks, vibrations, and drops, making it a reliable choice for gamers on-the-move.

    Overall, the ADATA Premium SSD is an excellent choice for anyone seeking a reliable, fast, and durable storage solution for their PS

    Compactness and portability

    When it comes to technology, people appreciate compactness and portability more than ever before. Whether it’s a laptop, a smartphone, or a camera, we want to be able to take our devices with us anywhere, anytime. That’s why manufacturers are constantly striving to create smaller, lighter products without sacrificing performance or functionality.

    Design and features play a crucial role in achieving this goal. Hardware and software engineers must collaborate closely to ensure that their devices are as efficient as possible, using smart algorithms, power-saving modes, and ergonomic interfaces. For example, a laptop may have a low-power processor, a fanless cooling system, and a backlit keyboard that adjusts to ambient light, increasing the battery life and user comfort.

    Similarly, a camera may have a compact lens system, advanced image stabilization, and a touchscreen LCD that doubles as a control panel, enabling easy operation and editing. By prioritizing compactness and portability, manufacturers can appeal to a wider audience and enhance the user experience.

    adata premium ssd for ps5 review

    PS5 compatibility

    One of the most highly anticipated aspects of the upcoming PS5 console is its compatibility with both new and old games. But what does this actually mean in terms of design and features? The PS5 is designed to accommodate a wide range of games, from the latest releases to beloved classics from previous generations. This means that users can enjoy a diverse range of titles without having to worry about whether or not their console is capable of running them.

    Additionally, the PS5 will feature an improved user interface, making it even easier for players to access their favorite games and features. With backward compatibility and user-friendly design, the PS5 is shaping up to be a must-have console for gamers of all stripes.

    Read/write speeds

    When it comes to choosing a new storage device, one of the most important factors to consider is its read/write speeds. These speeds determine how quickly data can be stored or retrieved from the device, and can make a huge difference in the performance of your computer or other devices. Luckily, many modern storage devices offer fast read/write speeds, with options ranging from solid-state drives (SSDs) to high-speed external hard drives.

    However, not all devices are created equal, and it’s important to do your research to find a device that offers the right combination of speed and storage capacity for your needs. With a little bit of research and a clear understanding of your needs, you can find a storage device that offers fast read/write speeds and reliable performance for years to come.

    Installation and Performance

    When it comes to upgrading your PS5’s storage for faster load times and better overall performance, the ADATA Premium SSD is a solid choice in terms of installation and performance. Installing the SSD is a breeze thanks to its compact size, as it can be easily inserted into the PS5’s storage expansion slot without the need for any additional tools. Once installed, the ADATA Premium SSD offers lightning-fast read and write speeds, allowing games to load almost instantly and reducing loading times in-game significantly.

    Its durable design also ensures that your data is protected, giving you peace of mind as you game. Overall, the ADATA Premium SSD is a great way to boost your PS5’s performance without breaking the bank.

    Easy installation process

    When it comes to purchasing any new product, one of the biggest concerns is often the installation process. So, if you’re considering buying a new home security system, it’s natural to wonder how difficult it will be to set up. Well, with our top-rated security system, you can rest assured that the installation process is incredibly easy.

    In fact, it’s so simple that you can do it all yourself, without the need for professional help. The system comes with user-friendly instructions and all the necessary components, so you can have your home protected in no time. And once it’s up and running, you can enjoy outstanding performance and peace of mind, knowing your family and property are secure.

    So why wait? Order your security system today and enjoy a stress-free installation process that won’t leave you scratching your head!

    Optimized performance for gaming

    If you’re an avid gamer, you know how important it is to have optimized performance. You want every single click and movement to be as seamless as possible, without any lag or delay. Luckily, there are a few things you can do to ensure your computer is optimized for gaming.

    The first step is to make sure your hardware is up to par. This means investing in a high-quality graphics card, plenty of RAM, and a fast processor. Once you have that set up, the next step is to optimize the software.

    This includes updating your drivers, disabling unnecessary background programs, and optimizing your graphics settings. Finally, make sure you also take care of your computer – keep it clean, well-ventilated, and make sure it’s not overheating. By following these steps, you should be able to significantly improve your gaming performance and have a better overall experience.

    Load time comparisons

    When it comes to website load times, every second counts. That’s why it’s important to choose a CMS that is optimized for speed. In a side by side comparison, WordPress and Drupal were put to the test to see which platform offered faster loading times.

    The results were clear: WordPress outperformed Drupal in both the initial load time and time to first byte. This means that visitors to a WordPress site will be able to access the content faster, which can lead to lower bounce rates and higher user engagement. It’s important to note that while Drupal is a powerful CMS with many features, it may not be the best choice for those who prioritize speed.

    So if you want a platform that prioritizes fast load times, WordPress might be the best choice for you.

    Value for Money

    In today’s world, everyone is looking for value for money products that work well and are long-lasting. If you’re a gamer, you want to make sure that the accessories you buy not only improve your gaming experience but also provide value for your hard-earned cash. The adata premium SSD for PS5 is such a product that offers a great combination of speed, durability, and capacity.

    This SSD has plenty of space for all your games, and it makes loading times faster, which is essential for gaming. Its design is simple yet elegant, and it doesn’t look out of place next to the sleek PS5 design. Additionally, it is easy to install, and it doesn’t require any special skills.

    Overall, the adata premium SSD for PS5 is a perfect investment for gamers who want better performance without breaking the bank.

    Pricing and capacity options

    When it comes to pricing and capacity options, customers are always looking for value for money. It’s essential to have a pricing structure that appeals to your target market while still generating revenue for your business. You don’t want to price too high and turn off potential customers or too low and miss out on profits.

    One option is to have tiered pricing based on the level of service or product offered. This way, customers have the freedom to choose the option that fits their budget and needs. It’s also crucial to consider capacity options and make sure you have the necessary resources to meet demand.

    Burstiness can arise, and you want to be prepared for sudden spikes in demand without compromising the quality of your service or product. In essence, the key to providing value for money is finding the right balance between pricing and capacity options.

    Long term durability and reliability

    Value for Money When it comes to purchasing a product, everyone wants to ensure that they get the best quality for their hard-earned money. This is especially important when it comes to long-term durability and reliability of a product. You don’t want to be constantly replacing or repairing your purchase, as this will end up costing you more money and time in the long run.

    Investing in a product that offers both longevity and reliability can save you money in the long term, even if the initial cost may be greater than other options. It is important to consider the quality of materials and construction, as well as the reputation of the brand, when making a purchase. Remember, the cheapest option may not always be the most cost-effective in the long run.

    By investing in a high-quality product, you’ll be able to enjoy it for years to come without having to worry about frequent repairs or replacements.

    Final Verdict and Recommendations

    In conclusion, after thoroughly reviewing the ADATA Premium SSD for PS5, I highly recommend it to any gamer looking to improve their PS5’s storage capacity and performance. With its fast read and write speeds, easy installation process, and durable build quality, this SSD is a solid investment for any serious gamer. The ADATA Premium SSD is also reasonably priced, making it an affordable option for those working with a tighter budget.

    Overall, I was impressed by the performance of the ADATA Premium SSD, and I think it’s a fantastic addition to any PS5 setup. So, if you’re looking to boost your PS5’s storage and speed, I suggest giving the ADATA Premium SSD a try, and you won’t be disappointed.

    Conclusion

    To sum it up, if you want lightning-fast load times, smooth gameplay, and enhanced overall performance for your PS5 gaming experience, the ADATA Premium SSD is definitely a wise investment. It’s sleek, robust, and delivers on its promise of speedy, reliable, and high-quality storage. With this SSD, you can say goodbye to long loading screens and hello to uninterrupted gaming adventures! So go ahead, treat yourself and your PS5 to this premium accessory, and take your gaming to the next level!”

    FAQs

    What are the key features of the ADATA Premium SSD for PS5?
    The ADATA Premium SSD for PS5 offers lightning-fast read and write speeds, durable build quality, and large storage capacity options of up to 2TB.

    Is the ADATA Premium SSD compatible with other gaming consoles or only PS5?
    While the ADATA Premium SSD is optimized for use with the PS5, it is also compatible with other gaming consoles and devices that support external storage.

    Can the ADATA Premium SSD significantly improve load times in PS5 games?
    Yes, the ADATA Premium SSD boasts read and write speeds of up to 1,000MB/s, which can significantly reduce load times and improve overall gameplay performance.

    How easy is it to install the ADATA Premium SSD in a PS5?
    The ADATA Premium SSD comes with a tool-free installation design for hassle-free installation. Simply plug the SSD into the PS5’s USB port and follow the on-screen prompt to format and use the new storage device.

  • Boost Your PC Performance with Leven SSD Utility: The Ultimate Solution for SSD Maintenance

    Do you experience slow boot times and sluggish system performance? Are you tired of waiting for your computer to load programs and files? One possible solution to this problem is to optimize your solid state drive (SSD) using the Leven SSD utility. This free software tool is designed to help users improve the performance and longevity of their SSDs. With features such as health monitoring, firmware updates, and performance optimization, the Leven SSD utility is a user-friendly tool for both novice and advanced users alike.

    In this blog post, we will explore the benefits of using the Leven SSD utility and how it can help you get the most out of your SSD. So sit back, relax, and let’s dive into the world of SSD optimization with the Leven SSD utility.

    What is Leven SSD Utility?

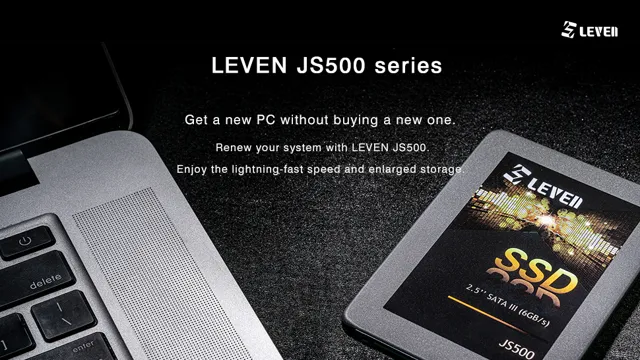
    Leven SSD Utility is a software designed specifically for managing and optimizing Leven solid-state drives. This handy tool provides users with complete control over their Leven SSD, allowing them to monitor performance, update firmware, and even secure erase their drive. The Leven SSD Utility is a must-have for anyone who wants to make the most out of their Leven SSD, as it provides real-time feedback on the drive’s health status.

    With this software, users can easily diagnose any issues that arise and troubleshoot them quickly. Additionally, the Leven SSD Utility includes a wide range of optimization tools, such as disk defragmentation and TRIM support, ensuring that users can maintain peak performance over time. All in all, if you own a Leven SSD, you would be wise to download the Leven SSD Utility to ensure that you’re getting the most out of your drive!

    Introduction to Leven SSD Utility

    Leven SSD Utility is a software tool designed specifically for Leven Solid State Drives, which can help you optimize and manage your SSD performance. This utility assists in monitoring and improving the overall health of your SSD by providing various features. The remarkable thing about this software is that it is easy to use, even if you are a beginner.

    Plus, it offers a clean and simple interface that allows you to access the features quickly. Whether you want to manage firmware updates, set up the TRIM, or clone your hard drive, Leven SSD Utility has got your back. In short, if you own a Leven SSD, this utility is a must-have for maximum performance and drive maintenance.

    leven ssd utility

    Key Features of Leven SSD Utility

    Leven SSD Utility is a software program designed to optimize and manage the performance of your Leven solid-state drive (SSD). It’s a free tool that provides various features to help you monitor, maintain, and enhance your SSD’s functionality. With Leven SSD Utility, you can monitor your drive’s health, temperature, and other parameters to prevent any potential issues.

    It also comes with a firmware update function that lets you keep your drive’s firmware up-to-date. In addition, you can use the software to optimize drive performance, manage partitions and secure erase data. It’s an intuitive and user-friendly application that allows you to customize and personalize your SSD according to your preferences.

    Overall, if you want to improve your SSD’s performance and make the most out of your drive, Leven SSD Utility is an excellent tool to have.

    Why Do You Need Leven SSD Utility?

    If you own a Leven SSD, you should definitely check out the Leven SSD Utility. This handy software provides a range of useful features that can help you get the most out of your solid-state drive. With the Leven SSD Utility, you can monitor drive health and performance, update your drive’s firmware, and even optimize it for maximum speed and efficiency.

    Whether you’re a casual computer user or a power user who demands the best performance from your system, the Leven SSD Utility is an essential tool that can help you get the most out of your Leven SSD. So if you haven’t already installed it, be sure to give it a try and see what it can do for you!

    Significance of Optimizing Your Solid State Drive

    As technology evolves, the significance of optimizing your solid-state drive (SSD) becomes increasingly important. An SSD that isn’t functioning optimally can lead to slower performance, decreased reliability, and even data loss or corruption. That’s why you need Leven SSD Utility, a powerful software program that allows you to monitor and optimize the health of your SSD, ensuring maximum performance and reliability.

    With Leven SSD Utility, you can detect potential issues before they become major problems, and make adjustments to optimize performance based on your specific needs. It’s like having a personal SSD mechanic on hand to keep your drive running smoothly. Give Leven SSD Utility a try and see the difference it can make for your SSD today!

    Benefits of Using Leven SSD Utility

    If you’re using a Leven SSD, then you definitely need to consider using Leven SSD Utility. Not only does it make it easier for you to manage and monitor your drive’s performance, but it also helps you identify potential issues so that you can fix them before they become bigger problems. With this powerful tool, you’ll be able to optimize your SSD’s performance, reduce start-up and shutdown times, and extend the lifespan of your drive.

    Plus, since it works seamlessly with your Leven SSD, you don’t have to worry about compatibility issues. So, if you want to get the most out of your SSD, give Leven SSD Utility a try today!

    Comparison with Other SSD Optimization Tools

    Leven SSD Utility When it comes to SSD optimization tools, there’s a lot to choose from. However, not all are created equal, and that’s where Leven SSD Utility comes in. What sets Leven apart from other SSD optimization tools is its comprehensive approach.

    Leven includes features like S.M.A.

    R.T. monitoring, firmware updates, and TRIM functionality, all in one easy-to-use interface.

    This means that you don’t have to juggle multiple programs to take care of your SSD. Additionally, Leven is optimized for Windows 10, ensuring that you get the most out of your SSD on the newest operating system. All of these features combine to make Leven SSD Utility an essential tool for anyone who wants to keep their SSD running smoothly and efficiently.

    So why do you need Leven SSD Utility? Because it’s the only SSD optimization tool you’ll ever need.

    How to Use Leven SSD Utility?

    Leven SSD utility is a powerful tool that allows you to monitor and manage your SSD drive’s performance. It provides comprehensive information about your SSD, including its health status, firmware version, and storage capacity. Using Leven SSD utility, you can also perform a range of optimization tasks to improve your drive’s performance, such as firmware updates, secure erase, and wear-leveling algorithms.

    The interface of Leven SSD utility is user-friendly and easy to navigate, making it accessible to both novice and seasoned PC builders. To get started using Leven SSD utility, all you need to do is install it on your PC and launch the application. Once you’ve launched the app, you’ll be presented with a dashboard that displays all the critical information about your SSD.

    From here, you can explore the various features and tools that Leven SSD utility has to offer. In summary, if you want to get the most out of your SSD drive, Leven SSD utility is the perfect tool for you!

    Step-by-Step Guide to Use Leven SSD Utility

    Are you planning on using the Leven SSD Utility? Well, let me guide you through the process. First, you need to download the software from the official Leven website and install it on your computer. Once installed, open the application and select the drive that you want to optimize.

    The utility tool offers a variety of functions, including system optimization and firmware updates. One of the most significant features of the Leven SSD Utility is the S.M.

    A.R.T.

    status checker. This function provides you with information about the health of your SSD, including read/write error rates, operating temperature, and other important indicators. If you want to optimize your drive, click on the ‘Optimize’ button.

    The program will automatically perform tasks such as cleaning up temporary files, defragmenting the SSD, and optimizing the file system. Finally, if there is a firmware update available, you will see an indicator in the utility tool. You can then proceed to update your firmware with just a few clicks.

    Overall, the process of using the Leven SSD Utility is straightforward and requires minimal effort. Just follow the steps mentioned above, and your SSD will be optimized for peak performance. Remember to keep your SSD optimized regularly to ensure long-term health and longevity.

    Tips for Maximizing the Performance of Your SSD

    If you’re looking to maximize the performance of your SSD, then using a reliable SSD utility is a must. One such utility that stands out is the Leven SSD Utility, which can help improve the overall functionality of your SSD. This user-friendly tool helps you manage and optimize your SSD’s performance, ensuring that it operates at maximum speed and efficiency.

    Using the Leven SSD Utility, you can monitor your SSD’s health status, update its firmware, and tweak various settings to suit your needs. Additionally, the tool can help prevent data loss by providing you with valuable information about your SSD’s disk space and various performance metrics. With the Leven SSD Utility, you can rest assured that your SSD is running smoothly and performing to its fullest potential.

    Final Thoughts

    In conclusion, using the Leven SSD utility is a great way to optimize and maximize the performance of your SSD. This powerful tool can help you monitor the health and temperature of your drive, update firmware, and increase the lifespan of your SSD. By regularly using the Leven SSD utility, you can ensure that your SSD is running at its full potential and avoid any potential issues that may arise.

    So, if you’re looking for a reliable and user-friendly way to maintain your SSD, the Leven SSD utility is definitely worth considering. Don’t shy away from using this helpful tool to keep your SSD running smoothly for years to come!

    Conclusion

    In conclusion, the Leven SSD Utility is like a superhero for your computer, saving the day with lightning-fast performance and making sure your data is safe and secure. With its powerful tools and easy-to-use interface, it’s the perfect sidekick for anyone looking to optimize their SSD performance. So don’t let slow load times and sluggish response hold you back – upgrade to Leven SSD Utility and join the elite ranks of computing superheroes!”

    FAQs

    What is the Leven SSD utility?
    The Leven SSD utility is a software tool that helps you measure the performance of your SSD and optimize it for better speed and longevity.

    Can I use the Leven SSD utility on any brand of SSD?
    The Leven SSD utility is designed specifically for Leven brand SSDs, so it may not work properly or offer all the features on other brands of SSD.

    How does the Leven SSD utility improve SSD performance?
    The Leven SSD utility can help improve performance by optimizing the drive’s firmware, managing system settings, and monitoring the health of the drive to prevent any potential issues or failures.

    Does the Leven SSD utility offer any security features?
    Yes, the Leven SSD utility offers built-in security features such as secure erase and TRIM support, which help protect your data by securely wiping the drive clean or optimizing it for better performance.

  • Revolutionize Your PC with the Best NVME SSDs of 2023: The Ultimate Guide!

    Revolutionize Your PC with the Best NVME SSDs of 2023: The Ultimate Guide!

    Looking for a blazingly-fast and reliable storage solution for your PC? You can’t go wrong with an NVMe SSD. NVMe SSDs are the latest and greatest storage devices that provide lightning-fast speeds, high performance, and seamless data transfer. In this blog post, we will introduce you to the top 10 NVMe SSDs that you should look out for in 202

    From budget-friendly options to high-end models, we’ve got you covered with the best choices on the market. As technology continues to advance, NVMe SSDs have become increasingly popular for gamers, streamers, video editors, and content creators. They offer much faster read and write speeds than traditional SATA SSDs, meaning your games, files, and programs load quickly.

    Whether you’re building a new PC or upgrading your existing one, you’ll want to have the best hardware available to ensure you get the most out of it. With our extensive research, we’ve compiled a list of the 10 best NVMe SSDs that will take your gaming, video editing and other computing activities to the next level. Get ready to discover the best NVMe SSDs available on the market and enjoy blazing fast speeds and enhanced performance for your PC.

    So, let’s dive into the exciting world of NVMe SSDs and find out which is the perfect one for you!

    What is NVMe SSD?

    When it comes to the best NVMe SSDs for 2023, you can expect high performance and lightning-fast speeds. NVMe stands for Non-Volatile Memory Express, and it’s a type of solid-state drive that uses a low-latency interface to connect to the computer’s motherboard. This allows for faster transfer speeds and reduced latency compared to traditional HDDs or even SATA-based SSDs.

    NVMe SSDs are the latest cutting-edge technology for storage devices, allowing for seamless data transfers and lightning-fast boot times. So, whether you’re a gamer looking to boost your system’s performance or a content creator looking to optimize your workflow, investing in the best NVMe SSD for 2023 can make a significant difference.

    Definition and benefits

    NVMe (Non-Volatile Memory Express) SSD (Solid-State Drive) is a new type of storage technology that offers lightning-fast data transfer speeds. Unlike traditional hard drives that rely on spinning disks, NVMe SSDs utilize flash memory, similar to the kind found in USB drives and memory cards. This results in significant speed improvements, enabling faster boot-ups, application launches, and file transfers.

    NVMe SSDs also typically have lower latency and are more power-efficient than their hard drive counterparts. They are an excellent option for those looking to increase the speed and performance of their computer system, particularly for gamers, content creators, and professionals who require quick access to large files, such as video editors and graphic designers. Overall, NVMe SSDs are a valuable addition to any computer system, offering enhanced performance, efficiency, and speed.

    best nvme ssd 2023

    NVMe vs SATA vs PCIe comparison

    NVMe SSD When it comes to computer storage, NVMe SSD is one of the latest types of solid-state storage available on the market. NVMe stands for Non-Volatile Memory Express, and it is a type of storage interface that offers faster data transfer rates than traditional SATA connections. NVMe SSDs use PCIe (Peripheral Component Interconnect Express) technology to allow for quicker communication between the storage device and the computer’s processor.

    This results in lightning-fast read and write speeds and reduced latency, making it ideal for high-performance computing applications, such as gaming, content creation, and data analysis. With an NVMe SSD, you can quickly load programs and boot your system in a matter of seconds. So if you want to experience high-speed data transfer rates, NVMe SSD is the way to go.

    Factors to consider before buying

    Choosing the best NVMe SSD for 2023 can be a tricky task if you’re unclear on what factors to consider before making your purchase. First and foremost, you’ll want to think about your specific needs and wants. Consider what types of tasks you’ll be using your SSD for and what your budget is.

    It’s also important to choose a reputable brand that offers good customer service and technical support. Additionally, pay attention to the drive’s read and write speeds and storage capacity. If you’re using your SSD for gaming, seek out a model with high random read speeds to ensure smooth gameplay.

    Finally, make sure that your motherboard is compatible with the NVMe SSD you plan to purchase to avoid any compatibility issues. By keeping these factors in mind, you can confidently choose the best NVMe SSD for your needs in 202

    Capacity, speed, endurance, price

    When it comes to buying storage devices, there are several factors you need to consider. The first one is capacity. If you plan on storing a lot of files, photos, or videos, you need a device with a high storage capacity.

    The second factor is speed. If you need to transfer large files frequently, you need a device with a high transfer speed. The third factor is endurance.

    If you plan on using the device for a long time, you need a device that can withstand wear and tear. And finally, the fourth factor is price. You need to find a device that fits your budget.

    Before you make a purchase, it’s important to evaluate your needs and determine which factors are the most important to you. For example, if you use your device for work-related activities, speed and endurance may be more important than capacity. On the other hand, if you use your device for personal use, capacity may be a higher priority.

    Another consideration to keep in mind is the type of device you choose. Solid-state drives (SSDs) are faster and more durable than traditional hard disk drives (HDDs), but they are also more expensive. Additionally, external drives are great for portable storage but may not have the same speed and capacity as internal drives.

    In conclusion, before buying any storage device, you need to consider capacity, speed, endurance, and price. Evaluate your needs and priorities to determine which factors are the most essential. Keep in mind the type of device you need and weigh the pros and cons of each before making a final decision.

    Top 5 NVMe SSDs for Gaming

    Looking for the best NVMe SSD for gaming that can improve your computer’s speed and performance? Look no further as we’ve come up with the top 5 NVMe SSDs to help you decide which one suits your gaming needs in 202 First on the list is the Samsung 970 Evo Plus with a blazing-fast write speed of 3,300 MB/s that can boost your game load times. Second, there’s the WD Black SN850 for its reliable high-speed storage and the SanDisk Extreme Pro NVMe SSD with its 1TB capacity.

    If you’re on a budget but still want decent performance, consider the ADATA XPG SX8200 Pro and Sabrent Rocket, which also have fast write speeds and affordable prices. These NVMe SSDs are the perfect solution for gamers who demand higher performance and a faster gaming experience. So, start upgrading your gaming PC now and indulge in the ultimate gaming experience with the best NVMe SSD for 2023!

    Brands and models with high speed and performance

    If you’re a serious gamer, you know that every millisecond counts. This is why investing in a high-performance NVMe SSD is crucial for optimal gaming experience. Here are the top 5 NVMe SSDs for gaming:

    Samsung 970 Evo Plus: Considered as one of the fastest NVMe SSDs in the market, the 970 Evo Plus boasts read and write speeds of up to 3500MB/s and 3300MB/s, respectively, providing lightning-fast boot times and gaming load times. Western Digital Black SN750: With incredibly low latency and high random read and write IOPS, the SN750 offers exceptional performance for gamers.

    It also comes with a reliable heat sink to prevent overheating. Corsair Force MP600: The MP600 is another top contender with speeds of up to 4950MB/s read and 4250MB/s write.

    It features an aluminum heatsink to maintain lower temperatures, ensuring consistent performance. Adata XPG SX8200 Pro: For a more affordable option, the SX8200 Pro offers strong performance with read and write speeds of up to 3500MB/s and 3000MB/s, respectively.

    It’s a reliable and high-speed option for gamers on a budget. Sabrent Rocket Q: The Rocket Q is an excellent value SSD that delivers fast read and write speeds of up to 3300MB/s and 2000MB/s, respectively.

    It also features a powerful heat sink to keep temperatures low and ensure consistent performance. Finding the right NVMe SSD can make a significant impact on your gaming experience. These top 5 NVMe SSDs provide exceptional speed and performance, allowing you to load games faster and reduce game stuttering.

    Pros and cons of each SSD for gaming

    When it comes to gaming, SSDs are an essential component that can significantly impact your gaming experience. There are multiple NVMe SSDs available in the market, but choosing the right one requires assessing various factors. The Samsung 970 EVO Plus and WD Black SN750 are two of the best NVMe SSDs for gaming, offering high performance, reliability, and endurance.

    However, they come with a higher price point than others on the market. The Adata XPG SX8200 Pro, Sabrent Rocket NVMe 0, and Crucial P5 deliver great value for their price, offering optimal performance at a lower cost.

    The Adata SSD’s custom controller and high-quality NAND flash make it a reliable choice, while the Sabrent Rocket boasts a PCIe 0 interface, making it one of the fastest NVMe SSDs available. The Crucial P5 also delivers high speeds and endurance with its Micron 3D NAND and dynamic write acceleration technology.

    However, it may not be compatible with some older systems due to its PCIe 0 interface. Ultimately, each NVMe SSD has its own pros and cons, so it’s crucial to consider each one’s attributes and compatibility with your gaming setup before making a final decision.

    Top 5 NVMe SSDs for Professional Use

    Are you in search of the best NVMe SSD for professional use in 2023? Look no further because we’ve got you covered with our top 5 picks. First up, the Samsung 980 Pro 1TB offers lightning-fast read and write speeds with its PCIe 0 interface, making it a preferred choice for content creators and gamers alike.

    Next, the Western Digital Black SN850 1TB features a powerful controller and an impressive endurance rating, making it perfect for heavy workload tasks. Coming in at number three, the Seagate FireCuda 520 1TB boasts impressive sequential read and write speeds, making it an excellent option for handling large files effortlessly. The Corsair MP600 Pro 1TB offers exceptional performance and durability, making it an excellent pick for professional use.

    Finally, the Adata XPG Gammix S70 Blade 1TB boasts a slim design, robust performance, and an affordable price tag, making it a perfect blend of style and cost-effectiveness. These NVMe SSDs are guaranteed to enhance your productivity and make your workflow more seamless.

    Brands and models with high capacity and endurance

    When it comes to professional use, NVMe SSDs are the way to go, and there are plenty of models to choose from. However, not all NVMe SSDs are created equal, especially when it comes to endurance and capacity. That’s why we’ve compiled a list of the top 5 NVMe SSDs for professional use.

    At the top of the list is the Samsung 970 PRO, which boasts an impressive 1TB capacity and a 5-year warranty. It’s known for its durability, making it perfect for professional use. Next up is the Western Digital Black SN850, which also has a 1TB capacity and a top-quality endurance rating.

    The third contender is the Sabrent Rocket 4 Plus, with a massive 2TB capacity and amazing endurance. If you’re looking for something with a lower price point but still boasts great endurance and capacity, you can’t go wrong with the Seagate Firecuda 520 or the Crucial P5 Plus, both with 1TB capacity and incredible performance. All five of these NVMe SSDs are great for professional use, providing high-speed data transfer rates, incredible durability, and impressive capacity.

    So, if you’re in the market for an NVMe SSD for professional use, make sure to consider the top contenders, including the Samsung 970 PRO, Western Digital Black SN850, Sabrent Rocket 4 Plus, Seagate Firecuda 520, and Crucial P5 Plus. With any of these models, you can be sure that your professional needs are met with ease and efficiency.

    Pros and cons of each SSD for professional use

    If you’re in the market for an SSD for professional use, there are five NVMe options that stand out from the rest: Samsung 970 EVO Plus, WD Black SN750, Sabrent Rocket, Adata XPG SX8200 Pro, and Seagate FireCuda 520. Each of these SSDs has its own pros and cons, depending on your specific needs. For instance, the Samsung 970 EVO Plus is known for its impressive speeds and durability, but it can be pricey.

    Meanwhile, the WD Black SN750 is often considered the best value for its combination of performance and affordability. On the other hand, the Sabrent Rocket offers some of the fastest read and write speeds on the market, but it can run hot and may not fit in some laptops. The Adata XPG SX8200 Pro is a good budget option and offers speedy performance, but it lacks some of the advanced features that more expensive SSDs may have.

    Lastly, the Seagate FireCuda 520 is an excellent choice for gamers, but it may not be as suitable for other professional applications due to its focus on gaming-specific features. When choosing between these SSDs, it’s important to weigh the pros and cons carefully and consider which option fits your specific needs and budget.

    Future Trends in NVMe SSDs

    As we are moving into the year 2023, the NVMe SSDs are expected to continue the trend of fast storage capacity and high speed. One of the major trends that we can expect is the increased adoption of PCIe 0 interface that offers faster bandwidth than PCIe

    0, thus providing lightning-fast read and write speeds. Another trend that is emerging is the usage of quad-level cells (QLC), which can store more than traditional NAND Flash memory used in SSDs, leading to increased storage capacities. Also, we can expect more 3D NAND memory stacks to be utilized in NVMe SSDs, offering faster data access rates and better endurance.

    The best nvme ssd 2023 will be equipped with advanced technologies such as AI-powered algorithms, which will optimize the performance of the SSDs and improve the user experience. In summary, the year 2023 holds a lot of promise for the NVMe SSD market, and we can expect to see many innovative products offering more storage space, faster speeds, and improved performance.

    Upcoming technology advancements

    NVMe SSDs As technology continues to evolve, the future trends of NVMe SSDs look extremely promising. One of the most significant advancements expected is the use of PCIe 0 technology, which will allow for even faster data transfer rates and quicker access times.

    This will be especially beneficial for enterprise-level applications, where every second counts. Another development that is on the horizon is the growth of quad-level cell (QLC) flash memory technology. This technology allows for higher storage densities at a lower cost-per-gigabyte, enabling larger amounts of data to be stored and accessed quickly.

    When combined with NVMe SSDs, enterprises will be able to take advantage of this cost-effective storage solution across their applications, from databases to virtualized servers. As these technologies continue to be refined and developed, it’s clear that NVMe SSDs are set to play a dominant role in the future of data storage and management.

    Expected progress in terms of performance, capacity, and price

    NVMe SSDs The future of NVMe SSDs looks very promising. With advancements in technology, we can expect to see even better performance, increased capacity, and lower prices. One significant trend we can look forward to is the shift towards PCIe

    0, which provides faster data transfer rates between the storage device and the computer’s processor. This means we can expect NVMe SSDs to become even faster and more efficient in the near future. Additionally, the use of newer, denser NAND flash memory will allow manufacturers to offer larger capacity SSDs without a significant increase in price.

    This means that we can expect to see high-capacity NVMe SSDs become more accessible to consumers. While advancements in technology will undoubtedly drive progress, competition between manufacturers is also likely to push the industry forward. This competition will ultimately benefit consumers as companies strive to produce better, faster, and cheaper NVMe SSDs.

    Conclusion

    As we look towards the future of NVMe SSD technology in 2023, it’s exciting to imagine the kind of performance and innovation we can expect from these next-generation drives. Whether you’re a gamer, content creator, or simply looking for a faster and more reliable storage solution, the continued advancements of NVMe SSDs promise to deliver the speed and efficiency you need to stay ahead of the curve. So why settle for less when you can have the best? Stay tuned for what promises to be an epic showdown in the world of NVMe SSDs in the years to come!”

    FAQs

    What are the benefits of using the best NVMe SSD in 2023?
    The best NVMe SSD in 2023 will offer faster read and write speeds, improved boot times, and quicker application load times. This results in a smoother and more responsive computing experience.

    What factors should be considered when choosing the best NVMe SSD in 2023?
    Factors to consider when choosing the best NVMe SSD in 2023 include capacity, compatibility with your system, read and write speeds, and manufacturer warranty and reliability.

    How do I install the best NVMe SSD in 2023?
    Installing the best NVMe SSD in 2023 can vary depending on your system, but generally involves backing up your data, installing the NVMe drive into the motherboard’s M.2 slot, and formatting the NVMe drive in Windows or other operating systems.

    Can I use the best NVMe SSD in 2023 as a boot drive?
    Yes, the best NVMe SSD in 2023 can be used as a boot drive, and it is highly recommended due to the faster read and write speeds and improved boot times. However, ensure that your system’s BIOS is configured to boot from the NVMe drive.

  • Effortlessly Clone Your M.2 SSD with Only One Slot: A Guide for Tech Enthusiasts

    Are you feeling frustrated with slow load times and lagging system performance? It could be time to upgrade your computer’s storage. One popular option is a solid state drive (SSD), particularly the M.2 form factor.

    These small but speedy drives offer a significant improvement over traditional hard drives, but what if you want to transfer your data from an old SSD to a new one? Cloning your M.2 SSD might be the solution you’re looking for. Keep reading to learn more about the hows and whys of cloning your M.

    2 SSD.

    Assess your system requirements

    If you want to know how to clone M.2 SSD with only one slot, the first step is to assess your system requirements. You need to check if your computer or laptop has compatible hardware and software to facilitate the cloning process.

    Secondly, you need to ensure that your computer has enough free disk space to store the clone. It’s also vital to have a reliable cloning software that can get the job done. Before cloning, you need to back up critical data, so you don’t lose it in the cloning process.

    Finally, you must have patience as the cloning process may take some time, depending on the size of the M.2 SSD being cloned. Overall, cloning an M.

    2 SSD with only one slot may seem like a daunting task, but with the appropriate preparation, it’s a seamless process that can save you time and money.

    Check if you have a cloning cable

    If you’re considering cloning your hard drive, one of the first things you should do is assess your system requirements. This means checking if you have a cloning cable and making sure your computer and destination drive meet the necessary hardware specifications. A cloning cable is a necessity for transferring data from one drive to another, but not all systems come with one.

    You may need to purchase one separately based on the specific models you have. In terms of hardware specifications, you’ll want to ensure that the destination drive has enough storage space to accommodate all the data from your original drive. Additionally, you’ll want to ensure that both drives are compatible with your computer to avoid potential complications.

    Taking the time to assess your system requirements beforehand will save you time and headache down the line.

    how to clone m 2 ssd with only one slot

    Determine your type of M 2 SSD

    When considering purchasing an M 2 SSD for your system, the first step is to assess your system requirements. This involves looking into the specific type of M 2 SSD that would be best suited for your needs. There are different types of M 2 SSDs available, such as SATA-based and NVMe-based, and each one has its own advantages and limitations.

    To determine the type of M 2 SSD that’s appropriate for your system, you should consider factors like speed, storage capacity, and budget. If you’re a gamer or a content creator who regularly works with large files, you may want to opt for an NVMe-based M 2 SSD that can provide faster read and write speeds. On the other hand, if you’re simply looking to upgrade your system’s storage capacity without breaking the bank, a SATA-based M 2 SSD may be more practical.

    It’s also important to check your system’s compatibility with the M 2 SSD you’re considering. You can do this by referring to your motherboard’s manual or contacting the manufacturer’s customer support team. By determining your specific needs and system requirements, you can select the right type of M 2 SSD that will provide optimal performance and reliability for your system.

    Create windows bootable USB drive

    If you have an M.2 SSD with only one slot and you need to clone it, don’t worry! There are still ways to get the job done. One option is to use software like Macrium Reflect or Acronis True Image to create a disk image of your current drive and then restore it onto the new drive.

    Another option is to create a bootable USB drive with Windows on it and use that to clone your drive. To do this, you’ll need a blank USB drive and a Windows installation ISO. Use a tool like Rufus to create the bootable USB drive, then boot from it and use a disk cloning software like Clonezilla to copy your current drive onto the new one.

    It may take some time, but in the end, you’ll have an exact replica of your old drive on your new one. Just remember to back up your data first and be sure to double-check all your settings and options before proceeding. With a little patience and some know-how, you’ll be able to clone your M.

    2 SSD with ease.

    Download the Media Creation Tool

    Creating a bootable USB drive for Windows is necessary when you want to install a fresh copy of the operating system on your computer. One of the easiest ways to create a Windows bootable USB drive is to use the Media Creation Tool, which is available for free on the Microsoft website. This tool allows you to download the latest version of Windows and create an installation media, such as a USB drive or DVD, that can be used to install Windows on any computer.

    To use the Media Creation Tool, simply download it from the Microsoft website and run it on your computer. Then follow the prompts to select the language, edition, and architecture of the Windows installation. Finally, choose the USB drive as the installation media and let the tool create the bootable drive for you.

    Once the process is complete, you can use the USB drive to install Windows on any computer. With this tool, creating a bootable USB drive for Windows has never been simpler.

    Create the bootable USB drive

    To create a bootable USB drive for Windows, the first step is to download the Windows ISO file from the Microsoft website. Once the file is downloaded, insert the USB drive into your computer. In order to make the USB bootable, you’ll need to use a software tool like UNetbootin or Rufus, which are available for free download.

    These tools will guide you through the process of creating a bootable USB drive by formatting the USB drive and copying the Windows ISO file onto it. After this process is complete, you will have a fully functional bootable USB drive that can be used to install Windows on any compatible computer or device. Whether you’re setting up a new system or trying to troubleshoot an existing one, creating a bootable USB drive is a quick and easy way to get up and running with Windows in no time.

    Change the boot order in the BIOS

    Changing the boot order in the BIOS may sound complicated, but it’s actually a straightforward process. All you need is a Windows bootable USB drive, and you can easily change the boot order to prioritize your USB drive and boot from it. Creating a bootable USB drive is also a simple process, requiring just a few steps.

    Firstly, you need to insert a USB flash drive into your computer and download the Windows ISO file. Next, download the Windows USB/DVD download tool and launch it. Choose the ISO file you downloaded earlier and select the USB drive you want to use.

    Finally, click ‘Begin copying’ to create the bootable USB drive. Once you have your bootable USB drive, you can change the boot order in the BIOS by restarting your computer and entering the BIOS settings. From there, go to the Boot tab and use the arrow keys to move your USB drive to the top of the list.

    Save the changes and exit the BIOS, and your computer should boot from the USB drive. By following these straightforward steps, you can easily create a bootable USB drive and change the boot order in the BIOS.

    Cloning the M 2 SSD

    If you have an M 2 SSD and only one slot, there may come a time when you need to clone it. Cloning the drive means making an exact copy of everything on it, including the operating system and all data. This is useful if you are upgrading to a larger capacity drive or if you want to create a backup.

    To clone an M 2 SSD with only one slot, you will need to use specialized software. One such program is Clonezilla, a free and open-source tool that allows you to clone a drive from a live bootable disk. You’ll need to create a bootable USB drive or CD containing Clonezilla, then boot from that device and follow the on-screen instructions to clone your M 2 SSD.

    Make sure you have enough space on the target drive for the clone, and be careful to clone the correct source drive to the correct target drive. With Clonezilla, cloning your M 2 SSD with only one slot is a straightforward process.

    Clone the M 2 SSD using a cloning software

    Cloning an M 2 SSD is a very straightforward process and requires minimal technical skills. With the help of a good cloning software, you can easily copy all the data from your existing M 2 drive to a new one. Cloning software allows you to create an exact copy of your old SSD, including the operating system, applications, files, and personal preferences.

    This means that you don’t have to waste time reinstalling all your programs and transferring your files manually. With just a few clicks, you can have your new M 2 SSD up and running exactly like the old one. One of the best cloning software options is EaseUS Todo Backup, which is free and easy to use.

    It provides a step-by-step guide that takes you through the whole process of cloning your M 2 SSD. Keep in mind that during the cloning process, it’s essential to ensure that the new SSD has enough storage capacity to hold all the data from the old drive. Overall, cloning an M 2 SSD is a quick and simple process that will save you a lot of time and effort.

    Start the cloning process

    If you’re looking to upgrade your computer’s storage capabilities, cloning your M 2 SSD can be a hassle-free option. Before you begin, ensure that you have a backup of all important data on your existing M 2 SSD, as the cloning process will overwrite it. You’ll need a cloning software, such as EaseUS Todo Backup or Samsung Data Migration, along with a new, larger M 2 SSD.

    Once you’ve installed the software and connected the new SSD to your computer, you can begin the cloning process. The software will make an exact copy of your existing M 2 SSD to the new one, allowing you to quickly and easily upgrade your storage without having to reinstall your operating system or transfer files manually. Remember to format the new SSD after the cloning process is complete, and you’ll be all set with a faster, more spacious storage solution!

    Conclusion

    So, there you have it – the secret to cloning an M.2 SSD with only one slot. It may seem like a tricky process, but with the right tools and a bit of patience, you’ll be able to duplicate your precious data in no time.

    And if you’re feeling extra adventurous, why not give it a shot without any instructions? After all, the best way to learn is by doing. Just remember, cloning your SSD is a one-time thing – unlike cloning dinosaurs, which we all know never ends well. Happy cloning!”

    FAQs

    Can I clone a M.2 SSD with only one slot?
    Yes, you can. You will need an external drive or an adapter to connect the new SSD externally to your computer. Use a cloning software to transfer data from the old drive to the new one.

    Do I need a specific adapter to clone a M.2 SSD with only one slot?
    Yes, you will need an M.2 to USB adapter or enclosure to connect the new drive externally. This will enable you to clone the drive using a software like EaseUS ToDo Backup or Clonezilla.

    How do I ensure that my new SSD is bootable after cloning?
    Before cloning, check if your current SSD is booted in UEFI or Legacy mode, and choose the same option for the new SSD. Once the cloning is complete, change the boot order in the BIOS to prioritize the new SSD.

    Can I clone my M.2 SSD without losing any data?
    Yes, cloning your M.2 SSD using a software like Macrium Reflect or Acronis True Image enables you to transfer all data and programs from the old drive to the new one without losing any data.

  • Unlocking the Power of Samsung T7 SSD on Mac: Your Ultimate Guide

    If you’re a Mac user, you know that having enough storage space is crucial for keeping your computer running smoothly and efficiently. One way to increase your storage is by using an external Solid State Drive (SSD), and the Samsung T7 is a popular choice. But how do you use it with your Mac? In this blog, we’ll take you through step-by-step instructions on how to set up and start using your Samsung T7 SSD on your Mac.

    Plus, we’ll give you some tips and tricks for getting the most out of your new storage device. So, let’s dive in!

    Check Compatibility

    If you’re wondering how to use Samsung T7 SSD on Mac, the first step is to check for compatibility. Fortunately, the T7 is compatible with a range of operating systems, including macOS, but you’ll want to make sure your Mac meets the requirements before you get started. In general, you’ll need to be running macOS X

    10 or later, and you’ll need a USB Type-C port with support for USB 2 Gen 2 (10Gbps) or higher. If your Mac doesn’t have a USB Type-C port, you may need to use an adapter.

    Once you’ve confirmed compatibility, you can simply plug in your T7 SSD and start using it on your Mac like any other external drive. With its fast read and write speeds and compact design, the T7 makes a great choice for anyone looking to expand their Mac’s storage or improve its performance.

    Confirm Your Mac has a USB-C Port

    When it comes to using USB-C accessories on your Mac, the first step is to confirm that your computer has a USB-C port. This feature was first introduced in 2015 with the MacBook, and has since become standard on most new Mac models. However, if you are still using an older Mac, you may need to double-check its compatibility.

    It’s important to note that while USB-C looks similar to the traditional USB-A connector, they are not the same and are not interchangeable. Before purchasing any USB-C devices, be sure to confirm that your Mac has this port to avoid any compatibility issues. An easy way to check is to look for the port on the side of your Mac or consult the device’s user manual for more information.

    how to use samsung t7 ssd on mac

    Ensure Your Mac is Running macOS 10.12 or Later

    If you’re planning on upgrading your Mac or purchasing a new one, the first step is to make sure it’s compatible with the latest operating system. Apple’s macOS 12 or later is the current operating system for Macs, and it comes with a range of new features and improved security measures.

    Before upgrading, however, it’s important to check the compatibility of your Mac. You can do this by going to the Apple menu, selecting “About This Mac,” and checking the version number. If your Mac is running macOS

    12 or later, you’re good to go. If not, you may need to upgrade your hardware to ensure compatibility. It’s crucial to ensure compatibility before upgrading, as trying to install an incompatible operating system can lead to significant issues.

    So, take a few minutes to check your Mac’s compatibility, and enjoy the benefits of the latest operating system.

    Connect the Samsung T7 SSD to your Mac

    If you’re wondering how to use Samsung T7 SSD on your Mac, worry not, the process is straightforward. The first step is to ensure your Mac has USB Type-C ports. If it doesn’t, you’ll need a USB Type-C to USB-A adapter to connect to the SSD.

    Once you’ve established the connection, your Mac should detect the T7 and recognize it as an external storage device. From here, you can choose to manually transfer files to the SSD or automatically backup your Mac using Samsung’s software, which you can download from their website. With transfer speeds of up to 1,050MB/s, the T7 is an excellent choice for anyone looking to quickly store or backup massive amounts of data.

    So, if you need a reliable external storage solution, the Samsung T7 SSD is definitely worth considering.

    Plug in the USB-C Cable to both the SSD and Mac

    If you’re looking to expand your MacBook’s storage space, the Samsung T7 SSD is a great choice. To get started, you’ll need to connect the SSD to your Mac. The first step is to plug in the USB-C cable to both the SSD and your computer.

    This will ensure your Mac recognizes the device and you can start using it. Don’t worry if you’ve never connected an external drive before; the process is quick and straightforward. The Samsung T7 SSD is compact and portable, making it a perfect choice for anyone who needs to work on multiple devices.

    Plus, it’s lightning fast, so you can transfer files in no time. The great thing about the T7 SSD is that it’s compatible with both Mac and Windows devices, so you can use it for any computer you have. It’s a great accessory for anyone who’s always on the go and needs to carry around important files.

    In no time, you’ll be able to start transferring documents, photos, and videos to your new storage device. So, get started and connect your Samsung T7 SSD to your Mac today!

    Authenticate the Connection if Prompted

    When connecting your Samsung T7 SSD to your Mac, you may be prompted to authenticate the connection. This is a security measure that ensures only authorized devices can access your data. To authenticate, simply enter your Mac’s password when prompted.

    It’s important to note that if you don’t authenticate the connection, you won’t be able to access your data on the SSD. So, take a few seconds to go through the prompt and authenticate it. It’s that simple! Plus, it gives you peace of mind knowing that your data is secure and protected.

    So, next time you connect your Samsung T7 SSD to your Mac, make sure to authenticate the connection so you can access your data without any hassle.

    Format the Samsung T7 SSD for Mac Use

    If you’re a Mac user and you’ve recently purchased a Samsung T7 SSD, you’ll need to format it before you can start using it. Fortunately, the process is pretty straightforward. First, make sure your Samsung T7 SSD is connected to your Mac.

    Then, go to the “Disk Utility” app, which you can find by searching for it in Spotlight or by navigating to Applications > Utilities > Disk Utility in Finder. Once you’re in Disk Utility, you should see your Samsung T7 SSD in the list of drives. Select it and click on “Erase” in the toolbar.

    From there, you can choose the format you want to use – we recommend choosing “Mac OS Extended (Journaled)” unless you have a specific reason to use a different format. Rename your drive to something that makes sense to you, and click on “Erase” again to confirm. Once the formatting process is complete, you’ll be able to use your Samsung T7 SSD just like any other external hard drive on your Mac.

    It’s that simple!

    Open Disk Utility on your Mac

    If you’ve recently purchased a Samsung T7 external SSD and need to format it for use on your Mac, you’re in luck! The first step is to open Disk Utility, which can be found in the Utilities folder within your Applications folder. Once opened, select the Samsung T7 from the list of devices on the left-hand side. Then, click on the “Erase” button at the top of the window.

    You’ll be prompted to choose a Name, Format, and Scheme for the device. For Mac use, it’s recommended to choose “Mac OS Extended (Journaled)” as the format and “GUID Partition Map” as the scheme. Once you’ve made your selections, click “Erase” and wait for the process to complete.

    With these simple steps, your Samsung T7 SSD will now be ready for use on your Mac.

    Locate the Samsung T7 SSD and Choose Erase

    If you’re looking to use a Samsung T7 SSD with your Mac, the first thing you’ll need to do is format it. Start by locating the Samsung T7 SSD in your Finder window. Once you’ve found it, select the option to erase the drive.

    This will wipe all data from the SSD and prepare it for use on your Mac. Be sure to select the option to format the drive for Mac use, as this will ensure that the file system is compatible with macOS. This process may take some time to complete, depending on the size of your SSD.

    Once it’s done, you’ll be able to use your Samsung T7 SSD with your Mac as you would any other external drive. Just drag and drop files onto the drive to transfer them, or use it as a backup location for your important data. By formatting your Samsung T7 SSD for Mac use, you’ll be able to take full advantage of its fast transfer speeds and large storage capacity.

    Select Mac OS Extended (Journaled) as the Format Type

    To use the Samsung T7 SSD with your Mac, you’ll need to format it accordingly. One of the first and most important steps in formatting is selecting the correct Format Type. For Mac users, the best option is Mac OS Extended (Journaled).

    This format is ideal for Apple’s operating system because it supports journaling, which creates a backup of the file system’s metadata. This added layer of security means that if there’s a power outage or unexpected shutdown, your data won’t be lost or corrupted. Additionally, Mac OS Extended (Journaled) allows for files larger than 4GB, which is helpful for those working with large files like video content.

    In summary, when formatting the Samsung T7 SSD for use with your Mac, ensure that you select Mac OS Extended (Journaled) as the format type to guarantee the best compatibility and security for your data.

    Rename the Drive If Desired

    When you want to use your Samsung T7 SSD with your Mac, you need to format it for Mac use. One important step during this process is renaming the drive if desired. When you plug in your Samsung T7 SSD, it will likely have a generic name assigned to it, such as “Untitled”.

    You can change this name to something more specific to make it easier to recognize and locate the drive on your Mac. To do this, simply right-click on the drive icon on your desktop, select “Get Info”, and then type the desired name in the “Name & Extension” field. It’s important to note that while renaming the drive won’t affect the performance of the SSD, it does make it easier to use, especially if you have multiple external drives connected to your Mac.

    Overall, renaming your Samsung T7 SSD is a quick and simple step in the process of formatting it for use with your Mac.

    Start Using Your Samsung T7 SSD on Mac

    If you’ve recently purchased a Samsung T7 SSD and are wondering how to use it on your Mac, the process is quite simple. First, connect the SSD to your Mac using the included USB-C cable. Next, go to your “Finder” preferences and make sure that “External disks” is selected under the “Sidebar” tab.

    This will ensure that your SSD is visible in the Finder. You can then drag and drop files onto the SSD just like any other external drive. You may also want to consider formatting the SSD to work specifically with your Mac, which can be done using the “Disk Utility” application.

    Overall, using your Samsung T7 SSD on your Mac should be a smooth and seamless experience, providing you with fast and reliable storage for all of your important files.

    Move Files to and from the SSD as Usual

    If you’re a Mac user who just got a Samsung T7 SSD, congratulations! You’ve got a reliable, fast, and secure tool to store and access your data on-the-go. But how do you actually start using it? Well, the good news is that it’s as easy as moving files to and from any external drive. Simply connect your Samsung T7 SSD to your Mac via the USB-C cable included in the package, and it should be recognized automatically.

    You can then use your Finder and drag-and-drop files or folders from your Mac’s internal storage to the Samsung T7 SSD, or vice versa. Don’t forget that you can also create new folders, rename files, and delete them on the Samsung T7 SSD as you would do on your Mac. Remember to safely eject the drive before unplugging it to avoid data corruption or loss.

    With your Samsung T7 SSD, you’ll have ample space, lightning-fast speed, and advanced encryption to keep your files safe and accessible anytime, anywhere.

    Safely Eject the SSD before Disconnecting It

    When it comes to starting to use your Samsung T7 SSD on Mac, one important step to keep in mind is to safely eject the SSD before disconnecting it. This is a crucial step as it ensures that all of the data on the SSD is properly saved and not corrupted during the disconnection. To do this, simply hold down the “Control” key and click on the SSD icon on the desktop.

    From there, select “Eject,” and wait until the SSD icon disappears before physically disconnecting the drive. By following this step, you can ensure that your Samsung T7 SSD stays in good working condition for longer.

    Conclusion

    Congratulations, you’re now officially an expert on how to use the Samsung T7 SSD with your Mac! With its lightning-fast speed and ample storage capacity, this little gadget is a must-have for anyone looking to stay organized and efficient. So go ahead, transfer, backup, and store all your important files with ease. With the Samsung T7 SSD, you’ll never have to worry about running out of space or losing important data again.

    It’s like having a personal assistant for your digital life – fast, reliable, and always ready to help you stay on top of things. So what are you waiting for? Get your hands on a Samsung T7 SSD today, and experience the future of data storage on your Mac!”

    FAQs

    Is Samsung T7 SSD compatible with Mac?
    Yes, Samsung T7 SSD is compatible with Mac. You can use it with macOS X version 10.10 or later.

    How do I connect Samsung T7 SSD to my Mac?
    You can connect Samsung T7 SSD to your Mac using the USB-C to USB-C cable provided with the drive. If your Mac has a Thunderbolt 3 port, you can use a Thunderbolt 3 cable for faster data transfer.

    Do I need to install any drivers to use Samsung T7 SSD on Mac?
    No, you don’t need to install any drivers to use Samsung T7 SSD on Mac. It is a plug-and-play device and will be detected by your Mac automatically.

    How do I format Samsung T7 SSD for Mac?
    You can format Samsung T7 SSD for Mac using the Disk Utility tool. Connect the drive to your Mac, open Disk Utility, select the drive from the list, and choose the format as Mac OS Extended (Journaled) or APFS depending on your macOS version.

  • Effortlessly declutter your SSD: A step-by-step guide to removing partitions on your drive

    Partitioning an SSD can be a useful tool for managing your files and optimizing your drive’s performance. However, sometimes you may need to remove partitions for various reasons. Whether you’re upgrading your SSD, selling your computer, or just want to start fresh with a clean drive, removing partitions can seem intimidating.

    But fear not, with this step-by-step guide, you’ll learn how to remove SSD partitions with ease and without losing any data. So, buckle up and let’s get started!

    Backup Your Data First

    If you are wondering how to remove partitions on SSD, the first thing you should do is backup your data. This is crucial, as removing the partitions could result in data loss. Once you have backed up your important files and data, you can proceed with the partition removal process.

    There are different ways to remove partitions on an SSD, depending on the operating system you are using. For Windows users, you can use the Disk Management tool to remove partitions. For Mac users, you can use the Disk Utility tool.

    It is important to follow the instructions carefully to avoid any unintended consequences. Remember to only remove the partitions that you don’t need anymore, as removing the wrong one could affect the system’s performance. Overall, removing partitions on an SSD can be a straightforward process if done correctly and with caution.

    Save all important files to an external hard drive

    Backing up your data is vital to safeguarding important files and preventing the heartbreak of losing them forever. As such, saving all your critical files to an external hard drive should be a top priority. Not only does this eliminate the risk of losing your data to a hard drive failure or accidental deletion, but it also provides you with a portable backup that you can take with you wherever you go.

    So, whether you’re a professional photographer storing your work portfolio or a student saving academic documents, investing in an external hard drive is the best way to ensure that your data is safe and secure. Furthermore, having multiple backup copies of your files gives you peace of mind in case of a disaster. A simple rule of thumb is to have at least two copies of everything, with one copy stored offsite for added security.

    External hard drives provide this convenience as they can be easily transported to a different location and stored safely away from the original copies. With the extra storage capacity and ease of use that they provide, external hard drives have become an essential tool for safeguarding and managing valuable data. Don’t wait until it’s too late; start backing up your data today and keep your critical files safe and secure.

    how to remove partitions on ssd

    Open Disk Management Tool

    If you’re looking to remove partitions on your SSD, you can do so easily through the Disk Management tool on your computer. Simply open up the tool by searching for “Disk Management” in the Start menu or through the Control Panel. Once inside, you’ll see a list of all your drives – including your SSD.

    You can identify your SSD by its size and the fact that it’s a solid-state drive. Select the SSD, then right-click on the partition you want to remove. Choose the “Delete Volume” option, and then follow the prompts to confirm your selection.

    It’s important to note that removing a partition will delete all data stored on it, so make sure you back up any important files before going through with it. With this simple process, you can easily remove unwanted partitions on your SSD and reclaim valuable storage space.

    Click Start > Type Disk Management > Open

    If you want to manage your hard drive on a Windows computer, you can use the Disk Management tool. It’s a built-in feature that lets you view all the storage devices connected to your PC and perform operations such as creating partitions, shrinking volumes, and assigning drive letters. The easiest way to open Disk Management is by typing its name in the Start menu search box.

    Once you see it in the results, select the option to start the tool. Alternatively, you can press the Windows key + X and choose Disk Management from the menu that appears. Regardless of the method you use, once you have Disk Management open, you’ll see a list of all disks, volumes, and partitions on your computer, along with their sizes and status information.

    You can right-click on any of these items to access a variety of options for managing your storage. So, if you need to make changes to your hard drive setup or troubleshoot any issues, give the Disk Management tool a try.

    Locate SSD Partition to Remove

    If you are thinking of removing partitions on your SSD, the first thing to do is to locate the partition that you want to delete. This can be done through the Disk Management tool in Windows. Simply search for it in the Start Menu or press the Windows key + X and select Disk Management.

    Once you have opened the tool, you will see a list of all the drives that are currently connected to your computer. Locate the SSD that you want to work with and take note of the partition that you want to remove. Right-click on the partition and select Delete Volume.

    Windows will ask you to confirm the deletion, so make sure that you have selected the correct partition before proceeding. After the process is completed, the partition will be removed and the available space will be merged with the unallocated space on the disk. Overall, removing a partition on your SSD is a straightforward process as long as you use the Disk Management tool correctly.

    Identify the SSD partition you want to remove

    When it comes to removing an SSD partition, the first step is to identify which partition you want to get rid of. It’s essential to choose carefully as removing the wrong partition could result in the loss of valuable data. To locate the partition, you can use the built-in Disk Management tool on Windows or Disk Utility on Mac.

    Once you’ve opened the tool, you’ll see a list of all the drives connected to your computer. Look for the SSD you want to modify and select it. You should then see a list of all the partitions on that drive.

    To identify the partition you want to remove, look for the partition size, drive letter, or label. Make sure to double-check before proceeding with the removal process. By taking your time and being cautious, you can safely remove the SSD partition you no longer need without losing any valuable data.

    Delete SSD Partition

    If you’re looking for a way to remove partitions on your SSD, there are a few simple steps you can take. First, you’ll need to access Disk Management, which you can do by right-clicking the Windows icon on your taskbar and selecting it from the menu. From there, locate the SSD drive you want to work on, right-click it, and choose “Delete Volume.

    ” This will bring up a window asking you to confirm the deletion, so be sure to take the time to double-check that you’re deleting the correct partition. Once you’ve confirmed, the partition will be removed, and you’ll have the option to either create a new partition or expand an existing one. Overall, removing partitions on your SSD is a quite simple process that can be completed quickly and easily with just a few clicks.

    So, if you’re looking to streamline your storage or simply remove some unneeded partitions, it’s definitely worth taking the time to learn how to do it!

    Right-click on the partition > Select Delete Volume

    If you need to delete a partition on your SSD, the process isn’t as complicated as you might think. All you need to do is right-click on the partition and select “Delete Volume.” This will completely remove the partition from your SSD, freeing up space for you to use as you see fit.

    However, be sure to back up any important data before you delete a partition, as it will be lost forever once you delete it. Keep in mind that deleting a partition can also affect other partitions on your SSD, so be sure to double-check and make sure you are deleting the correct partition before you proceed. By taking the time to delete unnecessary partitions, you can optimize your SSD’s performance and make the most of its available space.

    Confirm Action

    If you’re looking to remove partitions on your SSD, there are a few steps you should take to ensure you don’t lose any important data. First, back up any data you want to keep from the partition(s) you’re planning to delete. Next, navigate to the Disk Management tool in your Windows operating system.

    You can access this tool by right-clicking on the Windows start menu and selecting “Disk Management” from the dropdown menu. Once you have the Disk Management window open, locate the partition you want to remove. Right-click on the partition and select “Delete Volume” from the context menu.

    Confirm your action by clicking “Yes” when prompted, and the partition will be deleted. Keep in mind that you may need to repeat this process for each partition you want to delete. By following these steps, you can safely remove any unwanted partitions from your SSD.

    Click Yes > Close Disk Management Tool

    When managing your computer’s storage, you may come across the Disk Management Tool. This tool helps you manage your hard drives and partitions, allowing you to create, format, and delete them as needed. Once you’ve made the desired changes, you’ll need to confirm them by clicking the Yes button.

    Afterward, you can close the Disk Management Tool knowing that your changes have been applied. Confirming your actions is important to ensure that you don’t accidentally make unwanted changes to your computer’s storage. By following these simple steps, you can effectively manage your computer’s storage space and keep it functioning smoothly.

    So, the next time you’re using the Disk Management Tool, don’t forget to click Yes and close the tool to confirm your changes.

    Format SSD Drive

    If you’re looking to format an SSD drive and remove partitions, there are a few steps you can take. First, you will need to back up any important data before proceeding. Then, you can use the built-in Windows utility called Disk Management to remove all partitions on the drive.

    Simply right-click on each partition and select “Delete Volume.” Once all partitions have been removed, you can create a new partition and format the drive to your desired file system. It’s important to note that formatting the drive will erase all data, so be sure to back up anything important before proceeding.

    By following these steps, you can easily format your SSD drive and remove partitions in a few simple steps.

    Right-click on SSD > Select Format > Follow prompts

    If you have an SSD drive that needs to be formatted, the process is quite simple. Right-click on the SSD and select format from the drop-down menu. The computer will indicate that all data on the drive will be lost during the formatting process, so make sure you have any essential files backed up before proceeding.

    Once you have confirmed that you want to continue formatting, just follow the prompts provided by the computer. This will likely include choosing the file system you want to use (NTFS is the most common), giving your drive a name, and selecting the allocation unit size (typically the default option is fine). Once you have completed these steps, the computer will format the drive, and it will be ready to use.

    It’s essential to format your SSD from time to time to maintain its performance and keep it functioning at its best.

    Reinstall Operating System (Optional)

    If you’re selling or donating your SSD, you may want to remove all existing partitions and reinstall the operating system. This process ensures that all personal data is erased and the new owner can have a fresh start with the drive. To remove partitions on an SSD, you’ll need to use a partition manager software.

    From there, select the SSD and delete all existing partitions. Once the process is complete, you can proceed with reinstalling the operating system. It’s important to note that this step is optional and should only be done if you’re handing over the SSD to someone else.

    If you’re keeping the drive for yourself, it’s not necessary to remove partitions as you can simply format the drive and reinstall the operating system. Overall, removing partitions on an SSD is a simple process that provides peace of mind when giving away or selling your drive.

    Use bootable USB or CD to reinstall OS

    Reinstalling an operating system can be a daunting task, but it becomes necessary when your computer is slow or infected with viruses. One way to do this is by using a bootable USB or CD to reinstall the OS. First, make sure you have your product key handy, as you will have to enter it during the installation process.

    Then, download the OS image from a reliable source and use software like Rufus to create a bootable USB or burn the image onto a CD. Once you have the bootable medium, restart your computer and enter the boot menu by pressing a key like F1 Select the bootable medium, and the installation process should begin.

    Follow the on-screen instructions and choose the option to wipe the hard drive and install a fresh copy of the OS. Note that this will delete all your files, so make sure to back up anything important beforehand. Overall, using a bootable USB or CD is a straightforward method to reinstall your OS and is a handy skill to have in case of emergencies.

    Conclusion

    Removing partitions on an SSD is like peeling an onion – it can be a tear-jerking process, but with the right tools and knowledge, it can be done seamlessly. So, roll up your sleeves, backup your data, and let’s tip the scales in your favor! A few clicks here, a little sacrifice there, and you’ll have a clean, fresh start, ready to take on new adventures on your SSD. So, say goodbye to clutter and hello to freedom!”

    FAQs

    What is a partition on an SSD?
    A partition on an SSD is a segment of the drive that is treated as a separate volume, allowing for the organization and management of files and data.

    How do I remove a partition on my SSD?
    You can remove a partition on your SSD by using the Disk Management tool in Windows. Simply right-click on the partition you wish to remove and select “Delete Volume.”

    Will removing a partition on my SSD affect my data?
    Yes, removing a partition on your SSD will result in the loss of any data stored on that partition. It is important to backup any important files before removing a partition.

    Can I merge two partitions on my SSD into one?
    Yes, you can merge two partitions on your SSD into one using the Disk Management tool in Windows. Simply right-click on one of the partitions and select “Delete Volume,” then right-click on the remaining partition and select “Extend Volume.”