Author: David L. Lynn

  • Step-by-Step Guide: Safely Remove Your SATA SSD without Data Loss

    Have you ever needed to upgrade the storage in your computer or replace a malfunctioning SSD? You might be surprised at how simple it is to remove a SATA SSD. SATA (Serial ATA) is a common interface for connecting storage devices like solid-state drives (SSDs), hard disk drives (HDDs), and optical drives to your computer’s motherboard. Whether you’re looking to upgrade your equipment, sell an old SSD, or remove a failing one, this guide will provide you with an easy-to-follow process for safely and efficiently removing your SATA SSD.

    So, let’s dive in and give your computer some TLC!

    What is a SATA SSD?

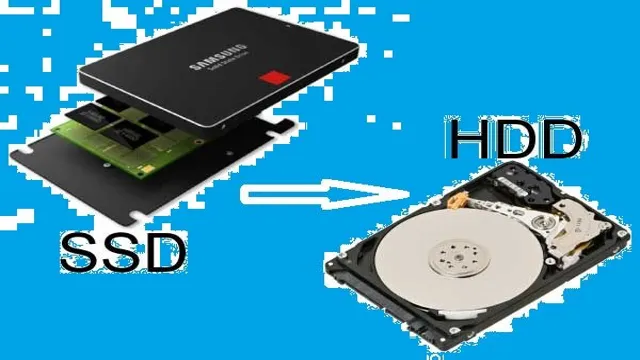
    So you’ve decided to upgrade your computer’s storage by removing your SATA SSD? Before we dive into the process, let’s first understand what a SATA SSD actually is. SATA, which stands for Serial Advanced Technology Attachment, is a type of interface used by hard drives and solid-state drives to connect to a computer’s motherboard. An SSD, or solid-state drive, is a storage device that uses NAND-based flash memory to store and retrieve data, making it much faster and more reliable than traditional hard drives.

    Now that we understand what a SATA SSD is, let’s walk through the steps to remove one from your computer.

    Explanation of SATA SSD and how it works

    SATA SSD A SATA SSD is a Solid State Drive that utilizes the Serial ATA interface to transfer data between the SSD and the motherboard of a computer system. These types of drives are much faster and more reliable than traditional hard disk drives (HDDs), as they have no moving parts that can break down or wear out over time. Instead, they use NAND flash memory to store and retrieve data, which allows for faster read and write speeds, lower latency, and less power consumption.

    SATA SSDs are widely used in laptops, desktops, and other computer systems, as they provide high performance and reliability at an affordable price. Plus, their small form factor makes them ideal for systems with limited space. So, if you’re looking to upgrade your computer’s performance, consider investing in a SATA SSD.
    how to remove sata ssd

    Preparing for Removal

    If you’re looking to remove a SATA SSD from your computer, there are a few things you should do to prepare. First, shut down your computer completely and unplug it from the power source. Make sure to also turn off any connected peripherals like printers or external hard drives.

    Next, find a suitable workspace with plenty of room to maneuver, and lay down an anti-static mat or wear an anti-static wristband to prevent any static electricity from damaging the drive. Once you’ve done this, locate the SATA SSD within your computer and disconnect any cables attached to it. This may require removing other components like the motherboard or power supply, so be sure to consult your computer’s manual or seek advice from a professional if you’re unsure.

    Once you’ve safely disconnected the drive, you can remove it from your computer and replace it with a new one if necessary. Remember to handle the drive carefully and avoid touching any sensitive components to avoid damage. With these steps in mind, you’ll be prepared to safely remove your SATA SSD with ease.

    Gathering necessary tools and equipment

    Before beginning the process of removing something, it is important to gather all necessary tools and equipment. This ensures that the job can be completed smoothly and efficiently. Depending on the item being removed, the required tools can vary.

    For example, if you are removing a piece of furniture, you may need a screwdriver, pliers, and a hammer. On the other hand, if you are removing a tree, you may need a chainsaw, pruning shears, and gloves. By taking the time to gather the appropriate tools and equipment, you can avoid having to stop in the middle of the removal process to search for missing items.

    This not only saves time but can also prevent accidents or injuries. Remember, always prioritize safety when preparing for removal.

    Backing up data on the SSD

    When it comes to preparing an SSD for removal, it’s important to properly backup all of your data beforehand. This can save you from losing important files or documents that you may have stored on your SSD. There are a variety of methods you can use to backup your data, such as cloud storage, external hard drives, or even USB drives.

    Once you have determined the best method for you, it’s important to create a backup of all of your data and verify that everything has been properly transferred before proceeding with removal. Remember, taking a few extra minutes to backup your data can save you from a lot of potential headaches and frustration down the road.

    Removing the SATA SSD

    If you’re looking to upgrade or replace your SATA SSD, you’ll need to know how to remove it from your device. Before you begin, make sure to shut down your device and disconnect the power source. Locate your SATA SSD, which is usually a small, rectangular-shaped device that plugs into the motherboard.

    Using a screwdriver, carefully unscrew any screws holding the SATA SSD in place. Once the screws are removed, gently lift the SSD out of its slot and disconnect any cables or wires attached to it. Be sure to handle the SATA SSD with care and avoid touching any of the sensitive components.

    Once removed, you can install a new or upgraded SATA SSD, or simply leave the slot empty if you don’t need the extra storage. With these simple steps, you can easily remove a SATA SSD from your device and get ready for your next upgrade.

    Locating and removing screws holding the SSD in place

    When it’s time to upgrade or replace your SATA SSD, the first step is to locate and remove the screws holding it in place. Depending on the computer or laptop model, the SSD may be easily accessible or require some disassembly to reach it. Look for any visible screws on the housing or the bottom of the laptop that are holding the SSD in place.

    Once you locate those screws, use a screwdriver to remove them and then gently slide the SSD out of its slot. It’s important to be careful not to damage any other components while removing the SSD. Once removed, you can replace it with a new one, making sure it’s properly secured with the screws.

    Remember to back up any important data before removing the old SSD to prevent data loss. Upgrading or replacing an SSD can take some time, but it’s worth it for the improved performance and increased storage capacity.

    Disconnecting SATA and power cables

    Disconnecting SATA and power cables is an essential step when removing the SATA SSD from your computer. To do this, first, locate the SSD inside your computer and identify the SATA and power cables that connect it to the motherboard and power supply, respectively. To disconnect them, gently pull out the cables from their respective connectors, making sure not to damage the cable or connector.

    Avoid using excessive force, as this can damage the cables or the connectors. Once both cables have been disconnected, you can remove the SATA SSD from your computer. Remember to keep the SSD in a safe and clean place to prevent damage, and label it properly to avoid confusion when reinstalling it later on.

    With proper care and attention, you can easily remove your SATA SSD and prepare it for future use.

    Gently removing SSD from slot

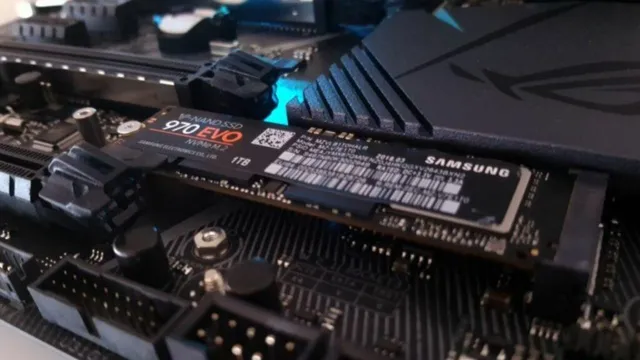
    Removing the SATA SSD from its slot requires a gentle touch to avoid any damage. Start by shutting down your computer and unplugging it from the power source. Locate the SSD slot, which can be found on your motherboard.

    It should be a rectangular-shaped slot with a small tab on each side. Gently press down on these tabs and slide out the SSD from the slot. If you encounter any resistance, do not force it out.

    Instead, check to see if there are any screws or clips holding it in place and remove them accordingly. Once removed, store the SSD in an anti-static bag to prevent any electrostatic discharge. By following these steps, you can safely remove your SSD without causing any damage or harm to your computer.

    Post-Removal Steps

    Once you have successfully removed your SATA SSD, there are a few post-removal steps you should take to ensure everything goes smoothly. Firstly, you want to carefully place your SSD in a safe place, ideally an anti-static bag or container, to prevent any damages. After that, it’s important to clean the area where your SSD was located to remove any dust or debris that may have accumulated.

    Additionally, you may want to reorganize any cables or components that were moved during the removal process to ensure everything is back in its proper place. Finally, you may want to test your computer to make sure everything is functioning properly, especially if you plan on installing a new SSD. With these post-removal steps, you can rest assured that your computer is in good working order and ready for whatever tasks you have in store.

    Installing a replacement SSD

    Now that you have successfully removed your old SSD, it’s time to begin post-removal steps to prepare for the installation of your new replacement SSD. Firstly, make sure to take precautions to avoid any static electricity that can damage sensitive components during installation. You can achieve this by grounding yourself to a metal object or by wearing anti-static gloves.

    Next, clean the area around the SSD bay and check for any loose screws or debris that may be left behind. It is also crucial to examine the connections and cables to ensure that they are functional and compatible with your new SSD. Once you have completed these steps, carefully install your new SSD and securely fasten it with screws.

    Remember to take your time and be gentle when handling components to avoid any damages. By following these post-removal steps, you can ensure a smooth and successful installation of your new SSD, providing your computer with improved performance and increased speed.

    Reconnecting cables and securing the new SSD

    After successfully removing the old hard drive, it’s time to connect the new SSD and secure everything in place. First things first, reconnect all the cables that were disconnected during the removal process. Double-check each connection to make sure they are snug and secure.

    Next, insert the new SSD into the slot from which the old hard drive was removed. Ensure that the SSD is securely in place by screwing it into the same spot where the old hard drive was secured. Tighten the screws until the SSD is firmly in place and won’t move around.

    This step is crucial as loose components can cause damage to the new SSD and affect its performance. Once everything is connected and the SSD is secured, you can power on your device and start enjoying your new storage solution. With the new SSD in place, you can expect a faster and more reliable performance, making your device feel brand new again.

    Restoring data from backup

    Restoring data from backup can be a lifesaver when things go wrong with your computer or device. However, it’s important to know what steps to take after restoring from backup to ensure that everything runs smoothly. Once you’ve restored your data, the first thing you should do is go through your files and make sure everything is there and that nothing is missing or corrupted.

    Additionally, it’s a good idea to update any software or applications that may have been affected by the data loss. This can help prevent future issues and ensure that your device is running at its best. Lastly, don’t forget to back up your data regularly to prevent the need for data restoration in the first place.

    By following these simple post-removal steps, you can restore your data and get back to work with ease.

    Conclusion

    Getting rid of a SATA SSD is easy as pie. Whether it’s because you’re upgrading or just don’t need it anymore, the process is straightforward. However, before you dive in make sure that this is the choice you want to make, and not just a case of too much “SSD” in your life – a situation we’ve all been in.

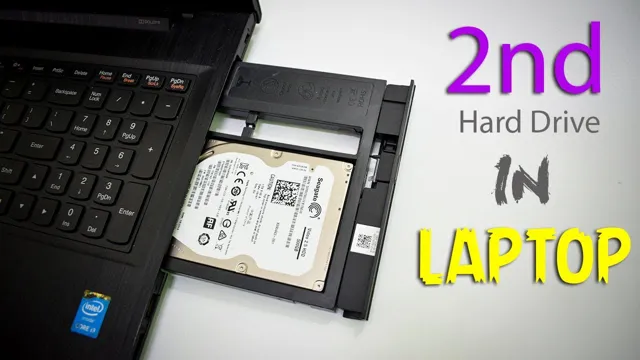
    With that out of the way, removing a SATA SSD is as simple as unplugging it from the motherboard and taking it out of its slot. If it’s a laptop, you’ll need to locate the disk drive bay and remove it from there. Of course, don’t forget to back up all your important data before you begin this process.

    As they say, “You never know when you’ll need some extra storage space”. Alright, no one says that, but you get the point. In conclusion, removing a SATA SSD is no rocket science.

    Just be sure to follow the correct steps and keep your important files safe. And remember, it’s always better to have too much storage space than not enough (unless, of course, it’s all filled with cat videos).

    FAQs

    What is the process of removing a SATA SSD?
    Before removing a SATA SSD, ensure that the device is powered off and unplugged. Locate the SATA connector and unplug it from the SSD. Gently and carefully remove the SSD from its bay.

    Can I remove a SATA SSD from a laptop?
    Yes, you can remove a SATA SSD from a laptop. The process may vary depending on the laptop model, but generally involves removing the back panel, finding the SSD, and unplugging it from the system.

    Is it safe to remove a SATA SSD while the computer is running?
    No, it is not safe to remove a SATA SSD while the computer is running. Doing so can damage the SSD, the motherboard, or other parts of the computer. Always make sure the device is powered down and unplugged before removing any hardware components.

    How do I know if my SATA SSD is removable?
    Most SATA SSDs are removable, but it’s always best to check the specifications of your device to be sure. If you’re unsure, consult the manufacturer’s website or user manual for more information.

  • Unleashing Top Performance: Step-by-Step Guide on Setting Up Your Sandisk Extreme Portable SSD

    Unleashing Top Performance: Step-by-Step Guide on Setting Up Your Sandisk Extreme Portable SSD

    Portable storage is a necessity in today’s technological era. With the increase in file sizes and the need for secure backups, having a reliable and efficient portable SSD is a must. The Sandisk Extreme Portable SSD is a popular product that promises to offer both quality and performance.

    However, setting up the device can be a daunting task, especially for those who are not tech-savvy. Are you one of those who recently purchased a Sandisk Extreme Portable SSD and are not sure where to begin? Do not worry! In this blog post, we will guide you through the process of setting up your new device step-by-step. Whether you intend to use it for backups, transferring files, or storing media, you will be up and running in no time.

    We will explain the technical terms and functions involved in the setup process in simple language so that you can understand them even if you are not tech-savvy. We will cover everything from formatting the drive to choosing the right connection type. So, make yourself comfortable and get ready to set up your Sandisk Extreme Portable SSD like a pro.

    What You Need

    Setting up a SanDisk Extreme Portable SSD can seem like a daunting task, but it doesn’t have to be. First and foremost, make sure you have all the necessary components. These include the SSD drive itself, a USB-C cable, and a computer with a USB-C port or adapter.

    Once you have everything, connect the USB-C cable to both the SSD and your computer. If your computer does not recognize the device, you may need to install drivers or update your operating system. Once your computer recognizes the SSD, you can begin transferring files and using it as additional storage.

    Remember to always safely eject the drive before disconnecting it to avoid corrupting any files. With these steps, setting up your SanDisk Extreme Portable SSD should be a breeze.

    Sandisk Extreme Portable SSD

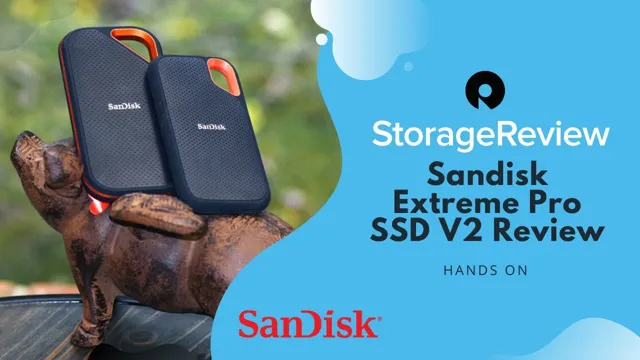
    If you’re someone who travels frequently or needs fast, reliable external storage for creative projects, the Sandisk Extreme Portable SSD is a great option that gives you what you need. This powerful, speedy device can hold up to 2TB of data and can transfer files at a lightning-fast pace. No more waiting around for files to transfer or worrying about the safety of your data while you’re out and about.

    With its durable design and advanced security features, you can trust the Sandisk Extreme Portable SSD to keep your files safe and secure wherever you go. Plus, with its compact design and low weight, it’s easy to carry with you wherever you go. Whether you’re a photographer, videographer, or just someone who needs reliable external storage, the Sandisk Extreme Portable SSD is a great investment that won’t disappoint.

    how to set up sandisk extreme portable ssd

    USB Type-C Cable

    If you’re someone who frequently transfers data, charges devices, or connects peripherals, then having a USB Type-C cable is a must. This new and improved cable has quickly become the go-to choice for many tech-savvy individuals due to its convenience and versatility. Not only is it reversible, meaning you can insert it into a port without having to worry about orientation, but it also delivers speedy charging and fast data transfer rates.

    What’s more, with its ability to handle up to 100 watts of power, it’s capable of charging larger devices like laptops. However, it’s worth mentioning that not all USB Type-C cables are created equal, and it’s essential to choose one that’s designed for your specific device. This will ensure that you get the optimal performance and safety from your cable.

    So, before you rush out and purchase one, take some time to research and read reviews to find the perfect USB Type-C cable that meets your needs.

    Computer or Laptop

    When it comes to choosing between a computer or a laptop, there are a few things to consider. It all comes down to what you need. If you’re someone who needs to work on-the-go or needs to work in different locations, a laptop might be the best option.

    Laptops are portable, lightweight, and have built-in batteries that allow you to work for hours without needing a power outlet. On the other hand, if you need a powerful workstation for intensive tasks like video editing, graphic designing, or gaming, a computer might be the better option. Computers are more powerful than laptops and are designed to handle more demanding workloads.

    Additionally, they have more space for additional components, like graphics cards or larger storage drives, which can enhance performance. Ultimately, the decision between a computer or laptop comes down to your specific needs. If you need portability, go for a laptop.

    If you need power, go for a computer.

    Step-by-Step Guide

    If you’re looking for a reliable and speedy external storage solution, the SanDisk Extreme Portable SSD is an excellent choice. Here’s a step-by-step guide on how to set it up quickly and easily. First, unbox the SSD and connect it to your computer using the included USB cable.

    In most cases, your computer will recognize the drive automatically. However, if your computer is older or has unusual settings, you might need to install the SanDisk driver first. Once your computer recognizes the drive, you can start transferring files and storing your data on the SSD.

    The SanDisk Extreme Portable SSD comes with handy software preloaded, which you can use to manage your files, password protect your data, and even back up your computer automatically. Overall, setting up and using the SanDisk Extreme Portable SSD is a breeze, and it will save you time and hassle in the long run.

    Connect SSD to Computer/Laptop

    If you’re looking to connect an SSD to your computer or laptop, there are a few easy steps to follow. First, make sure your computer has an available SATA port, which is the slot where the SSD will be connected. Then, open up your computer case and locate the SATA cable that runs from your motherboard to your hard drive.

    Unplug the cable from your hard drive and plug it into your SSD instead. Next, find a power cable from your power supply and connect it to your SSD. Make sure everything is securely plugged in and you’re ready to go! If you’re unsure about anything, consult the manual for your computer or SSD for more detailed instructions.

    Connecting an SSD can greatly improve the performance and speed of your computer, so it’s definitely worth the effort.

    Format the SSD

    SSD Formatting an SSD may seem like a daunting task, but with the right guidance, it can be a simple process. Before you begin, it’s important to back up any important data on the SSD as formatting will erase everything on it. Once you’ve done that, follow these steps:

    Connect the SSD to your computer. Open Disk Management by searching for it in the Start Menu.

    Locate the SSD in the list of disks and right-click on it.

    Select “Format” and choose the file system you want to use (NTFS is recommended for Windows). Name the volume and assign a letter to the SSD.

    Check the box for “Perform a quick format” to speed up the process.

    Click “OK” to start formatting the SSD. Formatting an SSD can help improve its performance and efficiency. With this step-by-step guide, you can confidently format your SSD and optimize its performance for all your storage needs.

    Install Sandisk Software

    If you’ve recently purchased a Sandisk product and need to install the required software, don’t worry – it’s a relatively easy process. In this step-by-step guide, we’ll walk you through the installation process to ensure that you can start using your Sandisk product in no time. First, insert the Sandisk product into your computer’s USB port.

    Next, visit the Sandisk website and click on the “Downloads” page. Here, you’ll be able to select the specific software that you need to download based on your product and system requirements. Once the download has finished, open the installer and follow the on-screen instructions to complete the installation.

    It’s important to note that if you encounter any issues during the installation, you should consult Sandisk’s support resources or seek assistance from their customer service team. By following these simple steps, you’ll be able to install your Sandisk software quickly and efficiently, allowing you to start using your product right away.

    Final Thoughts

    In conclusion, setting up a Sandisk Extreme Portable SSD is a quick and easy process that can improve your storage capabilities and speed up your workflow. By following the simple steps outlined in the user manual or watching online tutorials, you can format the drive, transfer your files, and start working on the go. It’s important to remember to regularly back up your data and protect your drive from physical damage, such as drops or exposure to extreme temperatures.

    With its compact size, durability, and high performance, the Sandisk Extreme Portable SSD is a great investment for anyone who needs to store, access, and share large files without compromising speed or security.

    Conclusion

    In conclusion, setting up the Sandisk Extreme Portable SSD is easier than building a sandcastle. All you need is a USB-C cable, a computer, and a few clicks of the mouse. And just like a well-designed sandcastle, this SSD is built to withstand the toughest conditions with its rugged shock-resistant design.

    It’s time to stop playing in the sandbox and start storing your data with confidence. So go ahead, make your beach day complete with the Sandisk Extreme Portable SSD.”

    FAQs

    What are the system requirements for using the SanDisk Extreme Portable SSD?
    The SanDisk Extreme Portable SSD requires a USB Type-C or Type-A port interface, and the system must be running Microsoft Windows 10, 8.1, or 7, or macOS High Sierra or newer.

    Does the SanDisk Extreme Portable SSD come with software for data backup?
    Yes, the SanDisk Extreme Portable SSD comes with SanDisk SecureAccess software for encrypted data backup.

    Can the SanDisk Extreme Portable SSD withstand extreme temperature and shock?
    Yes, the SanDisk Extreme Portable SSD is designed to be resistant to water, dust, extreme temperatures, and shock.

    How do I transfer data to and from the SanDisk Extreme Portable SSD?
    You can transfer data using the USB Type-C or Type-A cable that comes with the SSD, or you can use a compatible adapter or cable. Drag and drop files or use data backup software to transfer files.

  • Effortlessly Upgrade Your PC Speed: A Comprehensive Guide to Transfer Files from HDD to SSD

    Ready to speed up your computer’s performance? One of the best ways to give your machine a boost is by transferring files from your old, slow HDD to a speedy SSD. Not only will your computer run faster, but it can also increase its lifespan. But transferring files between hard drives can be daunting, especially if you’re not tech-savvy.

    Don’t worry, though – in this blog, we’ve got you covered with step-by-step instructions for transferring your files with ease. So sit back, grab a cup of coffee, and let’s dive into the world of HDD-to-SSD transfer!

    Check Both Drive Sizes

    When transferring files from an HDD to an SSD, it’s important to check both drive sizes. SSDs typically have smaller storage capacities compared to HDDs, so it’s crucial to make sure that the amount of data being transferred will fit in the target SSD. You don’t want to run into the issue of having insufficient space, which could result in data loss or corruption.

    It’s also important to note that some SSDs may have additional software or firmware that will take up additional space, so be sure to account for that as well. Checking both drive sizes beforehand will ensure a smooth and successful transfer process. So, make sure to double-check before transferring any large files or data to an SSD.

    Confirm Sufficient Space

    When it comes to adding new hard drives to your computer, it’s important to confirm that you have enough space to store all of your files. Checking both drive sizes is essential to make sure that your new hard drive can accommodate all of your files and won’t cause your system to slow down or crash. The main keyword here is “drive sizes,” which refers to the size of the hard drives in your computer.

    It’s crucial to check the sizes of both your existing hard drive and the one you want to add to determine if you have enough space. Additionally, it’s important to keep in mind any future expansion plans you may have for your computer and choose a hard drive that can accommodate those needs as well. By carefully considering both drive sizes, you can ensure that your computer has enough room for all of your files and that your system will continue to run smoothly.

    how to transfer files from hdd to ssd

    Connect the Drives

    So, you’ve decided to upgrade your computer’s storage by transferring files from your old hard disk drive (HDD) to a shiny new solid state drive (SSD). Well done! But before you can start enjoying those faster load times and data transfer rates, you need to physically connect the drives. The first step is to open up your computer case and find an available SATA port on the motherboard.

    Next, take the SATA cable that comes with your SSD and connect one end to the SSD and the other end to the SATA port on the motherboard. Then, find an available power cable from your power supply unit (PSU) and connect it to the SSD. If there’s no available power cable, you might need to get a SATA power adapter.

    With the drives now connected, you can move on to the process of transferring your files. This typically involves cloning your HDD onto your SSD, which allows you to preserve all your files and programs. There are a number of cloning software options available, but make sure to choose one that’s compatible with your specific hardware and operating system.

    With the software installed, you can start the cloning process and sit back while the software takes care of the rest. In just a few hours, you’ll have a fresh new SSD with all your files intact, and your computer will feel like new!

    Using SATA cables or in External Enclosure

    When it comes to connecting your hard drives, one option is to use SATA cables. SATA stands for Serial Advanced Technology Attachment, and it’s a type of connection commonly used for storage devices. SATA cables are relatively easy to use – you simply plug one end into your hard drive and the other end into your computer’s motherboard.

    However, if you’re dealing with an external hard drive, you may need to consider using an external enclosure. An external enclosure allows you to connect your hard drive to your computer via USB, making it easy to transfer files and access your data. Whether you’re using a SATA cable or an external enclosure, it’s important to make sure the connection is secure before transferring data.

    This can help prevent data loss and ensure that your files are safe. By taking the time to connect your hard drives properly, you can ensure that you have easy and reliable access to your data whenever you need it.

    Copy and Paste Method

    Are you looking for a quick and easy way to transfer files from your HDD to your SSD? One of the easiest methods is the copy and paste method. Simply connect both your HDD and SSD to your computer and create a new folder in your SSD where you want to transfer the files. Then, locate the files you want to transfer in your HDD and copy them by right-clicking and selecting “copy” or pressing “Ctrl + C”.

    Next, navigate to the new folder you created on your SSD and paste the files by right-clicking and selecting “paste” or pressing “Ctrl + V”. The transfer process may take some time depending on the size of the files and the speed of your computer. Once the transfer is complete, you can verify that the files have been successfully transferred by opening the folder on your SSD.

    This easy method allows you to quickly transfer files without the need for complicated software or technical knowledge.

    Select and Copy Files

    When it comes to selecting and copying files, the most common method is the copy and paste process. This involves selecting the files you want to copy, right-clicking and selecting “Copy,” then navigating to the destination folder and right-clicking again to select “Paste.” This method is straightforward and easy to use, especially for beginners.

    It also allows you to copy multiple files at once, saving you time and effort. However, it’s important to keep in mind that this method can be slow if you’re copying large files or entire folders. Additionally, be sure to check that the destination folder has enough space to hold the files you want to copy.

    Overall, the copy and paste method is a convenient and reliable way to copy files, as long as you take the necessary precautions.

    Paste into SSD Folder

    If you’re looking to transfer files from one location to another on your computer, the copy and paste method is an easy and effective way to do it. One common scenario in which you may need to use this method is when you want to move files into your SSD folder. Solid-state drives (SSDs) are a popular choice for storing data, particularly for those who need fast boot and load times for their computer applications.

    To use the copy and paste method to move files into your SSD folder, simply select the file or files you want to move, right-click them, and choose “Copy” from the dropdown menu. Then, navigate to your SSD folder, right-click in an empty space, and choose “Paste” from the menu that appears. The files you selected will now be transferred into your SSD folder.

    It’s important to note that when copying and pasting files, the original file will remain in its original location. This means that you can safely move files without worrying about losing them, as long as you make sure to leave a copy in their original location. Overall, the copy and paste method is a simple and effective way to transfer files from one location to another on your computer.

    Whether you’re moving files into your SSD folder or transferring them to another destination, this method can save you time and effort. So next time you need to move files around, consider using the trusty copy and paste method to get the job done quickly and easily.

    Using File Transfer Software

    If you’re upgrading to a new SSD, you’ll want to transfer your files from your old HDD to your new device. One of the easiest ways to do this is by using file transfer software. There are plenty of options out there, but some of the most popular include EaseUS Todo PC Trans, Laplink PCmover, and Acronis True Image.

    Using these programs is typically very straightforward. All you need to do is install the software on your old computer, select the files you want to transfer, and then connect your new SSD to your computer. The software will take care of the rest, copying over all of your files and ensuring that you don’t lose any data in the process.

    With the right file transfer software, you can make your upgrade to a new SSD seamless and stress-free.

    Download and Install Software

    When it comes to downloading and installing software, using file transfer software can be a game-changer. This type of software allows you to transfer files between different devices over a network, making it easy to install software on multiple computers without having to physically go to each one. Some popular file transfer software options include FileZilla, WinSCP, and Cyberduck.

    These programs are user-friendly and offer a variety of features such as drag and drop functionality, resume support for interrupted transfers, and the ability to transfer large files quickly. By utilizing file transfer software, you can save time and effort while ensuring that your software is installed efficiently and correctly. So, if you’re looking for a simpler way to transfer files and install software, consider using file transfer software as a solution.

    Select Source and Destination Drives

    When using file transfer software, the first step is to select the source and destination drives. This is essential because it determines where files will be transferred from and to. Your source drive is where the files currently reside, while the destination drive is where you want them to be transferred to.

    For instance, if you want to move files from your computer to an external hard drive, your computer will be the source drive and the external drive the destination. Before you begin transferring files, ensure that both the source and destination drives are connected and recognized by the file transfer software. This will prevent any hiccups during the transfer process.

    With this step correctly done, you can transfer files quickly and effortlessly.

    Initiate Transfer Process

    When it comes to initiating a transfer process, one of the most commonly used methods is through file transfer software. This type of software can help transfer large files quickly and easily, without the need for physical methods like USB drives or emailing attachments. There are many options available when it comes to file transfer software, but the important thing is to choose one that is secure and reliable.

    Look for software that uses encryption to protect your files during the transfer process, and that has a user-friendly interface. Some popular file transfer software options include Dropbox, Google Drive, and WeTransfer. With the right software in place, initiating a transfer process can be a seamless and stress-free process.

    Conclusion

    In conclusion, transferring files from an HDD to an SSD may seem like a daunting task, but it’s actually quite simple. All you need is the right tools, a clear plan of action, and a bit of patience. Think of it like moving houses – you want to make sure that everything is packed and unpacked properly, and that nothing gets left behind.

    With a little bit of time and effort, you’ll be able to enjoy the lightning-fast speeds and improved performance of your new SSD. Happy transferring!”

    FAQs

    What is the difference between an HDD and an SSD?
    HDD stands for hard disk drive and uses a spinning disk to store data, while SSD stands for solid-state drive and uses flash memory to store data. SSDs are generally faster and more reliable than HDDs.

    Can I transfer my entire operating system from an HDD to an SSD?
    Yes, it is possible to transfer your entire operating system from an HDD to an SSD using software such as Clonezilla or Acronis True Image. However, you will need to make sure the SSD has enough space to accommodate all of your operating system files.

    How much faster is an SSD compared to an HDD?
    SSDs can be significantly faster than HDDs, especially when it comes to booting up your operating system and launching applications. SSDs also have faster read and write speeds, which can improve overall system performance.

    Do I need to reformat my HDD after transferring files to an SSD?
    No, you do not need to reformat your HDD after transferring files to an SSD. However, you may want to consider wiping your HDD to securely erase any sensitive data before repurposing or disposing of it.

  • Seamlessly Migrate to Windows 11: Tips and Tricks to Transfer Your OS from One SSD to Another

    Looking to upgrade to a new SSD but worried about transferring your Windows 11 files and data? Don’t fret – we’ve got you covered. Migrating your Windows 11 to a new SSD can be a daunting task, but it’s essential for boosting your computer’s speed and performance. Imagine having a machine that boots up in seconds and can run multiple programs simultaneously without any lag.

    Whether you’re a gamer or a professional, a faster machine can make all the difference. In this blog post, we’ll guide you through the steps required to transfer Windows 11 to a new SSD, hassle-free. So sit back, relax, and let’s get started!

    Check System Compatibility

    If you are looking to transfer Windows 11 from one SSD to another, it’s important to check the compatibility of your system before proceeding. The first step is to ensure that the new SSD is compatible with your motherboard. Be sure to check the interface of both the old and new SSDs, as well as the available slots on your motherboard.

    You may also need to check the size and type of the new SSD to ensure it is compatible with your system. Additionally, you should make sure that your system meets the hardware requirements for Windows 11, as it requires a minimum of 64-bit processor, at least 4GB of RAM, and 64GB of storage. Once you have confirmed compatibility, you can proceed with transferring your Windows 11 operating system by using a cloning software or manually transferring your files.

    By following these steps, you can safely transfer your Windows 11 operating system without any compatibility issues.

    Determine SSD Specifications

    When upgrading to a solid-state drive (SSD), it’s important to determine the specifications that will work best for your system. One crucial factor to consider is system compatibility. Before making any purchases, check your computer’s manual or manufacturer’s website to ensure that the SSD you are considering is compatible with your system’s interface.

    Commonly used interfaces include SATA III and PCIe, but it’s essential to confirm which one your system uses to prevent any issues down the line. Additionally, consider the form factor of your SSD, as not all form factors will fit in all computer cases. By making sure that your chosen SSD is compatible with your system’s interface and form factor, you can ensure a smooth upgrade process and optimal performance.

    how to transfer windows 11 from one ssd to another

    Review Current System Requirements

    Before implementing any new system in your organization, it’s important to review the current system requirements and ensure that they are compatible. Compatibility issues can lead to system failures and can have a major impact on the overall productivity of your business. To check the compatibility of your current system, you should examine the hardware and software requirements of the new system and compare them to your existing system.

    You may need to upgrade your hardware or software to avoid potential compatibility problems. Additionally, it’s essential to ensure that the new system is capable of integrating with any existing applications or databases to avoid any conflicts or loss of data. By taking the time to review your current system requirements and confirm their compatibility, you can save your organization time and money in the long run and ensure a smooth transition to the new system.

    Backup Important Files

    Transferring Windows 11 from one SSD to another can seem like a daunting task, but with the right tools and knowledge, it can be done easily. Before getting started, it’s important to back up all important files to avoid the risk of losing them during the transfer process. This can be done by using an external hard drive or cloud storage service.

    Once the files have been backed up, the next step is to clone the original SSD to the new one using specialized software. This will create an exact copy of the original operating system, settings, and files, so that everything can be transferred seamlessly. It’s important to note that cloning may take some time, but once it’s complete, the new SSD can be installed and the computer can boot up as normal.

    By following these steps and taking the time to properly backup important files, transferring Windows 11 to a new SSD can be done with ease.

    Create a System Backup

    Creating a system backup is an essential step to ensure that your important files are safe and secure. Backing up your files not only protects you from data loss, but it also allows you to restore your system and files to their original state if something goes wrong. There are several ways to backup your files, but the most common method is to use an external hard drive or cloud-based service.

    An external hard drive is a physical device that connects to your computer via USB, while a cloud-based service allows you to upload your files to a remote server. Both options have their advantages and disadvantages, but they both work to ensure that your files are backed up and easily retrievable in case of an emergency. So don’t wait until it’s too late, take the time to create a system backup today and protect your important files from potential loss.

    Backup Essential Files and Documents

    In today’s digital age, backing up important files and documents is an essential practice that should not be overlooked. Losing crucial files can result in a lot of stress, wasted time, and sometimes even financial loss. The good news is that with the availability of cloud-based storage and external hard drives, backing up essential files has become much more accessible and convenient.

    Whether it’s important work documents, photographs, or personal files, it is crucial to have a backup plan in place. By doing so, you can ensure that your valuable data will be safe even if your device is lost, stolen, or damaged. So, take the time to back up your important files today because the last thing you want is to lose your data due to unforeseen circumstances.

    Remember, survival in the digital age is all about being proactive, and taking the necessary steps to prevent potential disasters from occurring.

    Create Installation Media

    If you’re looking to upgrade your computer’s storage, you might be wondering how to transfer Windows 11 from one SSD to another. Thankfully, the process is fairly straightforward. First, you’ll need to create installation media on a USB drive using Microsoft’s Media Creation Tool.

    This tool will download a copy of Windows 11 and create a bootable drive that you can use to install the operating system on your new SSD. Once you’ve created the installation media, you’ll need to open your computer’s BIOS settings and select the USB drive as the primary boot device. From there, you can follow the prompts to install Windows 11 onto your new SSD.

    Just be sure to back up any important files before you begin, as the installation process will wipe your old SSD clean. With a little bit of patience and the right tools, transferring Windows 11 to a new SSD can be a quick and easy process that’ll give your computer a new lease on life.

    Download and Install Media Creation Tool

    If you need to create installation media for your Windows operating system, the Media Creation Tool is a useful software to use. Before downloading and installing this tool, ensure that you have stable internet connectivity. Visit the official Microsoft website to find the Media Creation Tool and select the desired version of Windows to install.

    Once the Media Creation Tool finishes downloading, open and launch the software. The software interface provides two options, upgrade this PC or create an installation media. To create installation media, select the latter option and choose the language, edition, and architecture.

    Connect your USB or DVD storage media to your computer, and follow the on-screen instructions to complete the installation process. The Media Creation Tool is a useful utility tool that enables Windows users to fix installation errors and create bootable media, allowing them to reinstall Windows when the need arises.

    Create Bootable USB

    Creating a bootable USB drive is a crucial task when you want to install a new operating system or upgrade your current one. It is a handy tool that can save you a lot of time and hassle. To start, you must have a blank USB drive with at least 4GB of storage available.

    Next, download the installation media of the operating system you need from the official website. After that, use software like Rufus or UNetbootin to create a bootable USB drive by selecting the downloaded ISO file and USB drive. This process should take a few minutes, and once it’s finished, you can use the USB drive to install your new operating system.

    Just make sure that your computer has the option to boot from a USB drive by checking the BIOS settings. Overall, creating a bootable USB drive is an easy and straightforward process that can save you a lot of time and effort.

    Install Windows 11 on New SSD

    If you’re looking to upgrade your PC’s storage capacity or improve its overall performance, then transferring your Windows 11 operating system from one SSD to another is definitely worth considering. Fortunately, it’s a relatively straightforward process that you can do in just a few simple steps. First, you need to download and install a free disk cloning software like Clonezilla or EaseUS Todo Backup.

    Once you have the software installed, you need to connect the new SSD to your PC and select it as the target drive. Then, run the disk cloning software and select the option to clone your existing SSD to the new one. This will create an exact copy of your Windows 11 operating system, including all your data, settings, and programs, onto the new SSD.

    Once the cloning process is complete, shut down your PC, disconnect the old SSD, and boot up your computer using the new SSD. Voila! You now have a faster, more efficient system with all your files, settings, and programs intact. So go ahead and upgrade your SSD with confidence, knowing that transferring your Windows 11 is easier than you thought.

    Insert Bootable USB

    If you’re looking to install Windows 11 on a new SSD, you’ll need to start by inserting a bootable USB. This process can seem intimidating, but it’s actually quite simple. Begin by purchasing or creating a bootable USB drive that contains the Windows 11 installation files.

    Connect the USB drive to your computer, and then restart the system. As your computer boots up, you’ll see a prompt asking you to choose a boot device. Select the USB drive from the list of options, and your computer will boot from it.

    From there, you can follow the on-screen instructions to install Windows 11 on your new SSD. It’s essential to ensure that you format the SSD correctly and that you choose the correct drive to install Windows 11 on during the installation process. By taking your time and following the instructions carefully, you can successfully install Windows 11 on your new SSD and enjoy all the benefits of this exciting new operating system.

    Follow Windows 11 Installation Step-by-Step

    If you’re planning to install Windows 11 on a new SSD, make sure you follow the installation steps carefully to avoid any issues. Firstly, check your system requirements to ensure that the SSD is compatible with Windows 1 Once you have confirmed this, back up all your important data and files to an external drive to prevent any data loss during the installation process.

    Then, download and create a bootable USB drive with the Windows 11 installation files. Once you have created the bootable USB, restart your computer and boot from the USB drive to begin the installation process. Follow the on-screen instructions and select your SSD as the destination drive for the installation.

    After the installation is complete, set up your Windows 11 account and reinstall your important applications and files. With these simple steps, you can successfully install Windows 11 on a new SSD and enjoy its streamlined interface and improved features.

    Activate Windows 11

    If you want to transfer Windows 11 from one SSD to another, it’s actually a pretty straightforward process. The first step is to clone your old SSD onto the new one using software like Acronis True Image or Macrium Reflect. Once finished, you can replace the old SSD with the new one and boot up your system.

    If you’re using a retail version of Windows 11, you’ll need to activate it on the new SSD. This can be done by going to Settings, then Update & Security, and clicking on Activation. From there, click on “Change product key” and enter the product key you received when you purchased Windows 1

    If you’re using an OEM version, the activation should happen automatically. With these steps, you can easily transfer Windows 11 to a new SSD without any hassle.

    Check Windows 11 License Status

    If you’re using Windows 11 and wondering about the status of your license, it’s easy to check and activate it. Activating your license means that you can enjoy all the features of Windows 11, receive important security updates, and ensure that your operating system is running efficiently. To check your license status, simply go to Settings > System > About.

    You’ll see a section labelled “Windows specifications” which will indicate whether your copy of Windows 11 is activated or not. If it’s not activated, don’t worry! You can easily activate it by clicking the “Activate Windows” option and following the prompts. It’s important to note that if you obtained your copy of Windows 11 through unauthorized means, activating your license may not be possible.

    Make sure you obtain your copy of Windows 11 through official channels to avoid any issues with activation. By following these simple steps, you can ensure that your Windows 11 license is up to date and that you can enjoy all the benefits of this powerful operating system.

    Activate Windows 11 with Product Key

    Activating Windows 11 with a product key is a straightforward task. A product key is a unique set of characters that verifies the authenticity of your operating system. You can purchase a product key from Microsoft to activate your Windows 11, or if you upgraded from Windows 10, your product key will be automatically transferred.

    To activate your Windows 11, go to the “Settings” menu and click on “Update & Security.” Then click on “Activation” from the sidebar. Click on the “Change product key” button and type in your product key.

    Click “Next” and wait for Windows to verify your product key. Once verified, Windows 11 will be activated, and you will have access to all its features. Remember, activating your Windows 11 is essential, as Microsoft will prompt you to activate it after a certain period.

    So, don’t forget to activate your Windows 11 to avoid any inconvenience.

    Conclusion

    In conclusion, transferring Windows 11 from one SSD to another may seem daunting at first, but with the right tools and approach, it can be as smooth as a hot knife through butter. Remember to clone your old SSD, check for any compatibility issues, and ensure that your new SSD is in good working condition. With these steps in mind, you’ll be able to seamlessly transfer your operating system and get back to (digitally) conquering the world in no time.

    Happy transferring!

    FAQs

    What is the best way to transfer Windows 11 from one SSD to another?
    The best way to transfer Windows 11 from one SSD to another is to use a cloning software such as EaseUS Todo Backup.

    Can I transfer Windows 11 to a new SSD without reinstalling it?
    Yes, it is possible to transfer Windows 11 to a new SSD without reinstalling it by using a cloning software.

    How much time does it take to transfer Windows 11 from one SSD to another?
    The time required to transfer Windows 11 from one SSD to another depends on the size of the data and the speed of the SSD and the cloning software being used.

    Can I use the same Windows product key on the new SSD after transfer?
    Yes, you can use the same Windows product key on the new SSD after the transfer as long as the hardware configuration remains the same. However, if you change major hardware components such as the motherboard, you may need a new product key.

  • Unleashing the Power of SSD: A Step-by-Step Guide on How to Unallocate Your SSD

    If you own a solid-state drive (SSD) in your computer, you may want to learn how to unallocate it. This process of unallocating an SSD can help speed up your system or repair any issues you may be experiencing. But what is unallocating an SSD, and how do you go about it? Unallocating an SSD essentially erases all the data on the drive and resets it to its original state, freeing up any previously allocated space.

    Think of it like wiping the slate clean. In this blog post, we will guide you through the steps to unallocate an SSD, so you can optimize your computer’s speed and performance.

    Understanding SSD Allocation

    If you’re looking to unallocate a SSD, it’s important to understand first what allocation means. In simple terms, allocation is the process of assigning storage space on your SSD for certain files and programs. Unallocating, therefore, involves reversing that process and freeing up space on your drive.

    One way to do this is by deleting files or programs you no longer need. Another option is to use a disk management tool to view the allocation of all your storage and manually unallocate certain spaces that are no longer needed. Keep in mind, though, that unallocating a SSD can sometimes result in performance issues if not done properly.

    Ensure you have a backup before making any significant changes to your SSD’s allocations. With these precautions in mind, unallocating SSD space can be a great way to keep your computer running smoothly and efficiently.

    What is SSD Allocation?

    SSD Allocation Understanding SSD allocation is crucial for anyone who seeks to maximize their computer’s performance. Simply put, SSD allocation refers to the amount of storage space on an SSD (Solid State Drive) that is reserved for certain activities or functions, such as the operating system itself. This space is set aside during the formatting process so that it remains untouched by other files and processes, ensuring that the system has enough resources to perform critical tasks quickly and efficiently.

    By optimizing the SSD allocation, users can enjoy faster boot times, improved application performance, and reduced lag and stuttering when performing intensive tasks like gaming or video editing. It’s important to note that SSD allocation is not a one-size-fits-all solution and will vary depending on the specific needs of the user. A simple analogy would be that of a closet – just as you might reserve certain shelves or drawers for specific items like shoes or t-shirts, optimizing SSD allocation allows you to assign storage space to specific tasks so that everything runs smoothly and efficiently.

    how to unallocate a ssd

    How Does it Work?

    SSD Allocation When it comes to understanding SSD allocation, we need to break it down into simple terms. SSDs (Solid State Drives) are electronic storage devices that are much faster compared to traditional HDDs. SSDs have a finite number of data blocks they can write to, which means SSDs need to employ a technique called wear-leveling, which is how they process the allocation of data blocks.

    Wear-leveling ensures data blocks are allocated evenly throughout the SSD’s memory space, avoiding overuse of any particular block. This technique also ensures maximum utilization of the SSD and increases its lifespan. In addition to wear-leveling, modern SSDs also incorporate TRIM technology.

    TRIM helps the SSD to efficiently manage empty storage space, ensuring that new data can be written to the disk at maximum speed. Overall, understanding how the allocation process works in SSDs can help optimize your system’s performance while increasing the longevity of your SSD.

    Step-by-Step Guide to Unallocating an SSD

    Unallocating an SSD can be essential to improve the overall performance and manage disk space on your computer. Here’s a step-by-step guide on how to unallocate a SSD. Firstly, you need to open the Disk Management tool in Windows by pressing “Windows key + X” and selecting “Disk Management” from the pop-up menu.

    Once the Disk Management window opens, find the SSD you want to unallocate, right-click on it, and select “Delete Volume” from the context menu. This will free up all the space allocated to that volume. However, if you want to unallocate only a part of the space, right-click on the unallocated space and select “New Simple Volume.

    ” Follow the wizard to create a new partition with the desired size. Finally, formatting the unallocated space is necessary to reuse it which can be done by right-clicking on it and selecting “New Simple Volume” again. By following these simple steps, you can easily unallocate an SSD and optimize your computer’s storage usage.

    Step 1: Backup Your Data

    If you own an SSD and are planning to sell or dispose of it, you need to make sure that your data is safe from prying eyes. Before unallocating an SSD, the first step is to backup your data to another storage device. This ensures that all your important files, photos, videos, and documents are not lost forever.

    You can use various backup solutions, such as cloud storage, external hard drives, or USB drives, to create a backup of your data. Once you have successfully completed the backup process, you can proceed to the next step. It is always better to be safe than sorry when it comes to your data.

    It not only protects your sensitive information but also gives you peace of mind knowing that your memories and personal information are secure.

    Step 2: Securely Erase the SSD

    securely erase SSD (or SSD secure erase) When it comes to getting rid of an SSD, it’s important to make sure that all of your data is completely wiped from the drive to avoid potential security breaches. One way to do this is to unallocate the SSD. This involves securely erasing the drive to ensure that all data is permanently deleted.

    Here is a step-by-step guide to securely erasing your SSD: Back up all important data stored on your SSD. This will ensure that you still have access to all of your important files after you’ve erased the drive.

    Download and install an SSD utility program that is compatible with your SSD. You can find these programs on the SSD manufacturer’s website.

    Launch the SSD utility program and locate the option for Secure Erase. This may be labeled differently depending on the program you are using.

    Select the SSD that you want to securely erase.

    Follow the on-screen prompts to initiate the secure erase process. This may take some time depending on the size of your SSD.

    Step 3: Format the SSD

    Once you have unallocated the SSD, it is time to format it. This can be achieved in a few straightforward steps, and the good news is that most operating systems already have a built-in tool that allows you to do it. If you are using Windows, you can format the SSD by right-clicking on it in the ‘This PC’ section and selecting the ‘Format’ option.

    Then, select the file system you want to use (NTFS is most commonly used for Windows), select the allocation unit size (the default setting is usually fine), and give it a volume label (which is optional). Finally, click ‘Start’ to begin the formatting process. It may take a few minutes to complete, depending on the size of the SSD.

    After it’s done, your SSD will be entirely empty and ready for use. Just remember that formatting will erase everything on the drive, so make sure you’ve backed up any important data before doing so.

    Alternative Option for Unallocating an SSD

    If you’re looking to unallocate an SSD, there is an alternative option to consider. Rather than going through the hassle of wiping and reformatting the drive, you can simply use a partition manager tool to unallocate the space. One popular option is MiniTool Partition Wizard, which allows you to easily adjust the partitions on your drive without losing any data.

    All you have to do is select the partition you want to unallocate, click “Delete” and confirm the action. Keep in mind that this will permanently erase any data stored on that partition, so be sure to back up any important files first. With this alternative option, you can quickly and efficiently unallocate space on your SSD without going through the time-consuming process of wiping and reformatting.

    Using Parted Magic to Unallocate an SSD

    If you’re looking for an alternative way to unallocate an SSD, you might want to consider using Parted Magic. Unlike other methods that require you to reinstall your operating system, Parted Magic allows you to unallocate your SSD without compromising your current setup. This tool works by booting from a USB or CD/DVD drive, and then using its intuitive graphical interface to manage your SSD partitions.

    By unallocating your SSD space, you’re essentially removing all data from it, making it available for other tasks. Parted Magic is a great option for those who need to free up SSD space quickly and effectively. Plus, it’s relatively easy to use, making it a popular choice among computer enthusiasts.

    If you’re interested in using Parted Magic, you can download it from the official website and follow the instructions to get started.

    Conclusion

    Unallocating a SSD is like breaking up with a clingy partner who refuses to give back your favorite sweater. It may seem daunting at first, but with a little patience and persistence, you can reclaim your valuable storage space and free yourself from the burden of excess data. Just remember to back up your important files before making any drastic changes, and always practice safe computing habits.

    Happy unallocating!”

    FAQs

    What is SSD (Solid State Drive) unallocation and why is it important?
    SSD unallocation is the process of clearing data from a portion of the SSD so that it can be ready to receive new data. It is important because unallocating SSD can help improve its performance and efficiency.

    How do I unallocate an SSD?
    You can unallocate an SSD by using a disk management tool or formatting the drive. However, formatting will erase all the data stored on the drive, so if you want to unallocate specific files, you should use a disk management tool.

    Can I unallocate a specific file on an SSD?
    Yes, you can use a disk management tool to unallocate a specific file on an SSD. This will free up space on the drive, allowing you to use it for other purposes.

    Is it safe to unallocate an SSD?
    Yes, it is safe to unallocate an SSD as long as you use the proper tools and follow safety guidelines. However, if you accidentally unallocate a file that you still need, you may not be able to recover it.

    Can SSD unallocation improve my computer’s performance?
    Yes, unallocating an SSD can improve your computer’s performance by freeing up space on the drive and making it easier for the operating system to access data. However, the improvement may not be noticeable for all users.

  • Unleash the Speed: The Ultimate Guide to Upgrading Your M.2 SSD

    If you’re someone who’s looking to upgrade your computer’s storage system, you might have heard about M.2 SSDs. These tiny yet powerful drives are known for their lightning-fast speeds, making them a must-have for gamers, content creators, and power users alike.

    Upgrading your M.2 SSD can help you improve your PC’s overall performance and speed, allowing you to run more applications at once and open files in no time. But before you dive into the world of M.

    2, it’s important to understand what you’re dealing with. With so many options to choose from, it can be challenging to pick the right drive for your needs. Furthermore, installing an M.

    2 SSD requires some technical knowledge and expertise, so it’s essential to know what you’re doing to avoid any mishaps. Don’t worry – we’re here to help you navigate the world of M.2 SSDs and make the upgrade process as seamless as possible.

    In this guide, we’ll cover everything you need to know about upgrading your M.2 SSD, from choosing the right drive to installing it on your computer. So sit tight and get ready to boost your computer’s performance with an M.

    2 SSD upgrade!

    Introduction

    If you’re looking to give your computer a speed boost, upgrading your M.2 SSD can be a great way to do it. M.

    2 SSDs are small, high-speed solid-state drives that can replace your computer’s older, slower hard drive. To upgrade your M.2 SSD, you need to first make sure that your computer supports the newer NVMe standard.

    Once you’ve confirmed this, you simply need to purchase a new NVMe M.2 SSD and install it in your computer. This can be a relatively simple process, but it’s worth noting that different computers may have different installation requirements, so it’s always a good idea to check your computer’s manual or consult with a professional before attempting the upgrade yourself.

    With a new, faster NVMe M.2 SSD, you can enjoy faster boot times, quicker application launches, and improved overall performance. So if you’re ready to give your computer a speed boost, upgrading your M.

    2 SSD could be the perfect solution.

    What is an M.2 SSD?

    If you’re building or upgrading a computer, you may have come across the term M.2 SSD. So, what is it? Simply put, an M.

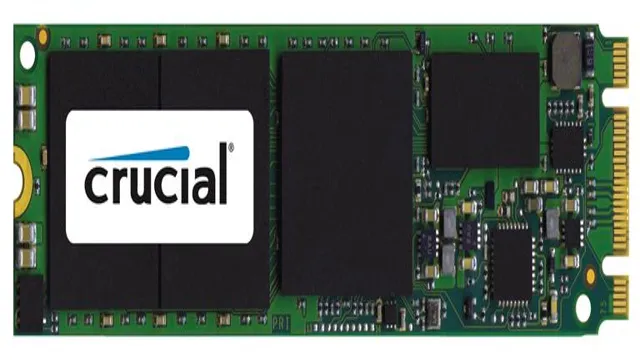
    2 SSD is a solid-state drive that uses the M.2 interface to connect to the motherboard. This interface is smaller and faster than the traditional SATA interface, allowing for faster data transfer speeds and a smaller physical footprint.

    M.2 SSDs can also come in different sizes, including 2242, 2280, and 22110, indicating the length and width of the drive. Overall, an M.

    2 SSD is a great option for those looking for faster storage and a more compact build. The benefits of using an M.2 SSD include faster boot times, quicker application launches, and faster transfer speeds.

    So, if you want to upgrade your computer’s storage and performance, consider adding an M.2 SSD to your build.

    how to upgrade your m.2 ssd

    Why upgrade your M.2 SSD?

    If you’re looking for a faster and more efficient storage solution, then upgrading your M.2 SSD might be the perfect solution. M.

    2 SSDs provide faster data transfer rates, improved boot times, and faster software load times. This means that upgrading your M.2 SSD is an excellent way to improve the performance of your computer or laptop.

    With larger storage capacities and faster read and write speeds, you’ll be able to handle more intensive applications and multitask with ease. Plus, with M.2 SSDs becoming more affordable in recent years, there has never been a better time to upgrade.

    So, whether you’re a gamer, creative professional, or just someone who likes to use their computer for work and leisure, upgrading your M.2 SSD will undoubtedly give you a noticeable performance boost.

    Preparation

    Upgrading your M.2 SSD is a great way to boost the performance of your PC. But before you jump in, there are a few things you need to consider.

    First, you need to make sure that your motherboard supports M.2 SSDs. You can check this by looking at your motherboard’s manual or by going to the manufacturer’s website.

    Next, you need to decide on the capacity of the new SSD. Make sure to choose an SSD with enough space to accommodate your needs. Finally, you need to ensure that you have the necessary tools and accessories to install your new SSD.

    This includes a screwdriver, a thermal pad or paste, and any necessary brackets or adapters. By preparing beforehand, you can ensure that the process of upgrading your M.2 SSD goes smoothly.

    Determine your M.2 SSD requirements

    When preparing to determine your M.2 SSD requirements, there are a few things you should consider. First, you need to identify the purpose of your M.

    2 SSD. Is it for gaming, video editing, or just general use? This will help you determine the size of the SSD you need and how much storage capacity you require. Secondly, you should ensure that your motherboard is compatible with M.

    2 SSDs. Recent motherboards support M.2 SSDs, so if your motherboard is older, you may need to upgrade it.

    Finally, you should consider the type of M.2 SSD you need. There are two types, SATA-based and NVMe-based.

    If you are using the M.2 SSD for general use, a SATA-based SSD will suffice, while NVMe-based SSDs are ideal for high-performance tasks like gaming or video editing. By considering these factors, you can determine your M.

    2 SSD requirements and select the perfect storage option for your needs.

    Choose the right M.2 SSD

    When it comes to choosing the right M.2 SSD, there are a few things you need to keep in mind before making your purchase. First, you’ll want to make sure that the M.

    2 slot on your motherboard is compatible with the SSD you are considering. This will typically be either an M.2 SATA or M.

    2 NVMe slot, so be sure to check the specifications of your motherboard to determine which one you have. Additionally, you’ll want to consider the capacity and performance of the SSD – does it have enough space for your needs, and will it be fast enough to handle the tasks you plan to use it for? Lastly, you’ll want to factor in the price and brand reputation of the SSD, as these can vary widely depending on the specific model you choose. By taking these factors into account, you can ensure that you’re choosing an M.

    2 SSD that will meet your needs and provide reliable performance for years to come.

    Backup your data

    Backing up your data is one of the most important preparations you can make to ensure that your important files, photos, and documents are safe. It’s easy to assume that your computer or device will always function properly, but technology can be unpredictable. One unexpected crash, virus, or disaster could lead to the loss of all your precious data.

    That’s why it’s critical to regularly backup all your important information. The process is relatively simple and there are many methods available to choose from. The easiest is simply copying your files to an external hard drive or cloud storage service.

    Another option is to use backup software that automates the process for you. Whatever method you choose, make sure you perform a backup regularly to ensure that you always have access to your important data.

    Installation

    Upgrading your M.2 SSD is a great way to improve your computer’s overall performance, and it doesn’t have to be a difficult task. To get started, you’ll need to make sure you have the correct size of SSD for your computer, as well as a Phillips #0 screwdriver.

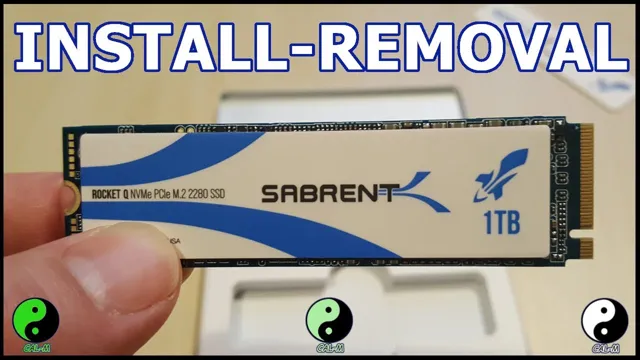
    First, power down your computer and locate the M.2 slot on your motherboard. Then, unscrew the existing SSD and carefully remove it from the slot.

    Next, insert your new SSD into the slot at an angle, using gentle pressure to secure it in place. Finally, screw the SSD back into place, being careful not to over-tighten the screws. Once you’ve completed these simple steps, you can power on your computer and enjoy the benefits of your upgraded M.

    2 SSD. Remember, upgrading your M.2 SSD can greatly improve your computer’s speed and performance, and it’s a task that anyone can do with a little patience and care.

    Install the M.2 SSD hardware

    Once you’ve got your M.2 SSD, it’s time to install the hardware. First things first, before touching any components, make sure to ground yourself by touching a metal surface.

    This will discharge any static electricity and prevent damage to the hardware. Next, locate the M.2 slot on your PC or motherboard.

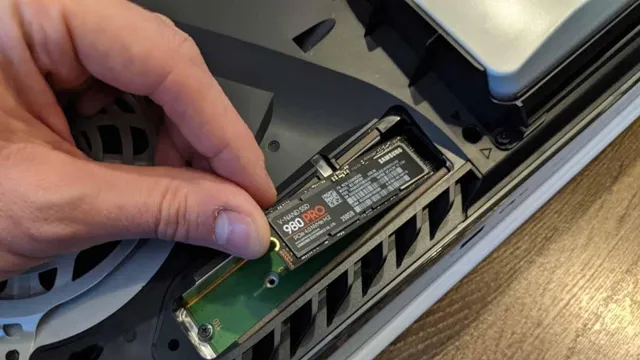
    It may be located on the bottom of the board or near the PCIe slots. Gently unlock the retention clip and carefully insert the M.2 SSD at a 30-degree angle.

    Push it down until it’s firmly in place, then tighten the retention clip to secure it. Finally, connect the M.2 SSD to your PC using the appropriate cables.

    Congratulations, you’ve successfully installed your new M.2 SSD and can now enjoy increased storage and faster loading times!

    Clone your old M.2 SSD

    If you want to upgrade your computer’s storage by cloning your old M.2 SSD, there are a few things you need to keep in mind. First, you’ll need to make sure you have the necessary tools and software to complete the task.

    You’ll also want to ensure that your new M.2 SSD is compatible with your computer. Once you have everything you need, the installation process is pretty straightforward.

    Simply open up your computer and locate the M.2 slot on your motherboard. Carefully insert your new M.

    2 SSD into the slot at a 30-degree angle, using gentle pressure to ensure it’s securely in place. Then, use your cloning software to transfer all your data from your old M.2 SSD to your new one.

    Once the transfer is complete, restart your computer and you should be good to go! With a bit of planning and preparation, cloning your old M.2 SSD can be a simple and effective way to upgrade your computer’s storage.

    Check the new M.2 SSD

    If you want to upgrade the storage capacity and speed of your computer, installing a new M.2 SSD is a great option. The installation process is relatively simple, but you will need to open up your computer’s case and be comfortable handling sensitive electronic components.

    First, locate the M.2 slot on your motherboard and remove any protective covers. Then, insert the M.

    2 SSD at a slight angle and gently push down until it clicks into place. Secure the SSD with the screw provided and replace the protective cover if necessary. Finally, power on your computer and check that the new SSD is recognized in the BIOS.

    With your new M.2 SSD installed, your computer will boot faster and programs will load much quicker. Don’t be afraid to take the plunge and upgrade your storage – it’s easier than you think!

    Conclusion

    Congratulations! You have successfully upgraded your M.2 SSD. Not only have you increased your storage capacity and improved your computer’s performance, but you also proved that you’re not afraid to take on a technology challenge.

    Now go forth and conquer the digital world, armed with your new and improved SSD. Who knows, with your newfound skills, you may even be able to upgrade your friend’s computer and become the ultimate tech guru.”

    FAQs

    What is an M.2 SSD?
    An M.2 SSD is a solid-state drive that is designed to fit into the M.2 slot on a motherboard, offering faster data transfer speeds than traditional hard drives.

    Why should I upgrade to an M.2 SSD?
    Upgrading to an M.2 SSD can significantly improve your computer’s performance, as M.2 SSDs tend to have faster read and write speeds than traditional hard drives.

    How do I know if my computer supports M.2 SSDs?
    You can check your computer’s motherboard specifications to see if it has an M.2 slot. If it does, it likely supports M.2 SSDs.

    How do I install an M.2 SSD?
    Installing an M.2 SSD involves opening your computer case, locating the M.2 slot on your motherboard, and inserting the SSD into the slot. Make sure to consult your motherboard manual for specific instructions.

  • Unlock Lightning-fast Speed: The Ultimate Guide to Installing Samsung SSD

    Installing a solid-state drive into your computer can be a game-changer, especially if you’ve been using a traditional hard drive. A Samsung SSD is a great choice for upgrading your system, as it offers fast read and write speeds, durability, and reliability. However, if you’re new to the process of installing hardware components, you might be feeling a bit apprehensive.

    Don’t worry, though – with the right guidance, it’s easy to install a Samsung SSD into your computer. In this blog post, we’ll walk you through the steps so you can get started. Let’s dive in!

    Preparation

    Before installing a Samsung SSD, there are a few things you need to keep in mind to ensure a smooth installation process. Firstly, you need to choose the right SSD based on the capacity and type you require. Ensure that the SSD is compatible with your computer’s motherboard, so it fits properly.

    Additionally, you should backup your data, so that you don’t lose any valuable information in case of data loss during the installation process. Finally, you need to gather the necessary tools for the installation, which includes a screwdriver and an antistatic wristband, anti-static mat or work table to avoid any electrostatic discharge while handling the SSD. By preparing beforehand, you can ensure a seamless Samsung SSD installation experience, and enjoy faster boot times and improved overall system performance.

    Check your computer compatibility

    Before diving into any software installation or update, it is essential to ensure that your computer system meets the minimum requirements. This preliminary check will save you time and effort in the long run by avoiding compatibility issues. The first step is to read the system requirements provided by the vendor.

    These include the necessary RAM, processor speed, operating system, and graphics card specifications. Additionally, you can run a system diagnostic tool to assess your system’s capacity and identify any potential hardware or driver issues that may hinder the installation process. Neglecting this step may lead to a suboptimal user experience, program crashes, or worse, system breakdown.

    Therefore, taking the extra time to prepare and verify your computer’s compatibility with the software you intend to install will lead to a streamlined and efficient installation process.

    how to install samsung ssd

    Back up your important data

    When it comes to protecting your important data, preparation is key. It’s essential to have a plan in place before disaster strikes. There are a few things you can do to prepare yourself and ensure you’re ready to back up your data.

    First, identify the data that’s most important to you. This could include family photos, important work documents, or personal financial information. Once you know what you need to protect, you can choose the appropriate backup solution.

    There are many different options available, from cloud storage to external hard drives. It’s important to find a solution that works for you and fits your budget. Remember, the cost of losing your valuable data is much higher than the cost of backing it up.

    By taking the time to prepare and choose the right backup solution, you can protect yourself and your data from potential disasters.

    Installation

    If you’re looking to upgrade your computer’s storage, installing a Samsung SSD is a great place to start. First, make sure you turn off and unplug your computer before starting. Next, open up your computer’s case and locate the hard drive bay.

    If you’re replacing an old hard drive, disconnect all cables and remove it from the bay. Then, slide the Samsung SSD into the bay and connect all cables securely. Make sure to check the orientation of the connectors, as they may be different from your old hard drive.

    Finally, close up your computer’s case and power it back on. You should see your new Samsung SSD listed as a storage option. Congratulations, you’ve successfully installed a Samsung SSD in your computer!

    Open the computer case

    If you’re ready to install new hardware or upgrade existing components in your computer, you’ll need to open the computer case first. This may seem daunting if you haven’t done it before, but it’s an essential step in upgrading your system. First, make sure to turn off and unplug your computer.

    Then, locate the screws holding the side panel in place, which are typically on the back and/or side of the case. Once you remove these screws, slide the panel off and set it aside. You should now have access to the internal components of your computer, such as the motherboard and hard drive.

    Take care not to touch any of these components unless necessary, as they are sensitive and delicate. With the case open, you can now install your new hardware, such as a graphics card or additional RAM. Just be sure to follow the manufacturer’s instructions carefully to ensure a successful installation.

    Overall, opening the computer case is a straightforward process that is essential for any hardware upgrades or maintenance.

    Locate the hard drive bay

    “Locating the hard drive bay” Are you looking to install a new hard drive into your computer but don’t know where to start? The first step is to locate the hard drive bay, which is where the hard drive will be installed. It may be located in different places depending on the type of computer you have, but it’s typically found near the bottom of the case. The hard drive bay usually has metal brackets for holding the hard drive in place, so look for a space with those brackets.

    If you’re still having trouble finding it, try consulting the manual for your computer or doing a quick online search. Once you’ve located the hard drive bay, you can move on to installing the hard drive and enjoying the benefits of increased storage space!

    Install the SSD

    If you’re looking to give your computer a speed boost, installing an SSD is a great way to do it. To get started, you’ll need to make sure you have the right tools for the job. You’ll need a screwdriver, some screws (typically included with your SSD), and possibly a mounting bracket or caddy if your computer doesn’t already have one.

    Once you have everything you need, you can begin the installation process. First, shut down your computer and unplug it from the wall. Open up the case to access the hard drive bays.

    Remove the screws holding your current hard drive in place (if you have one) and slide it out of the slot. Take your SSD and insert it into the same slot, then secure it with the screws provided. Finally, reconnect any cables you may have disconnected and close up the case.

    When you power on your computer, it should now recognize the new SSD and boot up faster than ever before. Just make sure to properly dispose of your old hard drive if you’re not planning on using it anymore.

    Configuration

    If you’re wondering how to install a Samsung SSD in your system, don’t worry, it’s not as complicated as it might seem. The first step is to make sure that your computer supports the type of SSD you’re planning to install. You’ll need to check the specifications of your motherboard or consult with a technician to ensure that it’s compatible.

    Once you’ve got that sorted, you’ll need to power down your system and disconnect all cables and peripherals. Then, you can open up your casing and locate the hard drive bays. Remove the existing hard drive and slot in your new Samsung SSD.

    Secure it in place with screws and reconnect the cables. Power up your system and check that the drive is being recognized in the BIOS. Finally, you can install your operating system and any other software using the installation media provided.

    With these simple steps, you can enjoy faster boot times and increased performance with your new Samsung SSD.

    Initialize the SSD

    When initializing an SSD, there are a few things you need to configure before you can start using it. The first step is to connect the SSD to your computer, either directly or through an enclosure. Once it’s connected, you’ll need to make sure it’s recognized by your operating system.

    If it’s not, you may need to update your drivers or change your BIOS settings. Once your computer recognizes the SSD, you’ll need to format it. This will erase any existing data on the drive and prepare it for use.

    To format the drive, you can use the built-in disk management tool in Windows or a third-party tool if you prefer. After formatting the drive, you’ll want to ensure that it’s running at its optimal performance. This can be done by enabling TRIM.

    TRIM is a command that allows an operating system to inform an SSD which blocks of data are no longer considered in use and can be wiped internally. Enabling TRIM can help to improve the SSD’s performance and lifespan. In order to enable TRIM, you’ll need to make sure your operating system supports it and then enable it through the command prompt or a third-party tool.

    In conclusion, initializing an SSD may seem daunting at first, but it’s actually quite simple. By following these steps, you’ll be able to configure your SSD and ensure that it’s running at its optimal performance. So go ahead and give your SSD the love and care it deserves, your computer (and your data) will thank you for it.

    Set the SSD as the boot drive

    If you are upgrading your computer with a solid-state drive (SSD), you might want to set it as the boot drive. This means that it will be the primary drive that your computer uses to start up. To do this, you need to access your computer’s BIOS settings and change the boot order.

    You can usually do this by pressing a key (e.g. F2, Delete, or Esc) when your computer starts up.

    Once you are in the BIOS settings, navigate to the boot order section and move the SSD to the top of the list. This will ensure that your computer looks for the operating system on the SSD before checking any other drives. Setting the SSD as the boot drive can significantly improve your computer’s startup time and overall performance.

    So, if you want to get the most out of your new SSD, make sure to follow these steps and set it as your boot drive.

    Conclusion

    Installing a Samsung SSD is a breeze – it’s like giving your computer a performance boost on steroids. With a few simple steps and the right tools, you’ll be cruising on the fast lane with lightning-fast boot times and load speeds that will make your head spin. So go ahead, unleash the power of your Samsung SSD and elevate your computing experience to new heights.

    Who said upgrading is hard? Not us.”

    FAQs

    What are the benefits of installing a Samsung SSD?
    Installing a Samsung SSD can improve overall system performance, increase data transfer speeds, and reduce boot and load times.

    How do I physically install the Samsung SSD?
    To physically install the Samsung SSD, turn off and unplug your computer, open the case, locate an available SATA power connector and data cable, and connect them to the SSD. Secure the SSD in place with screws and close the case.

    How do I install the Samsung SSD software and drivers?
    To install the Samsung SSD software and drivers, download and install the Samsung Data Migration software from the Samsung website. Follow the prompts to clone the data from your old drive to the new SSD and install necessary drivers.

    How do I ensure my Samsung SSD is set up for optimal performance?
    To ensure your Samsung SSD is set up for optimal performance, enable the AHCI (Advanced Host Controller Interface) mode in the BIOS, disable disk defragmentation, and ensure TRIM is enabled. Check for firmware updates regularly and keep your drivers up to date.

  • Step-by-Step Guide: Installing WD Black SSD in PS5 for Lightning-Fast Gaming!

    Looking to upgrade your PS5 storage for faster loading times and increased capacity? The WD Black SSD is a great option for gamers looking for lightning-fast speeds and reliable performance. But how do you install it onto your PS5? Don’t worry – it’s easier than you think! In this article, we’ll guide you through the step-by-step process of installing the WD Black SSD onto your PS5, ensuring that you can enjoy all your favorite games without any frustrating loading times. So grab your screwdriver and let’s get started!

    Check compatibility and requirements

    If you’re planning to upgrade your PS5’s storage with a WD Black SSD, then you should first check if it’s compatible. The WD Black SSD is compatible with the PS5’s PCIe Gen4 expansion slot, which means you need to have the latest system software version installed that supports this slot. To install the WD Black SSD, you’ll also need a few tools like a #1 Phillips screwdriver and a plastic pry tool.

    Make sure to take proper precautions when handling the SSD to avoid static electricity that may damage it. Lastly, before you begin the installation process, back up all your data, including game saves and settings. This will ensure that you don’t lose any personal data during the installation process.

    By following these steps and ensuring compatibility, you can easily install a WD Black SSD to your PS5 and enjoy faster load times and improved performance.

    Ensure SSD is supported by PS5

    If you’re considering upgrading your PS5’s storage with a solid-state drive (SSD), it’s important to check that it’s compatible with your console. Not all SSDs will work with the PS5, so you’ll need to ensure that the one you choose meets the console’s requirements. The PS5 supports NVMe SSDs with a capacity of at least 250GB and a read speed of at least

    5GB/s. It’s also important to note that not all NVMe drives will work, so be sure to check that it’s supported by the console manufacturer before making your purchase. Upgrading the storage of your PS5 can significantly improve performance and load times, so it’s definitely worth considering if you’re running out of space.

    By ensuring that your SSD is supported by the PS5, you can make the most out of your console and enjoy an improved gaming experience.

    how to install a wd black ssd ps5

    Confirm SSD form factor fits in PS5

    When looking to upgrade the storage on your PS5, it’s essential to ensure that the SSD form factor you choose is compatible with the console. The PS5 requires an M.2 SSD form factor that meets specific requirements for size, speed, and heat dissipation.

    To confirm compatibility, you can consult the manufacturer’s website or check with the retailer you’re purchasing from. Additionally, make sure to review the PS5’s storage expansion instructions to ensure you follow the proper installation procedure. Upgrading your PS5’s storage with a compatible SSD will not only increase storage space but also improve load times and overall performance.

    So don’t hesitate to upgrade your storage capacity today and enjoy a seamless gaming experience like never before!

    Have necessary equipment – screwdriver, mounting bracket, etc.

    When it comes to installing any kind of equipment, it’s crucial to have the necessary tools and materials handy. For example, if you’re installing a TV, you’ll need a screwdriver, a mounting bracket, and possibly other components depending on the specific requirements of the TV. Before getting started, make sure you check compatibility and requirements to ensure you have everything you need.

    This will save you time and frustration in the long run, and ensure that your installation goes smoothly. If you’re unsure about anything, consult the installation manual or reach out to the manufacturer for guidance. Remember, having the right tools on hand is half the battle!

    Prepare PS5 for installation

    Are you looking to upgrade your PS5 with a WD Black SSD? Before you start, it’s important to prepare your console for installation. First, make sure you have all the necessary tools, including a Phillips head screwdriver and a USB drive with at least 1GB of storage. Next, back up all your important data to the USB drive or cloud storage.

    Once you’ve backed up your data, shut down your PS5 and unplug all cables. Carefully remove the stand and then use a Phillips head screwdriver to remove the screw that secures the PS5’s bottom plate. Once the screw is removed, slide the plate off to expose the M.

    2 slot on the motherboard. Insert the WD Black SSD into the M.2 slot, making sure it’s seated correctly before screwing it down.

    Replace the bottom plate and secure it with the Phillips head screw, then re-attach the stand and plug in all cables. Finally, turn on your PS5, and follow the prompts to format your new drive and restore your saved data. With these simple steps, you can install a WD Black SSD and boost your PS5’s performance for a smoother gaming experience.

    Turn off PS5 and unplug from power source

    If you’re planning on installing or moving your PS5 console, you’ll want to make sure you prepare it beforehand. The first step in this process is to turn off your PS5 and unplug it from the power source. This ensures that there is no risk of electrical shock or damage to the console during the installation process.

    To turn off your PS5, press and hold the power button until the console shuts down. Once the console is powered off, unplug it from the wall outlet or power strip. It’s important to make sure that all cables and connections are removed before attempting to move the console.

    Once you’ve completed these steps, your PS5 is ready for safe and secure installation. Keep in mind that even though the PS5 is a powerhouse that can deliver an exceptional gaming experience, it also requires delicate handling, so be sure to take your time and handle it with care.

    Remove PS5 cover and locate storage expansion slot

    If you want to upgrade your PS5 storage, you first need to prepare your console for the installation process. The first step is to remove the PS5 cover and locate the storage expansion slot. This can be found at the bottom of the console, where you’ll see a removable panel.

    Simply slide this panel off to reveal the slot. Once you’ve located the slot, you can then move on to purchasing and installing the required hardware. It’s important to note that you should only use SSDs that meet Sony’s requirements for compatibility and performance.

    By taking these steps, you can easily expand your PS5 storage and enjoy more games and content without having to worry about running out of space. Remember to take your time and follow the instructions carefully, and your PS5 storage upgrade should be a breeze!

    Install WD Black SSD

    Installing a new WD Black SSD in your PS5 is a straightforward process. Start by turning off your console and unplugging all the cables. Then, remove the hard drive bay cover from the back of your PS

    You’ll see a rectangular metal bracket held in place by a single screw. Use a Phillips screwdriver to remove this screw and slide the metal bracket out. Now, carefully remove the old hard drive by gently lifting it out of the bay.

    Take the new WD Black SSD and line it up with the pins in the bay. Slide it in gently but firmly until it clicks into place. Finally, replace the metal bracket and screw it back in, then put the hard drive bay cover back on and plug your PS5 back in.

    It’s that simple! With your new WD Black SSD installed, you’ll enjoy faster load times and smoother gameplay, making the investment worthwhile.

    Secure SSD onto mounting bracket

    To install your WD Black SSD, you need to securely mount it onto the bracket. This process is crucial to keep your SSD firmly in place, especially if you’re planning to move your computer frequently. After removing the SSD from its protective packaging, you’ll need to screw it onto the bracket with the provided screws.

    Make sure you secure all screws tightly to avoid any wobbling or rattling inside your computer case. Once you’ve done this, you can proceed with installing the bracket onto your computer case. Check the user manual or instructions that came with your computer case to ensure you’re mounting the bracket correctly.

    Remember, a securely mounted SSD ensures your data stays safe and your computer runs smoothly, so take your time, and double-check your work.

    Insert mounting bracket with SSD into storage expansion slot

    To install your WD Black SSD, you need to insert the mounting bracket with the SSD into the storage expansion slot. It’s a fairly straightforward process that doesn’t require any special tools or expertise. The first step is to locate the storage expansion slot in your desktop or laptop computer.

    It’s typically located near the hard drive or on the motherboard. Once you’ve found the slot, you need to insert the mounting bracket with the SSD into it. The mounting bracket is designed to fit into the expansion slot securely, so you shouldn’t encounter any resistance or difficulty when inserting it.

    Once you’ve inserted the mounting bracket with the SSD, you can secure it in place with screws or other fasteners. It’s essential to ensure that the SSD is securely fastened to prevent any vibrations or movement that could damage the drive or affect performance. Overall, installing your WD Black SSD is a simple and quick process that can help you achieve faster load times and better system performance.

    So go ahead and get your hands dirty – you’ll be glad you did!

    Setup and Format SSD on PS5

    Installing an SSD on your PS5 is a smart move if you want to improve your gaming experience. One of the best SSDs you can install on your PS5 is the WD Black SSD. Before you start, make sure to back up your data and turn off the console.

    Then, remove the plastic slot cover on the back of your console and carefully insert the SSD into the M.2 slot. Secure it in place with the screw provided in the package.

    Once you turn on your PS5, go to the settings and select “storage.” Then, choose “format,” and your console will recognize your new SSD. It’s that simple! Your games will now load faster, and you’ll experience quicker load times.

    Overall, installing an SSD like the WD Black on your PS5 is a worthwhile investment that will enhance your gaming experience.

    Turn on PS5 and navigate to settings

    Setting up and formatting an SSD on your PS5 can significantly improve the overall performance of your gaming console. To get started, turn on your PS5 and navigate to the settings menu. From there, select the “Storage” option and choose the SSD you want to format.

    Make sure to back up any important data on the SSD before formatting, as this process will erase all existing data. Once you’ve confirmed that you want to format the SSD, wait for the process to complete before proceeding. After formatting, you can start installing games and applications onto your newly formatted SSD, providing a faster, more responsive gameplay experience.

    So, if you’re looking to maximize the potential of your PS5, consider formatting an SSD to help improve your gaming experience.

    Format SSD for PS5 use

    If you’re looking to expand the storage capacity of your PS5, you’re in luck! With the latest system update, you can now install and format a compatible SSD to use with your console. But first things first, make sure you have a compatible SSD that meets the requirements for use with the PS Once you have the SSD, installation is relatively simple.

    Just make sure your console is turned off and unplugged before opening the SSD slot on the back of the PS Carefully insert the SSD into the slot and tighten the screw to secure it. Once you power on your PS5, it should detect the new SSD and prompt you to format it.

    Keep in mind that formatting the SSD will erase any data stored on it, so make sure to back up your files before proceeding. With a freshly formatted SSD, you’ll have plenty of extra storage space for all your favorite games and media.

    Conclusion

    Installing a WD Black SSD on your PS5 is like giving your gaming console a shot of adrenaline. It’s a quick and easy process that yields impressive results. With this upgrade, you’ll experience faster load times, improved graphics, and a smoother gaming experience overall.

    So, don’t settle for slow loading screens and laggy gameplay. Follow our simple installation guide and upgrade your PS5 with a WD Black SSD to take your gaming experience to the next level. Your console will thank you for it.

    FAQs

    What is the WD Black SSD?
    WD Black SSD is a high-performance, NVMe solid-state drive that is specifically designed for gaming and creative professionals. It is a reliable and robust storage solution that provides faster load times and data transfer rates.

    Can I install a WD Black SSD on my PS5?
    Yes, you can install a WD Black SSD on your PS5 console. However, you need to make sure that the SSD meets the specifications set by Sony for compatibility. You also need to follow the installation instructions provided by Sony to avoid any issues.

    What are the benefits of installing a WD Black SSD on my PS5?
    Installing a WD Black SSD on your PS5 will provide you with faster load times, shorter game loading screens, and faster data transfer rates. It will also reduce the time taken for game installations and updates, providing you with a better gaming experience.

    How do I install a WD Black SSD on my PS5?
    To install a WD Black SSD on your PS5, you need to remove the cover of the PS5 and locate the M.2 slot. Then, you need to carefully insert the SSD into the slot and secure it using the screwdriver provided with the SSD. Once installed, you need to initialize and format the SSD using the PS5’s system software.

  • Step-by-Step Guide: Installing a Second SSD on Windows 11

    If you’re someone who enjoys working with technology, then installing a second SSD on your computer might be right up your alley! However, if you’re not sure where to start or how to go about it, then you’re in the right place. In this blog, we’ll talk about how to install a second SSD on Windows 11 and why it could be beneficial for you. You might be wondering, “why bother installing a second SSD if I already have one?” Well, just like how adding a new storage cabinet to your kitchen can make your life easier, having a second SSD can enhance your computer’s performance and make it run faster.

    We’ll cover everything from purchasing your second SSD to physically installing it in your computer and setting it up properly. It might sound daunting at first, but with a little bit of patience and the right tools, you can do it! Plus, there’s nothing quite like the satisfaction of completing a DIY project, especially when it comes to technology. So, whether you’re a seasoned computer whiz or just starting to delve into the world of tech, get ready to take your computer’s performance to the next level with a second SSD.

    Check Compatibility

    If you’re looking to add a second SSD to your Windows 11 system, the first step is to check compatibility. Make sure your motherboard has an available SATA or NVMe slot, and that your power supply has enough wattage to support the additional drive. Once you’ve confirmed compatibility, physically install the SSD into the available slot and secure it in place.

    Next, boot your computer and navigate to the Disk Management tool in Windows 1 From there, you can initialize and format the new drive. Once it’s formatted, you can begin using it to store files or install programs.

    Remember to always handle sensitive computer components with care and to ground yourself to avoid damaging your hardware. Overall, installing a second SSD can greatly improve your system’s performance and storage capacity.

    Ensure compatible SATA interface and available power connectors

    When you are shopping for a new SATA hard drive or solid-state drive, compatibility is key. You need to make sure that the drive you are purchasing has a compatible SATA interface and the necessary power connectors to work with your computer. SATA interfaces come in different speeds, so make sure that the speed of the new drive matches that of your system.

    Additionally, check whether your computer has enough power output to support the new drive, as some of the latest solid-state drives require a lot of power. Finding a compatible drive requires some research, but it’s essential to ensure a seamless installation process and avoid problems in the long run. So, take the time to do your homework, and you’ll be sure to find an excellent SATA drive that meets all your needs.

    how to install a second ssd windows 11

    Shut Down and Open Computer Case

    Installing a second SSD on a Windows 11 computer can significantly boost storage and speed capabilities. To begin the process, you will need to shut down your computer and open the computer case. Once you have done this, locate an available slot for the new SSD and connect it to the power supply and data cables.

    Make sure to use proper precautions to avoid damaging any components or static electricity. Once the SSD is securely in place, power up the computer and go into the BIOS settings to ensure that the new drive is recognized. From there, you will need to format and partition the drive, and then set it up for use in Windows 1

    Overall, adding a second SSD is a straightforward process that can greatly enhance your computing experience.

    Turn off PC, unplug power, open side panel of case

    When it comes to opening up your computer case, there are some important steps that you need to take. First, turn off your PC completely. This means shutting down any programs or applications and then selecting the “shut down” option.

    Once your computer is completely powered off, you should unplug the power cord to avoid any potential electric shock. Next, locate the side panel of the computer case and remove any screws or clasps that are holding it in place. Carefully slide the panel off to reveal the inner workings of your computer.

    It’s important to be gentle and avoid touching any delicate components, especially if you’re not familiar with them. Overall, taking the time to safely shut down and open up your computer case can be a great way to troubleshoot and upgrade your system. So go ahead and give it a try, just make sure to follow these simple steps!

    Mount SSD in Available Bay

    If you’re looking to increase your storage capacity, installing a second SSD in your Windows 11 system is a great option. The first step to installing a second SSD is to identify an available bay. Most desktop towers come with extra bays to add additional hard drives or SSDs.

    Once you find an available bay, carefully remove the cover to the bay and lay it aside. Then, slide the SSD into the bay and ensure that it is secured with the screws that come with your system. Finally, connect the power cable and data cable to the SSD and connect them to the appropriate ports on the motherboard.

    Make sure to properly ground yourself before working on any internal components to avoid damage from electrostatic discharge. By following these steps, you’ll be able to easily install a second SSD and enjoy all the benefits of expanded storage on your Windows 11 system.

    Screw or slide in SSD in compatible bay

    If you’re looking to upgrade your computer’s storage space, one of the easiest ways to do so is by installing an SSD. Once you have a compatible bay available, the first step is to decide whether you want to screw or slide in the SSD. If you choose to screw it in, make sure to align it properly and use the correct screws provided with the SSD.

    If you opt for sliding it in, make sure to push it gently until it clicks into place. Once the SSD is securely mounted, you can connect the necessary cables and start transferring your data. It’s important to note that some bays may require additional hardware or adapters, so double check compatibility before purchasing an SSD.

    With the right installation process, you can enhance your computer’s performance and increase storage capacity in no time.

    Connect Data and Power Cables

    If you want to install a second SSD in your Windows 11 system, then you need to know how to connect data and power cables properly. First, make sure you have the appropriate cables and a screwdriver. Locate an available SATA port on your motherboard and connect one end of the data cable to it.

    The other end of the data cable should be connected to your second SSD. Be sure to firmly attach the data cable connectors to prevent any potential data transfer issues. Then, connect the power cable to the power supply and attach the other end of the cable to your second SSD.

    Once everything is properly connected, you can turn on your computer and make driver installations and formatting adjustments, as necessary. However, don’t forget to make sure your system is compatible with the new SSD and to backup all important data prior to installation. By following these steps, you will successfully install a second SSD into your Windows 11 system and improve your overall storage capacity.

    Attach SATA data cable to SSD and motherboard, then power cable to PSU

    Connecting your SSD to your computer is an important step in getting your system up and running. To do this, you’ll need to attach the SATA data cable to both your SSD and your motherboard. This will allow the two components to communicate and work together seamlessly.

    You’ll also need to attach a power cable to your SSD and your power supply unit (PSU). This will provide the necessary power to your SSD and allow it to function properly. When connecting the data cable, be sure to line up the connectors correctly to avoid damaging either component.

    As for the power cable, it’s important to make sure it’s securely connected to both the SSD and the PSU to avoid any loose connections or potential malfunctions. Once this step is complete, you’re one step closer to getting your computer up and running smoothly.

    Boot Up and Format SSD

    If you’re wondering how to install a second SSD in Windows 11, don’t worry – it’s a relatively straightforward process. The first step is to ensure that your computer is turned off and unplugged from the power source. Once you’ve opened up the case, you’ll need to locate an empty drive bay where you can install the new SSD.

    Next, insert the SSD into the bay and secure it in place with screws or other hardware as necessary. Then, connect the appropriate cables to the SSD and ensure that it’s properly seated. Once you’ve finished physically installing the new SSD, it’s time to boot up your computer and format the SSD so that it’s ready to use.

    Go to your computer’s BIOS settings and ensure that the new SSD is detected. Then, boot into Windows and use your system’s disk management tools to format the new drive. With these steps completed, you should now have a functional second SSD ready to use alongside your existing storage devices.

    Access Disk Management and format SSD as NTFS file system

    To format your SSD as NTFS file system, you’ll first need to access Disk Management. After connecting your SSD to your PC and booting it up, right-click on the Windows Start button and select “Disk Management” from the dropdown menu. This will open a window displaying all connected drives, including your newly installed SSD.

    Locate your SSD and ensure that it is recognized by the system. If it isn’t, make sure all connections are secure and power is being supplied correctly. Once you confirm that your SSD is visible, right-click on it and select “Format”.

    This will bring up the “Format” menu where you can select the file system type you want to use – in this case, NTFS. After selecting NTFS, you can choose a volume label and enable file compression if desired. You can also adjust the allocation unit size, but leaving it at the default setting is generally recommended.

    Click “OK” to begin the formatting process. It’s important to note that formatting your SSD will erase all existing data, so make sure to back up any important files before proceeding. Once the formatting is complete, your SSD will be ready for use as an NTFS file system drive.

    Congratulations, you’ve successfully formatted your new SSD!

    Transfer Data to SSD

    If you want to install a second SSD on your Windows 11 computer, transferring data from your current drive to the new one isn’t as complicated as it may seem. First, make sure to shut down your computer and disconnect any cables. Next, locate an open drive bay and install your SSD.

    Once installed, connect the SATA power and data cables to your new drive. After completing the physical installation, you can transfer data using a cloning software. There are a number of free software options available that will help you transfer data from your current drive to the new SSD.

    Simply select the software you prefer, connect your new SSD to your computer, and follow the step-by-step instructions provided by the software. Once the transfer is complete, your data will be safely transferred to your new drive. And with your new SSD in place, you’ll enjoy faster performance and a smoother computing experience.

    So go ahead and take the plunge – you’ll be glad you did!

    Copy or migrate data from old drive to new SSD

    If you’re looking to upgrade your old computer to a new SSD, transferring your data to the new drive is a crucial step. The good news is that it doesn’t have to be a daunting task. There are several easy ways to copy or migrate your data from your old drive to the new SSD.

    You can use a cloning software that makes an exact copy of your current drive and transfers it to the new SSD, or you can manually transfer your data by copying and pasting your files and folders to the new drive. There are also specialized migration tools that come with your new SSD, which are designed to make the transfer process as easy as possible. The most important thing to remember is to back up your data before attempting any transfer, as it’s always better to be safe than sorry.

    With a bit of planning, transferring your data to your new SSD can be a simple and stress-free process that ensures your data is safe and secure.

    Conclusion

    Congratulations! With the above steps, you are now a seasoned pro at installing a second SSD on Windows 1 No need to be baffled by the idea of upgrading your computer’s storage – the process is straightforward and easy to execute. Remember to follow the precautions, pay attention to the details, and take breaks as needed.

    With your newfound knowledge, you’re on your way to having a computer that’s both faster and more capable than ever before. Happy computing!”

    FAQs

    Can I install a second SSD in my Windows 11 system?
    Yes, you can add a second SSD to your Windows 11 system for extra storage space.

    Do I need to format the second SSD before installing it in my system?
    Yes, you will need to format the second SSD before you can use it on your Windows 11 system.

    What steps do I need to follow to install a second SSD in my Windows 11 system?
    The steps to install a second SSD on your Windows 11 system include shutting down the PC, opening the case, connecting the SSD to the motherboard, initializing it in Disk Management, and finally formatting it.

    Is it possible to use the second SSD to run Windows 11?
    Yes, you can use the second SSD as your primary storage device to run Windows 11. However, you will need to reinstall the operating system on the new drive and ensure it is set as the boot device in your BIOS settings.

  • Step-by-Step Guide: Installing a Secondary SSD in Your Computer

    Adding a secondary SSD to your computer can provide a significant boost in performance and storage space. Whether you are looking to store large files or want to speed up your system’s boot and application load times, installing a secondary SSD is a straightforward process that anyone can do. But how do you go about it? In this guide, we will walk you through the steps required to install a secondary SSD in your computer, including what tools you will need, how to physically install the drive, and how to format and partition it once you have it up and running.

    So, buckle up and get ready to boost your computer’s performance with a secondary SSD!

    Check Compatibility and Needed Materials

    Before installing a secondary SSD, it is important to ensure that your computer is compatible with it. Check the specifications of your motherboard to confirm if it accepts the type of SSD you plan to install. Additionally, you will need the necessary tools and materials.

    It is recommended to have a screwdriver set, an anti-static wrist strap, and thermal paste on hand. Before beginning the installation process, it is also important to back up any important data from your primary drive to avoid any loss of data. Finally, ensure that your computer is shut down and unplugged before starting the installation process.

    By following these steps, you can successfully install a secondary SSD to enhance your computer’s performance.

    Check Motherboard Compatibility

    Now that you’ve decided to build a PC, it’s essential to check the compatibility of the motherboard. The motherboard is the most critical component of the computer, so it’s crucial to ensure that it’s compatible with other parts you plan to use. Checking compatibility helps to avoid any potential problems down the line, and it can save you a lot of time and money.

    One way to check compatibility is to look at the motherboard’s specifications and compare them to the parts you plan to use. Another option is to use online compatibility tools that match up the motherboard with other components, saving you time and energy. Checking compatibility isn’t the only thing you need to do when building a PC, though.

    You’ll also need to gather the necessary materials. Depending on the build, this can include a case, power supply, processor, RAM, storage, and graphics card. Make sure you have all the materials you need before you start building, so you don’t run into any problems halfway through.

    With a little bit of preparation, you’ll be able to build a PC that meets your needs and is compatible with all of its components.

    how to install secondary ssd

    Buy Required SATA Cables if Needed

    When you’re building or upgrading a computer, it’s essential to check compatibility and ensure you have all the necessary materials. One crucial aspect to consider is the SATA cables. If your new components require SATA cables and you don’t already have them, be sure to buy them before starting your build.

    You don’t want to get halfway through the process and have to run out to the store. SATA cables connect your hard drives and solid-state drives to your motherboard, and without them, your computer won’t be able to read or write data to those drives. It’s important to note that there are different types of SATA cables, so make sure you’re getting the right kind for your specific motherboard and drives.

    Double-check compatibility before making any purchases to avoid any issues down the line. Remember, investing in required SATA cables can save you time and frustration during the build process, so don’t skimp on this essential component.

    Prepare the Computer for Installation

    Installing a secondary SSD can be a straightforward process once you have prepared your computer. First, make sure to shut down your computer and unplug it from any power source. Next, ground yourself by touching a metal surface to release any static electricity that may damage the internal components of your computer.

    Then, locate the appropriate slot for your new SSD and ensure it is compatible with the computer. If needed, remove any cables or brackets that may be in the way. Once installed, connect any necessary cables and ensure the drive is secured in place.

    Finally, turn on your computer and ensure the new SSD is recognized by the system. With these steps completed, your computer is ready to take full advantage of the benefits of a secondary SSD, such as faster boot times and improved overall performance.

    Shut Down and Unplug Your Computer

    Before installing your new computer, it’s crucial to prepare the computer properly to ensure that it functions optimally. The first step in the preparation process is to shut down and unplug your computer. It may seem like a no-brainer, but it’s essential to make sure that your computer is turned off completely, with no power supply connected to it, before you start disassembling anything.

    Not doing so could lead to electrical damage or even personal injury, so it should never be skipped. Once you’re guaranteed to have safe access, it’s time to start the installation process. Taking the time to prepare your computer properly means that you’ll have a smoother, more seamless experience throughout the entire installation process.

    Remove the Computer Case

    When building a computer, one of the crucial steps is to remove the computer case. To do this, you need to start by giving yourself enough space to work. Ensure that you have a clean and flat area to work on where you can lay out all the parts and tools needed.

    Then, unplug all the cords and cables from the computer, including the power cable. Next, locate the screws or clips holding the case in place. If your computer case has screws, use a screwdriver to remove them.

    If it has clips, press them to release the case from the frame. Once the case is loose, gently lift it away from the frame to avoid damaging any internal components. By removing the computer case, you will have easy access to replace or add any necessary parts to your computer.

    Ground Yourself

    “Ground Yourself” Before installing any new computer hardware, it is always best to ground yourself to prevent any static electricity build-up that could potentially damage your components. One way to do this is by using an anti-static wrist strap, which can be easily attached to your wrist and grounded to a metal surface such as your computer case. Alternatively, you can also touch a grounded metal object before handling any hardware to discharge any static electricity in your body.

    It may seem like a small thing, but grounding yourself can help protect your investment and ensure a successful installation. So, take a moment to ground yourself before diving into your computer’s internals.

    Install the Secondary SSD

    If you’re running out of storage space on your computer, it might be time to install a secondary SSD. Fortunately, doing so can be relatively straightforward, even for those with limited technical expertise. First, you’ll want to gather your tools, including the SSD, screwdrivers, and an anti-static bracelet.

    Once you’ve done so, turn off your computer and unplug it from the outlet. Open up the computer case and locate an available drive bay. Check the size of your SSD to make sure it fits the bay, and then remove the mounting bracket screws if necessary.

    Attach the SSD to the bracket, being careful to line everything up correctly. Finally, secure the bracket to the drive bay using screws. Once everything is in place, you can close up the case, plug in your computer, and turn it back on.

    With your secondary SSD installed, you’ll have plenty of extra storage space to work with.

    Locate a Free Bay or Slot on the Motherboard

    When it comes to installing an additional SSD in your computer, the first step is to locate a free bay or slot on the motherboard. This can be a bit confusing for beginners, but don’t worry, it’s not as complicated as it may seem. Before opening up your computer, make sure to turn it off and unplug it from any power sources.

    Once you’ve opened up your computer case, you’ll need to locate the SATA ports on your motherboard. These are typically located near the bottom of the board and will be labeled. Simply plug in the data and power cables from your SSD into an available slot and you’re good to go! Just make sure to secure the SSD in place with the screws provided and close up your computer case.

    Congratulations, you’ve successfully installed your secondary SSD! With this additional storage, you’ll be able to store more files and applications without sacrificing the performance of your computer.

    Mount the SSD in the Bay or Slot

    If you’re looking to install a secondary SSD in your computer, the first step is to mount it in a bay or slot. This involves physically installing the SSD into the computer’s case so that it can be connected to power and data cables. To do this, start by locating an open bay or slot in your computer’s case.

    Depending on the type of case you have, this could be a dedicated SSD bay or a spare hard drive bay. Once you’ve found a suitable location, you can screw the SSD into place using the provided mounting screws. Be sure to connect both the power and data cables to the SSD, making sure they’re securely seated.

    Once the SSD is installed and connected, you can power on your computer and start using it right away. With your new secondary SSD in place, you’ll enjoy faster read and write speeds, allowing you to access your files more quickly than ever before.

    Connect the SSD to the Power Supply Unit

    If you’re looking to install a secondary SSD in your computer, the first step is to connect it to the power supply unit. It’s a simple process that can be accomplished by following a few basic steps. The first thing you’ll need to do is locate the SATA power connector on your power supply unit.

    This connector is typically a small, rectangular plug that’s labeled as SATA. Once you’ve located it, simply connect the SATA power cable from your secondary SSD to the power supply’s SATA connector. This will give your SSD the power it needs to operate and function properly.

    It’s important to ensure that the connections are secure and tight to avoid any problems down the line. Once connected, you can move on to installing the SSD in your computer and beginning the setup process. With just a few simple steps, you can easily install your secondary SSD and start reaping the benefits of faster speeds and improved performance.

    Connect the SSD to the Motherboard via SATA Cable

    To install a secondary SSD, you first need to connect it to the motherboard via a SATA cable. This is a relatively simple process that requires just a few steps. Start by locating the SATA ports on your motherboard.

    These are usually positioned near the edge of the board and are labeled with numbers or letters. Once you have located the SATA port, plug one end of the SATA cable into the port on the motherboard and the other end into the SSD. Make sure that the cable is securely connected on both ends.

    Once the cable is in place, power on your computer and wait for it to detect the new SSD. You may need to navigate to the BIOS to ensure that the SSD is recognized. With the SSD connected to the motherboard, you can now install your operating system or use it to store data.

    Overall, connecting your secondary SSD via SATA cable is a straightforward process that can greatly enhance the performance of your computer.

    Put the Computer Case Back On

    Now that you have the computer case off, it’s time to install the secondary SSD. Before you do so, make sure to locate the corresponding slot on your motherboard. Once you find it, gently insert the SSD into the slot and secure it in place by tightening the screws.

    Don’t forget to connect the SATA data cable and power cable to the SSD. Now that your secondary SSD is installed and secure, it’s time to put the computer case back on. Carefully line up the screw holes on the case with those on the motherboard and screw everything back into place.

    Remember, it’s important to handle your components with care when building or upgrading your PC to avoid any unnecessary damage. With your secondary SSD installed, you’ll have more storage space for all your files, programs, and games. Happy computing!

    Configure and Initialize the Secondary SSD

    So, you’ve decided to upgrade your computer’s storage capacity by installing a secondary SSD? Great decision! To get started, you’ll need to configure and initialize the new drive. First, open your computer’s case and locate the SATA ports on the motherboard. Connect the SATA cables from the new SSD to an available port, making sure to secure the connections.

    Power up your computer, and head to the Disk Management tool in the Control Panel. Here, you’ll see your new SSD listed as unallocated space. Right-click on it and select “Initialize Disk.

    ” Choose either MBR or GPT partition tables, and follow the prompts to create a new partition and format the drive. Voila! Your new SSD is now ready to use. Don’t forget to transfer over your files and programs from your old drive, or you can simply use your new SSD as additional storage space, depending on your needs.

    Congrats on successfully installing your secondary SSD – enjoy the increased speed and storage capacity it provides!

    Turn on the Computer

    When it comes to setting up a secondary SSD, the first step is to turn on the computer. Once it’s up and running, it’s time to configure and initialize the SSD. This process involves preparing the SSD for use by formatting it and assigning it a drive letter.

    The first thing to do is connect the SSD to the computer using a SATA cable and power cable. You can then go into the BIOS settings to make sure the computer recognizes the new SSD. Next, you’ll need to open Disk Management in Windows and initialize the SSD.

    This involves selecting the disk and choosing the partition style (either MBR or GPT). Finally, you’ll need to format the SSD and assign it a drive letter. This will make it accessible from Windows Explorer.

    By following these steps, you’ll be able to set up a secondary SSD that’s ready to use. Overall, setting up a secondary SSD may seem daunting at first, but it’s a relatively straightforward process that can greatly benefit your computer’s storage and performance.

    Enter the BIOS Setup Menu to Check for SSD Detection

    SSD detection, BIOS setup menu, secondary SSD, configure, initialize If you have installed a secondary SSD into your computer and it isn’t being detected, you may need to enter the BIOS setup menu to check for SSD detection. The BIOS, or Basic Input/Output System, is the firmware that initializes the hardware and software of a computer. Once you access the BIOS setup menu, look for the section labeled “Storage” or “Drives” and check if the secondary SSD is listed.

    If it isn’t, you may need to enable the SATA port that it’s connected to. Once the secondary SSD is detected, you can configure and initialize it. This means setting it up to store data and making sure it’s functioning properly.

    To do this, you’ll need to format the drive and assign a drive letter to it. This process can be done through the Disk Management tool on Windows. Properly configuring and initializing your secondary SSD will allow it to function as intended and provide you with more storage space for your files and programs.

    Initialize and Format the Drive in the Operating System

    To configure and initialize the secondary SSD, you will first need to connect it to your computer, and then initialize and format it in your operating system. This process involves allocating space on the drive for storing data and setting it up to be used by your computer. To initialize the SSD, open the Disk Management utility in Windows, select the drive, and choose the option to initialize it with the MBR or GPT partition table.

    Once the drive is initialized, you can format it with a file system such as NTFS or exFAT. Formatting the drive will erase any existing data, so be sure to back up any important files before proceeding. After formatting, you can assign a drive letter to the SSD, so that it can be easily recognized by your operating system.

    Remember to periodically check the health of your SSD, as constant usage can cause wear and tear on the drive. By initializing and formatting the drive, you can ensure that it functions smoothly and efficiently, providing you with reliable storage for your important files, videos, music, and more. So go ahead, configure and initialize your secondary SSD, and enjoy the added speed and storage capacity it brings to your computer!

    Conclusion

    And there you have it, folks! Installing a secondary SSD is a piece of cake. With a little bit of patience, a screwdriver, and some know-how, you’ll be up and running in no time. So go forth and double your storage capacity, because in today’s age of endless media and data, you can never have too much space.

    Happy installing!”

    FAQs

    What are the requirements for installing a secondary SSD?
    To install a secondary SSD, you need to make sure that your system has an available SATA port, a power connector, and enough physical space to accommodate the new drive. You also need to ensure that the new drive is compatible with your motherboard.

    How do I physically install a secondary SSD?
    Firstly, turn off your computer and unplug all cables. Open your computer case, locate an empty drive bay, and attach the SSD to the bay using screws. Connect the SATA data cable to the SSD and the motherboard, and connect the power cable to the power supply.

    How do I format a secondary SSD?
    Once the physical installation is complete, you need to format the drive. Go to Disk Management, locate your new SSD, right-click on it and select “New Simple Volume.” Follow the wizard to allocate a drive letter and set up the file system.

    How do I transfer data to my secondary SSD?
    You have two options for transferring data to your secondary SSD. You can transfer data manually by copying and pasting files to the new drive, or you can use backup software to clone your existing drive to the new SSD. Cloning your drive is generally faster and more efficient.