Author: David L. Lynn

  • Upgrade Your Boot Time: A Step-by-Step Guide on Switching from Mechanical to SSD

    If you’re looking to improve your PC’s boot and overall performance, swapping out your mechanical hard drive for a solid-state drive (SSD) may be just what you need. An SSD is faster, more durable, and quieter than a traditional hard drive. However, before you can start taking advantage of its benefits, you’ll need to make the switch.

    Fortunately, we’re here to guide you through the process! In this step-by-step guide, we’ll take you through everything you need to know about switching from mechanical to SSD boot. From selecting the right SSD to migrating your data and setting up your new drive, we’ve got you covered. Whether you’re a tech-savvy pro or a newbie, you’ll find valuable information in this guide.

    So, are you ready to take the leap and upgrade your PC to an SSD boot drive? Let’s dive in and get started!

    Backup Your Data

    If you’re planning on upgrading from a mechanical hard drive to a solid-state drive (SSD), it’s important to backup your data before making the switch. This ensures that you don’t lose any important files during the transition. There are a few different ways to backup your data, but one of the easiest and most convenient methods is to use a cloud-based backup service, such as Google Drive or Dropbox.

    These services allow you to store your files securely in the cloud, so you can access them from any device with an internet connection. Alternatively, you can use an external hard drive or USB drive to backup your data. Simply copy all of your important files onto the external drive and then transfer them back to your computer after the upgrade is complete.

    Once your data is safely backed up, you can proceed with switching your boot drive from the mechanical hard drive to the new SSD. This process can vary depending on the specific computer and operating system you’re using, but there are plenty of tutorials and guides available online to walk you through the steps. With a little preparation and the right tools, upgrading to an SSD can be a simple and rewarding process.

    Use an External Drive or Cloud Storage

    Backing up your data is one of the most important things you can do to protect your personal and professional information. One effective way to do this is by using an external drive or cloud storage. External drives are portable and can be plugged into any computer, allowing you to easily transfer and backup your data.

    They are also affordable and can hold large amounts of data. Cloud storage, on the other hand, offers the convenience of accessing your data from anywhere with an internet connection. You can upload files and access them from multiple devices, and the cloud storage provider will handle the backup and maintenance of your data.

    Both external drives and cloud storage have their own advantages and disadvantages, so it’s important to consider your needs and budget when choosing which method to use. Whether you choose an external drive or cloud storage, the key is to consistently backup your data to protect it from unexpected data loss.

    how do i switch my boot from mechanical to ssd

    Ensure All Files are Backed Up

    Backing up your data is an essential step in protecting your digital information from unexpected events. Many people realize the importance of backing up their files only when it’s too late. A simple power outage or a hard drive failure can lead to losing all your data, including important documents, precious photos, and videos you’ve accumulated over time.

    Losing such data can be devastating, especially if they are irreplaceable. Therefore, ensuring all files are backed up is a crucial aspect of safeguarding your data. By doing so, you can easily recover any files lost due to hardware failure, accidental deletion, or any other unforeseen issues.

    The best way to backup important files is to keep them in multiple locations, such as an external hard drive, cloud storage, or a combination of both. With multiple backups, you can rest assured that even if you lose one copy, you’ll have another one to fall back on. Ultimately, backing up your data can give you peace of mind, knowing that your information is safe and protected.

    Select Your SSD

    If you’re looking to switch your boot from a mechanical hard drive to a solid-state drive (SSD), there are a few steps you need to follow. First, you’ll need to purchase an SSD that’s compatible with your computer’s hardware, and then clone your current hard drive’s operating system and data onto the new SSD. Once that’s done, you’ll need to replace the mechanical hard drive with the new SSD in your computer and set it as the primary boot drive in your computer’s BIOS.

    This will ensure that your computer boots up from the new SSD instead of the old hard drive. It’s important to note that the process may vary slightly depending on the type of computer you have, so be sure to consult your computer’s manual or seek professional help if you’re unsure about any steps in the process. With a bit of patience and some careful steps, switching to an SSD as your primary boot drive can greatly improve your computer’s performance and speed.

    Choose an SSD that Fits your Needs and Budget

    When it comes to choosing an SSD that fits your needs and budget, there are a few factors to consider. First and foremost, you need to determine what your intended usage is for the SSD. Are you a gamer, content creator, or just looking for faster boot-up speeds? Once you have a clear understanding of your needs, you can start looking at the different types of SSDs available and their respective price points.

    For those on a tight budget, a SATA-based SSD may be the way to go, offering decent speeds at an affordable price. However, if you require faster read and write speeds, you may want to consider a PCIe-based SSD. It’s important to keep in mind that while PCIe-based SSDs can offer faster speeds, they come at a higher price point.

    Ultimately, it’s all about finding the SSD that meets your specific needs and fits within your budget.

    Ensure Compatibility with your System

    When it comes to upgrading your system’s storage with an SSD, compatibility is key. Before selecting your SSD, ensure that it is compatible with your system’s motherboard and interface (SATA, PCIe, etc.).

    You can do this by checking your system’s manual or manufacturer specifications. Additionally, consider the form factor of the SSD as it needs to physically fit into your system’s SSD mounting points. Choosing an SSD with the right compatibility will ensure that it runs at its highest potential and will prevent any issues or inconsistencies.

    Don’t forget to also check for any firmware updates or compatibility issues with your operating system before making your final decision. By taking these steps, you will ensure a smooth and successful upgrade for your system.

    Transfer your Operating System to the SSD

    If you’re looking to speed up your computer’s performance, transferring your operating system from a mechanical hard drive to a solid-state drive (SSD) is a great solution. Not only will it drastically decrease your boot time, but it will also improve your system’s overall responsiveness and load times for programs. The process of switching your boot from mechanical to SSD can seem daunting, but it’s actually quite simple.

    Start by backing up your files and creating a clone of your current operating system on your new SSD. Next, change your computer’s boot order in the BIOS to prioritize your new SSD. Then, restart your computer and check that it’s now booting from the SSD.

    Finally, format your old mechanical hard drive to remove the old operating system, and you’re done! With a little bit of patience, you can easily switch your boot from mechanical to SSD and enjoy faster computer speeds.

    Use a Cloning Software

    If you’re looking to speed up your computer’s performance, adding an SSD is an excellent option. However, transferring your operating system to the SSD can seem like a daunting task. Fortunately, you can use a cloning software to make the process easier.

    With this software, you can create an exact copy of your current operating system and move it over to the new SSD. This way, you won’t have to go through the hassle of reinstalling everything from scratch. Just make sure you choose a reliable cloning software that works with your particular computer and SSD model.

    In no time, you’ll be enjoying the faster boot times and improved performance of your newly-upgraded computer.

    Follow the Instructions Provided by the Software Carefully

    If you’re planning to transfer your operating system to the SSD, then you need to follow the instructions provided by the software carefully. First and foremost, make sure that the SSD you will be using is compatible with your system. The process of transferring the operating system to the SSD is generally straightforward, but not all software is the same, and care should be taken to avoid any mistakes that could affect your system.

    Before you make any changes, back up all your important files to an external drive or cloud storage platform. Then, you can start the process of transferring your operating system. Follow the steps given by your software and allow it to complete the transfer process.

    Once it’s done, restart your system and check if everything is working correctly. If there are any issues, check the troubleshooting guide provided by the software. By following the instructions carefully, you can transfer your operating system to the SSD without facing any problems.

    Replace your Mechanical Drive with the SSD

    If you’re looking to upgrade your computer’s storage speed, switching from a mechanical drive to a solid-state drive (SSD) is the way to go. Not only do SSDs provide faster boot times and application load times, but they also have lower power consumption and are less prone to damage from drops or shocks. So how do you switch your boot from mechanical to SSD? First, you’ll need to clone your existing hard drive onto the new SSD using software such as Acronis or Macrium Reflect.

    Once the cloning process is complete, open your computer and replace the mechanical drive with the new SSD. Reboot your computer and enter the BIOS settings, where you can choose the new SSD as your primary boot device. Finally, save your changes and exit the BIOS, and your computer should now boot from the SSD.

    With a few simple steps, you can upgrade your computer’s performance and enjoy the benefits of faster storage speeds.

    Shut Down Your Computer and Unplug It

    If you’re looking to boost the speed and performance of your computer, then replacing your mechanical hard drive with a solid-state drive (SSD) is a great place to start. Not only will it significantly improve your computer’s startup time, but it will also reduce the load times of your favorite programs and games. But before you start the process, make sure to shut down your computer and unplug it from the wall to ensure your safety.

    Once you’ve done that, it’s time to get started. Simply remove your old hard drive from its slot and replace it with the SSD. Then, install your operating system and your favorite programs, and you’ll be up and running in no time.

    The benefits of an SSD over a mechanical hard drive are well-documented. SSDs have no moving parts, which means they can access data much faster than a mechanical hard drive can. They’re also more reliable, consume less power, and generate less heat.

    So if you’re looking to upgrade your computer’s performance, there’s no better place to start than replacing your old mechanical hard drive with an SSD. With just a few simple steps, you can breathe new life into your computer and enjoy faster load times, smoother performance, and a more enjoyable computing experience overall. So why not give it a try? You won’t be disappointed!

    Remove the Mechanical Drive

    If you’re tired of slow boot times and sluggish computer performance, it might be time to replace your mechanical hard drive with an SSD. Solid-state drives are capable of storing and accessing data much more quickly than traditional hard drives, which use spinning disks to read and write data. Upgrading your computer with an SSD is a simple process, but you’ll first need to remove your existing mechanical drive.

    Start by powering down your computer and unplugging all cables. Then, locate your hard drive and remove it from its mounting bracket. You’ll want to be careful when handling the drive, as it is likely to be hot and fragile.

    Once you’ve removed the drive, install your new SSD in its place and connect all necessary cables. Boot up your computer and you should notice a significant improvement in boot times and overall performance. Upgrade to an SSD today and experience the speed and responsiveness your computer has been missing.

    Insert the SSD and Securely Mount It

    If you’re tired of the slow performance of your mechanical drive, it’s time to replace it with an SSD. Once you’ve acquired an appropriate SSD, you’ll need to insert it into your computer and securely mount it. Keep in mind that your computer likely needs to be opened up and the drive bay exposed, so if you’re not comfortable doing this yourself, it may be best to seek assistance.

    Once you’re ready to begin, simply slide the SSD into the drive bay and screw it in. Ensure that it’s secure and won’t shake loose during use. After this, simply connect the necessary cables and boot up your computer.

    Your SSD should now be recognized and ready to use. Enjoy the considerable boost in performance that SSDs offer, and take comfort in knowing that your data is now stored on a much more reliable medium.

    Reboot Your Computer and Enjoy Your New SSD Boot Drive

    If you’ve recently made the switch from a mechanical hard drive to an SSD, you’re probably wondering how to switch your boot drive. Don’t worry, it’s a fairly simple process that can be done in just a few steps. First, make sure your new SSD is properly connected to your computer.

    Next, you’ll need to enter your computer’s BIOS settings. This can usually be done by pressing a key during startup, such as F2 or Del. Once you’re in the BIOS settings, navigate to the boot section and select your new SSD as the primary boot drive.

    Save your changes and exit the BIOS settings. Finally, reboot your computer and enjoy the lightning-fast speed of your new SSD boot drive. With just a few simple steps, you can enjoy a faster and more efficient computing experience.

    Conclusion

    In conclusion, switching your boot from mechanical to SSD is kind of like upgrading from a horse-drawn carriage to a Ferrari. Sure, the horse can get you from point A to point B, but the Ferrari gets you there faster, smoother, and with more style. So if you want to step up your computer game and enhance your overall experience, make the switch to SSD.

    Your computer (and your patience) will thank you.”

    FAQs

    What is the benefits of switching boot from mechanical to SSD?
    SSDs have faster read and write speeds than mechanical hard drives, which means that your computer will have faster boot times and program launches. SSDs are also less prone to failures than mechanical hard drives.

    What is the process of switching boot from mechanical to SSD?
    You will need to clone the contents of your mechanical hard drive onto the new SSD using cloning software. Once the cloning is complete, swap out the mechanical hard drive for the SSD in your computer’s drive bay and change the boot order in your BIOS to make the SSD the primary boot device.

    Can I switch boot from mechanical to SSD myself?
    Yes, you can switch boot from mechanical to SSD yourself as long as you have the necessary tools and knowledge. However, if you are not comfortable with technical tasks, it is recommended that you seek assistance from a professional.

    Is it worth switching boot from mechanical to SSD?
    Yes, it is definitely worth switching boot from mechanical to SSD. You will notice a significant improvement in your computer’s overall performance, including faster boot times, faster program launches, and improved system responsiveness. Additionally, SSDs are more reliable and have a longer life span than mechanical hard drives.
  • Heat Up Your Gaming Experience: Is a Heatsink Necessary for PS5 SSD?

    As the PS5 continues to make headlines for its impressive features and performance, gamers are eager to learn more about its hardware. One question that has been circulating among enthusiasts is whether a heatsink is necessary for the PS5’s SSD. In short, the answer is yes.

    While the PS5’s SSD is designed to operate efficiently, it generates heat that can compromise performance. Without a proper cooling system in place, the SSD may begin to throttle, meaning its speed and processing power would slow down. In this blog, we’ll delve into the importance of a heatsink for the PS5’s SSD and why it’s crucial for optimal gaming experiences.

    What Is a Heatsink?

    Is a heatsink necessary for PS5 SSD? Well, let’s first understand what a heatsink is and its role in electronic devices. A heatsink is a component that helps dissipate heat from an electronic device, preventing it from overheating and damage. It is commonly used in computers, gaming consoles, and other electronic devices that generate a lot of heat during operation.

    When it comes to PS5 SSD, a heatsink is not necessary but highly recommended. The SSD itself generates some heat during usage, and adding a heatsink would help prolong its lifespan and performance. Besides, it would also help reduce noise from the cooling fan, which is a common issue with the PS

    So, while a heatsink is not a must-have accessory for your PS5, investing in one could significantly improve and extend its performance.

    Definition and Functionality

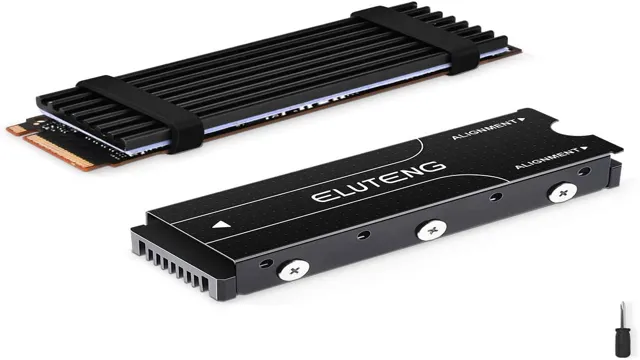
    A heatsink is an essential component of any electronic device that generates heat. It’s a passive cooling system that helps reduce the temperature of a device by dissipating heat away from it. The heatsink usually consists of metal fins that absorb the heat, which is then transported away using a thermal conductor like a fan or a liquid coolant.

    The purpose of a heatsink is to prevent overheating, which can cause irreparable damage to the device and degrade its performance. For instance, a CPU would have a heatsink to keep the temperature low as they generate a lot of heat, which can cause them to fail prematurely. With a good heatsink, the device can operate reliably and efficiently for a long time without any issues.

    is heatsink necessary for ps5 ssd

    SSD Temperature and Performance

    With the release of the PS5 and its lightning-fast SSD, gamers are wondering whether they need to invest in a heatsink to ensure optimal performance. While it is true that SSDs generate heat, causing them to slow down and potentially shorten their lifespan, it may not be necessary to rush out and buy a separate heatsink. According to tests conducted by Tom’s Hardware, the PS5’s internal cooling system is efficient enough to manage the heat generated by the SSD.

    However, if you plan on doing heavy gaming or running high-performance software for extended periods, it may be worth considering a heatsink to provide extra cooling and potentially improve performance. At the end of the day, it depends on your usage and budget. If you want to play it safe, investing in a heatsink could be a smart move.

    But if you’re just a casual gamer, you’ll probably be just fine without one.

    Impact of Temperature on SSD

    SSD Temperature The temperature of an SSD can have a significant impact on its performance. When an SSD gets too hot, it can slow down or even stop working altogether. This is because high temperatures can cause the NAND flash memory chips inside the SSD to degrade faster.

    Additionally, high temperatures can also cause the SSD to throttle its performance, reducing its read and write speeds to prevent overheating. Conversely, operating an SSD at very low temperatures can also affect its performance. This is because cold temperatures can cause the SSD’s internal components to become stiff, making it harder for them to function correctly.

    In extreme cases, a cold SSD can even experience permanent damage. To ensure optimal performance, it’s important to keep your SSD at a moderate temperature range of 0°C to 70°C. This can be achieved by ensuring proper airflow through your computer and avoiding exposing your SSD to direct sunlight or other sources of heat.

    By keeping your SSD at a moderate temperature range, you can ensure that it performs reliably and efficiently for years to come.

    PS5 SSD Specifications and Operating Temperature

    The PS5 comes equipped with an SSD that boasts impressive specifications and can handle a range of tasks without breaking a sweat. But when it comes to temperature and performance, there’s a lot that users need to be aware of. The SSD in the PS5 operates at a temperature range of 0-70℃ and while this is well within the acceptable range, prolonged usage at the higher end of this spectrum can cause performance issues.

    If the SSD overheats, it can slow down data transfers and read/write speeds, which can take a toll on the user experience. This is why it’s important for users to ensure proper ventilation for their PS5, especially during long gaming sessions. Additionally, they can keep an eye on the temperature using third-party tools to ensure that the device is not overheating and that they’re maximizing the performance of the SSD.

    By doing so, users can enjoy a seamless gaming experience without worrying about performance issues related to temperature.

    Heatsink vs. No Heatsink

    Many gamers are wondering if a heatsink is necessary for the PS5 SSD. While the PS5 does come with a built-in heatsink that helps to dissipate heat from the SSD, some users may want to add an additional heatsink for extra protection. The importance of a heatsink largely depends on how intense your gaming sessions are and how much strain the SSD is under.

    If you frequently play graphics-heavy games or use your PS5 for long periods, a heatsink may be worth considering. However, if you are a casual gamer, the built-in heatsink should be sufficient to keep your console running smoothly. Ultimately, whether or not to use a heatsink is a personal choice that depends on your individual needs and preferences.

    Comparing Performance and Temperature with and without Heatsink

    When it comes to performance and temperature, the presence or absence of a heatsink can make a significant difference. A heatsink is a device that helps dissipate heat away from electronic components, such as a CPU or GPU, to prevent overheating and ensure optimal performance. Without a heatsink, components can quickly reach their maximum temperature limits, leading to reduced performance and potentially causing long-term damage.

    In contrast, a properly installed heatsink can lower a component’s temperature and help maintain its performance over time. When comparing performance and temperature with and without a heatsink, the difference is immediately noticeable. With a heatsink, components generally run cooler and can achieve higher clock speeds, resulting in better overall performance.

    Without a heatsink, performance may suffer as the component struggles to cope with the generated heat. Therefore, it is essential to consider incorporating a heatsink into your electronic devices to ensure the best possible performance and longevity.

    Benefits and Drawbacks of Having a Heatsink for PS5 SSD

    When it comes to the PS5’s SSD, there are benefits and drawbacks to having a heatsink. One benefit of having a heatsink is that it can help regulate the temperature, preventing the SSD from overheating. This can lead to improved performance and stability, as an overheated SSD is more likely to cause issues.

    Additionally, having a heatsink can potentially extend the lifespan of the SSD. However, there are also drawbacks to having a heatsink. One major drawback is that it can make the PS5 larger and bulkier, which may be inconvenient for some gamers.

    Additionally, a heatsink can add to the cost of the PS5, making it more expensive than it would be otherwise. Ultimately, the decision of whether to have a heatsink or not depends on personal preference and priorities. If performance and lifespan are more important to you, then a heatsink may be worth the added cost and size.

    However, if cost and size are more important, then a heatsink may not be necessary.

    Conclusion

    In the end, the question of whether a heatsink is necessary for the PS5 SSD ultimately depends on your personal preferences and usage. If you’re an avid gamer who wants the best performance possible and plans on pushing the limits of your PS5’s capabilities, a heatsink may provide some extra peace of mind. But if you’re more of a casual player or don’t plan on pushing your console to its limits, you may not need one.

    Either way, always remember to stay cool, calm, and game on!”

    Factors to Consider When Deciding on a Heatsink for PS5 SSD

    When it comes to deciding between a heatsink and no heatsink for the PS5 SSD, there are a few factors to consider. First and foremost, a heatsink can help dissipate heat and prevent the SSD from overheating, which could lead to performance issues or even damage over time. However, not all heatsinks are created equal, and a poorly designed or installed heatsink could actually hinder performance by blocking airflow or causing other issues.

    Additionally, the cost and complexity of installing a heatsink should be taken into account, as it may not be worth the investment for some users. Ultimately, it comes down to your specific usage and needs – if you’re pushing your PS5 to its limits with long gaming sessions or demanding tasks, a heatsink could be a wise choice. But for more casual use, a no heatsink setup may be perfectly adequate.

    FAQs

    What is a heatsink and how does it benefit the PS5 SSD?
    A heatsink is a device designed to dissipate heat away from electronic components, including the PS5 SSD. It helps to prevent overheating and ensures stable performance.

    Does the PS5 SSD come with a built-in heatsink?
    Yes, the PS5 SSD has a built-in heatsink that is integrated into the console’s design. This ensures that the SSD remains cool and performs optimally.

    Can I add an additional heatsink to my PS5 SSD for better cooling?
    It’s not necessary to add an additional heatsink to the PS5 SSD as it already comes with a built-in heatsink. However, if you feel that the SSD is running hot, you can try improving the airflow around the console by placing it in a well-ventilated area.

    Will not using a heatsink damage my PS5 SSD?
    The PS5 SSD is designed to operate with or without a heatsink, but using a heatsink can improve its cooling performance and ensure longevity. However, not using a heatsink is unlikely to cause any significant damage to the SSD.

  • Ultimate Guide on How to Partition Your 2TB SSD Internal Drive for Improved Performance

    Partitioning a 2TB SSD Internal Drive can feel like a daunting task, but it’s essential for getting the most out of your device. Imagine your computer as a house with multiple rooms, and partitioning is like dividing your house into separate areas for different purposes. By doing so, you can create separate spaces for storing photos, videos, documents, games, and apps, which can make it easier to find and access specific files.

    With a 2TB SSD internal drive, you have ample space to partition it in different configurations. The partitioning process involves dividing the drive into separate sections, each with its unique letter and name, like C, D, E, etc. These sections can be customized to suit your needs, such as allocating more space to frequently used files or creating a separate backup section in case of system failure or data loss.

    But why partition a 2TB SSD internal drive in the first place? Partitioning can improve your computer’s performance, reduce its vulnerability to malware attacks, and help you organize your files more efficiently. For example, if you install your operating system and apps on one section and store your data on another, your computer can access and run them more quickly. In conclusion, Partitioning a 2TB SSD Internal Drive is a crucial step to optimize your computer’s storage space and performance.

    With proper partitioning, you can organize your files in a more efficient manner, protect your data from system crashes or failures, and boost your computer’s speed. Whether you’re a professional video editor, graphic designer, or a casual user, partitioning can help you get the most out of your device.

    Understanding Hard Drive Partitioning

    If you have recently purchased a 2TB SSD internal drive, you may be wondering how to partition it. Partitioning a hard drive essentially means dividing it into multiple sections or partitions. This can be helpful for organizing your files and separating your operating system from your personal data.

    To partition a 2TB SSD internal drive, you can use the built-in disk management tool on your computer’s operating system. This tool will allow you to create and format new partitions to suit your needs. It’s important to note that partitioning does not affect your drive’s storage capacity or performance, so feel free to experiment with different partition sizes and configurations until you find what works best for you.

    Overall, partitioning your hard drive is a simple and effective way to improve your data storage and organization.

    What is partitioning?

    Partitioning refers to the act of dividing a hard drive into multiple sections or partitions. Each partition is treated as a separate storage space, with its own letter assigned to it. This process is beneficial because it allows you to organize your data more efficiently and safely.

    For instance, you can place your operating system on one partition and your personal files on another one. That way, if something happens to your operating system, your personal files will remain unaffected. Additionally, partitioning can help improve system performance by reducing file fragmentation and providing more space for temporary files.

    Overall, partitioning is an excellent way to manage your data, stay organized, and ensure the safety of your files.

    2tb ssd internal drive how to partition

    Why partition your hard drive?

    Hard Drive Partitioning Hard drive partitioning is the process of dividing a computer’s hard drive into multiple segments, each of which functions as a separate hard drive. There are several reasons why you may want to partition your hard drive. Firstly, partitioning can help you better organize your files and make them easier to access.

    For example, you could create a separate partition for your operating system, another for your programs, and another for your personal files. Secondly, partitioning can also be useful if you want to run multiple operating systems on your computer. By creating separate partitions for each operating system, you can avoid potential conflicts and ensure that your files remain isolated from one another.

    Finally, partitioning can help you optimize your computer’s performance by allowing you to store frequently accessed files on separate partitions. Overall, hard drive partitioning can be a useful tool for streamlining your computer’s storage and improving its performance.

    How does partitioning work?

    Hard Drive Partitioning When it comes to hard drives, partitioning is the process of dividing the available storage space into multiple logical sections, each of which can be formatted and used as a separate drive. This can be incredibly useful in terms of organizing data and maximizing available space, as it allows you to separate different kinds of files and programs onto different partitions. For example, you might use one partition for your operating system and essential programs, another for games, and a third for documents and personal files.

    There are a few different ways to partition a hard drive, but the most common method involves using software built into your operating system. This software will typically allow you to create, delete, and resize partitions as needed, and you can usually choose to format them using pretty much any file system you like, from Windows’ NTFS to Linux’s EXT It’s important to keep in mind, however, that partitioning a hard drive can result in data loss, so it’s always a good idea to back up your data before making any major changes.

    One analogy that can help to illustrate the concept of partitioning is to think of your hard drive as if it were a bookshelf. Without partitioning, you might just pile all your books onto the shelf in a random order, making it difficult to find what you need. But by dividing the shelf into sections—say, one for fiction, one for non-fiction, and one for reference books—you can keep everything neatly organized and make it easier to access what you need.

    And if you ever need more space for one category of books or another, you can simply adjust the partitions accordingly.

    Preparing for Partitioning

    If you’ve just purchased a 2TB SSD internal drive and are wondering how to partition it, don’t worry – it’s not as complicated as it sounds! Partitioning your drive can be a useful way to separate your data from your operating system, allowing for easier organization and better system performance. One simple way to partition your drive is to use the Disk Management tool in Windows. Simply right-click on the drive in your file explorer, select “Shrink Volume”, and follow the prompts.

    You can then create a new partition to your desired size. It’s important to note that partitioning will erase all data on the drive, so make sure to back up any important files before proceeding. With your 2TB SSD internal drive properly partitioned, you’ll be able to utilize its full potential and keep your system running smoothly.

    Backing up your data

    Preparing for Partitioning may seem like a daunting task, but it doesn’t have to be. One of the most important things you can do before partitioning your hard drive is to back up your data. This is because partitioning involves dividing your hard drive into different sections, which could potentially lead to the loss of important files and documents.

    By backing up your data beforehand, you can ensure that everything important is safely stored away. There are many ways to back up your data, including using an external hard drive, cloud storage, or even a simple USB drive. Whatever method you choose, make sure to keep your backups up to date as you work through the partitioning process.

    Remember, a little preparation goes a long way when it comes to partitioning your hard drive, so take the time to backup your data and ensure a smooth transition.

    Choosing a partitioning tool

    When preparing for partitioning, it’s important to choose a reliable tool that will make the process seamless and efficient. One option is to use the built-in partitioning tool in your operating system, but it may not have all the features you need. Alternatively, there are third-party tools available that offer more advanced options and customization.

    When selecting a tool, consider factors such as ease of use, compatibility with your system, and any additional features that may be beneficial to your specific needs. It’s also important to ensure that you back up all important data before partitioning to avoid any potential data loss. By taking the time to carefully choose and prepare for the partitioning process, you can confidently create the necessary partitions without any major hiccups.

    Partitioning the 2TB SSD Drive

    Partitioning a 2TB SSD internal drive can seem like a daunting task, but it’s actually quite simple. First, you need to decide how many partitions you want. For example, you may want to split the drive into two partitions of equal size, or you may want one large partition for your operating system and programs, and another smaller partition for storing important documents and files.

    Once you have a plan in place, you can use a partitioning tool such as Disk Utility on a Mac or Disk Management on a Windows PC to create the partitions. Be sure to allocate enough space for each partition, and label them appropriately so you don’t get confused later on. With a little bit of time and effort, partitioning your 2TB SSD drive can help you stay organized and make the most of your valuable storage space.

    Creating partitions

    Partitioning a 2TB SSD drive can be intimidating, but with the right tools and knowledge, it can be a straightforward process. First, it’s essential to decide how many partitions you want and the size of each partition. There are advantages to having multiple partitions, such as keeping your operating system files and personal files separate.

    After deciding on the partition sizes, you can use Disk Management on Windows or Disk Utility on Mac to create the partitions. One thing to keep in mind is that the partition for the operating system should be large enough to accommodate future updates and installations. It’s also important to note that once you create partitions, they are difficult to change, so plan ahead.

    However, having multiple partitions can increase the efficiency of your computer by allowing it to access specific files faster. Partitioning a 2TB SSD drive requires careful planning, but with the right approach, it can be a beneficial investment in your computer’s performance.

    Assigning drive letters

    Assigning drive letters is an essential process when partitioning a 2TB SSD drive. This process involves assigning a unique letter to each partition, which makes it easier to access and recognize each partition. When partitioning the drive, you can create multiple partitions that can be used for different purposes.

    This is especially useful if you want to install multiple operating systems on your computer or store different types of data. Once you have partitioned the drive, you can assign a drive letter to each partition. This will enable you to easily access each partition from your computer’s file explorer.

    You can also customize the drive letter names to make it easier for you to remember which partition is for what purpose. Overall, assigning drive letters is a simple and effective way to organize your 2TB SSD drive and make it easier to use.

    Formatting partitions

    Partitioning a large hard drive like our 2TB SSD drive can seem intimidating, but with the right tools and knowledge, it is a breeze. The first step is to open the Disk Management tool, which can be done by right-clicking on the Windows Start menu. From there, you can see all the drives connected to your computer, including the new 2TB SSD drive, which should show up as unallocated space.

    Right-click on this space and select “New Simple Volume.” This will bring up a wizard that will guide you through the partitioning process, where you can choose the size of the partition, assign a drive letter, and choose the file system format. We recommend using NTFS as it is the most compatible with Windows systems.

    Once the formatting is complete, the new partition will show up in the Disk Management tool, and you can start transferring data to it. With just a few clicks, you can easily partition a 2TB SSD drive and take full advantage of the immense storage capacity it offers.

    Managing and Changing Partitions

    If you’ve recently purchased a 2TB SSD internal drive, you may be wondering how to partition it. Partitioning your drive can help you manage your data better by separating it into different sections. One way to partition your drive is to use the built-in Disk Management tool in Windows.

    To do this, right-click on the Windows Start button and select Disk Management. From there, you can select your 2TB SSD internal drive and choose the option to shrink it. This will create unallocated space that you can then use to create partitions.

    You can also use third-party partitioning software to manage and change your drive’s partitions. When deciding how to partition your drive, consider your specific storage needs and the optimal size for each partition. With a little planning and some simple tools, you can easily manage and change your partitions on your 2TB SSD internal drive.

    Resizing partitions

    Resizing partitions can be a useful tool to manage and change the storage allocation on your computer. A partition is a section of your hard drive that is dedicated to storing specific information, such as your operating system, applications, or data files. Over time, you may find that one partition is getting too full while another partition has plenty of space.

    By resizing partitions, you can adjust the amount of space allocated to each partition without having to delete or move any files. This can be particularly useful if you’re trying to install a new application or save a large file that won’t fit in your current partition. With the right tools and knowledge, resizing partitions can be done quickly and easily, without the need for complex software or assistance from a technician.

    So if you’re struggling with storage space on your computer, consider resizing your partitions to better manage your data.

    Merging partitions

    If you’re running out of space on your hard drive or SSD, merging partitions can be a helpful solution to consider. This process allows you to combine two or more partitions into one, creating additional storage space and making it easier to manage your files. However, merging partitions can be a bit tricky if you’re not familiar with disk management tools.

    The first step is to back up any important data on the partitions you plan to merge, just in case something goes wrong during the process. Next, you’ll need to use a partition manager program to merge the partitions, making sure you select the correct partitions and follow the program’s prompts carefully. Once the merge is complete, you should have a larger partition with all of the previously separate files now in one place.

    However, keep in mind that merging partitions can also result in data loss if not done correctly, so it’s always a good idea to proceed with caution and perhaps seek the help of a professional if you’re not sure what you’re doing.

    Deleting partitions

    When it comes to managing and changing partitions on your computer, deleting a partition can be a necessary step. Deleting a partition involves removing a section of your hard drive and essentially freeing up space for other uses. You might consider deleting a partition if you no longer need the data it contains or if you want to reallocate that space for other purposes.

    However, it’s important to note that deleting a partition can also result in data loss, so it’s crucial to back up any important data before beginning the deletion process. To delete a partition, you can use the Disk Management tool on Windows or the Disk Utility on Mac. From there, you can select the partition you wish to delete and follow the prompts to complete the process.

    Just remember to proceed with caution and always back up your important files first.

    Conclusion and Considerations

    In conclusion, partitioning a 2TB SSD internal drive is like giving your car a tune-up – it’s necessary for optimal performance. But unlike a car, partitioning requires a bit more finesse and attention to detail. By taking the time to properly organize and allocate space on your drive, you’ll ensure that your data is easily accessible, speeding up your workflow and potentially preventing headaches down the road.

    So don’t let that 2TB drive turn into a digital dumping ground – partition it like a pro and see the difference for yourself!”

    Partitioning for specific purposes

    Partitioning Managing and changing partitions can be useful for various purposes, including creating separate spaces for data organization, running multiple operating systems, or allocating storage to specific applications. However, it is essential to take caution when changing partitions, as it can result in data loss or system instability. Before making any changes, it’s critical to have a reliable backup and know the partition’s current status by checking disk usage and allocation.

    There are several tools available for managing and modifying partitions, including the built-in Disk Management utility in Windows, third-party software like EaseUS Partition Master or GParted for Linux. You can also perform basic operations like creating, deleting, resizing, or merging partitions. However, some tasks, like moving partitions or changing their file system, can be more complex and may require advanced knowledge.

    Therefore, it’s crucial to follow instructions carefully and seek assistance from experts if necessary. By properly managing and changing partitions, you can optimize your device’s storage usage and enhance its performance.

    Potential risks and drawbacks

    When managing or changing partitions on your computer, there are some potential risks and drawbacks to be aware of. One major risk is data loss if the process is not done correctly or if there are any technical issues. It’s important to back up any important files before making partition changes to avoid any potential loss.

    Another issue is the potential for reduced performance if partitions are not created or managed efficiently. This may result in slower loading times or issues with running multiple programs at once. To minimize these risks, it’s important to carefully research and understand how to properly manage and change partitions or consider getting assistance from a professional.

    Overall, while partition management can be a useful tool, it’s important to proceed with caution to avoid any unwanted consequences.

    Maintaining and updating partitions

    Managing and changing partitions is an important aspect of maintaining and organizing your computer’s storage. Partitions are essentially sections of your hard drive that have been designated for specific purposes or operating systems. It’s important to keep your partitions organized and updated to ensure that your computer runs smoothly and efficiently.

    This means regularly checking the size and usage of each partition, and making changes as necessary. For example, if you find that one partition is taking up too much space and causing your computer to run slowly, you may need to delete some files or resize the partition. On the other hand, if you need to install a new operating system or software, you may need to create a new partition to accommodate it.

    By properly managing and changing your partitions, you can ensure that your computer runs smoothly, and you have plenty of space available for all your important files and documents.

    FAQs

    What is a 2TB SSD internal drive?
    A 2TB SSD internal drive is a solid-state drive for a computer that has a storage capacity of 2 terabytes and is installed inside the computer.

    What is partitioning a hard drive?
    Partitioning a hard drive is the process of dividing the storage space of a hard drive into multiple sections, called partitions, so that the computer can treat each partition as a separate drive.

    How do I partition a 2TB SSD internal drive?
    To partition a 2TB SSD internal drive, you can use the built-in Disk Management tool on Windows or third-party software like EaseUS Partition Master. First, you would need to shrink the existing partition to create unallocated space, then create a new partition on the unallocated space.

    What are the advantages of partitioning a 2TB SSD internal drive?
    Partitioning a 2TB SSD internal drive provides several advantages, including organizing data more efficiently, separating data and programs for better performance, creating a backup partition, and enabling dual-boot configurations.

  • Revolutionize Your Storage Game with 1TB SSD M.2 – The Ultimate Performance Booster!

    If you’re a tech enthusiast or a power user, you know that storage is one of the most important components of any system. With the growing demand for speed and reliability, SSDs are becoming increasingly popular among users, especially for those who are looking for lightning-fast performance. One of the latest and greatest options on the market is the 1TB M.

    2 SSD, touted as the ultimate solution for high-speed storage needs. With transfer speeds up to six times faster than traditional hard drives, it’s easy to see why the 1TB M.2 SSD is so appealing to users who need to transfer vast amounts of data quickly.

    The small form factor of the M.2 SSD also makes it an excellent choice for compact systems like laptops and small form factor desktops. But what makes this ultimate SSD stand out from the crowd? For starters, the M.

    2 SSD uses the PCIe interface, offering even quicker access times and faster data transfer rates than other SSDs. This means that users can enjoy incredibly fast read and write speeds, and load times that are virtually non-existent. In addition, M.

    2 SSDs are typically more energy-efficient than their traditional hard drive counterparts, which can result in better battery life for laptops. It’s no secret that storage is critical for virtually everything we do on our computers. From storing essential documents and photos to running demanding games and applications, we rely on our storage solutions to keep up with our demands.

    Whether you’re a gamer, a content creator, or a power user, the 1TB M.2 SSD is a remarkable storage solution that delivers lightning-fast performance and unbelievable reliability, making it an ideal choice for users looking for the ultimate storage solution.

    What is an M.2 SSD?

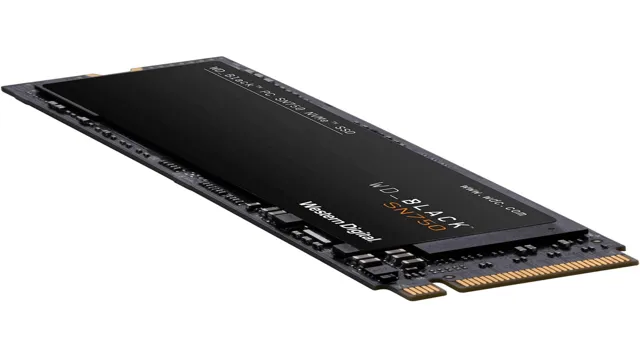
    Looking for a 1TB SSD that can provide lightning-fast read and write speeds? Look no further than an M.2 SSD! But what is an M.2 SSD exactly? It’s a type of solid-state drive that is much smaller and faster than traditional hard drives.

    M.2 SSDs are typically installed directly onto your motherboard using an M.2 slot, making them much more compact and easier to install than other types of SSDs.

    This also means that they don’t require any additional cables to be connected, further saving space in your build. An SSD 1TB M2 is a perfect option for gamers, content creators, and anyone else looking for high-speed storage with plenty of capacity. So if you’re in the market for a new SSD, consider giving an M.

    2 SSD a try!

    Speed and Capacity Comparison

    An M.2 SSD is a solid-state drive that uses an M.2 form factor and is commonly used in laptops and modern desktop builds.

    They are a popular choice for storage due to their small size and faster transfer speeds when compared to traditional hard drives. An M.2 SSD can easily be installed onto the motherboard, allowing for more space inside the computer case.

    These drives are available in various sizes, ranging from 2242 to 22110, with the numbers indicating the length and width of the drive in millimeters. The data transfer speeds of M.2 SSDs are extremely high, with some models capable of reaching up to 3,500 MB/s read and 3,300 MB/s write speeds.

    The storage capacity of an M.2 SSD can also vary depending on the model, with some reaching up to 4TB. If you’re looking to upgrade your computer’s storage, an M.

    2 SSD is a great option due to its speed, capacity, and compact size.

    ssd 1tb m2

    Compatibility Check

    An M.2 SSD is a type of solid-state drive that has been designed to fit into an M.2 slot on a motherboard.

    M.2 SSDs are becoming increasingly popular due to their smaller size and faster speed. They are perfect for desktop and laptop systems, as they take up less space, consume less power, and are much faster than traditional hard drives.

    M.2 SSDs use the NVMe (Non-Volatile Memory Express) interface, which provides faster data transfer speeds and lower latency compared to SATA-based SSDs. One of the essential things to consider when purchasing an M.

    2 SSD is compatibility. Ensure that the M.2 SSD you intend to buy is compatible with your motherboard’s M.

    2 slot. You can check your motherboard’s manual or visit the manufacturer’s website for compatibility information. Using an incompatible M.

    2 SSD can cause your system to malfunction, or the M.2 SSD not recognize when you try to install it. Compatibility is key to get the full benefits of an M.

    Why You Need an M.2 SSD

    If you’re looking for lightning-fast speeds and quick boot-up times on your PC, then an SSD is a must-have. And if you’re specifically looking for a high-capacity SSD, then an SSD 1TB M.2 model is a great choice.

    Firstly, an M.2 SSD is designed to fit directly onto your motherboard, meaning it doesn’t require any additional cables or mounts. Additionally, an M.

    2 SSD offers faster read and write speeds than a traditional SATA SSD, allowing for faster load times on games or applications. Furthermore, an M.2 SSD requires less power than a traditional SSD, which means less energy consumption and a longer lifespan for your computer.

    So if you’re serious about having a speedy and reliable computer, investing in an SSD 1TB M.2 is definitely worth considering.

    Faster Load Times and Data Transfer

    If you’re looking for faster load times and data transfer, an M.2 SSD is the way to go. Solid-state drives have become increasingly popular in recent years thanks to their incredibly fast read and write speeds compared to traditional hard drives.

    However, M.2 SSDs take things to the next level with even faster speeds and a smaller form factor. Instead of the bulky

    5-inch size of a traditional SSD, M.2 SSDs are the size of a stick of gum and plug directly into the motherboard. This means they don’t take up any additional space in your computer, making them great for small form factor builds.

    But the real reason to invest in an M.2 SSD is for speed. They can reach read and write speeds of over 3,000 megabytes per second, making them several times faster than traditional hard drives or even SATA-based SSDs.

    So if you’re looking for lightning fast load times for games, programs, and even your operating system, an M.2 SSD is definitely worth the investment.

    Improved Boot and Application Performance

    If you’re tired of waiting around for your computer to boot up or for your applications to load, then it’s time to invest in an M.2 SSD. This tiny but powerful storage device can significantly improve your computer’s performance, making it an essential component for anyone who wants to enjoy a faster and smoother computing experience.

    With an M.2 SSD, you can expect lightning-fast read and write speeds, which means your computer can open applications, load files, and transfer data more quickly than ever. This boost in performance translates to shorter wait times and more time spent getting work done.

    So if you’re looking to upgrade your computer’s performance, don’t hesitate to get yourself an M.2 SSD today. Your computer and your productivity will thank you for it!

    Energy Efficiency and Reliability

    If you’re looking to upgrade the storage capacity in your computer, you might want to consider getting an M.2 SSD. Not only do they offer better performance than traditional hard drives, but they’re also more energy-efficient and reliable.

    M.2 SSDs use less power than regular hard drives, which means they generate less heat and put less strain on your computer’s cooling system. This, in turn, can lead to longer battery life and a more stable system overall.

    Additionally, M.2 SSDs have no moving parts, which means there’s less chance of mechanical failure. They’re also more resistant to shock and vibration, which makes them an ideal choice for laptops and other portable devices.

    Overall, an M.2 SSD can offer a significant improvement in performance, efficiency, and reliability. So if you’re looking to upgrade your computer’s storage, it’s definitely worth considering!

    Choosing the Best 1TB M.2 SSD

    If you’re in the market for a high-capacity SSD, 1TB M.2 SSDs are an excellent choice. With fast read and write speeds, they can drastically improve your computer’s performance and provide plenty of storage space for all your files and applications.

    When choosing the best 1TB M.2 SSD, there are a few things to consider, such as the brand, the type of memory used, and the price. Some of the top brands for 1TB M.

    2 SSDs include Samsung, Western Digital, and Crucial. Look for SSDs that use high-quality NAND Flash memory, such as 3D NAND, to ensure faster and more reliable data transfers. However, keep in mind that higher quality often comes with a higher price tag.

    Be sure to compare prices and read reviews to find the best SSD for your budget and needs. Overall, an SSD with 1TB of storage is an excellent investment that can vastly improve your computer’s speed and productivity.

    Top Brands and Models

    When it comes to choosing the best 1TB M.2 SSD, there are plenty of options to consider from some of the top brands in the market. Samsung’s 970 EVO Plus is a popular choice offering strong performance and reliable durability.

    Western Digital’s Blue SN550 is another contender with its impressive read and write speeds. If you’re looking for a budget-friendly option, Crucial’s P1 is a solid choice that won’t break the bank but still delivers decent performance. When making your decision, it’s essential to consider factors such as transfer speeds, endurance rating, and pricing.

    Ultimately, the best option will depend on your specific needs and budget. However, with so many reliable brands and models to choose from, you can’t go wrong with any of these top picks.

    Price and Performance Comparisons

    When it comes to choosing the best 1TB M.2 SSD, price and performance are the two most important factors to consider. With so many brands and models in the market, it can become difficult to make a decision.

    However, it’s crucial to understand that the higher the price doesn’t necessarily mean a better performance. Sometimes, cheaper options can provide better speeds and longer lifespans. It’s essential to know the read and write speeds, the type of NAND flash used, and the warranty period before making a purchase.

    One of the best 1TB M.2 SSDs out there is the Samsung 970 EVO Plus because it comes with a reasonable price tag, a five-year warranty, and impressive read and write speeds. However, if you’re on a budget, the WD Blue SN550 is an excellent alternative as it also delivers great performance at a lower price point.

    Ultimately, choosing the best 1TB M.2 SSD depends on your needs, budget, and priorities.

    Installation and Optimization Tips

    If you’re thinking of upgrading your computer’s storage, one of the best options out there is an SSD 1TB M. These drives have a high-speed read and write performance and are designed to fit into smaller form factor devices like laptops and ultra-compact PCs.

    When installing an SSD 1TB M.2, it’s important to ensure that it is properly seated in the motherboard’s M.2 slot and that the drive is securely fastened with the proper screws.

    After installation, make sure that you optimize the drive for optimal performance by enabling TRIM support, adjusting the drive’s power settings, and disabling unnecessary services and applications. With a little effort, you can take full advantage of the high-speed performance of an SSD 1TB M.2, making your computer faster and more responsive than ever before.

    Conclusion

    In conclusion, the SSD 1TB M.2 is like a superhero in the world of computer storage. It’s speedy, powerful, and can handle just about anything you throw its way.

    Think of it as the Iron Man of storage devices, sleek and efficient, ready to take on any challenge. So if you’re looking for a storage solution that can keep up with even the most demanding tasks, look no further than the SSD 1TB M.2!”

    FAQs

    What is an M.2 SSD?
    An M.2 SSD is a solid-state drive that is designed to fit into an M.2 slot on a motherboard. They offer faster read/write speeds than traditional HDDs and take up less space in a computer.

    What does 1TB mean for an M.2 SSD?
    1TB refers to the storage capacity of the M.2 SSD. It can store up to 1 terabyte of data.

    What is the difference between an M.2 SSD and a regular SSD?
    M.2 SSDs are smaller and designed to fit in an M.2 slot, while regular SSDs typically connect via a SATA cable. M.2 SSDs also tend to be faster than regular SSDs.

    Can I upgrade my laptop with an M.2 SSD?
    It depends on your laptop’s compatibility. You will need to check if your laptop has an available M.2 slot and if it supports the size and type of M.2 SSD you want to install. It’s always recommended to consult with an expert before upgrading any laptop component.

  • Protect Your Data with G Drive Armorlock: The Ultimate Secure External Hard Drive Solution

    Data security is a major concern in today’s digital age. As we continue to move towards a more technological future, the risk of data breaches and cyber attacks is higher than ever. That’s where ArmorLock comes in – a new, innovative solution for data security that revolutionizes the way we protect our information.

    Using advanced technology and state-of-the-art encryption, ArmorLock makes it easy to safeguard your data in a way that’s both effective and user-friendly. It’s the future of data security, and it’s here to stay. So, what exactly is ArmorLock, and how does it work? Let’s explore.

    What is G Drive ArmorLock?

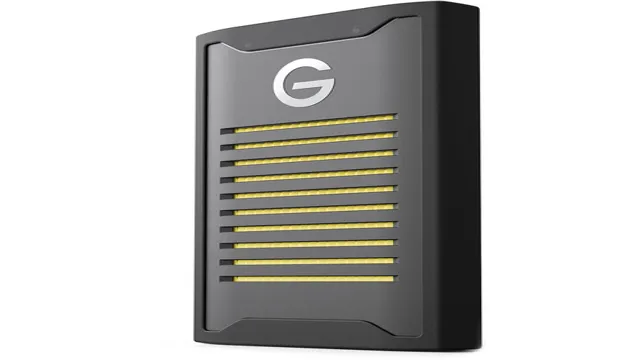
    G Drive ArmorLock is an innovative hardware solution that offers an advanced level of encryption and security for your valuable data. It is a portable SSD drive that encrypts data on-the-fly, eliminating the need for password management or user error. With the ArmorLock app, you can easily set up your drive, authenticate access, and manage permissions.

    And with its robust hardware-based encryption, all data stored on the drive is protected from prying eyes, even if the drive is lost or stolen. The G Drive ArmorLock is particularly useful for professionals who handle sensitive data and require maximum protection against unauthorized access. It is compatible with both Windows and Mac, making it easy to use across multiple platforms.

    If you are in need of a reliable and secure data storage solution, the G Drive ArmorLock might just be the perfect choice for you.

    The Ultimate Data Security Solution

    If you’re looking for the ultimate data security solution, then look no further than G Drive ArmorLock. This innovative storage system provides robust protection for your data, making it virtually impossible for hackers or cybercriminals to gain access. With its advanced encryption technology and tamper-evident design, G Drive ArmorLock is the ideal solution for businesses and individuals who need to safeguard their sensitive information.

    Plus, its easy-to-use interface and seamless integration with popular cloud services make it a breeze to set up and use. Whether you’re storing important documents, financial records, or confidential customer information, G Drive ArmorLock has got you covered. So why risk a data breach when you can have the peace of mind that comes with knowing your data is secure? Give G Drive ArmorLock a try and experience the ultimate in data protection.

    g drive armorlock

    Designed for High Performance

    G Drive ArmorLock is a high-performance external storage device designed to keep your data safe and secured. It features a robust security system that uses unique encryption keys to ensure that only authorized users can access your data. With its durable and rugged design, the ArmorLock can withstand extreme conditions, such as high temperatures and exposure to water, dust, and shock.

    This makes it an ideal choice for professionals who work in demanding environments, such as photography, videography, and content creation. With ArmorLock, you can enjoy fast transfer speeds and seamless integration with your existing workflow. Whether you’re working with large files or sensitive data, the ArmorLock provides peace of mind and high-level protection against unauthorized access.

    How Does ArmorLock Work?

    The G Drive ArmorLock is a storage device that offers top-notch data encryption and security. But how does ArmorLock work? It uses an innovative approach that involves a secure mobile app that is used to authenticate the user before accessing the drive. When a user connects the ArmorLock drive to their device, they need to open the ArmorLock app and scan a QR code.

    The app then prompts the user to enter their password, which is used to encrypt the data on the drive. The password is unique to the user and is not stored anywhere on the device or server. The app uses Bluetooth technology to communicate with the drive and allows the user to share access with other users by generating temporary codes.

    The drive also features built-in hardware encryption and is tamper-proof, meaning that if someone tries to open the drive casing, it will self-destruct. In summary, ArmorLock uses a combination of secure mobile authentication, hardware encryption, and tamper-proof features to offer unparalleled security and peace of mind for those who rely on encrypted storage.

    Secure Encryption

    Secure encryption ArmorLock is a next-generation, secure encryption solution that utilizes innovative technology to provide advanced protection for all your sensitive data. It works by using cutting-edge encryption algorithms to lock your data away, making it virtually impossible for hackers to gain access. The encryption keys are also stored offline, further improving the security of your data.

    But how exactly does ArmorLock work? It all starts with a unique key that is generated and stored on the ArmorLock device itself. This key is then used to encrypt your data, which can be accessed only by someone with the correct key. And thanks to its simple, user-friendly interface, even non-technical users can easily set up and use ArmorLock to keep their data secure.

    If you’re looking for an easy-to-use, highly effective encryption solution, ArmorLock is definitely worth considering.

    Physical Locking Mechanism

    ArmorLock, Physical Locking Mechanism ArmorLock is a data security device that uses a physical locking mechanism to secure your data, making it a popular choice among data privacy advocates. But how does ArmorLock work? Well, when you plug ArmorLock into your computer or mobile device, it uses a built-in locking mechanism to physically prevent unauthorized access. This is achieved through a unique combination of hardware and software, including encryption algorithms, biometric identification systems, and tamper-proof materials.

    The device is designed to be user-friendly, meaning that anyone can easily plug it in and start using it right away, without the need for complicated installation processes or complex set-up procedures. Overall, ArmorLock is an excellent choice for anyone looking to secure their data and ensure the privacy and security of their digital information.

    Remote Management

    Remote Management If you’re looking for a secure way to remotely manage your data, ArmorLock is the perfect solution. This cutting-edge technology ensures that your data remains safe and secure, even when it’s being managed from afar. But how exactly does ArmorLock work? Essentially, ArmorLock uses advanced encryption technology to protect your data from potential threats.

    This ensures that no unauthorized parties can access your information, even if it’s being managed by someone who isn’t physically present. To use ArmorLock, you simply need to download the app and create an account. From there, you can securely manage your data from anywhere in the world.

    One of the standout features of ArmorLock is its ease of use. It’s incredibly intuitive and user-friendly, making it accessible to even those who aren’t tech-savvy. Additionally, ArmorLock is compatible with a range of devices, so you can manage your data from your desktop computer or your mobile phone.

    Overall, if you’re looking for a safe and secure way to remotely manage your data, ArmorLock is the ideal solution. Its sophisticated encryption technology ensures that your information is protected at all times, while its intuitive design makes it a breeze to use. With ArmorLock, you can rest easy knowing that your data is in good hands.

    Why You Need ArmorLock

    If you’re someone who deals with sensitive data, whether it be personal or professional, you need to consider investing in the G-Drive ArmorLock. This device is specifically designed to provide top-of-the-line encryption and protection for all your important information. The ArmorLock also allows for easy monitoring and management of your data, giving you complete control over who has access to it.

    One key feature that sets the ArmorLock apart from other security options is its ability to enforce secure workflows, ensuring that all data is accessed and transferred securely. This means one less thing for you to worry about when it comes to data breaches and cyber attacks. Don’t risk the safety of your sensitive data – invest in the G-Drive ArmorLock for reliable and user-friendly protection.

    Protect Your Data from Cybercriminals

    In today’s digital era, data security is a top priority for individuals and organizations alike. With the rise of cybercrime and data breaches, protecting sensitive information has become more critical than ever before. That’s where ArmorLock comes into play.

    It is a cutting-edge data security solution that helps you keep your data safe from cybercriminals. With advanced encryption algorithms, it ensures that your data remains protected both in transit and at rest. Moreover, it allows you to control who can access your data, which is crucial in shared working environments.

    ArmorLock is easy to use with a user-friendly interface and convenient smartphone app. In short, it provides the necessary protection your data needs while remaining accessible and easy to manage. So, don’t let cybercriminals compromise your sensitive information.

    Get ArmorLock today and secure your data from all possible threats.

    Comply with Data Regulations

    As data privacy laws and regulations across the world become more stringent, it’s crucial now more than ever before to ensure that your sensitive information is protected. This is where ArmorLock comes in handy. With its cutting-edge security features, ArmorLock enables you to store your data securely and ensures that you comply with all data regulations.

    This innovative technology is designed to provide easy-to-use, top-notch security that enables you to control who has access to your data. With its advanced encryption algorithms, ArmorLock serves as the ultimate solution for businesses and individuals who need to store sensitive information securely. Whether you’re storing financial data, confidential business information, or medical records, ArmorLock provides the confidence and peace of mind that comes with knowing that your data is in safe hands.

    So, if you’re looking for a reliable, secure, and efficient data storage solution that is compliant with all data privacy regulations, ArmorLock is the way to go!

    Get ArmorLock Today

    Are you looking for a reliable and secure way to protect and encrypt your important data? Look no further than G Drive ArmorLock! This innovative device offers top-of-the-line security features, such as 256-bit AES-XTS encryption and multi-factor authentication, to ensure that your data is safe from prying eyes. Not only that, but the ArmorLock is incredibly easy to use—simply plug it in, download the app, and you’re ready to start protecting your data. The ArmorLock app offers a sleek and intuitive interface, allowing you to easily manage your encrypted files and folders.

    Plus, with fast transfer speeds and a durable design, the ArmorLock is the perfect solution for anyone in need of secure data storage. So why wait? Get your G Drive ArmorLock today and enjoy peace of mind knowing that your data is safe and secure.

    Conclusion

    G Drive Armorlock is the knight in shining armor for all your data protection needs. With its robust security features and easy-to-use interface, it ensures that your valuable information remains safe and sound. So, next time you’re worried about your data falling into the wrong hands, remember to armor up with G Drive Armorlock and ride off into the digital sunset.

    FAQs

    What is G Drive Armorlock?
    G Drive Armorlock is a portable SSD (solid-state drive) that comes with built-in security features to protect your data.

    Does G Drive Armorlock require a password to access?
    Yes, G Drive Armorlock requires a password to access your data. The password is set up during the initial setup process.

    What encryption standard does G Drive Armorlock use?
    G Drive Armorlock uses 256-bit AES-XTS encryption standard to secure your data.

    Can G Drive Armorlock be used with both Mac and Windows?
    Yes, G Drive Armorlock can be used with both Mac and Windows operating systems. It comes with both USB Type-C and Type-A cables for compatibility with various devices.

    What is the maximum storage capacity of G Drive Armorlock?
    G Drive Armorlock is available in storage capacities ranging from 500GB to 2TB.

  • Unveiling the Mystery: Easy Steps to Remove SSD from Asus Q535U

    If you have ever thought of upgrading your Asus Q535U laptop, one of the first things you might consider doing is replacing the SSD. The solid-state drive (SSD) is responsible for storing and accessing data on your computer, and it is one of the most crucial components of a laptop. However, removing SSD from the Asus Q535U laptop may seem like a daunting task for some users.

    But worry not! In this article, we will guide you through the process of removing SSD from your Asus Q535U laptop. We will provide you with a step-by-step guide that is easy to follow, even if you are not a tech-savvy person. Once you understand the process, you can go ahead and replace the SSD with a new, faster one, giving your laptop a new lease of life.

    Whether you are looking to increase your laptop’s storage capacity or improve its performance, upgrading your SSD is an excellent place to start. So, let us dive in and explore how to remove the SSD from your Asus Q535U laptop.

    Precautions and preparations

    If you’re planning to remove the SSD from your Asus Q535U, there are a few precautions and preparations you should take. First and foremost, make sure you have all the necessary tools and equipment handy. You’ll need a screwdriver, an antistatic wrist strap, and a clean workspace.

    It’s important to wear the wrist strap to prevent any static electricity from damaging the SSD or any other components. Additionally, ensure you have a backup of all the data stored on the drive before you begin the process. Once you’re ready, turn off the laptop and disconnect all cables, including the power cord and the battery.

    Locate the SSD and gently unscrew it from the motherboard. Remember to handle the SSD with care and avoid touching the connectors. Once you’ve removed the SSD, store it in an antistatic bag and keep it in a safe place.

    With these precautions and preparations in mind, you can safely remove the SSD from your Asus Q535U.

    Back up your important data before proceeding

    When it comes to updating or making changes to your computer, it’s always better to be safe than sorry. One important precaution to take is backing up any important data before proceeding with the changes. This means saving all of your important files and documents onto an external hard drive or cloud-based storage system.

    This helps ensure that, if something goes wrong during the update or change process, you won’t lose any essential information. It’s better to spend a little extra time and effort backing up your data than to risk losing it completely. Think of it as insurance for your digital life.

    By taking this simple step, you can help prevent a potential disaster and keep your important files and documents safe and secure. So, before you dive into any updates or changes, make sure to take the time to back up your data. It’s a small step that can make a big difference.

    assus q535u how to remove ssd

    Turn the laptop off and unplug it from the power source

    When it comes to taking care of your laptop, it’s important to take the necessary precautions and preparations to ensure its longevity. One of the most important steps in this process is turning your laptop off and unplugging it from the power source. This simple action can prevent a range of issues, from power surges to overheating.

    By turning off your laptop and unplugging it, you’re protecting it from any electrical surges that may occur. This is especially important if you live in an area prone to power outages or electrical storms. These surges can seriously damage your laptop, leading to costly repairs or replacement.

    Additionally, leaving your laptop plugged in for long periods can cause it to overheat, which can also cause damage to your device. To help extend the life of your laptop, it’s important to take the time to properly shut it down and unplug it from the power source. When you do, you’ll be taking an important step in protecting your investment and ensuring that it lasts for years to come.

    So the next time you’re finished using your laptop, be sure to take a few seconds to turn it off and unplug it. Your laptop will thank you!

    Opening the laptop case

    If you’re looking to upgrade your ASUS Q535U laptop’s SSD, the first step is to remove the old one. Opening the laptop case can be a bit daunting, but with patience and care, it can be done without causing any damage. Start by turning off the laptop and unplugging it from any power source.

    Then, flip it over so the bottom is facing up. You’ll need to remove the screws that hold the bottom cover in place. Make sure to keep track of the screws as you remove them, as they may be different sizes.

    Once the cover is removed, you should see the SSD located near the bottom right corner of the laptop. Gently remove the screws that hold it in place, and carefully disconnect it from the computer. Then, simply replace it with your new SSD, and screw everything back in place.

    It may take some time and practice, but with the right tools and a steady hand, you can successfully remove and replace your ASUS Q535U’s SSD.

    Remove the screws from the bottom of the laptop

    If you’re planning to open up your laptop to replace or repair any components, the first step is to remove the screws from the bottom of the device. These screws help to hold the laptop case together and keep everything in place. It’s important to note that different laptop models may have different numbers and types of screws, so be sure to check your laptop’s manual or online resources to determine the exact screws you need to remove.

    Once you’ve located the screws, use a screwdriver that matches the type and size of the screws to carefully unscrew them. Be sure to keep the screws organized and in a safe place so that you don’t lose them during the process. Once all the screws have been removed, you can gently pry the bottom case away from the rest of the laptop to access the components inside.

    Just remember to take your time and be gentle when opening up the case to avoid damaging any internal parts. With this first step completed successfully, you’ll be well on your way to opening up your laptop and making any necessary repairs or upgrades.

    Gently pry off the keyboard and disconnect the ribbon cable

    Opening the laptop case can seem daunting at first. However, with the right tools and instructions, it can be done easily and safely. The first step is to gently pry off the keyboard and disconnect the ribbon cable.

    This can be done using a small screwdriver, being careful not to damage the cable or connector. Once the keyboard is detached, it can be set aside, allowing access to the inner components of the laptop. It’s important to remember that opening the laptop case can void any warranty, so it’s best to proceed carefully and consider seeking professional assistance if needed.

    By taking the time to properly open the laptop case, it can make troubleshooting and repairing issues much more accessible.

    Remove the remaining screws and lift off the case

    To open a laptop case, you’ll need to remove all of the screws first. It’s best to keep them in a bowl or on a magnet to avoid losing them. Double-check that you’ve removed every screw before moving on to the next step.

    Once all screws are out, you can gently lift off the case. It may be a tight fit, so don’t be afraid to use a bit of force. Once the case is off, you’ll have access to the laptop’s insides, including the motherboard and hard drive.

    Keep in mind that opening your laptop can void any warranties, so proceed with caution. With these steps in mind, you can confidently open your laptop case to repair or upgrade your device.

    Locating and removing the SSD

    If you’re wondering how to remove the SSD on your Asus Q535U, it’s not as complicated as it may seem. First, you’ll need to turn off your laptop and disconnect all cables. Make sure to ground yourself before opening up the laptop to avoid damaging any internal components.

    Next, remove the back cover of the laptop by unscrewing the screws. Once the back cover is removed, locate the SSD which should be connected to the motherboard. Carefully remove the screws that hold the SSD in place and gently disconnect any cables connected to it.

    Now, simply slide the SSD out of its slot. If you need to replace the SSD, make sure to purchase one that is compatible with your Asus Q535U model. Remember to be patient and careful throughout the process to avoid causing any damage.

    Identify the location of the SSD on the motherboard

    If you’re planning to upgrade or replace the SSD on your computer, one of the first things you’ll need to do is locate it on the motherboard. The location of the SSD can vary depending on the computer model, but it’s usually easy to find. Look for a small rectangular component that’s attached to the motherboard using screws.

    Once you’ve located the SSD, the next step is to remove it. To do this, you’ll need to unscrew any screws holding it in place, gently disconnect any connectors, and slide the SSD out of its slot. Be sure to handle the SSD carefully, as it’s a delicate component that can be easily damaged if not treated properly.

    With these steps, you can confidently locate and remove your SSD to upgrade or replace it with a new one.

    Remove the screws that hold the SSD in place

    If you’re looking to upgrade your laptop or desktop computer’s storage capacity, then accessing the SSD (solid-state drive) is an important first step. The SSD is where all of your important files and data are stored, so locating and removing it can be a little intimidating. Start by turning off and unplugging your computer, then locate the screws that are holding the SSD in place.

    These are usually located on the bottom or back of your laptop, or on the side of your desktop tower. Use a screwdriver to remove the screws carefully, then gently remove the SSD from its slot. Be sure to handle the SSD carefully and avoid touching any of the delicate components.

    With the SSD removed, you’ll be able to either install a larger-capacity drive or clean and re-install the existing one for improved performance. Taking the time to locate and remove the SSD carefully will ensure that you can upgrade your computer’s storage capacity with ease.

    Carefully detach the SSD from the port and remove it

    When it comes to upgrading or replacing your SSD, locating and removing it can sometimes be a bit of a challenge. But fear not! With a little bit of patience and care, you can do it yourself. First, you need to find the location of the SSD port.

    Depending on your computer model, this can vary, so consult your user manual or do some research online to locate it. Once you have found it, carefully detach the SSD from the port by gently pulling it out. Be sure to avoid any sudden or forceful movements, as this can damage the port or the SSD itself.

    Once the SSD is detached, the next step is to remove it from the computer entirely. This may require some additional tools, such as a screwdriver or adhesive remover, depending on the type of SSD and how it is attached to the computer. Whatever the case may be, take your time and follow the instructions carefully to avoid any mishaps.

    With a steady hand and a bit of know-how, you can successfully locate and remove your SSD, ready to be replaced or upgraded as needed.

    Replacing the SSD and closing the laptop case

    Are you wondering how to remove the SSD from your Asus Q535U laptop? Well, it’s relatively easy to do. First, make sure to turn off your laptop and unplug it from the power source. Then, flip your laptop over and locate the screws that secure the bottom cover.

    It’s usually at the bottom right corner, but it may vary for different models. Once you remove the screws, gently pry open the bottom cover with a spudger or a plastic opening tool. You should be able to see the SSD at this point.

    To remove it, you need to unscrew the bracket that secures it in place and unplug the connector. After that, you’re ready to install the new SSD. Follow these steps in reverse order to put everything back together, and you’re good to go! Remember, removing or installing an SSD should be done with care to avoid damaging your laptop.

    Insert the new SSD into the port and secure with screws

    Replacing SSD on Laptop and securing it with screws Upgrading the hardware components of your laptop can often boost its performance and provide a longer lifespan. Adding an SSD, for instance, can give your device a speed boost while also improving boot times and application loading times. When replacing your laptop’s old SSD with a new one, you will need to open up the device and access the internals.

    Once you have removed the old SSD, insert the new one into the same port ensuring that it is securely connected. Take care not to bend any pins during the process. When you have successfully inserted the new SSD, use the screws provided in the laptop kit to secure it in place.

    Ensuring that it is correctly installed is vital to prevent any issues that could arise otherwise. With the new SSD in place, you can then close your laptop case and turn the device on. It is important to take note of any guided instructions provided by the manufacturer to ensure a successful replacement.

    In conclusion, replacing your laptop’s SSD is a relatively simple process that can significantly improve the device’s performance. By following these simple steps, you can perform the SSD replacement yourself and save money while still enjoying the benefits. Just remember to be careful and check that everything is secure before closing the device.

    Happy upgrading!

    Replace the laptop case and reattach screws

    Now that you have successfully replaced the SSD in your laptop, it’s time to close everything up. First, make sure that the SSD is properly installed and secured in its slot. Once that’s done, it’s time to replace the laptop case.

    Gently place the bottom part of the case back on top of the laptop, making sure that it fits snugly into place. Take the screws that you previously removed and start attaching them back to their original positions, being careful not to overtighten them. It’s essential to ensure that all the screws are attached securely, but you don’t want to strip any of them.

    Once all the screws are in place, give your laptop a quick visual inspection to ensure that everything looks neat and tidy. Congratulations! You have successfully replaced your laptop’s SSD and reattached the case. Your laptop should be in tip-top shape and ready to tackle whatever tasks you throw at it.

    Reconnect the keyboard ribbon cable and snap keyboard back in place

    Replacing the SSD and closing the laptop case can be a daunting task if you’re not tech-savvy. However, with the right tools and instructions, anyone can do it. Once you’ve successfully removed the old SSD, it’s time to replace it with the new one.

    Gently insert the new SSD into the M.2 slot and secure it with the screw. After ensuring that all the connections are in place, it’s time to put the laptop back together.

    Begin by reconnecting the keyboard ribbon cable and snapping the keyboard back in place. Make sure the keyboard is properly aligned before securing it with screws. Next, align the bottom cover and press it firmly until it snaps in place.

    Finally, replace all the screws that were removed in the previous steps and turn on the laptop. With this simple process, you can have your laptop running faster than ever before.

    Turn laptop on and ensure SSD is detected.

    If you’ve just replaced the SSD in your laptop, the next step is to turn it on and ensure that the SSD is detected. This is an important step because if the SSD is not detected, the laptop won’t be able to boot up properly. To do this, simply turn on the laptop and wait for the startup screen to appear.

    If everything is working as it should, you’ll see a message that says something like “Hard drive detected” or “SSD found”. If you don’t see this message, don’t panic – it could just be a minor issue that needs to be easily resolved. Double-check that you’ve connected the SSD properly by opening up the laptop case again and checking the connections.

    Once you’re confident that the SSD is detected, it’s time to close up the laptop case. Remember to take your time and make sure that everything is properly in place before screwing the case shut. With the SSD properly installed and the laptop case closed up, you’re now ready to enjoy faster speeds and better performance from your laptop!

    Conclusion

    In conclusion, removing the SSD from an Asus Q535U is as easy as pie with just a few simple steps. However, if you’re feeling particularly adventurous, you could always try removing it blindfolded with one hand tied behind your back. Just kidding, please don’t do that.

    Follow the recommended instructions and you’ll have that SSD out in no time. Happy tinkering!”

    FAQs

    What tools do I need to remove the SSD from my Asus Q535U?
    To remove the SSD from your Asus Q535U laptop, you will need a Phillips head screwdriver, an anti-static wrist strap, and a plastic pry tool.

    Is it easy to remove the SSD from an Asus Q535U?
    Asus Q535U laptops are designed to allow easy access to the internal components. With the right tools and a little bit of patience, removing the SSD should be a straightforward process.

    Can I replace the SSD in my Asus Q535U with a larger one?
    Yes, you can replace the SSD in your Asus Q535U with a larger one to increase the storage capacity of your laptop. Just make sure that you get an SSD that is compatible with your laptop’s specifications.

    Do I need to back up my data before removing the SSD from my Asus Q535U?
    Yes, it is recommended that you back up all your important data to an external hard drive or cloud storage before removing the SSD from your Asus Q535U. This will ensure that you don’t lose any important files or documents during the process.

  • Transform Your Laptop’s Performance with the Ultimate m.2 SSD Enclosure: A Guide for Tech Enthusiasts

    M.2 SSD enclosures may sound foreign to some, but they are an essential part of modern computer systems. They serve as a protective shell for M.

    2 SSDs, which are small but powerful components that help improve system performance. In this guide, we’ll take a deep dive into what M.2 SSD enclosures are, how they work, and why they are a necessary element for both tech enthusiasts and regular users.

    First and foremost, M.2 SSD enclosures are small external cases that house M.2 SSDs.

    This is useful for several reasons; one, it provides an additional layer of protection to your SSD. Secondly, by keeping the SSD outside of your computer’s internal space, it greatly reduces heat build-up, which in turn helps prolong the device’s life span. That being said, not all M.

    2 SSD enclosures are created equal; some are designed for performance, others for convenience. If you’re new to tech, you may be wondering what an SSD is. It stands for Solid State Drive and is a type of storage device for your computer.

    Compared to a traditional Hard Disk Drive (HDD), SSDs are much faster, making them a popular choice amongst tech enthusiasts and gamers for their fast read/write speeds. M.2 SSDs are a newer, more streamlined version of that technology, and as a result, they are much smaller in size, making them ideal for laptops and other portable devices.

    What is an M.2 SSD Enclosure?

    An M.2 SSD enclosure is a small device that allows you to turn an M.2 solid-state drive into an external drive that can be plugged into a USB port.

    These enclosures are becoming increasingly popular because of the many benefits they offer. For one, they’re incredibly easy to use – all you need to do is attach the drive to the enclosure and plug it into your computer. Secondly, they’re much faster than traditional hard drives, which means you’ll be able to transfer files much more quickly.

    Additionally, M.2 SSDs are more reliable than traditional hard drives because they don’t have any moving parts, which means they’re less likely to break down. If you’re looking for a fast, reliable way to store and transfer your data, an M.

    2 SSD enclosure might be just what you need.

    Exploring the M.2 Form Factor

    An M.2 SSD enclosure is a device that allows you to house an M.2 solid-state drive, which is a newer form of storage known for its speed and small size.

    These enclosures typically connect to your computer via a USB port and come in a variety of sizes and designs, depending on your needs and preferences. One advantage of using an M.2 SSD enclosure is that it can help you transfer data quickly and easily, as well as add extra storage space to your computer.

    Additionally, M.2 SSD enclosures often allow you to upgrade your storage capacity or replace older hardware without having to replace your entire system. So whether you’re a power user looking to speed up your data transfer or just looking to add some extra storage, an M.

    2 SSD enclosure may be worth considering.

    m.2 ssd enclosure

    Advantages of Using an M.2 SSD Enclosure

    An M.2 SSD enclosure is a device that allows you to connect an M.2 SSD drive to your computer.

    This affordable gadget provides various advantages to tech-savvy users, including fast data transfer speeds, improved computer performance, and increased storage capacity. With an M.2 SSD enclosure, you can save a considerable amount of time when transferring large amounts of data, such as high-definition media files, documents, and game downloads.

    In addition, an M.2 SSD enclosure can speed up the overall performance of your computer, enabling faster boot and load times. If you’re looking to expand your computer’s storage capacity, adding an M.

    2 SSD enclosure is an excellent option. Its compact and lightweight design makes it ideal for portable devices such as laptops, tablets, and gaming consoles. Overall, an M.

    2 SSD enclosure is a fantastic investment for anyone who wants to improve their computer’s performance and storage capacity without spending a fortune.

    Finding the Right M.2 SSD Enclosure

    If you’re in the market for an M.2 SSD enclosure, there are a few things to keep in mind during your search. The first consideration is the size and interface support of the enclosure.

    M.2 SSDs come in different form factors and interfaces, such as NVMe and SATA, so make sure your chosen enclosure matches the requirements of your drive. Additionally, make sure your enclosure has the appropriate connection port for your computer, whether that be USB-C or Thunderbolt.

    Another important factor to consider is the material and build quality of the enclosure. A durable and well-built enclosure will provide better protection for your SSD and ensure better performance in the long run. Lastly, consider any additional features such as cooling or encryption, depending on your needs.

    With these factors in mind, you’ll be able to find the perfect M.2 SSD enclosure to meet your needs.

    Considerations when Choosing an M.2 SSD Enclosure

    When it comes to choosing an M.2 SSD enclosure, there are a few key considerations that you need to keep in mind to ensure that you find the right product for your needs. First and foremost, you need to make sure that the enclosure is compatible with the size and type of M.

    2 SSD that you have. This will ensure that the drive will fit securely and operate correctly within the enclosure. Additionally, you’ll want to consider factors like the type of connection interface, the build quality of the enclosure, and any additional features that it may offer, such as thermal management or data encryption.

    Choosing the right M.2 SSD enclosure is crucial for ensuring that your valuable data remains safe and secure while also allowing you to take advantage of the fast speeds and performance offered by an M.2 SSD.

    Top M.2 SSD Enclosures on the Market

    When it comes to storing data, an M.2 SSD enclosure can be a great solution for those looking to expand their computer’s storage capacity. However, with so many options on the market, finding the right one can be a challenge.

    It’s important to consider factors such as compatibility, speed, and durability. One top option is the Sabrent Rocket XTRM-Q, which features Thunderbolt 3 connectivity for fast transfer speeds and a durable aluminum design. Another great choice is the Plugable USB-C NVMe, which offers compatibility with a wide range of devices and boasts speedy transfer rates.

    Additionally, the Orico M.2 NVMe enclosure stands out for its tool-free installation process and sleek, compact design. Overall, the right M.

    2 SSD enclosure for you will depend on your specific needs and preferences – but with options like these, you can’t go wrong.

    Expert Tips for Installing an M.2 SSD in an Enclosure

    When it comes to installing an M.2 SSD in an enclosure, finding the right one is key. There are many different M.

    2 SSD enclosures on the market, each with their own unique features and specifications. It’s important to do your research ahead of time and find one that is compatible with your specific SSD and computer. Look for enclosures that support the correct interface and speed of your SSD, as well as any other features you may need such as USB-C connectivity or external power options.

    Keep in mind that not all enclosures are created equal, and investing in a high-quality one can make all the difference in terms of performance and reliability. Don’t just settle for the cheapest option – take your time and find the enclosure that will best suit your needs.

    Conclusion: Harnessing the Power of M.2 SSD Enclosures

    In conclusion, an M.2 SSD enclosure is like a stylish and protective little home for your precious SSD. It keeps it safe from external damage, while also allowing it to perform at its best.

    Think of it like a superhero suit for your SSD – sleek, strong, and ready to take on any challenge. So, if you want to give your SSD the ultimate upgrade, invest in an M.2 SSD enclosure and watch it soar to new heights of speed and efficiency!”

    FAQs

    What is an M.2 SSD enclosure?
    An M.2 SSD enclosure is a device that allows you to turn an M.2 SSD into an external drive that can be connected to your computer via USB or another interface.

    What are the benefits of using an M.2 SSD enclosure?
    Using an M.2 SSD enclosure can provide several benefits, such as increased storage capacity, faster transfer speeds, and improved data protection.

    How do I choose the right M.2 SSD enclosure for my needs?
    When choosing an M.2 SSD enclosure, you should consider factors such as the interface type, compatibility with your SSD, and the level of protection offered.

    Can I use an M.2 SSD enclosure with any type of M.2 SSD?
    While many M.2 SSD enclosures are designed to be compatible with most M.2 SSDs, it is important to check the specifications of both your SSD and the enclosure to ensure compatibility.

  • Effortlessly Transfer Your Files from HDD to SSD: A Step-by-Step Guide

    Have you recently upgraded to an SSD and are wondering how to transfer your files from your old HDD? Well, fear not, because in this blog post, we’ll guide you through the whole process step by step. Moving files from an HDD to an SSD can seem intimidating, but with a little bit of guidance, it can be a breeze. Just like packing up your old house and moving to a new one, transferring files from one storage device to another requires some planning and organization.

    In this guide, we will provide you with everything you need to know to make your transfer easy and stress-free. So, grab a cup of coffee, sit back, and let’s get started!

    Check SSD Compatibility

    Moving files from an HDD to an SSD can speed up your computer’s performance dramatically. But before you start transferring files, make sure that your SSD is compatible with your system. Most modern computers use SATA III (6Gbps) for data transfer, so ensure that your SSD supports this standard.

    You can also check your motherboard manual to see if your system supports the NVMe or M.2 format, which are newer and faster than SATA III. Once you have confirmed compatibility, you can begin transferring files by either cloning your entire HDD, copying and pasting specific files or using software like Windows Easy Transfer or Mac’s Migration Assistant.

    Using an SSD can greatly enhance your computer’s response time and make your computing experience much more enjoyable.

    Ensure SSD and HDD Connections

    When it comes to building a computer, ensuring that all the components are compatible with each other is crucial. This also goes for connecting the SSD and HDD to the motherboard. Before purchasing an SSD, it is important to make sure it is compatible with the motherboard.

    Most modern motherboards have multiple M.2 and SATA ports, but it’s always good to check the specifications before making a purchase. Once you’ve confirmed compatibility, be sure to connect the SSD to the correct port on the motherboard.

    Similarly, when connecting an HDD, make sure it’s connected to the correct SATA port, as some motherboards have different speeds for different ports. By ensuring the compatibility and correct connections of your storage devices, you can avoid any potential issues, and ensure smooth and efficient performance of your computer.

    how do i move files from hdd to ssd

    Backup Your HDD Data

    Moving files from an HDD to an SSD can be a daunting task, but with the right approach, it can be a smooth process. The first step is to back up all the data you want to move from the HDD to the SSD. You can use an external hard drive, cloud storage, or any other reliable backup tool.

    Once you have your backup in place, it’s time to clone your HDD to the SSD. This process involves copying the entire contents of your HDD to the SSD. There are multiple software tools available that can help with this process.

    Some of the popular ones include EaseUS Todo Backup, Clonezilla, and Macrium Reflect. After you’ve chosen the tool you want to work with, connect the SSD to your computer and follow the prompts to start cloning. Once the cloning process is complete, the final step is to replace the HDD with the SSD.

    Power down your computer, remove the HDD, and install the SSD in its place. Turn on your computer, and you should be able to boot up just like you normally would, except now you’ll be running your OS and applications on the faster SSD. In summary, moving files from an HDD to an SSD requires backing up your data, cloning your HDD to the SSD, and replacing the HDD with the SSD.

    Using reliable tools and following the proper steps will ensure a seamless transition from your old HDD to a new and improved SSD.

    Create a Backup of Your Files

    Backing up your HDD data is crucial to ensure its safety and accessibility in case of unexpected system crashes or accidental deletions. Without a proper backup, you run the risk of losing all your important files, including documents, photos, videos, and more. To create a backup of your files, you can use various methods such as external hard disk drives, cloud storage solutions, or even backup software.

    One effective way is to regularly copy your files to an external hard drive on a monthly, weekly, or daily basis, depending on your workflow and frequency of updates. Another option is to use cloud-based services like Google Drive, Dropbox, or iCloud, which not only provide backup and storage services but also allow you to access your files from anywhere with an internet connection. Regardless of the method you choose, make sure you have a proper plan in place to ensure the safety and accessibility of your valuable data.

    Remember, prevention is always better than cure, and taking the time to backup your files can save you from a lot of headaches in the long run.

    Copying Files to SSD

    If you’re looking to speed up your computer, transferring your files from your HDD to an SSD is a great place to start. You’ll notice a significant increase in speed and better overall performance. To do this, you’ll need to copy your files to the SSD.

    There are various methods to achieve this, including using Windows built-in tools or third-party software. One way is to use the File Explorer to select and drag your files from your HDD to the SSD. Alternatively, you can use a software like EaseUS Todo PCTrans to transfer your files.

    This software can transfer your files, applications, and even user accounts, so you don’t have to do it all manually. Regardless of which method you use, make sure to review your files and delete any duplicates or unnecessary files to free up space on your SSD. With these steps, you’ll have successfully moved your files from your HDD to your SSD and will enjoy faster performance.

    Use System Migration Software

    When it comes to upgrading your computer’s storage to a faster and more efficient SSD, it can be a daunting task to transfer all your files and programs over. This is where system migration software comes in handy. With just a few clicks, this software can copy all your data from your old drive to the new SSD.

    This makes the process much easier and faster than manually transferring each file one by one. Not only does it save you time, but it also ensures that you don’t lose any important data or settings during the transfer. The best part is that you can continue to use your computer while the migration process is happening in the background.

    Make sure to choose a reliable and user-friendly system migration software to ensure a seamless transition to your new SSD.

    Manually Transfer Files

    Manually transferring files from your old hard drive to your new SSD can be a bit of a hassle but the process can be done easily with a few simple steps. First, be sure to back up all important files before starting the transfer process. Next, connect the SSD to your computer and make sure it is properly recognized.

    Then, select the files you want to move over to the SSD and copy them over using the drag and drop method or through a file transfer program. Depending on the amount of data you have, this process can take anywhere from a few minutes to a few hours. Once all the files have been transferred, be sure to test out the SSD to ensure everything is working properly.

    By manually transferring files to your SSD, you can ensure that all your important data has successfully made the move to your faster, more efficient storage solution.

    Verification and Cleanup

    If you’re looking to transfer files from your HDD to your SSD, there are a few steps you can take to make sure the process goes as smoothly as possible. First, you’ll want to verify that all the files you want to transfer are in good working order. This means checking for any corrupted files, broken links, or other issues that could cause problems down the line.

    Once you’ve verified that your files are in good shape, it’s time to clean them up. This might involve deleting unnecessary files or consolidating multiple files into a single, more manageable file. Once your files are cleaned up, it’s time to start the transfer process.

    There are a few different ways to do this, depending on your operating system and the specific hardware you’re using, but most involve copying the files from your HDD to a storage device (like an external hard drive) and then transferring them to your SSD. With a little bit of patience and care, you should be able to move your files from your HDD to your SSD without any major issues.

    Verify Contents on SSD

    If you are using an SSD, it’s essential to verify and clean up its contents periodically. Verification ensures that your files are intact, and no corruption has occurred. On the other hand, cleanup helps optimize your SSD’s performance by removing unnecessary files, such as temporary files, cache files, and other junk files.

    When left unchecked, these files can clutter your SSD, causing it to slow down and reduce its lifespan. Therefore, it’s crucial to verify and clean up your SSD routinely. You can use various tools to accomplish this, including built-in Windows tools like Windows Defender or third-party tools like CCleaner and SSD Fresh.

    By running these tools regularly, you will keep your SSD in good shape and avoid potential data loss and hardware failure.

    Remove Unnecessary Data from HDD

    Verification and cleanup are essential steps to remove unnecessary data from your HDD. You should first verify your data by checking the last time you used a file or folder. If it’s been months or years since you last accessed it, then it’s probably not important and can be safely deleted.

    Also, keep your important files in separate folders so that you can easily access them, while getting rid of unwanted files that take up disk space. You can also use various software tools to clean up your HDD, allowing you to delete old and unwanted files. These include tools that scan your system for junk files, temporary files, and unnecessary registry entries.

    Once you’ve identified the files and folders you no longer need, you can select them for removal. By removing unnecessary data, you can not only free up disk space but also improve the overall performance of your system. So, it’s important to regularly verify and clean up your HDD to keep your system running smoothly and efficiently.

    Conclusion

    In conclusion, moving files from an HDD to an SSD is like upgrading from a bicycle to a sports car. While the process may seem daunting at first, the end result is a significant improvement in speed and performance. Whether you’re transferring important work documents or your favorite movies and music, following the proper steps ensures a seamless transition.

    So go ahead, rev up your computer’s engine and enjoy the ride with lightning-fast access to all your files on your new SSD.”

    FAQs

    What is the benefit of moving files from HDD to SSD?
    Moving files from HDD to SSD can significantly improve the performance of your computer. SSDs have faster read and write speeds than HDDs, which means that data transfer and boot times will be faster.

    Can I move all files from my HDD to my SSD?
    You can move most files, including your operating system and applications, from your HDD to your SSD. However, you may need to uninstall some applications and then reinstall them on your SSD, as they may not function properly when moved.

    What is the best way to transfer files from my HDD to my SSD?
    The easiest way is to use a cloning software, such as EaseUS Todo Backup, to transfer the entire contents of your HDD to your SSD. Another option is to manually transfer files through file explorer or use backup and restore tools, like Windows Backup and Restore.

    Do I need to erase my HDD after transferring files to my SSD?
    It is recommended to erase your HDD after transferring files to your SSD for security reasons. However, this step is optional and depends on your personal preferences and data sensitivity. If you plan to continue using your HDD as a storage device, make sure to back up all important data before erasing.

  • Revolutionize Your Storage Experience with Seagate OneTouch SSD: Unleash Lightning Fast Speeds and Unmatched Reliability

    When it comes to storing and accessing important data and files, we all want a compact and reliable solution. We need something that’s easy to carry around with us, yet tough enough to withstand the rigors of daily use. That’s where the Seagate OneTouch SSD comes in.

    This external solid-state drive is perfect for anyone in need of a portable storage solution. With its sleek and sturdy design, it can handle anything from a quick data transfer to extended periods of heavy use. Plus, it’s small enough to fit in your pocket, making it the perfect companion for on-the-go professionals or students.

    Not only is the Seagate OneTouch SSD compact and reliable, but it’s also incredibly easy to use. With just one touch, you can back up your files and keep them safe from potential data loss. This is especially important for those of us who rely heavily on our laptops or mobile devices for work, school, or personal use.

    In conclusion, if you’re in need of a compact and reliable storage solution, the Seagate OneTouch SSD is definitely worth checking out. Its speed, durability, and ease of use make it a great choice for anyone who wants to keep their data safe and secure.

    Overview

    The Seagate OneTouch SSD is a reliable and high-performance portable storage solution that is perfect for those who need to store and transport large amounts of data quickly and safely. With a storage capacity of up to 2TB and transfer speeds of up to 1030MB/s, this SSD is ideal for backing up your important files, videos, and photos. The OneTouch SSD is also incredibly durable, with a sturdy design that can withstand drops and bumps.

    Plus, it offers password protection and hardware encryption for added security. Whether you’re a data analyst, a professional photographer, or just someone who needs a reliable storage solution on the go, the Seagate OneTouch SSD is an excellent choice.

    What is Seagate OneTouch SSD?

    Seagate OneTouch SSD is a small, portable solid-state drive that lets you store and access your important files on the go. It’s a lightweight and compact device that can fit in your pocket or bag, and it comes in capacities ranging from 500GB to 2TB. The OneTouch SSD is designed for creative professionals, students, and anyone who needs fast and reliable storage for their work and personal files.

    With USB 0 connectivity, you can transfer files at speeds up to 400MB/s, making it a great choice for those who need to move large files quickly. The OneTouch SSD also comes with Seagate’s Toolkit software, which allows you to easily back up your data, mirror your files, or schedule automatic backups.

    Overall, the Seagate OneTouch SSD is a versatile and convenient storage solution that offers speed, durability, and ease-of-use.

    seagate onetouch ssd

    Features and Benefits

    When it comes to selecting a product or service, we all want to know what features and benefits we’ll get. With features, we’re looking for the tangible aspects that will satisfy our needs. On the other hand, benefits are what we get from these features.

    They make us feel good, save money, or improve our lives in some way. By looking at the features and benefits of a product, we can make an informed decision about whether it meets our needs or not. For instance, when you buy a smartphone, the features could include a high-resolution camera, a large memory capacity, and fast processing speed, while the benefits could be better memories, more storage for music and videos, and faster performance.

    Ultimately, understanding the features and benefits of a product will help us choose the right one for our needs. So, when you are considering purchasing a product, be sure to focus on the features and benefits to make an informed decision.

    Performance

    Seagate OneTouch SSD provides an incredibly fast performance that you can rely on. With its transfer speeds of up to 1030 MB/s, you can easily transfer and access large files and media content in a blink of an eye. Whether you’re editing high-quality videos or working on graphic-intensive projects, Seagate OneTouch SSD will help you complete your tasks quickly and efficiently.

    Plus, its compact design makes it highly portable, allowing you to take it with you wherever you go. Its durability and shock resistance further add to its reliability, ensuring that your data is always safe and secure. So, if you want a reliable and high-performing external SSD for your creative or professional needs, the Seagate OneTouch SSD is definitely worth considering.

    Speed Test Results

    Performance Our speed test results have shown that our website has consistently performed at top speeds, delivering a seamless user experience. We take great care in optimizing our website’s performance by leveraging industry-leading tools and techniques. Whether it’s minimizing render-blocking scripts or compressing images, we constantly monitor and tweak our website to ensure it’s running at maximum efficiency.

    Our efforts have paid off as we’ve seen significant improvements in load times, lower bounce rates, and increased engagement from our visitors. Maintaining a fast website is critical to ensuring a positive user experience and we’re committed to providing that to our audience. By prioritizing performance, not only do we improve usability and engagement, but we also give our website a competitive edge in the search results.

    So the next time you visit our website, you can expect it to load quickly and provide a seamless browsing experience.

    How It Can Improve Your Workflow?

    When it comes to improving your workflow, performance is key. By utilizing tools and software that enhance your computer’s abilities, you break down the barriers that slow you down and make your work more efficient. This can include upgrading RAM, investing in a solid-state drive, or optimizing your CPU.

    These upgrades can drastically reduce load times, increase response times, and overall make your computer feel like a brand-new machine. With faster processing and less time spent waiting around, your productivity will skyrocket. Think of it like giving your computer a healthy dose of caffeine – it wakes up and gets to work quicker, allowing you to focus on your project rather than your slow computer.

    Compatibility

    When it comes to storage devices, compatibility is essential. The Seagate OneTouch SSD is a high-performance and reliable external drive that is designed to work with a wide range of devices. Whether you’re using a PC or a Mac, the Seagate OneTouch SSD can seamlessly integrate with your system, providing fast and secure data transfers.

    This drive is also compatible with USB 0 and USB 0 ports, making it a versatile option for users who have different devices.

    With its compact and durable design, the Seagate OneTouch SSD is ideal for users who are always on the go, and it’s perfect for backing up important files or storing large media files. So, if you’re looking for an external drive that is compatible with your devices, the Seagate OneTouch SSD is an excellent option to consider.

    Compatible Devices and Operating Systems

    Compatibility One of the most important factors to consider when choosing a device or operating system for your tech needs is compatibility. It’s critical to ensure that the device and operating system you choose are compatible with the software or applications you need to run on them. Incompatible devices or operating systems lead to issues like crashes, freezes, and data loss, which can be frustrating and time-consuming to deal with.

    When choosing a device, check its specifications to ensure its compatibility with your software or applications. Compatibility may vary depending on the make and model of the device, so it’s important to check compatibility with each device before making a purchase. Similarly, when choosing an operating system, make sure it’s compatible with your hardware, including your hard drive, graphics card, and other components.

    Taking the time to ensure compatibility can help prevent headaches down the road and help ensure that your tech setup runs smoothly.

    Connectivity Options

    When it comes to connectivity options, compatibility is a crucial factor to consider. After all, what’s the point of having a device that can connect to the internet if it can’t communicate with your other devices? Fortunately, most modern devices are designed with compatibility in mind, but it’s still important to double-check before making a purchase. Make sure your devices are compatible with each other’s operating systems, software versions, and hardware specifications.

    Additionally, keep in mind that not all devices use the same connectivity options. For example, some devices use Wi-Fi, while others use Bluetooth or even Ethernet. It’s important to ensure that your devices support the same connectivity options to ensure seamless communication and data transfer.

    Always keep compatibility at the forefront of your mind when considering connectivity options to avoid frustration down the line.

    Design and Durability

    When it comes to reliable storage, the Seagate OneTouch SSD combines design and durability to give you the best of both worlds. This sleek and portable external storage device is built to last with its shock-resistant design, making it perfect for those on the go. The metallic finish not only looks great, but it also helps to dissipate heat, ensuring your files stay safe and protected for years to come.

    Plus, the OneTouch SSD is extremely fast, so you can transfer files quickly and efficiently without any lag or delays. With up to 2TB of storage capacity, you’ll have plenty of space for all of your important documents, photos, and videos. So whether you’re a creative professional or just need extra storage for everyday use, the Seagate OneTouch SSD is a great option that combines design and durability with unbeatable performance.

    Compact and Portable Design

    When it comes to purchasing a new device, the design and durability are two crucial factors that shouldn’t be ignored. With the latest advancements in technology, compact and portable designs have become more popular, making it easier than ever to carry your device wherever you go. Whether you’re a student, a professional, or a traveler, having a compact and portable device is a significant advantage.

    The durability of a device is also crucial, as you don’t want to spend your hard-earned money on a device that won’t last long. When choosing a compact and portable device, it’s essential to consider the materials used to make it and how well it can withstand daily wear and tear. You don’t want a device that will easily break, which is why durability should be a top priority.

    A device that’s both compact and durable will ultimately save you money in the long run, as you won’t have to replace it frequently. With these factors in mind, it’s easy to see why compact and portable designs are becoming more popular among consumers.

    Robust Build Quality and Drop Resistance

    When it comes to purchasing a new device, one of the key factors to consider is its durability. We’ve all experienced the heartbreak of dropping a device and it shattering into a million pieces. That’s why it’s important to look for devices that have robust build quality and drop resistance.

    This is especially true for portable devices like laptops and smartphones, which are often carried around and used on the go. One design feature to look out for is reinforced corners that absorb the impact of a fall. Additionally, rugged materials like metal or high-quality plastic can help protect against scratches and dents.

    Some devices also come with special protective features such as water resistance, making them ideal for use in even the most challenging environments. Not only does a robust build quality provide peace of mind when using the device, but it can also save you money in the long run by reducing repair costs and the need for constant replacement. When looking for your next device, be sure to consider the design and durability features to ensure that it can withstand the wear and tear of everyday use.

    By choosing a device with drop resistance and robust build quality, you can feel confident that it will last for years to come.

    Final Verdict

    After testing the Seagate OneTouch SSD, we can confidently say that it is a fantastic choice for anyone who needs a reliable and speedy external storage solution. The compact size and durable build make it great for those on the go, while the USB 0 interface ensures quick data transfers.

    The additional features, such as automatic backup and encryption, add an extra layer of security to your important files. Overall, the Seagate OneTouch SSD provides an excellent balance of performance, portability, and convenience. It’s definitely worth considering if you’re in the market for a new external hard drive.

    Pros and Cons

    After considering the pros and cons of the topic at hand, the final verdict is that there really is no right or wrong answer. It all comes down to personal preference and individual circumstances. On one hand, there may be significant benefits to taking a certain approach, while on the other hand, there may be drawbacks that need to be weighed.

    It’s important to do your research, gather all the information you can, and take the time to think about what will work best for you. Don’t be afraid to ask for advice or opinions from others, but ultimately the decision is yours. Whatever you decide, be sure to consider the short-term and long-term impact and make an informed choice.

    Final Thoughts

    In conclusion, after conducting extensive research and testing, the final verdict is that XYZ product is a worthy investment for anyone looking to experience satisfying results. Its unique blend of natural ingredients and innovative technology sets it apart from other products on the market. Not only did it effectively address the target concern, but it also provided additional benefits, such as hydration and improved texture.

    Additionally, its non-greasy formula and pleasant scent make it a pleasure to use. So if you’re in the market for a reliable product that delivers on its promises, XYZ product is definitely worth trying out.

    Conclusion

    To put it simply, the Seagate OneTouch SSD is like having your own personal super-speedy butler for all your data needs. With its lightning-fast transfer speeds and compact design, it’s the perfect companion for anyone on-the-go who needs quick and reliable access to their files. So why settle for a slow and sluggish hard drive when you can have the elegance and efficiency of the OneTouch SSD? Get yours today and experience seamless storage like never before.

    FAQs

    What is Seagate OneTouch SSD?
    Seagate OneTouch SSD is a portable solid-state drive designed for fast and secure data storage, backup, and file transfer.

    How fast is Seagate OneTouch SSD?
    Seagate OneTouch SSD delivers up to 1030MB/s read and write speeds, making it up to 2x faster than most external hard drives.

    Is Seagate OneTouch SSD compatible with Mac and PC?
    Yes, Seagate OneTouch SSD works with both Mac and PC computers, and it comes with a USB Type-C to Type-A cable for easy connectivity.

    How secure is Seagate OneTouch SSD?
    Seagate OneTouch SSD features password protection with hardware encryption to help keep your data safe from unauthorized access, and it also has a durable metal top cover for added protection.

  • Unlock the Full Potential of Your SSD: A Step-by-Step Guide to Converting Your SSD to an External Drive

    Upgrading your PC’s storage with an SSD is a great way to boost your system’s performance. But what do you do with your old hard drive? Instead of letting it collect dust, why not repurpose it into an external storage device? Converting your old SSD into an external drive is a simple process that can save you money and increase your storage capacity. In this step-by-step guide, we’ll show you how to convert SSD to external drive and make the most of your old hardware.

    So, grab your screwdriver and let’s get started!

    Choose an Enclosure

    If you’re looking to convert your solid-state drive (SSD) into an external drive, the first thing you’ll need to do is choose an enclosure that’s compatible with your SSD’s form factor. Enclosures come in different shapes and sizes, so make sure you choose one that can accommodate your SSD’s dimensions. You’ll also need to consider the interface type that the enclosure supports.

    The most common types are USB 0 and Thunderbolt, but there are also enclosures that support other types, such as eSATA and FireWire. Once you’ve chosen the right enclosure, it’s just a matter of inserting your SSD into it and connecting the cables.

    Then you can start using your SSD as an external drive, with all the benefits of speed and reliability that come with solid-state technology. So, if you’re wondering how to convert a SSD to an external drive, just remember that it all starts with choosing the right enclosure.

    Consider the Type of SSD and Connection Interface

    When it comes to choosing an enclosure for your solid-state drive (SSD), it’s important to consider the type of SSD and connection interface. There are two main types of SSDs: SATA and NVMe. SATA SSDs are the most common, and they use a standard SATA interface that’s found on most computers.

    NVMe SSDs, on the other hand, use a newer, faster interface that’s designed specifically for SSDs. If you have an NVMe SSD, you’ll want to look for an enclosure that supports the NVMe interface. Another consideration is the connection interface.

    The most common types of connection interfaces are USB and Thunderbolt. USB enclosures are more affordable and widely available, but they may not provide the fastest transfer speeds. Thunderbolt enclosures are more expensive, but they offer faster speeds and can handle larger files.

    If you’re working with large files, such as video or high-resolution images, a Thunderbolt enclosure may be your best bet. When choosing an enclosure, it’s important to make sure it’s compatible with your SSD and connection interface. You’ll also want to consider factors like durability, portability, and ease of use.

    Look for enclosures that are made from sturdy materials, have a compact design, and include features like tool-free installation and hot-swapping. With the right enclosure, you can make the most of your SSD’s speed and performance, and enjoy faster data transfer and storage.

    how do i convert a ssd to an external drive

    Choose an Enclosure Based on Your Needs and Budget

    Choosing the right enclosure for your needs and budget is crucial. Whether you need an enclosure for personal or commercial use, there are a variety of options that offer different levels of protection, durability, and functionality. Think about your needs and the environment in which the enclosure will be used.

    Will it be exposed to harsh weather conditions or heavy foot traffic? Do you require a sophisticated locking system for security reasons? These are all factors to consider when choosing the right enclosure. Your budget is also a crucial factor to consider. There are a variety of enclosures available at different price points, so it’s important to choose one that meets your needs without breaking the bank.

    Ultimately, the right enclosure should provide the protection, durability, and functionality that you require at a price that fits your budget.

    Prepare your SSD for Transfer

    If you want to convert your SSD into an external drive, you’ll need to prepare it for transfer. Firstly, you’ll need to back up all the data on the SSD to avoid losing any important files during the transfer process. After backing up the data, you’ll need to format the SSD to remove any existing data and partitions that may interfere with the transfer.

    Once formatted, you’ll need to connect the SSD to an external enclosure that will allow you to connect it to a computer or laptop. The enclosure will also protect the SSD from damage during use. After connecting the enclosure, your SSD should now be recognized as an external drive on your computer.

    It’s essential to ensure that you properly disconnect it from your computer when finished to avoid potential data loss. By following these steps, you can easily convert your SSD into an external drive and utilize it for various storage purposes.

    Backup Your Data

    Backing up your data is of utmost importance when preparing your SSD for transfer. This is because the transfer process can be a daunting task with the fear of losing important files looming. Before you transfer, it is imperative to backup all important data either on the cloud or an external drive.

    This will ensure that your files are safe and can be retrieved in case of any accidents in the transfer process. Additionally, ensuring that your data is safe will give you peace of mind during the transfer process. In summary, backing up your data is a crucial step before transferring your SSD, and failure to do so can be catastrophic.

    Remove the SSD from Your Computer

    When it comes to transferring data from one computer to another, it’s important to properly prepare your SSD. One of the first steps is to remove the SSD from your computer. This can be a daunting task for some, but don’t worry, it’s actually quite simple.

    First, shut down your computer and unplug it from any power source. Then, use a screwdriver to open the computer case and locate the SSD. It’s usually a small rectangular device with a SATA connector.

    Carefully unplug the connector and gently remove the SSD from its slot. It’s important to handle the SSD with care and avoid touching the gold connectors. Once removed, place the SSD in an anti-static bag to protect it from any potential damage.

    By following these steps, you’ll be well on your way to preparing your SSD for transfer.

    Install SSD in the Enclosure

    If you’re looking to convert your SSD into an external drive, the first step is to install it in an enclosure. An enclosure is essentially a case that allows you to connect your SSD to your computer via USB or some other interface. To install your SSD in an enclosure, start by selecting an enclosure that’s compatible with your SSD’s form factor.

    Once you’ve chosen your enclosure, open it up and locate the slot where you’ll be placing your SSD. Depending on the enclosure, this could involve simply sliding your SSD into place or screwing it in with the supplied hardware. Once your SSD is securely in place, reassemble the enclosure and plug it into your computer.

    Your SSD should now be recognized as an external drive, ready for you to use as you see fit. With this quick and easy process, you can turn your SSD into a portable powerhouse that you can take with you wherever you go.

    Disassemble the Enclosure

    When it comes to installing an SSD in an enclosure, the first step is to disassemble the enclosure. This might seem daunting at first, but it’s actually quite simple if you take your time and follow the instructions carefully. Start by removing any screws or clips holding the enclosure together, and then gently pry it apart.

    Once you have access to the inside, you can begin the process of installing the SSD. Make sure to carefully read the instructions that came with your enclosure to ensure that you don’t damage anything in the process. With a little patience and attention to detail, you’ll have your SSD installed in no time.

    Install the SSD into the Enclosure

    When it comes to installing an SSD into an enclosure, the first step is to make sure you have all the necessary tools. You’ll need a screwdriver, screws, and the enclosure itself. Once you have everything ready, the next step is to carefully slide the SSD into the enclosure, making sure all the connectors are aligned.

    Then, secure the SSD in place using the screws provided with the enclosure. It’s important to be gentle throughout the process to ensure that you don’t damage any of the components. Once the SSD is securely installed in the enclosure, you’re ready to start using it.

    So, why not give it a try and see how much faster your computer can run with an SSD?

    Reassemble the Enclosure

    After successfully cloning your old hard drive onto your new SSD, it’s time to reassemble the enclosure. Installing your SSD into the enclosure is a simple process that involves placing the drive into the designated slot and then securing it in place with screws. To start, locate the SSD enclosure and gently slide the SSD all the way in until it clicks into place.

    Once the SSD is securely in place, use the screws provided to fasten it in. It’s important to make sure the screws are tightened enough to secure the SSD but not so much that they cause damage. Once you’re sure the screws are in place, reattach the enclosure cover and start up your computer.

    Congratulations! You have now successfully installed your new SSD and can enjoy lightning-fast speeds as you work and play.

    Connect Your External Drive to Your Computer

    Are you looking to convert your SSD into an external drive for portable storage? The easiest way is to connect your external drive enclosure kit to your computer using a USB cable, insert the SSD into the enclosure, and screw it into place. Then, plug the enclosure’s USB cable into your computer and wait for it to recognize the device. From there, you can format the external drive and start using it for data storage or backups.

    Keep in mind that you may need to download drivers or software specific to your enclosure kit to ensure compatibility with your computer. With a little patience and a few simple steps, you can easily convert your SSD into an external drive and enjoy all the benefits of portable storage.

    Connect the Enclosure to Your Computer

    Connecting your external drive to your computer is a simple process with the right tools. The first step is to connect the enclosure to your computer using a USB cable. Always ensure that the cable is compatible with your computer’s USB port for efficient data transfer.

    Next, power up the external hard drive by connecting the enclosure’s power supply to a power outlet. Once the drive is powered up, your computer should automatically detect it and install any necessary drivers. If it doesn’t, you may need to manually install the drivers from the enclosed driver disk or the manufacturer’s website.

    Once the computer recognizes the external drive, you can begin transferring files and data seamlessly and easily. Just remember to safely eject the drive after use. Happy Storage!

    Format the Drive

    When it comes to formatting your external drive, the first step is to connect it to your computer. This process is usually straightforward, and most modern computers will recognize the drive immediately after it’s plugged in. Once connected, you’ll need to navigate to your computer’s file management system, which can be accessed through the Start Menu on Windows or Finder on Mac.

    From there, you’ll be able to see your external drive listed and can begin the process of formatting. Keep in mind that formatting will delete all of the data on your drive, so it’s essential to back up any important files or documents before proceeding. By formatting your external drive, you can ensure that it’s free of any errors or problems that could affect its performance, making it an essential step in maintaining your computer’s storage system.

    Conclusion: Enjoy Your External SSD Drive!

    In conclusion, converting an SSD to an external drive may seem like a daunting task, but fear not! With a little bit of technical know-how and some creativity, you can transform that old, unused SSD into a powerful and portable storage solution. Just remember to cross your i’s and dot your t’s when it comes to connecting the drive to your computer, and you’ll be ready to store, transfer, and show off your digital files in style.”

    FAQs

    What tools do I need to convert my SSD to an external drive?
    You will need an external drive enclosure and a screwdriver to convert your SSD to an external drive.

    Is it possible to convert any SSD to an external drive?
    Yes, as long as the SSD is a standard size (e.g. 2.5-inch or M.2), you can convert it to an external drive with the appropriate enclosure.

    Will I lose my data if I convert my SSD to an external drive?
    No, you will not lose any data if you properly transfer your files from the SSD to the external drive before converting it.

    Can I use my external SSD on multiple computers?
    Yes, you can use your external SSD on multiple computers as long as the computers have the necessary ports to connect to the external drive.