Author: David L. Lynn

  • A Step-by-Step Guide: Upgrade Your PC with SSD by Replacing the Old HDD

    Are you fed up with your snail-paced computer? Do you want to boost the speed of your computer without having to buy a brand new one? Then, swapping out your HDD for an SSD could be the solution to your problems! Here’s a quick guide on how you can change your HDD to SSD and get a faster and smoother experience on your computer. An HDD (hard disk drive) is a traditional storage device that uses spinning platters and a mechanical arm to read and write data, while an SSD (solid-state drive) uses flash memory to store data. SSDs are faster, more durable, and less prone to failures than HDDs, making them a popular upgrade option for many computer users.

    Switching from an HDD to SSD can be a great way to refresh an old computer, making it run much faster and smoother. If you’re considering upgrading, this guide will take you through the process step-by-step, from selecting the right SSD to copying your files and reinstalling your operating system. With this guide, you’ll learn everything you need to know about swapping out your old HDD for a new, faster SSD, and you’ll be able to do it all by yourself without seeking professional help.

    Read on to find out how to switch from HDD to SSD in a few simple steps – your computer will thank you for it!

    Determine Compatibility

    If you’re looking to upgrade your computer’s storage system from an HDD to an SSD, the first thing you need to do is determine if your computer is compatible with an SSD. One easy way to do this is to check the specifications of your computer’s motherboard. Look for SATA ports, which are essential for connecting an SSD.

    Most modern motherboards will have SATA III ports, which are necessary for achieving the maximum speed benefits of an SSD. Additionally, you should check the physical dimensions and mounting options of your computer’s hard drive. SSDs come in different sizes and form factors, so make sure you choose one that fits your computer’s specific requirements.

    Overall, upgrading to an SSD is a great way to improve your computer’s speed and performance, but you’ll want to make sure you do your research and confirm compatibility before making the switch. So, how do I change my HDD to an SSD? By ensuring compatibility with your computer first and then physically swapping out your hard drive for the new SSD.

    Check Your Laptop or Desktop

    When it comes to upgrading your laptop or desktop, it’s crucial to first determine compatibility before making any purchases. While some components may seem like they will work with your device, there could be certain specifications or limitations that could cause issues. One way to check compatibility is to look up the specifications of your device, either through the manufacturer’s website or by looking at the manual that came with your device.

    This will give you a detailed list of the components that your device can support. It’s also important to consider the space available in your device for any new components, as well as any power requirements they may have. By taking the time to check compatibility, you can avoid any potential compatibility issues and ensure that you get the most out of your device.

    So before upgrading or purchasing any components, be sure to do your research and determine compatibility first.
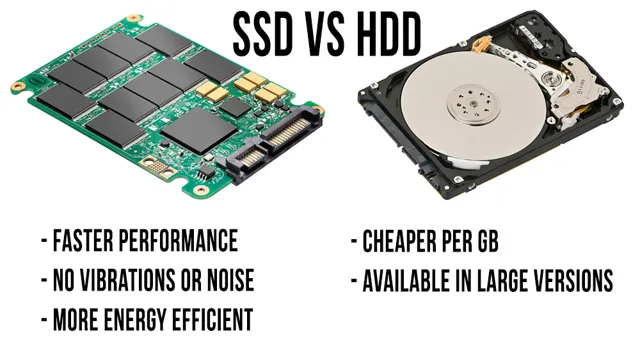
    how do i change my hdd to a ssd

    Confirm SSD Specs

    When it’s time to upgrade or replace your computer’s hard drive, it’s important to ensure that the new solid-state drive (SSD) is compatible with your system. To determine compatibility, it’s essential to check the SSD’s specifications. Start by looking at the form factor and interface of your current hard drive.

    Most modern systems use the SATA (Serial ATA) interface, but some may require different types like NVMe or PCIe. Check your computer’s motherboard manual or contact the manufacturer if you’re unsure. The SSD’s storage capacity is another important factor to consider.

    You don’t want to get an SSD that’s too small, as you might run out of storage quickly, but you also don’t want to overspend on storage that you don’t need. It’s essential to get the right balance. Finally, pay attention to the SSD’s read and write speeds, which are essential for fast and efficient performance.

    With these factors considered, you can select the perfect SSD that meets your needs and ensures compatibility with your computer system.

    Prepare for the Upgrade

    If you’re tired of your computer running slow or just need more storage, upgrading your HDD to a SSD may be the answer. Before you begin, it’s important to back up all your important files to an external drive. Once you have them safe, you can turn off your computer and unplug it.

    Open it up and locate the HDD by removing the panel or the cover. Remove the power and data cables that are connected to the HDD and carefully take it out of its slot. Next, install the SSD in the same slot and connect the necessary cables.

    Lastly, turn on your computer and check if the SSD is detected by the system. If it is, go ahead and install your operating system and software on the SSD. By following these steps, you can easily change your HDD to a SSD and give your computer a new lease on life.

    Back Up Your Data

    Before upgrading your technology, it’s crucial to back up your data. This may seem like a hassle, but trust me, it’s much better than losing all your important files and documents! There are a variety of ways to back up your data, such as using an external hard drive or backing up to the cloud. Personally, I like to use both methods just in case one fails.

    It’s also important to make sure you’re backing up everything, not just specific folders or files. Take the time to review all your data, including photos, music, and documents, and make sure everything is accounted for. By taking these steps to prepare for the upgrade, you can have peace of mind knowing your data is safe and secure.

    Gather the Necessary Tools

    When it comes to upgrading your system, it is important to gather all the necessary tools beforehand. This includes checking the compatibility of your new hardware with your existing system, acquiring the appropriate cables and connectors, and ensuring you have the necessary software and drivers. It’s also crucial to have the right physical tools, such as a screwdriver set and antistatic wrist strap, to avoid damaging your equipment.

    Before starting the upgrade process, you should take the time to familiarize yourself with each tool and its purpose to ensure a smooth and successful upgrade. Remember, a little preparation can go a long way in making the upgrade process hassle-free.

    Shutdown Your Device

    If you’re planning to upgrade your device, the first step is to shut it down properly. This may seem like a no-brainer, but it’s important to remember that simply pressing the power button may not be enough. Depending on your device’s operating system, there may be a specific process for shutting down that ensures all open applications and processes are properly closed before power is cut to the device.

    It’s also a good idea to backup any important data on the device before shutting it down, just in case something goes wrong during the upgrade process. By properly shutting down your device, you can ensure that the upgrade goes as smoothly as possible and minimize the risk of any data loss or other issues.

    Replace HDD with SSD

    If you’re looking to switch out your old HDD with a brand new SSD, there are a few things you’ll need to keep in mind. First and foremost, it’s important to backup any important data or files before making any changes to your computer’s hardware. Once you’ve done this, you can begin the process of physically swapping out the old HDD for the new SSD.

    Make sure to turn off your computer and unplug it from any electrical outlets before opening it up. You’ll then need to locate the hard drive bay and unscrew it from your computer’s housing. Carefully remove the old HDD and replace it with the new SSD, making sure to connect any necessary cables and screws.

    Once everything is securely in place, you can power up your computer and begin the transfer of data from your backup to your new SSD. With a bit of patience and attention to detail, switching out your HDD for an SSD can greatly improve the speed and performance of your computer.

    Open the Case

    If you’re looking to give your computer a speed boost, swapping out your HDD for an SSD is a great way to go. To replace your hard drive with an SSD, you’ll first need to open up your computer case. Make sure to turn off your computer and disconnect any power cables before doing so.

    Once your case is open, locate your hard drive and disconnect any cables or screws holding it in place. Gently remove the HDD and set it aside. Next, insert your new SSD into the same slot and secure it with the necessary cables and screws.

    Finally, turn your computer back on and make sure everything is running smoothly. With your newly installed SSD, you should see significantly faster boot times and quicker file transfers. Don’t let a sluggish hard drive slow you down any longer – upgrade to an SSD today!

    Remove the HDD

    Replacing a traditional hard drive with a solid-state drive (SSD) is a great way to improve your computer’s performance. If you’re looking to make the switch, the first step is to remove the old HDD from your machine. To do so, you’ll need to first power down your computer and disconnect any cables or peripherals.

    Open up the case and locate the HDD, which is typically mounted on a bracket or secured with screws. Carefully remove the screws or release the bracket, taking care not to damage the surrounding components. Once the HDD is free, gently disconnect the data and power cables, being sure to free any retaining clips or tabs.

    With the old HDD removed, you can now install your new SSD in its place, using the same cables and mounting hardware. By swapping out your HDD for an SSD, you can enjoy faster boot times, quicker application launches, and improved overall system responsiveness.

    Install the SSD

    If you want to improve your computer’s performance, replacing the HDD with an SSD is a great way to do it. Installing an SSD is fairly easy and doesn’t require any advanced technical knowledge. First, you need to purchase an SSD that is compatible with your computer.

    Once you have the SSD, remove the back cover of your laptop and locate the hard drive. Depending on your laptop model, you may need to unscrew a few screws or remove the battery to access the hard drive. Carefully disconnect the hard drive and remove it from the laptop.

    Next, slide the SSD into the same spot where the hard drive was located. You may need to reinstall the screws or battery if you had to remove them. Finally, boot up your computer and go into the BIOS to check if your computer recognizes the new SSD.

    If it does, you’re good to go! Your computer will now be much faster and more responsive, allowing you to get more done in less time. Remember to back up your data before replacing your hard drive to avoid losing any important files.

    Reassemble and Boot Up

    So, you’ve decided to upgrade your computer’s hard drive to a speedy and efficient SSD – good call! Now, let’s walk through the steps to physically make the switch. Once you have your new SSD ready to go, power down your computer and disconnect all cables. Remove the cover of your computer case and locate the hard drive bay.

    You will need to unscrew the mounting bracket of the old HDD and remove it from the bay. Insert the new SSD into the same bay and secure it with the same screws. Reconnect any cables that were disconnected and replace the cover.

    Once your computer is reassembled, it’s time to boot up! Turn on your computer and press the key to enter the BIOS settings, usually F2 or Delete. Within the BIOS, set the new SSD as the primary boot device and save your changes. With the new SSD now the primary boot device, restart your computer one final time and you should be good to go! Enjoy your lightning-fast new SSD.

    Put Everything Back Together

    Once you’ve finished troubleshooting and fixing any issues with your computer, it’s time to put everything back together and get it up and running again. Start by reattaching any cables or wires that you may have disconnected during the process. Double-check that everything is properly connected before moving on to the next step.

    Then, carefully place the side panel back onto the computer case and secure it with the screws you removed earlier. Finally, it’s time to boot up your computer and make sure everything is working smoothly. Power on your computer and make sure you don’t encounter any error messages or issues during the startup process.

    If everything looks good, it’s time to celebrate! Your computer is now fully functional and ready to use once again. Remember to keep up with regular maintenance to avoid any future issues.

    Power On and Boot Up

    After disassembling and cleaning your computer parts, the next step is to reassemble and boot it up. Before proceeding, ensure that all components are firmly and correctly connected to their respective slots. Once you’re done, hit the power button to turn it on and wait for it to boot up.

    A series of checks and tests will be conducted, and you will see them go by on your screen. If everything goes well, you’ll soon be greeted with your computer’s home screen. In case there are any issues during the boot-up process, an error message will appear on the screen, signaling a problem with a particular component.

    A tip to keep in mind here is to remain patient, as the process might take a little longer than usual, depending on the computer’s age and hardware. So, grab a cup of coffee and wait for your computer to fully boot up.

    Final Steps and Tips

    So, you’ve decided to upgrade your old hard disk drive to a faster and more reliable solid state drive? Congrats, you’re about to experience a major improvement in your computer’s performance! Before you dive into the process, make sure to backup all important files and data onto a separate device or cloud storage. Once you’re ready, open up your computer’s case and locate the HDD bay. Carefully remove the old HDD and replace it with your new SSD, making sure it’s securely fastened.

    You’ll need to install a fresh operating system on your new drive, so have your Windows or Mac OS installation file ready. Follow the installation prompts and make sure your new SSD is properly formatted. Finally, install your apps and programs onto your new drive and enjoy lightning-fast speed! Remember, changing your HDD to an SSD might seem daunting, but with proper preparations and this step-by-step guide, you’re well on your way to a smoother, faster computing experience.

    Reinstall Your OS

    As you prepare to reinstall your operating system, there are a few final steps and tips to keep in mind. First, be sure to back up all of your important files and documents to an external hard drive or cloud storage service. This will ensure that nothing is lost during the installation process.

    Next, make sure you have a copy of your operating system on a USB drive or DVD. You will need this to install the OS on your computer. Once you have backed up your files and have your OS installation media ready, it’s time to begin the installation process.

    Follow the on-screen prompts and be patient, as the installation can take some time. Once the installation is complete, make sure to install any necessary updates and drivers for your computer’s hardware. Finally, take the time to customize your settings and install any necessary software or programs.

    These final steps will ensure that your newly installed OS is running smoothly and ready for use.

    Configure Your Settings

    After setting up your account, the next step is to configure your settings. This will ensure that you have control over how your profile looks, what notifications you receive, and who can see your content. One important setting to check is your privacy settings, which allow you to choose who sees your posts, and who can follow you.

    Additionally, you can enable two-factor authentication to enhance your account’s security. It’s also a good idea to customize your notifications, so you get alerts for what’s important, and not for every little thing. When it comes to choosing your display name and profile picture, make sure they’re professional and represent the image you want to convey.

    Lastly, take some time to explore the app and familiarize yourself with all the features it has to offer. By doing so, you’ll be able to make the most of your experience.

    Optimize Your New SSD

    If you’ve recently upgraded to an SSD, you’re probably already enjoying lightning-fast boot times and increased application speed. However, there are a few final steps that you can take to optimize your new drive further. The first step is to ensure that your firmware is up to date.

    Manufacturers regularly release firmware updates to improve performance and fix any bugs. Check the manufacturer’s website to see if there’s an update available for your drive. Another important consideration is your operating system’s power settings, which should be optimized for an SSD.

    Power settings can significantly affect performance, so make sure you’re using the right settings. Finally, remember that your SSD has a limited number of writes and erases, so it’s essential to minimize unnecessary writes. You can reduce writes by disabling hibernation, moving your paging file to a different drive, and avoiding defragmentation.

    By following these simple steps, you can maximize the performance and longevity of your new SSD.

    Conclusion

    Changing your HDD to an SSD is like swapping out a tired old horse with a sleek, speedy stallion. By upgrading your storage to an SSD, you’ll experience lightning-fast load times and a smoother computing experience overall. Don’t settle for sluggish performance when you can give your system the boost it deserves with this simple hardware upgrade.

    So, saddle up and switch to an SSD – your computer (and your sanity) will thank you!”

    FAQs

    Why should I upgrade my HDD to an SSD?
    An SSD is much faster than an HDD, meaning faster boot times, faster application launch times, and faster file transfer speeds. It can also improve overall system performance and responsiveness.

    Do I need to reinstall my operating system when upgrading to an SSD?
    It is recommended to reinstall the operating system on your new SSD, as it will ensure optimal performance. However, you can also clone your existing hard drive onto the SSD using specialized software.

    Are all SSDs compatible with my computer?
    You will need to check if your computer supports the interface and form factor of the SSD you want to install. For example, if your computer only supports SATA III, you can’t install an NVMe SSD.

    How much storage space do I need on an SSD?
    It depends on your usage and storage needs, but most people find 256GB or 512GB to be sufficient. If you have a large media collection or regularly work with large files, you may need more storage.
  • Upgrade your PC with ease: A comprehensive guide on how to add an SSD drive to your computer

    Upgrade your PC with ease: A comprehensive guide on how to add an SSD drive to your computer

    Are you tired of your computer running slow and taking forever to load programs? Adding an SSD to your PC could be the solution you’ve been looking for. An SSD, or solid-state drive, can significantly speed up your computer’s boot and load times, as well as improve overall performance. It’s like giving your computer a boost of energy, allowing it to handle more tasks and run more smoothly.

    In this blog, we’ll explore the benefits of adding an SSD to your PC and provide some tips on how to do it.

    Check if your PC supports NVMe or SATA SSDs

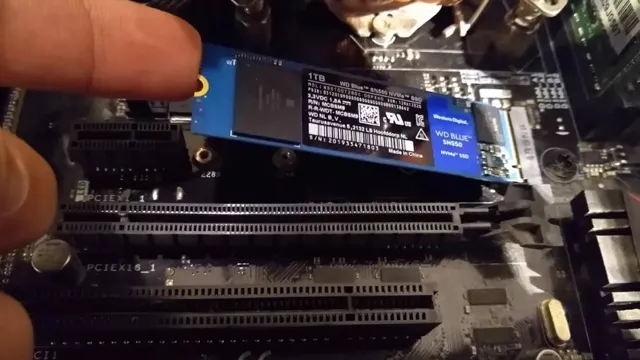
    If you’re looking to upgrade your PC’s storage by adding an SSD drive, the first thing you’ll need to know is if your system supports NVMe or SATA SSDs. NVMe SSDs are newer and faster, while SATA SSDs are more common and affordable. To check which type your PC supports, you can look up the specifications for your motherboard or check the manual.

    If you’re not sure how to do this, you can also use a system information tool like CPU-Z or Speccy. These programs can provide detailed information about your system, including the type of SSD interface your motherboard has. Once you know which type of SSD your PC supports, you can choose an SSD that fits your needs and budget and install it according to the manufacturer’s instructions.

    With an SSD installed, you’ll be able to enjoy faster boot times, quicker program launches, and improved overall system performance.

    Find your PC’s motherboard specifications

    If you’re looking to upgrade your PC’s storage, the first step is to check if your motherboard supports NVMe or SATA SSDs. NVMe SSDs are faster than SATA SSDs, but they require a motherboard that supports the NVMe protocol. To find out if your motherboard supports NVMe, you can look up its specifications online.

    One way to do this is to look at the manual or user guide that came with your PC or motherboard. You can also use a system information tool like CPU-Z or Speccy to find out what kind of motherboard you have and its specifications. Once you have identified your motherboard, you can check its specifications to see if it supports NVMe SSDs.

    If it does not support NVMe, you can still use a SATA SSD to upgrade your storage. SATA SSDs are more widely available and are still quite fast, though not as fast as NVMe SSDs.

    how do i add a ssd drive to my pc

    Purchase the appropriate SSD

    If you’re looking to add an SSD drive to your PC, the first step is to purchase the appropriate SSD. There are a few factors to consider when selecting an SSD for your system. The first thing you’ll want to do is make sure that the SSD is compatible with your motherboard and that your system can support it.

    Once you’ve checked compatibility, you should consider the size of the SSD. An SSD with at least 256GB of storage is recommended, but you may want to opt for a larger drive if you plan to store a lot of files or programs on it. Additionally, you should consider the speed of the SSD, as a faster drive will improve load times and overall system performance.

    With these factors in mind, you’ll be able to select an SSD that meets your needs and is compatible with your system, allowing you to enjoy the benefits of faster storage and improved performance. So, how do you add an SSD drive to your PC? Keep reading to find out!

    Consider storage capacity and speed

    When choosing an SSD, it’s important to consider both the storage capacity and speed. You want to make sure you have enough storage to hold all of your files and programs, while also ensuring fast and efficient performance. The right SSD will depend on your specific needs, so it’s important to do your research before making a purchase.

    One option is to choose an SSD with a high storage capacity, such as 1TB or more, to ensure you have plenty of space for everything you need. Additionally, you’ll want to consider the read and write speeds of the SSD. Look for an SSD with high read and write speeds, since this will ensure that your computer runs smoothly and programs load up quickly.

    In the end, choosing the right SSD can take some time and effort, but it’s worth it for the benefits it can bring to your system.

    Back up your data

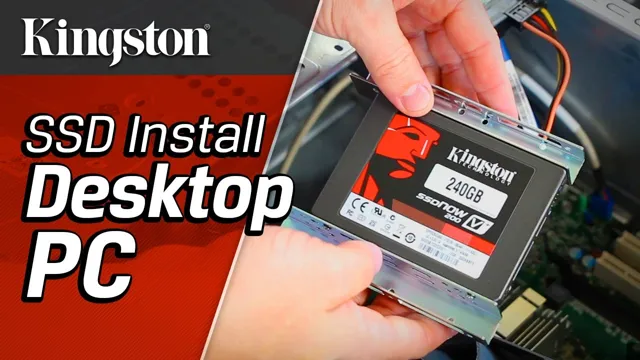
    If you’re looking to add an SSD drive to your PC, it’s a fairly straightforward process. First, you’ll need to make sure your computer has an available SATA port and a power connector for the drive. Then, you’ll need to physically install the SSD into your computer – this typically involves opening up your computer case, finding an available drive bay, and securing the SSD in place using screws.

    Once the physical installation is done, you’ll need to initialize and format the drive in order to begin using it. This can typically be done through your computer’s built-in disk management tools. The benefits of adding an SSD to your PC are numerous – you’ll experience faster boot times, faster application launches, and smoother overall performance.

    And since SSDs have no moving parts, they’re generally more reliable and durable than traditional hard drives. So if you’re looking to speed up your computer and add some extra storage space, consider adding an SSD drive to your PC.

    Use an external hard drive or cloud storage

    Backing up your data is an essential step in protecting your important files from loss. One way to do this is by using an external hard drive or cloud storage. An external hard drive is a physical device that you connect to your computer to store data.

    It’s easy to use and can hold large amounts of data. Cloud storage, on the other hand, is an online service that enables you to store, share, and access your files from anywhere with an internet connection. It’s a great solution for those who want to safeguard their data from theft, damage, or loss.

    By using either of these options, you can create a duplicate copy of your files and keep them safe in case something goes wrong with your primary storage device. With an external hard drive or cloud storage, you won’t have to worry about losing your important files – they’ll always be available when you need them. Start backing up your data today to avoid the headache of losing important files.

    Install/Connect the SSD to the PC

    If you want to give your PC a speed boost, adding an SSD drive is an excellent way to do it. Thankfully, the process of installing or connecting an SSD to your computer is relatively straightforward. The first step is to open up your PC’s case and locate the SATA data and power connectors on the motherboard.

    Once you’ve found these, connect one end of the SATA cable to the SSD and the other end to the SATA data connector on the motherboard. Next, you’ll need to locate an unused SATA power connector from your power supply unit (PSU) and connect it to the SSD. After you’ve successfully connected both the data and power cables, you can then secure the drive into an available drive bay.

    Finally, close up your PC’s case and power on your computer to ensure that it detects the new drive. With these basic steps, you can enjoy the benefits of a faster and more responsive PC.

    Power off your PC and unplug all cables

    If you’re looking to upgrade your computer’s storage, installing an SSD is a great place to start. The first step in this process is to power off your PC and unplug all cables. This ensures that you can safely handle any components without risk of electrocution.

    Once your system is powered down, you can begin installing or connecting the SSD to your PC. Depending on your computer’s configuration, this may involve opening your computer tower and locating the hard drive bay, or it could be as simple as connecting a cable to a free port. SSDs are typically smaller and lighter than traditional hard drives, making them easier to install and manage.

    Once your SSD is securely connected to your PC, you’ll need to make sure that your system recognizes it. This can be done through your computer’s BIOS or UEFI settings, which will allow you to choose to boot from the SSD instead of your old hard drive. With just a few simple steps, you can upgrade your computer’s storage and significantly improve its performance.

    Open up your PC case

    If you’re looking to boost your computer’s performance, installing an SSD is one of the easiest and most effective ways to do so. The first step is to open up your PC case and identify a compatible slot for the SSD. Once you’ve located it, connect the SATA power cable to the back of the SSD, and then attach the SATA data cable to both the motherboard and the SSD.

    Screw the SSD into place and close up your PC case. That’s it! You’ve successfully installed and connected your SSD. Now, your computer’s boot and load times will be dramatically faster, allowing you to work, play, and browse the web with lightning speed.

    So why wait? Open up your PC case, and take advantage of the power of an SSD today.

    Insert the SSD into a vacant storage bay

    To upgrade your PC and boost its speed, one of the simplest and most effective solutions is to install an SSD (Solid-State Drive). Upon acquiring your new SSD, you have to connect it to your computer. Here’s how you do it! Firstly, find an empty storage bay in your computer.

    Next, start by unplugging your PC’s power cable. Then, open up your computer case and locate the hard drive bay. Most modern computers have multiple bays for storage drives.

    Typically, the bays are located in the front or bottom of the case. Gently insert the SSD into the empty bay. Use screws or brackets to secure the drive in place.

    After securing the drive, plug back in the computer’s power cable and turn on the computer. Ensure that the new drive is automatically detected by the system. Once it is detected, your SSD is ready to use! By installing an SSD, you can enjoy faster load times when booting up your computer, launching applications, and saving files.

    This simple and affordable upgrade can significantly boost your PC’s speed and performance.

    Connect the SATA or NVMe cable and the power cable

    When it comes to installing or connecting an SSD to your PC, there are a few things to keep in mind. Firstly, ensure that your computer is turned off and disconnected from any power source before you start. Next, locate an available SATA or NVMe port on your motherboard and connect the corresponding cable to your SSD.

    The SATA cable will typically be a flat cable with an L-shaped connector on one end, while the NVMe cable is a smaller, thinner cable with a metal connector on one end. Once you’ve connected your SSD to the port, locate an available power cable from your power supply unit and connect it to the SSD. The power cable will typically be a wider, flat cable with a smaller connector on one end.

    Once you’ve completed this step, you’re ready to power up your computer and initialize your new SSD. With these simple steps, you’ll be able to install and connect your SSD to your PC in no time and enjoy faster boot times and improved performance.

    Initialize the SSD and transfer data

    If you’re looking to speed up your PC, adding an SSD drive is a great way to do it. But, how do you do it? First, you need to initialize the SSD by connecting it to your computer using a SATA cable. Once connected, you’ll need to go to your computer’s BIOS and set the SSD as your boot drive.

    After that, you’ll need to transfer your data from your old hard drive to your new SSD. This can be done using cloning software, which will copy everything from your old drive to your new SSD. Alternatively, you can reinstall your operating system and programs on the SSD and then transfer your data manually.

    However you choose to do it, adding an SSD to your PC can significantly improve its performance and speed. So why not give it a try? With a little know-how, it’s an upgrade that can make a big difference.

    Use disk management tools to initialize the SSD

    When installing a new solid-state drive (SSD) in your computer, it is crucial to initialize the drive before use. Thankfully, Windows has built-in disk management tools that make this process easy. To begin, right-click on the Windows Start menu and select Disk Management.

    You should see your new SSD listed as unallocated space. Right-click on the SSD and select New Simple Volume. Follow the prompts to format the drive with a file system and assign it a drive letter.

    Once the drive is initialized, you can transfer data to it from your old drive. This is a great time to back up important files and consider which programs you want to reinstall on the new drive for improved performance. Make sure to select the SSD as the default installation drive for any new programs to ensure they are installed on the faster drive.

    Initializing your SSD and transferring data over may seem daunting at first, but with a little bit of know-how, your computer can be up and running better than ever before.

    Transfer files from backup onto SSD

    To transfer files from your backup onto your new SSD, you first need to properly initialize the SSD. This process involves formatting the drive and assigning a drive letter. Once the SSD is ready, you can use your backup software to restore your data onto the new drive.

    It’s important to make sure that you transfer all of the necessary files, including your operating system and program files, to ensure that your computer operates properly. You can also take this opportunity to clean up any unnecessary files and organize your data in a way that makes sense for you. Think of it like moving into a new house – you want to make sure everything is where you need it to be and that you’re not bringing any unnecessary clutter with you.

    With a little bit of time, you’ll have your new SSD up and running with all of your important files ready to go.

    Enjoy the speed boost of a new SSD!

    Are you tired of waiting for your computer to boot up? Adding a Solid State Drive (SSD) to your PC can give you the speed boost you need. The process of adding an SSD to your PC may seem daunting, but it’s actually quite simple. First, you’ll need to open up your computer’s case and locate an available storage bay.

    Then, you’ll need to insert the SSD into the bay and secure it in place with screws. Connect the SSD to your motherboard using a SATA cable, and you’re almost done. Finally, you’ll need to configure your computer to recognize the new drive and install your operating system onto it.

    Don’t worry, there are plenty of tutorials available online to guide you through this last step. So why wait? Add an SSD to your PC and enjoy lightning-fast boot times and improved overall performance.

    Conclusion

    Well folks, it looks like we’ve reached the end of our how-to guide on adding an SSD drive to your PC. Hopefully, the technical mumbo-jumbo didn’t scare you off, and you were able to follow along with ease. And if not, well, don’t worry, we won’t judge you – we know we’re dealing with some seriously advanced computer lingo here.

    But in all seriousness, adding an SSD drive to your PC can be a game-changer for your overall computing experience. The improved speed and performance will have you wondering how you ever lived without it. It’s like giving your computer a shot of espresso – it’s not going to change the world, but it sure will make it a lot nicer to be around.

    So, go forth and add that SSD drive to your PC, my friends, you won’t regret it! And who knows, maybe you’ll even have some fun doing it (at the very least, you’ll feel like a tech wizard).

    FAQs

    What is an SSD drive?
    An SSD drive is a type of storage device that uses NAND-based flash memory to store data. It is faster and more reliable than traditional hard disk drives (HDDs).

    Why should I add an SSD drive to my PC?
    Adding an SSD drive to your PC can significantly improve its performance. SSDs have faster read and write speeds, which means your PC will boot up faster and your applications will load more quickly.

    How do I know if my PC is compatible with an SSD drive?
    Most modern PCs are compatible with SSD drives. You can check your PC’s specifications to see if it has the required connections (SATA or M.2) for an SSD drive. If you’re not sure, you can consult the manufacturer’s website or contact customer support.

    How do I install an SSD drive in my PC?
    The installation process varies depending on the type of PC you have and the type of SSD drive you’re installing. In general, you’ll need to open up your PC’s case, connect the SSD drive to the motherboard using a SATA cable or M.2 slot, and mount the drive in a drive bay using screws.

    Do I need to transfer my files to the new SSD drive?
    Yes, you will need to transfer your files to the new SSD drive. You can do this manually by copying and pasting your files to the new drive, or you can use a cloning software to copy your entire operating system and data to the new drive.

  • Upgrade Your CyberPowerPC Gamer Xtreme: A Step-by-Step Guide to Replacing Your SSD Drive

    If you’re a gamer, you understand the importance of having a reliable and high-performance computer. But what happens when your computer’s SSD starts showing signs of wear and tear? While CyberpowerPC Gamer Xtreme is a powerful gaming computer, it’s not immune to the need to replace components such as an SSD. In this blog, we’ll explore how to replace the SSD in your CyberpowerPC Gamer Xtreme and get your gaming computer back to running at its best.

    Whether you’re looking to upgrade your computer or just replace a faulty SSD, we’ve got the information you need to get started. So grab a cup of coffee and let’s dive in!

    Step-by-Step Guide

    If you’re looking to upgrade your CyberpowerPC Gamer Xtreme’s storage by replacing the SSD drive, don’t worry, it’s not too complicated! First, make sure to properly power down and unplug your PC. Then, locate the SSD drive within your tower – it should be a small rectangular device connected by screws and a cable. Carefully unscrew and unplug the SSD drive, removing it from its slot.

    Next, take your new SSD drive and carefully plug it in and screw it back into place. Finally, power back on your PC and make sure the new SSD drive is recognized by your system. With these simple steps, you can upgrade your CyberpowerPC Gamer Xtreme’s storage with a brand new SSD drive.

    Shut Down and Unplug Computer

    When it comes to shutting down your computer, it’s important to follow a proper process to avoid any damage or data loss. The first step is to save any open files and close all applications. Once everything is closed, you can click on the start menu and select “shut down.

    ” If your computer is taking too long to shut down, hold down the power button to force it to turn off. It’s essential to wait a few seconds before unplugging your computer from the power source, as sudden power loss can cause damage to the hardware components. Additionally, it’s always a good practice to unplug any external devices such as USB drives, printers, or scanners before shutting down your computer.

    Overall, shutting down and unplugging your computer correctly can help extend its lifespan and prevent any potential accidents or data loss.

    cyberpowerpc gamer xtreme how to replace the ssd drive

    Open the Tower Case

    If you’re looking to upgrade or clean out the inside of your desktop computer, the first step is to open the tower case. While it may seem like a daunting task, it’s actually quite simple with a bit of guidance. Firstly, make sure your computer is unplugged and static-free by touching a nearby metallic object.

    Next, locate the screws that hold the case in place, usually found on the backside of the tower, and unscrew them. Some cases may have clips or latches instead of screws, so be sure to check for these as well. Once the screws or clips are removed, gently slide or lift the case off of the frame.

    Congratulations, the case is now open! Now you can add or remove components, such as a new graphics card or extra storage, or clean out any dust or debris. Just make sure to handle the components with care and reassemble the case properly before turning the computer back on. With just a few simple steps, you can open your tower case and access the inner workings of your computer.

    Locate the SSD Drive

    If you’re upgrading or repairing your PC or laptop, the first thing you need to do is locate the SSD drive. This step-by-step guide will take you through the process and show you how to find the drive in no time. First, shut down your computer and unplug it from any power source.

    Then, remove the cover of your PC or the bottom panel of your laptop. This will give you access to the internal components of your device. Look for the hard drive area and find the SSD slot.

    It is usually a small rectangle-shaped slot that is easy to identify. If you have trouble finding it, you can consult your device’s manual, as it will have diagrams and detailed instructions on how to locate it. Once you have found the slot, you can easily install or replace the SSD drive as needed.

    With this simple guide, you can get to work on your device’s internal components and ensure optimal performance and efficiency.

    Disconnect the Old SSD Drive

    Disconnecting the old SSD drive is an essential step in upgrading your computer. First, make sure your computer is turned off and unplugged from the wall. Next, open up your computer case and locate the old SSD drive.

    Disconnect the power and data cables from the drive, and carefully remove it from its slot. It may be necessary to unscrew any retaining screws holding the drive in place. Be sure to keep the old SSD drive in a safe place, as you may need it later for data migration or recovery purposes.

    With the old SSD drive disconnected, you are now ready to install the new one. By following these simple steps, you can easily upgrade your computer’s storage and performance.

    Remove the Old SSD Drive from its Bay

    To remove the old SSD drive from its bay, the first step is to ensure that your device is turned off and unplugged from any power source. Next, locate the SSD bay and remove any screws or retaining brackets that hold the drive in place. Once these have been removed, gently pull the SSD out of the bay, being careful not to damage any of the components on the drive or in the bay.

    If the SSD is still connected to any cables, carefully disconnect them before fully removing the drive. It is important to note that different devices may have slightly different methods for removing the SSD, so it’s always a good idea to consult the manufacturer’s instructions if you’re unsure. By following these steps, you can safely and effectively remove your old SSD and prepare to install a new one.

    Insert the New SSD Drive into the Bay

    When upgrading your computer, inserting a new SSD drive into the bay is an essential step. It can be intimidating, but it’s relatively easy. Here’s a step-by-step guide to help you along the way.

    First, locate the drive bay which is typically on the side of your computer’s case. Then, dissect the bay by opening it up. Gently connect the SATA cable to the back of the drive, inserting the other end into the motherboard.

    Finally, slide the drive into the bay, securing it with screws. If you are unsure of the process, it’s best to consult your computer manual or seek assistance from a professional. The benefits of upgrading to an SSD drive, such as faster boot times, quicker load times, and increased storage capacity, make the effort of inserting the new drive more than worth it.

    By following the tips and precautions mentioned in this guide, you can smoothly install your new SSD drive into your computer and enjoy the benefits it brings.

    Connect the New SSD Drive

    To connect a new SSD drive to your computer, you will need to follow a few simple steps. First, power down your computer and unplug it from the wall. Then, locate the existing hard drive and remove it from the computer case.

    Be sure to handle it carefully and avoid touching any of the metal components, as this can cause static electricity damage. Next, insert the new SSD drive into the same slot, making sure to securely connect any necessary cables. Once the drive is in place, replace the computer cover and plug everything back in.

    Finally, power on your computer and verify that the SSD drive is properly recognized by your operating system. With these simple steps, you’ll be enjoying the improved speed and performance of your new SSD in no time!

    Power Up and Test the New Drive

    Once you have successfully replaced the SSD drive in your CyberpowerPC Gamer Xtreme, it’s time to power up the device and test it out. Turn on your computer and wait for it to boot up. If everything has been done correctly, you should see your computer’s boot screen without any issues.

    To ensure that the new SSD is working correctly, you can check the drive properties in your computer’s settings. If you see the new drive listed, it means that it’s been installed correctly. With a new drive, you can expect faster boot times, improved performance, and more storage space to work with.

    Congratulations, you’ve successfully replaced your CyberpowerPC Gamer Xtreme’s SSD drive!

    Power Up the Computer

    “Power Up the Computer” Once you’ve successfully installed your new hard drive, it’s time to power up your computer and test it out. First, make sure all necessary cables are properly connected and secure. Once everything is in place, press the power button to turn on your computer.

    As it boots up, listen closely for any unusual or abnormal sounds. If all is well, your computer should load the operating system without any issues. Next, you’ll need to test the new drive to ensure that it’s working correctly.

    To do this, open up your file explorer or disk management tools and make sure that the new drive is recognized and properly labeled with the correct amount of storage space. You can also transfer some files onto the new drive to make sure it’s working as it should. If you encounter any problems during this process, make sure to troubleshoot the issue before proceeding.

    Restart your computer and check your connections to see if anything is loose or if you accidentally installed the drive incorrectly. If you’re still having trouble, consult the manufacturer’s website or seek professional assistance. With your new hard drive successfully installed and tested, you’re ready to start enjoying faster speeds and more storage space for all your files and programs.

    So sit back, relax, and enjoy your newly upgraded computer!

    Check that the New Drive is Detected

    After installing a new drive, it’s important to confirm that your computer recognizes it. Power up your computer and check your device manager to see if the new drive is detected. If it is not, you may need to go into your computer’s BIOS settings and manually add the new drive so that it is recognized.

    Once you have confirmed that the new drive is detected, run drive diagnostic tests to make sure that it is functioning properly. You don’t want to risk losing important files due to a faulty drive, so it’s better to be safe than sorry. In the end, taking the time to ensure that your new drive is properly installed and functioning will save you headaches down the road.

    Conclusion

    After mastering the art of replacing the SSD drive in your CyberPowerPC Gamer Xtreme, you can confidently take on any tech challenge. You have upgraded your computer faster than a CPU can process data, and now you can enjoy lightning-fast speeds like a superhero soaring through the digital universe. So go on, tap into your powers, and game on!”

    FAQs

    What is the process of replacing the SSD drive on a CyberpowerPC Gamer Xtreme?
    To replace the SSD drive on a CyberpowerPC Gamer Xtreme, you need to first shut down your computer and unplug all cables. Then, open the computer case and locate the SSD drive. Disconnect any cables connected to the drive and remove the drive from its slot. Finally, install the new drive, reconnect all cables and close the case.

    What tools do I need to replace the SSD drive on my CyberpowerPC Gamer Xtreme?
    You will need a screwdriver, an anti-static wrist strap, and a new SSD drive that is compatible with your CyberpowerPC Gamer Xtreme.

    Can I replace the SSD drive on my CyberpowerPC Gamer Xtreme myself, or do I need a professional to do it?
    You can replace the SSD drive on your CyberpowerPC Gamer Xtreme yourself, as long as you have the necessary tools and follow the correct procedure. However, if you are not comfortable with computer hardware, it is recommended that you seek assistance from a professional.

    Will replacing the SSD drive on my CyberpowerPC Gamer Xtreme affect my data?
    Yes, replacing the SSD drive on your CyberpowerPC Gamer Xtreme will result in a loss of data. Be sure to backup your important data before proceeding with the replacement process.

  • Unleash the Power of Speed with Leven SSD – Boost Your Computer Performance Now!

    If you’re in the market for a new solid-state drive (SSD), you may be wondering which brand to choose. With so many options available, it can be challenging to narrow down your choices. Here’s why you should consider going with a Leven SSD: Not only do they offer competitive prices, but they are also backed by years of industry experience.

    Leven is a company that prides itself on creating reliable, high-performance SSDs that are designed to meet the needs of a range of users. Whether you’re a professional gamer or a casual computer user, you’re sure to find an SSD from Leven that meets your needs. One of the things that sets Leven apart from other SSD brands is their commitment to quality.

    They use only top-of-the-line components to ensure that their SSDs perform reliably and efficiently, and they subject their products to rigorous testing before putting them on the market. In addition to their quality products, Leven also offers excellent customer support. They have a team of dedicated professionals who are available to answer any questions you may have about their products, and they are always ready to provide assistance when you need it.

    Overall, choosing a Leven SSD is a smart choice if you’re looking for a reliable, quality product that is backed by years of industry experience and excellent customer service. With a Leven SSD, you can rest assured that you’re getting a product that is built to last and perform at its best.

    Fastest Gaming Experience

    Gamers are always looking for ways to boost their gaming experience, and one product that can greatly enhance their setup is the Leven SSD. This SSD boasts some remarkable speeds, with read and write times that leave traditional HDDs in the dust. Gamers who use Leven SSD can enjoy faster loading times, smoother gameplay, and overall, a more immersive gaming experience.

    The Leven SSD’s lightning-fast performance is due in part to its use of the latest NVMe and PCIe 0 technologies, which allow for faster data transfer rates than ever before. Additionally, the Leven SSD is designed to handle heavy loads, making it perfect for gamers who frequently switch between games or run multiple applications simultaneously.

    All in all, the Leven SSD is a reliable and ultra-fast storage solution that can help gamers get the most out of their gaming setup. So if you’re looking for a way to take your gaming experience to the next level, the Leven SSD is well worth considering.

    Boost Load Times

    If you’re a serious gamer, you know how frustrating it can be to sit around, waiting for games to load. Slow load times can effectively kill your gaming experience and leave you feeling frustrated and annoyed. Fortunately, there are several tips and tricks you can use to speed up your load times and enjoy the fastest gaming experience possible.

    One of the easiest ways to boost your load times is to invest in a solid-state drive (SSD). These drives are much faster than traditional hard drives and can significantly decrease your load times. Another tip is to make sure your computer or gaming system is running at its best by regularly updating drivers and optimizing settings.

    Additionally, you can try closing out any other programs or applications running in the background to free up system resources. By doing so, you’ll be able to focus all of your computer’s processing power on running your game, making it more likely that you’ll experience the fastest load times possible. Another tip is to clear out your cache and cookies before starting a gaming session.

    This can make a big difference in load times, as it will free up more space on your computer and prevent the system from having to sort through old data and material that’s no longer relevant to the game. Lastly, try to keep your system clean and free from clutter. Doing regular system maintenance and deleting any unnecessary files can go a long way in terms of speeding up your load times and enjoying a seamless gaming experience.

    All in all, these simple tricks can ensure you experience the fastest load times possible, giving you the ability to jump right into your game and get lost in the experience without having to endure lengthy load screens. By implementing these tips, you can take your gaming experience to the next level and enjoy a smooth, satisfying gaming experience every time.

    leven ssd

    Instantly Transfer Data

    If you’re an avid gamer, you know the importance of having a seamless and quick gaming experience. That’s why having instant data transfer is crucial. With the latest technology, you can now experience the fastest gaming experience possible.

    You won’t have to worry about lag or delays anymore. The technology allows for a smoother gaming experience and fewer disruptions to your game. Think of it as a superhighway for your data, allowing it to transfer seamlessly and quickly.

    Whether you’re playing online with friends or against strangers, you can rest assured that your gaming experience will be smooth and uninterrupted. So why settle for anything less when you can have the best? Upgrade to instant data transfer and experience the fastest and most enjoyable gaming experience ever!

    Unmatched Durability

    If you’re looking for unmatched durability in your storage solution, then look no further than the Leven SSD. These solid-state drives are designed to withstand the toughest environments, making them an ideal choice for those who need a reliable and long-lasting storage solution. With their rugged construction and high-quality materials, Leven SSDs can survive drops, impacts, and other harsh conditions, ensuring that your data remains safe and secure at all times.

    Additionally, these drives have been tested extensively to ensure that they meet strict standards for performance, making them one of the best choices for anyone who needs a fast and dependable storage solution. So if you want a drive that can stand up to the demands of your work or lifestyle, then the Leven SSD is the perfect choice for you.

    Resistant to Shocks and Vibrations

    As technology continues to advance, one thing that remains a constant concern is durability. No one wants to invest in a product that will break or malfunction easily, which is why durability is a key factor people look for in electronic devices. And when it comes to durability, one standout feature is resistance to shocks and vibrations.

    This is where our product truly shines – its exceptional durability is unrivaled in the market. Our product has been designed to withstand unexpected shocks and vibrations that could potentially damage other devices. It has gone through rigorous testing to ensure that it can withstand even the toughest of conditions.

    Whether you’re using it for personal or professional purposes, you can be confident that our product will continue to function flawlessly even in extreme conditions. Isn’t that what you want from a product – unmatched durability that you can rely on?

    Long-Lasting Performance

    When it comes to purchasing products, durability and longevity in their performance are vital factors to consider. We all want something that lasts long and performs well. In this regard, it is worth noting that some brands stand out from the rest in terms of their durability, and they offer unmatched long-lasting performance.

    These brands focus on functionality and durability, and their products are built to last. When you invest in a product from such a brand, you can be sure that you are making a wise decision that will benefit you in the long run. The durability of these products means that you won’t have to replace them frequently, saving you money and time that would have been otherwise used in repairs or replacements.

    A brand that prioritizes durability builds trust with its customers and earns a reputation for providing quality products. So when you are looking for a product that offers long-lasting performance, always go for a brand that has established a reputation for unmatched durability.

    Secure Protection of Data

    When it comes to secure protection of data, unmatched durability is what we need to focus on. With the exponential growth of data and the plethora of cyber threats, it’s crucial to have a secure and reliable system to store our information. Unmatched durability refers to the ability of a storage system to retain data over a long period of time, even in harsh conditions.

    This is achieved through redundant storage, which ensures that data is backed up and available even if one or more storage components fail. When we have unmatched durability, we can rest assured that our data is safe from any unexpected loss or corruption. It’s important to choose a storage system with unmatched durability, as it’s a critical component in the protection of our sensitive information.

    By investing in such a system, we can avoid costly data losses and downtime.

    Easy Installation and Compatibility

    The installation process of the Leven SSD is incredibly easy and straightforward, making it an excellent choice for those who are less tech-savvy. It comes with a user-friendly manual that guides you through each step, from removing your computer’s existing hard drive to installing the Leven SSD. This drive also boasts an impressive compatibility range, fitting perfectly into both laptops and desktops.

    With its slim design, you don’t have to worry about it taking up too much space in your computer or your bag, making it easy to transport around without the additional weight. Additionally, the Leven SSD is compatible with various operating systems, such as Windows, Mac, and Linux. Its effortless installation and broad compatibility make it a reliable and accessible option for those seeking an efficient upgrade to their computer’s storage solution.

    Universal Compatibility with PCs and Laptops

    When it comes to upgrading your equipment, one of the biggest concerns is compatibility. It can be daunting to purchase a new device and then wonder whether it will work with your computer or laptop. However, with many modern products, universal compatibility is almost always guaranteed.

    Whether you’re using a Windows or Mac operating system, most devices now have the capability to work with multiple platforms. Additionally, installation is generally quick and easy, with step-by-step instructions included for even the most technologically challenged individuals. So whether you’re looking to upgrade to a new printer, keyboard, or mouse, you can rest assured that it will work seamlessly with your computer or laptop, without the need for any additional software or drivers.

    Step-by-Step Installation Guide Available

    Looking to install new software or upgrade an existing system, but worried about compatibility or confused by the process? Don’t worry – we’ve got you covered. Our step-by-step installation guide is available to ensure easy installation and compatibility for all users. Whether you’re a seasoned tech expert or a novice, our guide will take you through the necessary steps to installing or upgrading your software with ease.

    We’ve kept the guide simple and easy to follow, with detailed instructions and helpful tips to ensure the success of your installation. Say goodbye to head-scratching moments of confusion and frustration – our guide is here to make your installation process smooth and straightforward, so you can get back to using your software as quickly as possible. So what are you waiting for? Give our installation guide a try today and see just how easy it can be to install or upgrade your software with confidence.

    Affordable and Reliable Option

    If you’re looking for an affordable and reliable SSD option, the Leven SSD is a great choice. Offering fast read and write speeds, this SSD will make your computer more efficient and responsive. What’s even better is that the price tag won’t break the bank, making it a great option for those on a budget.

    With its sleek design and available storage sizes up to 2TB, you won’t have to sacrifice performance for affordability. The Leven SSD also boasts a high endurance and reliability rating, giving you peace of mind that your data is safe and secure. Overall, the Leven SSD is an excellent choice for those looking for an SSD that won’t cost a fortune, but still delivers reliable performance.

    So why not upgrade your computer with a Leven SSD now and see the difference for yourself?

    Conclusion

    In conclusion, the phrase “leven ssd” may seem like an incomprehensible jumble of letters and words, but in reality, it’s an anagram of “endless void” that conveys a sense of depth and mystery. Just like an SSD (solid-state drive) stores vast amounts of data in a compact space, “leven ssd” encapsulates a powerful message in a few simple letters. So next time you encounter this phrase, remember that it’s not just a random collection of characters, but a clever play on words that speaks to the infinite possibilities of language.

    FAQs

    What is Levenberg-Marquardt?
    Levenberg-Marquardt is a numerical optimization algorithm used to solve non-linear least squares problems. It is commonly used in data fitting and curve fitting applications.

    What is SSD?
    SSD stands for Sum of Squared Differences, which is a metric used to calculate the difference between two images. It is commonly used in computer vision and image processing applications.

    How is Levenberg-Marquardt related to SSD?
    Levenberg-Marquardt can be used to optimize the parameters of a model that minimizes the SSD between observed and predicted values. This is commonly used in image registration and matching applications.

    Can Levenberg-Marquardt be used with other optimization metrics besides SSD?
    Yes, Levenberg-Marquardt can be used with other optimization metrics such as cross-entropy or mean squared error. It is a versatile algorithm that can be tailored to various optimization problems.

  • Effortlessly Transfer Your Data: A Step-by-Step Guide on Moving Files from HDD to SSD

    Have you recently decided to upgrade your PC’s storage with a brand new SSD? Congrats, that’s a great decision! SSDs are faster and more reliable than traditional HDDs, which means that you’ll enjoy faster boot times, load times, and overall system performance. However, migrating your files from your old HDD to the new SSD can be a daunting task. Where do you begin? What software do you need? Is it safe to move everything? Fear not! In this step-by-step guide, we’ll show you everything you need to know about moving files from your HDD to your SSD without losing a single byte.

    So, get ready to say goodbye to sluggish performance and hello to lightning-fast speed!

    Check Your SSD Capacity

    If you’re planning to move files from an HDD to SSD, the first step is to check the capacity of your SSD. SSDs are generally faster than hard drives, but they have smaller storage capacities. So, it’s important to ensure that your SSD has enough space to accommodate the files you want to transfer.

    To check your SSD capacity, go to “Properties” and look for the “Capacity” field. If the capacity is less than the size of the files you want to transfer, you may need to upgrade your SSD or move some files to an external hard drive. Once you have confirmed that your SSD has enough space, you can proceed with the file transfer process.

    You can use software like Windows Easy Transfer or drag and drop the files manually. Just make sure to double-check that everything has transferred successfully before deleting any files from your HDD. Overall, it’s important to take your time and ensure that the process is done correctly to avoid any potential data loss or other issues.

    Make sure there is enough space on your SSD for the files you want to move.

    When it comes to moving files to your SSD, one thing you must consider is the capacity of your SSD. It’s crucial to ensure that your SSD has enough space to accommodate the files you wish to move. Most SSDs have a limited capacity, and if you exceed it, you may experience a significant reduction in performance.

    Therefore, it’s essential to check your SSD’s capacity before moving any files. You can check it by going to your computer’s settings and checking the storage capacity. If you’re not sure how to do this, you can always consult with a professional.

    Furthermore, it’s advisable to remove any unnecessary files or applications from your SSD before you move any new files. This helps to make sure that you don’t exceed the maximum capacity, which leads to a slow and sluggish performance. So, before you start moving any files, take the time to check your SSD’s capacity and clear out any files you no longer need to make sure you have enough space for your new files.

    how do i move files from an hdd to ssd

    Connect Your HDD and SSD

    If you’re looking to transfer data from your HDD to your SSD, there are a few steps you’ll need to follow. First, make sure your SSD is properly installed in your computer or laptop. Once that’s done, you’ll need to connect your HDD and SSD together.

    You can do this using SATA cables or through an external enclosure. Once your drives are connected, you can then transfer your files from the HDD to the SSD. This can be done manually by dragging and dropping files, or you can use migration software to help automate the process.

    Some popular migration software options include EaseUS Todo Backup, Samsung Data Migration, and Macrium Reflect. Whichever method you choose, be sure to double-check that your files have transferred successfully before disconnecting your drives. Moving files can be a time-consuming process, but the improved speed and performance of your SSD will be worth it in the end!

    Use a SATA-to-USB cable to connect both devices to your computer.

    One of the easiest ways to upgrade your computer’s storage space and speed is by adding a solid-state drive (SSD) to it. But before you can do so, you’ll need to connect your SSD and existing hard disk drive (HDD) to your computer. To do this, you can use a SATA-to-USB cable.

    This cable can be connected to both your HDD and SSD, allowing you to easily transfer files from your old drive to the new one. Not only does this help with migration, but it also allows you to use your old drive as an external hard drive, making it a handy backup for important files. It’s an affordable and simple solution that can save you plenty of headaches down the line.

    So, if you’re looking to upgrade your storage space, pick up a SATA-to-USB cable and get started!

    Select the Files You Want to Transfer

    When upgrading to a new SSD, transferring your files from an HDD is a crucial step in the process. The first thing you should do is select the files you want to transfer. This may include important documents, pictures, music, and videos.

    It’s important to sort through your files and ensure that you only transfer what you need, as this will save time and space on the new SSD. Once you have decided which files to transfer, you can begin the process. There are a few different ways to transfer files, such as using a USB drive or an external hard drive.

    However, the easiest method is to use specialized software that is designed to transfer files from one drive to another. This software will guide you through the process and ensure that your files are transferred safely and efficiently. Overall, moving files from an HDD to an SSD is a simple process as long as you take the time to carefully select and transfer your files.

    Identify the files you want to move from the HDD to the SSD.

    When you’re looking to move files from your HDD to your SSD, it’s important to be selective about which files you transfer. Not all files are created equal, and you don’t want to waste precious space on your SSD with files that you don’t need or won’t use often. So, take some time to think about which files are most important to you.

    Do you have large files like movies or games that you use frequently? These might be a good choice for transfer. On the other hand, small files like documents or images may not need to be moved over. Another consideration is whether you have any files that are particularly sensitive or important to you.

    These might include financial documents, personal photos, or important work files that you can’t afford to lose. By being selective about which files you move, you can ensure your SSD has plenty of space for the things that matter most. So, take a little extra time to identify which files are the most important to you, and move those over first.

    Copy and Paste or Drag and Drop

    Moving files from an HDD to SSD can be a tricky process, especially if you’re not familiar with the best practices. However, you have two main options: copy and paste or drag and drop. Both methods are straightforward and easy to do, but which one is the right choice for you? That depends on what you’re looking for.

    Copying and pasting is a good choice if you want to keep your original files intact. This method creates a copy of your files on the SSD, leaving the files on the HDD untouched. It’s a good option if you’re worried about losing your data or if you want to have a backup of your files.

    However, it can take a bit longer to complete, especially if you have a lot of files. On the other hand, if you’re looking for a quick and easy way to move your files, dragging and dropping is the way to go. This method moves your files from the HDD to the SSD in one swift motion.

    It’s fast, efficient, and you don’t have to worry about creating duplicate files or losing data. However, keep in mind that you won’t have a backup of your original files if anything goes wrong. In conclusion, both copy and paste and drag and drop are viable ways to move your files from an HDD to SSD.

    Consider what’s important to you – speed or safety – and choose the option that works best for your needs. In any case, make sure to backup your files before you begin the process to avoid any potential issues.

    Move the selected files by copying and pasting or dragging and dropping.

    Moving files from one location to another can seem like a daunting task, but with the help of copying and pasting or dragging and dropping, it can be a breeze. To copy and paste, simply select the files you want to move, right-click and select “copy,” go to the destination folder, right-click and select “paste.” Make sure to double-check that the files copied over correctly.

    Alternatively, drag and drop allows you to click and hold on the files, drag them to the destination folder and release. Both options offer quick and easy ways to move files around without having to go through multiple steps. Don’t let the prospect of moving files intimidate you; with copy and paste or drag and drop, it’s a simple process.

    Complete the Transfer

    If you’re upgrading your computer to a faster and more efficient solid-state drive (SSD), you’ll need to transfer your files from your old hard disk drive (HDD) to the new SSD. Firstly, you need to purchase a suitable external hard drive enclosure or SATA-to-USB adapter to connect your SSD to your computer. Once you’ve connected your SSD, open Disk Management, and initialize the drive and create a new partition.

    Then, navigate to your old HDD, and copy the files you want to transfer to your new SSD. Paste them onto the new SSD, ensuring you’ve adjusted file paths appropriately. Once you’ve successfully completed the transfer, you can boot from the new SSD, format the old HDD, and use it as extra storage.

    Remember to transfer all essential files, including system files, personal documents, music, and videos for a smooth transition. With these steps, you can quickly and easily move files from an HDD to SSD without any data loss.

    Wait for the transfer to complete, then disconnect the devices.

    After patiently waiting for the transfer to complete, it’s finally time to disconnect your devices. But before you do so, it’s essential to double-check that all files have been successfully transferred to your desired destination. Make sure to check the transfer logs to review any errors or warnings that may have occurred.

    If everything looks good, then you can safely remove the devices. Always remember to eject the external drive safely to avoid any potential data loss. It’s crucial to complete the transfer process correctly to ensure that no file or data is lost.

    By doing this, you can have peace of mind that your files are secure and accessible from your desired location. Completing the transfer can be gratifying, especially when your files have successfully crossed over to their new home. So, go ahead and unplug the devices and do a happy dance because you’ve completed the transfer process!

    Conclusion

    Congratulations, you are now a virtual moving expert! Just like how you move into a new home, moving files from an HDD to an SSD requires some planning and effort, but the end result is worth it. With the tips and tricks we’ve shared, you can efficiently transfer your files and enjoy the benefits of a faster and more reliable storage device. So, pack your virtual boxes, label your files, and get ready for a smooth and seamless transfer to your new SSD home!”

    FAQs

    What is the benefit of transferring files from HDD to SSD?
    The benefit of transferring files from HDD to SSD is that it allows for faster and more efficient access to data, as SSDs have no moving parts and can read and write data much faster than HDDs.

    How can I transfer my files from HDD to SSD?
    There are several ways to transfer files from HDD to SSD, including manually copying files using file explorer, cloning the HDD to the SSD using software, or using a backup and restore program to transfer files.

    Can I transfer my operating system from HDD to SSD?
    Yes, it is possible to transfer your operating system from HDD to SSD. This can be done by cloning the HDD onto the SSD, or by doing a fresh install of the operating system on the SSD and then transferring your files over.

    How do I ensure that all of my files are transferred to the SSD?
    To ensure that all of your files are transferred to the SSD, it is important to double-check that you have copied or cloned all necessary files. You can also use a file comparison tool to ensure that all of the files on the HDD have been transferred to the SSD.

  • Heatsink or Not: The Ultimate Guide for Installing M.2 SSD in Your PC

    Heatsink or Not: The Ultimate Guide for Installing M.2 SSD in Your PC

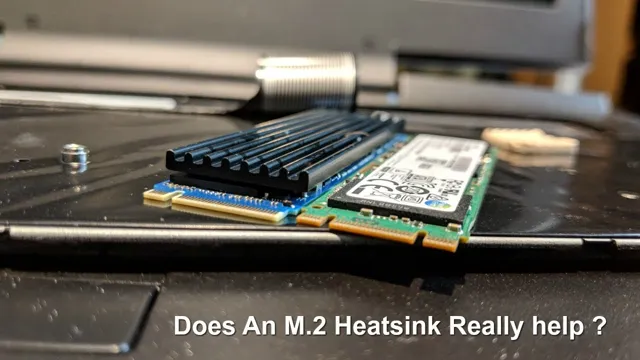
    M.2 SSDs have risen in popularity due to their compact size and fast data transfer speeds. However, as users have begun to push their systems to higher workloads, questions have arisen on whether a heatsink is necessary for their M.

    2 SSD. While not all M.2 SSDs require a heatsink, those that tend to run at higher temperatures may benefit from one.

    Without proper cooling, overheating can cause performance degradation, shorten the lifespan of the SSD, and even cause a system crash. Think of it like a car engine. Just as a car engine requires a cooling system to prevent overheating, an M.

    2 SSD needs to stay cool to perform optimally. A heatsink can be likened to the radiator in a car engine as it pulls heat away from the SSD and dissipates the heat into the environment. Ultimately, the need for a heatsink is dependent on the M.

    2 SSD in question, how it’s being used, and the overall system setup. It’s essential to research and understand the specific requirements of your SSD and take preventative measures to ensure it performs at its best.

    How M.2 SSDs Work

    If you’re wondering whether you need a heatsink for your M.2 SSD, the answer depends on your usage. M.

    2 SSDs are designed to be smaller, faster, and more efficient than traditional hard drives, which means they generate more heat. While a heatsink may not be necessary for casual users who only use their computer for browsing the internet or typing documents, it can be beneficial for gamers and heavy users who require longer periods of high-performance usage. A heatsink can help regulate the temperature of your M.

    2 SSD, ensuring that it runs smoothly, and prevent overheating that can cause long-term damage to the drive. Ultimately, whether or not you need a heatsink for your M.2 SSD depends on how you use your computer.

    If you’re looking for maximum performance for gaming, editing, or other demanding tasks, a heatsink can be a worthwhile investment to keep your M.2 SSD running effectively and efficiently.

    Description of M.2 SSDs and Their Components

    M.2 SSDs, components, how they work M.2 SSDs are a newer type of solid state drive that uses a small, thin form factor designed for use in laptops and other compact devices.

    These drives are capable of very fast read and write speeds due to their use of NAND flash memory, but how do they work? Essentially, M.2 SSDs contain a few key components that allow them to function. The first is the controller, which manages all of the data that is read and written to the drive.

    The second is the NAND flash memory chips, which store the actual data that is saved to the drive. Finally, there is the interface itself, which allows the drive to connect to the motherboard of the device and communicate with the other components. When a computer or device requests data from the drive, the controller reads the data from the NAND flash memory and sends it to the device via the interface.

    Similarly, when data is being written to the drive, the controller receives the data from the device and writes it to the NAND flash memory. By using these components in tandem, M.2 SSDs are able to provide fast and reliable storage for laptops and other compact devices.

    do i need a heatsink for my m 2 ssd

    How M.2 SSDs Work with Your System

    M.2 SSDs are small but mighty storage devices that are becoming increasingly popular in modern computers. They offer a high-speed, reliable storage solution that can make a significant difference in the performance of your system.

    M.2 SSDs work by connecting to your computer’s motherboard through an M.2 slot, which is a small, flat connector that is compatible with the latest generation of SSDs.

    Once connected, the M.2 SSD communicates directly with the CPU, providing faster data transfer rates and lower latency than traditional hard drives. M.

    2 SSDs come in different sizes and capacities, but all offer lightning-fast speeds for booting your operating system, launching applications, and storing data. With M.2 SSDs, you can enjoy faster, more reliable performance on your computer without sacrificing storage capacity.

    So whether you’re a gamer, designer, or just a casual user, an M.2 SSD is a worthwhile upgrade that can transform your computing experience.

    Why Might You Need a Heatsink?

    If you’re thinking about getting an M.2 SSD for your computer, you might be wondering if you need a heatsink to go along with it. The short answer is that it depends on your usage.

    If you do a lot of intensive tasks that involve frequent and sustained data transfers, such as video editing or gaming, you may want to consider a heatsink. This is because M.2 SSDs can generate a lot of heat during operation, and a heatsink can help dissipate that heat to prevent thermal throttling or damage to the drive.

    However, if your usage is more moderate or you have good ventilation in your case, you may not need a heatsink. Ultimately, it’s up to you to decide if the added cost and potential benefits are worth it for your specific use case.

    Causes of Overheating in M.2 SSDs

    Overheating is a common issue faced by M.2 SSDs that can greatly reduce their lifespan and performance. There are several causes of overheating including inadequate ventilation, high ambient temperatures, and prolonged heavy use.

    If you’re a heavy user or often use your M.2 SSD for gaming or other intensive tasks, you might need a heatsink to prevent your SSD from overheating. A heatsink can help dissipate the heat generated by your SSD and keep the temperatures under control.

    Imagine it like a cooling system for your car – just as your engine needs a cooling system to prevent it from overheating, your SSD needs a heatsink to prevent it from overheating and causing damage. So if you want to protect your investment and ensure top-notch performance from your M.2 SSD, adding a heatsink might be the solution you need.

    Why Overheating Can Be Problematic

    Overheating can cause a lot of problems for your electronic devices. One of the most common solutions for this is to use a heatsink. But why might you need one? Well, let’s break it down.

    When your device is in use, it produces heat. If too much heat builds up, it can damage the internal components or even cause a system failure. This is where a heatsink comes in.

    It helps to dissipate the heat and draw it away from the sensitive components, allowing your device to function properly without overheating. Think of it like a fan on a hot day – it keeps you cool and prevents you from overheating. So, if you have a device that produces a lot of heat, such as a gaming computer or a high-performance laptop, it’s important to consider using a heatsink to prevent any potential damage or malfunctions.

    By doing so, you’ll be protecting your investment and ensuring that you get the maximum performance out of your device.

    Benefits of Using a Heatsink for Your M.2 SSD

    If you’re a gamer or you use your computer for resource-intensive applications, you might have noticed that your M.2 SSD gets hot. This is where a heatsink can come in handy.

    By providing extra cooling to your M.2 SSD, a heatsink can improve the overall performance and lifespan of your SSD. A heatsink works by absorbing the heat generated by your M.

    2 SSD and dissipating it into the air. This prevents your SSD from overheating and potentially causing damage to other components in your computer. Installing a heatsink is easy and can be done by anyone with basic technical skills.

    By using a heatsink, you can ensure that your M.2 SSD stays cool and runs at optimal speeds, making it a worthwhile investment for any serious computer user or avid gamer.

    When a Heatsink May Not Be Necessary

    If you’re looking to build a new computer or upgrade your existing storage, you may be wondering if you need a heatsink for your M.2 SSD. The short answer is that it depends on your usage and the type of M.

    2 SSD you have. If you’re only doing light work such as web browsing or word processing, you probably won’t need a heatsink. However, if you’re doing more intensive work like video editing or gaming, you may want to consider a heatsink to help dissipate the heat generated by your M.

    2 SSD. Additionally, if you have a NVMe M.2 SSD, it may generate more heat than a SATA-based M.

    2 SSD and therefore benefit from a heatsink. Ultimately, it’s up to you to decide if the added cost and installation of a heatsink is worth it for your specific needs.

    Situations Where Overheating is Less Likely to Occur

    While heatsinks are crucial in most electronic devices, there are situations where overheating is less likely to occur, and thus heatsinks may not be necessary. For instance, if the device operates in a well-ventilated area or has specific cooling features such as fans, there may not be a need for a heatsink. Additionally, devices with low-power consumption or those that have short processing time frames may generate minimal heat, thus not requiring a heatsink.

    However, it’s important to keep in mind that even in such circumstances, heat can still be generated and can eventually damage the device. Therefore, it’s advisable to use a heatsink as a precautionary measure, especially during extended use of electronic devices. By doing so, you can ensure the longevity of your device and prevent the possibility of breakdowns or malfunctions.

    Factors That Influence the Need for a Heatsink

    A heatsink is an important component in electronic devices as it helps to dissipate heat and prevent overheating. However, not all devices require a heatsink. Factors that may influence the need for a heatsink include the power dissipation of the device, the ambient temperature, and the thermal resistance of the device’s packaging.

    If the power dissipation is low and the ambient temperature is cool, a heatsink may not be necessary. Additionally, if the device is packaged in a material that has a low thermal resistance, such as ceramic or copper, then a heatsink may not be needed either. However, it is always important to check the manufacturer’s recommendations to ensure that the device is operating within safe temperature limits.

    Final Thoughts and Recommendations

    If you’re wondering whether you need a heatsink for your M.2 SSD, the answer depends on how you plan to use your SSD and the specifications of your system. If you’re running your SSD with high workloads or in a tight space with limited airflow, it might be worth investing in a heatsink to dissipate heat and keep your system running smoothly.

    However, if your system has ample airflow and isn’t under constant heavy load, a heatsink may not be necessary. Ultimately, it’s important to consult your SSD and system specifications to determine whether a heatsink is needed for optimal performance. So, to answer the question – “Do I need a heatsink for my M.

    2 SSD?” – it depends on your specific situation.

    Conclusion

    In short, the answer to whether you need a heatsink for your M.2 SSD is complicated. It depends on various factors, such as the workload, ambient temperature, and airflow inside your PC.

    However, if you’re pushing your SSD to its limits or simply want to prolong its lifespan, adding a heatsink can’t hurt. Plus, it’s a great excuse to show off your PC building skills by adding a stylish accessory. So, go ahead and slap on a heatsink, because cooler SSDs mean better performance and bragging rights!”

    FAQs

    What is a heatsink and why do I need it for my M.2 SSD?
    A heatsink is a device that helps to dissipate heat from your M.2 SSD. It is important to use a heatsink with your M.2 SSD to prevent it from overheating, which can lead to performance issues and even data loss.

    Can I use any type of heatsink with my M.2 SSD?
    No, you need to make sure that the heatsink you use is compatible with your M.2 SSD. Most M.2 SSDs are designed to work with specific types of heatsinks, so be sure to check the specifications of your SSD before purchasing a heatsink.

    How do I install a heatsink on my M.2 SSD?
    The installation process varies depending on the type of heatsink you are using, but generally involves attaching the heatsink to your M.2 SSD using screws or adhesive. Be sure to follow the manufacturer’s instructions carefully to ensure proper installation.

    What are the benefits of using a heatsink with my M.2 SSD?
    Using a heatsink with your M.2 SSD can help to improve its performance by reducing heat buildup and preventing thermal throttling. It can also help to extend the lifespan of your SSD by reducing the risk of damage from overheating.

  • Unlock Your SSD: A Step-by-Step Guide on How to Make Your Files Readable

    Efficient file reading is essential for an enjoyable user experience. Unfortunately, there are times when our solid-state drives (SSDs) struggle with reading files. While this can be frustrating, there are measures you can take to resolve the issue.

    In this blog post, we’ll cover some easy ways to get your SSD to read files faster and more efficiently. From optimizing your settings to defragmentation techniques, we’ll explore the best strategies to improve your SSD’s file-reading capabilities. So, whether you’re a gamer looking to load levels faster or a graphic designer struggling to access your files, read on to learn how you can maximize your SSD’s potential.

    Check SSD Connection

    Are you having trouble accessing your files on your SSD? The first thing you should check is the connection between your SSD and your computer. Make sure that the SATA or PCIe cable is securely connected to both the SSD and the motherboard. Sometimes, the connection can become loose, causing the SSD to not be detected by your computer.

    Additionally, check to see if the SSD is properly installed in its slot. If the SSD is not seated correctly, it can also cause issues with accessing your files. Once you have verified the connection and installation, try restarting your computer to see if that fixes the issue.

    If the problem persists, it may be a sign of a faulty SSD and you may need to replace it. Remember, ensuring proper connections is crucial for your SSD to function correctly.

    Make sure your SSD is properly connected to your computer.

    If your SSD is not properly connected to your computer, it can cause a whole host of problems and reduce its overall performance. One of the first things you should check when experiencing issues with your SSD is its connection. Start by turning off your computer and unplugging it from any power source.

    Remove the case cover and locate the SSD. Make sure it is securely connected to the motherboard and check that the power cable is properly plugged in. If everything seems to be in place, you can try removing and reinserting the cables to ensure a secure connection.

    A loose connection can cause the SSD to disconnect while your computer is in use, resulting in data loss and other problems. By taking a few minutes to check your SSD connection, you can help ensure that it is functioning at its optimal level and improve your overall computing experience.

    how do i get my ssd to read my files

    Ensure all cables are securely plugged in.

    Check SSD Connection When your computer is slow or not starting up properly, the culprit could be a faulty or loose connection with your SSD. A simple check to ensure all cables are securely plugged in could save you from a lot of frustration. It’s essential to open up your computer and check that the SSD connector is intact and properly seated.

    If you find that the SSD Nvme M.2 connector has come loose, carefully reattach it and secure it with the screw. When working on your computer, it’s always important to be gentle, take your time, and avoid using excessive force to avoid any unnecessary damage to the delicate internal components.

    By taking the time to ensure your SSD connection is secure, you’ll be able to enjoy a faster and more reliable computer. Remember, it’s always better to be safe than sorry, so don’t hesitate to seek professional help if you’re unsure about anything.

    Update Device Drivers

    If you’re having trouble accessing files on your SSD, one reason could be outdated or missing device drivers. Device drivers allow your computer to communicate with hardware components, like your SSD, and if they are old or non-existent, your SSD may not function properly. To update your device drivers, you can go to your device manager, find your SSD, and then right-click and select “update driver.

    ” If Windows can’t find a driver, you can go to the manufacturer’s website and download the most recent driver for your specific SSD model. Updating device drivers can often fix issues with SSDs not reading files, and it’s a simple process that can save you a lot of frustration. So, take the time to update your drivers and get your SSD working the way it should.

    Open Device Manager.

    Update Device Drivers When your computer starts to act sluggish or certain peripherals stop functioning, one possible solution is to update your device drivers. Device drivers are pieces of software that enable your operating system to communicate with hardware components, like your sound card, graphics card, or keyboard. Thankfully, updating device drivers is a relatively simple process that can often be done in just a few clicks.

    To start, open up Device Manager on your computer. Depending on your operating system, you can do this by searching for “Device Manager” in the Start menu or by pressing Windows key + X and selecting “Device Manager.” Once you’re in Device Manager, you’ll see a list of all the hardware components installed on your computer.

    Find the component for which you want to update the driver, right-click on it, and select “Update driver.” The operating system will search for and install the latest driver for your device. It’s important to keep your device drivers up to date to ensure optimal performance and proper functioning of your hardware components.

    Find your SSD device and right-click on it.

    If you’re experiencing trouble with your SSD device, updating the device drivers can often solve the issue. To update your drivers, you’ll first need to find your SSD device. Typically, this will be located under “Disk Drives” in your device manager.

    Once you’ve found it, right-click on the device and select “Update Driver.” From there, you’ll be prompted to choose between searching for the driver automatically or browsing your computer for the driver software. If you choose to automatically search, your computer will connect to the internet and search for the appropriate driver.

    Searching manually allows you to specify the location of the driver software on your computer. Either way, once the driver is updated, your device should be functioning properly again. Remember to periodically check for driver updates to ensure your device is running at its best.

    Click ‘Update Driver’ and follow prompts.

    Updating your device drivers regularly is crucial for the smooth functioning of your system. Whether you’re using a printer, scanner, or software, keeping drivers up to date is vital. One way to update your drivers is by clicking ‘Update Driver’ and following the prompts.

    Generally, you’d right-click on the device, select ‘Properties,’ click the ‘Driver’ tab, and select ‘Update Driver.’ From there, you can choose to let Windows search for an updated version or manually select a driver from your computer. It’s essential to keep your drivers updated to ensure the security and optimal performance of your devices.

    Doing so can prevent device conflicts and crashes while also enhancing their features and capabilities. Therefore, make sure you update your device drivers regularly to keep your system running smoothly.

    Format SSD for Use

    So, you’ve just purchased a brand new SSD (Solid State Drive), but now you’re not quite sure how to get it to read your files. No worries, we’ve got you covered! First things first, you’ll need to format your SSD for use. This will wipe any pre-existing data, so be sure to back up anything important before proceeding.

    To format your SSD, you can use Windows’ built-in Disk Management tool. Simply right-click on the Windows button and select “Disk Management”. Locate your SSD, right-click it and select “Format”.

    From there, you can choose your desired file system (NTFS is recommended for Windows users), and assign a new drive letter. Just like that, your SSD is ready for use! Remember to be cautious when formatting any drive, as you don’t want to accidentally wipe important data. With a properly formatted SSD, your computer will be blazing fast and ready to handle any task you throw its way.

    Open Disk Management utility.

    When it comes to setting up a new SSD, one of the crucial steps is formatting it for use. To get started, you can open the Disk Management utility on your computer. This tool will show you all the connected disks on your system.

    Look for the SSD you want to format and right-click on it to see the available options. Choose the format option and follow the prompts to format your SSD. Take note that formatting an SSD will erase all data on it, so be sure to back up any important files before proceeding.

    Once the formatting process is complete, your SSD should be ready to use. By formatting your SSD, you ensure that it is optimized for your computer’s operating system, giving you better performance and reliability. So don’t forget this important step in setting up your new storage device.

    Locate your SSD and right-click on it.

    If you’re planning to use a new SSD, you may need to go through a few steps to format it for use. To do this, you’ll first need to locate the SSD and right-click on it. This will bring up a menu of options, where you can select the “Format” option.

    The process of formatting the SSD will wipe any existing data, so you’ll want to make sure you’ve backed up any important files beforehand. Once the formatting process is complete, your SSD will be ready for use. With a newly formatted SSD, you’ll experience faster data transfer speeds and improved overall performance.

    So, if you’re looking to boost your computer’s capabilities, consider formatting your SSD and get ready for a quicker, more responsive experience.

    Select ‘Format’ and follow prompts.

    When it comes to using a new SSD (Solid State Drive), the first step is to format it properly to ensure it’s ready for use. To format an SSD, you’ll need to follow a few simple steps. First, go to your computer’s settings and select ‘Disk Management.

    ‘ From here, you’ll be able to see a list of all your drives, including the new SSD. Select the SSD and choose ‘Format.’ You’ll then be prompted to choose the type of file system format you want to use.

    Depending on your needs, you may choose NTFS, FAT32, or exFAT. It’s important to note that formatting your SSD will erase all data on it, so be sure to back up any important files before proceeding. Additionally, if you’re not familiar with the process, it’s always a good idea to seek out guidance from an expert to ensure you’re doing everything correctly.

    By formatting your SSD for use, you can ensure that it’s optimized for your specific needs, whether that’s storage, performance, or a combination of both. With the right format, you can rest assured that your SSD will work as efficiently and effectively as possible, allowing you to get the most out of your new hardware investment. So why wait? Select ‘Format’ and start enjoying the benefits of your new SSD today!

    Note: This will erase all data on the SSD.

    If you’re planning to use a solid-state drive (SSD) on your computer or device, you’ll need to format it first before you can start using it. It’s important to note that formatting your SSD will wipe out all existing data on it, so make sure to back up any important files before proceeding. To format your SSD, you can use the built-in formatting tool on Windows or macOS.

    Simply connect your SSD to your computer, open the Disk Management tool on Windows or Disk Utility on macOS, select your SSD, and choose the format option that’s compatible with your device. If you’re not sure which format to use, you can choose exFAT, which is compatible with both Windows and macOS. Once the formatting process is complete, your SSD will be ready for use! Just remember to transfer any necessary files back onto it.

    Test the SSD

    If you’re struggling to get your SSD to read your files, there are a few simple steps you can take to troubleshoot the issue. First, make sure that the drive is properly connected to your computer and that all cables are securely in place. Next, check to see if the drive is being recognized by your operating system.

    In most cases, you should be able to see the drive listed under “This PC” or “My Computer”. If the drive is not showing up, you may need to update your drivers or check for any conflicts with other devices. Once you have verified that the drive is properly recognized, you can run a diagnostic test to check for any errors or defects.

    This can be done using a utility program provided by the manufacturer or through your operating system’s built-in diagnostic tools. By following these simple steps, you can quickly identify and resolve any issues that may be preventing your SSD from reading your files.

    Try accessing the SSD and opening a file.

    If you want to test the performance of your SSD, one of the simplest ways to do that is by accessing the SSD and opening a file. This process can help you determine how quickly your SSD can retrieve and load data. When you try accessing the SSD, you should look for any delays or hiccups that might occur.

    If you find any, it could be a sign that your SSD isn’t functioning optimally or may be nearing the end of its lifespan. You should also pay attention to the loading time of your file, as this can give you an idea of how quickly your SSD can read and write data. By performing this test periodically, you can get a better understanding of the health and performance of your SSD and take steps to optimize its usage.

    If issue persists, try using the SSD on a different computer.

    If you’re experiencing issues with your SSD and troubleshooting efforts haven’t yielded any results, it may be time to test the SSD on a different computer. This can help determine if the problem lies with the SSD itself or with other components on your original computer. To test the SSD, simply remove it from your original computer and connect it to a different one.

    If it functions properly on the second computer, the issue may be related to your original computer’s hardware or software. If the issue persists on the second computer, it’s likely that the SSD is faulty and may need to be replaced. Testing the SSD on a different computer is a quick and easy way to narrow down the cause of any issues you may be experiencing.

    It’s important to note that this is just one step in troubleshooting and that additional steps may be necessary depending on your specific situation. However, by testing the SSD on another computer, you can rule out one potential cause and move closer to finding a solution.

    If it still does not work, it may be a hardware issue. Consider contacting technical support.

    If you’re experiencing issues with your solid-state drive (SSD), one of the first things you should do is test it. There are a variety of tools available for this, including CrystalDiskInfo and Samsung Magician. These tools can check your SSD’s health and provide valuable diagnostic information.

    If there are issues with the drive itself, such as bad sectors or read/write errors, it may be time to consider contacting technical support. While there are steps you can take to try to resolve these issues on your own, some hardware issues may be beyond the scope of what can be fixed at home. Don’t hesitate to reach out to the professionals if you’re experiencing persistent problems with your SSD.

    By taking a proactive approach to addressing issues with your hardware, you can avoid data loss and other frustrating problems down the road.

    Conclusion

    In conclusion, getting your SSD to read your files is not rocket science, but it does require a bit of troubleshooting and technical know-how. Just like with any electronic device, sometimes all it takes is a simple restart or update to get things back on track. However, if you’re dealing with a more complex issue, don’t be afraid to consult the vast wealth of knowledge available online or seek professional help.

    At the end of the day, it’s all about being persistent and determined in your quest to access those precious files. So, roll up your sleeves and get to work; your digital treasures are waiting for you!”

    FAQs

    What could be the reasons for my SSD not reading my files?
    There could be several reasons for this issue. It could be due to a faulty cable connection or driver issues. You may need to check if the SSD is properly connected to the motherboard or update the drivers.

    Can I recover the data on my SSD if it’s not reading my files?
    Yes, there are many data recovery tools available in the market that can help recover data from non-reading SSDs. You may also try using disk recovery software to recover your data.

    How do I troubleshoot my SSD when it’s not reading my files?
    You can try reseating the connections, updating the drivers, or changing the storage controller mode in BIOS. You can also run a disk check and repair utility to fix any errors.

    What should I do if my SSD is completely dead and not reading my files?
    If your SSD is dead, you may have to consider replacing it. You can contact the manufacturer or a certified repair center to get it fixed or replaced. It’s also a good idea to have a backup of your important data to avoid data loss.

  • Upgrade Your Raspberry Pi Storage with Style: Top SSD Cases for Raspberry Pi

    Upgrade Your Raspberry Pi Storage with Style: Top SSD Cases for Raspberry Pi

    Are you looking for an efficient and affordable way to store data for your Raspberry Pi? Look no further than the RPi SSD case! This innovative case allows you to connect a solid-state drive to your Raspberry Pi, providing lightning-fast speeds and ample storage space for all your projects. Gone are the days of relying on slow and unreliable SD cards. With the RPi SSD case, you can enjoy the benefits of solid-state storage, including faster boot times and improved read/write speeds.

    Plus, the case protects your SSD from damage while also providing a sleek and compact design. In this ultimate guide, we’ll walk you through everything you need to know about the RPi SSD case. From installation to troubleshooting, we’ll cover all the important details to help you get the most out of your device.

    So whether you’re a seasoned Raspberry Pi veteran or new to the world of DIY computing, you’re sure to find valuable information in this guide. So why wait? Join the many satisfied users who have upgraded their Raspberry Pi with the RPi SSD case. With its reliable performance and convenient design, it’s the perfect addition to any Pi-based project.

    Let’s get started!

    Why You Need an SSD Case for Your RPi?

    If you’re using a solid-state drive (SSD) with your Raspberry Pi, it’s essential to invest in an SSD case. A well-designed case can help to protect your drive from damage and ensure that it stays cool and functional over time. The Raspberry Pi is a small device that generates a considerable amount of heat, and an SSD case has the potential to minimize the risk of overheating.

    Furthermore, the case protects your SSD from dust, moisture, and other forms of physical damage that can compromise its function. An rpi ssd case is an affordable investment that can add a layer of protection to your SSD while maintaining its performance. With a plethora of options available, you can choose a case that best suits your needs while keeping your hardware protected and running smoothly.

    Protection from Physical Wear and Tear

    If you’re using a Raspberry Pi regularly, you know how important it is to protect your investment from physical wear and tear. That’s where an SSD case comes in handy! Not only does it protect your Raspberry Pi from scratches and dents, but it can also help prevent damage from accidental drops or spills. An SSD case will keep your Pi secure and safe while ensuring it won’t get damaged due to everyday use.

    Plus, with so many different types of cases available, you can choose one that matches your personal style and preferences. So, if you want to keep your Raspberry Pi in top condition, consider investing in an SSD case today!

    rpi ssd case

    Heat Dissipation and Increased Lifespan

    Heat Dissipation and Increased Lifespan If you own a Raspberry Pi, you already know its powerful processing capabilities. However, all that power comes at a cost. The RPi generates a lot of heat, which can be detrimental to its components’ lifespan.

    That’s where an SSD case comes into play. An SSD case not only protects your RPi but also increases its lifespan by dissipating heat more efficiently. The case’s design allows for better airflow around the components and provides better thermal conductivity for dissipation.

    Think of it as wearing a hat in the summer sun. Just as a hat’s brim shields your face from the sun’s direct rays, an SSD case shields your RPi from excessive heat that can damage its components. So, invest in an SSD case to protect your RPi from heat, and you’ll get a longer lifespan out of your device.

    Better Performance and Speed

    If you’re looking to enhance the performance and speed of your Raspberry Pi (RPi), then an SSD case is a must-have accessory. An SSD (solid-state drive) is a storage device that uses flash memory to store data. Unlike traditional hard drives, which are mechanical and slow, SSDs are much faster and efficient.

    By using an SSD case to house your RPi, you can experience a significant boost in performance. The RPi can process data and access files much quicker, resulting in faster load times for applications and programs. With an SSD case, you can take full advantage of the RPi’s powerful hardware and unlock its true potential.

    So if you’re looking for an easy way to upgrade your RPi’s performance, consider investing in an SSD case.

    What to Look for in an RPi SSD Case?

    When it comes to choosing an SSD case for your Raspberry Pi (RPi), there are several factors you should consider. Firstly, look for a case that has a compatible form factor and interface with your chosen SSD. Make sure it supports the type of connectivity you need for your project, whether it’s USB

    0, SATA, or M. Next, consider the durability and build quality of the case.

    Ideally, it should be made from sturdy materials like metal or high-quality plastic to protect your SSD from physical damage. Additionally, look for a case that has good heat dissipation properties to prevent your SSD from overheating. Finally, take into account the type of project you’re working on and the environment in which it will be used.

    Is it an indoor or outdoor project? Will it be subjected to extreme temperatures or humidity? Choosing an SSD case that can withstand these conditions will help ensure the longevity of your RPi and SSD. With the right SSD case, you’ll have peace of mind knowing your project is protected and running smoothly.

    Compatibility with your RPi board.

    When it comes to the compatibility of your RPi board with an SSD case, there are a few things to consider. First and foremost, it’s important to ensure that the case is designed to fit your specific RPi model. Different models have different dimensions and placement of ports, so you’ll want to make sure you get a case that accommodates your board’s layout.

    Additionally, you’ll want to look for a case that allows for easy access to the board’s GPIO pins, as these are often used for expansion and add-on projects. Another thing to consider is the type of connection that the case uses to connect to your board. Many SSD cases use USB

    0 connections, which provide fast transfer speeds and easy setup, but may not be ideal for certain projects where other types of connections, such as SATA or NVMe, might be necessary. Overall, finding an RPi SSD case that fits your board and meets your project’s specific needs is essential to getting the most out of your Raspberry Pi setup.

    Ventilation and Heat Dissipation

    When choosing an SSD case for your Raspberry Pi, it’s important to consider ventilation and heat dissipation. Since SSDs produce heat while in use, it’s important that the case has adequate airflow to prevent overheating. Look for cases with vents or fans to ensure proper airflow.

    Additionally, cases with passive cooling solutions like heat sinks or thermal pads will help dissipate heat. When choosing a case, make sure it fits the dimensions of your specific SSD and Pi model to ensure a secure fit and proper ventilation. By choosing a case with proper ventilation and cooling solutions, you can ensure that your Raspberry Pi and SSD stay cool and function optimally.

    Accessibility of SD Card Slot

    When it comes to choosing an SSD case for your Raspberry Pi, there are a few things to consider, and one of the most important factors is the accessibility of the SD card slot. You want to make sure that the slot is easily accessible, so you can remove and insert your SD card without any hassle. Some SSD cases have a separate slot for the SD card, while others have a cutout on the side of the case to provide access.

    Additionally, it’s important to ensure that the case is compatible with your specific SSD and Raspberry Pi model, as some cases may only work with certain combinations. Overall, a good SSD case should provide reliable protection for your hardware, while also allowing for easy accessibility and compatibility. So, before you make a purchase, be sure to do your research and choose a case that meets your specific needs.

    Top 5 RPi SSD Cases in the Market.

    If you’re looking for a reliable and sturdy case to protect your Raspberry Pi with an SSD, you’re in the right place. Here are the top 5 RPi SSD cases in the market that you should definitely consider. Firstly, the Argon ONE M.

    2 is an aluminum case that can cool your SSD while keeping things slim. Secondly, the GeeekPi Raspberry Pi 4B M.2 case is a clear acrylic case with a unique design that allows you to save space and visibility.

    Thirdly, the MakerFocus Raspberry Pi 4B M.2 case is made from aluminum alloy and has excellent heat dissipation. Fourthly, the Miuzei Raspberry Pi 4B SSD case is an easy-to-install metal case that has great support for various SATA SSDs.

    Finally, the Suptronics X900 Raspberry Pi 4B case is a solidly built enclosure that can fit two M.2 SSDs, making it a great option for those in need of more storage capabilities. Each of these cases offers excellent protection and durability for your Raspberry Pi with an SSD, enabling you to fully utilize its capabilities in your projects.

    Product 1: Features and Benefits

    If you’re looking for a way to improve the storage of your Raspberry Pi (RPi), then an SSD case may be just what you need. These cases come in all shapes and sizes, but the top five in the market offer a range of features and benefits. First on the list is the Argon ONE M.

    2 case. It’s compact, easy to install, and offers both M.2 NVMe and SATA drive support.

    Next is the Inateck FE201 This case is lightweight and durable, with a heat dissipation mechanism that keeps your SSD at a safe temperature. Another great option is the Geekworm X835-C1 case, which has a built-in power button and an LED indicator to keep you informed of drive activity.

    The Ugreen SSD enclosure is also worth considering, as it supports a variety of SSD sizes and interfaces, including M.2 NVMe and SATA. Finally, we have the Waveshare Metal Case.

    This case features excellent heat dissipation and a sleek design that looks great on any desk. So, if you’re in the market for an SSD case for your RPi, these top five options have got you covered.

    Product 2: Features and Benefits

    RPi SSD Cases If you’re a fan of Raspberry Pi and you want to upgrade to an SSD, it’s essential to choose a reliable case for protection. RPi SSD cases come in different designs and materials, catering to different needs and preferences. Here are the top 5 RPi SSD cases in the market that you can consider.

    First on the list is the Argon ONE M.2 case. It’s made of aluminum and has a sleek, minimalist design that fits seamlessly with your Raspberry Pi.

    It also has an integrated fan for better cooling performance. Next is the KKSB RPi 4 case, made of durable steel with an open design for easy access to the ports. You can also add a cooling fan for extra protection.

    Third on the list is the SupTronics X835 case that supports M.2 and SATA drives. It has an elegant look and comes with a power switch, fan, and LED indicator.

    Fourth is the Geekworm X825 case, which can accommodate different sizes of SSDs. It has a simple design that’s easy to assemble. And last but not least is the Waveshare Metal Case Type-C, which is made of high-quality aluminum alloy.

    It has a rugged design that’s perfect for outdoor use and can protect the SSD from any damage. In summary, choosing the best RPi SSD case depends on your needs and preferences. Whether it’s for aesthetics, durability, or functionality, these top 5 SSD cases have got you covered.

    Product 3: Features and Benefits

    Looking for reliable storage for your Raspberry Pi? Then you might want to consider investing in an SSD case. With an SSD case, you can protect your Pi and add more storage space at the same time. But with so many options available, which one should you choose? Here are the top 5 RPi SSD cases in the market today.

    First on the list is the Flirc Raspberry Pi 4 case. It’s not only sleek and stylish but it also comes with excellent thermal properties, which ensures that your Pi does not overheat. It also has a built-in SSD holder for added storage.

    Second on the list is the Geekworm Raspberry Pi 4 case. It’s made from durable aluminum and has a rugged design that provides excellent protection for your Pi. It also has plenty of storage options, so you can easily add additional SSDs.

    Third on the list is the Argon ONE M.2 case. It’s designed specifically for the Raspberry Pi 4, and it comes with an M.

    2 SSD holder, which allows you to expand your storage capabilities while keeping your Pi safe from overheating. Fourth on the list is the ASUS Tinker Edge R. It was designed to be a versatile and reliable case for Raspberry Pi 4 users.

    It’s made from high-quality materials and has excellent thermal properties, making it ideal for demanding applications. And finally, we have the Vilros Raspberry Pi 4 case. It’s a simple and affordable option that provides ample protection and room for storage.

    Conclusion

    In conclusion, the RPi SSD case is a game-changer for anyone looking to boost their Raspberry Pi’s storage speed and capacity. With its sleek design and easy installation process, it turns your humble Pi into a powerhouse of productivity. It’s like giving your Pi a souped-up sports car to ride around in, leaving those clunky external hard drives in the dust.

    So take your Pi’s storage to the next level with the RPi SSD case – your data (and your Pi’s performance) will thank you.”

    FAQs

    What is an RPi SSD case?
    An RPi SSD case is an enclosure designed to protect and contain a solid-state drive (SSD) that can be connected to a Raspberry Pi (RPi) computer.

    Why use an RPi SSD case?
    Using an RPi SSD case can provide physical protection for the SSD, help dissipate heat, and make it more convenient to transport the RPi and SSD together.

    Are RPi SSD cases compatible with all types of SSDs?
    No, RPi SSD cases may only be compatible with certain sizes and types of SSDs. It is important to check the specifications before purchasing an RPi SSD case.

    How do I install an SSD into an RPi SSD case?
    The installation process may vary depending on the specific case, but generally, it involves opening the case, attaching the SSD to the adapter board, and securely placing the board inside the case before closing it up. It is recommended to follow the product instructions carefully.

  • Upgrade Your Storage with a Lightning-Fast 42mm NVMe SSD: Everything You Need to Know!

    Welcome to the world of 42mm NVMe SSDs! If you’re in the market for a new SSD, you’ll want to consider the benefits of these small but mighty storage devices. Despite their diminutive size, 42mm NVMe SSDs pack a powerful punch, with lightning-fast read and write speeds that make them ideal for high-performance applications. Think of it this way: if a traditional hard drive is like a bike, a 42mm NVMe SSD is like a Ferrari.

    Both will get you from point A to point B, but the Ferrari will do it faster and more efficiently. With read speeds of up to 3500MB/s and write speeds of up to 3000MB/s, these SSDs can handle even the most data-intensive tasks with ease. But the benefits don’t stop there.

    42mm NVMe SSDs also consume less power than traditional hard drives, which means longer battery life for your laptop or mobile device. They’re also incredibly durable, with no moving parts to break or wear out over time. And because they’re so small, they take up very little space in your computer or device, leaving more room for other components.

    So, whether you’re a gamer, a content creator, or just someone looking for a faster, more reliable storage solution, a 42mm NVMe SSD could be just what you need. With their impressive performance, low power consumption, and tiny footprint, these SSDs are sure to make a big impact on your computing experience.

    What is NVMe SSD?

    If you’re in the market for a compact, high-speed storage solution, a 42mm NVMe SSD might just be what you need. NVMe (Non-Volatile Memory Express) is a protocol that allows solid-state drives to operate at their full potential, delivering blazing fast speeds and low latency for lightning-fast data access. What sets NVMe SSDs apart is their ability to use multiple queue depths and parallelism that can significantly improve performance.

    With a size of just 42mm, these miniaturized storage devices fit perfectly in laptops, tablets, and compact desktops, providing a high-speed solution without taking up much space. If you’re looking for a storage solution that can keep up with the demands of power users, a 42mm NVMe SSD might be just what you need. Its small size and high capacity make it a great fit for anyone looking for high-speed storage that won’t take up much space in their system.

    A brief on NVMe SSD technology

    NVMe SSD stands for Non-Volatile Memory Express Solid State Drive. It is the latest and most advanced technology for storage devices in the market today. It is designed for use in high-performance computing systems that require ultra-fast data transfer speeds, low latency, and high input-output operations per second (IOPS).

    NVMe SSD is based on a protocol that is optimized for flash memory and PCIe interfaces, which takes advantage of parallelism to boost performance. It is also more power-efficient compared to previous SSD technologies, which can lead to longer battery life for mobile devices. Overall, NVMe SSD technology is highly recommended for those who require the best performance and speed for their storage needs.

    42mm nvme ssd

    Why 42mm?

    Are you wondering why 42mm is the favored size for NVMe SSDs? The answer is simple: 42mm is the most compact M.2 SSD form factor available in the market. It is designed to fit into a wide range of devices, including laptops, tablets, and small form factor PCs.

    NVMe SSDs are fast, reliable, and efficient, which makes them an ideal storage solution for modern devices. The small size of a 42mm NVMe SSD is perfect for portable devices that require fast, reliable storage but have limited space. With the increasing demand for thinner and lighter devices, manufacturers have shifted towards smaller and more efficient storage solutions like the 42mm NVMe SSD.

    So, if you are in the market for a fast, reliable, and compact storage solution, a 42mm NVMe SSD might be just what you need.

    An analysis on size suitability

    When it comes to choosing the right watch size, many people struggle with finding the right balance between functionality and fashion. It’s true that watches come in all shapes and sizes; however, the 42mm size seems to be a sweet spot for many watch enthusiasts. But why 42mm? Well, there are a few reasons.

    Firstly, it’s a size that suits both men and women, making it a universal choice. Additionally, a 42mm watch face can display more information than a smaller one, which can be especially advantageous for those who need to read the time quickly in busy or fast-paced environments. Moreover, this size is big enough to make a statement and stand out on the wrist, yet still small enough to avoid feeling heavy or bulky.

    The 42mm size strikes a balance between practicality and style, making it an ideal choice for those looking to invest in a watch that’s both functional and fashionable.

    Performance Boost

    If you’re looking for a performance boost in your laptop or desktop, you might want to consider upgrading your storage with a 42mm NVMe SSD. These drives use the latest technology to deliver lightning-fast speeds for both reading and writing data. Compared to traditional SATA solid-state drives, NVMe SSDs can achieve up to six times faster speeds while consuming less power.

    With their compact form factor, 42mm NVMe SSDs can fit into even the tightest spaces, making them an excellent choice for laptops and mini PCs. Plus, they offer high endurance and reliability, making them a sound investment for anyone who values their data. Whether you’re a gamer, a content creator, or just a regular user looking for a snappier experience, upgrading to a 42mm NVMe SSD could make a world of difference.

    Comparing 42mm NVMe SSDs to other storage devices

    NVMe SSDs NVMe SSDs are the ultimate performance boost for anyone looking for faster storage devices. When compared to traditional storage options like hard disk drives and SATA SSDs, the NVMe SSDs clearly outshine their competitors, especially the 42mm NVMe SSDs. The NVMe SSDs utilize the PCIe

    0 interface, which allows for faster data transfer rates, thereby reducing the loading time of applications and booting time. The 42mm NVMe SSDs are particularly popular because of their compact size, which makes them ideal for use in ultrabooks, tablets, and other portable devices where space is a premium. Additionally, the NVMe SSDs have lower latency and a higher input/output operation per second (IOPS) compared to the traditional storage options.

    This feature makes them ideal for professionals who constantly work with large data sets, such as designers, videographers, and software developers. NVMe SSDs are an invaluable addition to any device seeking better performance.

    Real life benefits of 42mm NVMe SSDs

    Performance Boost Upgrading your storage solution to a 42mm NVMe SSD can give your computer system a noticeable boost in performance. With its lightning-fast read and write speeds, an NVMe SSD can increase your computer’s boot and load times. As a result, you’ll be able to open applications and files much quicker than before.

    This will save you time and increase your overall productivity. Additionally, NVMe SSDs require less power and generate less heat compared to typical hard disk drives (HDDs). This means that your computer will run more efficiently and quietly.

    In short, upgrading to a 42mm NVMe SSD is a simple and effective way to optimize your computer’s performance, speed, and efficiency.

    Top 42mm NVMe SSDs

    Looking for a compact yet powerful solid-state drive (SSD) for your laptop or desktop? A 42mm NVMe SSD might just be the solution you need. These tiny drives are designed to fit into tight spaces while delivering blazing-fast storage performance. Whether you’re a gamer, content creator, or power user, there’s an NVMe SSD in the 42mm form factor that will meet your needs.

    Some of the top options on the market include the Samsung 970 EVO Plus, WD Black SN750, and Kingston A2000. These drives offer lightning-fast read and write speeds, high endurance, and reliable performance. So if you’re looking to upgrade your system’s storage, consider a 42mm NVMe SSD – it might just be the upgrade you need to take your computing experience to the next level.

    Product descriptions and recommendations

    Looking for a fast and reliable 42mm NVMe SSD? Look no further than our list of top picks! These SSDs offer lightning-fast read and write speeds, making them ideal for gamers, content creators, and anyone who needs to transfer large files quickly. The Samsung 970 EVO Plus leads the pack with sequential read speeds of up to 3,500 MB/s and write speeds of up to 3,300 MB/s. The WD_Black SN750 is another great option with read speeds of up to 3,470 MB/s and write speeds of up to 3,000 MB/s.

    If you’re on a budget, the Kingston A2000 offers excellent value for money with read speeds of up to 2,200 MB/s and write speeds of up to 2,000 MB/s. Other top picks include the Crucial P5, Seagate FireCuda 520, and ADATA XPG SX8200 Pro. No matter which 42mm NVMe SSD you choose, you can’t go wrong with any of these high-performing options.

    So why wait? Upgrade your storage today and experience the lightning-fast speeds of an NVMe SSD!

    Installation and Compatibility

    If you’re looking to upgrade your system’s storage, you might have come across the 42mm NVMe SSD. This SSD form factor can be a great choice for small laptops or compact desktops, but before purchasing one, you need to ensure that your system supports it. The 42mm NVMe SSD uses the M.

    2 interface, which means that your motherboard needs to have an M.2 slot that supports NVMe drives. Some older motherboards may not have this feature, so it’s essential to check the specifications before making a purchase.

    Additionally, keep in mind that not all 42mm NVMe SSDs are the same, and there are different versions that support different transfer speeds and have different power consumption levels. So, make sure to read the product specifications carefully to ensure compatibility and get the best performance out of your purchase. Overall, the 42mm NVMe SSD can be a great addition to your system if you have the appropriate hardware and know which one to choose.

    A guide on how to install and use 42mm NVMe SSDs with various devices

    If you’re planning to upgrade your device’s storage capacity, installing a 42mm NVMe SSD could be a great option. These solid-state drives provide faster read and write speeds than traditional hard drives, and since they’re available in a small form factor, they’re compatible with a wide range of devices. Before you buy a 42mm NVMe SSD, it’s important to ensure that your device supports this type of drive.

    Many newer laptops and PCs have M.2 slots that can accommodate these SSDs, but you should check your device’s specifications to be sure. Once you’ve confirmed compatibility, the installation process is relatively simple.

    Just insert the SSD into the appropriate slot and secure it in place. You may need to adjust your BIOS settings to boot from the new drive, but this can be easily done through your device’s startup menu. Overall, adding a 42mm NVMe SSD to your device can improve its performance and provide additional storage space for your files and applications.

    Conclusion

    In a world where speed and efficiency reign supreme, the 42mm NVMe SSD rises to the occasion. Its compact size belies its immense power, delivering lightning-fast read and write speeds. It’s the perfect companion for users who demand the utmost performance from their devices.

    In short, the 42mm NVMe SSD proves that good things do indeed come in small packages.”

    FAQs

    What is the speed of a 42mm NVMe SSD?
    The speed of a 42mm NVMe SSD can vary depending on the specific model, but generally they offer faster read and write speeds than traditional SATA SSDs, with some reaching speeds of up to 3,500 MB/s read and 3,000 MB/s write.

    Can a 42mm NVMe SSD be used in a laptop?
    Yes, a 42mm NVMe SSD can be used in a laptop as long as the laptop supports the NVMe interface and has an available M.2 slot for installation.

    How much storage can a 42mm NVMe SSD hold?
    The amount of storage that a 42mm NVMe SSD can hold will depend on the specific model, with some offering storage capacities ranging from 128GB to 2TB or more.

    What are the advantages of using a 42mm NVMe SSD over a traditional SATA SSD?
    Some advantages of using a 42mm NVMe SSD over a traditional SATA SSD include faster read and write speeds, lower latency, and better power efficiency. Additionally, NVMe SSDs typically have a smaller form factor than SATA SSDs, making them a good choice for compact systems or installations with limited space.

  • Upgrade Your Acer Nitro 5 with Ease: A Simple Guide on How to Add an SSD

    If you’re an Acer Nitro 5 owner, you may have noticed that your laptop could use some speed upgrading. And we have the perfect solution for that: adding an SSD to your Acer Nitro But before jumping into that, let’s clarify what an SSD is and why it’s beneficial for your laptop.

    Think of your laptop’s hard drive as a library: the disks are the shelves, and the data are the books. Your laptop’s processor needs to move from one shelf to another every time it needs to access data. Now, imagine if you could fit all those books on one shelf, making it easier and faster for your processor to access them.

    An SSD (Solid State Drive) is like that one shelf – it stores all your data in its flash memory, which means your processor can access it instantly without having to physically move through disks. This results in faster boot times, opening apps in a snap, and ultimately, an overall faster and responsive laptop. And don’t worry; adding an SSD to your Acer Nitro 5 is an easy task.

    In this blog, we’ll guide you through the steps to upgrade your laptop’s speed, so you can enjoy better performance and an improved laptop experience. So, let’s get started!

    Preparation

    Adding an SSD to your Acer Nitro 5 can significantly improve its performance by giving it faster read and write speeds. To do this, you’ll need to prepare your laptop by gathering the necessary tools, including a screwdriver and a new SSD. You can find SSDs at any electronics retailer or online store.

    Once you have your SSD, the next step is to turn off your laptop and unplug all cables and peripherals. Carefully remove the back cover of your laptop by unscrewing the screws and locate the hard drive bay. Carefully remove the hard drive and switch it with your new SSD, making sure to secure it in place.

    Finally, replace the back cover of your laptop and screw it in place. Restart your laptop and you should now have a faster and more responsive system. Keep in mind that it’s always a good idea to back up your data before making any hardware changes to your system.

    Check Compatible SSD Drive

    When upgrading your computer’s storage system, it’s essential to check if your SSD drive is compatible. Before purchasing a new drive, make sure to do some research on the specifications of your computer’s motherboard. Check the type of interface your SSD uses (SATA, NVMe, or PCIe) and the maximum capacity your computer can handle.

    One way to find this information is to look up your motherboard’s model number online. You can also consult the manual that came with your computer. Some other things to consider are the form factor and the performance of the SSD drive.

    Most desktops and laptops use 5-inch or M.2 form factors.

    Make sure to choose the appropriate size and shape for your computer. When it comes to performance, consider the read and write speeds of the SSD, as well as its endurance and lifespan. A reliable and compatible SSD drive can significantly improve your computer’s speed and performance.

    So before making your purchase, take the time to do your research, and make sure you’re getting a compatible drive that meets your needs.

    acer nitro 5 how to add ssd

    Gather Required Tools

    One of the first steps in any new DIY project is gathering all the necessary tools. This can seem overwhelming at first, but with a little planning, anyone can prepare like a pro. The key is to start by identifying exactly what tools are required for the project.

    Once you have a list, you can start checking off items you already own and purchase any missing tools. Depending on the project, some tools may be available for rent. This can help save money on expensive items that you may not need again.

    Remember, having the right tools can make all the difference when it comes to the success of your project. So, take the time to prepare properly and don’t rush into anything unprepared.

    Installation process

    If you’re looking to add an SSD to your Acer Nitro 5, it’s a relatively straightforward process. The first step is to shut down your laptop and unplug it from any power sources. Then, locate the SSD slot on the underside of the laptop, which is typically located near the battery.

    Once you’ve found the slot, remove the screws and gently slide the SSD into place, ensuring that it is firmly seated. Next, replace the screws and power up your laptop. At this point, you may need to format the new SSD to ensure that it is recognized by your operating system.

    To do this, go to the Disk Management tool in Windows and initialize and format the new drive. With your new SSD installed and formatted, you should notice a significant improvement in performance, including faster boot times and quicker read and write speeds.

    Turn Off and Unplug Laptop

    If you’re planning to install new hardware or software on your laptop, it’s essential to turn off and unplug your device. It may seem like an unnecessary step, but it can save you from potential harm and damage to your laptop. Turning off your laptop ensures that no power is running through the device, which can make it difficult for any electrical current to damage the hardware or circuits during the installation process.

    Furthermore, unplugging your laptop from the power source prevents any potential electrical surges that can occur while the device is connected, giving you peace of mind while you work. So don’t forget to turn off and unplug your laptop before starting the installation process – it could save you from costly repairs in the long run.

    Locate the SSD Slot

    When upgrading your laptop’s storage, installing an SSD can make a significant difference in overall speed and performance. But first, you need to locate the SSD slot on your device. Finding the slot will depend on your laptop’s make and model, so be sure to refer to the manufacturer’s website for guidance.

    Once you have identified the location of the slot, you’ll need to physically open up your laptop, which can be a daunting task. Before doing so, be sure to have the necessary tools and follow proper safety precautions. Once inside, you can locate the SSD slot and secure the SSD in place.

    It’s essential to ensure that the SSD is compatible with your laptop and that you properly install any necessary software or drivers for it to function correctly. With the SSD installed and configured, you can enjoy faster boot times, faster application load times, and improved overall performance. Remember, taking the time to properly install an SSD will make all the difference in your laptop’s performance and longevity.

    Insert the SSD Drive

    Inserting an SSD drive into your computer can greatly enhance its speed and overall performance. To begin the installation process, ensure that your computer is turned off and unplugged from any power source. Locate the SSD drive slot and remove the cover if necessary.

    Gently insert the SSD drive into the slot, making sure that it is securely in place. Screw in the cover to hold the drive in place if needed. Once the physical installation is complete, turn on your computer and check to see if the drive is recognized.

    If it is not, you may need to go into your computer’s BIOS settings to enable the SSD drive. By following these steps, your computer will be able to take advantage of the many benefits that an SSD drive provides, such as faster boot times and improved application performance.

    Secure the SSD with Screw

    When it comes to securing your SSD, it’s essential to make sure that it is firmly attached to the mounting bracket inside your computer case. This can be achieved by using screws that come with the bracket or the SSD itself. Installing the screws into the mounting bracket is a simple process that can be done using a screwdriver.

    Once the bracket is secured in place, the SSD can be positioned onto it and the screws tightened to hold it in place. This ensures that the SSD stays put and doesn’t move around inside the case during use, reducing the risk of damage. So, don’t forget to secure your SSD with screws during installation to ensure it remains safe and secure at all times.

    Configuring SSD Drive

    If you are looking to upgrade your Acer Nitro 5 laptop by adding an SSD drive, it’s a fairly simple process that you can do yourself at home. First, you need to ensure that your laptop has an available slot for an SSD drive. Next, you will need to purchase an SSD drive and a SATA cable if one is not included with the drive.

    Then, you need to remove the bottom panel of your laptop to access the hard drive bay. From there, you can remove the existing hard drive and replace it with your new SSD drive. Finally, you need to reinstall the bottom panel and boot up your laptop.

    Once you complete this process, you should notice a significant boost in speed and performance. Adding an SSD drive can be a game-changer for any laptop, and the Acer Nitro 5 is no exception. So, why not take the plunge and upgrade your laptop today?

    Initialize and Format the SSD

    Configuring an SSD drive can greatly improve the performance of your computer. The first step to setting up an SSD drive is to initialize it and format it correctly. Initializing refers to preparing the drive for use with your computer.

    To do this, right-click on the Windows Start menu and select Disk Management. Locate the new SSD drive, right-click on it, and select Initialize Disk. Choose the MBR (Master Boot Record) option and click OK to confirm.

    Once the SSD drive is initialized, it’s time to format it. Formatting prepares the drive for use by creating a file system. To do this, right-click on the unallocated space of the drive and select New Simple Volume.

    Follow the prompts to create a volume of the desired size and format it with NTFS (New Technology File System). This will ensure compatibility with Windows operating systems. After formatting the SSD, it’s important to enable the TRIM feature.

    TRIM is a command that helps optimize the performance of an SSD drive by clearing out unused space on the drive. To enable TRIM, simply open the Command Prompt as an administrator and enter the command “fsutil behavior set DisableDeleteNotify 0”. This will allow the operating system to send the TRIM command to the SSD drive.

    In conclusion, initializing and formatting an SSD drive is a crucial step in optimizing the performance of your computer. By following these simple steps and enabling TRIM, you can ensure that your SSD drive is ready for use and running at peak performance. So, go ahead and configure your SSD drive today and enjoy faster boot times and improved overall performance!

    Set Up Windows on the SSD Drive

    When setting up a new SSD drive, it’s important to configure it properly to make the most of its capabilities. One crucial step is to install your Windows operating system on the SSD drive. This can significantly improve your computer’s performance, speed up boot times, and reduce load times for programs and files.

    To do this, you’ll need to create a bootable USB or DVD installation media using the Windows Media Creation Tool. Then, you can connect your new SSD drive to your computer and boot from the installation media. During the installation process, you’ll need to select the SSD drive as the location for your Windows installation.

    Once the installation is complete, your computer should be ready to go with a fresh, optimized Windows installation on your SSD drive.

    Conclusion

    In conclusion, adding an SSD to your Acer Nitro 5 is like giving it a turbo boost. It’s a simple and effective way to improve your laptop’s performance and make it run faster than ever before. So don’t hesitate to upgrade your device and experience the ultimate gaming and computing experience!”

    FAQs

    How to add an SSD to Acer Nitro 5?
    Adding an SSD to Acer Nitro 5 involves opening the back cover, inserting the SSD into the dedicated slot, and then screwing the back cover back on. Here’s a step-by-step guide: 1. Turn off your Acer Nitro 5 and unplug the power adapter. 2. Flip the laptop over and locate the screws on the back cover. 3. Use a screwdriver to remove the screws and carefully lift the cover off. 4. Locate the SSD slot and carefully insert the SSD. Make sure it is lined up correctly. 5. Screw the SSD into place. 6. Replace the back cover and screw it on. 7. Turn on your Acer Nitro 5 and check if the SSD is detected.

    What is the best SSD to add to Acer Nitro 5?
    There are several great SSD options to add to Acer Nitro 5, but some of the most recommended ones are Samsung 970 EVO Plus, WD Blue SN550, Crucial MX500, and Kingston A2000. These SSDs have good speed, storage capacity, and reliability.

    Do I need to clone my HDD before adding an SSD to Acer Nitro 5?
    Yes, it’s a good idea to clone your HDD to the new SSD before installing it on your Acer Nitro 5. Cloning ensures that all your data, files, and programs are transferred to the new SSD, so you don’t have to reinstall everything from scratch. You can use a cloning software like Clonezilla, Macrium Reflect, or Acronis True Image to do this.

    Can I add both SSD and HDD to Acer Nitro 5?
    Yes, you can add both SSD and HDD to Acer Nitro 5 as it has two storage bays. You can replace the existing HDD with an SSD and use it as the primary drive for the operating system and applications, while keeping the HDD as a secondary drive for storing files, media, and backup. Alternatively, you can add an SSD to the vacant slot and use it as a cache drive to speed up the HDD.