Author: David L. Lynn

  • Boost Your PC’s Speed: Step by Step Guide on How to Copy Your C Drive to an SSD

    Are you tired of a sluggish and slow system? Has your C drive run out of space, and you’re looking for a way to transfer data to a new SSD? Well, fret no more! In this complete guide, we will walk you through the process of copying your C drive to an SSD with ease. It’s not uncommon to experience a slow system after a while or run out of space on your hard drive. When this happens, replacing your hard drive with an SSD can be an easy fix.

    But the process can be intimidating, especially if you’re not tech-savvy. Thankfully, copying your C drive to an SSD is a straightforward process that can be achieved in just a few steps. With our comprehensive guide, you’ll learn how to properly back up your data and clone your hard drive.

    We’ve broken down the process into clear and concise steps that will save you time and unnecessary stress. From upgrading your hardware to transferring your data, this guide will provide you with everything you need to know to make the transition seamless. So, why settle for a slow and outdated system when you can enjoy the lightning-fast speeds of an SSD? Keep reading to learn everything you need to know about copying your C drive to an SSD.

    Check SSD Compatibility

    If you’re looking to upgrade your computer’s storage, swapping out your traditional hard drive for a solid-state drive (SSD) is one of the best ways to speed things up. But before you can copy your C drive to an SSD, you need to make sure your computer is compatible with this type of storage device. In most cases, newer computers are likely to have an M.

    2 slot or support SATA connections that can interface with an SSD. However, if your computer is older, you may need to consult the manufacturer’s documentation to determine compatibility. It’s also important to note that when copying your C drive to an SSD, you’ll want to ensure that the new drive has enough space to accommodate all of your data, applications, and operating system files.

    By taking the time to check your computer’s compatibility with an SSD and ensuring there’s enough space on the new drive, you can enjoy faster boot times, shorter application load times, and an overall improved computer experience.

    Ensure the SSD is compatible with your computer’s motherboard.

    When upgrading your computer’s storage to a solid-state drive (SSD), it’s important to ensure compatibility with your motherboard. One way to do this is to check the specifications of both components and compare them to see if they match. Some motherboards may have limitations on the type or size of SSD they can support, so it’s crucial to know what your computer can handle.

    You can also consult the manufacturer’s website or user manual for information on compatible SSDs. Incompatible hardware can cause issues such as data loss, system crashes, or even damage to your computer. So before making any upgrades, make sure to do your research and check compatibility to avoid any potential headaches.

    By taking this simple step, you’ll be one step closer to a faster, more efficient computer.
    how do i copy my c drive to an ssd

    Backup C Drive

    If you’re looking to upgrade to a new SSD or simply want to make sure your important files are safe, backing up your C drive is a smart move to make. The process of copying your C drive to an SSD is not as complicated as it may seem, and can be completed in just a few steps. First, you’ll need to connect your new SSD to your computer and make sure it’s recognized.

    Then, you can use software like Acronis True Image or EaseUS Todo Backup to clone your C drive to the SSD. Make sure to choose the option to clone the entire drive to ensure all of your files are backed up. This can take some time depending on the size of your C drive, so be patient.

    Once the cloning process is complete, you’re ready to use your new SSD. It’s important to note that the process of backing up your C drive does not delete any data from your original drive, so you can still access your files if needed. By following these steps, you can ensure that your important files are safe and sound on your new SSD.

    Transfer your necessary data from C Drive to other storage.

    When it comes to backing up your computer’s data, one of the most critical steps is to transfer important data from your C drive to other storage devices, such as an external hard drive or a cloud-based solution. The C drive is often where your operating system, programs, and personal files are stored, making it the most vulnerable to data loss. By transferring this data to another storage device, you can ensure that you have a safe copy of your critical files in case of a hard drive failure or other data catastrophe.

    To backup C drive, all you need is a reliable storage device and simple software that can automate the process of transferring files. Additionally, it’s always a good practice to make a habit of regularly backing up your data to minimize the risk of losing valuable information. So, take the time to backup your C drive today and enjoy the peace of mind that comes with knowing your data is safe and secure.

    Create Disk Image

    If you’re thinking of upgrading to an SSD or simply want to create a backup of your files and system, then copying your C drive is the way to go. The simplest way to do this is by creating a disk image. A disk image is a replica of your entire hard drive, including all your system files, programs, and settings.

    First, attach your SSD to your computer, and ensure it’s initialized, formatted, and has enough space to accommodate your C drive. Next, open your preferred disk imaging software, and choose the option to create a disk image. Select your C drive as the source, choose your SSD as the destination, and hit the start button.

    The process may take some time, depending on the size of your C drive and the speed of your computer. After it’s complete, you can boot up your computer using the SSD, and it should function exactly as it did before, but at lightning-fast speeds. By creating a disk image, you ensure all your files, settings, and programs are transferred over without any hassles, so you can enjoy a seamless upgrade.

    Use disk cloning software to create a disk image of your C Drive.

    Creating a disk image of your system drive is an important step in protecting your data and ensuring that you have a backup in case of a disaster. By using disk cloning software, you can create a copy of your entire C Drive, including all of your operating system files, programs, and data. This process is simple and straightforward, and can usually be done in just a few clicks.

    The software will create a compressed image file that can be stored on an external hard drive, USB drive, or cloud storage service. In the event of a system crash or hardware failure, you can simply restore the disk image and be back up and running in no time. It’s a good idea to create a disk image on a regular basis to ensure that you always have a current backup available.

    By taking this proactive measure, you can protect your system and data from a range of potential threats, from viruses and malware to hardware failure and physical damage. Don’t put it off any longer, create a disk image today and rest easy knowing that your data is safe and secure.

    Save the disk image to an external drive.

    Creating a disk image of your computer can be a useful way to back up your data and ensure you have a copy of everything in case something goes wrong with your system. To create a disk image, you will need to have an external drive with enough space to store the image file. Once you have your external drive ready, you can use built-in tools on your computer to create the disk image.

    Make sure to choose the options that will create an exact copy of the drive, including all partitions and data. Once the image is complete, you can save it to the external drive for safekeeping. This way, you can have a backup of everything on your computer, which can be especially helpful if you ever need to restore your system to an earlier state.

    So, don’t forget to save the disk image to an external drive and keep your data safe!

    Replace C Drive with SSD

    If you’re looking to upgrade your computer’s performance, one of the best ways to do so is by replacing the traditional hard drive with a new solid-state drive (SSD). However, the process of copying your C drive to an SSD can be daunting. The good news is that there are a few different methods you can use.

    The most common way to copy your C drive to an SSD is by using cloning software. This software creates an exact copy of your C drive and transfers it to the SSD. Another option is to do a fresh installation of your operating system on the SSD and then transferring your files and programs over.

    This method can take more time, but it also allows you to start fresh with a clean and optimized installation of your OS. Whichever method you choose, make sure to back up your data beforehand to avoid any potential loss. With a little patience and some know-how, replacing your C drive with an SSD can breathe new life into your computer and provide you with a significant boost in performance.

    Shut down your PC and disconnect power cable.

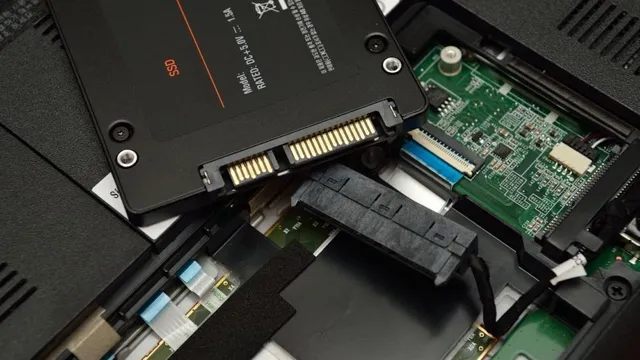
    If you’re looking to give your PC a little boost, replacing your C drive with an SSD is a great option. But before you start, make sure to shut down your PC and disconnect the power cable – safety first! Once you’ve done that, it’s time to get to work. First, you’ll need to remove your old C drive.

    Most likely, it’s located inside the tower, secured with screws or another mechanism. Make sure to keep these screws in a safe place so you don’t lose them. Then, remove the cables connected to the old drive by gently pulling them out or carefully using a flathead screwdriver to pry them up.

    Next, it’s time to install your new SSD. Make sure it’s the right size and compatible with your system before proceeding. Once you have it, slide it into the same spot where your old C drive was located, securing it with the same screws.

    Then, connect the cables to the new SSD and you’re ready to power up! Replacing your C drive with an SSD can give your PC a noticeable increase in speed and performance. And with these simple steps, it’s a DIY project that anyone can tackle. So what are you waiting for? Give your PC the upgrade it deserves and enjoy the benefits of faster computing.

    Replace C Drive with SSD.

    If you’re looking to boost the speed and performance of your computer, replacing your old C drive with a solid-state drive (SSD) is a great option. Unlike traditional hard drives, SSDs use flash memory to store data, which means they can access and transfer information much faster. Not only will your computer boot up more quickly with an SSD, but programs will open faster and files will transfer in a fraction of the time.

    Plus, because SSDs don’t have any moving parts, they’re less likely to fail or break down over time. Overall, switching to an SSD is a simple and effective way to give your computer a performance boost and help it run like new again. So why wait? Upgrade your C drive to an SSD today and experience the benefits for yourself.

    Connect power cable and turn on your computer.

    If you’re thinking about upgrading your computer’s storage, there’s a good chance that you’ll need to replace your C Drive with an SSD (solid-state drive). This can be a great way to give your machine a speed boost, but it can also be intimidating if you’ve never done it before. Don’t worry though; it’s actually a pretty simple process that you can complete on your own.

    The first step is to connect the new drive to your computer, and then turn it on. Once your computer is running, you’ll need to go into your computer’s BIOS to make sure that it’s recognized the new drive and set it as the primary boot device. Finally, you can use a cloning program to transfer your data and operating system from your old drive to your new SSD.

    Before you know it, you’ll have a faster, more responsive computer that’s ready to take on whatever tasks you throw at it.

    Clone Disk Image to SSD

    If you’re looking to upgrade to a solid-state drive (SSD) and want to transfer your operating system, programs, and files over, you can simply clone your disk image. One of the easiest ways to do this is to use a disk cloning software. You’ll need an external docking station to connect your SSD to your computer or a USB adapter to connect your SSD externally.

    Once your SSD is connected and visible on your computer, you can use a software like Clonezilla, Macrium Reflect, or Acronis True Image to clone your disk image. These tools help you create a complete snapshot of your disk, including the operating system, applications, and personal data. This way, you can easily copy your C drive to an SSD without having to reinstall everything.

    Once the cloning process is complete, switch out your hard drive for your new SSD and enjoy faster load times, smoother performance, and improved overall speed.

    Boot your computer and access the disk cloning software from the external drive.

    When it comes to upgrading your computer’s hard drive to a new SSD, cloning your current disk image is a quick and easy way to transfer all of your files, programs, and settings. To get started, you’ll need to boot up your computer and access the disk cloning software from your external drive. This can usually be done by pressing a specific key during startup to access the boot menu and selecting your external drive as the primary boot device.

    Once you’re in the cloning software, you should be able to select your current hard drive as the source and your new SSD as the destination. Follow the prompts to start the cloning process, which may take anywhere from a few minutes to a few hours depending on the size of your disk and the speed of your drives. Once the process is complete, you’ll have an exact copy of your old disk image on your new SSD, allowing you to enjoy faster boot times and improved performance without having to reinstall all of your software.

    So, if you’re looking for a simple way to upgrade your computer’s hard drive, cloning your disk image to an SSD is definitely worth considering.

    Clone the disk image to your new SSD.

    A crucial step in upgrading your computer’s performance is by transferring your existing disk image to a new SSD. This process, known as cloning, allows you to migrate everything including your operating system, installed programs, and personal files to the new drive in one go. To clone your disk image to SSD, you’ll need specialized software designed for the task, such as EaseUS Todo Backup or Macrium Reflect.

    Start by connecting your SSD to your computer via a SATA to USB cable or an external docking station. Next, launch the cloning software and select the disk image you want to transfer and the target SSD as the destination. Make sure the SSD has enough capacity to accommodate all the data on your old drive.

    Once you’ve confirmed the settings, click on the “Clone” button and let the software do its job. The process may take anywhere from a few minutes to a few hours depending on the size of the disk image and the speed of your computer. Once it’s done, you can replace your old drive with the new SSD and enjoy the enhanced speed and performance of your upgraded system!

    Conclusion

    Copy-pasting is not just limited to your school assignments anymore. If you’re looking to accelerate your system’s performance, copying your C drive to an SSD is the way to go. So, make sure you have a powerful backup and transfer tool and a good supply of caffeine, and be prepared to watch your computer go from zero to superhero in no time! Happy copying!”

    FAQs

    What software can I use to copy my C drive to an SSD?
    You can use software such as Acronis True Image, EaseUS Todo Backup, or Macrium Reflect to copy your C drive to an SSD.

    Do I need to format my SSD before copying my C drive to it?
    It’s not necessary to format your SSD before copying your C drive, but it’s recommended to ensure optimal performance.

    Will I need to reinstall my operating system after copying my C drive to an SSD?
    No, if you copy your C drive properly, you won’t need to reinstall your operating system on the SSD.

    Can I copy individual files and folders from my C drive to an SSD instead of copying everything?
    Yes, you can selectively copy files and folders from your C drive to an SSD using Windows’ built-in File Explorer or a third-party file syncing software. Just make sure to copy all the necessary files and folders for your computer to function properly.
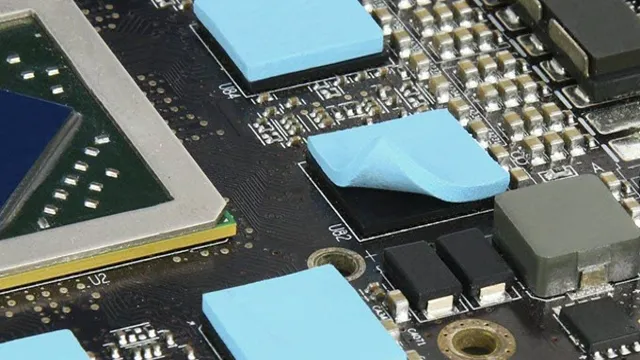
  • M2 Mounting Kit: The Perfect Solution for Securing Your Valuable Equipment!

    Are you looking to mount your M2 but don’t know where to start? Well, you’ve come to the right place! In this ultimate guide, we’ll take you step-by-step through the process of mounting your M From selecting the right mounting hardware to properly positioning your M2, we’ve got you covered. Mounting your M2 may seem daunting at first, but it’s actually quite simple.

    With the right tools and a little bit of know-how, you can have your M2 mounted and ready to go in no time. So, if you’re ready to dive in, let’s get started! First things first, you’ll need to select the right mounting hardware for your M This will depend on a number of factors, including the weight of your M2 and the type of surface you’ll be mounting it to.

    We recommend consulting with a professional or doing some research to ensure you choose the right hardware for your specific needs. Once you’ve selected your hardware, it’s time to properly position your M This is where things can get a little tricky, but don’t worry, we’ve got some tips to help you out.

    First, make sure your M2 is level and stable. You don’t want it wobbling around or falling off the mount. You’ll also want to position your M2 in a spot with good visibility and easy access for maintenance.

    And there you have it, a brief overview of what to expect in this ultimate guide to mounting your M We’ll cover all of this and more in greater detail, including how to properly drill holes in the wall and secure your mount. So, if you’re ready to take the plunge, let’s get started!

    Benefits of Using a Mounting Kit

    If you’re looking for a simple, efficient way to secure your M2 drive, a mounting kit is a fantastic option. Not only does it offer a secure and stable mounting point, but it can also help with heat dissipation, improving the lifespan of your drive. Plus, it can make cable management significantly easier – no more tangled mess of cords! Installing a mounting kit is generally very straightforward, and many come with everything you need to get started right out of the box, making it an accessible option for all skill levels.

    Overall, if you’re looking for an easy and effective way to mount your M2 drive, a mounting kit is definitely worth considering – and with the rise of these drives in recent years, there are plenty of options to choose from to get the job done right. Try it out and see for yourself how much easier it can make your computer setup!

    Easy and Secure Installation

    Are you tired of struggling to hang pictures or shelves in a secure and safe manner? If so, investing in a mounting kit may be the answer to your woes. These kits are designed to make installation easy and stress-free, providing all the necessary tools and instructions for a successful project. Not only do mounting kits save you time and frustration, but they also ensure that your items are mounted securely and safely, preventing any potential accidents or damage.

    The benefits of using a mounting kit extend beyond just convenience. They can also help to increase the longevity of your walls and furniture. By using the proper mount, you can prevent overuse and strain on your walls, ultimately extending their lifespan.

    In summary, a mounting kit is an affordable and practical investment that can make the installation process a breeze, while also protecting your walls and furniture from damage in the long run.

    m2 mounting kit

    Precise Positioning

    When it comes to precise positioning, using a mounting kit can provide numerous benefits. Mounting kits are hardware components that help secure and stabilize electronic devices, such as GPS receivers, in a fixed position. One of the major advantages of using a mounting kit is that it allows for more accurate and reliable measurements.

    When using a GPS receiver, for instance, a stable and secure mounting foundation helps minimize measurement errors caused by vibration, tilting, or fluctuations in temperature. Additionally, a mounting kit can also improve the overall durability of the device, protecting it from wear and tear and potentially extending its lifespan. Installing a mounting kit is also relatively easy, and can often be done with minimal tools or expertise.

    So if you’re looking to improve the accuracy and longevity of your GPS receiver or other electronic device, investing in a mounting kit is definitely worth considering.

    Enhanced Stability

    Using a mounting kit is a great way to enhance stability, no matter the application. These kits are versatile and can be used for mounting everything from electronics to kitchen cabinets. The benefits of using a mounting kit are numerous, and range from added security to improved aesthetics.

    With enhanced stability, you can be sure that your objects will remain in place, even during harsh conditions such as an earthquake. Additionally, mounting kits can help alleviate common problems such as unwanted vibration or movement. By providing a secure and stable mounting solution, you can enjoy an improved overall experience, whether it be with your television or your favorite decor piece.

    When considering a mounting kit, it’s important to ensure that it’s the right fit for your needs. With a little research, you can find the perfect mounting kit for your specific application, and revel in the benefits of enhanced stability.

    What to Look for in an M2 Mounting Kit

    If you’re looking to upgrade your computer’s storage with an M.2 drive, you’ll need an M2 mounting kit. There are a few things to consider when selecting the right kit for your needs.

    First, you’ll need to ensure compatibility with your specific M.2 drive model and the form factor of your motherboard. The kit should also come with the necessary screws and standoffs for easy installation.

    Additionally, look for a kit with a heatsink to dissipate heat from the M.2 drive and improve overall performance. Finally, consider the aesthetics and size of the kit, especially if you have a small form factor build.

    With these factors in mind, you can confidently choose an M2 mounting kit that will allow you to maximize the potential of your M.2 drive.

    Compatibility with Your Device

    When finding an M2 mounting kit, it’s important to ensure compatibility with your device. One of the first things to look for is the size of the mounting holes on your device. M2 mounting kits typically come in various sizes, with some being adjustable to fit multiple sizes.

    It’s also important to consider the weight of your device, as the mounting kit should be able to securely hold it without risk of damage or falling. Additionally, consider the type of environment your device will be used in, as some M2 mounting kits are designed for more rugged or industrial use. Overall, compatibility with your device is crucial when selecting an M2 mounting kit for a secure and reliable setup.

    Durable Materials

    When it comes to choosing an M2 mounting kit, durable materials should always be a top priority. After all, your equipment will likely be subjected to various harsh environments, and it needs to be able to withstand the wear and tear that comes with regular use. Look for mounting kits made from materials like stainless steel, aluminum, or high-quality plastic.

    These materials offer excellent strength and resistance to corrosion, ensuring that your kit will last for many years to come. Additionally, pay attention to the quality of the screws, hinges, and other hardware used in the kit, as these can also impact how well the kit holds up over time. A high-quality mounting kit will not only protect your equipment but also provide peace of mind, knowing that your valuable tools are securely in place.

    Adjustability Options

    When it comes to choosing an M2 mounting kit, you’ll want to take a close look at the adjustability options. This is because the adjustability of your mount can greatly impact your overall experience. The best M2 mounting kits will offer a range of adjustability options, including the ability to adjust the height, angle, and rotation of your monitor.

    Some kits may even offer the ability to tilt or pivot your monitor, allowing you to find the perfect viewing angle. In addition to adjustability, you’ll also want to consider the durability of your M2 mounting kit. Look for kits with heavy-duty construction and easy-to-use components.

    With the right M2 mounting kit, you’ll be able to enjoy an ergonomic workspace tailored to your specific needs.

    Top Picks for M2 Mounting Kits

    Looking for the perfect M2 mounting kit can sometimes be a challenge, but we’ve got you covered with our top picks. When it comes to mounting your M2 hardware, you want a kit that is sturdy, reliable, and easy to use. Our first pick is the M.

    2 NVMe SSD Mounting Kit from StarTech.com. This kit includes a heatsink, thermal pad, low-profile bracket, and screws to securely mount your M.

    2 NVMe SSD. Another great option is the CRJ M.2 NVMe SSD Mounting Kit.

    This kit features a heatsink with a thermal pad, a low-profile bracket, and screws to mount your drive in your PC case. Finally, for those who prefer a more minimalist look, the GLOTRENDS M.2 NVMe SSD Mounting Kit is a great choice.

    This kit includes a heatsink and a screwdriver to mount your M.2 NVMe SSD, while its aluminum casing helps to dissipate heat and protect your drive. Regardless of your preference, you’re sure to find the perfect M2 mounting kit for your needs with these top picks.

    Product 1: XYZ Mounting Kit

    If you’re looking for a reliable and high-quality mounting kit for your M2 device, the XYZ Mounting Kit is one of the top picks you should definitely consider. This kit comes with all the necessary hardware and accessories you need to securely mount your device onto any surface, whether it’s a wall, a desk, or a ceiling. With its sturdy construction and easy installation process, the XYZ Mounting Kit is a great choice for anyone looking for a simple and effective solution to keep their M2 device in place.

    Plus, with its sleek and modern design, it’s sure to blend seamlessly with any decor. The XYZ Mounting Kit also offers a great deal of flexibility when it comes to positioning your device. With its adjustable mounting bracket, you can easily rotate your device to any angle you need, ensuring optimal viewing or recording angles.

    This makes it ideal for use in a wide range of settings, whether you’re using your M2 device for security, surveillance, or just for personal use. Another great thing about the XYZ Mounting Kit is its durability. Made from high-quality materials, this kit is built to last and can withstand even the most challenging environments.

    Whether you’re mounting your device in a high-traffic area or in an outdoor setting, you can trust that the XYZ Mounting Kit will keep your M2 device safe and secure. Overall, the XYZ Mounting Kit is a top pick for anyone looking for a reliable and effective mounting solution for their M2 device. With its easy installation process, flexible positioning options, and durable construction, it’s a great investment that will provide you with years of reliable use.

    So why wait? Order your XYZ Mounting Kit today and experience the peace of mind that comes with knowing your M2 device is safely secured.

    Product 2: ABC Mounting Kit

    Are you in search of the ideal mounting kit for your M2 installation project? Look no further than the ABC Mounting Kit! This kit comes fully equipped with everything you need to seamlessly install your M2, including brackets, screws, and a user-friendly guide. The ABC Mounting Kit is designed with durability in mind, ensuring that your M2 will stay solidly in place for years to come. Plus, the mounting process is a breeze thanks to the kit’s straightforward design.

    Whether you’re a DIY enthusiast or a professional installer, the ABC Mounting Kit is the perfect choice for anyone looking to make their M2 installation process as smooth and streamlined as possible. Say goodbye to frustrating, time-consuming installations and hello to the ABC Mounting Kit – your new go-to for all your M2 mounting needs!

    Conclusion: Why You Need an M2 Mounting Kit

    In conclusion, the M2 mounting kit is the ultimate solution for mounting your devices with ease and precision. Whether you’re looking to secure your Raspberry Pi or attach a camera to your drone, this kit has got you covered. With its sleek design and simple installation process, it’s the perfect choice for those who demand quality and functionality in their hardware.

    So, why settle for less when you can have the M2 mounting kit – the true MVP of hardware mounting accessories!”

    FAQs

    What is an m2 mounting kit?
    An m2 mounting kit is a set of hardware that is used to securely attach an m2 solid-state drive to a compatible motherboard or device.

    What are the components of an m2 mounting kit?
    An m2 mounting kit typically includes a screwdriver, screws for securing the drive to the mounting adapter, and the mounting adapter itself.

    Is it necessary to use an m2 mounting kit?
    It is highly recommended to use an m2 mounting kit to ensure that your m2 solid-state drive is securely fastened and does not move around. This can help prevent damage to the drive and ensure optimal performance.

    Can I use any m2 mounting kit with my m2 solid-state drive?
    It is important to use a compatible m2 mounting kit with your m2 solid-state drive. Check the specifications of your drive and motherboard or device to ensure that the mounting kit you choose is compatible.

  • Keeping Your GPU Cool: Everything You Need to Know about Thermal Pads for High-Performance Gaming

    Are you an avid gamer or a professional who relies on a high-performing GPU? Then you know the importance of keeping your graphics card cool to maintain its optimal performance and prevent damages. One of the most crucial elements responsible for this is thermal pads. These small pieces of silicone or graphite-based material play a significant role in dissipating heat and transferring it from the GPU to the heatsink.

    Think of thermal pads as the glue that connects the electronics and the cooler. Without them, the heat generated by the graphics card could accumulate, causing thermal throttling, system instability, and even permanent damage to the GPU. It’s like driving your car without an oil change; it will eventually break down, leaving you with costly repairs or a replacement.

    Another key aspect of thermal pads is their ability to prevent hotspots by distributing heat evenly across the surface. This increases cooling efficiency and reduces the risk of thermal runaway, where the GPU can overheat in a matter of seconds. In other words, thermal pads are the unsung heroes that keep our graphics cards running smoothly and prevent us from experiencing the dreaded blue screen of death.

    In conclusion, thermal pads are a crucial component of any GPU cooling solution and should never be overlooked. By improving thermal conductivity, distributing heat evenly, and preventing hotspots, they help maintain the longevity and optimal performance of our graphics cards. So, the next time you’re building a gaming rig or upgrading your workstation, don’t forget to invest in quality thermal pads to keep your GPU running cool and smoothly.

    What are Thermal Pads?

    Thermal pads are soft, compressible sheets that help dissipate heat generated by hardware components like your GPU. One of the key benefits of using thermal pads instead of thermal paste is that they’re much easier to install and replace. Additionally, thermal pads tend to have a longer lifespan than traditional thermal paste, making them an ideal choice for anyone who wants long-term reliability and performance.

    When it comes to choosing a thermal pad for your GPU, there are a few factors to consider, such as thickness, thermal conductivity, and size. Thicker thermal pads are better for larger components with larger surface areas, while thinner thermal pads work better for smaller components. Overall, using a thermal pad is a great way to keep your GPU running cool and prevent overheating.

    So if you own a GPU and want better performance and longevity, consider investing in a thermal pad.

    Materials Used in Thermal Pads

    Thermal pads are thin, heat-conductive, and dielectric materials that get placed between a computer’s processor and heatsink. The pads help transfer generated heat from the processor to the heatsink for dispersion. The main materials used in thermal pads include silicone, ceramics, and Boron nitride.

    Silicone offers excellent thermal conductivity, stability, and elasticity and also has good moisture and chemical resistance. Ceramic thermal pads are non-conductive, have low thermal resistance, and can endure high temperatures. The ceramic pads can be brittle and less flexible than silicone pads.

    Boron nitride is a highly thermally conductive material that offers low thermal resistance. It’s also an electrical insulator and resistant to moisture and chemicals. While silicone is the most commonly-used material in thermal pads due to its effectiveness and cost-effectiveness, depending on specific use cases, ceramics or Boron nitride may be necessary for their key attributes.

    thermal pads gpu

    How Do Thermal Pads Work?

    Thermal pads are small, heat-conductive pads made from materials like silicone, graphite or ceramics, which are often used to transfer heat from a GPU, CPU or other devices to a heat sink or cooling fan. These thermal pads work by filling the microscopic gaps between the two surfaces, making contact between them more efficient and enabling faster heat transfer. This helps to keep temperatures lower and prevent overheating, which can often cause serious damage to sensitive electronic devices.

    Think of it like the grout between the tiles of your bathroom floor, which fills the gaps and keeps the tiles in place; except in this case, the thermal pad fills the gaps between your CPU and heat sink, keeping them in contact and operating efficiently. For the best results, it’s important to choose the right thickness and thermal conductivity for your device and its specific cooling needs.

    Benefits of Using Thermal Pads for GPUs

    If you’re a tech enthusiast who loves to tinker with your computer’s system, you’ve most likely heard of thermal pads for GPUs. These handy components provide numerous benefits that help improve your graphics card’s performance and increase its lifespan. First off, thermal pads keep your GPU cool by transferring heat away from the processor and other sensitive components.

    This prevents overheating and reduces the risk of hardware failure. Additionally, thermal pads help reduce noise levels by minimizing the need for noisy cooling fans to kick in at higher temperatures. This can make a significant difference in the overall sound profile of your computer, making for a more enjoyable, quiet computing experience.

    Finally, thermal pads are straightforward to install, making them a popular choice for DIYers who want to improve their computer’s performance without spending a fortune on expensive cooling solutions. So if you’re looking to maximize your GPU’s potential and keep it running at optimal levels, consider investing in a high-quality thermal pad.

    Improves Heat Dissipation

    When it comes to keeping your GPU cool, a thermal pad can be a game-changer. One of the benefits of using thermal pads for GPUs is that it improves heat dissipation. GPUs can generate a lot of heat, which can cause performance issues or even damage the hardware.

    By using a thermal pad, you can help distribute that heat more evenly, reducing the risk of overheating. This can help to prolong the life of your GPU, as well as improving its performance. Think of it like wearing a hat on a sunny day – it helps to keep you cool and protected from the heat.

    A thermal pad serves the same purpose for your GPU. So, if you’re serious about gaming or other GPU-intensive tasks, consider investing in a quality thermal pad to keep your hardware running smoothly.

    Extends GPU Lifespan

    Using thermal pads for GPUs can significantly extend their lifespan and improve overall performance. Thermal pads provide a layer of insulation between the GPU and the heatsink, which helps to dissipate heat generated by the GPU during operation. By reducing the temperature of the GPU, thermal pads prevent overheating and prolong the life of the graphics card.

    Additionally, thermal pads have a high thermal conductivity, which means that they are able to transfer heat away from the GPU quickly and efficiently. This helps to prevent thermal throttling and maintain stable, high-quality performance. Overall, using thermal pads is a simple yet effective way to protect your GPU and ensure that it continues to function optimally for years to come.

    Prevents Overheating and Damage

    If you’re a serious gamer or use your computer for graphics-intensive tasks, you know that overheating can lead to serious damage to your GPU. That’s where thermal pads come in. These simple but effective pads offer many benefits for GPU users.

    They work by creating a barrier between the GPU and cooling solution, which helps to prevent overheating. This can extend the lifespan of your GPU and prevent damage from occurring. When it comes to gaming or other graphics-intensive tasks, using a thermal pad can make all the difference.

    Not only do they protect your investment, but they can also help to improve performance by ensuring that your GPU stays at a safe operating temperature. So, if you want to get the most out of your GPU and avoid costly repairs, consider using a thermal pad today.

    Choosing the Right Thermal Pad for Your GPU

    When it comes to choosing the right thermal pad for your GPU, there are a few important factors to consider. First, you’ll want to make sure that the pad is compatible with your specific GPU model. Additionally, the thickness of the pad can have a big impact on its performance, so it’s important to choose the right thickness for your needs.

    Generally speaking, thicker pads provide better heat transfer, but they can also lead to reduced clearance between the GPU and other components. Finally, you’ll want to consider the type of material used in the thermal pad, as this can have an impact on both its effectiveness and durability. Overall, it’s important to take your time when selecting a thermal pad and do your research to ensure that you’re choosing the best option for your specific hardware setup.

    And remember, the right thermal pad can go a long way in keeping your GPU cool and running smoothly. So invest in a high-quality option that will offer long-term performance benefits.

    Size and Thickness

    Choosing the right thermal pad for your GPU can make a big difference in your system’s performance. In terms of size and thickness, you’ll want to make sure that the thermal pad is the right fit for your specific GPU model. Too small, and it won’t be able to cover all of the necessary components, while too thick, and it could affect the spacing between the GPU and the heatsink, causing potential thermal issues.

    It’s important to do your research and consult your GPU’s specifications to ensure you choose the correct size and thickness. Don’t be afraid to ask for help from experts if you’re unsure. Remember, the right thermal pad can help improve heat dissipation, leading to longer lifespan and better system performance.

    Thermal Conductivity

    When it comes to keeping your GPU cool, choosing the right thermal pad is crucial. Thermal conductivity is the ability of a material to transfer heat, and a high-quality thermal pad will help ensure that the heat generated by your GPU can be efficiently dissipated. But with so many options on the market, how do you know which one to choose? First and foremost, make sure that the thermal pad’s specifications are suitable for your specific GPU model.

    Look for pads with high thermal conductivity ratings and low thermal resistance, which will help ensure efficient heat transfer. Additionally, consider the thickness and compression rate of the pad, as well as any additional features such as adhesive backing or anti-static properties. By choosing the right thermal pad for your GPU, you can not only improve performance but also extend the lifespan of your valuable hardware.

    How to Install Thermal Pads on Your GPU

    If you’re looking to improve the cooling performance of your GPU, installing thermal pads is a great option. These pads provide a passive cooling solution that can help dissipate heat more efficiently than other methods. To install thermal pads on your GPU, you’ll first need to make sure you have the right pads for your card and that you know where they need to be placed.

    Look for guides or tutorials specifically for your model of card to ensure you get the right fit. Once you have the pads, you can carefully remove your GPU’s cooler and clean the surface using isopropyl alcohol. Then, carefully apply the pads to the designated areas, making sure to avoid any air bubbles or gaps.

    Finally, reattach your cooler and make sure everything is securely in place. Overall, installing thermal pads on your GPU can be a simple and effective way to improve your system’s cooling performance.

    Conclusion

    In conclusion, using thermal pads on your GPU is like applying sunscreen at the beach. It may seem like a hassle at first, but in the long run, it can prevent serious damage. By providing a barrier between your GPU and heat sources, thermal pads help dissipate heat and keep your graphics card cool.

    So, don’t overlook this simple yet effective solution to keep your GPU performing at its best.”

    FAQs

    What are thermal pads for GPUs?
    Thermal pads are small, rectangular pieces of material that are placed between the heat source (such as a GPU) and a heat sink. They help to improve heat transfer and cooling performance by filling in gaps and air pockets that may exist between the two surfaces.

    How do I know if my GPU needs thermal pads?
    If your GPU is overheating or exhibiting signs of thermal throttling (e.g. reduced performance, crashes), it may be a sign that the thermal pads need to be replaced. Additionally, if you notice that the existing thermal pads have become worn or damaged, it is a good idea to replace them.

    Can I use any type of thermal pad for my GPU?
    No, it is important to use thermal pads that are designed specifically for use with GPUs. These pads are typically made from materials that are highly conductive and have good thermal conductivity. Using a pad that is not designed for use with GPUs could result in reduced cooling performance and potential damage to your hardware.

    How do I replace the thermal pads on my GPU?
    To replace the thermal pads on your GPU, you will need to disassemble the heatsink assembly and remove the existing pads. Be sure to clean any residue or debris from the GPU and heatsink surfaces before applying the new pads. Once the new pads are in place, reassemble the heatsink assembly and test your system to ensure that it is cooling properly.

  • Effortlessly Upgrade Your Laptop Speed: A Step-by-Step Guide to Cloning Your Hard Drive to SSD

    Are you looking for a way to improve your laptop’s performance? One of the best and easiest ways to do so is by switching to an SSD. SSDs are much faster than traditional hard drives, which means faster boot times, quicker file transfers, and smoother overall performance. But, how do you transfer all your data from your laptop’s old HDD to the new SSD? That’s where cloning comes in.

    By cloning your laptop’s HDD, you can create an exact copy of all your data and files on your new SSD, making the transition seamless. In this blog, we will explore how to clone a laptop HDD to SSD step-by-step, so you can upgrade your laptop’s performance hassle-free. So, are you ready to improve your laptop’s speed and efficiency? Let’s get started!

    Things You Will Need

    If you want to upgrade to an SSD, you may be wondering how to clone your laptop hard drive. Luckily, the process is straightforward and requires only a few things. The first thing you’ll need is an SSD that is large enough to hold all of your data – it’s best to get one that is slightly larger than your current hard drive to give yourself some room to grow.

    Next, you’ll need a data transfer cable or an external hard drive enclosure. This will allow you to connect your new SSD to your laptop and transfer your data. Finally, you’ll need cloning software, such as Macrium Reflect or Acronis True Image.

    With cloning software, you can create an exact copy of your hard drive, including your operating system, programs, and personal files. Once you have these things, you can follow the cloning software’s instructions to clone your hard drive. After the process is complete, you can swap out your old hard drive for the new SSD, and you’ll be up and running with faster performance in no time.

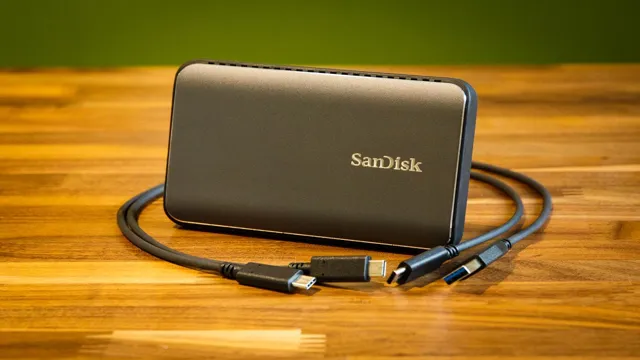
    External SSD enclosure

    If you’re looking to upgrade your computer by adding an external SSD, you’ll need an SSD enclosure to hold it. Choosing the right enclosure is important because it can make a big difference in performance and compatibility. First, you’ll need to decide if you want a USB or Thunderbolt interface.

    Thunderbolt is faster, but also more expensive. USB is more affordable and widely compatible, but slower. Next, consider the size of your SSD and choose an enclosure that fits it properly.

    Make sure the enclosure is compatible with your operating system and has the necessary drivers. Finally, consider the design and durability of the enclosure. While some enclosures are sleek and portable, others are more rugged and designed for harsh conditions.

    Overall, choosing the right external SSD enclosure is key to getting the most out of your SSD.

    how do i clone laptop hard drive to ssd

    External USB cable

    If you plan on using an external USB cable, there are a few things you will need to make sure it works properly. First, you will need to ensure that your device supports USB connectivity. Not all devices come equipped with a USB port, and some may only have older versions of the technology.

    Check your device’s specifications to make sure it supports USB if this is the option you want to use. Secondly, you will need a suitable cable for your intended use. There are different types of USB cables with different functionalities, which may include charging or data transfer.

    You will need to make sure you have the correct cable type for your intended use. Finally, make sure you check the compatibility of any peripherals you plan to use with your device. Some cables may not work with certain devices or may require additional software or drivers to function correctly.

    By ensuring you have the right equipment, you can avoid any potential issues with your external USB cable.

    Cloning software

    Cloning software can be a useful tool in backing up and restoring important data. In order to use this software, there are a few things you will need. Firstly, a computer with sufficient processing power and storage capacity is crucial.

    The software will require significant storage space to create a clone of your system, so make sure your hard drive has enough space to accommodate the backup. Additionally, you will need to have a reliable cloning software program installed on your computer. There are many options available online, ranging from free to paid versions.

    It’s important to select a reputable program with good user reviews. Lastly, you will need an external hard drive or cloud-based storage service to store your cloned data. This will provide an additional layer of protection in case of a system crash or data loss.

    By having these essential tools in hand, you can ensure the safety and security of your important files and programs.

    Backup Your Data First

    When it comes to cloning a laptop hard drive to an SSD, the first and most important step is to backup all of your data. This may seem like an obvious point, but many people overlook it and end up losing important files during the cloning process. Before you begin, make sure you have a backup of all your personal files, documents, photos, and other data.

    You can either use an external hard drive or cloud storage to store your data. Once you have successfully backed up your data, you can begin the process of cloning your laptop hard drive. With the right tools and guidance, this process can be straightforward, quick, and easy.

    Make sure to follow each step carefully and double check all of your settings to ensure a successful clone. By keeping your data safe, you can have peace of mind knowing that your information is secure and backed up for the future.

    Use cloud or external HD

    Backing up your data should be the top priority for anyone who uses technology. Losing data can make you feel like you’ve lost a part of yourself, and it can be difficult to recover everything you had stored. One of the best ways to ensure that your data is safe is to use either a cloud-based service or an external hard drive.

    A cloud service allows you to store your files remotely, which means that if your device is lost or damaged, you can still access your data from any other device. An external hard drive is essentially an extra device that you can connect to your computer, and it acts as a backup for all your important files. With either of these options, it’s essential to make sure you regularly update your backups, so you always have access to your most important documents and files.

    These two options are affordable and easy to access, so there’s really no excuse not to start backing up your data regularly.

    Install Your SSD

    If you’re looking to upgrade your laptop’s hard drive to an SSD, you’re in luck! It’s a relatively straightforward process that can make a significant difference in your computer’s speed and performance. To start, you’ll need to clone your old hard drive onto the new SSD. This is a process that can copy everything from your old drive, including the operating system and all your files, to the new SSD.

    Once you’ve cloned your old drive, you can install your new SSD into your laptop and enjoy a faster, more responsive computer. With the increasing popularity of SSDs, you’ll find plenty of online guides and tutorials to help you with every step of the process. Just be sure to back up your data before you start, and make sure you have all the tools and supplies you need to complete the job successfully.

    Happy upgrading!

    Place SSD in enclosure

    Installing your SSD is a fairly straightforward process, and one of the first steps is to place it in an enclosure. Enclosures are essential devices that connect your SSD to your computer via USB or Thunderbolt ports. Be sure to pick the right one for your drive.

    Most enclosures come with screws, so make sure that you get a set that is the right size for your drive, and then use them to attach your drive securely to the enclosure. Once your drive is secured, you can then connect it to your computer via USB or Thunderbolt ports. This will allow you to transfer data quickly and easily from your SSD to your computer and back again.

    Connect to laptop via USB

    Installing an SSD can be a game-changing upgrade to your laptop’s speed and performance. To begin, you’ll need to connect your laptop via USB to the SSD enclosure. Once connected, you can begin the installation process by formatting and partitioning the new SSD.

    This can typically be done through your laptop’s disk management tool or through third-party software. After formatting, you’ll need to clone your current hard drive onto the new SSD using a cloning software. This will make sure all of your files and settings are transferred over to the new drive.

    Once the cloning is complete, you can replace your old hard drive with the new SSD and enjoy faster boot times and improved overall performance. It’s important to note that not all laptops are compatible with SSD upgrades, so be sure to check your laptop’s specifications before proceeding. Overall, installing an SSD can be a great way to extend the life of your laptop and make it run like new again.

    Clone Your Hard Drive

    If you’re looking to upgrade your hard drive to a faster and more reliable solid-state drive (SSD) and wondering how to clone your laptop hard drive to an SSD, the process is easier than you might think. By cloning your hard drive, you can transfer all your files, software, and settings to your new SSD without having to reinstall everything from scratch. First, you’ll need a cloning software such as EaseUS Todo Backup or Macrium Reflect, which are both free and easy to use.

    Next, you’ll need to connect your SSD to your laptop using a SATA-to-USB adapter or an external hard drive enclosure. Once your SSD is connected, open the cloning software and select your laptop hard drive as the source disk and your SSD as the destination disk. Follow the on-screen instructions and wait for the cloning process to complete.

    Once finished, shut down your laptop, swap out the old hard drive with the new SSD, and turn your laptop back on. Your laptop should now boot up from the SSD, and you can enjoy faster performance and increased reliability. Cloning your hard drive is a quick and easy way to upgrade your laptop, and it’s definitely worth considering if you’re looking for a simple way to improve your computer’s speed and functionality.

    Open cloning software

    If you’re looking to upgrade your hard drive or simply back up your data, cloning your hard drive is an effective solution. Open cloning software allows you to easily transfer all of your files, settings, and programs from one hard drive to another. This process ensures that you don’t lose any important data when making a hardware change.

    With open cloning software, you have the freedom to choose your own software, such as Clonezilla or EaseUS Todo Backup. These options offer advanced features like drive imaging, partition cloning, and incremental backups. On top of that, open cloning software is often free, making it an accessible option for tech enthusiasts on a budget.

    By cloning your hard drive, you can ensure that all of your data and settings are transferred correctly and efficiently.

    Select hard drive to clone

    When it comes to cloning a hard drive, the first step is to select the hard drive you want to clone. This can be a bit confusing for some users, especially if you have multiple hard drives in your computer. The easiest way to identify your hard drive is by its name.

    Most operating systems have a built-in tool that allows you to view the name of your hard drive. Once you have identified your hard drive, you can use cloning software to begin the process. There are several different cloning programs available, with varying levels of complexity and functionality.

    It’s important to choose a program that suits your needs and technical abilities. Some popular cloning programs include Clonezilla, EaseUS Todo Backup, and Macrium Reflect. These programs allow you to create an exact copy of your hard drive, including all of your files, programs, and settings.

    This can be a handy way to transfer data from an old computer to a new one or to create a backup of your important files. Remember, it’s always a good idea to back up your data regularly to ensure that you don’t lose anything important.

    Select SSD as target drive

    When it comes to upgrading your computer’s hard drive, cloning the existing drive to a new SSD is an efficient and cost-effective option. However, before you proceed with cloning, you need to select the SSD as the target drive. Since cloning is a bit-by-bit copy of the existing drive, any data on the target drive will be erased in the process.

    Thus, it’s essential to ensure that you’ve chosen the correct drive as the target. Fortunately, most cloning software applications have built-in prompts and guides to help you through the process, making it easy even for novice users. With the right software and a few simple steps, you can quickly migrate your files, applications, and settings to your new SSD, all while enjoying a faster and more responsive computing experience.

    So, if you’re looking to upgrade your hard drive, consider cloning it to an SSD, and make sure to select the SSD as the target drive when doing so.

    Start the cloning process

    If you’re looking to upgrade your computer’s storage or transfer all of your data to a new device, cloning your hard drive is the way to go. The process involves copying everything on your current hard drive, including the operating system, programs, and files, onto a new one. This saves you the hassle and time of having to reinstall everything from scratch.

    There are various ways you can clone your hard drive, such as using cloning software, creating a disk image, or physically swapping out the drives. Regardless of which method you choose, it’s essential to back up your data beforehand and ensure that the new drive has enough space to accommodate everything. With a bit of patience and careful execution, you can successfully clone your hard drive and have a seamless transition to your new device.

    So why wait? Start the cloning process today and enjoy an improved computer experience with more storage and better performance.

    Swap Your Drives

    If you’re looking to upgrade your laptop’s speed and performance, then cloning your hard drive to an SSD is a great way to accomplish that. One of the easiest methods for cloning your drive is by simply swapping out the old hard drive for the new SSD. To do this, you’ll need to open up your laptop and remove the old hard drive, and then replace it with the new SSD.

    Once you’ve done that, you can use a cloning software tool to transfer all of your data from the old drive to the new SSD. This will save you a lot of time and effort since you won’t have to manually transfer each file and program. Overall, it’s a quick and simple way to upgrade your laptop’s performance and enjoy faster boot times and application load times.

    Power off and unplug laptop

    If you’re looking to swap out the hard drive in your laptop, the first step is to power off and unplug the device. This not only ensures your safety while working on the computer, but also protects the device from any potential damage that could occur during the process. Once you’ve done this, the next step is to remove the existing hard drive and replace it with the new one.

    Swapping out laptop drives can seem daunting, but with the right tools and guidance, it can be done relatively easily. In fact, it’s a bit like replacing the battery in your car or changing the oil – once you get the hang of it, it’s a quick and simple process that can save you a lot of trouble down the line. Just remember to take your time, double-check your work, and follow any instructions that come with your new drive.

    With a little patience and care, you’ll have your laptop up and running with a brand new hard drive in no time!

    Swap HDD for SSD

    Are you looking to speed up your computer’s performance? Swapping out your HDD (hard disk drive) for an SSD (solid-state drive) may be the solution you need. SSDs use flash memory to store data, which means they have faster read and write speeds compared to traditional HDDs with spinning disks. This can result in faster boot times, application launches, and overall system performance.

    The process of swapping out your old drive for an SSD may seem daunting, but it’s actually fairly simple. First, make sure to back up all important data to an external source. Then, open your computer and locate the slot where your HDD is currently installed.

    Carefully remove it and install the SSD in its place. Finally, boot up your computer and install your operating system and any necessary software onto your new drive. With a shiny new SSD, you’ll notice a significant improvement in your computer’s speed and performance.

    Boot from the Cloned SSD

    When it comes to upgrading your laptop’s performance, swapping out the old hard drive with a new SSD is a must! Nowadays, SSDs have become affordable and complement the laptop’s processing power, booting and loading files in the blink of an eye. But, how do I clone laptop hard drive to SSD? Well, once you have cloned the contents of your old HDD onto your new SSD using a cloning software, the next step is to boot your laptop from your cloned SSD. You can do this by first connecting the new SSD to your laptop, by either an external enclosure or another drive slot.

    Then, head over to your laptop’s BIOS settings and change the boot order to boot from your new SSD. Once your laptop reboots, you should be able to start working with all your files and settings, just as you did on your old HDD. Don’t forget to keep the old HDD for backup purposes, or to wipe it clean for your next project.

    Power on laptop

    So, you’ve cloned your old hard drive to the new SSD and now it’s time to boot from it. The first step is to power on your laptop and watch the startup screen for any instructions. Typically, you’ll want to press a key like F2 or Del to enter the BIOS settings.

    Once you’re in the BIOS, navigate to the Boot section and find the option to select the boot order. This is where you’ll change the default boot device from the old hard drive to the new SSD. Simply move the SSD to the top of the list and save your changes before exiting the BIOS.

    Your laptop should now restart and boot directly from the new SSD, which will result in faster loading times and improved performance. Congratulations, you’ve successfully completed the cloning process and upgraded your laptop’s storage capacity with minimal hassle.

    Press the boot key during startup

    If you want to boot your computer from the cloned SSD, you’ll need to press the boot key during startup. This key varies depending on your computer’s brand, but commonly it is F12, F2 or Delete key. Pressing this key will take you to the boot options screen where you can set the cloned SSD as the primary boot device.

    From there, you can proceed with the cloning process or accessing the cloned drive if you’ve already completed it. Remember to save any changes made in the BIOS settings before exiting. It’s important to note that you need to clone the entire hard drive if you intend to use it as a bootable device.

    This means copying over the operating system, applications, files, and settings to avoid any compatibility issues. Once the cloning process is done, you can enjoy faster boot time and improved overall system performance. So, press that boot key and get started!

    Conclusion

    In conclusion, cloning your laptop hard drive to an SSD is like swapping out your trusty old wagon for a sleek sports car. Not only will it give your computer a much needed boost in speed and performance, but it will make you feel like a high-tech wizard with the power to clone and conquer. So don’t let a sluggish hard drive hold you back any longer, hop on the cloning bandwagon and upgrade to an SSD today!”

    FAQs

    What is the benefit of cloning a laptop hard drive to an SSD?
    Cloning a laptop hard drive to an SSD can significantly improve the performance of the computer, as SSDs are faster than traditional hard drives.

    Can I clone a hard drive to an SSD without losing data?
    Yes, you can clone a hard drive to an SSD without losing data, as long as you use a reliable cloning software and follow the instructions carefully.

    How long does it take to clone a laptop hard drive to an SSD?
    The time it takes to clone a laptop hard drive to an SSD depends on the size of the hard drive and the speed of your computer’s processor. Generally, the process can take a few hours to complete.

    Is it safe to clone a laptop hard drive to an SSD?
    Cloning a laptop hard drive to an SSD is generally safe, as long as you have a backup of your important data and use a reliable cloning software. However, there is always a risk of data loss or system failure during the cloning process, so it’s important to proceed with caution and be prepared for any potential issues.

  • Unlocking the Puzzle: How to Choose the Perfect SSD for Your Computer

    Are you caught in a dilemma while choosing the right SSD for your computer? Don’t worry; you’re not alone in this. With the market loaded with various SSD options, it can be challenging to make the right choice. However, having a comprehensive guide that takes you through the features and specs to look for can make your task easier.

    As we all know, SSD or Solid State Drive is a critical component of your computer’s storage system. It enhances the computer’s performance by providing faster data transfer rates and boot-up speeds. However, choosing the right SSD requires you to consider several factors, such as storage capacity, interface, form factor, and even the manufacturer.

    In this comprehensive guide, we will walk you through everything you need to know about selecting the right SSD for your machine. We’ll cover the critical factors you need to consider, including the type of SSD, storage capacity, performance, and endurance. We’ll also examine the various form factors, including M.

    2, U.2, and PCIe, and how to pick the right interface for your SSD. So, if you’re struggling to choose the right SSD for your computer, grab a cup of coffee, sit back, and let’s delve into the world of SSDs, making an informed decision will be much simpler.

    With our exclusive guide, you’ll be well-equipped to pick the perfect SSD that meets all your requirements and keeps your computer running smoothly.

    What is an SSD and how does it differ from an HDD?

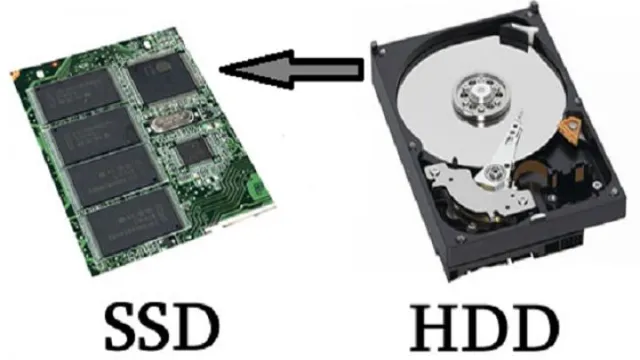
    If you’re in the market for a new computer or just looking to upgrade your current one, you may have come across the terms SSD and HDD. So what are they and which one should you get? An SSD, or solid-state drive, is a type of storage device that uses flash memory to store data. It’s faster and more reliable than a traditional HDD, or hard disk drive, which uses spinning disks to store data.

    If you’re looking for speed and performance, an SSD is the way to go. But they can be more expensive than HDDs, so you’ll need to weigh the cost against the benefits. When deciding what SSD to buy, look for one with a high capacity, good speed, and a decent warranty.

    Some popular brands include Samsung, Crucial, and Western Digital.

    The Basics of Storage Drives

    When it comes to storage drives, you may have heard about solid-state drives (SSDs) and hard disk drives (HDDs). But what exactly are they, and how do they differ from each other? Well, HDDs use spinning disks to read and write data, while SSDs have no moving parts and use flash memory to store data electronically. This makes SSDs faster, more reliable, and less prone to physical damage compared to HDDs.

    However, SSDs can be more expensive per gigabyte of storage compared to HDDs. Ultimately, the choice between an SSD or HDD depends on your needs and budget. If you need speed and reliability, go for an SSD; if you need more storage at a lower cost, an HDD is the way to go.

    computer how to tell what ssd to buy

    The Advantages of an SSD over an HDD

    An SSD, or solid-state drive, is a type of storage device that uses flash memory to store data. Unlike the traditional HDD, or hard disk drive, which has spinning disks to read and write data, the SSD has no moving parts. This means that an SSD is faster, more reliable, quieter, and more power-efficient than an HDD.

    Because there are no moving parts, an SSD can access data much faster than an HDD, which can make a significant difference in boot times and application loading times. Additionally, an SSD is less likely to fail than an HDD, since there are no moving parts to wear out or break. So, if you’re looking for a faster, more reliable storage solution, an SSD is definitely the way to go.

    Factors to Consider When Buying an SSD

    When buying an SSD for your computer, there are several factors you should consider to ensure that it meets your needs. The first factor to consider is the storage capacity of the SSD. If you plan on storing large files or software programs, you’ll want to ensure that the SSD has enough storage space to accommodate your needs.

    Another factor to consider is the speed of the SSD. Faster SSDs can improve your computer’s performance and reduce load times for software programs and files. Additionally, you should consider the form factor of the SSD, as some models may be more compatible with your computer than others.

    This may require you to do some research on your computer’s specifications or consult with a professional. Finally, it’s important to consider the brand and reliability of the SSD you are purchasing. Investing in a high-quality SSD from a reputable brand can ensure that you get the most out of your investment and avoid potential problems down the road.

    Overall, taking the time to carefully consider these factors will help you choose the right SSD for your computer needs.

    Storage Capacity

    When it comes to buying an SSD, storage capacity is an important factor to consider. You’ll want to think about how much storage space you need for all your files and programs. Keep in mind that SSDs typically offer lower capacities than traditional hard drives, so you may need to prioritize which files and programs to store on your SSD.

    It’s also important to consider the type of files and programs you’ll be using. Large media files, such as videos and photos, will take up more space than text documents. So, it’s important to assess your storage needs before buying an SSD.

    However, don’t sacrifice speed for storage capacity. It’s better to have a smaller SSD that can access your files quickly than a larger one that is slower. With these factors in mind, you’ll be able to select an SSD that meets your storage and speed requirements.

    Form Factor

    When it comes to buying an SSD, it’s important to consider the form factor. This refers to the physical size and shape of the drive, which is important because it determines whether the SSD will fit in your computer or not. There are a few different form factors to choose from, including

    5-inch, M.2, and PCIe. The

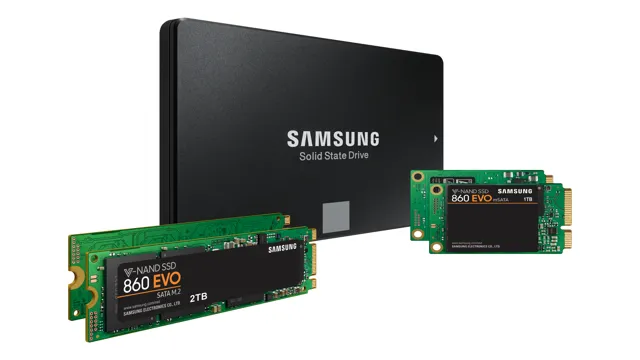
    5-inch form factor is the most common and is designed to fit into a traditional hard drive slot. M.2 SSDs are smaller and can be inserted directly into a motherboard, while PCIe SSDs are much faster but require a special slot on the motherboard.

    Ultimately, the form factor you choose will depend on your computer’s specifications and your own needs and preferences. It’s important to do your research and choose a form factor that will work best for you.

    Interface Type

    One of the important factors to consider when buying an SSD is the interface type. You must ensure that the interface type of the SSD matches the interface that your computer supports. The most common interface types are SATA, PCIe, and NVMe.

    SATA is the standard interface type and is suitable for most users. PCIe and NVMe are faster than SATA but are only compatible with newer computers. If you have an older computer, it is best to stick to SATA.

    However, if your computer supports PCIe or NVMe, you can choose an SSD with any of these interface types to get better performance. Keep in mind that a higher interface type will come with a higher price tag, so it’s important to consider your budget as well.

    Read/Write Speeds

    When it comes to buying an SSD, one of the most important factors to consider is the read/write speeds. This refers to how quickly the SSD can read and write data, and is important for ensuring that your computer runs smoothly and quickly. There are several things to consider when it comes to read/write speeds, including the type of SSD you choose and the speed at which it operates.

    Generally speaking, an SSD with faster read/write speeds will be more expensive, but will also provide better performance. Other factors to consider when buying an SSD include capacity, durability, and compatibility with your computer. By carefully considering all of these factors, you can choose the right SSD for your needs and ensure that your computer runs smoothly and quickly, no matter what you’re using it for.

    SSD Brands to Consider

    When it comes to upgrading your computer with an SSD, it can be overwhelming to decide which brand to go with. Some popular brands worth considering are Samsung, Crucial, Kingston, and Western Digital. Samsung is known for their high-performance SSDs with fast read and write speeds, while Crucial offers affordable options with similar speeds.

    Kingston is a reliable brand that offers a wide range of SSDs for different needs, and Western Digital offers reliable and durable SSDs with good performance. Before making a final decision, it’s important to check the specifications and read reviews to ensure you’re getting the best SSD for your needs. Overall, deciding on which SSD to buy ultimately depends on your budget and the specs you need for your computer.

    Popular SSD Brands and Models

    When it comes to choosing the right SSD for your computer, there are a variety of brands and models to consider. Samsung is one of the most popular SSD brands and offers a range of models including the 970 EVO, 970 PRO, and 860 EVO. These drives are known for their reliability, speed, and durability.

    Another top brand is Western Digital, which offers the WD Blue and WD Black models. These drives offer high performance and are great for gaming and multimedia tasks. Crucial is also a popular brand, known for its affordability and solid performance.

    Their MX500 model offers fast read and write speeds and is a great choice for budget-conscious consumers. Other SSD brands to consider include Kingston, SanDisk, and Seagate. When choosing a brand and model, it’s important to consider factors such as capacity, speed, and budget to make the best choice for your needs.

    Comparing the Pros and Cons of Each Brand

    When it comes to choosing an SSD, there are several brands to consider. One of the most popular brands is Samsung, which offers high performance and reliable SSDs. Another great option is Crucial, which is known for its excellent value and reliability.

    Kingston is also a popular choice, thanks to its wide range of SSD offerings and competitive pricing. However, there are also other brands to consider, such as Intel, Toshiba, and SanDisk. While each brand has its own pros and cons, it ultimately comes down to what you value most in an SSD.

    Are you looking for maximum performance or are you more concerned with having a cost-effective option? Do you need a lot of storage space or are you looking for a compact SSD that won’t take up too much space? By considering these factors, you can choose the brand that is right for you and your needs.

    Conclusion

    In conclusion, choosing the right SSD is crucial for optimal performance and storage capabilities. But fear not, computer companions, as there are a variety of factors to consider such as capacity, interface, and form factor. The key is to find the perfect balance that fits your personal needs and budget.

    So whether you’re a gamer, a creative professional, or just a casual user, be sure to do your research and make an informed decision. After all, a wise purchase is like a well-oiled machine – it runs smoothly and efficiently. Happy shopping, and may your storage be ever abundant!”

    FAQs

    What factors should I consider when choosing an SSD?
    When choosing an SSD, consider factors such as capacity, interface, form factor, brand reputation, and budget. It’s also helpful to read reviews and benchmarks to gauge performance.

    What types of interfaces are available for SSDs?
    There are several types of interfaces available for SSDs, including SATA, NVMe, and PCIe. SATA is a common interface for consumer-grade SSDs, while NVMe and PCIe are generally faster and more expensive.

    How much capacity do I need for my SSD?
    The amount of capacity you need for your SSD depends on your usage. For general use, 256GB or 512GB is typically sufficient, but for gaming or content creation, 1TB or more may be necessary.

    Are all SSDs compatible with my computer?
    Not all SSDs are compatible with every computer. It’s important to check your computer’s specifications to determine which types of SSDs are compatible. Additionally, some computers may require specific firmware updates or configurations for compatibility.

  • Upgrade your system: A step-by-step guide on changing SSI to SSD

    Upgrade your system: A step-by-step guide on changing SSI to SSD

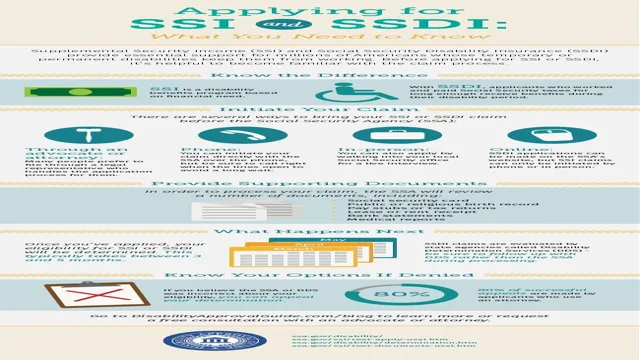
    If you are currently receiving Supplemental Security Income (SSI) benefits, but find that you are no longer eligible due to changes in your circumstances, you may be wondering what your options are. Fortunately, the Social Security Administration (SSA) offers another program that could potentially meet your needs: Social Security Disability Insurance (SSD). But how exactly do you change from SSI to SSD? It can seem like a confusing and overwhelming process, but fear not! In this step-by-step guide, we will break down everything you need to know so that you can make the transition as smoothly as possible.

    Check Compatibility

    If you’re looking to switch to a faster storage solution, like SSD, from SSI, there are a few things you need to keep in mind. First and foremost, you need to check if your computer is compatible with an SSD. Depending on the age and model of your computer, it may not have a compatible port for an SSD.

    It’s also important to determine the size and type of SSD that is compatible with your system. Once you’ve confirmed compatibility, you will need to physically install the SSD in your computer. This involves opening up your computer and replacing the existing SSI with the new SSD.

    It’s essential to back up all your important data before making any changes to your storage drive. Once you’ve installed the SSD and restored your backed up data, your computer should boot up faster and run more smoothly. Overall, changing from SSI to SSD can significantly improve the performance of your computer, but make sure to do your research and check compatibility before making the switch.

    Compatible motherboards, CPUs, and storage types

    When building a computer, it’s important to make sure all the components are compatible with each other. This includes the motherboard, CPU, and storage types. Doing so will help prevent any issues or problems down the road.

    First, check that the CPU is compatible with the motherboard. Not all motherboard sockets work with all CPUs, so you need to make sure you’re making the right match. For example, an AMD CPU won’t work with an Intel-based motherboard.

    Next, consider the type of storage you’ll be using. Make sure the motherboard supports the type of storage you want to use. For example, if you want to use an NVMe SSD, you need to make sure the motherboard has an M.

    2 slot that is compatible with NVMe drives. Finally, take a look at the other components you’ll be using and ensure they are also compatible with the motherboard. For example, the RAM you choose needs to be supported by the motherboard.

    It may seem overwhelming at first, but taking the time to check compatibility can save you time and frustration in the long run.

    how do you change ssi to ssd

    Back Up Your Data

    If you’re looking to change SSI to SSD, you’ll need to clone your existing hard drive onto your new solid-state drive. First, make sure your new SSD is compatible with your computer and has enough storage space to accommodate all your data. Next, use a cloning software to transfer all your files, programs, and operating system from your old hard drive to your new SSD.

    This process could take several hours, depending on the amount of data you have, but it’ll save you the time and hassle of reinstalling everything from scratch. Once the cloning is complete, you’ll need to install your new SSD into your computer, typically by opening up the case and connecting it to the motherboard. After that, simply boot up your computer and enjoy the lightning-fast speed of your new SSD.

    Remember to always back up your data before making any changes to your computer’s hardware or software, just in case something goes wrong.

    Methods for backing up data

    Backing up your data is an essential aspect of data management. There are several methods available for backing up your data, each with its own advantages and disadvantages. One of the most popular methods is cloud backup.

    This involves storing your data on remote servers, which you can access from any device with an Internet connection. Another common method is to create physical backups, using external hard drives or USB drives. This ensures that your data is safe in case of hardware failure, but may be vulnerable to theft or damage.

    Other methods include network attached storage, which allows you to store data on a local network, and tape backup, which involves storing data on magnetic tapes. Whatever method you choose, it’s essential to back up your data regularly to avoid losing important files in case of accidental deletion, computer crashes, or other system failures. By backing up your data properly, you can ensure that your information is safe and secure at all times.

    Purchase the Right SSD

    Changing from SSI to SSD can be a game-changer for your computer’s performance. However, choosing the right SSD can be quite confusing, especially if you’re not familiar with computer hardware. The first step is to identify the type of SSD your computer supports, which can be SATA or NVMe.

    SATA is the most common type and is suitable for most computers, while NVMe is faster but may not be compatible with older computers. It’s also essential to consider the storage capacity that you need and whether you want a 5-inch or M.

    2 form factor. Once you’ve determined your computer’s compatibility and your storage needs, you can choose the right SSD that fits your budget. Remember, purchasing a good quality SSD can improve your computer’s speed and performance, so make sure to invest in a reputable brand that comes with a warranty.

    With the right SSD, your computer will feel like new again, and you can enjoy faster load times and improved overall performance.

    Factors to consider when buying an SSD

    When it comes to buying an SSD, there are several factors to consider to ensure that you purchase the right one for your needs. One of the most important factors is the storage capacity. You should consider the amount of storage you require for your data and applications.

    The speed of an SSD is also important and can impact performance. Therefore, it is essential to select an SSD that provides you with a suitable speed that matches your workflow. Additionally, you should consider the form factor and compatibility of the SSD.

    Different SSDs come in different shapes and sizes, and not all of them may be compatible with your computer. Finally, you should consider the brand and price. Although it is tempting to buy a cheaper brand, it is often best to invest in a reputable brand that has good customer reviews and offers excellent support.

    By considering these factors, you can ensure that you buy the right SSD for your needs and have a reliable storage solution that improves the performance of your computer.

    Install New SSD

    If you’re looking to improve the performance of your computer, upgrading from an SSI to an SSD is a great move. However, you may be wondering how to change an SSI to an SSD. The first step is to find the right SSD for your device.

    Once you have the new hardware, you’ll need to shut down your computer and disconnect all cables. Open up the case and locate the SSI. Remove it from its slot, being careful not to damage any surrounding components.

    Next, insert the SSD into the same slot and secure it in place. Finally, reattach all cables, close up the case, and turn on your computer. You may need to install new drivers or transfer data from your old drive to the new one, but with a little patience, you’ll be up and running on your new SSD in no time.

    With the faster load times and improved performance, your computer will feel like new again.

    Physical installation steps for SSDs

    If you’re looking to upgrade your computer’s storage capacity and speed, installing a new SSD is definitely an excellent option. Fortunately, the physical installation process is fairly simple, even for those who aren’t tech-savvy. First, open up your computer’s case and locate the SATA data and power cables.

    These two cables will be used to connect the SSD to the motherboard and power supply, respectively. Next, insert the SSD into an empty drive bay and secure it with screws if necessary. Finally, connect the SATA data and power cables from the SSD to the motherboard and power supply, respectively.

    Once everything is connected, you can close up the case, plug in your computer, and turn it on to make sure everything is working correctly. With these simple steps, you’ll have a brand new SSD ready to take on all your computer’s storage needs!

    Transfer Data to New SSD

    If you’re looking to upgrade your computer’s storage by replacing a hard disk drive (HDD) with a solid state drive (SSD), you’re in luck. With SSDs becoming faster, cheaper, and more reliable, it’s no surprise that many people are choosing to make the switch. The good news is that transfering your data to the new SSD is a relatively simple process.

    First, you’ll need to clone your old HDD to the new SSD using an external device such as a docking station or a USB-to-SATA adapter. The second step involves removing the old HDD and replacing it with the new SSD. Finally, boot up your computer and ensure that everything is working as intended.

    With these steps completed, you’ve successfully changed your HDD to an SSD and can enjoy all the benefits that come with it, including faster load times, improved system responsiveness, and increased reliability. So, why wait? Try upgrading your computer to an SSD today and see the difference for yourself!

    Methods for transferring data to a new SSD

    When transferring data to a new SSD, there are several methods that you can consider. One of the easiest ways to transfer your files is to use a cloning software that makes a duplicate of your existing drive. This involves creating an exact copy of the entire drive on the new SSD, including the operating system and all the applications installed.

    Another method is to manually transfer your files using a file transfer tool, such as Windows Easy Transfer. This allows you to select the files and folders that you want to transfer and move them to the new drive. Additionally, you may want to consider using cloud-based storage services, such as Google Drive or Dropbox, to move your files.

    This can be a great option if you have limited space on the new SSD or if you want to access your files from multiple devices. Whatever method you choose, it’s important to back up your data before you start the transfer to ensure that you don’t lose any important files. By taking these steps, you can ensure a seamless transfer process when upgrading to a new SSD.

    Test and Set Up New SSD

    Changing your computer’s solid-state drive (SSD) is a great way to boost its performance. This process is easy and can be done by following a few simple steps. The first thing you need to do is to test the new SSD to ensure that it is working properly.

    You can do this by connecting the SSD to your computer and running a speed test. Once you have confirmed that the new SSD is working correctly, you can then set it up in your computer by cloning your existing system to the new drive. This will ensure that all your data, files, and operating system will be transferred to the new SSD.

    After this process is complete, you can then remove the old SSD from your computer and replace it with the new one. This will give your computer a significant boost in speed and performance. Overall, changing your computer’s old SSD to a new one is a simple process that can quickly improve your computer’s performance.

    Methods for testing and configuring new SSD

    If you’re investing in a new SSD, making sure it works correctly is essential. Fortunately, there are several methods for testing and setting up a new SSD that can ensure optimal performance. One of the easiest ways to configure your SSD is by connecting it to your computer and initiating the formatting process.

    Formatting your SSD enables you to prepare it for data storage and ensure it’s compatible with your system. Additionally, you can run various diagnostic software to test your SSD’s performance and check for any defects. These programs will often provide information on your SSD’s health, speed, and overall functionality.

    For optimal results, be sure to update your SSD’s firmware regularly, as these updates can improve performance and security. Finally, consider optimizing your system to ensure it benefits fully from your new SSD’s capabilities. These methods will help you configure your SSD and get the most out of your investment.

    Conclusion

    Changing SSI to SSD is about as easy as swapping out a vowel in Scrabble. Just like how swapping a tile can completely change the word and its worth, switching from SSI to SSD can greatly improve your financial stability and provide the support you need. Just make sure you follow the rules and regulations, and you’ll be on your way to a better quality of life.

    So, next time you’re staring at your Scrabble tiles, think about swapping that “I” for a “D” and changing your SSI to SSD instead.”

    FAQs

    What is the difference between SSI and SSD?
    SSI (Supplemental Security Income) is a needs-based program providing assistance to those with low income and limited resources, while SSD (Social Security Disability) provides benefits to individuals who are disabled and unable to work.

    How do I apply for SSD benefits?
    You can apply for SSD benefits online at the Social Security Administration website, by calling their toll-free number, or by visiting a local SSA office.

    Can I receive both SSI and SSD benefits at the same time?
    Yes, it is possible to receive both SSI and SSD benefits at the same time, but the amount of SSI benefits will be reduced by the amount of SSD benefits received.

    What is the average wait time for SSD benefits approval?
    The average wait time for SSD benefits approval can vary depending on the individual case, but it typically takes 3 to 5 months for an initial decision and up to 2 years if an appeal is necessary.

    How can I check the status of my SSD application?
    You can check the status of your SSD application by contacting your local SSA office, calling the SSA toll-free number, or checking online through the Social Security Administration website.

  • Rev up Your Computer’s Performance with These Top-Rated SSDs: The Best Brands and Models of 2021

    Hey there! Are you someone who loves speedy performance? Whether you’re a gamer or work with large files, nothing beats the overall experience of having a lightning-fast storage solution. That’s where SSDs come in! In this blog, we’re going to take an in-depth look at the best SSDs available on the market and some of their remarkable features. You might be wondering how much of a difference an SSD can make in terms of overall speed.

    Think about it like this: it’s the difference between using a bicycle and driving a sports car. With that in mind, let’s explore your options so that you can make the right choice for your needs. Keep reading to find out our top picks for the best SSDs for fast storage solutions.

    1. Samsung 860 EVO

    Looking for the best SSDs on the market? Look no further than the Samsung 860 EVO. This reliable and high-performing solid state drive is perfect for those who demand speed and efficiency from their storage devices. Built with V-NAND technology, the 860 EVO offers fast read and write speeds, ensuring that your data loads quickly and your system boots up in record time.

    Plus, with its enhanced speed, you can multitask like never before, allowing you to get more done in less time. What’s more, this SSD is backed by Samsung’s 5-year warranty, providing peace of mind that your data is safe and secure. So, whether you’re a gamer, a content creator, or simply looking to upgrade your storage, the Samsung 860 EVO is definitely worth considering.

    So why wait? Boost your computer’s performance and upgrade to the best SSD on the market today!

    Outstanding Performance and Reliability

    When it comes to outstanding performance and reliability in solid-state drives, the Samsung 860 EVO is hard to beat. This SSD offers a capacity ranging from 250GB to 4TB, making it a suitable option for both casual and professional use. Its impressive read and write speeds, coupled with its advanced V-NAND technology, ensure that data transfer is fast and efficient.

    Additionally, the Samsung 860 EVO features a robust build quality, making it durable and resistant to shocks, vibrations, and extreme temperatures. This SSD is also equipped with advanced encryption, safeguarding data from unauthorized access. Whether you’re a gamer, content creator, or business professional, the Samsung 860 EVO is an excellent choice that won’t disappoint.

    So if you’re looking for lightning-fast speeds, top-notch reliability, and remarkable endurance, the Samsung 860 EVO is definitely worth considering.

    best ssds

    Available in Multiple Capacities

    When it comes to solid-state drives (SSDs), one of the most popular options on the market right now is the Samsung 860 EVO. What makes this particular SSD stand out is that it is available in multiple capacities to suit the needs of different users. Whether you need a small 250GB drive for basic use or a massive 4TB drive to handle intensive gaming or video editing, the Samsung 860 EVO has you covered.

    This level of flexibility is especially important for users who need to balance performance with budget, as it allows them to choose the capacity that best suits their needs without overspending on storage they don’t need. In addition, the Samsung 860 EVO offers fast read and write speeds, making it an excellent choice for anyone who wants to improve their computer’s overall performance. If you’re in the market for a reliable and versatile SSD, the Samsung 860 EVO is definitely worth considering.

    2. Crucial MX500

    When it comes to finding the best SSDs on the market, the Crucial MX500 is a top contender. This high-performing, low-cost SSD boasts impressive read and write speeds, making it an excellent choice for anyone looking to improve their computer’s performance. Plus, with up to 2TB of storage, the MX500 provides plenty of room for all of your files and programs.

    One of the standout features of the MX500 is its advanced error correction technology, which ensures that your data stays safe and secure. Additionally, the MX500 is incredibly easy to install, making it an excellent option for anyone who wants to upgrade their computer without needing advanced technical knowledge. All of these factors combine to make the Crucial MX500 one of the best SSDs on the market today.

    Excellent Value for Money

    If you are looking for a cost-effective storage solution for your data, then the Crucial MX500 is an excellent option to consider. This solid-state drive offers a superb value for money, thanks to its high performance, reliability, and affordability. With capacities ranging from 250GB to 2TB, the MX500 is an ideal choice for different users, whether for personal or business purposes.

    It is equipped with advanced features such as 3D NAND technology, AES 256-bit encryption, and thermal monitoring, which ensure fast and secure data transfer. Additionally, the MX500 comes with a five-year limited warranty, which guarantees its quality and durability. Overall, the Crucial MX500 provides exceptional value for money, making it one of the best SSDs in the market today.

    High Speeds and Durability

    When it comes to high speeds and durability, the Crucial MX500 is a top contender. This solid-state drive boasts impressive read and write speeds, making it a great choice for gamers, photographers, and anyone who needs quick access to large files. With its 3D NAND technology, the MX500 is also built to last.

    It can withstand temperature extremes, shock, and vibration, making it a reliable option for those who need a drive that can keep up with their active lifestyle. One of the best things about the MX500 is that it comes in a range of capacities, from 250GB to 2TB, so you can choose the one that best suits your needs. Plus, it’s backed by Crucial’s five-year limited warranty, giving you peace of mind that your investment will be protected.

    So whether you’re looking to upgrade your existing machine or build a new one from scratch, the Crucial MX500 is an SSD that’s definitely worth considering.

    3. WD Blue 3D NAND

    When it comes to finding the best SSDs, the WD Blue 3D NAND is definitely worth considering. This solid-state drive offers impressive performance and reliability, making it a top choice for gamers, content creators, and anyone who needs a fast and responsive storage solution. One of the key features of the WD Blue 3D NAND is its 3D NAND technology, which allows for higher data transfer speeds and better durability compared to traditional SSDs.

    This drive also comes in a range of sizes to fit your storage needs, from 250GB to 2TB. Additionally, the WD Blue 3D NAND has a low power consumption, which means you won’t have to worry about your PC overheating or your battery life draining too quickly. Overall, if you’re looking for a top-performing SSD that’s built to last, the WD Blue 3D NAND is definitely worth considering.

    Fast Read and Write Speeds

    When it comes to fast read and write speeds, the WD Blue 3D NAND is a top contender. This solid-state drive (SSD) boasts impressive performance, thanks to its 3D NAND technology and advanced controller. The drive offers sequential read speeds of up to 560 MB/s and write speeds of up to 530 MB/s, making it a great choice for demanding applications like gaming, video editing, and data analytics.

    What sets the WD Blue 3D NAND apart from other SSDs is its endurance, with a rating of up to 1TB of written data, surpassing many other drives in the same range. Additionally, the drive uses less power than other SSDs, which translates to lower energy bills and a smaller carbon footprint. Whether you are a professional or a casual user, the WD Blue 3D NAND is an excellent choice for all your storage needs.

    Are you looking for a reliable and fast SSD? Look no further than the WD Blue 3D NAND.

    Energy Efficient

    Looking for an energy-efficient storage device? The WD Blue 3D NAND is worth considering. It’s a solid state drive (SSD) that boasts fast read and write speeds, making file transfers quick and easy. But what sets it apart from other SSDs is its low power consumption, which translates to longer battery life on laptops and less energy used overall.

    This means that you can enjoy faster speeds without sacrificing energy efficiency. Plus, it’s built to last, with a durable design that can withstand shocks and vibrations. This makes it a great option for people who are always on the go and need a reliable device.

    So if you’re looking for a storage device that’s both speedy and energy-efficient, the WD Blue 3D NAND is definitely worth considering.

    4. SanDisk Ultra 3D

    If you’re in the market for the best SSDs, then the SanDisk Ultra 3D is certainly worth considering. This drive offers some impressive specs, including read speeds of up to 560MB/s and write speeds of up to 530MB/s. It also uses cutting-edge 3D NAND technology to boost its storage capacity while maintaining its small form factor.

    In fact, the 2TB model can hold up to 500 hours of movies or over 1 million photos! But what really sets the SanDisk Ultra 3D apart is its durability. It can withstand shock, vibration, and extreme temperatures, making it ideal for on-the-go use or for use in harsh environments. Plus, it comes with a 5-year warranty to give you peace of mind.

    So if you’re looking for a fast, reliable, and robust SSD, the SanDisk Ultra 3D is an excellent choice.

    Up to 2TB Storage Capacity

    The SanDisk Ultra 3D hard drive offers up to 2TB storage capacity, making it an amazing choice for those who need ample space for their digital files. Whether you’re a gamer, photographer, videographer or just someone who collects data, this hard drive has got you covered. With its fast read and write speeds and modern 3D NAND technology, the SanDisk Ultra 3D is not only reliable but also efficient.

    Its sleek design, durability and compatibility with a range of devices, including PCs and laptops, make it one of the best hard drives on the market. So, if you’re looking for a high-performance hard drive that can accommodate all your data needs, the SanDisk Ultra 3D is the perfect choice.

    Ultra-Fast Boot Times and File Access

    If you’re looking for ultra-fast boot times and quick file access, the SanDisk Ultra 3D is an excellent option to consider. This solid-state drive (SSD) uses 3D NAND technology to deliver faster load and boot times compared to traditional hard disk drives (HDDs). Its read and write speeds can reach up to 560MB/s and 530MB/s respectively, allowing you to get your work done faster and more efficiently.

    With its reliable performance and a capacity range of up to 2TB, the SanDisk Ultra 3D is a great choice for anyone looking to upgrade their computer’s storage. Additionally, the SSD uses less power compared to HDDs, which can help prolong the battery life of laptops. So, if you’re looking for a speedy and reliable SSD, the SanDisk Ultra 3D is definitely one to consider.

    5. Toshiba TR200

    Looking for a budget-friendly SSD that provides impressive performance? If yes, then Toshiba TR200 is the perfect choice for you. This SSD offers a read speed of up to 555 MB/s and a write speed of up to 540 MB/s. It is available in different storage capacities ranging from 240GB to 960GB, making it easier for users to select the right one that meets their needs.

    The Toshiba TR200 features 64-layer 3D TLC NAND flash memory, which ensures longer lifespan and faster performance compared to traditional solid-state drives. Thanks to the implementation of SLC cache technology, this SSD delivers excellent burst performance, even under heavy workloads. It is compatible with most desktop and laptop computers, making it easy to install and use.

    So, if you are looking for one of the best SSDs available in the market, then Toshiba TR200 is worth considering.

    Affordable Option with Good Speeds

    If you’re on a budget but still want good performance in your storage drive, the Toshiba TR200 is an excellent choice. This SSD offers reliable, fast speeds at a price point that won’t break the bank. With read and write speeds of up to 555MB/s and 540MB/s, respectively, it can handle large file transfers with ease.

    The Toshiba TR200 also uses 3D NAND technology, providing extra durability and longevity for your drive. Plus, with its sleek design and easy installation process, it’s a great option for those who want a simple and affordable way to upgrade their computer’s storage. Overall, the Toshiba TR200 is an affordable option with good speeds that won’t disappoint.

    Resistant to Wear and Tear

    When it comes to SSD drives that are resistant to wear and tear, the Toshiba TR200 is definitely worth considering. This solid state drive is built to last and provides exceptional performance over its lifespan. The TR200 utilizes 3D NAND technology, which not only makes it more durable but also increases its read and write speeds.

    Additionally, it features a high endurance rating, meaning that it can handle a lot of writes over time without degrading. This makes it an ideal choice for gamers, content creators, and professionals who need a reliable and sturdy storage solution. Whether you are looking to upgrade your laptop or desktop computer, the Toshiba TR200 is a dependable choice that won’t disappoint.

    Conclusion

    In conclusion, SSDs (solid-state drives) can be the perfect upgrade to enhance your computer’s performance. With lightning-fast speeds and increased reliability, they’re the Ferrari of hard drives. So if you’re looking for the best SSDs, don’t settle for anything less than top-notch quality.

    After all, life’s too short for slow boot times and endless loading screens.”

    FAQs

    What is an SSD?
    SSD stands for Solid State Drive, it is a type of data storage device that uses flash memory to store data.

    What are the advantages of using SSD over HDD?
    SSDs have many advantages over traditional Hard Disk Drives (HDDs), including faster data access times, faster boot times, quieter operation, and higher levels of reliability and durability.

    How do I choose the best SSD for my computer?
    When choosing an SSD, consider the storage capacity, the read and write speeds, the type of interface it uses (SATA or PCIe), as well as other features like encryption and power consumption.

    Can I use an SSD with my existing computer?
    Yes, most modern computers are compatible with SSDs. However, you may need to check if your computer supports the type of interface that the SSD uses (SATA or PCIe). Additionally, some older computers may require a BIOS update in order to work with SSDs.

  • From SSD to HDD: A Step-by-Step Guide on Transferring Data without Hassle

    If you’re an avid computer user, you’re likely aware of the difference between a solid-state drive (SSD) and a hard disk drive (HDD). While SSDs offer lightning-fast speeds and efficient performance, they can be pricier compared to traditional HDDs. It’s not uncommon for users to wonder whether it’s worth making the switch from an SSD to an HDD.

    There can be different reasons why someone might consider this switch. Perhaps you need more storage space for your growing collection of files, and an HDD can offer more capacity for less money. Or maybe you’ve noticed that your computer’s SSD has become slower over time, and you’re not able to replace it right away.

    Whatever the case may be, deciding whether to switch from an SSD to an HDD requires careful consideration. In this blog post, we’ll explore some of the key factors to consider when making the transition from an SSD to an HDD. We’ll discuss the pros and cons of both storage options, weigh their costs and benefits, and provide tips on how to switch from one to the other.

    Whether you’re a casual computer user or a professional working with large files, this post aims to help you make an informed decision about your storage needs. So, let’s dive in!

    Backup Data

    Switching from an SSD (solid-state drive) to an HDD (hard disk drive) can be a daunting task, but there are a few steps you can take to make the process easier. Firstly, the most important thing you need to do is backup your data. When switching drives, there is a high likelihood that you may lose important files, so it’s essential to make sure that you have a backup of everything on your computer.

    You can use a cloud-based backup system such as Google Drive or Dropbox, or you can use an external hard drive to store a copy of your files. Once your data is backed up, you can then begin transferring it from your SSD to your HDD. One of the best ways to do this is to use a cloning software program that will make an exact copy of your SSD onto your HDD.

    This process can take a while, but it’s the surest way to make sure that everything on your old drive makes it onto your new one.

    Export Files to External Drive

    Backing up data is one of the most important things you can do to ensure that you don’t lose important files and documents. One of the best ways to back up your data is to export your files to an external drive. This is an easy and effective way to ensure that your important documents and files are saved in a secure location that you can access even if your computer crashes or is lost.

    To get started, simply plug your external drive into your computer, select the files you want to back up, and then transfer them to the external drive. This process is quick and easy, and it can save you a lot of time and stress in the long run. So don’t wait until it’s too late – start backing up your files today!

    how do i switch everything from ssd to hdd

    Create Restore Point

    Creating a Restore Point is an important part of backing up your data. It’s an easy and quick way to make sure that your files and settings are protected in case anything goes wrong. To create a Restore Point, you’ll need to go to your Control Panel and click on System Protection.

    From there, you can select the drive you want to create the restore point on and click on the Create button. This will create a snapshot of your current system settings and files, which can be used to roll back your computer to its previous state if something goes wrong. It’s a great way to protect your files and ensure that you don’t lose any important data, especially if you’re making major changes to your computer.

    Make sure to create Restore Points regularly to stay protected!

    Install New HDD

    If you’ve decided to switch everything from SSD to HDD, the installation process is fairly straightforward. First, you’ll need to physically install the HDD into your computer. This involves opening up your computer’s case, finding an empty slot for the HDD, and securing it in place.

    Once the physical installation is complete, you can begin transferring your data over from the SSD to the HDD. There are a variety of ways to do this, depending on what files you have and how you want to transfer them. Some people prefer to use backup software, while others simply copy and paste their files over.

    You’ll also want to make sure that any software programs you have installed on your SSD are reinstalled onto your HDD, so you can access them from there. Overall, the process may take a bit of time, but it should be fairly straightforward if you follow the right steps. By switching to an HDD, you’ll have more storage space and can save some money in the process!

    Physically Install HDD

    Installing a new HDD can be an intimidating task, but it’s actually quite straightforward. First, you’ll need to gather the necessary tools: a screwdriver and your new hard drive. Make sure to power down your computer completely and unplug it from any power sources before getting started.

    Once you’ve located the existing HDD, you’ll need to gently remove it from its dock using the screws on either side of the drive. Carefully disconnect the cables that connect the HDD to the motherboard and power supply. Next, you’ll want to install the new HDD in the same slots, securely connecting the cables to the motherboard and power supply.

    Finally, use the screws to firmly attach the new drive to the dock. Once you’ve successfully installed the new HDD, plug your computer back in and power it up to ensure that everything is functioning properly. With a bit of patience and attention to detail, installing a new HDD can be a simple and rewarding process.

    Assign Drive Letter

    When you add a new hard drive to your computer, you may need to assign a drive letter in order for it to be recognized by the system and for you to access its files. This process is simple and can be completed in just a few steps. First, open the Disk Management tool by right-clicking on the Windows Start button and selecting “Disk Management” from the menu.

    Find your new hard drive in the list of disks and right-click on it, then choose “Change Drive Letter and Paths”. Click the “Add” button and then choose a letter from the drop-down menu. Click “OK” and your new hard drive will now be recognized by your system and you can access it like any other drive.

    Remember to safely eject any removable drives before unplugging them to prevent data loss or corruption. Follow these steps and you’ll be storing and accessing files on your new hard drive in no time!

    Copy Data

    If you’re looking to switch everything from your SSD to your HDD, it’s a reasonably straightforward process that can be completed in a few steps. First, you must ensure that your HDD has enough storage space to accommodate all of the data on your SSD. Once you’ve confirmed that, it’s time to copy the data.

    You can do this by simply dragging and dropping files from your SSD into your HDD, or by utilizing software specifically designed for data transfer. However, keep in mind that some programs may not transfer correctly. In such instances, you’ll need to reinstall the software onto your new hardware from the original installation media or download.

    Once you’ve transferred all of your data, you’ll want to make sure that your new hardware is set as the primary drive in your system BIOS or UEFI firmware settings. This adjustment ensures that your computer boots from the HDD, not your SSD. While the process may require a bit of time and effort, you’ll free up valuable space on your SSD and reduce startup times by having all data stored on your HDD.

    Transfer User Files

    When you get a new computer, one of the most daunting tasks can be transferring your old files and data onto it. However, with the right tools and a little bit of patience, it can be a fairly straightforward process. One of the simplest ways to do this is by using an external hard drive or USB stick.

    Simply copy and paste the files you want to keep onto the external device, and then plug it into your new machine and transfer them over. Another option is to use cloud storage, such as Google Drive or Dropbox. This method allows you to access your files from anywhere and easily transfer them to your new device.

    No matter which method you choose, don’t forget to back up your important files beforehand to ensure that nothing gets lost in the transfer.

    Restore Backed Up Data

    When it comes to restoring backed up data, the first step is to copy the data onto your device. Depending on the type of backup you have, this process may look different. For example, if you have a physical backup like an external hard drive, you’ll need to connect it to your device and manually drag and drop the files onto your computer or device.

    On the other hand, if you have a cloud backup, you may need to download the files from the cloud onto your device. It’s important to ensure that the files are being copied to the correct location on your device and that you’re not overwriting any existing files. Once you’ve successfully copied the files, you can begin the process of restoring the data to its original location.

    By following these steps and taking care to ensure that your copied data is accurate and complete, you can successfully restore your backed up data and avoid the loss of important files and information.

    Modify Boot Settings

    If you have installed an operating system on your SSD and want to switch everything to your HDD, there are a few steps you can follow. One way to do this is to modify your boot settings in the BIOS. First, go into your computer’s BIOS by restarting your computer and pressing the key listed on the screen (usually F2, F12, or Delete) to enter the BIOS.

    From there, navigate to the boot settings and change the boot order so that your HDD is the primary boot device. Save and exit the settings, and your computer should restart. The next time your computer boots up, it will load from your HDD instead of your SSD.

    Keep in mind that this method will only transfer your operating system and installed programs to the HDD – you will need to manually transfer any other files or data to your HDD if you want to save space on your SSD. With these simple steps, you should be able to switch everything from your SSD to your HDD with ease.

    Access BIOS/UEFI

    Accessing the BIOS/UEFI is essential when you want to modify the boot settings of your system. It allows you to change the order of boot devices, set up security features or configure hardware components. To access the BIOS or UEFI, you need to press a specific key during the boot process.

    The key differs across different manufacturers and models, but is usually displayed on the screen during start-up. Some common keys include F2, F10, DEL, and ESC. Once inside, navigate through the menu using the arrow keys and look for the boot settings option.

    Here, you can change the order in which the system boots from different devices like hard drive, CD/DVD, USB device, or network boot. It’s crucial to save your changes and exit before the system can boot with the new settings. Modifying your boot settings can help fix issues like slow boot, booting from the wrong device, or accessing bootable media for a software upgrade or data recovery.

    Change Boot Order

    If you need to change the boot order of your computer’s operating system, it’s a relatively simple process that you can do yourself. The boot order determines which device the computer searches for the operating system at startup. This can come in handy if you need to repair your operating system or install a new one.

    To change the order, you need to access the BIOS or UEFI settings. This can usually be done by pressing a particular key during boot-up, like F2 or Del. Once you enter the settings, look for the boot options and adjust the order to your preferred order.

    For example, you may want to set your CD/DVD drive or USB drive to be the first device the computer searches. It’s important to save the changes before exiting the settings to ensure the new boot order settings are saved. By following these steps and making these changes, your computer will boot differently, potentially improving its functionality and performance.

    Conclusion

    Well, my dear friend, it’s time to bid adieu to your trusty SSD and welcome a new member to the family – your shiny new HDD. But fear not, the transition need not be daunting! With a few simple steps, you can easily switch all your data from your old SSD to your new HDD and enjoy all the perks of high capacity storage. So, grab a cup of coffee, put on your thinking cap, and get ready to switch it up! Your data will thank you for it.

    FAQs

    How do I switch everything from SSD to HDD?
    You can do this by first backing up all your data on the SSD to an external drive. Then, using a software like Clonezilla or Macrium Reflect, clone the SSD onto the HDD. Once the cloning process is finished, boot your computer from the HDD and format the SSD.

    What is the benefit of switching from SSD to HDD?
    While SSDs are faster and more reliable than HDDs, they are also more expensive. By switching to an HDD, you can save money on storage without compromising too much on performance.

    How long does it take to switch everything from SSD to HDD?
    The time it takes to switch from SSD to HDD depends on the amount of data you have and the speed of your computer. Typically, it can take anywhere from a few hours to a whole day.

    Will switching from SSD to HDD affect my computer’s performance?
    It is possible that your computer’s performance may be affected if you switch from an SSD to an HDD, as HDDs are slower than SSDs. However, if you use an HDD with a high spin rate (7200 RPM), you may not notice much of a difference.

  • Step-by-Step Guide to Creating a System Image on SSD: Your Ultimate Beginner’s Tutorial

    Step-by-Step Guide to Creating a System Image on SSD: Your Ultimate Beginner’s Tutorial

    Have you ever felt frustrated waiting for your computer to start up? It can be time-consuming and lead to a decrease in productivity. One solution to this common problem is to use a Solid State Drive (SSD) as your computer’s main drive. With an SSD, your computer boots up much faster, allowing you to get to work without any unnecessary delays.

    In addition to being faster, SSDs are also more reliable than traditional hard drives because they have no moving parts. This means that they are less likely to suffer from physical damage due to impact or vibration. In this blog, we will discuss how to start a system image from an SSD and explore its benefits.

    Check System Requirements

    So, you’ve created a system image onto your SSD – that’s great! But now you may be wondering how to actually start it up. Before you dive in, it’s important to check if your system meets the necessary requirements to run the image smoothly. These requirements will vary depending on the specific image you created, but generally, your computer should have enough storage space, a compatible processor, and sufficient RAM to handle the new system.

    It’s also important to ensure that your computer’s BIOS is set to boot from the SSD, and that the SSD is properly connected and configured within your system. By double-checking these system requirements and settings, you can ensure a successful and seamless start-up of your newly created system image on your SSD.

    Ensure SSD is the Primary Boot Device

    When upgrading to an SSD, one important step is to make sure it is set as the primary boot device in your computer’s BIOS settings. This ensures that your computer will boot up quickly and efficiently from the SSD instead of the slower HDD or other storage devices. However, it’s crucial to also check your system requirements to ensure that your computer is compatible with an SSD.

    Factors such as the type of motherboard, the available SATA ports, and the power supply output can all affect whether or not your computer can support an SSD. It’s also important to make sure that your system has enough space to accommodate the new SSD and that you have the necessary tools and knowledge to physically install it. By taking these steps and carefully checking your system requirements, you can ensure a smooth and successful upgrade to an SSD and enjoy all the benefits it has to offer.

    created system image onto ssd how to start

    Configuration Settings

    When it comes to setting up a new software, it’s essential to first check the system requirements to ensure that your computer can handle the software’s demands. Before you start downloading and installing the new program, be sure to look at the required RAM, processor speed, operating system, and other technical specifications. If your computer doesn’t meet these requirements, the software may not work or may work slowly and inefficiently.

    However, if you meet or exceed the system requirements, you can be confident that your software will run smoothly and without issue. Just like ensuring that your car has enough gas to get you to your destination, checking the system requirements is a crucial step that you don’t want to overlook. So, take some time to do your research and make sure your computer is up to the task before proceeding with the installation process.

    Booting the System from SSD

    So, you’ve just created a system image onto your SSD, and now you’re wondering how to start it up. Don’t worry, it’s a pretty straightforward process. First, make sure your computer is turned off and disconnect any external drives.

    Then, power on your computer and quickly start mashing the key that takes you to the BIOS menu (usually F2, F12, or Del). Once in the BIOS, navigate to the “Boot” section, and set your SSD as the primary boot device. Make sure to save your changes before exiting the BIOS menu.

    After restarting your computer, it should now boot up from your newly created system image on the SSD. Congratulations, you’re now enjoying faster boot times and better overall performance!

    Reboot and Enter BIOS/UEFI Mode

    Booting the system from SSD requires a few steps that depend on the type of operating system you’re running. First, you need to enter the BIOS/UEFI mode, which allows you to change the boot order of your system. To access this mode, you need to restart your computer and press the key to enter the BIOS/UEFI setup utility.

    This key varies depending on your manufacturer and model, so you may need to refer to your user manual or search for the information online. Once you’re in the BIOS/UEFI mode, you need to find the Boot options and change the boot order to prioritize the SSD. This ensures that your computer will boot from the SSD rather than the traditional hard drive.

    After saving your changes, you can reboot your computer and enjoy faster boot times and improved performance with your new SSD. Remember to backup your data before making any changes to your system to avoid any data loss.

    Select SSD as Boot Device

    If you’ve recently installed an SSD into your computer or laptop, then you’ll want to make it the primary boot device. Doing so will significantly improve your system’s overall performance, including faster boot times, quicker application loading, and improved responsiveness. To select an SSD as a boot device, you’ll need to enter your system’s BIOS or UEFI firmware and change the boot order.

    First, restart your computer and press the appropriate key (usually F1, F2, or DEL) to access the BIOS or UEFI firmware. Once inside, navigate to the Boot or Startup tab and select the SSD as the primary boot device. You may need to disable boot options related to the previous boot device to ensure that your system boots from the SSD every time.

    After making the changes, save and exit the BIOS/UEFI firmware, and your system will now boot from the SSD by default. Congratulations, you’ve successfully optimized your system’s boot process with an SSD!

    Save Changes and Exit

    After completing the necessary changes for booting the system from SSD, it’s essential to save and exit the changes made. This simple process guarantees that any configuration changes made permanently automated when the system boots back up. It might seem like a small step compared to the entire process, but it’s crucial.

    Before saving and exiting the BIOS, take a look and ensure that each change you’ve made aligns with your goals. If everything lines up, press F10, which saves the changes and exits the BIOS. You’re then good to go.

    With the operating system, applications, and programs all configured to run from the SSD, you can enjoy speedy performance, better reliability, and a more efficient system. By adding an SSD and configuring the system to boot from it, you’ll have a faster, more robust system that caters to your needs.

    Troubleshooting Tips

    You’ve finally created a system image onto your newly installed SSD, but now you’re wondering what the next step is to get your computer up and running. Don’t worry; starting up your computer with an SSD is a straightforward process. Firstly, make sure that your motherboard supports booting from the SSD.

    You can usually find this in the BIOS settings under the “boot order” tab. Then, plug the SSD into your computer and power it on. Your computer will detect the SSD as a bootable device and prompt you to install your operating system onto it.

    From there, follow the on-screen instructions to complete the installation. Once it’s finished, your system should start up in no time, with faster speed and improved performance thanks to your new SSD. It’s that easy!

    Verify Image Creation on SSD

    If you’re having trouble with verifying image creation on your SSD, don’t worry – there are a few things you can try to troubleshoot the issue. Firstly, double-check that your SSD is properly connected and recognized by your computer. Next, make sure that you are using the correct software to create the image and that it is compatible with your specific SSD model.

    Additionally, ensure that you have enough free space on your SSD to accommodate the image file. Another thing to consider is whether your SSD is running firmware that needs updating – this can cause issues with image creation and verification. By following these tips and ensuring that all necessary updates and connections are in place, you can troubleshoot the issue and successfully verify image creation on your SSD.

    Reset BIOS/UEFI Settings

    Resetting BIOS/UEFI settings is a troubleshooting tip that can help you resolve various issues related to your computer’s hardware and software. When you reset your BIOS/UEFI, you are essentially restoring the factory-default settings of your computer’s firmware. This can help fix issues like booting problems, speed or performance issues, errors during startup, etc.

    Resetting the BIOS or UEFI is like pressing the reset button on your computer. It restores the basic settings that your computer needs to function properly. It can also help you recover from certain malware or virus infections.

    In order to reset your BIOS/UEFI, you need to follow a few simple steps that vary depending on your computer model. However, the process usually involves entering the BIOS/UEFI setup utility, selecting the restore or default option, and saving the changes before exiting the setup. In some cases, you may also need to remove the CMOS battery from your motherboard to reset the BIOS/UEFI.

    Final Thoughts

    Congratulations! You’ve successfully created a system image onto your SSD. Now, it’s time to start using it. One of the easiest ways to launch your new system is to simply restart your computer and change the boot order in your BIOS settings.

    This will allow your computer to boot from the SSD instead of your old hard drive. Alternatively, you can use a bootable USB drive or DVD to start your system and install the image onto your SSD. Once your system is up and running on the SSD, you’ll notice a significant improvement in speed and performance.

    Your computer will boot up faster, applications will launch almost instantly, and your overall computing experience will be smoother. With your new SSD, you can enjoy all the benefits of a lightning-fast system. So, sit back, relax, and enjoy your newly upgraded computer!

    Conclusion

    In the world of technology, there are few things that bring as much joy and satisfaction as upgrading your system with a shiny new SSD. And if you’ve made the wise decision to create a system image and transfer it onto your SSD, you’re in for a seamless and lightning-fast transition. But hold your horses, cowboy! Before you hit that power button and start exploring the depths of your new speed demon, there are a few things you need to keep in mind.

    Take your time, follow the instructions, and don’t forget to pat yourself on the back for a job well done. In the end, the feeling of pure computer bliss will be more than worth it.”

    FAQs

    What is a system image and how is it created on SSD?
    A system image is an exact copy of your computer’s operating system, files, and settings saved onto an external storage device like an SSD. To create a system image on an SSD, go to “Control Panel,” select “Backup and Restore,” and click on “Create a System Image.” Follow the prompts to select your SSD as the backup location and start the process.

    Can a system image be restored onto a new SSD?
    Yes, a system image can be restored onto a new SSD. Simply connect the new SSD to your computer, insert the system image recovery disk or USB drive, boot from it, and follow the prompts to restore the backup onto the new SSD.

    How do I start my computer using the system image on my SSD?
    To start your computer using the system image on your SSD, first, connect the SSD to your computer, then follow these steps: – Restart your computer and press the key that opens the boot menu (F8, F10, F12, or Esc). – Select the SSD as the boot device from the list of options. – Press “Enter” to confirm and start the boot process from the SSD.

    What should I do if my computer fails to start after restoring the system image from my SSD?
    If your computer fails to start after restoring the system image from your SSD, you can try booting into safe mode and repairing the startup process. To do this, follow these steps: – Restart your computer and press the key that opens the boot menu (F8, F10, F12, or Esc). – Select “Safe Mode with Networking” from the list of options. – Once in safe mode, go to “Control Panel,” select “System and Security,” and click on “Backup and Restore.” – Follow the prompts to select your system image on the SSD and click on “Restore System.” – Restart your computer and see if it starts normally.

  • Unleash the Power of Lightning Fast Data Transfer with SSD External Drives

    Running out of storage space is a common problem for people in the digital age. With the increasing amount of data we generate and store, it’s easy to fill up a computer’s hard drive or an external hard drive. Fortunately, the solution to this problem is simple, cost-effective, and accessible to everyone: an SSD external drive.

    Solid-state drives (SSDs) are a type of storage device that use flash memory to store data. Unlike traditional hard drives, SSDs have no moving parts, which means they are faster, more reliable, and consume less power. External SSDs are even more convenient as they offer a portable, lightweight way to carry large amounts of data around with you.

    Whether you’re a photographer, a gamer, a student, or just someone who needs to store a lot of files, an SSD external drive can be a game-changer. With read and write speeds that are up to ten times faster than traditional hard drives, you can transfer large files in a matter of seconds. Plus, with capacities ranging from 256GB to 2TB, you can choose the size that suits your needs and budget.

    But the benefits of an SSD external drive go beyond speed and capacity. They also offer better durability, making them less prone to damage from bumps and drops. And because they don’t require power from the computer, you can even use them with a tablet or smartphone.

    In short, if you’re running out of storage space or looking for a reliable, portable way to carry your data around, an SSD external drive is the way to go. With its fast speeds, large capacity, and durability, it’s a smart investment that will boost your productivity and give you peace of mind.

    What is an SSD External Drive?

    An SSD external drive is a portable storage device that houses a Solid State Drive (SSD), which provides faster data transfer speeds and improved performance compared to traditional Hard Disk Drives (HDDs). Unlike internal SSDs, an SSD external drive can be easily connected to different devices through various interfaces such as USB, Thunderbolt, and SATA. These drives are known for their durability, shock resistance, and low power consumption, making them a popular choice for individuals who need to store and transfer data on the go.

    They come in various sizes and price ranges, depending on the storage capacity, brand, and interface type. Whether you are looking to store important data, transfer media files, or conduct business on the go, an SSD external drive can offer you the speed and convenience you need.

    Solid State Drives Vs. Hard Disk Drives

    An SSD External Drive is a newer type of external storage device that utilizes solid state technology. Unlike the traditional Hard Disk Drives (HDDs), SSDs do not have moving parts, making them more durable and less prone to mechanical failure. They are also faster, more energy-efficient, and quieter than HDDs.

    SSDs use NAND based flash memory to store data and do not require spinning disks to read and write information. They have higher shock resistance, lower access times, and faster read and write speeds, which makes them perfect for gamers, video editors, and content creators. Unlike HDDs, SSDs are also lightweight and easy to carry around.

    If you are looking for a reliable, compact and fast external drive, an SSD external drive is the way to go.

    ssd external

    Benefits of Using an SSD External Drive

    An SSD external drive is a solid-state drive that is connected to a computer through an external port. It is a storage device that uses flash memory to store data, just like the SSDs in laptops. An SSD external drive is faster than a traditional hard drive, and its speed is noticeable when transferring files, booting up the computer, and opening applications.

    The main benefit of using an SSD external drive is its speed, as it saves time and enhances productivity. It is also more durable than a traditional hard drive, as there are no moving parts that can break down over time. Additionally, an SSD external drive is smaller and more portable than a traditional hard drive, which makes it ideal for use when traveling.

    Overall, an SSD external drive is a reliable and efficient way to store data while also improving a computer’s overall performance.

    Choosing the Best SSD External Drive

    When it comes to choosing the best SSD external drive, there are several factors to consider. First and foremost, you’ll want to check the capacity and speed of the drive. SSDs are known for their faster read/write speeds compared to traditional hard drives, so make sure to choose an SSD that can handle your data transfer needs.

    Additionally, consider the size and portability of the drive – do you need something that can fit in your pocket and easily transport with you? Finally, take note of any additional features such as encryption or compatibility with multiple operating systems. By taking all of these factors into account, you can find the best SSD external drive to suit your needs and keep your data safe and secure.

    Factors to Consider when Choosing an SSD External Drive

    When looking to purchase an SSD external drive, there are several factors to consider to ensure that you get the best product for your needs. Firstly, consider the drive’s capacity. If you plan on storing large files, such as high-resolution photos and videos, you should opt for a larger capacity drive.

    Additionally, think about the drive’s transfer speed. Faster transfer speeds mean faster file transfers, which can save you time and hassle. Another consideration is the durability of the drive.

    If you plan on taking your drive with you on the go, look for a sturdy and shock-resistant option. Lastly, consider the price and brand reputation. While cheaper options may seem more appealing, investing in a high-quality drive from a reputable brand can save you money and frustration in the long run.

    By considering these factors, you can choose the best SSD external drive for your needs.

    Top SSD External Drives of 2021

    When it comes to choosing the best SSD external drive for your needs in 2021, there are a few important factors to consider. One of the most crucial is the storage capacity you require, as this will determine how much data you can store on your drive. Other key considerations include the drive’s read and write speeds, durability, and the overall cost per gigabyte.

    Some of the top SSD external drives on the market today include the Samsung T7 Touch, the SanDisk Extreme Pro, and the WD Black P50. Each of these drives offers excellent read and write speeds, as well as impressive durability and storage capacities. Ultimately, the best SSD external drive for you will depend on your unique needs and budget, so it’s important to consider all of these factors carefully before making a final decision.

    Pros and Cons of Popular SSD External Drives

    When it comes to choosing an SSD external drive, there are several options to consider. While they all offer faster read/write speeds than traditional hard drives, each has its own pros and cons. One popular option is the Samsung T

    It provides fast transfer speeds, has a sleek design and is small enough to fit into a pocket. However, it can be more expensive than some other options. Another popular choice is the SanDisk Extreme Pro.

    It also has fast transfer speeds and a durable design, but it’s larger and heavier than the Samsung T Additionally, it can be more expensive. A more budget-friendly option is the Crucial X

    It offers good transfer speeds and is affordable, but it lacks the durability of some other options. Ultimately, the best SSD external drive for you will depend on your budget and needs.

    How to Use and Maintain your SSD External Drive

    If you’ve recently purchased an SSD external drive, then there are a few useful tips you should keep in mind to help you get the most out of this type of storage device. Firstly, it’s imperative to ensure that the device is used and stored correctly to prevent data corruption or device failure. You should also take care not to move the device excessively while it’s in use, as this can cause damage to the internal components.

    When transferring files to or from the device, it’s advisable to use USB 0 or higher as this will provide the best performance and efficiency. In terms of maintenance, regular backups and virus scans are recommended to ensure the longevity and security of the device.

    By following these simple steps, you’ll be able to make the most of your SSD external drive for years to come.

    Setting Up your SSD External Drive

    Setting up your SSD external drive can be an easy process, but it’s important to do it correctly to ensure optimal performance and longevity. First, you’ll want to connect your new drive to your computer using a USB cable. Then, depending on your operating system, you may need to format the drive to ensure it’s compatible.

    Once your drive is formatted, you can begin using it to store files and programs. It’s important to keep your SSD external drive well-maintained by using it regularly and ensuring it’s stored in a cool, dry place when not in use. By taking proper care of your SSD external drive, you can increase its lifespan and avoid the frustration of lost or corrupted files.

    So, don’t hesitate to invest in an SSD external drive for your storage needs and ensure it’s set up and maintained properly for optimal performance.

    Tips for Maintaining Your SSD External Drive

    SSD External Drive An SSD External Drive is a quick and efficient way to store your data, but taking care of it is essential to ensure it continues to work correctly. To maintain your SSD External Drive, always eject it correctly from your computer when you’re finished using it. Abrupt unplugging can lead to data corruption and damage to the drive.

    You should also be careful when handling and moving your drive, making sure it doesn’t sustain any physical damage. Avoid exposing the drive to extreme temperatures and keep it away from moisture or dusty areas. Additionally, defragmentation is not required for your SSD External Drive.

    In fact, defragmenting can even cause damage to the drive’s lifespan. By following these tips, you can increase the longevity of your SSD External Drive and ensure it remains reliable for all your data storage needs.

    Conclusion and Final Thoughts

    In conclusion, an SSD external drive is like having a personal pocket-sized superhero for your data storage needs. With its lightning-fast speed, sleek design, and dependable reliability, it’s your trusty sidekick for transferring and storing large files, backups, and everything in between. It’s not just a mere gadget, but an essential tool for modern life.

    So whether you’re a tech-savvy superhero or just a regular user, don’t leave home without your SSD external drive!”

    FAQs

    What is an SSD external hard drive?
    An SSD external hard drive is a portable storage device that uses solid-state drive technology to store data. Unlike traditional hard drives, SSDs have no moving parts, making them faster and more durable.

    How is an SSD external hard drive different from a traditional external hard drive?
    An SSD external hard drive is different from a traditional external hard drive in several ways. First, it uses solid-state drive technology instead of a spinning disk to store data. This makes it faster, more reliable, and less prone to failure. Second, it is typically lighter and more portable than a traditional external hard drive. Finally, it can be more expensive than a traditional external hard drive.

    What are the benefits of using an SSD external hard drive?
    The benefits of using an SSD external hard drive include faster data transfer speeds, better durability, and more reliable performance. SSDs have no moving parts, which means they are less prone to failure and can withstand more physical damage than traditional hard drives. Additionally, SSDs are faster than traditional hard drives, which can help improve overall system performance.

    What should I look for when choosing an SSD external hard drive?
    When choosing an SSD external hard drive, there are several factors to consider. First, you should look for a drive with a fast transfer speed and enough storage capacity to meet your needs. Additionally, you should consider the physical size and weight of the drive, as well as any additional features like encryption or backup software. Finally, you should consider the price and choose a drive that fits within your budget.