Author: David L. Lynn

  • Heat up your Knowledge: Unravelling the Mystery of Heatsinks for Your SSD

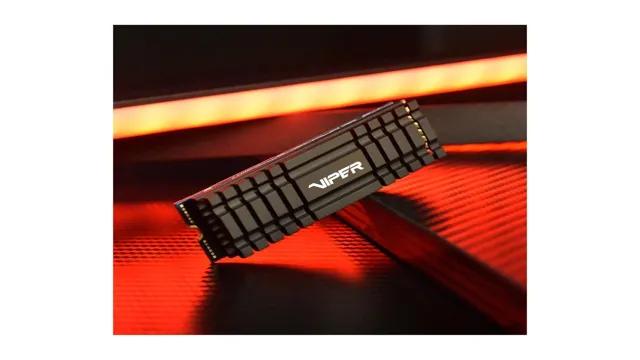
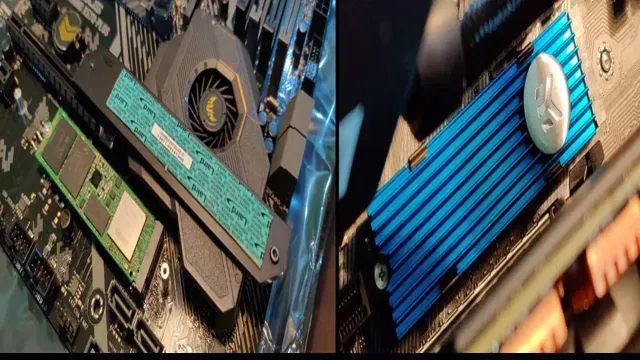
    If you’re an avid PC builder or gamer, you’ve likely put a lot of thought and care into selecting your components. From your CPU to your GPU, you’ve considered every facet of your setup. But have you ever stopped to consider whether or not you need a heatsink for your SSD? For those who may not be aware, an SSD heatsink is exactly what it sounds like – a device that helps dissipate heat from your SSD.

    When your SSD heats up, it can lead to performance issues and potentially even damage your drive. However, not all SSDs require a heatsink, and the necessity of one largely depends on your specific setup and usage. So, how do you know if your SSD needs a heatsink? One factor to consider is the type of workload you’ll be putting on your drive.

    If you plan on heavy usage, such as video editing or intense gaming, a heatsink may be beneficial. Additionally, if your SSD is in close proximity to other heat-generating components, such as your GPU or power supply, a heatsink could help ensure optimal performance. Of course, the type of SSD you have also plays a role.

    NVMe drives, in particular, tend to generate more heat than their SATA counterparts. Additionally, some SSDs come with built-in thermal protection features, eliminating the need for a separate heatsink. At the end of the day, determining whether or not you need an SSD heatsink requires careful consideration of both your usage and component selection.

    While it may not be necessary for everyone, those who want to ensure optimal performance and longevity for their drive may find it to be a worthwhile investment.

    Understanding SSD Heat Dissipation

    Many people wonder whether they need a heatsink for their SSD. The answer ultimately depends on the type of SSD you have and how you’re using it. In general, SSDs do generate heat, but it’s usually not enough heat to require a heatsink.

    However, if you’re running your SSD at high loads for extended periods of time, or if you’re using an NVMe SSD, you may benefit from a heatsink. NVMe SSDs can generate more heat than other types of SSDs due to their increased data transfer rates. A heatsink can help dissipate this heat and keep your SSD running cooler.

    Additionally, if you’re using your SSD in a cramped computer case or stacking multiple SSDs on top of each other, a heatsink can provide extra protection against heat buildup. In most cases, though, a heatsink isn’t necessary for your SSD.

    Why Your SSD Generates Heat

    SSD heat dissipation SSD or Solid-State Drives have become increasingly popular due to their faster performance and reliability compared to traditional hard drives. However, one of the significant issues with SSDs is their tendency to generate heat while in operation. The primary reason for SSD heat dissipation is its internal components.

    The SSDs have multiple chips, controllers, and other components that generate heat while processing data, which can cause the drive’s temperature to rise. As the drive’s temperature increases, the performance may start to slow down, and in some cases, it may even damage the drive’s longevity. Therefore, SSD heat dissipation is a critical factor to consider when selecting an SSD.

    Some high-end SSDs have advanced thermal management technologies, such as heatsinks and temperature sensors to manage the heat, ensuring better performance and longevity. It is important to remember that SSDs are electronic devices that can generate heat, and their heat dissipation needs careful consideration to keep the drive running optimally.
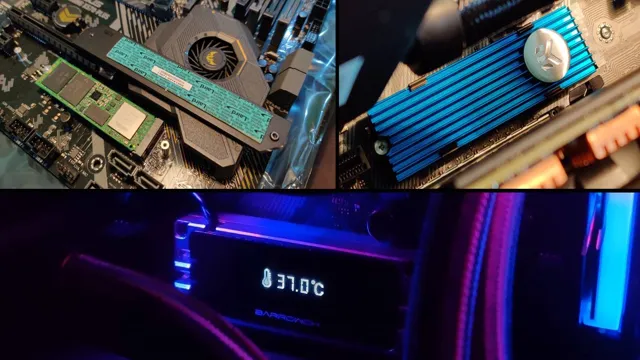
    do i need a heatsink for my ssd

    Factors Affecting SSD Temperature

    When it comes to SSDs, there are a number of factors that can affect their temperature. One important consideration is the amount of storage space on the drive, as larger drives tend to generate more heat. Another factor is the speed at which data is being read and written, as this can also impact the temperature of the drive.

    In addition, the overall design of the SSD plays a role in heat dissipation. Some drives have better cooling mechanisms than others, which can result in lower operating temperatures. Overall, it’s important to keep an eye on SSD temperatures and ensure that they don’t get too hot, as this can lead to reduced performance and even damage to the drive.

    By understanding how and why SSDs generate heat, it’s possible to take steps to keep them running at optimal temperatures.

    When Do You Need a Heatsink for Your SSD?

    If you’re someone who extensively uses your computer or gaming setup, you might be considering if you need a heatsink for your SSD. The answer to this question isn’t straightforward as it depends on your usage patterns and SSD model. Generally speaking, traditional hard drives generate a lot of heat due to their mechanical movement, but the same isn’t the case with SSDs.

    Hence, low-end and mid-range SSDs come without a heatsink, and they perform perfectly fine. However, if you’re someone who uses their computer for extended hours, especially while executing large file transfers or gaming, investing in a heatsink can be a good idea. A heatsink can help dissipate the heat generated by your SSD, increasing its lifespan and performance.

    Hence, you should analyze your computer usage patterns, check your SSD model’s specs, and accordingly make a decision about whether or not you need a heatsink for your SSD.

    High-Performance SSDs

    High-performance SSDs If you’re looking to get the most out of your high-performance SSD, it might be worth considering adding a heatsink to your setup. Heatsinks are devices designed to help mitigate the buildup of heat in a system, and they can be incredibly useful when it comes to SSDs in particular. When an SSD gets too hot, it can start to experience performance issues and even become damaged over time.

    This is because SSDs work by writing and rewriting data to and from their storage chips, which generates heat in the process. By adding a heatsink to your SSD, you can help disperse this heat and keep your SSD running smoothly for longer. It’s worth noting, however, that not all SSDs require a heatsink, so it’s important to do your research before making any purchases.

    And if you’re not comfortable installing a heatsink yourself, it’s always best to consult a professional to ensure that everything is done safely and correctly.

    Intensive Workloads

    If you’re running intensive workloads on your SSD, such as large file transfers or running multiple applications at once, then you may need a heatsink to prevent overheating and potential damage to your drive. A heatsink is a device that helps to dissipate heat by transferring it away from the SSD and into the surrounding environment. Without a heatsink, an SSD can quickly reach its maximum operating temperature, which can cause performance issues and even reduce the lifespan of the drive.

    One way to tell if your SSD needs a heatsink is to monitor its temperature using a utility program. If the temperature regularly exceeds the recommended operating range, then a heatsink is likely necessary. Installing a heatsink is a simple process that can provide significant benefits for the longevity and performance of your SSD.

    So, if you’re running intensive workloads on your SSD, be sure to consider adding a heatsink to keep it running smoothly and efficiently.

    Overclocking and Overvolting

    When it comes to overclocking and overvolting your SSD, it’s important to consider whether or not you need a heatsink. Overclocking refers to pushing your SSD beyond its rated specifications in order to achieve faster speeds. While this can be a great way to boost performance, it also generates more heat, which can cause damage to your system over time.

    Overvolting, on the other hand, involves increasing the voltage supplied to your SSD in order to improve its performance. This can also generate more heat. Whether or not you need a heatsink for your SSD largely depends on how far you plan on pushing your system.

    If you’re only doing a mild overclock or overvolt, you may be fine without a heatsink. However, if you’re planning on really pushing your system to its limits, a heatsink is recommended. This is because heatsinks help dissipate the extra heat generated by overclocking or overvolting, preventing damage to your SSD and other components.

    So, if you want to squeeze every last bit of performance out of your SSD, overclocking and overvolting can be great ways to do so. Just remember to keep an eye on the temperature and consider a heatsink if you want to ensure your system remains stable over the long term.

    Benefits of Using a Heatsink for Your SSD

    “Do I need a heatsink for my SSD?” This is a common question among computer enthusiasts, and the answer is dependent on a few factors. Firstly, if you’re someone who pushes your SSD to its limits by running intensive applications or multitasking heavily, a heatsink may be beneficial. Heatsinks help to dissipate heat, which enables your SSD to perform optimally without overheating.

    Additionally, if you have an M.2 SSD that is positioned close to other components that emit heat, a heatsink will assist in preventing overheating. Even if you don’t fall into either of these categories, adding a heatsink to your SSD won’t harm your system, and it could prolong the lifespan of your drive.

    Therefore, while you may not necessarily require a heatsink for your SSD, it’s worth considering if you prioritize longevity and performance.

    Improved Performance and Stability

    When it comes to maximizing your SSD’s performance and stability, utilizing a heatsink can make all the difference. SSDs generate heat during operation, which can cause them to slow down or even fail over time. By attaching a heatsink to your SSD, you can dissipate this heat and ensure that your device functions at peak performance for longer.

    In addition to keeping your SSD cool, heatsinks can also protect it from physical damage and electromagnetic interference. Investing in a quality heatsink can be a game-changer for gamers, designers, and other professionals who depend on lightning-fast SSD speeds. So if you want to make the most of your investment and avoid setbacks due to overheating or other issues, consider adding a heatsink to your setup.

    Your SSD will thank you for it.

    Prolonged SSD Lifespan

    Using a heatsink for your SSD comes with numerous benefits, one of which is prolonged SSD lifespan. Solid State Drives (SSDs) operate at high temperatures, which may lead to reduced performance and shortened lifespan. A heatsink acts as a thermal conductor between your SSD and the surrounding environment, facilitating heat dissipation and lowering the overall temperature.

    This ensures that your SSD operates at an optimal temperature, reducing the likelihood of failure due to overheating and prolonging its lifespan. Think of it like wearing a hat on a sunny day – your head is shielded from the sun’s heat, meaning you can stay out longer without getting uncomfortably hot. Similarly, installing a heatsink to your SSD helps mitigate the effects of high temperatures, resulting in a reliable and long-lasting SSD performance.

    Conclusion: Is a Heatsink Necessary for Your SSD?

    Well, the short answer is no, you don’t necessarily need a heatsink for your SSD. However, if you’re someone who likes to take extra precautions to protect your hardware and keep it running cool, then by all means go ahead and slap on a heatsink. Who knows, it may even add a little extra flare to your computer’s aesthetic.

    Ultimately, it comes down to personal preference and how much you value peace of mind when it comes to your tech.”

    FAQs

    What is a heatsink and why is it needed for an SSD?
    A heatsink is a device that helps to dissipate heat away from components to prevent them from overheating. It is needed for an SSD to prevent thermal throttling which can lead to decreased performance and potential damage to the SSD.

    Are heatsinks necessary for all SSDs or just certain ones?
    Heatsinks are generally not necessary for all SSDs, but are recommended for high-end or enthusiast-grade SSDs that generate a lot of heat during operation.

    Can I use any type of heatsink with my SSD?
    It is recommended to use a heatsink that is specifically designed for your SSD, as some generic heatsinks may not fit properly or provide adequate cooling.

    Do all motherboards come with built-in heatsinks for SSDs?
    No, not all motherboards come with built-in heatsinks for SSDs. It is important to check the specs of your motherboard to see if it has a heatsink, and if not, consider purchasing a separate one.
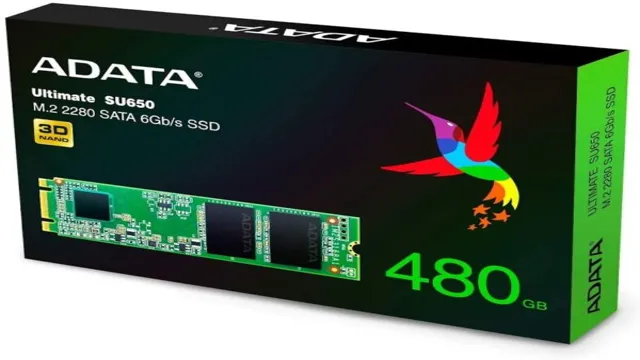
  • Upgrade Your System with Ease: A Complete Guide on How to Replace Your Adata M2 SSD

    Upgrading your SSD storage space is a great way to boost your computer’s performance, allowing you to store more data without slowing down your system. One of our favorite SSD brands is ADATA, known for its high-quality and reliable products. However, there comes a time when even the most reliable SSDs need to be replaced.

    If you’re looking to replace your ADATA M2 SSD, then you’ve come to the right place. In this step-by-step guide, we’ll show you how to replace your ADATA M2 SSD and get your computer up and running again in no time. So, whether you’re a tech-savvy enthusiast or just looking to upgrade your storage, let’s dive in and get started on our journey towards more storage space.

    Preparation

    If you’re looking to replace your ADATA M.2 SSD, there are some things you’ll need to prepare ahead of time. First, you’ll want to make sure you have the proper tools to open your laptop or PC and access the M.

    2 slot. This usually involves a small screwdriver and some patience. You’ll also want to have a new M.

    2 SSD ready to go, with the same or greater capacity as your old one. It’s important to back up any important files or data on your old SSD before replacing it, so you don’t lose anything important. You can do this by transferring files to an external hard drive or using a cloud storage service.

    Once you have all of these things ready, you’re almost ready to replace your ADATA M.2 SSD and enjoy faster speeds and better performance. Don’t forget to power down your device and discharge any static electricity before handling your new SSD.

    Check your laptop or desktop computer specifications

    When it comes to preparing for buying a new laptop or desktop computer, it’s important to check the specifications before making your final decision. These specifications will give you a clear idea of what the computer is capable of and whether it will meet your needs. Some of the key specifications to look at include the processor, RAM, storage, and graphics card.

    For example, if you plan on using your computer for gaming or video editing, you’ll want to make sure you have a powerful processor and high-end graphics card. On the other hand, if you just need a computer for browsing the web and checking emails, a less powerful processor and graphics card may be sufficient. By understanding your own needs and checking the specifications of the computers you’re considering, you’ll be able to make an informed decision and get the most value for your money.

    adata m2 ssd how to replace

    Shut down and unplug your computer or laptop

    “computer shutdown” When it comes to shutting down your computer or laptop, it’s important to take a few steps to ensure everything is properly prepared. First, save any important documents or files you’re working on and close all open programs. This will prevent any potential data loss or corruption during the shutdown process.

    Next, make sure any peripherals such as printers or external hard drives are also safely disconnected. Once everything is properly saved and disconnected, it’s time to shut down your computer. Click on the Start menu and select the Shutdown option, or if you’re using a laptop, press the power button until the device turns off.

    Additionally, don’t forget to unplug your computer or laptop if you’re not planning to use it for an extended period. This can help prevent potential power surges or other electrical issues. By taking these simple steps, you can ensure your computer remains in good working condition and is always ready for your next use.

    So always remember to prepare and take the extra steps to safely shut down your computer.

    Installation

    If you’re looking to upgrade your computer’s storage with an ADATA M.2 SSD, the process is fairly straightforward. First, you’ll need to make sure your computer is turned off and unplugged from any power source.

    You’ll then need to locate the M.2 slot on your motherboard, which is typically located near the CPU and labeled as such. Once you’ve found it, carefully remove the screw or clip holding the existing M.

    2 drive in place, then gently slide it out of the slot. From there, simply slide your new ADATA M.2 SSD into the slot, then secure it in place with the screw or clip you removed earlier.

    Finally, plug your computer back in and turn it on, and your new M.2 SSD should be detected automatically. Overall, the process should only take a few minutes and can greatly improve the speed and performance of your computer.

    Remove the Old ADATA M2 SSD

    If you’re looking to upgrade your computer’s storage capacity, one of the first steps is to remove the old ADATA M2 SSD. This is a simple process, but it’s important to handle the SSD carefully to avoid damaging it or other components in your device. Before starting, you’ll want to ensure that your computer is turned off and disconnected from any power sources.

    You’ll then need to locate the M2 slot on your motherboard and unscrew any fastenings that are holding your SSD in place. Gently remove the old SSD, being careful not to bend any pins or damage the slot. With the old SSD removed, you can now install your new SSD and enjoy increased storage and performance on your computer.

    Install the New ADATA M2 SSD

    Installing the new ADATA M2 SSD is a quick and easy process that can significantly boost the performance of your computer. First, you need to locate the M.2 slot on your motherboard and make sure it’s compatible with the size of your SSD.

    Then, remove any preexisting SSD or hard drive from the slot and carefully align the ADATA M2 SSD with the slot until it is snugly in place. Finally, secure the SSD with the included screw and you’re ready to start enjoying faster boot times and improved application loading speeds. With the ADATA M2 SSD, you can easily upgrade your computer’s storage and performance without having to go through the hassle of transferring data to an external drive or reinstalling your operating system.

    So why wait? Upgrade your computer today and experience the benefits of lightning-fast storage with the ADATA M2 SSD.

    Post-installation

    Replacing an ADATA M.2 SSD can seem like an intimidating task, but it is actually quite simple and straightforward. The first step is to shut down your computer and unplug it from the power source.

    Once you have done that, locate the M.2 slot on your motherboard. Carefully remove the existing SSD from the slot by gently pushing down on the retention clip and sliding the drive out.

    Slide the new ADATA M.2 SSD into the slot, making sure it is aligned correctly, and tighten the screw to secure it in place. Once it is secure, replace the back cover of your computer and power it back up.

    You will need to go into the BIOS and select the new SSD as your boot device. Congratulations, you have successfully replaced your ADATA M.2 SSD!

    Turn on your computer and check if the new ADATA M2 SSD is detected

    Now that you’ve installed your new ADATA M2 SSD, it’s time to make sure everything is working as it should be. The first step is to turn on your computer and check if the SSD is detected. This is an important step because if the SSD isn’t detected, then it won’t be usable.

    Fortunately, the detection process is usually automatic, so you should see the SSD listed in your computer’s BIOS. If you don’t see it, then there might be a problem with the installation or with the SSD itself. It’s important to troubleshoot the problem at this stage so that you don’t waste any more time.

    Once the SSD is detected, you can start to use it to store your files, install applications, and run your operating system. With the ADATA M2 SSD, you’ll enjoy faster boot times, faster application load times, and overall better performance from your computer. So take the time to make sure everything is working as it should be, and enjoy the benefits of your new investment.

    Verify the Storage Capacity of the New ADATA M2 SSD

    After installing your new ADATA M2 SSD, it’s important to verify the storage capacity to ensure you’ve received what you paid for. To do this, you can check your computer’s settings or use a disk usage analysis tool. It’s possible that your computer may recognize a slightly smaller capacity due to the way storage is measured, but this should only be a small difference.

    If you do notice a significant discrepancy in your storage capacity, you should contact the manufacturer or vendor to see if there’s a problem with the device. Remember, the capacity of an M2 SSD is important to consider when looking for a fast and reliable storage solution, so it’s worth taking the time to verify it post-installation.

    Conclusion

    Replacing your old hard drive with a new ADATA M2 SSD is like upgrading from a bicycle to a sports car. It’s faster, more efficient, and will give your computer a new lease on life. With its easy installation process, you’ll be able to get up and running in no time, and your computer will thank you for it.

    So say goodbye to slow boot times and storage limitations, and hello to the turbocharged performance of an ADATA M2 SSD.”

    FAQs

    What is an ADATA M.2 SSD?
    An ADATA M.2 SSD is a high-speed storage device that uses the M.2 interface, which is a small, compact form factor designed for use in devices with limited space.

    How do I know if my computer is compatible with an ADATA M.2 SSD?
    You can check your computer’s specifications to see if it has an M.2 slot and whether it supports the type of SSD you are considering. You can also check the motherboard manual to see if it lists compatible devices.

    Can I replace my old hard drive with an ADATA M.2 SSD?
    If your computer has an M.2 slot and your old hard drive uses the same interface, then you can replace it with an ADATA M.2 SSD. However, you may need to transfer your data using a cloning tool or reinstall your operating system.

    How do I install an ADATA M.2 SSD in my computer?
    The installation process for an ADATA M.2 SSD may vary depending on your computer’s hardware configuration. Generally, you will need to open your computer’s case, locate the M.2 slot, insert the SSD, and secure it with screws. You may also need to configure your BIOS settings to recognize the new device.

  • Speed Up Your PC: Learn How to Save Files to SSD for Faster Access and High Performance

    Have you ever experienced a slow computer? Do you get frustrated when it takes forever to open your files or applications? The solution to that problem lies in having a faster storage option. Saving to SSD is one of the most effective ways to speed up your computer’s performance. Solid-state drives or SSDs are faster, more robust, and reliable than hard disk drives.

    They are designed to store data on flash-memory chips, which are faster and more reliable than traditional spinning disks. Compared to the traditional HDDs that have moving parts, SSDs don’t have any moving parts, making them less prone to failure and much faster. But what exactly does saving to SSD mean? It involves transferring your data from your computer’s existing hard drive to your new solid-state drive.

    By doing so, you can significantly boost the performance speed of your computer. You’ll notice that your computer will start up faster, software will load quickly, and files will save at lightning-fast speed. Now that you understand what saving to SSD means, it’s time to consider upgrading your computer’s storage with an SSD.

    It will not only improve your computer’s performance but also prolong its lifespan. Moreover, an SSD provides a more significant capacity, meaning you can store more files, photos, and videos without having to worry about running out of space. In summary, upgrading your storage to an SSD is an investment that will significantly improve your computer’s performance and prolong its lifespan.

    Anyone can benefit from an SSD upgrade, whether you’re a gamer, graphic designer, student, or just a regular user. It’s a quick and easy process that will give you fast results.

    Locate Your SSD

    If you want to make your computer save to your SSD, the first step is to locate where your SSD is. If you installed the SSD yourself, you likely know where it is located. However, if someone else installed it or it came pre-installed, you may need to do a bit of digging.

    One way to locate your SSD is to check your computer specs. This information can often be found by searching for “system information” in the start menu. From there, you can find the model number of your SSD and locate it physically within your computer.

    You can also check your device manager to see if your SSD is listed under “disk drives”. Once you have located your SSD, you can then make it your default storage drive by adjusting the settings in your computer’s operating system.

    Check your computer’s drives for your SSD

    If you’re looking for your SSD on your computer, the first step is to check your computer’s drives to see if it’s listed. The process of finding your SSD will depend on your operating system. For Windows 10 users, you can open File Explorer and click on “This PC.

    ” From there, you should see a list of drives installed on your computer. If your SSD is installed and recognized by your computer, it should be listed alongside other drives such as your hard drive or CD/DVD drive. On a Mac, you can click on the Apple icon in the top left corner of your screen and select “About This Mac.

    ” From there, click on “Storage” and you’ll see a breakdown of your computer’s storage options. If your SSD is installed and functioning, it should be listed here as well. If you can’t find your SSD listed, it may be worth checking your computer’s BIOS settings to ensure that it’s enabled and properly recognized by your system.

    how do i make my computer save to my ssd

    Make sure your SSD has enough space to save files

    If you are having trouble finding your SSD, do not fret. It is most likely located inside your computer or laptop, attached to the motherboard. You can easily locate it by opening up your device and looking for a small rectangular chip.

    Once you have located your SSD, it is crucial to make sure it has enough space to save your files. SSDs can fill up quickly, especially if you are storing large files such as videos or photos. Not having enough space on your SSD can lead to slow system performance and even data loss.

    One great way to free up space is by uninstalling programs or deleting unnecessary files. You can also invest in an external hard drive to store larger files. Remember, a little bit of maintenance can go a long way in keeping your SSD running smoothly.

    Set Your Default Save Location

    If you’ve recently installed a new SSD on your computer and want everything to save to that drive by default, it’s a pretty straightforward process. Setting your default save location is easy, and it can help you avoid accidentally saving files to your older drives. First, navigate to your settings, then go to “System” and “Storage”.

    From there, you can select which drive you want to be your default save location for your files. You can even choose which folders are saved there, which is especially helpful if you have limited space on your SSD. Once you’ve made these changes, all your new files will automatically be saved to your chosen SSD location.

    Keep in mind that some applications may continue to save to the previous default location until changed within the individual application settings. By setting your default save location to your new SSD, you’ll enjoy faster read and write speeds, ensuring a better experience overall.

    Open File Explorer and click on ‘This PC’

    Setting a default save location on your PC can save you a lot of time and hassle when you’re working with files. Open File Explorer and click on “This PC” to begin. From there, select the drive where you want to set your default save location.

    You can then right-click on that drive and select “Properties.” In the Properties window, click on the “Location” tab. Here, you can choose the folder where you want to save all your files.

    Once you select a folder, click “Apply” and then “OK” to set it as your default save location. From now on, whenever you save a file, it will automatically go to your chosen folder. It’s a simple step that can help you stay organized and save you time in the long run.

    Right-click on your SSD and select ‘Properties’

    If you’re looking to increase the speed of your computer’s file-saving capabilities, setting your default save location to your SSD is a great way to start. To do this, right-click on your SSD and select “Properties.” From there, click on the “Location” tab and then “Move.

    ” You can then select a new folder on your SSD to designate as your default save location. This will ensure that all of your files are saved to your SSD by default, allowing them to be quickly accessed and loaded. By taking advantage of your SSD’s speed, tasks such as document saving and file transferring will be faster than ever before, leading to a streamlined computing experience.

    Don’t let slow file saving hold you back – make the switch today and enjoy the benefits of a lightning-fast SSD!

    Click on the ‘Location’ tab and ‘Move’ your default save location

    Setting your default save location is a simple yet essential task that can save you a lot of time and effort. Whether you prefer to save your files on your desktop or in a specific folder, changing your default save location can streamline your workflows and keep your workspace neat and tidy. To change your default save location in Windows, click on the “Location” tab in the properties window of your desired folder and then select “Move”.

    From there, you can navigate to the folder where you want your files to be saved and click “OK”. That’s it! All the files you save in that application will now automatically be saved to your preferred folder. By setting your default save location, you can ensure that your files are always in the same location, making it easier to find what you need when you need it.

    It also simplifies backing up your files since they’ll all be located in one place. In conclusion, taking a few minutes to set your default save location can yield significant benefits for your productivity and organization. So why not take the time to do it today and enjoy the benefits of a simplified workspace?

    Change Your Programs’ Save Location

    If you are struggling to find space on your computer’s hard drive and you have an SSD installed, you might want to consider changing the save location of your programs. By default, most programs will save their files to your computer’s main drive, which can take up a lot of space. To make your computer save to your SSD, you can change the save location of each program individually or change the default save location for all programs.

    To do this, you need to first identify where your SSD is located on your computer. Once you have found your SSD, you can change the save location of your programs by navigating to the program’s settings or preferences menu. In some cases, you might need to reinstall the program to change the save location.

    By saving your programs to your SSD, you can help ensure that your computer runs quickly and smoothly, and that you never run out of space for new files and programs.

    Open the program you want to change the save location for

    Changing the save location for your programs is a simple process that can save you a lot of time and frustration. The first step is to open the program you want to change the save location for. Once the program is open, click on the File menu and select the Save As option.

    This will open a dialog box that will allow you to choose where you want to save your files. Simply choose the desired location and click Save. The next time you save a file, it will automatically be saved to the new location you selected.

    By changing the default save location for your programs, you can easily organize your files and access them more quickly. So why not give it a try?

    Open preferences or settings and locate ‘Save’ options

    If you’re tired of having all of your files automatically saved to your computer’s default location, you might want to explore the various save options available in your programs. Most modern programs allow you to choose exactly where you want your files to be saved, so you can keep everything organized and easy to find. To get started, simply open up the preferences or settings menu in your program and locate the “Save” options.

    From there, you can choose a new default location for your documents, images, and other files. Whether you want to save everything to an external hard drive or a specific folder on your desktop, taking advantage of this feature can help you streamline your workflow and avoid clutter on your computer. Give it a try and see how much easier it can be to keep your files organized and accessible!

    Select your SSD as the new save location

    If you’re running out of space on your computer’s hard drive, you might want to consider changing your programs’ save location to your SSD instead. Not only is it faster, but it also frees up valuable space on your hard drive. To do this, first, locate your SSD in your file explorer and create a new folder for your program’s save location.

    Next, open the program and go to its settings or preferences. Look for the option to change the save location and navigate to the new folder you created on your SSD. Finally, save the changes and your program will now save files to your SSD.

    By selecting your SSD as the new save location for your programs, you’ll have more room to store files and a faster experience overall.

    Frequently Asked Questions

    If you want to make your computer save to your SSD, there are a few steps you need to follow. First, you need to make sure your computer recognizes your SSD. You should check your BIOS settings to ensure the SSD is detected.

    Once your computer recognizes your SSD, you can start saving files to it. One way to do this is to move important folders like Documents, Music, and Pictures to your SSD. This can be done by simply right-clicking on the folder and selecting Properties.

    From there, you can change the location of the folder to your SSD. Another way to save files to your SSD is to change the default save location in your programs. For example, in Microsoft Office programs, you can go to File > Options > Save and change the default save location to your SSD.

    By taking these steps, you can ensure that your important files are saved to your SSD, which can improve the performance of your computer.

    How do I check if my computer is already saving to my SSD?

    If you’re wondering if your computer is saving files to your SSD, don’t worry, it’s easy to check. SSDs are faster and more efficient storage drives than traditional HDDs, but they come with a smaller capacity, which can fill up faster. First, check if your computer has an SSD installed.

    You can do this by going to your computer settings and searching for “storage.” If you find an SSD listed, then your computer is saving files to it. Another way to check is by looking at where your files are being saved.

    If your files are being saved to the C: drive, which is the default location for most computers, and your computer has an SSD, then it’s safe to assume that your files are being saved to your SSD. However, it’s always a good idea to double-check the location of your files to make sure they are being stored where you want them to be. So, the next time you’re saving a file, take a moment to verify its location.

    By doing so, you can ensure that your computer is utilizing your SSD’s capabilities to their fullest potential.

    Can I save certain files to my SSD and others to my hard drive?

    Yes, you can definitely save certain files to your SSD and others to your hard drive. It’s a great way to optimize your storage space and ensure that your system runs smoothly. The SSD is much faster and more reliable than the hard drive, so it’s best to keep your frequently used files, such as the operating system and applications, on the SSD.

    This will result in faster boot times and more responsive applications. On the other hand, large files such as movies, music, and photos can take up a lot of space, and are best stored on a hard drive. It’s important to note that moving files from one drive to another can be time-consuming and cumbersome, so it’s a good idea to plan ahead and decide which files you want to store where before you start using your computer.

    Overall, using both an SSD and a hard drive together is a great way to optimize your storage space and ensure that your system runs smoothly.

    Conclusion

    In conclusion, unlike a knight in shining armor, your computer won’t automatically save to your SSD without some guidance. With a little bit of know-how, however, you can ensure that your important files are stored safely on your solid-state drive. So take charge and make the switch to SSD – trust us, your computer (and your sanity) will thank you.

    FAQs

    What steps do I need to follow to save files to my SSD?
    First, make sure your SSD is properly connected and recognized by your computer. Then, select the file or folder you want to save and right-click on it. Select “Properties” and then go to the “Location” tab. Click “Move” and select the folder on your SSD where you want to save the file. Click “OK” and then “Apply.”

    How do I check if my computer recognizes my SSD?
    Go to your computer’s “Device Manager” and look for the SSD under the “Disk drives” section. If it appears there, your computer recognizes it.

    Can I clone my HDD to SSD to transfer all my data?
    Yes, you can use cloning software to transfer all the data from your HDD to SSD. This will make an exact copy of your HDD, including the operating system, files, and settings.

    What are the benefits of using an SSD?
    SSDs provide faster access to data, faster boot times, and quicker application load times compared to traditional hard drives. They are also more durable and reliable since they have no moving parts.

  • Boost Your Gaming Performance: Simple Steps to Move Games to SSD

    Are you tired of slow game loading times and lag during gameplay? Moving your game to an SSD could be the solution you’ve been searching for. Solid-state drives, or SSDs, are a type of hard drive that stores data on memory chips instead of spinning disks, resulting in lightning-fast read and write speeds. When you transfer a game to an SSD, the game loads faster, and gameplay is smoother.

    It’s like moving from a horse-drawn carriage to a Lamborghini. In this blog post, we’ll go over the benefits of moving your game to an SSD and provide step-by-step instructions on how to do it. Get ready to elevate your gaming experience to new heights!

    Check SSD space

    If you’re running out of storage space on your computer’s standard hard drive, you might want to consider moving some games over to your SSD. This can be done by first making sure that you have enough space on the SSD to accommodate the game. Next, locate the game files on your computer’s hard drive by going to the game’s folder under Program Files or Program Files (x86).

    Then, copy the files to a new folder on your SSD. Once the files have been copied over, go to the game’s settings and change the installation path to the new folder location on your SSD. From there, the game should be able to run off of your SSD without any issues.

    Overall, moving games over to an SSD can greatly improve load times and overall performance, making for a much smoother gaming experience.

    Identify game location

    When it comes to gaming, one of the most important things to consider is the amount of space you have on your SSD. This becomes particularly important when identifying game location, as games can take up a lot of space, especially larger games that have lots of graphics and data. To ensure that you’re able to properly identify game location, it’s vital to check your SSD space and make sure that you have enough room to store the game.

    This will help prevent any issues with the game itself, such as crashes or freezing. It’s also important to note that different games require different amounts of space, so it’s always best to check the storage requirements beforehand. By doing so, you can ensure that you have enough space to store the game without any problems.

    In addition to checking your SSD space, there are other things to consider when identifying game location. For example, you may want to think about how often you play the game, how much storage you have available, and whether or not you plan on downloading additional content. All of these factors can influence where you store the game.

    For instance, if you play the game frequently and have limited SSD space, it may be best to store it on an external hard drive. This can help free up space on your SSD and ensure that your system runs smoothly. Overall, identifying game location requires careful consideration of several factors, including SSD space, gameplay habits, and storage requirements.

    By taking these factors into account, you can make informed decisions about where to store your games and avoid any issues with your system. Whether you’re a seasoned gamer or just starting out, proper game storage is key to a smooth and enjoyable gaming experience.

    how do i move a game over to ssd

    Copy game files to SSD

    If you’re planning on moving your games to an SSD, the first thing to check is if there’s enough space. It’s essential to ensure that you’ve got adequate space on the SSD before copying game files to it. Make sure you have enough space to fit your games plus some additional space, as games tend to grow in size with updates and expansions.

    If you don’t have enough space, it’s best to consider upgrading to a larger SSD. Once the space check is done and dusted, it’s time to start the migration process. Depending on the size and number of games, this could take a while, so be prepared.

    Remember to keep a backup of your game files, just in case things go awry during the copying process. With games installed on an SSD, you’ll benefit from faster load times and an overall enhanced gaming experience. So what are you waiting for? Get those games onto your SSD and start enjoying faster loading times and smoother gameplay.

    Update Game Launcher

    Are you tired of slow game loading times and want to move your games over to your SSD? One easy way to do so is through your game launcher. Simply navigate to your game library and find the game you want to move. Right-click on it and select “Properties.

    ” From there, select the “Local Files” tab and click on “Move Install Folder.” Choose your SSD as the new location and follow the on-screen instructions to complete the transfer. After the move is complete, launch the game from your SSD and enjoy faster loading times and improved performance.

    Moving your games to an SSD can significantly improve your gaming experience, and with this simple guide, you can do so quickly and easily.

    Locate game settings

    When looking to update your game settings, it’s important to first locate where those settings are found. Typically, game settings can be accessed through the game launcher. The game launcher is the program that is used to start the game, and it often includes options for controlling graphic settings, sound, input devices, and more.

    To update it, you may need to look for a setting or option labeled “Update Game Launcher,” which will allow you to download and install the most up-to-date version of the launcher. Once you have the updated launcher, you can then access your game settings and make any necessary changes. Remember to always keep your game launcher up-to-date to ensure a smooth and seamless gaming experience.

    Change game directory to SSD

    If you’re looking to boost your productivity and optimize your gaming experience, it might be time to switch up your game directory to your SSD. Your SSD has faster read and write speeds, which means that loading times will be reduced and you’ll be able to access your games and game files more quickly. To do this, you’ll need to update your game launcher and change the default installation location to your SSD.

    This may sound a bit technical, but it’s actually a simple process. First, open up your game launcher and navigate to the settings menu. From there, look for an option to change the installation directory or location.

    This may be labeled differently depending on your launcher, but it should be relatively easy to find. If you’re having trouble, a quick Google search can usually help you find the right option. Once you’ve located the option, simply select your SSD as the default location and save your changes.

    With this simple adjustment, you’ll be able to enjoy faster loading times and a smoother gaming experience.

    Test the game on SSD

    Are you looking to test your game on an SSD for optimal performance? If so, you might be wondering how to move your game over to your SSD. The first step is to make sure your SSD is properly installed and recognized by your computer. Once that’s done, you can start the process of moving your game.

    The easiest way to do this is to simply re-install the game onto your SSD. However, this can be time-consuming and may require you to download the game again. Another option is to manually move the game files over to your SSD.

    This involves locating the game’s files on your computer, copying them to your SSD, and updating the game’s settings to point to the new location. Whichever method you choose, testing your game on an SSD can greatly improve your gaming experience, so it’s definitely worth the effort!

    Launch game from new directory

    If you’re looking to test your game’s performance on an SSD, you may want to launch it from a new directory. This can help you make sure that your game will run smoothly when installed on an SSD. When you launch the game from a new directory, your computer will load all the necessary files from scratch, rather than relying on cached data from previous sessions.

    This can give you a more accurate picture of how your game will perform on an SSD. Plus, it’s a great way to test out your game’s optimization and see where you might need to make improvements. So if you want to make sure your game is ready for the SSD market, try launching it from a new directory and giving it a thorough test run.

    Monitor game performance on SSD

    If you’re an avid gamer, you know how crucial it is to have a smooth and uninterrupted gaming experience. One way to ensure this is by using an SSD (Solid State Drive) instead of a regular HDD (Hard Disk Drive). SSDs are faster, more reliable, and have quicker load times, amongst other benefits.

    However, it is essential to monitor game performance when using an SSD. You can test the game on both an SSD and an HDD to compare the results. You will likely notice that games load faster and perform better on an SSD.

    This could mean that gameplay is smoother, and you experience fewer lags or freezes during gameplay. It’s essential to keep in mind that not all games are created equal, and while some may perform significantly better on an SSD, others may not show a significant difference. Ultimately, testing your game on an SSD is a great way to ensure that you’re getting the most out of your gaming experience.

    Delete game from old drive

    So you’ve finally decided to move a game over to your SSD for faster load times and better performance? Great choice! But what about the old drive that you’re moving it from? Don’t just leave the game sitting there taking up valuable space, delete it from the old drive to free up some room. First, make sure the game is fully installed on your SSD and running smoothly. Then, locate the game files on your old drive and delete them.

    You can typically find the game files by navigating to the game’s installation directory, which is usually located within the “Program Files” or “Program Files (x86)” folder on your old drive. Before you delete the game files, make sure you’ve backed up any important save data or preferences that you want to keep. You can usually find these files in a separate directory within the game’s installation folder.

    Once you’ve backed up any important files, go ahead and delete the game’s installation directory from your old drive. You may also want to use a disk cleaning tool to free up any additional space that the game may have been taking up. And that’s it! You’ve successfully moved a game over to your SSD and freed up some space on your old drive.

    Now you can enjoy faster load times and better performance on your new storage device.

    Uninstall game from previous drive

    If you’re running out of space on your previous drive and need to make some room for new games, it might be time to delete some old ones that you no longer play or need. To uninstall a game from your previous drive, you can start by locating the game in your file explorer and right-clicking on it. From there, select “uninstall” or “uninstall/change” depending on your version of Windows.

    You can also go to the control panel and choose “programs and features” to find and uninstall the game. Remember to save any progress you want to keep before deleting the game, and make sure you have enough space on your new drive before re-installing it. By doing regular clean-ups and clearing out unnecessary games, you can free up space and improve the overall performance of your computer.

    Conclusion

    Moving a game over to an SSD is like giving your computer a turbo boost. It’s a brilliant way to enhance your gaming experience and get the most out of your machine. So, my dear gamer, don’t hesitate to follow the steps and move your game to an SSD.

    It may take a bit of effort, but the results are worth it. Your game will load faster, run smoother, and you’ll spend less time staring at loading screens. Plus, you can impress your friends with your newfound knowledge and become the ultimate tech guru!”

    FAQs

    What are the benefits of moving games to an SSD?
    Moving games to an SSD will significantly reduce loading times and improve overall performance. Games will also run smoother and be less prone to freezing or crashing.

    Can I move a game to an SSD without reinstalling it?
    Yes, you can move a game to an SSD without reinstalling it by using a disk cloning tool. However, it is recommended to reinstall the game on the SSD for optimal performance.

    How much faster will games load on an SSD compared to an HDD?
    Games will load significantly faster on an SSD compared to an HDD. The exact improvement will depend on the game, but it can range from 2-4 times faster loading times on average.

    How do I choose which games to move to an SSD?
    It is recommended to move games that have long loading times or that you frequently play. Games with frequent access to large files or scenes will benefit the most from being on an SSD.

  • Unlock the Power of Samsung T7 SSD on Windows 10: A Comprehensive Guide

    If you’re looking for a portable and reliable storage solution to expand your computer’s storage or to transfer files between devices, the Samsung T7 SSD is one of the best options in the market. With its sleek design, high-speed performance, and robust security features, the Samsung T7 SSD is an ideal choice for tech-savvy users who value productivity and data privacy. But how do you use the Samsung T7 SSD on Windows 10, and what settings should you tweak to get the best performance out of it? In this blog, we’ll guide you through the steps to set up the Samsung T7 SSD on your Windows 10 computer and cover some tips and tricks to optimize its performance and longevity.

    Whether you’re a professional photographer, a gamer, or a business user, the Samsung T7 SSD can help you store, access, and share your files with ease and speed. So let’s dive into the world of portable SSDs and explore how the Samsung T7 can enhance your digital experience.

    Check Compatibility

    If you’re wondering how to use the Samsung T7 SSD on Windows 10, one of the most important things to consider first is compatibility. While the T7 is designed to work with a wide range of devices, including both Windows and Mac operating systems, it’s always a good idea to double-check that your setup is compatible before diving in. One of the easiest ways to do this is to visit the official Samsung website and review the system requirements for the T

    This will give you a clear idea of whether your device meets the necessary specs to use the SSD effectively. Additionally, many online forums and communities dedicated to tech enthusiasts can offer valuable insights and tips on using the T7 with Windows 10, so don’t hesitate to seek out advice from other users who have experience with this popular external drive. Overall, taking the time to confirm compatibility and gather information can help ensure a smooth and successful experience using the Samsung T7 SSD on Windows

    Check if your system meets the minimum requirements

    Before installing any software on your system, it’s important to check if your system meets the minimum requirements or not. This step is known as checking compatibility. It can save you from a lot of hassle later on.

    Every software comes with certain specifications that your system should have, such as RAM, processor, Graphics Card, and more. To check if your system is compatible with the software or not, you can either visit the website of the software manufacturer or simply look for the system requirements inside the software package. Usually, the required hardware and software specifications are mentioned on the download page, or you can find them in the manual guide.

    If your system meets the standards mentioned, then you can go ahead and install the software. On the other hand, if your system falls short of any requirement, then you may need to upgrade your system or choose another software that your system is compatible with. In conclusion, it’s always advisable to check the compatibility of a software before installing it on your system.

    It can save you time, efforts, and money. So, whenever you plan to install any software, don’t forget to go through its system requirements carefully.

    how to use samsung t7 ssd on windows 10

    Ensure your system supports USB 3.2 Gen 2 standard

    When it comes to ensuring maximum speed and efficiency with your external storage devices, it’s important to make sure that your system supports the USB 2 Gen 2 standard. But how do you check compatibility? The first step is to consult your device’s specifications and look for USB

    2 Gen 2 support. You can also check the type of USB port on your device. USB

    2 Gen 2 ports are typically colored in blue, while older versions may be colored black or white. Another way to check is to use a benchmarking tool to test the speed of your USB ports and compare them to the speeds of USB 2 Gen 2 devices.

    Keep in mind that even if your system doesn’t currently support USB 2 Gen 2, you may be able to upgrade your hardware to add this support. Doing so can provide a significant boost to your overall system performance and make transferring files faster and more efficient.

    So make sure to check your devices and upgrade as needed to enjoy the benefits of USB 2 Gen 2 compatibility.

    Connect Your Samsung T7 SSD

    Connecting your Samsung T7 SSD to your Windows 10 computer is a straightforward process. First, ensure that your Samsung T7 SSD comes with the USB cable. Next, plug one end of the USB cable into the Samsung T7 SSD and the other end into a USB port on your Windows 10 computer.

    Once your computer recognizes the Samsung T7 SSD, you can transfer and access your files quickly and easily. Using the Samsung T7 SSD makes it easy to carry around your documents, music, photos, and videos, especially when you’re on the go. Now that you know how to use Samsung T7 SSD on Windows 10, you can start enjoying the many benefits this storage device has to offer.

    So, what are you waiting for? Give it a try and see for yourself.

    Connect the SSD to your computer’s USB port

    If you want to make the most of your Samsung T7 SSD, you need to connect it to your computer’s USB port. This is a simple process that will allow you to transfer data quickly and easily between these devices. The first step is to locate your computer’s USB port, which is typically found on the side or back of your computer.

    You may need to move your computer to get a clear view of the USB port. Once you’ve found the port, you can insert the USB cable that came with your Samsung T7 SSD. Make sure that the cable is securely connected to both the SSD and the USB port on your computer.

    If the cable is loose, you may experience connection issues or slow transfer speeds. Once the SSD is connected, you can start transferring files and backing up your data. With the Samsung T7 SSD, you can enjoy lightning-fast transfer rates and reliable storage for all your important data.

    Wait for the driver installation to complete

    Connecting your Samsung T7 SSD to your computer may seem like a straightforward process, but it’s important to be patient during the driver installation. Once you’ve plugged your SSD into your computer’s USB port, your operating system will automatically prompt you to install the necessary drivers. This is important in order to ensure that your computer recognizes and properly utilizes your Samsung T7 SSD.

    The installation process may take a few minutes, so it’s important to refrain from unplugging your device or interrupting the process. Once the driver installation is complete, your Samsung T7 SSD will be ready to use and you can transfer files and data quickly and easily. Remember to always give your computer time to properly install any necessary drivers, as it can make a world of difference in terms of performance and efficiency.

    Format the Samsung T7 SSD

    If you’re using the Samsung T7 SSD on your Windows 10 computer, you’ll need to format it first. Formatting is the process of preparing a storage device so that it’s ready to be used by your operating system. To format your T7 SSD, first connect it to your Windows 10 computer using a USB cable.

    Then, go to the Windows Search Box and type in “Disk Management”. From there, you’ll see a list of all storage devices connected to your computer. Find your T7 SSD in the list and right-click on it to select “Format”.

    You’ll need to choose a file system, such as NTFS, and assign a drive letter. Once you’ve completed these steps, your T7 SSD will be ready for use on your Windows 10 computer.

    Open the Disk Management Tool

    To format a Samsung T7 SSD, you first need to open the Disk Management Tool on your Windows computer. This tool allows you to manage all the drives connected to your computer, including the Samsung T7 SSD. Once you open the tool, you will see a list of all the drives on your computer, including the Samsung T7 SSD.

    You need to select the drive that you want to format and right-click on it. You will see a menu that includes the option to format the drive. Click on that option to begin the formatting process.

    It is important to note that formatting the drive will erase all the data on it, so you should make sure that you have backed up any important files before proceeding. Overall, formatting a Samsung T7 SSD is a straightforward process that can be easily accomplished with the Disk Management Tool.

    Locate your Samsung T7 SSD in the list of disks

    Formatting the Samsung T7 SSD can be an imperative task, especially if you want to erase all the data stored on it or tackle any performance issues that may have arisen. To begin with, the first step is to locate your Samsung T7 SSD in the list of disks. This can be done by navigating to the Disk Utility program on your Mac computer.

    Once you have located your Samsung T7 SSD, you can proceed to format it. Formatting can help erase all the data stored and reformat it to the preferred file system. You can choose between APFS, HFS+, or exFAT formats, depending on your needs and preferences.

    You’ll also have the option of selecting the Scheme, which will determine the partition structure of the Samsung T7 SSD. Your ideal option would be GUID Partition Map for maximum compatibility. However, keep in mind that formatting the Samsung T7 SSD will erase all the data stored on it.

    Therefore, it’s vital to make sure you have a backup of all your data before proceeding with the formatting process.

    Right-click on the SSD and select ‘Format’

    To format your Samsung T7 SSD, right-click on the drive in your file explorer and select the ‘format’ option. This will allow you to erase all the data on the drive and set it up for use. It’s essential to format the drive before using it, as it will ensure that you have a clean slate to work with and minimize any issues that may arise.

    Once you’ve clicked on ‘format,’ you’ll be presented with a few options, including the file system, allocation unit size, and volume label. For most users, the default settings will work just fine, but you can customize these settings based on your needs. Just keep in mind that changing these settings can affect the performance and compatibility of the drive.

    Formatting your SSD may seem like a daunting task, but it’s incredibly simple and necessary for optimal performance. It’s essential to back up any important files before formatting the drive as they will be erased during the process. Once the formatting is complete, you’ll have a clean, blank slate to work with.

    This ensures that there are no corrupted files or previous data that can impact your system’s performance. So, if you’re setting up a new SSD, or experiencing any issues with your current one, formatting might just be the solution you need.

    Choose the file system, allocation unit size, and volume label

    When setting up a new Samsung T7 SSD, one of the important steps is to format the drive with the appropriate file system, allocation unit size, and volume label. The file system determines how the data is organized and stored on the drive, while the allocation unit size affects the efficiency and speed of read and write operations. Additionally, the volume label is a name you can give to the drive to help identify it easily.

    To format the Samsung T7 SSD, connect it to your computer and open the built-in disk management utility. From there, choose the file system you want to use, such as NTFS for Windows or exFAT for cross-platform compatibility. You can also select the allocation unit size, which can impact the speed and performance of the drive.

    Generally, a larger unit size is better for larger files, while a smaller one is more appropriate for smaller files. Lastly, give your drive a descriptive label that will help you identify it quickly and easily. It’s important to note that formatting the drive will erase all current data, so be sure to back up any important files before proceeding.

    Once you’ve chosen the file system, unit size, and volume label, click format, and the disk management utility will take care of the rest. After formatting, your SSD will be ready to use with optimal performance and organization, ensuring that your data is protected and easily accessible.

    Transfer Files To and From the SSD

    If you just got your hands on the Samsung T7 SSD and want to transfer files to and from your Windows 10 computer, you’re in luck! One great feature of this external solid-state drive is just how simple it is to use. First, you’ll want to connect the T7 SSD to your computer via USB Type-C. Once you do, your computer should recognize it automatically, and you’ll be able to view the files on the drive.

    From there, simply drag and drop files to or from the SSD as needed. You can also use third-party software like Samsung’s “Portable SSD Software” to manage and optimize the drive’s performance. With its fast read and write speeds, the Samsung T7 SSD is the perfect solution for quickly transferring files between devices or making backups.

    So why wait? Give it a try today and see for yourself just how easy it is to use!

    Drag and drop files to the Samsung T7 SSD

    The Samsung T7 SSD offers lightning-fast data transfer speeds and the ability to easily drag and drop files, making it an excellent choice for anyone looking to quickly transfer large files. Whether you’re looking to move a single video file or an entire photo library, the process is quick and simple. All you need to do is connect the SSD to your computer and use the drag-and-drop method to transfer files to and from the drive.

    This not only saves time but also ensures that your documents are safe and secure. With no additional software or special hardware required, the Samsung T7 SSD is an excellent choice for anyone looking to transfer files quickly and easily. So, if you need to move large files or backups, consider using the Samsung T7 SSD to help you get the job done quickly and efficiently.

    Use Samsung’s Data Migration Tool for larger transfers

    Samsung’s data migration tool is an essential tool when it comes to transferring files to and from an SSD. This tool is perfect for larger transfers, as it takes care of the entire process for you. Whether you’re switching to a new computer or upgrading your storage, Samsung’s data migration tool will make the process easy and stress-free.

    Simply connect your SSD to your computer and launch the tool. The tool will automatically detect the SSD and guide you through the transfer process. With this tool, you can transfer not only your files, but also your operating system and applications, saving you time and effort.

    So, if you’re looking for a seamless and efficient way to transfer your files to and from an SSD, look no further than Samsung’s data migration tool.

    Eject the Samsung T7 SSD

    If you’re wondering how to use Samsung T7 SSD on Windows 10, it’s actually quite simple. First, make sure the SSD is connected to your computer via the USB cable. Once it’s connected, Windows should automatically recognize the SSD as a new drive.

    You can then transfer files to and from the SSD just like you would with any other external storage device. When you’re finished using the SSD, it’s important to properly eject it from your computer. This will ensure that any files you’ve transferred are safely saved and that the device is ready for future use.

    To eject the Samsung T7 SSD, simply right-click on the drive in the file explorer and select “Eject.” Wait for the “Safe to Remove Hardware” message to appear before unplugging the USB cable. Overall, using the Samsung T7 SSD on Windows 10 is a fast and efficient way to transfer files and boost your computer’s storage capacity.

    With its durable design and high-speed data transfer capabilities, it’s the perfect solution for anyone in need of extra storage space.

    Safely eject the SSD to prevent data loss or corruption

    Samsung T7 SSD When it comes to using an external SSD, it’s important to properly eject the device to prevent any potential data loss or corruption. The Samsung T7 SSD is a popular choice for many when it comes to external storage, and properly ejecting it is crucial. Ejecting the Samsung T7 SSD is quite simple and can be done in just a few steps.

    First, locate the “Safely Remove Hardware” icon on your computer and click on it. Then, select the Samsung T7 SSD from the list of devices and click “Eject.” Wait until you receive a message that it is safe to remove the device, and then physically remove the cable from both the SSD and your computer.

    By following these simple steps, you can ensure that your Samsung T7 SSD will continue to function correctly and that all of your important files and data will remain secure.

    Conclusion

    In conclusion, using the Samsung T7 SSD on Windows 10 is as easy as pie. With lightning-fast transfer speeds, ample storage space, and sleek design, this little device is a powerhouse of storage. Simply plug it into a USB port, and you’re good to go! Think of it as your personal pocket-sized hard drive that can accompany you on any adventure.

    So if you’re looking for reliable, lightning-fast storage, the Samsung T7 SSD is the way to go on Windows “

    FAQs

    Can I use the Samsung T7 SSD on Windows 10 without installing any drivers?
    Yes, you can use the Samsung T7 SSD on Windows 10 without installing any drivers. It is plug-and-play and can be used right out of the box.

    Does the Samsung T7 SSD support USB 3.0 and 3.1?
    Yes, the Samsung T7 SSD supports USB 3.0 and 3.1. It is backwards compatible with USB 2.0 as well.

    Is it possible to password protect the Samsung T7 SSD?
    Yes, the Samsung T7 SSD comes with built-in password protection and software encryption to keep your data secure.

    How do I format the Samsung T7 SSD on Windows 10?
    You can format the Samsung T7 SSD on Windows 10 by opening Disk Management, finding the SSD, right-clicking on it, and selecting Format. Make sure to select the correct file system (NTFS or exFAT) based on your needs.

  • Unlock the Potential of Your External Hard Drive with USB SATA Technology: A Comprehensive Guide

    Have you ever wondered how to unlock the full potential of your USB SATA devices? Look no further because we have the answers. With USB SATA, your external hard drives, solid-state drives, and optical drives can provide lightning-fast data transfer speeds and easy plug-and-play connections. This technology has revolutionized the storage industry, and now you can take full advantage of it with just a few simple steps.

    Think of USB SATA as the key to unlocking the speed and power of your storage devices. USB stands for Universal Serial Bus, and SATA stands for Serial Advanced Technology Attachment. SATA technology is used to connect data storage devices to your device’s motherboard, and USB technology allows for a universal connection to almost all devices.

    Combining these two technologies creates a powerful and flexible way of transferring data. In this blog, we will delve deeper into the world of USB SATA, exploring its incredible features, benefits, and applications. We will guide you through the process of setting up USB SATA devices, explain how to optimize your system for the fastest transfer speeds, and give you tips for maintaining your devices to ensure they last as long as possible.

    Whether you’re a tech enthusiast or a casual user looking to make the most out of your storage devices, this blog is for you. Join us on this journey to uncover the power of USB SATA, and discover just how much potential your devices hold. Get ready to unlock the speed and power of your storage like never before!

    Introduction to USB SATA Technology

    USB SATA technology has revolutionized the way we store and transfer data on external hard drives. This technology works by connecting the SATA hard drive to a USB port on your computer, allowing you to access and transfer files quickly and easily. The USB SATA interface provides faster transfer speeds, making it ideal for use with high-resolution images and large video files.

    It also eliminates the need for an external power source, as it draws power directly from the USB port. This makes it a convenient and portable storage solution that can be easily carried with you wherever you go. If you’re looking for a reliable and efficient way to store and transfer data, USB SATA technology is definitely worth considering.

    What is USB SATA?

    USB SATA is a technology that allows users to connect an internal SATA drive to their computer using a USB port. This type of connection offers data transfer rates that are faster than traditional USB connections, making it an ideal choice for users who are looking for high-speed data transfer. With USB SATA, you can easily take your data with you from one location to another as you can convert an internal drive into an external one.

    Additionally, this technology is more reliable and efficient than other external storage options because it is not dependent on network or cloud connectivity. In simpler terms, think of it as an express lane that allows you to easily and quickly move large files from one device to another. So if you are someone who frequently works with large files and needs high-speed data transfer, USB SATA is definitely worth considering.

    usb sata

    Why is USB SATA Important?

    USB SATA USB SATA technology is becoming increasingly important in today’s digital age as more and more people rely on storing their data remotely. SATA, which stands for Serial ATA, is a data transfer protocol that allows information to be transmitted between a computer and its storage device. USB, on the other hand, is a universal interface that is widely used for connecting different devices to one another.

    When combined, USB SATA allows for a high-speed, reliable connection between a computer and an external hard drive or solid-state drive. This means that users can enjoy faster data transfer speeds and also, backup and store their files more easily and safely. Whether you are an individual looking to save precious family photos or a business in need of secure storage, the USB SATA technology is an important solution that can make your life a lot easier.

    Benefits of USB SATA in Data Management

    USB SATA is an innovative technology that offers a wide range of benefits in data management. One of its biggest advantages is the ability to transfer data at high speeds. With USB SATA, transferring large amounts of data is a breeze and can be done seamlessly.

    Additionally, this technology offers high levels of flexibility, as it can be used across a range of devices, including desktop computers, laptops, and even gaming consoles. Furthermore, USB SATA is also highly portable, making it an ideal solution for professionals who need to work on-the-go. Whether you’re a photographer, videographer, or simply need to store important files, USB SATA offers a reliable and efficient solution for all your data management needs.

    So if you’re looking for a fast, accessible, and secure way to manage your data, USB SATA is definitely worth considering.

    Faster Data Transfer Rates

    USB SATA USB SATA technology has revolutionized data management by providing faster transfer rates and improving overall performance. With USB SATA, users can now transfer large files in minutes that previously took hours. This technology works by connecting a device via a USB cable, allowing data to be quickly transferred between devices.

    Overall, USB SATA provides numerous benefits such as faster access to data, less strain on a computer’s resources, and more efficient data backups. It is an excellent tool for anyone who works with large volumes of data or needs to move data quickly and securely. Plus, it is easy to use and offers excellent compatibility with a wide range of devices.

    If you are looking for a way to improve your data management, consider USB SATA as a viable option.

    Increased Storage Capacity and Versatility

    USB SATA USB SATA is a revolutionary technology that has transformed the way we manage data. One of the most significant benefits of USB SATA is the increased storage capacity and versatility it offers. With USB SATA, you can store large amounts of data and access it quickly and easily.

    This comes in handy, especially if you are dealing with large files or multiple files. USB SATA can store data in terabytes, making it a preferred choice among individuals and businesses alike. Additionally, its versatility is a game-changer; you can use USB SATA to connect your internal hard drive to an external device, which increases data transfer rates from one device to another.

    USB SATA is undoubtedly a game-changer in data management, offering increased storage capacity and versatility and solving data storage problems for individuals and businesses.

    Effortless Data Recovery

    USB SATA Effortless data recovery is essential for both individuals and businesses alike in managing critical data. One of the benefits of using USB SATA is that it simplifies data management by facilitating seamless data transfers between devices. This feature is especially useful when recovering lost data from a damaged hard drive.

    With USB SATA, you can easily connect your hard drive to another device without needing to open up your computer, thereby minimizing the risk of further damage to your data. Additionally, USB SATA allows you to quickly migrate data between devices, whether you’re upgrading your computer’s hard drive or just backing up important files. Overall, the convenience of USB SATA makes it a valuable tool for managing your data and simplifying data recovery.

    How to Choose the Right USB SATA Device

    If you’re in the market for a USB SATA device, choosing the right one can be a daunting task. There are a few things to consider before making a purchase. Firstly, make sure the device is compatible with your operating system.

    Some devices may only work with specific systems, and you don’t want to waste your money on something that won’t work with your computer. Additionally, consider the data transfer speed of the device. If you’re transferring large files frequently, you’ll want a faster transfer speed to save time.

    Finally, think about the size and portability of the device. If you need to use it on the go, you’ll want something small and lightweight that you can easily carry with you. Overall, take your time and do your research before making a purchase to ensure you get the best USB SATA device for your needs.

    Compatibility with Your System

    When it comes to choosing the right USB SATA device, compatibility with your system is a crucial consideration. Before purchasing a USB SATA device, be sure to check the necessary requirements needed for use with your computer or device. This includes checking the operating system, interface type, and compatibility with USB ports.

    Additionally, consider the storage capacity and speeds supported by the USB SATA device and ensure that it meets your storage needs. Some USB SATA devices may also have additional features such as hardware encryption or backup software, so take these into account when making your decision. Ultimately, taking the time to research and select the right USB SATA device for your system will ensure optimal performance and functionality.

    Capacity and Speed Requirements

    When it comes to choosing the right USB SATA device, there are a few things to keep in mind to ensure you’re getting the best one for your needs. One of the most important factors to consider is the capacity and speed requirements. You’ll want to choose a device with enough capacity to store all of your files, including any future ones you may create.

    Additionally, the speed of the device is important for transferring files quickly and efficiently. If you’re someone who frequently works with large files, like videos or high-resolution images, you’ll want to opt for a device with a higher speed. On the other hand, if you only occasionally transfer files, a slower speed may be sufficient.

    Ultimately, the right USB SATA device is one that meets the specific needs and demands of your workflow. So, take the time to consider your capacity and speed requirements before making your purchase to ensure you’re getting the right fit for you.

    Maximizing Your USB SATA Device

    If you own a USB SATA device, you may be wondering how to maximize its potential. The first step is to ensure that your computer’s USB ports are USB 0 or higher.

    This will allow for faster data transfer speeds, which is especially important for large files. Additionally, make sure that your USB SATA device is using a properly shielded cable to avoid any interference that may cause errors or slow transfer speeds. Regularly defragmenting your device can also improve its performance by organizing data more efficiently.

    If you’re using your USB SATA device frequently, consider investing in an external power supply to ensure that it’s getting the power it needs for optimal performance. Finally, always safely eject your device before unplugging it to avoid data corruption. With these tips, you can make the most out of your USB SATA device.

    Tips for Optimal Performance

    If you’re looking to maximize the performance of your USB SATA device, there are a few tips that can help. Firstly, make sure you’re using a USB 0 port rather than an older USB

    0 port. This will ensure faster transfer speeds and better overall performance. Additionally, make sure you’re using the right type of SATA cable – a 6Gb/s cable will give you the best results.

    Another important factor to consider is the power supply – ensure that your device is getting enough power to operate at its maximum capacity. Finally, consider upgrading to an SSD if you haven’t already – this will give you a further boost in performance and faster speeds overall. By following these tips, you should be able to get the most out of your USB SATA device and enjoy faster transfer speeds and better performance.

    Maintenance and Care

    When it comes to maximizing the life and performance of your USB SATA device, the key is maintenance and care. Regularly cleaning the device and ensuring that it is stored in a safe and dry place can go a long way in preventing damage and potential loss of data. It’s also important to avoid exposing the device to extreme temperatures or humidity, as this can affect its overall performance and durability.

    In addition, formatting the device on a regular basis can help to clear out any unnecessary files or errors, making it run faster and more efficiently. By taking the time to properly care for and maintain your USB SATA device, you can ensure that it will continue to perform at its best for years to come.

    Final Thoughts and Recommendations

    In conclusion, if you’re looking for a reliable way to connect your SATA hard drives to your computer, a USB to SATA adapter is a great option to consider. These adapters provide a simple, convenient way to access and transfer data from your hard drives, and they’re often more cost-effective than other solutions like external hard drives. When choosing an adapter, be sure to look for one that’s compatible with your computer and SATA drives, and consider factors like data transfer speeds and port availability.

    Overall, a USB to SATA adapter can be a valuable tool for anyone who needs to access data from their SATA hard drives on a regular basis.

    Conclusion

    In conclusion, USB SATA is the dynamic duo that every tech-savvy individual needs in their arsenal. Like Batman and Robin, they are an inseparable team that can conquer any obstacle thrown their way. USB provides the convenience and mobility while SATA delivers the speed and efficiency.

    Together, they form a powerful alliance that ensures your data is always accessible and secure. So next time you need to transfer data at lightning-fast speeds, think USB SATA – the ultimate dynamic duo of the tech world.”

    FAQs

    What is a USB SATA adapter?
    A USB SATA adapter is a device that allows you to connect a SATA hard drive or SSD to your computer or laptop using a USB port.

    Can I use a USB SATA adapter to clone my hard drive?
    Yes, you can use a USB SATA adapter to clone your hard drive. Simply connect the new drive to the adapter, connect the adapter to your computer, and use cloning software to transfer the data.

    What is the maximum transfer speed of a USB SATA adapter?
    The maximum transfer speed of a USB SATA adapter will depend on the specific adapter you are using. Some adapters may support USB 3.0 or USB 3.1 for faster transfer speeds, while others may only support USB 2.0.

    Can a USB SATA adapter be used to recover data from a damaged hard drive?
    Yes, a USB SATA adapter can be a useful tool for recovering data from a damaged hard drive. By connecting the damaged drive to the adapter and then to a different computer, you can potentially access and recover your files.

  • Patriot Viper VPN110 2TB: Secure Your Data with Lightning Fast Speeds!

    Do you ever find yourself running out of storage space on your computer or losing important files due to a lack of organization? It’s time to upgrade your storage game with the Patriot Viper VPN110 2TB. This external solid-state drive offers lightning-fast read and write speeds, making file transfers and backups a breeze. It’s compact and portable, making it easy to take with you on the go.

    With the Viper VPN110, you won’t have to worry about losing your files or running out of space ever again. So why settle for mediocre storage solutions when you can have the best? Upgrade to the Patriot Viper VPN110 2TB and take control of your digital world.

    Fast and Reliable Storage

    When it comes to storing important files and documents, you want to make sure you have a fast and reliable storage device. That’s where the Patriot Viper VPN110 2TB comes in. With its impressive read and write speeds, you can transfer files quickly and efficiently.

    This solid-state drive is also built to last, with its durable design and shock-resistant technology, giving you peace of mind knowing your data is safe and secure. Whether you’re a graphic designer, a gamer, or just someone who needs a lot of storage space, the Patriot Viper VPN110 2TB is a great option. So why settle for slow and outdated storage when you can have the speed and reliability of the VPN110?

    Speedy Performance for Data-Intensive Tasks

    When it comes to data-intensive tasks, fast and reliable storage is crucial for speedy performance. Slow and unreliable storage systems can slow down processes and cause delays, which can lead to frustration and lost productivity. That’s why it’s important to invest in high-quality storage solutions that can handle large amounts of data quickly and efficiently.

    One such solution is solid-state drives (SSDs), which use flash memory to store data and access it much faster than traditional hard disk drives. This makes them ideal for tasks such as video editing, gaming, and database management, where fast read and write speeds are essential. Another option is cloud storage, which allows you to store and access data from anywhere with an internet connection.

    Cloud storage providers generally offer high-speed access to data and a reliable infrastructure with built-in redundancy to protect against data loss. Of course, the type of storage solution you choose will depend on your specific needs and budget. But no matter what option you choose, investing in fast and reliable storage is key to ensuring speedy performance for data-intensive tasks.

    patriot viper vpn110 2tb

    Keep Your Data Safe with VPN Encryption

    As technology progresses, the need for fast and reliable storage is becoming increasingly critical. With VPN encryption, you can keep your data safe from malicious attacks while enjoying lightning-fast speeds for storing and accessing your files. VPN encryption adds a layer of security to your online activities, making it difficult for hackers and other entities to intercept your data.

    It works by encrypting your data into a secure tunnel, protecting it from prying eyes. This way, you can store and access your data from anywhere in the world without worrying about security breaches. So if you’re looking for a secure, fast, and reliable storage solution, consider VPN encryption to keep your data safe.

    Versatile Connectivity Options

    The Patriot Viper VPN110 2TB is an excellent option for those seeking versatile connectivity options. The SSD comes with a range of connectivity options that will allow you to connect it to a variety of different devices, including laptops, desktops, and gaming consoles. You can even use it with your smartphone and tablet devices thanks to the inclusion of the USB Type-C port.

    With speeds of up to 1,000MB/s, you can expect lightning-fast data transfer speeds, no matter what type of device you connect it to. You’ll find that the Patriot Viper VPN110 2TB is an excellent choice if you need a reliable, high-speed, and versatile storage solution that will keep up with your needs. So if you’re in the market for a high-quality SSD, look no further than the Patriot Viper VPN110 2TB.

    Easy Integration with USB 3.2 and NVMe PCIe

    Versatile Connectivity Options When it comes to data transfer and storage, having flexible connectivity options is crucial. This is where USB 2 and NVMe PCIe come in handy.

    With USB 2, you can enjoy faster data transfer rates than ever before, making it a great choice for transferring files between devices quickly and efficiently. With NVMe PCIe, you get fast and reliable storage that takes advantage of PCIe’s high bandwidth for maximum performance.

    The best part is that USB 2 and NVMe PCIe are easy to integrate into your systems, making it easy to upgrade your existing devices or build new ones from scratch. Whether you’re a gamer, content creator, or professional user, versatile connectivity options can make a big difference in how you work and play.

    So why not take advantage of these technologies today and experience the benefits for yourself?

    Compatible with Most Operating Systems

    When it comes to choosing a new device, compatibility is an essential factor to consider. Luckily, there are many versatile connectivity options available that allow most operating systems to communicate effectively. Whether you’re using a Windows operating system or an Apple operating system, you can rest assured that you’ll be able to sync your device with your other gadgets without any hiccups.

    The best part is that you don’t have to be a tech-savvy person to enjoy these benefits. Many devices are designed to offer seamless connectivity, making it easy for anyone to use them. So, whether you’re connecting your phone to your laptop or syncing your tablet with your smartwatch, you can trust that your devices will work together efficiently.

    With the advancement of technology, compatibility is no longer a significant issue, and you can enjoy the convenience of syncing your devices with ease.

    Ideal for Gamers, Creators, and IT Professionals

    The ASUS ProArt Display PA278CV is the go-to monitor for gamers, creators, and IT professionals alike. It boasts a range of versatile connectivity options to accommodate every user’s needs. Whether you’re a hardcore gamer or a filmmaker, this monitor has got you covered with its HDMI, DisplayPort, and USB-C ports.

    You can connect multiple devices to the monitor and switch between them seamlessly. The ultra-fast 75Hz refresh rate ensures a smooth gaming experience without any lag or stuttering. Additionally, the high-resolution display and accurate color reproduction make it perfect for content creators who need to work with accurate colors.

    Even IT professionals will find this monitor useful with its built-in blue light filter, ergonomic design, and adjustable stand. Keep your eyes and neck comfortable all day long with the ASUS ProArt Display PA278CV.

    Peace of Mind with Long-Term Warranty

    Looking for peace of mind with your storage solution? Look no further than the Patriot Viper VPN110 2TB. This powerful SSD comes backed by a long-term warranty, ensuring that your investment is protected for years to come. Whether you’re using it for work, leisure, or anything in between, the Viper VPN110 2TB provides lightning-fast speed and reliable performance that you can count on.

    Plus, with its compact design and low power consumption, this SSD is the perfect addition to your laptop or desktop setup. So if you want the best in storage technology, choose the Patriot Viper VPN110 2TB and experience the peace of mind that comes with a long-term warranty.

    Guaranteed with Limited 5-Year Warranty

    As a consumer, one of the most important things to consider when making a purchase is the warranty that comes with it. That’s why we guarantee our product with a limited 5-year warranty, giving you the peace of mind you deserve. We stand by the quality and durability of our product, and we want you to be completely satisfied with your purchase, both now and for years to come.

    Our warranty covers any manufacturing defects or issues with materials and workmanship, so you can rest assured that you’re getting a high-quality product that will stand the test of time. And with a warranty lasting five years, you can enjoy your purchase without worrying about unexpected repairs or replacements. We believe in the quality of our product and want you to feel confident in your purchase.

    That’s why we offer a long-term warranty to ensure your satisfaction and protection. Whether you’re using our product for personal or professional use, you can trust that it will exceed your expectations and that we have your back should anything go wrong. So, if you’re looking for a durable and reliable product that comes with a guarantee, look no further.

    With our limited 5-year warranty, you can enjoy your purchase with complete peace of mind, knowing that we have you covered.

    24/7 Support Available for Hassle-Free Assistance

    As a customer, the last thing you want is to invest in a product and not receive adequate support when you need it. That’s why we offer 24/7 support for hassle-free assistance whenever you need it. Whether you’re experiencing technical difficulties or just have a question about your purchase, our friendly and knowledgeable representatives are always available to lend a helping hand.

    We understand that your time is valuable, so we strive to resolve any issues as quickly and efficiently as possible. Furthermore, we also want to provide you with peace of mind when making your purchase. That’s why we offer a long-term warranty to ensure that your investment is protected for years to come.

    This warranty covers any defects in materials or workmanship, so you can rest assured that your product will continue to perform at its best. We stand behind the quality of our products and are committed to providing excellent customer service every step of the way. With our 24/7 support and long-term warranty, you can trust that you’re in good hands.

    Upgrade Now for Better Storage Solution

    If you’re tired of dealing with slow-loading files and constantly running out of space on your computer, it’s time to upgrade to the Patriot Viper VPN110 2TB. This high-performance storage solution provides ample space for all of your documents, photos, videos, and more, allowing you to work and play without worrying about running out of room. Not only does this drive offer lightning-fast transfer speeds, but it also comes with advanced security features to keep your data safe and protected.

    So if you’re looking for a reliable and efficient storage solution that will keep up with your demanding workload, the Patriot Viper VPN110 2TB is the way to go. Don’t settle for less when you could have the best – upgrade to the Patriot Viper VPN110 2TB today and experience the difference for yourself.

    Conclusion

    In conclusion, the Patriot Viper VPN110 2TB is the secret weapon of the digital patriot. With its high-speed performance and reliable security features, you can trust it to protect your valuable data and keep your online activity incognito. Whether you’re a privacy-conscious individual or a business looking to safeguard your confidential information, the Viper VPN110 2TB has got you covered.

    It’s the VPN equivalent of the star-spangled banner – a symbol of freedom and protection in the digital landscape. So, why settle for anything less? Join the ranks of the digital patriots and get your hands on the Viper VPN110 2TB today!”

    FAQs

    What is the storage capacity of the Patriot Viper VPN110 2TB?
    The Patriot Viper VPN110 has a storage capacity of 2TB.

    Is the Patriot Viper VPN110 2TB compatible with Mac computers?
    Yes, the Patriot Viper VPN110 2TB is compatible with Mac computers.

    What type of interface does the Patriot Viper VPN110 2TB use?
    The Patriot Viper VPN110 2TB uses a USB 3.1 Gen 2 interface.

    Can the Patriot Viper VPN110 2TB be used for gaming?
    Yes, the Patriot Viper VPN110 2TB is a high-performance SSD that is ideal for gaming.

    Does the Patriot Viper VPN110 2TB come with any software for data encryption?
    Yes, the Patriot Viper VPN110 2TB comes with an AES 256-bit hardware encryption software for data security.

  • Keeping Your SSD Cool: A Guide to Checking and Monitoring SSD Temperature

    As PC enthusiasts, it is essential to keep track of your computer’s temperature, especially when it comes to delicate components such as your solid-state drive (SSD). Overheating can cause permanent damage, resulting in significant loss of data and money. Do you know how to check the temperature of your computer’s SSD? In this blog, we will provide you with detailed steps on how to check SSD temperature and the importance of keeping your SSD cool.

    So, let’s dive in and learn how to ensure your SSD stays in tip-top shape!

    Why is Monitoring SSD Temperature Important?

    If you’re wondering how to check SSD temperature, you’re not alone. Monitoring SSD temperature is important because it can affect the performance and lifespan of your solid-state drive. High temperatures can cause your SSD to slow down or even fail, so it’s essential to keep an eye on it.

    Most modern SSDs come with built-in temperature sensors that can be accessed through various software programs such as CrystalDiskInfo or HWMonitor. By regularly checking the temperature of your SSD, you can ensure that it’s running optimally and avoid any potential issues. If you notice that your SSD is running hotter than usual, try improving the airflow in your computer case or upgrading to a better cooling system.

    Protect your investment and keep your SSD running smoothly by monitoring its temperature regularly.

    Identify potential data loss risk.

    As SSDs (Solid State Drives) become increasingly popular due to their fast data access speeds and reliability, it’s important to also consider the potential risks of data loss that come with them. One important aspect to monitor is the temperature of the SSD. An SSD that runs too hot can suffer from data corruption, decreased lifespan, and even complete failure.

    This is because high temperatures can cause the electrical components within the drive to degrade. Monitoring the temperature of an SSD can help prevent data loss and extend the drive’s lifespan, which is crucial whether it’s being used for personal or business purposes. By keeping an eye on the temperature and properly cooling the drive, you can ensure that your data remains intact and accessible.

    So, if you’re looking to leverage the potential benefits of an SSD, make sure to prioritize temperature monitoring to minimize the risk of data loss and maximize your investment.

    how to check ssd temperature

    Maintain the life and performance of your drive.

    When it comes to prolonging the lifespan and maintaining the optimal performance of your SSD, monitoring its temperature is crucial. Your SSD’s temperature can affect its performance and longevity, and a higher temperature can lead to a higher likelihood of data loss or the drive failing altogether. This is because higher temperatures can increase the rate of wear on your drive’s components, especially if they are exposed to those temperatures for an extended period of time.

    To prevent this, monitoring your SSD’s temperature and ensuring it stays within safe limits can often mean the difference between a long-lasting, high-performing drive and one that fails prematurely. Make sure to keep an eye on your drive’s temperature to keep it running smoothly and avoid any potential issues down the line.

    Methods for Checking SSD Temperature

    Wondering how to check the temperature of your SSD? There are a few methods you can use to keep track of your SSD’s temperature and prevent overheating. One way is to use third-party software such as CrystalDiskInfo or HWMonitor. These tools will display real-time information about your SSD’s temperature, among other metrics.

    Another option is to check the temperature directly from your computer’s BIOS settings, which usually have a section dedicated to hardware monitoring. Additionally, some SSD manufacturers provide their own software for monitoring drive health and temperature. Keeping your SSD at a safe temperature can help prevent damage and ensure its longevity.

    So, don’t hesitate to use one of these methods to ensure your SSD is running at an optimal temperature.

    Use SSD monitoring software.

    SSD Temperature Checking your SSD temperature is crucial for ensuring its longevity and performance. One way to monitor your SSD’s temperature is to use SSD monitoring software. These utilities can provide real-time data on your drive’s temperature, as well as other important metrics like health and performance.

    Programs like CrystalDiskInfo and HWMonitor are great options for Windows users, while DriveDx is a popular choice for Mac users. By regularly checking your SSD temperature and other metrics, you can catch potential issues early and take action before they cause lasting damage to your drive. In short, using SSD monitoring software is an excellent way to stay on top of your drive’s health and ensure its longevity.

    BIOS monitoring.

    SSD temperature, BIOS monitoring. If you have an SSD in your computer, it’s important to keep an eye on its temperature to avoid overheating and potential damage. One way to do this is through BIOS monitoring.

    This involves accessing your computer’s basic input/output system and checking the temperature readings for your SSD. Some motherboards even have specific temperature sensors just for this purpose. Another method for checking SSD temperature is through third-party software.

    These programs can provide more detailed information and allow you to set alerts if the temperature rises too high. Whatever method you choose, regularly monitoring your SSD temperature can prolong its lifespan and ensure optimal performance. So don’t forget about this often overlooked aspect of computer maintenance!

    Physically check the temperature through the case.

    If you want to ensure that your SSD is functioning optimally and doesn’t overheat, you need to check its temperature regularly. One method for doing this is through the case, which involves physically checking the temperature of the SSD by touching it. However, this method isn’t always reliable, as the temperature can vary depending on the location of the SSD, the airflow in the case, and the workload of the system.

    Another method is to use specialized software that monitors the temperature of the SSD in real-time. This method is more accurate and less intrusive, and can be set up to alert you if the temperature exceeds a specified threshold. Examples of such software include CrystalDiskInfo, SSD-Z, and HWMonitor.

    By monitoring your SSD’s temperature, you can identify any potential issues and take steps to prevent them before they cause damage. So don’t neglect your SSD’s temperature – keep an eye on it and ensure that it stays within safe limits!

    Choosing the Right SSD Monitoring Software

    Are you looking for ways to check your SSD temperature? Good news! There are several SSD monitoring software programs available that can help. Before choosing the right one for you, it’s essential to consider your needs. If you’re looking for a more straightforward solution, a basic program may suffice.

    However, if you require more in-depth information, a more advanced program with robust analytics tools may be necessary. Some popular options include CrystalDiskInfo, HWMonitor, and SSD Health. Additionally, ensuring proper airflow and ventilation around your SSD can help keep it running smoothly and avoid overheating.

    Remember, regularly monitoring your SSD’s temperature can help you catch issues before they become major problems, ultimately increasing your system’s lifespan.

    Check for compatibility with your SSD brand and model.

    When choosing the right SSD monitoring software, it’s essential to consider compatibility with your SSD brand and model. Different SSDs have different needs, and not all monitoring software work with every brand and model. Checking for compatibility is crucial to ensure you get the most out of your SSD and avoid any potential data loss or hardware damage due to incompatible software.

    You can usually find this information on the software’s website or by contacting their support team. It’s essential to take this step seriously and not skip it because choosing incompatible monitoring software can result in several issues, including performance inconsistencies and system instability. So, before downloading any software, make sure to check for compatibility with your SSD brand and model.

    Look for temperature alerts and notifications.

    When it comes to selecting SSD monitoring software, there are several things to keep in mind. Among the most important features to look for is temperature alerts and notifications. This is essential because temperature can have a significant impact on the lifespan and performance of an SSD.

    Choosing software that will alert you when your SSD temperature exceeds safe levels can ensure that you take steps to prevent damage or data loss. Another important factor to consider when selecting monitoring software is compatibility with your operating system and SSD type. Make sure that the software you choose is designed for use with your system and can effectively monitor your specific SSD type.

    By taking the time to choose the right SSD monitoring software, you can ensure that your valuable data remains safe and your SSD continues to perform at its best.

    Final Thoughts

    In conclusion, checking the temperature of your SSD is crucial to maintaining its performance and increasing its lifespan. By implementing the various methods discussed earlier, such as using third-party software or accessing the BIOS settings, you can easily monitor your SSD’s temperature and stay ahead of any potential issues. Remember to keep your SSD clean and properly ventilated, and avoid exposing it to excessive heat or moisture.

    Finally, it’s always recommended to consult with your SSD manufacturer for specific recommendations and guidelines regarding temperature control. So, if you’re wondering how to check SSD temperature, just follow the steps outlined above, and you’ll ensure optimal performance and longevity for your valuable data storage device.

    Conclusion

    In conclusion, monitoring the temperature of your SSD is crucial for maintaining its health and performance. Fortunately, it’s a quick and easy process that anyone can do with a few simple steps. Just remember to use a reliable monitoring tool, keep your SSD clean and well-ventilated, and stay vigilant for any warning signs of overheating.

    With these tips in mind, you’ll be able to keep your SSD running smoothly and avoid any catastrophic crashes or failures. So, keep your cool and stay on top of your SSD temperature – your computer will thank you for it!”

    FAQs

    What is the ideal temperature for SSD?
    The ideal temperature for an SSD ranges between 0 to 70 degrees Celsius. However, it can operate within a broader spectrum but keeping the temperature within the specified range is recommended.

    How can I check the temperature of my SSD?
    You can check the temperature of your SSD by using various monitoring software such as HWMonitor, Crystal Disk Info, or SSD Health. These software will provide you with real-time temperature readings of your SSD.

    Can high temperatures affect the performance of my SSD?
    Yes, high temperatures can affect the performance of your SSD. When the temperature of the SSD increases above the recommended range, it can cause slow data transfer speeds, decreased lifespan, and even failure of the drive.

    How can I cool down my SSD?
    You can cool down your SSD by using a fan, optimizing your computer’s airflow, or by installing heat sinks. Heat sinks will absorb and dissipate the heat generated by the SSD, which will help reduce its overall temperature.

  • Unleashing the Power of 1TB Laptop Hard Drive: A Comprehensive Guide

    Have you ever experienced the dreaded notification on your laptop that says you’re running out of storage space? It’s definitely not a pleasant feeling. But fear not, because there are ways to upgrade the storage on your laptop and unleash its full potential. Upgrading your laptop’s storage is a great way to increase your productivity and make sure you always have enough storage available for work or entertainment purposes.

    So, whether you’re a student, professional or just an avid laptop user, read on to find out everything you need to know about upgrading your laptop’s storage!

    Benefits of a 1TB Hard Drive

    If you’re searching for a reliable and spacious laptop hard drive, a 1TB laptop hard drive may be your best option. The main benefit of a 1TB hard drive is its vast storage capacity, which can hold up to 1,000GB or 1 trillion bytes of data. This is especially ideal for those who work with large media files, such as videos and high-resolution photos, or individuals who want to store their entire media library in one convenient location.

    With a 1TB hard drive, you won’t have to worry about deleting old files or continuously transferring data to an external hard drive. Plus, a 1TB hard drive is more affordable than ever before, making it a practical investment for anyone looking to upgrade their laptop’s storage capacity. With the added peace of mind of knowing information won’t be cluttered and lost on another device, a 1TB laptop hard drive is the perfect option for those who prioritize organization, convenience, and storage capacity.

    More Space for Your Media Files

    If you’re a media junkie who loves to store all their files on their computer, then a 1TB hard drive is exactly what you need. With the rising popularity of high-resolution photos and videos, you need more storage space than ever before. A 1TB hard drive offers ample space for you to store all your files without worrying about running out of space.

    Moreover, with a 1TB hard drive, you can also keep a backup of your files so that you don’t lose them in case of any unexpected mishap. The best part? A 1TB hard drive is affordable and easily available in the market. So, whether you’re a professional photographer, videographer, or someone who loves to collect media, a 1TB hard drive is a great investment for all your storage needs.

    Say goodbye to those pesky low storage notifications and enjoy the freedom of storing all your media files in one place.

    1tb laptop hard drive

    Faster System Performance

    If you’re looking for faster system performance, upgrading to a 1TB hard drive can provide significant benefits. By increasing your storage capacity, you’ll be able to store more files, programs, and applications on your computer without compromising on performance. This means you’ll be able to run multiple programs at the same time, switch between them seamlessly, and enjoy faster load times overall.

    Additionally, a 1TB hard drive can help you avoid the frustration of running out of space on your computer, which can slow down your system and impact your productivity. With a larger hard drive, you can store all of your files, photos, videos, and music in one central location, making it easier to find what you need and stay organized. So if you want to boost your computer’s speed and performance, upgrading to a 1TB hard drive can be a smart choice that will pay off in the long run.

    Expandability Options

    One of the biggest concerns when it comes to technology is the issue of limited storage space. This is especially true when it comes to devices such as laptops and gaming consoles, which rely heavily on local storage. That’s where a 1TB hard drive comes in.

    With a total capacity of 1000 gigabytes, it offers more than enough space for all of your files, media, and applications. But the benefits of a 1TB hard drive don’t stop there. In addition to the ample storage space, a 1TB hard drive also offers expandability options.

    This means that if you were to run out of space in the future, you could simply add an external hard drive to your system, without having to worry about running out of storage space anytime soon. With a 1TB hard drive, you can play games, watch movies, and store all of your important files without any worries or limitations. So if you’re in the market for a new device, make sure to choose one with a 1TB hard drive.

    Choosing the Right Hard Drive

    When you’re looking for a 1tb laptop hard drive, there are several factors to consider before making your purchase. First, think about the speed of the drive. A solid-state drive (SSD) is generally faster than a traditional hard drive (HDD) because it has no moving parts.

    However, SSDs can be more expensive. Another consideration is the brand of the drive. Look for a reputable brand with good reviews and a solid warranty.

    Additionally, make sure the drive is compatible with your laptop. Check the interface type and form factor, which will impact how the drive connects to your computer. By taking these factors into account, you can choose the right 1tb laptop hard drive that meets your storage and performance needs.

    Compatibility with Your Laptop

    When it comes to upgrading your laptop’s hard drive, compatibility is key. It’s important to choose a hard drive that is compatible with your laptop’s hardware and operating system. Firstly, consider the form factor of the hard drive – it needs to fit into your laptop’s chassis.

    Secondly, check the interface – ensure the connector type and data transfer rate is compatible with your laptop’s motherboard. Thirdly, pay attention to the storage capacity and speed of the hard drive. If your laptop is getting slow, consider investing in an SSD (Solid State Drive), which can significantly improve the speed and performance of your laptop.

    Lastly, check the manufacturer’s website for any compatibility restrictions or recommendations. By choosing the right hard drive, you can breathe new life into your laptop and enjoy improved performance, speed, and reliability.

    Type of Hard Drive

    Choosing the right hard drive for your computer can be a daunting task, given the many options available in the market. One major consideration when selecting a hard drive is the type – traditional hard disk drives (HDDs) or solid-state drives (SSDs). HDDs are the more affordable option and offer larger storage capacities for the price, making them ideal for heavy data users.

    However, they are relatively slow and noisy, and more vulnerable to damage due to their moving parts. SSDs, on the other hand, are faster, more durable, and consume less power than HDDs. While they may be pricier per gigabyte of storage, their speed and reliability make them ideal for gamers, graphic designers, and other power users.

    Ultimately, the choice of which hard drive to go for comes down to your budget, storage needs, and performance requirements.

    Brand and Warranty

    When it comes to choosing the right hard drive, there are two important factors to consider: the brand and the warranty. The brand of the hard drive you choose can make a big difference in terms of reliability and performance. Look for brands that have a good reputation and are known for producing high-quality products.

    Another important factor to consider is the warranty that comes with the hard drive. A good warranty can give you peace of mind and protect your investment in case something goes wrong. When shopping for hard drives, be sure to look for brands that offer a solid warranty, typically one that lasts at least three years.

    By taking the time to choose a reputable brand and a reliable warranty, you can ensure that your data is safe and secure.

    Installation Guide

    Are you looking for a way to upgrade your laptop storage? Consider an easy-to-install 1TB laptop hard drive. Installing a new hard drive may seem daunting, but it’s a simple process that can be done in a few easy steps. First, ensure that the laptop is turned off and unplugged before opening the back panel.

    Once opened, locate the old hard drive and gently remove it from the laptop. Install the new hard drive in the same place and connect it to the laptop with the necessary cables. Lastly, secure the back panel and turn on the laptop.

    Within minutes, you’ll have a brand-new 1TB hard drive ready to store all your important files. Upgrading your laptop storage doesn’t have to be complicated, and with a 1TB laptop hard drive, you can enjoy more space to store all your favorite media and documents.

    Preparing Your Laptop

    When getting ready to install software on your laptop, there are a few key steps to ensure a smooth and successful experience. First, make sure your laptop meets the system requirements for the software you want to install. This includes checking your operating system, available storage space, and RAM.

    Next, create a backup of any important files and documents on your laptop just in case anything goes wrong during the installation process. You can use an external hard drive, cloud storage, or a USB drive for this backup. Finally, ensure that your laptop is connected to a stable internet connection before you begin the installation process.

    With these steps in mind, you’ll be ready to install your chosen software and get back to work or play in no time!

    Installing the Hard Drive

    When it comes to installing a hard drive, the first step is to ensure that your computer is switched off and unplugged from any power source. Once you have done this, you should locate the hard drive bay where you will be installing your new drive. In most cases, this will be located on the bottom of your computer case, but you should refer to your computer’s manual for guidance if in doubt.

    Once you have located the bay, you should remove any screws or mounting brackets that are holding the bay in place. After this, you can slide your new hard drive into the bay and secure it in place with screws or mounting brackets. Once your hard drive is securely installed, you can connect it to your computer’s power supply using the appropriate cables.

    Finally, you should switch your computer back on and ensure that the new hard drive is recognized by your operating system. By following these simple steps, you can easily install a new hard drive in your computer and expand your storage capacity.

    Conclusion

    In conclusion, a 1tb laptop hard drive is like the digital equivalent of Mary Poppins’ bottomless bag- it can hold an endless amount of files, documents, and cat videos without ever reaching its limit. But unlike Mary Poppins’ magical bag, a 1tb laptop hard drive won’t require any singing or dancing to keep it running smoothly. So, if you’re in need of a reliable and spacious storage solution for your laptop, a 1tb hard drive is the way to go!”

    FAQs

    What is the storage capacity of a 1TB laptop hard drive?
    The storage capacity of a 1TB laptop hard drive is 1 terabyte, which is equivalent to 1,000 gigabytes.

    Can a 1TB laptop hard drive be upgraded?
    Yes, most laptops have the ability to upgrade or replace their hard drives, including a 1TB hard drive. It is recommended to consult your laptop’s manual or a professional technician before attempting to upgrade.

    What is the difference between a 1TB hard drive and a 1TB solid-state drive (SSD)?
    A 1TB hard drive uses magnetic disks to store data, while a 1TB SSD uses NAND-based flash memory. SSDs are faster, more durable, and have no moving parts, but are typically more expensive than traditional hard drives.

    How many files can a 1TB laptop hard drive hold?
    The number of files that a 1TB laptop hard drive can hold depends on the size of the files. As a reference, a 1TB hard drive can hold approximately 200,000 photos, 250,000 songs, or 500 hours of HD video.

  • Say Goodbye to Cluttered SSD: Learn How to Transfer Windows 10 to Another SSD

    Upgrading your computer’s storage is never an easy task, especially when it’s the operating system that needs to be transferred. Have you ever found yourself struggling to efficiently transfer Windows 10 from your SSD to another SSD? It can seem like a daunting task, but fear not – we’ve got you covered! In this blog post, we’ll explore the best ways to transfer Windows 10 from SSD to SSD without any hassle. We understand the frustration you may have experienced in the past, whether it’s losing important files, taking up too much time, or simply not knowing where to start.

    This article will provide you with easy-to-follow steps, helpful tips, and thorough explanations, so you can transfer Windows 10 from SSD to SSD flawlessly. So, let’s dive right into it and make the process a breeze!

    Preparation

    If you’re looking to transfer Windows 10 from one SSD to another, there are a few steps you need to take to prepare for the process. Before you even attempt the transfer, make sure to back up all of your important files and documents. This will ensure that nothing is lost in the process and you can easily restore your data if anything goes wrong.

    Additionally, you should make sure that your new SSD is formatted correctly and has enough space to accommodate all of your files. Once you’ve completed these preparations, you can begin the process of transferring Windows 10 to your new SSD. By taking these steps, you can ensure that your transfer is successful and your data remains safe and secure.

    Back up data

    If you’re looking to back up your data, it’s important to make sure that you have everything you need before you get started. One of the first things you should do is determine how much data you’re looking to back up. This will help you to figure out which backup method is best for you, whether it be an external hard drive, cloud storage, or other options.

    Additionally, you’ll want to ensure that you have enough space available to store all of your data, so you may want to go through and delete any unnecessary files or run a disk cleanup to free up space. Once you have everything prepared, you’ll be able to confidently back up your data knowing that it’s all secure and safe. Remember, it’s always better to be safe than sorry when it comes to your important files and information.

    how do i transfer windows 10 from ssd to ssd

    Ensure SSD has enough space

    Preparation is key when it comes to ensuring your SSD has enough space. Before you even begin to think about managing your SSD storage, it’s essential to take stock of what you already have. This means checking your current usage and evaluating the amount of space you’ll need moving forward.

    Once you have an idea of what you need, it’s time to declutter your SSD. Start with the basics, such as deleting unused programs and files, and ensure you regularly clear your trash bin. A cluttered SSD not only takes up valuable space but can also slow down your system’s performance.

    By taking the time to prepare and declutter, you’ll be able to optimize your SSD’s storage capacity and enjoy smoother, faster performance. Remember, preparation is key in ensuring your SSD has enough space.

    Disconnect other drives

    One of the best ways to ensure a smooth and secure installation of a new operating system is by preparing your computer in advance. One crucial step is to disconnect any other drives you might have connected to the system. This includes external hard drives, flash drives, and memory cards.

    Disconnecting these drives reduces the risk of losing any data during the installation process. Furthermore, it ensures that the operating system is installed on the correct drive, avoiding any confusion about where your files and applications are stored. Taking the time to prepare your computer in this way can save you a lot of time, effort, and frustration in the long run.

    Therefore, before beginning the installation process, it is essential to disconnect any other drives to ensure the smoothest and most accurate installation possible.

    Cloning Process

    If you’re thinking of how to transfer Windows 10 from one SSD to another, the cloning process could be the answer. Cloning is the process of copying the content of an entire hard drive, including the operating system, programs and data, to another drive, typically a larger or faster one. To begin the cloning process, you need cloning software, which is usually available online for free.

    Once you download the software, connect both SSDs to your computer and open the tool. The software will guide you through the process, and you’ll only need to select the source drive (the one with Windows 10) and the target drive (the one you want to transfer the operating system to). After that, the software will copy everything from the source drive to the target drive, including hidden system files and boot files, as well as the Master Boot Record (MBR), which tells the computer where to find the operating system.

    When the process is completed, shut down your computer, disconnect the old drive, and boot up using the new SSD. And voila! You’ve successfully transferred Windows 10 to a new SSD with no hassle.

    Download cloning software

    If you’re looking to clone your hard drive or make a backup of your important files, you’ll need to download cloning software. This type of software creates an exact copy of your hard drive onto another storage device, such as a USB drive or external hard drive. There are many different cloning software options available online, both free and paid.

    Some popular choices include Clonezilla, EaseUS Todo Backup, and Acronis True Image. When you download cloning software, be sure to read the instructions carefully and follow the steps closely to ensure a successful and accurate cloning process. Overall, cloning software is a valuable tool for anyone who wants to ensure the safety and security of their important files and data.

    Connect both SSDs

    Once you’ve confirmed that both of your SSDs meet the cloning criteria, it’s time to connect them. This will involve opening up your computer and finding the appropriate input slots. Some laptops require a screwdriver to access these slots, so it’s a good idea to have one on hand.

    Once you’ve connected both SSDs, you’re ready to begin the cloning process. Essentially, this involves copying all of the data from your existing SSD onto the new, larger one. This can be done using a variety of software applications and tools, depending on your specific needs and preferences.

    However, the most important thing is to make sure that the process is done carefully and thoroughly, ensuring that all of your data is safely transferred over to the new SSD. By taking the time to correctly clone your SSD, you can upgrade your computer’s storage capacity and enjoy faster speeds and more reliable performance. Just make sure to follow all of the instructions carefully and take the necessary precautions to protect your data throughout the process.

    Run cloning software

    When it comes to cloning your hard drive, there are a few different software options to choose from. One popular choice is Clonezilla, a free and open-source program with a simple interface. Once you’ve downloaded and installed the software onto a USB drive, you can boot up your computer from that drive and run Clonezilla.

    From there, you’ll need to choose your source and destination drives, and then follow the prompts to initiate the cloning process. The software will make an exact copy of your hard drive, including all files, settings, and operating system. This is a great option if you want to migrate to a new computer or replace your current hard drive without losing any data.

    Just be sure to choose a reputable and trusted cloning software, and backup your data before starting the process. Cloning your hard drive can give you peace of mind knowing that your important files and data are safe and accessible.

    Select source and target drives

    When you’re cloning a hard drive, one of the first steps is selecting the source and target drives. The source drive is the drive from which you’ll be copying data, while the target drive is the drive to which you’ll be copying that data. It’s important to choose these drives carefully, as you don’t want to accidentally overwrite any important data.

    Before starting the cloning process, make sure you have a clear understanding of which drives you’re using as the source and target, and double-check to ensure you’ve selected the correct ones. Once you’ve confirmed this, you can proceed to the next steps in the cloning process with peace of mind, knowing you’re not going to lose any important data. By taking the time to carefully select your source and target drives, you’ll ensure a successful cloning process from start to finish.

    Start cloning

    If you’re interested in cloning, the first step is to start researching. Cloning is the process of creating a genetically identical copy of an organism, and it can be done in a few different ways. One popular method is somatic cell nuclear transfer (SCNT), which involves transferring the nucleus of a somatic cell into an egg cell that has had its nucleus removed.

    Another method is embryo splitting, where a single embryo is divided into two or more identical embryos. Regardless of the method, successful cloning requires a lot of precise and delicate work, as well as specialized equipment. If you’re serious about cloning, it’s important to find a reputable source for materials, equipment, and guidance.

    Start by researching the specific type of organism you want to clone, and be prepared to invest a significant amount of time and resources into the process.

    Booting from New SSD

    If you’ve recently upgraded to a new SSD and are wondering how to transfer your Windows 10 operating system, don’t worry, it’s actually not as complicated as you might think. With the right software and a bit of patience, you can easily clone your current SSD to your new one. Start by downloading a cloning software like Macrium Reflect or Acronis True Image and connect both SSDs to your computer.

    Once you have installed the software, select the option to clone your existing disk to the new one and wait for the process to complete. Once it’s finished, you should be able to boot from your new SSD just as you did before. Make sure to double-check all your data has been transferred correctly and you’re good to go! With this quick and easy process, you’ll be able to enjoy all the benefits of your new SSD without losing any of your old files or settings.

    Shut down your computer

    Are you tired of waiting for ages for your computer to boot up? Upgrading to a new SSD can solve that problem and have your computer running smoother and faster. However, the first step in the process is shutting down your computer and properly installing the new SSD. Once the computer is shut down, you’ll need to take the necessary precautions to avoid any damage to your computer or the new SSD while installing it.

    Anti-static wristbands can help prevent static shock from causing damage, and carefully removing screws and cables will prevent any accidents. Once the new SSD is securely installed, you can turn your computer back on and experience the benefits of faster boot times and improved overall performance. With a new SSD, you can say goodbye to slow boot times and hello to a faster and smoother computing experience.

    Swap the old SSD with the new one

    After successfully installing the new SSD in your computer, it’s time to boot from it. You need to enter your computer’s BIOS setup to set the new SSD as the boot drive. To do this, reboot your computer and press the key to enter the BIOS setup menu (usually F2, DEL, or F10).

    Once you’re in the BIOS setup, navigate to the “Boot” tab. Here, you’ll see a list of boot devices that your computer recognizes. Select the new SSD as the first boot device and save your changes before exiting the BIOS setup.

    Your computer will now boot from the new SSD, which should be noticeably faster than your old one. It’s important to note that if your computer uses UEFI instead of BIOS, the process will be slightly different, so make sure to refer to your computer’s manual or online resources for specific instructions. With your new SSD set as the boot drive, you’ll be able to enjoy faster boot times and improved performance in all of your applications and tasks.

    Boot the computer

    Booting a computer can be a confusing task, especially if you’re doing it for the first time on a new SSD. Before you begin, make sure the SSD is plugged into the motherboard correctly and that all other peripherals are disconnected. Then, power on the computer and immediately begin pressing the designated key to enter the BIOS menu (usually F2 or Delete).

    Once in the menu, navigate to the “Boot” tab and select the new SSD as the primary boot option. Save changes and exit the BIOS menu. Your computer will now automatically boot from the new SSD every time it’s powered on.

    It’s important to note that if you’re transferring data from an old hard drive to the new SSD, you’ll need to ensure that the operating system is also transferred correctly. This can be done using cloning software or by performing a fresh installation of the OS on the new SSD. Overall, booting a computer from a new SSD may seem daunting at first, but with a bit of patience and technical knowledge, it can be easily accomplished.

    Conclusion

    In conclusion, transferring Windows 10 from SSD to SSD is like performing a high-stakes game of Jenga. You need to carefully remove all the blocks from one SSD and place them perfectly on the other, without causing the tower to topple over. But with the right tools and a steady hand, you can master this task and enjoy a seamless transition to your upgraded SSD.

    Just be sure to take your time and approach it with a strategic mindset, or you may find yourself picking up the pieces (and your data) off the floor.”

    Double-check everything

    When it comes to upgrading your computer’s storage, installing a new SSD can provide a significant boost to speed and performance. However, before booting up your computer from the new SSD, it’s crucial to double-check everything to ensure a smooth transition. Firstly, make sure the new SSD is properly connected to your motherboard and power supply.

    Then, ensure that your BIOS settings are configured correctly to recognize the new SSD as the primary bootable drive. Additionally, ensure that all necessary drivers and software are installed on the new SSD. Finally, back up all important data from your old hard drive and transfer it to the new SSD before booting up to avoid any data loss.

    By following these steps, you can ensure a seamless transition to your new SSD and enjoy improved performance on your computer. Get ready to experience lightning-fast boot times and faster application launch speeds with your new SSD.

    Enjoy faster SSD speeds

    Upgrading to a new SSD will enhance your computer performance drastically. You can now enjoy faster boot times, improved load times, and smooth multitasking without any delays. The days of waiting for your computer to start up are officially over! With an SSD, you can boot up in seconds and launch your favorite applications without any lag.

    The best part is that SSDs are highly reliable and durable, meaning you won’t have to worry about any sudden crashes or data loss. So, if you want to improve the overall performance and speed of your computer, consider investing in an SSD. Trust me; you won’t be disappointed!

    FAQs

    How do I transfer Windows 10 to a new SSD?
    You can transfer Windows 10 to a new SSD by cloning your current SSD using software like EaseUS Todo Backup, Acronis True Image, or Macrium Reflect.

    Is it possible to transfer Windows 10 to another SSD without losing data?
    Yes, it is possible to transfer Windows 10 to another SSD without losing data by using a cloning software that will copy everything from your old SSD to your new SSD.

    What is the best way to transfer Windows 10 to a new SSD?
    The best way to transfer Windows 10 to a new SSD is by cloning your old SSD to your new SSD using a software like EaseUS Todo Backup, Acronis True Image, or Macrium Reflect.

    Can I transfer Windows 10 from HDD to SSD?
    Yes, you can transfer Windows 10 from HDD to SSD by cloning your HDD to your SSD using a software like EaseUS Todo Backup, Acronis True Image, or Macrium Reflect.

    How long does it take to transfer Windows 10 to a new SSD?
    The time it takes to transfer Windows 10 to a new SSD depends on the size of your current SSD and the speed of your new SSD. Typically, it can take anywhere from 30 minutes to a few hours.