
If you own a MacBook Pro, you already know how powerful and reliable Apple’s flagship laptop can be. But even the most capable machines have their limits—especially when it comes to storage. Over time, the built-in SSD in your MacBook Pro may slow down, fill up, or simply not offer enough space for your growing library of photos, videos, apps, and projects. Whether you’re a creative professional editing 4K footage, a developer compiling large codebases, or a student juggling multiple applications, upgrading your SSD can dramatically improve performance, responsiveness, and overall user experience.
That’s where this guide comes in. We’ve spent months researching, testing, and comparing the latest SSD drives compatible with MacBook Pro models—from the older 2012–2015 removable SSD units to the newer M1, M2, and M3 chip-based machines with soldered storage. Our goal is to help you make an informed decision based on real-world performance, compatibility, durability, and value—not just flashy specs or marketing claims. By the end of this article, you’ll understand exactly what to look for, which brands deliver the best results, and how to avoid costly mistakes that could leave you with a drive that doesn’t fit, underperforms, or fails prematurely.
The market for MacBook Pro SSDs has evolved significantly in recent years. With Apple’s shift toward proprietary storage solutions and tighter hardware integration, third-party upgrades have become more complex—but not impossible. At the same time, external SSD options have exploded in speed, capacity, and affordability, offering viable alternatives for users who can’t (or don’t want to) open their MacBook. This guide covers both internal and external SSDs, so whether you’re looking to replace your existing drive or add high-speed portable storage, you’ll find actionable advice tailored to your needs.

What to Look for When Buying Buying Guide
1. Compatibility with Your MacBook Pro Model
Before anything else, you must confirm that the SSD you’re considering is compatible with your specific MacBook Pro model. Apple has used different SSD form factors and connectors across generations, and using an incompatible drive will result in it not fitting or not being recognized at all.
For MacBook Pros released between 2012 and 2015 (non-Retina and early Retina models), the SSD uses a proprietary Apple connector that resembles an elongated PCIe slot. These drives are removable and replaceable, but they require specific adapters or direct-fit replacements. Models from 2016 onward—especially those with Touch Bar—often use a different connector, and many newer M-series MacBooks have storage soldered directly to the logic board, making internal upgrades impossible without specialized tools and expertise.
To check your model, go to Apple Menu > About This Mac. Note the year, model identifier (e.g., MacBookPro15,1), and chip type (Intel or Apple Silicon). Cross-reference this with manufacturer compatibility lists. Reputable brands like OWC (Other World Computing), Transcend, and Sintech provide detailed compatibility charts on their websites.
2. Performance Specifications
Speed matters—especially if you’re working with large files, multitasking heavily, or running resource-intensive applications. SSD performance is typically measured in two key metrics: sequential read/write speeds (in MB/s or GB/s) and random IOPS (Input/Output Operations Per Second).
For most MacBook Pro users, sequential speeds above 2,000 MB/s are more than sufficient. High-end NVMe SSDs can reach 3,500–7,000 MB/s, which is ideal for video editors, 3D animators, or developers working with large datasets. Random IOPS matter more for everyday tasks like booting up, launching apps, or switching between browser tabs—look for drives with at least 300,000 IOPS for smooth multitasking.
Keep in mind that your MacBook Pro’s Thunderbolt or USB-C port may limit external SSD speeds. Thunderbolt 3 and 4 support up to 40 Gbps (roughly 5,000 MB/s), while USB 3.2 Gen 2 caps out around 10 Gbps (1,250 MB/s). Always match your SSD’s interface to your Mac’s port capabilities to avoid bottlenecks.
3. Storage Capacity Needs
How much space do you really need? This depends entirely on your usage patterns. A casual user who mostly browses the web, streams media, and uses office apps might be fine with 512GB. But if you’re a photographer storing RAW images, a filmmaker editing 4K/8K video, or a gamer with large game libraries, you’ll want 1TB or more.
Consider future-proofing: storage fills up faster than you think. A 512GB drive might seem adequate today, but after installing macOS updates, creative apps like Final Cut Pro or Adobe Creative Cloud, and a few large projects, you could be down to under 100GB within a year. We recommend starting at 1TB if your budget allows—it offers the best balance of price, performance, and longevity.
Also note that SSDs perform better when they’re not nearly full. Apple recommends keeping at least 10–15% of your drive free for optimal performance and longevity. So a 512GB drive effectively gives you only about 430–460GB of usable space.
4. Build Quality & Durability
SSDs have no moving parts, making them inherently more durable than traditional hard drives. However, not all SSDs are built equally. Look for drives with robust controllers, high-quality NAND flash memory (preferably TLC or MLC over QLC), and solid thermal management—especially for external drives that may run hot during prolonged use.
For internal upgrades, ensure the drive is designed to fit snugly in your MacBook Pro’s SSD slot without requiring excessive force. Poorly designed adapters or loose-fitting drives can cause connection issues or physical damage. For external SSDs, consider ruggedized models with shock resistance, dust/water protection (IP55 or higher), and aluminum enclosures for heat dissipation.
Brand reputation plays a role here. Companies like Samsung, SanDisk, and OWC have established track records for reliability. Avoid no-name brands selling suspiciously cheap SSDs—they often use inferior components and lack proper firmware support.
5. Interface & Connection Type
The interface determines how your SSD connects to your MacBook Pro and directly impacts speed and compatibility. Internal SSDs for older MacBook Pros typically use PCIe 2.0 or 3.0 interfaces, while newer external drives rely on USB-C, Thunderbolt 3/4, or USB 3.2.
Thunderbolt SSDs offer the fastest speeds and are ideal for professionals who need near-internal performance from an external drive. USB-C SSDs are more affordable and widely compatible but may be limited by USB bandwidth. Always verify which ports your MacBook Pro has—older models may only support USB 3.0 (5 Gbps), while newer ones offer Thunderbolt 4.
If you’re upgrading an internal drive, pay close attention to the connector type. Apple used several proprietary designs, including the “blade” SSD in 2013–2015 models and the “B-key” M.2 connector in some 2016–2017 models. Using the wrong adapter or drive can result in physical damage or data loss.
6. Brand Reputation & Ecosystem Support
Not all SSD manufacturers are created equal. Some specialize in Mac-compatible hardware and offer better firmware, software tools, and customer support. OWC (Other World Computing), for example, has been making Mac-specific SSDs and accessories for over 30 years and provides detailed installation guides, data migration tools, and even free tech support.
Samsung and SanDisk are known for their high-performance consumer SSDs, but their products may require additional adapters or configuration for MacBook Pro use. Always check user forums and reviews to see if others have successfully used a particular drive with your model.
Additionally, consider whether the brand offers cloning software, backup utilities, or warranty services tailored to Mac users. These extras can save you hours of troubleshooting and ensure a smoother upgrade process.
7. Warranty & Support
A good warranty is a strong indicator of a manufacturer’s confidence in their product. Most reputable SSDs come with 3- to 5-year limited warranties, covering defects and premature failure. Some high-end models even offer up to 10 years of coverage.
Pay attention to what the warranty includes. Does it cover data recovery? Is there a replacement guarantee? Can you get support via phone, chat, or email? OWC, for instance, offers U.S.-based technical support and often provides free replacements for defective drives.
Avoid brands with vague or restrictive warranty terms. If a company only offers a 1-year warranty or requires you to ship the drive internationally for repairs, it’s a red flag. Also, note that opening your MacBook Pro to install an internal SSD may void Apple’s warranty—check your coverage status before proceeding.
8. Price vs. Value
It’s tempting to go for the cheapest SSD available, but this often leads to disappointment. Low-cost drives may use slower NAND, weaker controllers, or lack proper thermal throttling, resulting in poor performance under load or early failure.
Instead of focusing solely on price per gigabyte, consider total value: performance, durability, warranty, and ease of installation. A $200 1TB SSD from a trusted brand may outperform and outlast a $120 no-name alternative, saving you money in the long run.
Set a realistic budget based on your needs. For most users, spending between $150 and $300 for a 1TB SSD offers the best balance of quality and affordability. Premium drives with Thunderbolt support or enterprise-grade features can cost $400+, but they’re only necessary for specialized workflows.
Different Types of Buying Guide

Common Buying Mistakes to Avoid

❌ Mistake: Ignoring Model-Specific Compatibility
Why it’s bad: Apple’s SSD connectors vary significantly between models. Installing an incompatible drive can damage your MacBook Pro’s logic board or render the drive unusable.
What to do instead: Always verify your MacBook Pro’s exact model number and year before purchasing. Use manufacturer compatibility tools or consult forums like MacRumors or OWC’s support page.
❌ Mistake: Choosing Based Solely on Price
Why it’s bad: Extremely cheap SSDs often use low-grade NAND and lack proper error correction, leading to data corruption or sudden failure.
What to do instead: Prioritize value over absolute lowest cost. Look for drives from reputable brands with solid warranties and positive user reviews.
❌ Mistake: Overlooking Thermal Throttling
Why it’s bad: Some external SSDs overheat during sustained use, causing speeds to drop dramatically—especially in compact enclosures without cooling.
What to do instead: Choose drives with aluminum casings or built-in heat sinks. Read professional reviews that test sustained write performance.
❌ Mistake: Assuming All M.2 SSDs Work Internally
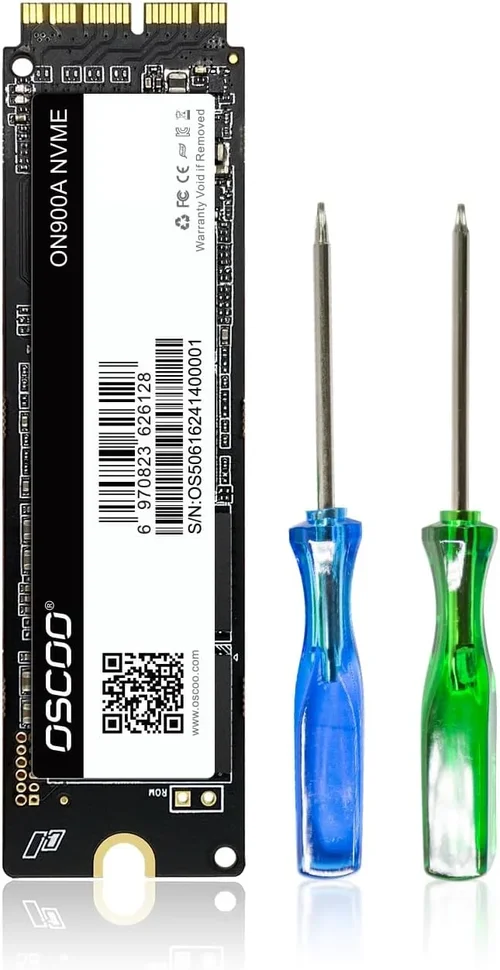
Why it’s bad: Many MacBook Pro models use proprietary connectors, not standard M.2 slots. Buying a generic M.2 NVMe drive without an adapter will result in a paperweight.
What to do instead: Only use drives specifically designed for your MacBook Pro model, such as OWC Aura Pro or Transcend JetDrive kits.
❌ Mistake: Skipping Data Backup Before Upgrade
Why it’s bad: Replacing or formatting an SSD erases all data. Without a backup, you risk losing irreplaceable files.
What to do instead: Always create a full Time Machine backup or clone your drive using tools like Carbon Copy Cloner or SuperDuper! before starting the upgrade.
❌ Mistake: Buying More Capacity Than Needed
Why it’s bad: Overspending on a 4TB drive when you only need 1TB wastes money and may not improve performance.
What to do instead: Assess your actual storage needs. Use macOS’s Storage Management tool (Apple Menu > About This Mac > Storage > Manage) to see what’s taking up space.
❌ Mistake: Neglecting Firmware Updates
Why it’s bad: Outdated firmware can cause compatibility issues, reduced performance, or security vulnerabilities.
What to do instead: Check the manufacturer’s website for firmware updates after installation. Some brands provide Mac-specific updater tools.
Budget Guidelines: How Much Should You Spend?
- Entry-Level ($80 – $150): Ideal for basic storage expansion or replacing a failing drive in an older MacBook Pro. Expect SATA-based speeds (500–550 MB/s) and capacities up to 1TB. Best for students or casual users. Examples: Samsung 870 EVO (with adapter), Kingston XS2000 (external).
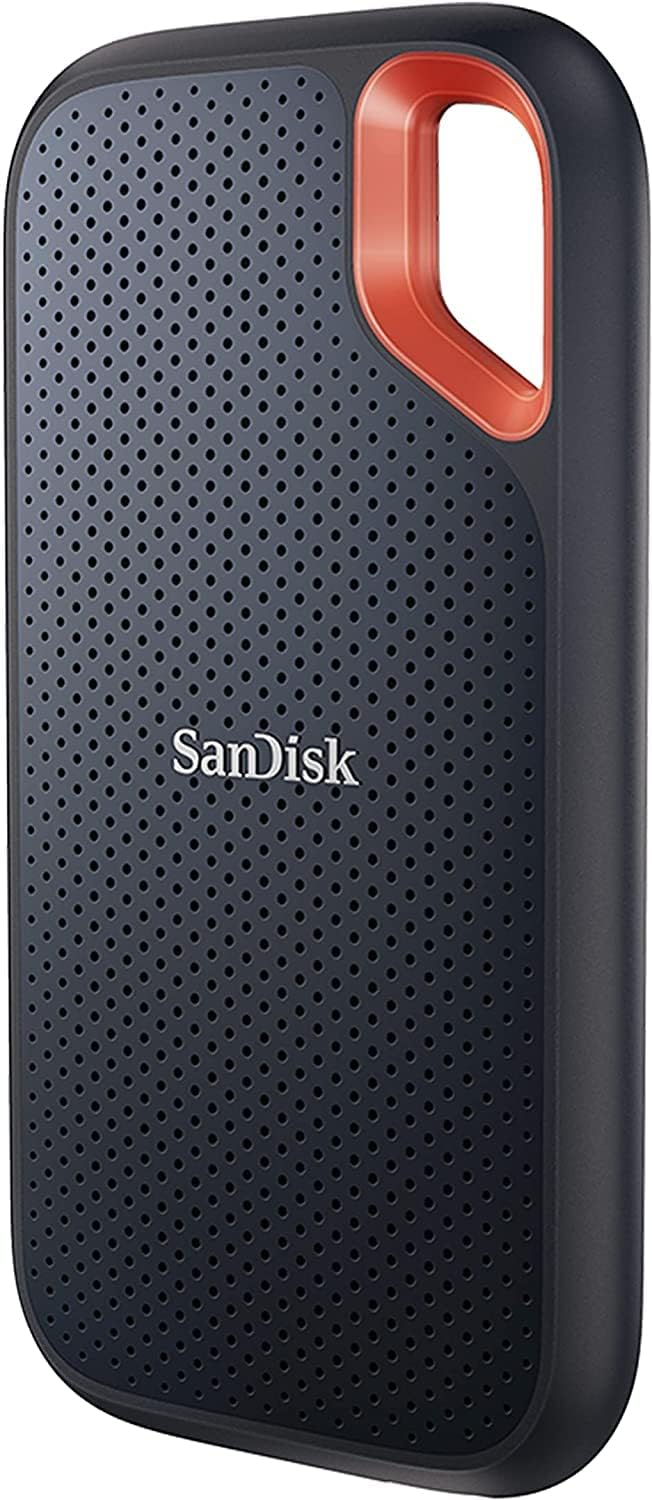
- Mid-Range ($150 – $300): The sweet spot for most users. Offers NVMe-level speeds (2,000–3,500 MB/s), 1TB–2TB capacity, and reliable performance. Great for creatives, developers, and power users. Examples: OWC Envoy Pro FX (Thunderbolt), SanDisk Extreme Pro (USB-C).
- Premium ($300 – $500): For professionals who demand top-tier speed, durability, and capacity. Includes Thunderbolt 3/4 drives with 2,800+ MB/s speeds and rugged designs. Ideal for 4K/8K video editing, large database work, or frequent travel. Examples: Samsung X5, OWC Envoy Express.
- Luxury ($500+): High-capacity (4TB+) enterprise-grade SSDs or custom-built solutions. Typically used by studios, IT departments, or enthusiasts with extreme storage needs. Overkill for most individuals but justified for mission-critical workflows.

Expert Tips for Getting the Best Deal
- Buy During Seasonal Sales: Major retailers like Amazon, Best Buy, and B&H Photo offer significant discounts on SSDs during holidays and shopping events. Sign up for price alerts using tools like CamelCamelCamel or Honey.
- Choose Authorized Retailers: Purchase from authorized dealers to ensure warranty validity and avoid counterfeit products. Avoid third-party sellers with unclear return policies.
- Check Return Policies: Even the best SSDs can arrive defective. Choose retailers with at least 30-day return windows and free return shipping.
- Consider Refurbished or Open-Box Deals: Certified refurbished SSDs from reputable sellers often come with full warranties and can save you 15–25%. Just ensure they’re tested and include original accessories.
- Use Manufacturer Rebates: Some brands offer mail-in rebates or instant discounts on their websites. OWC frequently runs promotions for Mac users.
- Test Before Committing: If possible, test the SSD with your MacBook Pro before finalizing the setup. Use Blackmagic Disk Speed Test or AmorphousDiskMark to verify real-world performance.
- Bundle with Accessories: Some kits include USB-C cables, adapters, or cloning software—adding value beyond the drive itself.
- Don’t Rush the Installation: If you’re replacing an internal SSD, watch a model-specific tutorial first. Rushing can lead to static damage or connector misalignment.
Frequently Asked Questions
Q: Can I upgrade the SSD in my M1/M2 MacBook Pro?
A: Unfortunately, no. Apple solders the storage directly to the logic board in all M-series MacBook Pros (2020 and later). Internal upgrades are not possible without specialized microsoldering equipment and expertise. Your best option is a high-speed external SSD via Thunderbolt or USB-C.
Q: Will upgrading my SSD void my Apple warranty?
A: If your MacBook Pro is still under Apple’s limited warranty or AppleCare+, opening it to replace the SSD may void coverage—especially if damage occurs during the process. Check your warranty status first. For out-of-warranty models, this isn’t a concern.
Q: Do I need special software to clone my old drive?
A: Yes. macOS doesn’t include built-in disk cloning tools. Use free options like Carbon Copy Cloner or SuperDuper!, or paid software like ChronoSync. OWC also provides free cloning utilities with their drives.
Q: Are external SSDs as fast as internal ones?
A: Not always—but Thunderbolt 3/4 external SSDs can match or exceed the speed of many internal drives (up to 2,800 MB/s). USB-C drives are typically slower but still much faster than HDDs. For most users, the difference is negligible in daily use.
Q: How long do SSDs last?
A: Modern SSDs are extremely durable. Most consumer drives are rated for 150–600 terabytes written (TBW). With normal use, an SSD should last 5–10 years. macOS also includes TRIM support to extend lifespan.
Q: Can I use a PC SSD in my MacBook Pro?
A: Only if it’s compatible with your model’s connector and interface. Generic M.2 NVMe drives won’t work in older MacBook Pros without an adapter. Always choose Mac-specific drives or verified cross-platform models.
Q: What’s the difference between SATA and NVMe SSDs?
A: SATA SSDs use an older interface with max speeds around 550 MB/s. NVMe SSDs use the PCIe interface and are significantly faster (2,000–7,000 MB/s). For MacBook Pros, NVMe is preferred when supported.
Q: Should I encrypt my SSD?
A: Yes, especially if you store sensitive data. Use macOS’s built-in FileVault encryption, which works seamlessly with SSDs and has minimal performance impact.
Q: Can I use multiple external SSDs at once?
A: Absolutely. macOS supports multiple external drives simultaneously. Just ensure your MacBook Pro has enough ports or use a Thunderbolt dock for expanded connectivity.
Our Final Recommendations
- Best for Budget-Conscious Buyers: Samsung T7 Shield (1TB) – Durable, fast (1,050 MB/s), and affordable at around $120. Great for everyday use and light creative work.
- Best Overall Value: OWC Envoy Pro FX (1TB) – Thunderbolt 3 speeds (2,800 MB/s), compact design, and excellent Mac support. Perfect for professionals who need speed and reliability.
- Best Premium Option: Samsung X5 (2TB) – Blazing-fast NVMe performance over Thunderbolt 3, ideal for 8K video editors and data-intensive workflows. Expensive but unmatched in speed.
- Best for Beginners: SanDisk Extreme Portable SSD (1TB) – Simple plug-and-play setup, USB-C connectivity, and solid performance. Comes with backup software and a 5-year warranty.
- Best for Advanced Users: OWC Aura Pro X2 (for 2013–2015 MacBook Pros) – A true internal replacement SSD with PCIe 3.0 speeds and seamless macOS integration. Requires technical skill to install but offers the best internal upgrade experience.
Conclusion: Making the Right Choice
Upgrading your MacBook Pro’s SSD is one of the most impactful improvements you can make—boosting speed, expanding storage, and extending the life of your machine. But with so many options, compatibility concerns, and technical nuances, it’s easy to feel overwhelmed. The key is to start with your specific needs: your MacBook Pro model, your workflow, your budget, and your tolerance for DIY installation.
Remember, the “best” SSD isn’t always the fastest or most expensive—it’s the one that fits your use case perfectly. Whether you’re a student needing extra space for assignments, a filmmaker transferring hours of footage, or a developer compiling code, there’s an SSD out there designed for you. Prioritize compatibility, reliability, and real-world performance over marketing hype.
Take your time, do your research, and don’t hesitate to reach out to manufacturer support if you’re unsure. And once you’ve made your choice, back up your data, follow installation guides carefully, and enjoy the newfound speed and capacity. Your MacBook Pro—and your productivity—will thank you.