
The MacBook Pro is a powerhouse machine—renowned for its sleek design, robust performance, and seamless integration with macOS. Whether you’re a creative professional editing 4K video, a developer compiling code, or a student managing research projects, your MacBook Pro’s storage drive plays a pivotal role in how efficiently it operates. While Apple’s factory-installed SSDs are generally reliable, many users eventually seek to upgrade or replace their drives—whether due to insufficient capacity, slower-than-expected speeds, or hardware failure. This is where choosing the right SSD becomes critical.
Upgrading your MacBook Pro’s SSD can dramatically improve boot times, application loading, file transfers, and overall system responsiveness. However, the process isn’t as simple as plugging in any off-the-shelf drive. Apple uses proprietary connectors and firmware, and compatibility varies significantly between models and years. A poorly chosen SSD can lead to instability, data loss, or even permanent damage to your MacBook. That’s why this guide exists: to cut through the confusion and help you make an informed, confident decision. By the end, you’ll understand exactly what to look for, which models are worth your money, and how to avoid common pitfalls.
The SSD market for MacBook Pro users is more dynamic than ever. While Apple has locked down internal upgrades on newer models (especially those with M1, M2, and M3 chips), there are still viable upgrade paths for older Intel-based MacBook Pros and external solutions for all models. Third-party manufacturers like OWC (MacSales), Transcend, and Sabrent have stepped up with high-quality, Apple-compatible SSDs that offer excellent performance and reliability. Meanwhile, external Thunderbolt and USB-C SSDs provide flexible, high-speed storage for users who need portability or extra capacity without opening their machines. This guide covers both internal and external options, ensuring you find the best fit for your needs, budget, and technical comfort level.

What to Look for When Buying Buying Guide
1. Compatibility with Your MacBook Pro Model
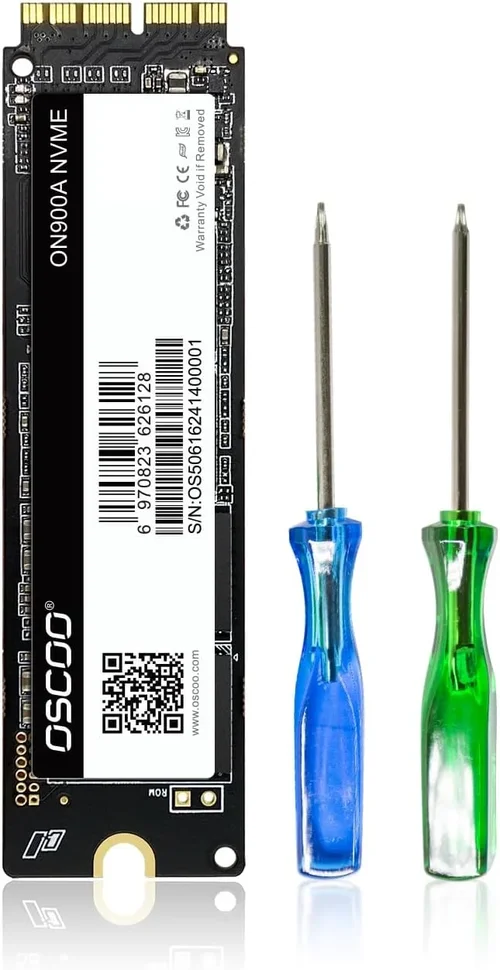
The single most important factor when selecting an SSD for your MacBook Pro is compatibility. Apple has used several different SSD form factors and connectors over the years, and using the wrong drive can result in physical incompatibility or failure to boot. For example, MacBook Pros from 2013 to 2015 typically use a proprietary 12+16 pin connector, while models from 2016 to 2019 often use a different 12+16 pin layout with updated firmware requirements. The 2020 and later Intel models may support NVMe-based drives, but still require specific Apple firmware.
To determine your exact model, click the Apple logo in the top-left corner of your screen, select “About This Mac,” and note the model identifier (e.g., MacBookPro15,1). Cross-reference this with manufacturer compatibility lists. OWC and Transcend, for instance, provide detailed compatibility charts on their websites. If you’re unsure, consult Apple’s official support documentation or use tools like Mactracker. Never assume a drive will work just because it’s labeled “for Mac”—always verify the exact model year and connector type.
2. Performance Specifications
SSD performance is measured primarily by read and write speeds, typically expressed in megabytes per second (MB/s). For MacBook Pro users, faster speeds translate to quicker boot times, snappier app launches, and smoother multitasking. Most modern SSDs use the NVMe protocol over PCIe lanes, which offers significantly higher bandwidth than older SATA-based drives.
For internal upgrades, look for drives with sequential read speeds of at least 2,000 MB/s and write speeds above 1,500 MB/s. High-end models like the OWC Aura Pro X2 can exceed 3,000 MB/s, rivaling Apple’s own factory drives. However, real-world performance also depends on controller quality, NAND flash type (TLC vs. QLC), and thermal management. QLC drives are cheaper but wear out faster under heavy write loads, making them less ideal for video editors or developers.
External SSDs connected via Thunderbolt 3 or USB 3.2 Gen 2 can also deliver impressive speeds—up to 2,800 MB/s with Thunderbolt. These are excellent for users who want high-speed external storage without opening their MacBook. Just ensure your MacBook Pro has the appropriate port (Thunderbolt 3/4 for best results).
3. Storage Capacity Needs
Storage capacity directly impacts how much data you can store locally—apps, projects, media files, and system files all consume space. Apple’s base models often start at 256GB or 512GB, which can fill up quickly, especially for creative professionals. Upgrading to 1TB, 2TB, or even 4TB can future-proof your system and reduce reliance on cloud storage.
Consider your workflow: a photographer working with RAW files may need 2TB just for a single project, while a student might be fine with 512GB. Keep in mind that larger capacities generally offer better performance and longevity due to more NAND chips distributing wear. Also, macOS itself requires at least 30–40GB of free space for optimal performance, so don’t max out your drive.
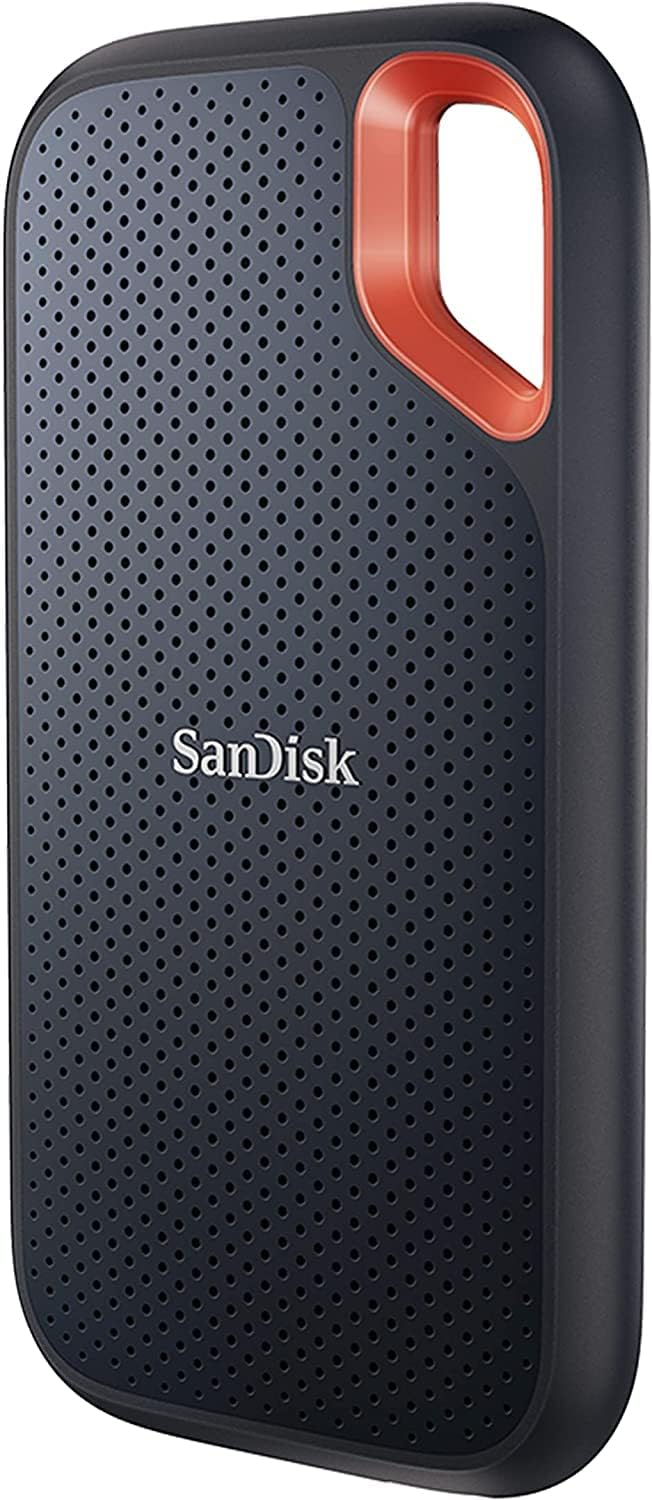
For external SSDs, 1TB to 2TB is a sweet spot for most users. Portable drives like the Samsung T7 Shield or SanDisk Extreme Pro offer rugged designs and fast speeds in compact form factors. If you’re backing up large libraries or editing video externally, consider 4TB models, though they come at a premium.
4. Build Quality & Durability
SSDs have no moving parts, making them inherently more durable than traditional hard drives. However, build quality still varies. Look for drives with robust enclosures, especially for external models that may be dropped or exposed to dust and moisture. Ruggedized SSDs often feature IP65 or IP67 ratings, meaning they’re dust-tight and can withstand water jets or brief submersion.
Internal SSDs should be built with high-quality NAND flash and controllers. Brands like Samsung, Crucial, and OWC use enterprise-grade components that offer better endurance and thermal performance. Avoid no-name brands that cut corners on materials—these may fail prematurely or throttle under load.
Thermal management is another key factor. High-performance SSDs generate heat, and without proper heat dissipation, they may throttle speeds to prevent damage. Some aftermarket drives include built-in heat sinks or thermal pads, which are especially useful in tightly packed MacBook Pro chassis. If your model has limited airflow, consider a drive with low power consumption and efficient thermal design.
5. Brand Reputation & Reliability
Not all SSD brands are created equal. Established manufacturers with a history of producing reliable storage solutions are your best bet. OWC (MacSales) is particularly respected in the Mac community for its Apple-specific engineering and excellent customer support. Their drives are rigorously tested for macOS compatibility and often come with cloning software and installation kits.
Samsung, SanDisk, and Crucial are also trusted names, though their drives may require additional setup for Mac use. Avoid generic brands sold on marketplaces like Amazon or eBay with vague descriptions and no verified reviews. These often use rebranded or counterfeit components and lack proper firmware support.
Check user forums like MacRumors, Reddit’s r/mac, and Apple Support Communities for real-world feedback. A drive with hundreds of positive reviews and minimal reports of failure is a safer choice than one with mixed or sparse feedback. Reliability matters—especially when your data is at stake.
6. Warranty & Support
A solid warranty is a strong indicator of a manufacturer’s confidence in their product. Most reputable SSDs come with a 3- to 5-year limited warranty, covering defects and premature failure. OWC, for example, offers a 3-year warranty on its Aura Pro series, with optional extended coverage.
Support matters too. If something goes wrong, you want responsive customer service, clear troubleshooting guides, and easy RMA processes. Brands with dedicated Mac support teams (like OWC) are preferable, as they understand macOS-specific issues like TRIM support, sleep/wake behavior, and firmware updates.
Always register your drive after purchase to activate the warranty. Keep your receipt and packaging in case you need to return it. Some manufacturers also offer data recovery services or partnerships with recovery firms, which can be a lifesaver in worst-case scenarios.
7. Price & Value for Money
SSD prices have dropped significantly in recent years, but they still represent a meaningful investment. As of 2026, expect to pay anywhere from $80 for a basic 512GB SATA drive to over $600 for a high-capacity, high-performance NVMe model. The key is balancing cost with performance, capacity, and reliability.
Don’t fall for the cheapest option—low-cost drives often use inferior NAND or lack proper macOS support. Conversely, avoid overpaying for features you don’t need. A 4TB drive may be overkill if you only store documents and photos. Instead, focus on value: how much performance and peace of mind you get per dollar.
Compare prices across retailers like OWC, B&H Photo, Amazon, and Best Buy. Watch for seasonal sales (Black Friday, back-to-school, Prime Day) when SSDs often see 20–30% discounts. Bundled kits with installation tools or cloning software can also improve value.
8. Ease of Installation & Use
Installing an internal SSD in a MacBook Pro can be intimidating, especially if you’ve never opened a laptop before. Some models require specialized tools (like pentalobe screwdrivers) and careful handling of delicate components. If you’re not comfortable with disassembly, consider professional installation—many Apple Authorized Service Providers offer this service.
External SSDs are plug-and-play and require no technical skill. Simply connect via USB-C or Thunderbolt, format using Disk Utility, and you’re ready to go. They’re ideal for users who want extra storage without risking their warranty or data.
For internal upgrades, look for drives that come with installation guides, cloning software (like Carbon Copy Cloner or SuperDuper!), and necessary tools. OWC’s kits include everything you need, making the process smoother. Always back up your data before attempting any upgrade.
Different Types of Buying Guide

Common Buying Mistakes to Avoid
❌ Mistake: Buying a PC SSD Without Checking Compatibility
Why it’s bad: Many users assume that because an SSD uses NVMe, it will work in their MacBook Pro. However, Apple’s proprietary connectors and firmware requirements mean that most PC SSDs won’t fit or function properly. Even if they do, macOS may not enable TRIM support, leading to degraded performance over time.
What to do instead: Always choose SSDs specifically designed for Mac. Look for models labeled “Mac-compatible” or sold by reputable Mac-focused retailers like OWC or Transcend. Verify the exact model number and connector type before purchasing.
❌ Mistake: Overlooking Warranty and Support
Why it’s bad: A cheap SSD might save you $50 upfront, but if it fails after six months with no warranty, you’ve lost both money and data. Generic brands often offer minimal or no customer support, leaving you stranded.
What to do instead: Prioritize brands with strong warranties (3+ years) and responsive support. Register your drive and keep documentation. Consider extended warranty options if available.
❌ Mistake: Choosing the Largest Capacity Without Need
Why it’s bad: A 4TB SSD may seem like future-proofing, but if you only use 200GB, you’re paying a premium for unused space. High-capacity drives also tend to be more expensive per gigabyte at the top end.
What to do instead: Assess your actual storage needs. Use tools like DaisyDisk or GrandPerspective to analyze your current usage. Opt for 1TB or 2TB unless you regularly work with large media files.
❌ Mistake: Ignoring Thermal Performance
Why it’s bad: High-speed SSDs generate heat, and MacBook Pros have limited internal cooling. Without proper thermal management, your drive may throttle, reducing performance during sustained workloads like video rendering.
What to do instead: Choose drives with efficient controllers and consider models with built-in heat spreaders. Avoid overclocked or excessively power-hungry drives unless your MacBook has adequate ventilation.
❌ Mistake: Skipping Data Backup Before Installation
Why it’s bad: Installing a new SSD involves wiping your existing drive. Without a backup, you risk losing all your files, apps, and settings.
What to do instead: Always back up using Time Machine or a cloning tool before starting. Test the backup to ensure it’s bootable. Keep the backup until you’re confident the new drive is working properly.
❌ Mistake: Buying Based Solely on Price
Why it’s bad: The cheapest SSD may use low-quality NAND, lack macOS optimization, or fail prematurely. You’re investing in long-term reliability, not just a one-time purchase.
What to do instead: Focus on value, not just cost. Compare performance, warranty, brand reputation, and user reviews. A slightly more expensive drive from a trusted brand often pays off in durability and peace of mind.
❌ Mistake: Assuming All External SSDs Are Equal
Why it’s bad: USB-C and Thunderbolt SSDs differ vastly in speed and compatibility. A USB 3.2 drive won’t deliver the same performance as a Thunderbolt 3 model, even if both use the same port.
What to do instead: Match the SSD to your MacBook’s capabilities. If you have Thunderbolt 3/4, invest in a Thunderbolt SSD for maximum speed. For older models, USB 3.2 Gen 2 is sufficient for most tasks.
Budget Guidelines: How Much Should You Spend?
- Entry-Level ($80–$150): Ideal for basic upgrades or external storage. Look for 512GB USB-C SSDs from SanDisk or Samsung. These offer solid performance for everyday tasks but may lack ruggedness or Thunderbolt support.
- Mid-Range ($150–$300): The sweet spot for most users. Includes 1TB internal NVMe drives (OWC Aura Pro) or high-speed external SSDs (Samsung T7). Great balance of speed, capacity, and reliability.
- Premium ($300–$500): For professionals and power users. Features 2TB+ capacities, Thunderbolt connectivity, and enterprise-grade components. Models like the OWC Envoy Pro FX or Sabrent Rocket XTRM-Q fall here.
- Luxury ($500+): Top-tier performance and capacity. Includes 4TB internal drives or ultra-rugged external SSDs with IP68 ratings. Best for filmmakers, developers, or users who demand maximum reliability and speed.

Expert Tips for Getting the Best Deal
- Buy during sales events: Black Friday, Cyber Monday, and back-to-school seasons often feature significant SSD discounts. Sign up for newsletters from OWC, B&H, and Amazon to get early alerts.
- Compare retailers: Prices can vary widely. Check OWC, Amazon, Best Buy, and Newegg. Sometimes bundled kits offer better value than standalone drives.
- Check refurbished options: Certified refurbished SSDs from manufacturers like OWC come with full warranties and can save you 20–30%.
- Read return policies: Ensure the retailer offers at least a 30-day return window. Some drives may require formatting or firmware updates that aren’t immediately obvious.
- Use price tracking tools: Tools like CamelCamelCamel (for Amazon) or Honey can alert you when prices drop.
- Consider total cost of ownership: Include tools, software, and potential installation fees in your budget. A cheaper drive may end up costing more if you need professional help.
- Test before committing: If possible, test the SSD in your MacBook before finalizing the setup. Check for boot issues, speed consistency, and thermal behavior.
Frequently Asked Questions
Q: Can I upgrade the SSD in a MacBook Pro with an M1 or M2 chip?
A: Unfortunately, no. Apple has soldered the SSD directly to the logic board in M1, M2, and M3 MacBook Pros, making internal upgrades impossible. Your only option is external SSDs via Thunderbolt or USB-C.
Q: Will a third-party SSD void my warranty?
A: Opening your MacBook Pro may void the hardware warranty, especially if done improperly. However, using an external SSD does not affect warranty coverage. For internal upgrades, consider professional installation to minimize risk.
Q: Do I need to enable TRIM manually?
A: Yes, for third-party SSDs. macOS doesn’t enable TRIM by default on non-Apple drives. Use the command sudo trimforce enable in Terminal, or use a tool like OnyX to manage it safely.
Q: How do I clone my existing drive to a new SSD?
A: Use cloning software like Carbon Copy Cloner, SuperDuper!, or OWC’s own tools. Connect both drives (internally or via USB), select the source and destination, and start the clone. Ensure the new drive is equal or larger in capacity.
Q: Are external SSDs as fast as internal ones?
A: With Thunderbolt 3/4, yes—external SSDs can match or exceed internal speeds. USB-C drives are fast but limited by the USB protocol. For most users, the difference is negligible in real-world use.
Q: Can I use an SSD from a Windows PC in my MacBook Pro?
A: Generally, no. PC SSDs use different connectors and lack macOS firmware. Even if physically compatible, they may not be recognized or perform poorly.
Q: How long do MacBook Pro SSDs last?
A: Modern SSDs are rated for hundreds of terabytes written (TBW). For typical users, a 1TB drive can last 5–10 years. Heavy workloads may reduce lifespan, but failure is rare with quality drives.
Q: Should I choose TLC or QLC NAND?
A: TLC (Triple-Level Cell) is more durable and faster than QLC (Quad-Level Cell). Choose TLC for performance and longevity, especially for internal drives. QLC is acceptable for external, light-use SSDs.
Q: Can I use multiple external SSDs at once?
A: Yes, as long as your MacBook Pro has enough ports or a hub. macOS supports multiple drives simultaneously, useful for backups, projects, or media libraries.
Q: What’s the difference between SATA and NVMe SSDs?
A: NVMe is faster and more efficient than SATA. NVMe drives use the PCIe interface and can reach speeds over 3,000 MB/s, while SATA is capped at around 550 MB/s. Most modern MacBook Pros use NVMe.
Our Final Recommendations
- Best for Budget-Conscious Buyers: Samsung T7 Shield (1TB) – Reliable, fast, and affordable at around $120. Great for students and casual users.
- Best Overall Value: OWC Aura Pro X2 (1TB) – Perfect for Intel MacBook Pro upgrades. Excellent speed, macOS-optimized, and comes with cloning software.
- Best Premium Option: OWC Envoy Pro FX (2TB) – Thunderbolt 3 external SSD with blazing speeds and rugged design. Ideal for professionals.
- Best for Beginners: Transcend JetDrive 820S (512GB) – Easy-to-install internal SSD with clear guides and solid performance for older MacBook Pros.
- Best for Advanced Users: Sabrent Rocket XTRM-Q (4TB) – High-capacity, high-speed external SSD with Thunderbolt support. Built for heavy workloads and large media files.
Conclusion: Making the Right Choice
Choosing the best SSD for your MacBook Pro isn’t just about speed or capacity—it’s about finding the right balance of compatibility, reliability, and value for your specific needs. Whether you’re upgrading an older Intel model or expanding storage on a newer M-series MacBook, the options are better than ever. By focusing on trusted brands, verifying compatibility, and avoiding common pitfalls, you can significantly enhance your MacBook’s performance and longevity.
Remember, your SSD is the foundation of your system’s responsiveness. Invest wisely, back up regularly, and don’t hesitate to seek professional help if you’re unsure about installation. With the right drive, your MacBook Pro will feel faster, more capable, and ready to handle whatever you throw at it. Take the time to evaluate your workflow, budget, and technical comfort level—then make a decision that supports your goals, not just your wallet. Your future self will thank you.