

The internal SSD market for Mac users has evolved dramatically over the past few years, and choosing the right drive can feel overwhelming—especially when Apple’s hardware ecosystem is tightly controlled and often restrictive. Whether you’re upgrading an older MacBook Pro, replacing a failing drive in a Mac mini, or building out a high-performance workstation with a Mac Studio, selecting the best internal SSD format isn’t just about speed or capacity. It’s about compatibility, longevity, performance consistency, and future-proofing your investment. With Apple’s shift away from user-replaceable storage in many newer models, getting this decision right the first time is more critical than ever.
This comprehensive buying guide is designed to cut through the noise and deliver expert-level insights tailored specifically for Mac users. You’ll learn how to evaluate SSD formats—from NVMe M.2 to Apple’s proprietary blade-style connectors—and understand which ones work with your specific Mac model. We’ll break down key technical specifications like interface types, NAND flash technology, controller quality, and thermal management, all while keeping real-world usability in mind. Whether you’re a creative professional handling 8K video files, a developer compiling large codebases, or a student looking to breathe new life into an aging MacBook, this guide will equip you with the knowledge to make a confident, informed decision.
The market today offers a wide range of options, from budget-friendly SATA-based drives to cutting-edge PCIe 4.0 and even PCIe 5.0 NVMe SSDs that push the limits of what’s possible on macOS. However, not all SSDs are created equal—and not all are compatible with every Mac. Some require adapters, others may void your warranty, and a few might not be recognized at all by macOS due to firmware or encryption issues. By the end of this guide, you’ll know exactly what to look for, which pitfalls to avoid, and how to maximize both performance and value when upgrading your Mac’s internal storage.

What to Look for When Buying Buying Guide
1. Compatibility with Your Mac Model
Before considering speed or price, the single most important factor is whether the SSD will physically and logically work with your Mac. Apple uses different internal storage formats across its product line, and compatibility varies significantly by year and model. For example, MacBook Pros from 2013–2015 typically use a proprietary Apple blade SSD (sometimes called “Apple SSD” or “PCIe-based”), while models from 2016 onward often use standard NVMe M.2 drives—but with caveats. The 2016–2019 MacBook Pros, for instance, use a custom M.2 connector that’s shorter than the standard 2280 size and may require specific firmware.
Newer Macs like the M1 and M2 MacBook Air, MacBook Pro, Mac mini, and Mac Studio use Apple’s unified memory architecture and soldered storage, meaning internal upgrades are impossible without specialized tools and expertise—and even then, it’s risky. Always check your exact Mac model (found under Apple Menu > About This Mac) and cross-reference it with trusted upgrade databases like OWC’s Mac Compatibility Guide or Crucial’s Scanner Tool. Using an incompatible drive can result in boot failures, data corruption, or complete system unresponsiveness.
2. Interface and Protocol: NVMe vs. SATA
The interface determines how fast data can move between your SSD and the rest of your system. For Mac users, NVMe (Non-Volatile Memory Express) is the gold standard for modern internal SSDs. Unlike older SATA III drives, which max out around 550 MB/s, NVMe drives leverage the PCIe bus to deliver significantly higher speeds—often exceeding 3,500 MB/s on PCIe 3.0 and over 7,000 MB/s on PCIe 4.0.
Most Macs that support internal SSD upgrades are designed for NVMe-based storage. SATA SSDs are rarely used internally in Macs (except in very old models like the 2012 MacBook Pro), and even when they are, performance gains over the original drive are minimal. Always verify that your Mac supports NVMe before purchasing. You can usually find this information in Apple’s technical specifications or by consulting community forums like MacRumors or Reddit’s r/macbuilds.
Additionally, pay attention to the PCIe generation. While PCIe 3.0 is still widely supported and offers excellent performance, newer Macs with Apple Silicon (M1, M2, M3) are optimized for PCIe 4.0, which doubles the bandwidth. However, unless you’re working with extremely large files or doing intensive video editing, the real-world difference between PCIe 3.0 and 4.0 may not be noticeable for everyday tasks.
3. Form Factor and Physical Dimensions
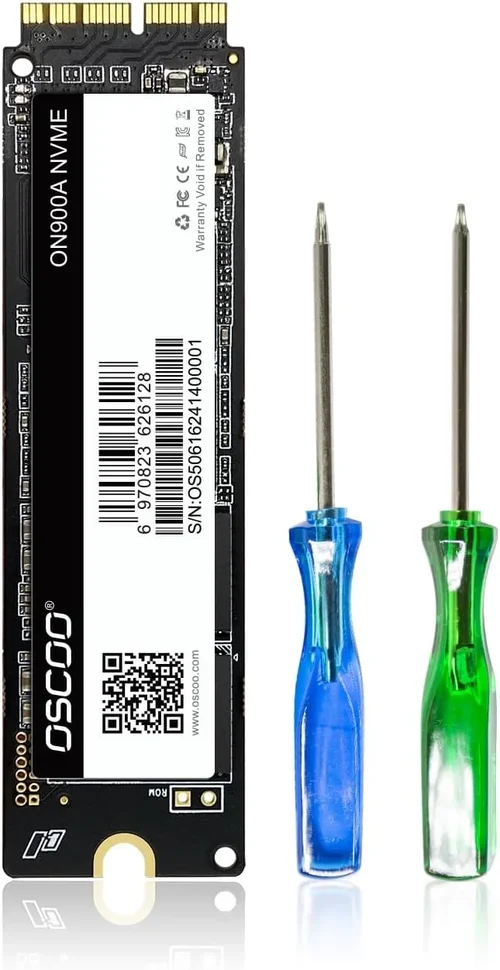
SSDs come in various form factors, but for internal Mac upgrades, the two most relevant are M.2 2280 and Apple’s proprietary blade-style connectors. The M.2 2280 (22mm wide, 80mm long) is the industry standard and used in many Windows laptops and some Macs. However, Apple has historically deviated from this norm.
For example, MacBook Pros from 2013–2015 use a unique “blade” SSD that’s thinner and shorter than M.2, often labeled as “Apple SSD” or “PCIe x4.” These drives are not cross-compatible with standard M.2 slots and require specific replacements. Meanwhile, 2016–2019 MacBook Pros use a hybrid form factor: they look like M.2 but have a different keying (notch position) and may not fit standard M.2 enclosures without an adapter.
Always measure your existing drive or consult your Mac’s service manual before buying. A drive that’s even slightly too long or wide can prevent the bottom case from closing properly—or worse, damage internal components. Some third-party manufacturers like OWC and Transcend offer Mac-specific SSDs that match Apple’s exact dimensions and connector layouts.
4. Performance Specifications: Read/Write Speeds and IOPS
While raw speed numbers (like 3,500 MB/s read) look impressive on paper, they don’t tell the whole story. Sustained performance under load, random read/write speeds (measured in IOPS—Input/Output Operations Per Second), and controller efficiency are equally important, especially for creative workflows.
For example, a drive might advertise 7,000 MB/s sequential read speeds, but if it throttles after 30 seconds due to overheating or uses a low-quality controller, real-world performance will suffer. Look for SSDs with DRAM cache, which helps maintain consistent speeds during heavy multitasking or large file transfers. DRAMless SSDs are cheaper but can become sluggish when the drive is nearly full or under sustained load.
IOPS matter more for tasks like database operations, software development, or running virtual machines. A high IOPS rating (e.g., 500,000+ random read IOPS) indicates better responsiveness when accessing many small files—common in macOS system operations. For general use, sequential speeds are more relevant, but for power users, balancing both is key.
5. NAND Flash Type: TLC vs. QLC vs. SLC
The type of NAND flash memory used in an SSD affects durability, speed, and cost. Triple-Level Cell (TLC) NAND stores three bits per cell and offers a good balance of performance, endurance, and price—it’s the most common type in consumer SSDs and ideal for Mac users. Quad-Level Cell (QLC) NAND stores four bits per cell, increasing density and lowering cost, but at the expense of write speed and longevity.
QLC drives are acceptable for light workloads (web browsing, document editing) but can struggle with sustained writes, such as video editing or large backups. They also tend to have lower TBW (Terabytes Written) ratings, meaning they wear out faster under heavy use. Single-Level Cell (SLC) NAND is the most durable and fastest but is prohibitively expensive and typically reserved for enterprise applications.
For Mac users, TLC-based NVMe SSDs are the sweet spot. Avoid QLC unless you’re on a tight budget and only need basic storage expansion. Always check the TBW rating—a higher number means the drive can handle more writes over its lifetime. For a 1TB TLC drive, expect 600–1,200 TBW; for QLC, it may be as low as 200–400 TBW.
6. Brand Reputation and Reliability
Not all SSD brands are created equal. While you might be tempted by ultra-cheap no-name drives on Amazon or eBay, these often use inferior controllers, lack firmware updates, and may fail prematurely. Stick with reputable manufacturers known for quality control and macOS compatibility.
Top-tier brands like Samsung (970 EVO Plus, 980 Pro), Western Digital (WD Black SN850X), Crucial (P5 Plus), and OWC (Aura Pro) have proven track records with Mac users. These companies offer reliable performance, regular firmware updates, and strong customer support. OWC, in particular, specializes in Mac upgrades and provides detailed compatibility guides and even bootable macOS installers for their drives.
Avoid brands with limited reviews or those that don’t disclose technical specifications clearly. A reliable brand also typically offers better warranty terms and faster RMA (Return Merchandise Authorization) processes, which is crucial if your drive fails.
7. Warranty and Support
A good warranty is a strong indicator of a manufacturer’s confidence in their product. Most premium SSDs come with 5-year limited warranties, often tied to TBW limits. For example, a 1TB drive with a 600 TBW rating and 5-year warranty means you’re covered if the drive fails before writing 600 terabytes or within five years, whichever comes first.
Check the warranty terms carefully. Some brands require registration, while others offer international coverage—important if you travel frequently. Also, consider the ease of the RMA process. Samsung and WD have streamlined online systems, while lesser-known brands may require lengthy email exchanges or shipping to overseas service centers.
Customer support matters too. If you run into installation issues or compatibility problems, having access to knowledgeable tech support can save hours of frustration. Brands like OWC and Crucial offer live chat and phone support specifically for Mac users.
8. Thermal Management and Throttling
High-performance NVMe SSDs generate heat, and without proper cooling, they can throttle—slowing down to prevent damage. This is especially relevant in compact Macs like the MacBook Air or Mac mini, where airflow is limited.
Look for SSDs with built-in thermal throttling protection or consider adding a heatsink if your Mac’s design allows it. Some third-party SSDs, like the WD Black SN850X, include integrated heat spreaders. Others may require a separate M.2 heatsink, though this isn’t always feasible in tightly packed Mac internals.
Monitor drive temperatures using tools like DriveDx or Intel SSD Toolbox (for compatible drives). Sustained temperatures above 70°C can reduce lifespan and performance. If your Mac runs hot during normal use, prioritize drives with efficient controllers and low power draw.
Different Types of Buying Guide

Common Buying Mistakes to Avoid
❌ Mistake: Assuming All M.2 SSDs Are Compatible
Why it’s bad: Many Macs use non-standard M.2 keying or require specific firmware. Installing a generic M.2 drive can result in the Mac not recognizing the drive or failing to boot.
What to do instead: Always verify your Mac’s exact SSD requirements. Use tools like M.2 SSD compatibility checkers or consult Mac-specific upgrade guides from OWC or iFixit.
❌ Mistake: Ignoring Thermal Throttling
Why it’s bad: High-speed NVMe drives can overheat in compact Macs, causing performance drops during sustained workloads like video rendering.
What to do instead: Choose drives with efficient controllers or consider thermal pads/heatsinks if space allows. Monitor temps with diagnostic software.
❌ Mistake: Buying QLC NAND for Heavy Workloads
Why it’s bad: QLC drives slow down significantly during large writes and have lower endurance, making them unsuitable for creative professionals.
What to do instead: Opt for TLC-based SSDs with DRAM cache for consistent performance under load.
❌ Mistake: Overlooking Warranty and Support
Why it’s bad: A failed SSD can mean lost data and downtime. Poor warranty terms or slow RMA processes compound the problem.
What to do instead: Prioritize brands with 5-year warranties and responsive customer support. Register your drive upon purchase.
❌ Mistake: Upgrading Soldered Storage on Apple Silicon Macs
Why it’s bad: Attempting to replace soldered storage on M1/M2 Macs is extremely risky, often voids warranties, and can permanently damage the device.
What to do instead: If you need more storage, consider external Thunderbolt 3/4 SSDs or cloud solutions. Only attempt internal upgrades on user-serviceable models.
❌ Mistake: Skipping Firmware Updates
Why it’s bad: Outdated firmware can cause compatibility issues, performance bugs, or security vulnerabilities.
What to do instead: Check the manufacturer’s website for firmware updates after installation. Some brands offer macOS-compatible update tools.
❌ Mistake: Choosing Capacity Over Performance
Why it’s bad: A 2TB QLC drive may seem like a great deal, but if it’s slow and unreliable, it’s not worth the savings.
What to do instead: Balance capacity with performance needs. For most users, a 1TB TLC NVMe SSD offers the best value.
Budget Guidelines: How Much Should You Spend?
- Entry-Level ($50–$100): Suitable for basic upgrades on older Macs. Expect SATA III or low-end NVMe drives with modest speeds (up to 2,000 MB/s). Ideal for web browsing, office work, and light photo editing. Brands like Kingston or Team Group offer reliable options in this range.
- Mid-Range ($100–$200): The sweet spot for most Mac users. PCIe 3.0 NVMe drives with TLC NAND, DRAM cache, and speeds around 3,500 MB/s. Perfect for students, professionals, and casual creators. Models like the Samsung 970 EVO Plus or Crucial P5 Plus excel here.
- Premium ($200–$400): For power users and creatives. PCIe 4.0 NVMe drives with speeds exceeding 7,000 MB/s, excellent endurance, and robust thermal management. Ideal for 4K/8K video editing, 3D rendering, and large dataset processing. Consider the WD Black SN850X or Samsung 980 Pro.
- Luxury ($400+): Top-tier performance with enterprise-grade features. These drives offer the highest speeds, longest warranties, and advanced error correction. Overkill for most users but justified for studios or developers running intensive workloads. Examples include the Sabrent Rocket 4 Plus or OWC Aura Pro X2.

Expert Tips for Getting the Best Deal
- Buy during seasonal sales: Black Friday, Cyber Monday, and Amazon Prime Day often feature deep discounts on SSDs. Sign up for price alerts on sites like CamelCamelCamel or Honey.
- Shop from authorized retailers: Purchase from Apple, Best Buy, B&H Photo, or direct from manufacturers like Samsung or WD to ensure authenticity and full warranty coverage.
- Check for bundle deals: Some retailers offer SSDs with free cloning software, USB enclosures, or installation tools—great for first-time upgraders.
- Read Mac-specific reviews: Look for reviews from Mac users on forums like MacRumors or YouTube channels that test real-world performance on macOS.
- Consider used or refurbished drives: Only from reputable sellers with warranty. Avoid drives with high power-on hours or unknown usage history.
- Test before finalizing: After installation, run benchmarks with Blackmagic Disk Speed Test or AmorphousDiskMark to verify performance matches specs.
- Backup first: Always clone your existing drive or create a full Time Machine backup before swapping SSDs.
- Use macOS Recovery if needed: If your Mac doesn’t recognize the new drive, boot into Recovery Mode (Cmd+R) and reinstall macOS.
Frequently Asked Questions
Q: Can I upgrade the SSD in my M1 MacBook Air?
A: No. The M1 and M2 MacBook Air, MacBook Pro, Mac mini, and Mac Studio have soldered storage that cannot be upgraded by users. Any attempt to do so will likely damage the device and void the warranty.
Q: Will a Windows NVMe SSD work in my Mac?
A: Possibly, but not guaranteed. Some Windows SSDs use firmware or controllers that aren’t fully compatible with macOS. Stick to drives known to work with Macs, or check compatibility lists from OWC or Crucial.
Q: Do I need to format the SSD before installing macOS?
A: Yes. Use Disk Utility in macOS Recovery to erase the drive as APFS (for macOS High Sierra and later) or Mac OS Extended (Journaled) for older versions.
Q: How do I clone my old drive to the new SSD?
A: Use tools like Carbon Copy Cloner, SuperDuper!, or Apple’s built-in Migration Assistant. For best results, clone before installing the new drive.
Q: Can I use an external SSD instead of upgrading internally?
A: Absolutely. Thunderbolt 3/4 external SSDs offer near-internal speeds and are ideal for Macs with soldered storage. They’re also portable and reusable.
Q: Will upgrading my SSD improve boot time?
A: Yes, especially if replacing an older SATA drive with NVMe. Expect faster boot, app launches, and file access.
Q: Are there SSDs that come with macOS preinstalled?
A: Some third-party vendors like OWC offer SSDs with macOS already installed, making the upgrade process seamless.
Q: How long do Mac SSDs typically last?
A: With normal use, a quality TLC NVMe SSD should last 5–10 years. Monitor health with tools like DriveDx to catch early signs of failure.
Q: Can I use a PCIe 4.0 SSD in a PCIe 3.0 Mac?
A: Yes, but it will run at PCIe 3.0 speeds. There’s no harm in using a faster drive, and it may be more future-proof.
Q: What’s the difference between APFS and Mac OS Extended?
A: APFS is optimized for SSDs and offers better performance, encryption, and space sharing. Use it for macOS Sierra and later. Mac OS Extended is for older systems and HDDs.
Our Final Recommendations
- Best for Budget-Conscious Buyers: Crucial P3 1TB – Affordable PCIe 3.0 NVMe drive with solid performance and a 5-year warranty. Great for older Macs needing a speed boost.
- Best Overall Value: Samsung 970 EVO Plus 1TB – Reliable, fast, and widely compatible. Offers excellent performance for the price and is trusted by Mac users worldwide.
- Best Premium Option: WD Black SN850X 2TB – PCIe 4.0 powerhouse with blazing speeds, built-in thermal management, and top-tier endurance. Ideal for creative pros.
- Best for Beginners: OWC Aura Pro X2 1TB – Specifically designed for Macs, comes with cloning software and detailed guides. Plug-and-play simplicity.
- Best for Advanced Users: Samsung 980 Pro 2TB with Heatsink – Maximum performance with thermal protection. Perfect for developers and video editors pushing their Macs to the limit.
Conclusion: Making the Right Choice
Choosing the best internal SSD for your Mac isn’t just about picking the fastest or cheapest drive—it’s about finding the right balance of compatibility, performance, reliability, and value for your specific needs. Whether you’re reviving an aging MacBook or optimizing a high-end Mac Studio, the decisions you make today will impact your system’s performance and longevity for years to come.
Remember to prioritize compatibility above all else. A drive that doesn’t work with your Mac is useless, no matter how fast or affordable it is. Once you’ve confirmed compatibility, focus on performance specs that align with your workflow: TLC NAND, DRAM cache, and PCIe 4.0 support are worth the investment for demanding tasks. And don’t overlook the importance of brand reputation, warranty, and thermal management—these factors often determine real-world reliability.
Finally, take your time. Research your Mac model, read user reviews, and consider your long-term needs. If your Mac doesn’t support internal upgrades, explore high-speed external SSDs via Thunderbolt—they’re a fantastic alternative. With the insights from this guide, you’re now equipped to make a confident, informed decision that enhances your Mac experience without breaking the bank.
Upgrade wisely, back up regularly, and enjoy the speed, responsiveness, and peace of mind that a quality SSD brings to your Apple ecosystem.