
Upgrading your MacBook Air’s SSD can feel like giving your laptop a second life—especially if you’re working with an older model that’s starting to lag under the weight of modern apps, large files, or multitasking demands. Whether you’re a student juggling research papers and video calls, a creative professional editing photos or videos, or just someone who values smooth performance over long-term use, a solid-state drive (SSD) upgrade is one of the most impactful hardware improvements you can make. But here’s the catch: not all MacBook Air models are created equal when it comes to SSD upgrades, and the process itself has evolved significantly over the years. That’s why this comprehensive guide exists—to cut through the confusion, clarify your options, and help you make an informed decision in 2026.
In this guide, you’ll learn everything you need to know about upgrading your MacBook Air’s SSD, from understanding which models are even upgradeable to choosing the right drive based on speed, capacity, compatibility, and budget. We’ll walk you through key technical considerations like NVMe vs. SATA interfaces, physical form factors, and firmware limitations, while also addressing real-world concerns like data migration, warranty implications, and DIY vs. professional installation. Whether you’re looking to double your storage for less than $100 or invest in a high-speed PCIe Gen4 drive for future-proofing, we’ve got you covered. By the end, you’ll have a clear roadmap tailored to your specific MacBook Air model and usage needs—no tech jargon overload, just practical, expert-backed advice.
The market for MacBook Air SSD upgrades has matured considerably since Apple first began soldering storage directly onto logic boards around 2013. While newer M1 and M2 MacBook Airs (released from 2020 onward) are not user-upgradeable due to integrated storage, many Intel-based models—particularly those from 2013 to 2017—still offer viable upgrade paths using third-party replacement SSDs. At the same time, companies like OWC (Other World Computing), Transcend, and Sintech have developed specialized adapters and drives that restore upgradeability to otherwise locked-down systems. This creates a unique landscape: some users can swap out their SSDs easily with off-the-shelf parts, while others must rely on professional services or accept cloud-based workarounds. Our goal is to help you navigate this complexity with confidence, so you can extend the lifespan of your device, boost performance, and avoid costly mistakes.

What to Look for When Buying Buying Guide
1. Compatibility with Your MacBook Air Model
Before you even consider purchasing an SSD, you must confirm whether your specific MacBook Air model supports user-upgradeable storage. Apple has increasingly moved toward soldered, non-removable SSDs—especially in M-series chip models—but certain Intel-based Airs from 2013 to 2017 still allow upgrades. For example, the 2013–2015 MacBook Air models use a proprietary blade-style SSD that can be replaced with compatible third-party drives, while the 2017 model introduced a slightly different connector that requires specific adapters. Always cross-reference your MacBook Air’s model identifier (found under “About This Mac” > “System Report” > “Hardware Overview”) with manufacturer compatibility lists. Attempting to install an incompatible drive can result in boot failures, data loss, or physical damage to the logic board.
2. SSD Interface and Protocol
The interface and communication protocol your MacBook Air uses determine both speed and compatibility. Most upgradeable Intel MacBook Airs use the PCIe-based NVMe protocol, but not all NVMe drives are equal. Older models (like the 2013 Air) may only support PCIe 2.0 x2 lanes, capping theoretical speeds around 700–800 MB/s, whereas newer Intel models (2015–2017) often support PCIe 3.0 x4, enabling speeds up to 2,000 MB/s or more. Using a Gen4 NVMe drive in a Gen2 slot won’t damage anything, but you won’t see the performance benefits—and you’ll pay more for no gain. Always match the drive’s protocol to your Mac’s capabilities. Additionally, some third-party SSDs require firmware patches or kernel extensions to work properly in macOS, so check community forums or vendor documentation for known issues.
3. Physical Form Factor and Connector Type
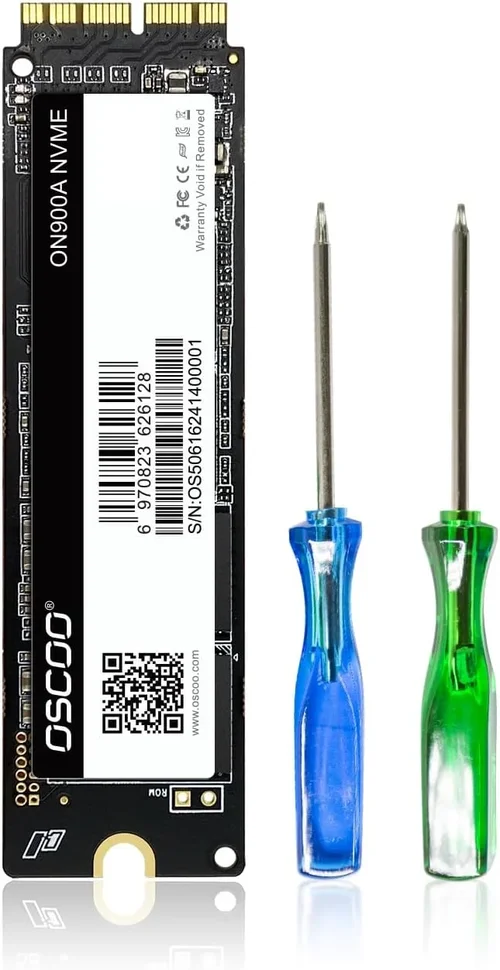
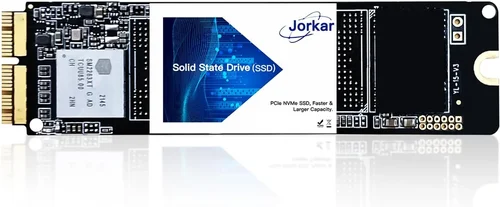
MacBook Air SSDs don’t follow standard M.2 2280 dimensions. Instead, they use custom “blade” or “B-key” connectors with varying lengths and pinouts. The 2013–2014 models typically use a 6+16 pin connector with a 12+16 configuration in later years. This means generic M.2 NVMe drives won’t fit without an adapter. Companies like Sintech and OWC produce precise-fit replacements or adapter kits that convert standard M.2 drives into Apple-compatible form factors. When shopping, look for terms like “Apple Blade SSD,” “MacBook Air 2015 SSD,” or “B+M key M.2 adapter.” Pay close attention to length (often 80mm or 90mm) and thickness—some aftermarket drives are too thick and won’t seat properly in the tight MacBook Air chassis.
4. Storage Capacity Needs
How much storage do you actually need? This depends heavily on your workflow. Casual users who primarily browse the web, stream media, and use office apps may find 256GB sufficient—especially if they leverage iCloud or external drives. However, photographers, videographers, developers, or students managing large project files should aim for at least 512GB, with 1TB being ideal for long-term use. Keep in mind that macOS itself consumes 20–30GB, and system caches, apps, and temporary files can quickly eat into available space. Also, SSDs perform best when they’re not more than 70–80% full, so buying a larger drive than you think you need often pays off in sustained performance and longevity.
5. Performance Specifications (Speed & Endurance)
SSD performance is measured in sequential read/write speeds (MB/s) and random IOPS (input/output operations per second). For most MacBook Air users, sequential speeds above 1,500 MB/s are excellent and will noticeably improve boot times, app launches, and file transfers. Random performance matters more for multitasking and database-heavy workloads. Look for drives with high endurance ratings, expressed in terabytes written (TBW). A 512GB drive with 300TBW will last longer under heavy use than one with 150TBW. While consumer workloads rarely hit these limits, higher TBW indicates better-quality NAND flash and controller chips. Avoid ultra-budget drives with unknown controllers—they may offer attractive prices but suffer from poor reliability or sudden failure.
6. Brand Reputation and Reliability
Not all SSD brands are equal, especially in the niche MacBook upgrade market. Stick with reputable manufacturers that specialize in Mac-compatible storage, such as OWC (Aura series), Transcend (JetDrive), or Sintech. These companies rigorously test their products against specific MacBook models and often provide macOS-specific firmware. Generic or no-name SSDs might seem like a bargain, but they frequently lack proper thermal management, suffer from compatibility bugs, or fail prematurely. Reading user reviews on forums like MacRumors, Reddit’s r/mac, or OWC’s own community pages can reveal real-world experiences—look for patterns in complaints about boot loops, sleep/wake issues, or kernel panics.
7. Warranty and Technical Support
A good warranty isn’t just about replacement—it’s a sign of confidence in product quality. Most premium SSDs come with 3- to 5-year limited warranties, but verify whether the warranty applies to Mac use. Some manufacturers void coverage if the drive is used in non-standard configurations (e.g., with adapters). Additionally, consider the availability of technical support. OWC, for instance, offers free U.S.-based phone and email support, detailed installation videos, and data migration tools. If you’re attempting a DIY upgrade, having access to clear guides and responsive support can mean the difference between success and frustration. Always register your product and keep proof of purchase.
8. Price vs. Value Proposition
It’s tempting to go for the cheapest SSD that fits your MacBook Air, but value matters more than upfront cost. A $60 256GB drive might save you money today but could fail in two years, costing you data and downtime. Conversely, overspending on a 2TB Gen4 drive for a 2014 MacBook Air makes little sense when the system can’t utilize its full speed. Aim for the sweet spot: a reliable, well-reviewed drive from a trusted brand that matches your capacity needs and performance ceiling. As of 2026, expect to pay roughly $80–$120 for a quality 512GB upgrade and $150–$250 for 1TB. Watch for seasonal sales (Black Friday, back-to-school) when prices often drop 15–25%.
Different Types of Buying Guide
Common Buying Mistakes to Avoid

❌ Mistake: Assuming All MacBook Airs Are Upgradeable
Why it’s bad: Apple stopped making user-upgradeable SSDs in MacBook Airs starting with the 2018 model and all M-series chip models. Attempting to “upgrade” an M1 or M2 Air by opening it will void your warranty and likely damage the logic board, as the SSD is fused directly to the chip.
What to do instead: Always verify your model year and chip type first. Use Apple’s official support page or third-party tools like Mactracker to confirm upgradeability before spending money on parts.
❌ Mistake: Buying Generic M.2 Drives Without Adapters
Why it’s bad: Standard M.2 NVMe drives won’t physically fit or connect to older MacBook Air logic boards. Even if you force an adapter, incompatible pinouts or power delivery can cause instability or failure.
What to do instead: Purchase either a purpose-built Apple blade SSD (like OWC Aura) or a verified M.2 + adapter combo (e.g., Sintech NGFF M.2 adapter for 2015 Air). Double-check pin compatibility (B-key vs. B+M key).
❌ Mistake: Ignoring Firmware and macOS Compatibility
Why it’s bad: Some third-party SSDs require specific firmware versions or kernel extensions to work properly in macOS. Without these, you may experience slow performance, sleep issues, or inability to boot.
What to do instead: Stick to brands that explicitly state macOS compatibility and provide firmware updates. OWC and Transcend regularly release firmware tools for their drives.
❌ Mistake: Overlooking Data Migration Planning
Why it’s bad: Installing a new SSD without a backup or cloning strategy means starting from scratch—losing apps, settings, and personal files unless you manually reinstall everything.
What to do instead: Use tools like Carbon Copy Cloner, SuperDuper!, or Apple’s built-in Migration Assistant. Always create a full Time Machine backup before beginning the upgrade.
❌ Mistake: Choosing Capacity Over Reliability
Why it’s bad: Ultra-cheap SSDs often use low-grade NAND and weak controllers that fail prematurely. A failed drive can mean total data loss, especially if you haven’t backed up recently.
What to do instead: Prioritize reputable brands with good TBW ratings and user reviews. A reliable 512GB drive is better than a risky 1TB one.
❌ Mistake: Skipping Thermal Considerations
Why it’s bad: MacBook Airs have minimal cooling. High-performance SSDs can throttle under sustained load if they overheat, negating speed gains.
What to do instead: Choose drives with built-in thermal throttling protection or consider adding a small thermal pad (if space allows). Avoid drives marketed for gaming laptops—they’re often overkill and run hot.
❌ Mistake: Not Checking Return Policies
Why it’s bad: If the SSD doesn’t work or is incompatible, you could be stuck with a non-returnable item—especially if purchased from overseas sellers.
What to do instead: Buy from retailers with clear return windows (30+ days) and free return shipping. U.S.-based sellers like OWC, B&H, or Amazon (sold by Amazon, not third parties) are safer bets.
Budget Guidelines: How Much Should You Spend?
– Entry-Level ($60–$100): Ideal for basic upgrades on 2013–2015 MacBook Airs. Expect 256GB–512GB capacities from brands like Sintech or lower-tier OWC models. Performance is adequate for everyday tasks but may lack advanced features like power-loss protection. Best for students or light users on a tight budget.
– Mid-Range ($100–$200): The sweet spot for most users. You’ll get 512GB–1TB of reliable storage from trusted brands (OWC Aura Pro, Transcend JetDrive) with full macOS compatibility, good speeds (1,500–2,000 MB/s), and solid warranties. Perfect for creatives, professionals, and anyone wanting longevity.
– Premium ($200–$350): For enthusiasts or those with high-performance Intel MacBook Airs (2015–2017). Includes top-tier NVMe drives with Gen3 x4 speeds, enhanced endurance (400+ TBW), and premium support. Overkill for basic use but worthwhile if you edit video or run virtual machines.
– Luxury ($350+): Typically unnecessary for MacBook Air upgrades, but includes exotic options like 2TB+ capacities or enterprise-grade SSDs. Only consider if you have extreme storage needs and don’t mind paying a premium for marginal real-world gains.
Expert Tips for Getting the Best Deal
– Time your purchase wisely: SSD prices fluctuate based on NAND flash market conditions. Historically, Q3 and Q4 offer the best discounts. Avoid buying right after a new MacBook release—demand spikes can inflate prices.
– Buy from authorized resellers: Stick to OWC, B&H Photo, Adorama, or Apple-authorized service providers. Avoid eBay or AliExpress unless the seller has overwhelmingly positive feedback and clear compatibility notes.
– Bundle with tools and software: Many upgrade kits include screwdrivers, spudgers, and cloning licenses. Buying these separately can add $30–$50. Look for “complete kits” to save money and hassle.
– Check for refurbished or open-box deals: Reputable sellers sometimes offer lightly used or returned SSDs at 20–30% off. Ensure they come with full warranties and are factory-reset.
– Verify return and exchange policies: Some retailers charge restocking fees or won’t accept returns on opened electronics. Read the fine print—especially for international shipments.
– Test before finalizing: Once installed, run diagnostics using Apple Diagnostics (hold D at boot) or third-party tools like DriveDx to confirm the SSD is recognized and functioning properly.
– Consider future resale value: A MacBook Air with a known-good, high-capacity SSD retains more value than one with original, worn-out storage. Document your upgrade for potential buyers.
– Don’t forget about TRIM: Enable TRIM support in macOS (via Terminal: sudo trimforce enable) to maintain SSD performance over time. Most modern third-party drives support this, but it’s worth confirming.

Frequently Asked Questions
Q: Can I upgrade the SSD in my M1 or M2 MacBook Air?
A: No. Apple solders the SSD directly to the M1 and M2 logic boards, making user upgrades impossible without specialized (and risky) microsoldering. Your best options are using external SSDs via Thunderbolt/USB-C or upgrading to a new Mac with more internal storage.
Q: Will upgrading my SSD void my warranty?
A: If your MacBook Air is still under Apple’s limited warranty or AppleCare+, opening the case may void coverage—even if the SSD itself isn’t damaged. However, many third-party SSD manufacturers (like OWC) offer their own warranties that cover the drive independently.
Q: How do I clone my existing drive to the new SSD?
A: Use Carbon Copy Cloner (paid) or SuperDuper! (free version available) to create a bootable clone. Connect the new SSD via USB adapter, clone the old drive, then swap them internally. Always verify the clone boots before removing the original.
Q: What’s the difference between NVMe and SATA SSDs for MacBook Air?
A: NVMe drives are significantly faster (2–3x) than SATA and are required for most Intel MacBook Air upgrades. SATA SSDs won’t fit the physical connector and aren’t supported by macOS in these models.
Q: Can I use a Samsung 970 EVO or WD Black SN850 in my MacBook Air?
A: Only with a compatible adapter (like Sintech’s) and if your model supports the protocol. However, some high-power drives may cause instability. Stick to drives recommended by Mac upgrade specialists for best results.
Q: How long does a MacBook Air SSD upgrade take?
A: The physical swap takes 15–30 minutes if you’re experienced. Adding cloning and setup, plan for 1–2 hours total. Beginners should allow extra time and watch tutorial videos.
Q: Will a larger SSD improve my MacBook Air’s speed?
A: Not directly—but larger SSDs often have more NAND chips, enabling better parallelism and slightly faster write speeds. More importantly, having free space (20–30%) helps maintain performance over time.
Q: Are there any macOS settings I should change after upgrading?
A: Yes. Enable TRIM (as mentioned above), ensure FileVault is re-enabled if used, and check that Spotlight reindexes properly. Also, verify Time Machine backups recognize the new drive.
Q: What if my MacBook Air doesn’t recognize the new SSD?
A: First, reseat the drive and check connections. If that fails, try the SSD in another Mac or via USB adapter. If it’s still not detected, the drive may be incompatible or defective—contact the manufacturer.
Q: Can I upgrade both RAM and SSD in my MacBook Air?
A: No. Like the SSD, RAM is soldered to the logic board in all unibody MacBook Airs (since 2008). Upgrading RAM is not possible—focus on SSD and external solutions instead.
Our Final Recommendations
– Best for Budget-Conscious Buyers: Sintech 512GB Apple Blade SSD – Reliable, affordable, and widely compatible with 2013–2017 Airs. Great entry point under $100.
– Best Overall Value: OWC Aura Pro 1TB – Excellent performance, macOS-optimized firmware, 5-year warranty, and includes cloning software. Ideal for most users seeking balance.
– Best Premium Option: Transcend JetDrive 1TB (for MacBook Air) – High endurance, sleek design, and proven stability. Slightly pricier but built to last.
– Best for Beginners: OWC Aura Pro Upgrade Kit (512GB) – Comes with tools, instructions, and support. Everything you need in one box—perfect for first-time upgraders.
– Best for Advanced Users: Samsung 980 Pro + Sintech Adapter (1TB) – For those who want maximum speed and don’t mind tweaking settings. Requires technical confidence but delivers top-tier performance.
Conclusion: Making the Right Choice
Upgrading your MacBook Air’s SSD is one of the smartest investments you can make to extend your device’s lifespan and enhance daily usability—but only if done correctly. The key is matching your specific model, needs, and technical comfort level with the right type of drive and installation method. Remember: not all MacBook Airs are upgradeable, and even among those that are, compatibility nuances matter. Prioritize reputable brands, verify physical and protocol compatibility, and always back up your data before starting.
Whether you’re breathing new life into a 2015 Air with a 1TB OWC drive or opting for a professional install to avoid risk, the payoff in speed, storage, and satisfaction is well worth the effort. Don’t let outdated hardware hold you back—empower yourself with knowledge, choose wisely, and enjoy a faster, more capable MacBook Air for years to come. Ready to upgrade? Start by identifying your model, then pick one of our recommended drives based on your budget and use case. Your future self will thank you.