
If you’ve ever had to replace or upgrade an SSD in your computer, you might have found yourself in the position of needing to remove the heatsink from the SSD. This can be a tricky process, especially if you’re not familiar with how to do it. But fear not, because removing a heatsink from an SSD isn’t as complicated as it might seem.
With a little bit of patience and some basic tools, you can remove the heatsink from your SSD without damaging anything. In this blog post, we’ll cover everything you need to know about removing a heatsink from an SSD, and give you some tips to make the process as easy and stress-free as possible. So, grab your tools and let’s get started!
Introduction
If you’re looking to upgrade your SSD or simply replace a faulty one, you may need to remove the heatsink that’s attached to it first. While it may seem daunting to remove a heatsink, it’s actually a straightforward process that can be done by following some simple steps. First, you’ll need to identify the heatsink and unscrew it from the SSD.
Make sure to do this carefully to avoid damaging the SSD or any other components around it. Once the heatsink is removed, you can then proceed with your upgrade or replacement. It’s essential to ensure that you put everything back together correctly and securely to avoid any unexpected issues.
With patience and care, removing a heatsink from an SSD shouldn’t be too challenging, and you’ll have a smoother SSD upgrade or replacement experience.
What is a heatsink?
Heatsinks are a crucial component of our modern-day electronics, and yet many people are unaware of what they are and how they work. At its core, a heatsink is a passive cooling device that absorbs and dissipates heat generated by electronic components such as CPUs, GPUs, and voltage regulators. They are typically made from materials with high thermal conductivity such as aluminum, copper or graphite, and they work by maximizing the surface area available for heat transfer while increasing the airflow around them.
Think of a heatsink as a radiator for your electronics, except there’s no fluid being circulated. Instead of water, a heatsink relies on natural air convection to transfer the heat away from the source and into the surrounding environment. Without a heatsink, electronic components can overheat and damage themselves, leading to reduced lifespan or even complete system failure.
So the next time you use your computer or smartphone, take a moment to appreciate the small but mighty heatsink – the unsung hero of our electronics.
Why remove a heatsink from SSD?
Many people may question why they would need to remove a heatsink from their SSD, but there are several reasons why someone might need or want to do so. Removing the heatsink could help with better air circulation and cooling, which can optimize the SSD’s performance. Additionally, some individuals may want to replace the heatsink with a different one for aesthetic purposes or for a more effective cooling solution.
However, it’s important to note that removing the heatsink could also potentially void the SSD’s warranty or could cause damage if not done properly. Therefore, it’s important to weigh the potential benefits and risks before deciding to remove a heatsink from an SSD.
Step-by-Step Guide
If you’re planning to upgrade your SSD or replace it with a new one, knowing how to remove the heatsink from your SSD is crucial. This step-by-step guide will help you to effectively remove your SSD heatsink without damaging your device. First, ensure that you have disconnected all power sources from your computer and removed the SSD from its slot.
Using a Torx screwdriver, unscrew the screws holding the heatsink in place gently. Remove the heatsink carefully from the SSD by gently twisting it out of its position. If it is stuck, apply slight force to break its bond with the thermal paste but be cautious not to damage the SSD.
Once the heatsink is fully detached, use thermal paste remover to clean off any residual paste from the SSD. Remember to clean the heatsink thoroughly before reusing it. Reapply the thermal paste following the manufacturer’s instructions before reattaching the heatsink in its position.
When screwed in, double-check to confirm that the heatsink is held firmly in place. That’s it! Your SSD is now ready to be reinstalled in your computer.
Step 1: Power off the system
When it comes to powering off a computer system, it may seem like a straightforward process, but it’s essential to follow the correct steps to ensure that no data is lost, and the system is not damaged. The first step is to power off the system correctly. This can be done by clicking on the Start button and selecting Shut Down or using the power button if there is no option to shut down.
It’s essential to wait for all programs and applications to close before proceeding with the next step. This ensures that all unsaved data is stored safely before the system is shut down. Therefore, the keyword “power off” is crucial in this process to ensure that the computer system is shut down correctly.
By following these simple steps, you can ensure that your computer system remains in good condition and that you don’t lose any important data.
Step 2: Locate the SSD
After opening up your computer, the next step in installing an SSD is to locate where it’s going to go. This can vary depending on the make and model of your computer, but most will have a spot for an SSD on the motherboard. You’ll need to find the SATA cables and power connectors in your computer, which are typically located near the hard drive.
Once you’ve found these, you can go ahead and unscrew the hard drive from its mount. From there, you can either replace it with the SSD, or find an additional mount for the SSD if you want to keep both drives in your computer. It’s important to keep in mind that the process can differ from computer to computer, so be sure to do your research beforehand.
By taking your time and double-checking your work, you can ensure that your SSD is installed properly and ready to go.
Step 3: Remove the SSD from its slot
When it comes to upgrading your computer, one of the most effective ways is to replace your old hard drive with a solid-state drive (SSD). In this guide, we will discuss the necessary steps in removing an SSD from its slot to ensure a smooth and seamless process. Step three of this guide is removing the SSD from its slot.
To do this, you will need to locate the screw that secures the SSD to your computer’s motherboard. You’ll need to use a screwdriver to remove this screw carefully. Once the screw has been removed, carefully slide out the SSD from its slot.
Be sure to pull the SSD straight out of its slot, taking care not to bend or damage any of the pins. It’s important to note that different computer models may have different SSD slots, so the process of removing an SSD may vary slightly. However, the principle remains the same – carefully remove the screw that secures the SSD and gently slide it out of its slot.
By following these simple steps, you should be able to remove your SSD from its slot with ease. Now that the SSD has been removed, you can go ahead and install your new SSD, making sure to securely fasten it in place with a screw. With your upgraded SSD in place, your computer should run much faster and more efficiently than before.
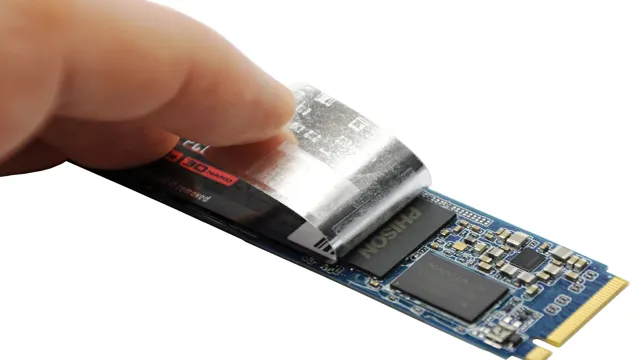
Step 4: Remove the heatsink from the SSD
When it comes to upgrading your SSD, removing the heatsink is an essential step. The heatsink helps dissipate heat from your SSD, preventing it from overheating and potentially causing damage. To remove it, you’ll first need to locate the screws holding it in place.
Once you’ve done that, use a screwdriver to carefully remove them, being careful not to damage any surrounding components. With the screws removed, you should be able to gently lift the heatsink off the SSD. Be sure to store the screws in a safe place so you don’t lose them.
Removing the heatsink from your SSD may seem daunting, but with a bit of care and attention, it can be done with ease.
Precautions
Before deciding to remove the heatsink from your SSD, it’s important to take a few precautions. Firstly, make sure the SSD has been turned off and unplugged for at least a few minutes to allow the components to cool down. Next, ensure that you have the appropriate tools for the job, including a good quality screwdriver and possibly a pry tool to carefully remove the heatsink.
It’s also a good idea to wear an anti-static wrist strap or use an anti-static mat to prevent any electrostatic discharge from damaging the SSD. Additionally, be careful not to damage any of the other components or cables when removing the heatsink, and take note of any screws or other attachments that may need to be reattached later on. By taking these simple precautions, you can safely and successfully remove the heatsink from your SSD without causing any damage.
Potential risks while removing the heatsink
Removing a heatsink can be an intimidating task and can potentially come with some risks. One of the main issues that can arise is damage to the CPU, as it is a delicate component. Therefore, it is crucial to handle it with care and avoid sudden jerks or pressure.
Additionally, when removing the heatsink, one must be cautious of the thermal compound that is present between the CPU and heatsink. This material can be sticky, and if accidentally spread or smeared, it can cause issues with heat dissipation. One way to avoid this risk is by using a specialized thermal compound remover.
Moreover, one must ensure that the CPU is not kept exposed for too long as air exposure can cause oxidization and damage the components. Thus, it is crucial to replace the heatsink promptly. In conclusion, while removing the heatsink, one must take all the necessary precautions to avoid any damage or complications to the CPU.
Tips to avoid any damage while removing the heatsink
Removing a heatsink can be a daunting task, especially if you’re worried about causing any damage to your CPU or motherboard. But with a little bit of care and attention, you can avoid any mishaps and safely remove your heatsink without causing any damage. One of the main things you need to be careful about is the amount of force you apply when removing the heatsink.
Applying too much force can bend your CPU pins or damage the motherboard, so it’s essential to use gentle, steady pressure to loosen the heatsink. Another thing to keep in mind is the temperature of your CPU. You don’t want to try to remove the heatsink when your CPU is still warm, as this can cause the thermal paste to become more adhesive and make it harder to remove the heatsink.
Wait until your CPU has cooled down before you attempt to remove the heatsink. By following these precautions, you can safely remove your heatsink without causing any damage to your CPU or motherboard.
Conclusion
In the world of SSDs, removing the heatsink can be a daunting task. It’s like taking the training wheels off your first bike – you know you’ll be fine, but there’s always that lingering anxiety. However, once you remove that heatsink, you’ll uncover a world of possibilities.
Your SSD will run cooler and faster, giving you an unparalleled performance boost. So, don’t be afraid to take the leap – remove that heatsink and watch your SSD soar to new heights!”
FAQs
Why do I need to remove the heatsink from my SSD?
Sometimes the heatsink can interfere with proper installation or cause compatibility issues with your motherboard or other components.
Is it safe to remove the heatsink from my SSD?
Yes, as long as you do it carefully and follow proper procedures. Make sure to disconnect the power source and avoid touching any electronic components.
How do I know if my SSD has a heatsink installed?
You can check the manufacturer’s specifications or visually inspect your SSD for any additional cooling hardware.
Can I reuse the heatsink after I remove it from my SSD?
It depends on the design and compatibility with other components. Some heatsinks may be able to be used on other devices with comparable dimensions.