
If you’re an avid gamer or work with demanding applications, adding an extra cooling mechanism in your PC can boost its performance. One popular way of keeping your computer cool is by installing heatsinks, which help dissipate heat from critical components such as the CPU and GPU. However, what happens when you need to remove the heatsink, particularly the one on your Samsung 980 Pro SSD? In this post, we’ll show you how to remove your 980 Pro SSD heatsink safely and efficiently.
So, grab your toolkit, and let’s get started!
Tools Needed
If you’re trying to remove the heatsink from your Samsung 980 Pro SSD, you’ll need a few tools to get the job done. First and foremost, you’ll need a screwdriver. The screwdriver needs to be small enough to fit in the screws that hold the heatsink in place.
You’ll also want to have a pry tool on hand. A plastic pry tool is ideal since it won’t scratch the delicate circuitry of the SSD. Lastly, it’s a good idea to have some thermal paste on hand so you can reapply it to the SSD once you remove the heatsink.
With these tools in hand, you’ll be ready to remove the heatsink from your SSD quickly and safely. Just remember to take your time and be gentle when prying off the heatsink to avoid damaging any of the components inside.
List of Required Tools for This Process
If you’re new to DIY, choosing the right tools for a project can be a daunting task. However, having the proper tools for the job is essential for achieving good results. For this process, you will need a few basic tools such as a measuring tape, claw hammer, screwdrivers, pliers, and a level.
Additionally, a power drill, saws, a utility knife, and a set of chisels may be necessary depending on the specifics of your project. Don’t forget to use safety equipment like gloves, goggles, and ear protection to keep yourself safe during the whole process. Moreover, investing in good quality tools means that they’ll last longer, saving you money in the long run.
Taking some time to collect the required tools beforehand means that you’ll be fully equipped for a successful DIY project.
Preparation
If you’re thinking about removing the heatsink from your Samsung 980 Pro SSD, it’s important to take a few steps to prepare before getting started. First, make sure you have all the tools you need, including a screwdriver, some thermal paste, and maybe even a pair of pliers in case the screws are difficult to remove. You’ll also want to disconnect your computer from any power sources and ground yourself to avoid any static electricity damage.
Once you’re ready, carefully remove any cables or connectors from the SSD and locate the screws holding the heatsink in place. Gently unscrew and remove the heatsink, making sure to keep it and any thermal pads or tape intact. With the heatsink removed, you can replace the thermal paste and reattach the SSD to your computer.
Removing the heatsink from a 980 Pro can be a bit tricky, but with the right preparation and tools, it’s definitely doable.
Guide on What to Do Before Starting the Removal Process
When it comes to removing something, preparation is key. Before you start the removal process, there are a few things you should do to make sure everything goes smoothly. Firstly, you should gather all the necessary tools and equipment you’ll need for the job.
This might include things like gloves, a dust mask, safety glasses, or any specialized tools specific to your particular project. Next, it’s important to make sure any materials you’ll be removing are properly labeled and disposed of. Depending on what you’re removing, you might need to take some extra precautions to ensure that you’re following safety regulations.
Finally, it’s a good idea to plan out the removal process in advance so that everything goes smoothly. Take some time to analyze the space and consider any obstacles or challenges you might encounter during the removal process. By taking the time to prepare properly, you’ll save yourself time and stress in the long run.
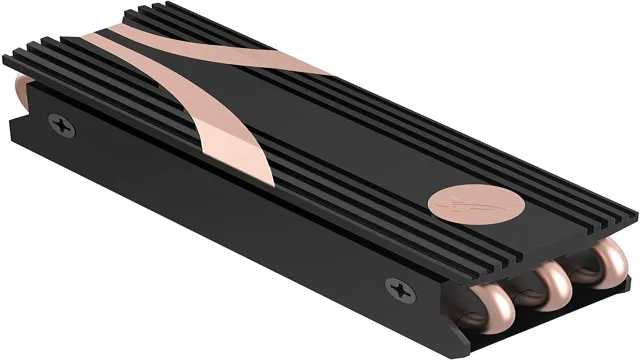
Removing the Heatsink
If you’re looking to remove the heatsink on your Samsung 980 Pro SSD, it’s important to take the proper steps to avoid any damage. The first step is to power down your computer and unplug it from any electrical outlets. After that, you’ll need to locate the screws that are holding the heatsink in place.
These are typically located on the backside of the SSD, so you’ll need to flip it over to find them. Once you’ve located the screws, use a screwdriver to remove them carefully. You should also take care not to put too much pressure on the SSD while you’re removing the screws, as this can cause damage to the delicate electronics inside.
Once the screws have been removed, you can gently lift the heatsink off of the SSD. If the heatsink is stuck, try gently twisting it back and forth until it comes free. With the heatsink removed, you can now access the components of your SSD for cleaning or upgrades.
Step-by-Step Guide on Removing The Heatsink from Your PC
Removing the heatsink from your PC can be a daunting task, but with our step-by-step guide, it can be a breeze. The first step is to shut down your PC and unplug it from the power source. Then, you’ll need to locate your heatsink, which is usually attached to the processor.
Check your motherboard’s manual if you’re unsure of its location. Once you’ve located the heatsink, the next step is to release it from the processor. Depending on the type of heatsink you have, this can either be done by unlatching the clip or turning screws.
Be sure to consult your manual for the proper technique. Once the heatsink is free, gently lift it off of the processor. Before proceeding further, it’s important to clean off any leftover thermal paste from both the processor and the base of the heatsink.
You can use rubbing alcohol and a lint-free cloth to do this. Once everything is clean, the heatsink is ready to be reinstalled or replaced. Remember that proper removal and installation of the heatsink is crucial for the longevity and overall performance of your PC.
By following these easy steps, you’ll have no problem safely removing your heatsink and keeping your system running smoothly.
Post-Removal Process
If you need to remove the heatsink from a Samsung 980 Pro SSD, there are a few steps you should follow to ensure a smooth post-removal process. First, make sure you have the right tools on hand. You’ll need a small Phillips-head screwdriver and a plastic pry tool to help you gently remove the heatsink without damaging the drive.
Before you start, power off your computer and unplug it for safety. Once you’ve removed the heatsink, you may notice that there’s residual adhesive on the drive’s surface. Don’t worry, this is normal.
Use a soft cloth and some rubbing alcohol to wipe away the adhesive and any other residue. Finally, take care when re-installing the SSD into your computer. Make sure it’s properly seated and secured with the correct screws to avoid any damage or data loss.
With these steps, you can safely and effectively remove the heatsink from your Samsung 980 Pro SSD without any issues.
What to do After Successfully Removing the Heatsink
After successfully removing the heatsink, there are a few post-removal processes you should follow to ensure that everything is in order. The first thing to do is to clean the old thermal paste off both the CPU and the heatsink. You can use a lint-free cloth and some high-purity isopropyl alcohol to do this.
Once you have done this, you need to reapply some thermal paste to the CPU. Be careful not to apply too much or too little, as this can affect the performance of your CPU. You can simply use a pea-sized drop of thermal paste and spread it evenly using a plastic card or your finger.
Finally, reattach the heatsink by tightening the screws in the sequence recommended by the manufacturer. It is crucial not to overtighten the screws, as this can damage the CPU or the motherboard. By following these post-removal processes, you can ensure that your CPU and heatsink are working efficiently and that your computer is running smoothly.
Conclusion
Removing the heatsink from your 980 Pro is like taking off a warm winter coat when the sun comes out – it may have been necessary for colder temperatures, but now it’s just holding you back from achieving optimal performance. Get ready to feel the speed and power of your Samsung SSD as it runs cool and unrestricted without the extra weight of a heatsink. Just make sure to keep an eye on those temperatures and maybe throw on a light sweater if it gets chilly.
“
FAQs
Do I need to remove the heatsink on my Samsung 980 Pro SSD?
Yes, if you want to replace the stock heatsink with a custom one or if you want to take off the heatsink for any other reason, you will need to remove it first.
How do I remove the heatsink from my Samsung 980 Pro SSD?
To remove the stock heatsink, you will need to unscrew the screws that hold it in place and gently pry it off the SSD. Make sure to avoid damaging any of the components on the SSD.
Can I reuse the stock heatsink after removing it from my Samsung 980 Pro SSD?
Yes, you can reuse the heatsink on another Samsung 980 Pro SSD or on a different M.2 SSD that has the same form factor and size.
Will removing the heatsink void my Samsung 980 Pro SSD warranty?
Yes, removing the heatsink or any modification made to the SSD may void the warranty. Make sure to check with the manufacturer’s warranty policies before attempting any modifications.