
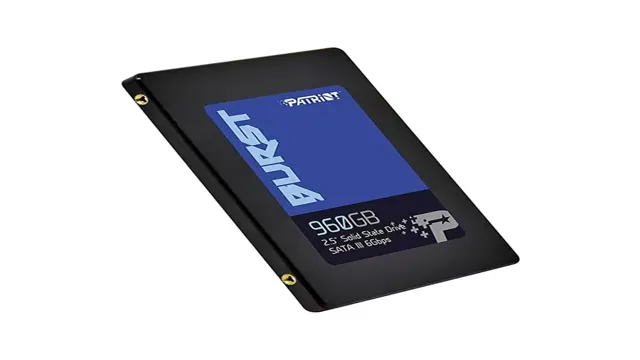
Have you recently upgraded your PC with a Patriot Burst SSD but are facing issues with it not showing up on your system? This can be a frustrating problem to deal with, especially if you were expecting a performance boost from the upgrade. Don’t worry, you’re not alone! Many users have reported similar issues with the Patriot Burst SSD not showing up in their system. In this blog, we’ll take a closer look at the reasons why your Patriot Burst SSD may not be showing up and what steps you can take to fix the issue.
We’ll explore common sources of the problem, such as incorrect installation, driver issues, and faulty hardware. You’ll also learn how to troubleshoot the issue and get your Patriot Burst SSD up and running in no time! So, if you’re frustrated with your Patriot Burst SSD not showing up on your system, keep reading! We’re here to help you diagnose and resolve the issue, so you can enjoy the full benefits of your SSD upgrade.
Check the Connections
If your Patriot Burst SSD is not showing up on your computer, one possible reason is loose connections. Try checking the connections to make sure everything is properly plugged in and secure. This includes the SATA cable, power cable, and any other connectors that may be involved.
It’s not uncommon for cables to come loose over time, especially with frequent plugging and unplugging. If you find any loose connections, reconnect them and see if the SSD appears. If not, you may need to troubleshoot further or seek professional help.
Remember to always handle hardware carefully and follow proper safety procedures when working with electronic components.
Make sure the SSD is connected properly
One of the most common issues that users may encounter when installing an SSD is a faulty connection. To prevent such an issue, it’s essential to check the connections thoroughly. Firstly, ensure that you have a suitable cable to connect your SSD to your motherboard.
Make sure the cable is plugged in correctly and securely, and the connector is fit snuggly. Wiggle the cable a little to ensure that it’s firmly attached. Secondly, if you are using an external enclosure, ensure that the enclosure’s connectors are tightly connected to the SSD.
If you are unsure, remove the SSD and check the connectors’ cleanliness, then reinsert it, ensuring that it slides into the slot firmly. By checking the connections, you can minimize the risk of data loss and prevent the SSD from being shorted due to loosened connections.
Check the power and data cables
When your computer isn’t turning on or is displaying an error message, the first thing you should check is the power and data cables. A loose or faulty connection could be the culprit and cause all sorts of problems. Even though it may seem like common sense, double-checking that all cables are correctly plugged in could save you a lot of time and frustration.
Make sure the power cable is securely plugged into the outlet and the back of the computer and that the data cables for the monitor, keyboard, and other peripherals are properly connected as well. If everything looks good, try unplugging and plugging the cables back in to ensure a solid connection. Remember, simple checks like this can often fix the issue without the need for professional assistance.
By taking your time to check all the connections, you might be able to get back to work or entertainment without much delay or headache.
Update the Drivers
If your Patriot Burst SSD is not showing up after installation, updating the drivers could be the solution. Outdated or incompatible drivers can result in various issues, including the SSD not being detected by the system. You can update the drivers manually or use a third-party tool such as Driver Booster to do it automatically.
To update the drivers manually, visit the manufacturer’s website, locate the latest driver for your SSD model, and download it. Then, go to Device Manager, select the SSD, right-click it, and choose Update Driver. Browse to the location where you saved the downloaded driver and follow the prompts to install it.
Alternatively, you can use Driver Booster to scan your system for outdated drivers and update them with a single click. Updating drivers can help fix issues with the SSD and improve its overall performance.
Download and install the latest drivers for the SSD
When it comes to optimizing your SSD’s performance, one of the simplest and most effective steps you can take is updating its drivers. Drivers serve as a bridge between your operating system and your hardware, allowing your computer to communicate with your SSD effectively. By downloading and installing the latest drivers for your SSD, you can ensure that it’s running at peak performance, with the latest features and fixes.
Updating your SSD drivers may seem like a small step, but it can make a big difference in your computer’s performance. Outdated or incorrectly configured drivers can cause a range of issues, from slower write speeds to system crashes. By keeping your drivers up to date, you can avoid these problems and enjoy faster boot times, quicker file transfers, and a more seamless computing experience overall.
Luckily, updating your SSD drivers is a fairly simple process. Begin by visiting your SSD manufacturer’s website and locating the latest drivers for your model. Download the drivers and follow the installation instructions carefully, taking care to back up your data and create a restore point before proceeding.
Once you’ve installed the drivers, restart your computer and enjoy the improved performance of your SSD! So if you’re looking to get the most out of your SSD, make sure to keep its drivers up to date. With the latest drivers installed, you’ll enjoy faster speeds, fewer errors, and a smoother computing experience overall. And best of all, it only takes a few minutes to make the update!
Restart the computer after installing the drivers
After downloading and installing new drivers on your computer, it’s essential to restart the system to ensure the changes take effect properly. Restarting the computer is a crucial step that many people tend to overlook, but it can have significant consequences if neglected. By doing so, you allow the updated drivers to integrate with the operating system’s functions correctly, ensuring that your computer runs efficiently.
It’s understandable to think that the computer will automatically restart after installing the drivers, but that’s not always the case. Some drivers require a reboot to activate fully, and if you don’t do it, your computer may experience errors or even crashes. Therefore, it’s crucial to make restarting a habit every time you update your drivers.
As a result, you’ll enjoy optimal performance and security from your computer with every update.
Check the BIOS Settings
If you are experiencing the frustrating issue of Patriot Burst SSD not showing up on your computer, one potential solution to try is checking your BIOS settings. Often times, the BIOS settings dictate the priority and detection of hardware devices, so it is important to ensure that your SSD is properly configured in the settings. To access the BIOS settings, simply restart your computer and press the key indicated on the startup screen (typically F2, F10, or Delete).
Once in the BIOS, navigate to the boot options and check that the SSD is listed and set as the primary boot device. Additionally, check that the SATA port is correctly configured for your SSD. If you are unsure of how to make the proper changes, consult your motherboard documentation or seek the assistance of a professional.
By checking the BIOS settings, you may be able to resolve the issue of your Patriot Burst SSD not showing up and get back to using your computer with ease.
Make sure the SATA controller is enabled in BIOS
If you’re having trouble detecting your SATA device, it may be because the SATA controller is disabled in your computer’s BIOS. To check if this is the case, you’ll need to access your BIOS menu and navigate to the SATA configuration or settings. Look for an option that enables the SATA controller and make sure it is set to “Enabled”.
Once you’ve saved your changes and exited the BIOS, restart your computer and see if the device is detected. Keep in mind that the exact steps may vary depending on your motherboard and BIOS version. Checking the BIOS settings may seem daunting, but it’s a crucial step in troubleshooting issues like this.
If you’re still having trouble, consider consulting your motherboard manual or reaching out to support for further assistance. By enabling the SATA controller in BIOS, you can ensure that your device is properly recognized and functioning as it should.
Check that the SSD is detected in the BIOS
When it comes to installing an SSD, it is essential to check whether your BIOS settings recognize the device. BIOS, also known as the Basic Input and Output System, contains all the configuration settings that your computer requires to boot up. By accessing the BIOS settings of your computer, you can ensure that the SSD is correctly installed.
To check whether your SSD is recognized, you need to restart your computer and enter the BIOS settings. Once you’re in the BIOS settings, head over to the “Storage” or “Drives” section and check whether the SSD is displayed under the list of installed drives. If the SSD is not listed, you may need to recheck the connections or update the BIOS firmware to the latest version.
Enabling the AHCI setting may also help to detect the SSD. By ensuring that your SSD is detected by your BIOS settings, you can avoid any boot-up issues and improve the overall performance of your computer.
Contact Patriot Customer Support
If your Patriot Burst SSD is not showing up, don’t panic. It could be due to a number of reasons. For instance, there might be issues with the cables or connections, or the storage device may have been accidentally damaged.
To fix the problem, you can try re-seating the drive and checking the connections. You can also run diagnostics or update the firmware to rule out any software issues. However, if you’re still experiencing problems, it’s best to reach out to Patriot’s customer support team for further assistance.
They’ll be able to provide you with expert advice and guidance on how to troubleshoot and resolve the issue, so you can get back to using your SSD as soon as possible.
If all else fails, contact Patriot’s technical support team for assistance
If you are experiencing difficulty with your Patriot product and have tried all troubleshooting options on your own, do not hesitate to reach out to Patriot’s technical support team for further assistance. They have a team of knowledgeable representatives who are dedicated to providing exceptional customer service and resolving any issues you may encounter. Whether it’s a quick question or a complex problem, they are there to help you every step of the way.
You can contact them via email, live chat, or phone, and they will guide you through the process to get your device working efficiently again. Remember, contacting customer support is always a great solution when you’re stuck, and Patriot’s team is always happy to assist you.
Conclusion
In conclusion, it seems that the Patriot Burst SSD has decided to take a patriotic stance and hide its true potential from plain sight. Perhaps it’s waiting for the perfect moment to burst onto the scene and amaze us all. Or maybe it just wants to keep its secrets close to home.
Whatever the reason may be, one thing is for sure: the Patriot Burst SSD is a rebel at heart, and we can’t help but admire its unwavering spirit. So, if you find yourself frustrated by its disappearing act, just remember that sometimes even the best things in life like to play hard to get.”
FAQs
Why is my Patriot Burst SSD not showing up on my computer?
There are several potential reasons for this issue. First, check your connections to ensure that the SSD is properly plugged in. You may also need to check your BIOS settings to ensure that the drive is recognized. Additionally, there may be a driver issue or the SSD may be defective.
How can I check if my Patriot Burst SSD is defective?
You can use diagnostic software to check if your SSD is faulty. Patriot provides their own SSDtoolbox software which can check for errors and perform firmware updates. There are also third-party diagnostic software options available.
What should I do if my Patriot Burst SSD is defective?
If your SSD is still within its warranty period, contact Patriot’s customer support to request a replacement. If the warranty has expired, you may need to purchase a new SSD.
Can a faulty SATA cable cause the Patriot Burst SSD to not show up?
Yes, a loose or faulty SATA cable can cause connectivity issues with your SSD. Try replacing the cable to see if it resolves the issue.
Can I recover data from a Patriot Burst SSD that is not showing up?
It may be possible to recover data from the SSD using data recovery software if the issue is software-related. However, if the SSD is defective, data recovery may not be possible.