

Upgrading your Mac’s storage is one of the most impactful performance improvements you can make—especially if you’re still running on an older model with a slow or nearly full internal drive. Whether you’re a creative professional editing 4K video, a student managing large project files, or a casual user frustrated by constant “disk almost full” warnings, swapping out your existing SSD for a faster, higher-capacity third-party option can breathe new life into your machine. But with Apple’s tight ecosystem and proprietary hardware designs, the process isn’t as straightforward as it is on a PC. That’s where this guide comes in.
In this comprehensive 2026 Mac SSD upgrade guide, we’ll walk you through everything you need to know to make a smart, informed decision. You’ll learn how to identify which Mac models support third-party SSD upgrades, what specifications truly matter (and which marketing claims are just noise), how to balance performance with budget, and—most importantly—which operating systems work seamlessly with aftermarket drives. We’ll also debunk common myths, highlight frequent pitfalls, and share expert-backed tips to ensure your upgrade goes smoothly without voiding warranties or bricking your system.
The market for third-party Mac SSDs has evolved dramatically over the past few years. Once dominated by a handful of niche brands using custom controllers and firmware, it now includes major players like Samsung, Crucial, OWC (Other World Computing), Transcend, and even Apple itself offering certified replacements. However, compatibility remains fragmented: some Macs use standard NVMe M.2 drives, while others require Apple-specific form factors like the proprietary blade-style SSD found in pre-2016 MacBook Pros or the soldered storage in newer M-series Macs. Understanding these differences is critical—because buying the wrong drive won’t just waste money; it could render your Mac unusable. This guide cuts through the confusion so you can confidently choose the best SSD for your specific Mac model, use case, and macOS version.

What to Look for When Buying a Third-Party Mac SSD
1. Compatibility with Your Mac Model
The single most important factor when choosing a third-party SSD for your Mac is compatibility. Not all Macs support user-upgradeable storage, and among those that do, the required form factor, interface, and firmware vary widely. For example, MacBook Pros from 2012 to 2015 typically use a proprietary Apple SSD connector (sometimes called “blade” or “AHCI-based”), while models from 2016 onward often use standard NVMe M.2 drives—but with Apple-specific power delivery and thermal considerations. Meanwhile, all Macs with Apple Silicon (M1, M2, M3, and beyond) have soldered storage that cannot be upgraded at all.
Before purchasing any SSD, consult Apple’s official technical specifications for your exact Mac model (found under “About This Mac” > “System Report” > “Hardware” > “Storage”). Cross-reference this with reputable third-party upgrade guides from sources like OWC, iFixit, or MacRumors forums. Look for keywords like “user-replaceable,” “PCIe Gen3,” or “NVMe 1.3.” If your Mac uses a soldered SSD or a T2 security chip with strict firmware validation, third-party upgrades may be limited or require special tools and firmware patches—which can complicate future macOS updates.
2. Performance Specifications: Speed, Interface, and NAND Type
Not all SSDs are created equal—even within the same capacity range. Performance hinges on three key specs: sequential read/write speeds, interface type (PCIe Gen3 vs. Gen4), and NAND flash technology (TLC vs. QLC). For most Mac users, sequential speeds above 2,000 MB/s are more than sufficient for everyday tasks like booting macOS, launching apps, and transferring files. However, creative professionals working with large media files may benefit from drives hitting 3,000–3,500 MB/s, especially on Macs that support PCIe Gen4 (like the 2021+ MacBook Pros with M1 Pro/Max).
The interface matters because older Macs (pre-2016) often use AHCI-based PCIe 2.0 or 3.0 lanes, while newer Intel and Apple Silicon models leverage NVMe over PCIe 3.0 or 4.0. Using a Gen4 drive in a Gen3 Mac won’t damage anything, but you’ll only see Gen3 speeds—so there’s little point paying extra for Gen4 unless you plan to reuse the drive in a future-compatible machine. As for NAND type, TLC (triple-level cell) offers better endurance and consistent performance under load compared to QLC (quad-level cell), which can slow dramatically during sustained writes. Avoid QLC drives for primary system use unless you’re on a tight budget and prioritize capacity over longevity.
3. Build Quality & Durability
SSDs are generally reliable, but build quality varies significantly between brands and price points. Look for drives with robust controllers (like Phison, Silicon Motion, or Samsung’s in-house designs), adequate thermal management (heat spreaders or thermal pads), and high-quality NAND sourced from reputable manufacturers (Samsung, Micron, SK Hynix). Cheaper drives may use recycled or lower-grade components that fail prematurely under heavy workloads.
Durability is measured in terabytes written (TBW)—the total amount of data that can be written to the drive before failure becomes likely. A 1TB TLC SSD typically offers 600–1,200 TBW, while QLC drives may drop to 200–400 TBW. For context, the average user writes less than 20TB per year, so even modest TBW ratings are sufficient for personal use. However, video editors or developers running constant builds should aim for higher endurance. Also consider shock resistance (most SSDs are inherently shockproof due to no moving parts) and operating temperature range, especially if you use your Mac in hot environments or inside tight enclosures.
4. Features & Functionality: Encryption, TRIM, and macOS Integration
Modern macOS versions rely heavily on SSD-specific features like TRIM (which maintains performance over time by clearing unused data blocks) and hardware encryption (for FileVault compatibility). Unfortunately, not all third-party SSDs enable these out of the box. Some require manual TRIM enablement via Terminal commands (sudo trimforce enable), while others may lack native AES-256 encryption support, forcing reliance on software-based FileVault—which can slow down older Macs.
Additionally, macOS Ventura and Sonoma introduced stricter firmware validation for storage devices, particularly on Macs with the T2 chip or Apple Silicon. While many third-party drives now include Apple-compatible firmware, some may trigger warnings or fail to boot after major OS updates. Always check recent user reports and manufacturer update logs before upgrading your OS post-installation. Features like sleep/wake reliability, low-power states, and hibernation support also vary—poorly implemented firmware can cause kernel panics or unexpected shutdowns.
5. Brand Reputation & Ecosystem Support
When it comes to Mac-specific SSDs, brand matters more than ever. Generic or off-brand drives might offer tempting prices, but they often lack proper macOS optimization, long-term firmware updates, or responsive customer support. Established players like OWC, Transcend, and Samsung have spent years refining their Mac compatibility, offering tools like cloning software, step-by-step installation videos, and even pre-loaded macOS recovery partitions.
OWC, for instance, provides a dedicated “Aura” line of SSDs designed exclusively for Macs, complete with custom firmware that mimics Apple’s original drives. Their support team includes Mac technicians who can troubleshoot boot issues or guide you through Time Machine restoration. Similarly, Transcend’s JetDrive series includes macOS-specific utilities and detailed compatibility charts. In contrast, buying a no-name NVMe drive from an unknown seller might save $30 upfront but cost you hours of frustration—and potentially a failed upgrade.
6. Warranty & Support
A solid warranty isn’t just about peace of mind—it’s a reflection of the manufacturer’s confidence in their product. Most reputable SSD brands offer 3- to 5-year limited warranties, covering defects but not physical damage or misuse. However, Mac-specific drives often come with enhanced support, including free data recovery consultations or replacement drives shipped overnight. OWC, for example, provides a 3-year warranty with optional extended coverage and includes a free cloning kit with purchases.
Pay attention to warranty terms: some require registration within 30 days, others void coverage if the drive is used in a non-supported device (even if it technically works). Also consider return policies—Amazon and Best Buy typically allow 30-day returns, while specialty retailers like B&H or OWC’s own store may offer longer windows. If you’re unsure about compatibility, choose a seller with a generous return policy and clear restocking fee structure.
7. Size & Form Factor Constraints
MacBooks are notoriously space-constrained, and SSD upgrades must account for physical dimensions beyond just length. Standard M.2 2280 drives (22mm wide, 80mm long) fit most 2016+ MacBooks, but some models—like the 12-inch MacBook (2015–2017)—use shorter 2230 or even proprietary modules. Thickness is another concern: double-sided NAND chips or large heat spreaders may not fit under the logic board shield.
Always measure your existing drive or consult disassembly guides before buying. iFixit’s teardowns include precise SSD dimensions and clearance notes. If you’re replacing a drive in a MacBook Air or Retina MacBook Pro, ensure the new SSD doesn’t exceed 2.5mm in height. Some users resort to removing factory thermal pads or using slim aftermarket alternatives to make room—but this voids Apple’s warranty and increases overheating risk.
8. User Reviews & Real-World Testing
Spec sheets tell part of the story; real-world usage tells the rest. Look beyond star ratings and read detailed reviews from users with the same Mac model and macOS version as yours. Pay attention to comments about boot times, app launch speeds, thermal throttling, and long-term reliability. Forums like MacRumors, Reddit’s r/mac, and OWC’s community boards are goldmines of firsthand experiences.
Beware of fake or incentivized reviews—especially on marketplace sites. Genuine feedback often includes photos of the installed drive, benchmark results (using Blackmagic Disk Speed Test or AmorphousDiskMark), and notes on macOS update compatibility. If multiple users report the same issue (e.g., “won’t boot after updating to macOS Sonoma”), treat it as a red flag—even if the drive has great specs on paper.
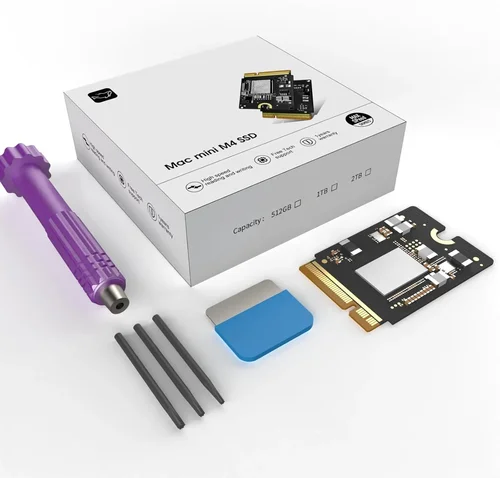
Different Types of Third-Party Mac SSDs
Common Buying Mistakes to Avoid
❌ Mistake: Assuming All M.2 Drives Work in All Macs
Why it’s bad: While many 2016+ Macs use standard M.2 slots, Apple often implements custom power delivery, thermal limits, or firmware checks that reject incompatible drives. A drive that benchmarks perfectly on a PC may fail to boot or throttle aggressively in a MacBook.
What to do instead: Stick to drives explicitly listed as compatible with your Mac model. Use tools like OWC’s compatibility checker or Transcend’s Mac SSD selector. When in doubt, buy from a retailer with a good return policy.
❌ Mistake: Ignoring macOS Version Compatibility
Why it’s bad: macOS updates—especially major releases like Sonoma or Sequoia—can break third-party SSD functionality if the drive’s firmware isn’t updated. Users have reported boot loops, kernel panics, or missing drives after updating.
What to do instead: Check the manufacturer’s website for firmware updates before installing a major macOS update. Keep your SSD’s firmware current, and avoid beta OS versions unless you’re prepared to troubleshoot.
❌ Mistake: Prioritizing Capacity Over Endurance
Why it’s bad: Buying a cheap 2TB QLC drive for your main system might seem like a bargain, but under sustained writes (like video editing or compiling code), performance can drop to HDD levels. You’ll experience lag, crashes, and potentially premature failure.
What to do instead: For primary drives, choose TLC NAND with at least 600 TBW for 1TB+ capacities. Reserve QLC for external backups or media storage where speed isn’t critical.
❌ Mistake: Skipping TRIM and Encryption Setup
Why it’s bad: Without TRIM enabled, your SSD will slow down over time as garbage collection becomes inefficient. Lack of hardware encryption forces macOS to use slower software-based FileVault.
What to do instead: After installation, run sudo trimforce enable in Terminal (for Intel Macs). Verify encryption support in System Settings > Privacy & Security > FileVault. If your drive lacks hardware encryption, consider using a Thunderbolt SSD with built-in AES support.
❌ Mistake: Attempting Upgrades on Non-User-Serviceable Macs
Why it’s bad: All Apple Silicon Macs (M1 and later) have soldered storage. Attempting to replace these drives requires microsoldering skills, specialized tools, and voids all warranties. Most DIY attempts result in permanent damage.
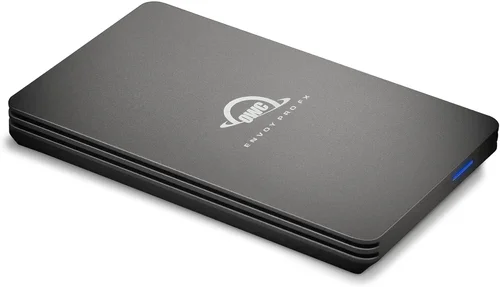
What to do instead: If you own an M-series Mac, focus on external Thunderbolt 3/4 SSDs for expandable storage. These offer near-internal speeds and are fully bootable in macOS.
❌ Mistake: Overlooking Thermal Throttling
Why it’s bad: MacBooks have minimal cooling for SSDs. High-performance drives can overheat during large transfers, causing speed drops or system instability.
What to do instead: Choose drives with low power draw or integrated heat spreaders. Monitor temps using apps like DriveDx or TGPro. Avoid running sustained heavy workloads on thin-and-light Macs without external cooling.
❌ Mistake: Not Backing Up Before Upgrading
Why it’s bad: SSD upgrades involve wiping your existing drive. Without a full Time Machine or Carbon Copy Cloner backup, you risk losing irreplaceable data.
What to do instead: Always create a verified backup before opening your Mac. Test the backup by booting from it. Keep it until you confirm the new SSD is working flawlessly.
Budget Guidelines: How Much Should You Spend?
Entry-Level ($50–$100): Ideal for light users upgrading older Macs (2012–2015) or adding secondary storage. Expect 500GB–1TB capacities using TLC or entry-level QLC NAND. Speeds around 1,500–2,000 MB/s. Brands like Kingston, Crucial, or Transcend offer reliable options in this range. Perfect for students or casual users who need more space without breaking the bank.
Mid-Range ($100–$200): The sweet spot for most upgraders. You’ll get 1TB–2TB of high-quality TLC NAND with speeds up to 3,500 MB/s (on Gen3/Gen4-compatible Macs). Drives from OWC, Samsung (970 EVO Plus, 980 Pro), and Sabrent include better controllers, thermal management, and macOS optimization. This tier balances performance, endurance, and value—ideal for professionals and power users.
Premium ($200–$400): For enthusiasts and creative pros who demand maximum performance and reliability. Expect 2TB–4TB capacities, Gen4 speeds (7,000+ MB/s on supported Macs), and enterprise-grade controllers. Look for drives with 1,200+ TBW ratings, hardware encryption, and active thermal throttling prevention. Samsung 990 Pro, OWC Aura Pro X2, and Sabrent Rocket 4 Plus are top contenders.
Luxury ($400+): Reserved for extreme use cases—4K/8K video editing, large-scale development environments, or RAID setups. These drives offer 4TB+ capacities, ultra-low latency, and professional support. While overkill for most users, they future-proof your investment and deliver unmatched consistency under load. Consider only if your workflow justifies the cost.
Expert Tips for Getting the Best Deal
- Buy during seasonal sales: Black Friday, Prime Day, and Back-to-School periods often feature 20–30% discounts on SSDs. Sign up for newsletters from OWC, B&H, and Amazon to get early alerts.
- Check refurbished or open-box deals: Retailers like Apple Refurbished, Best Buy Open-Box, and OWC’s “B-Stock” section sell tested, warrantied drives at significant savings.
- Bundle with cloning kits: Some sellers include free USB enclosures or cloning software—valuable if you’re transferring data from your old drive.
- Prioritize retailers with Mac expertise: OWC, Transcend Direct, and SmallNetBuilder specialize in Mac upgrades and offer better support than generic electronics stores.
- Verify firmware before OS updates: Always check your SSD manufacturer’s site after a macOS update announcement. Download and install any recommended firmware patches.
- Use benchmarking tools post-install: Run Blackmagic Disk Speed Test to confirm real-world performance matches specs. If speeds are far below expectations, your Mac may be thermal throttling or the drive may be defective.
- Keep your old drive as backup: Store it in a static-safe bag. If your new SSD fails, you can revert quickly—and some users even repurpose old drives as external backups.
- Consider future-proofing: If you plan to keep your Mac for 5+ years, invest in a higher-endurance drive now to avoid another upgrade cycle.

Frequently Asked Questions
Q: Can I upgrade the SSD in my M1 MacBook Air?
A: No. All Apple Silicon Macs (M1, M2, M3) have soldered storage that cannot be replaced or upgraded by users. Your only option for additional storage is an external Thunderbolt 3 or USB4 SSD.
Q: Will a third-party SSD void my Mac’s warranty?
A: On Intel Macs with user-replaceable SSDs, upgrading the drive does not void the overall warranty—but Apple may refuse service if they determine the upgrade caused damage. On Apple Silicon Macs, any internal modification voids the warranty entirely.
Q: Do I need to reinstall macOS after swapping SSDs?
A: Not necessarily. You can clone your existing drive using Carbon Copy Cloner or SuperDuper!, then swap the drives. However, a clean install of macOS is recommended for optimal performance and to avoid legacy issues.
Q: Are Samsung SSDs safe to use in Macs?
A: Yes—but with caveats. Samsung’s consumer NVMe drives (like the 970 EVO Plus) work well in most 2016+ Macs, but may require manual TRIM enablement. Avoid Samsung PM981/991 drives, which are known to cause kernel panics in macOS.
Q: Can I boot macOS from an external SSD?
A: Absolutely. Since macOS Catalina, Apple has supported booting from external Thunderbolt and USB4 drives. This is the recommended way to expand storage on Apple Silicon Macs.
Q: How do I enable TRIM on my third-party SSD?
A: On Intel Macs, open Terminal and type sudo trimforce enable, then follow the prompts. On Apple Silicon Macs, TRIM is automatically enabled for certified external drives but cannot be manually configured for internal storage.
Q: What’s the difference between AHCI and NVMe SSDs?
A: AHCI is an older protocol used in pre-2016 Macs, while NVMe is faster and more efficient, used in newer models. You cannot mix them—your Mac’s interface determines which type you need.
Q: Will my Time Machine backup work with a new SSD?
A: Yes, but you’ll need to reconfigure it. After installing the new drive, go to System Settings > General > Time Machine and select your backup disk again.
Q: How long do third-party Mac SSDs last?
A: With typical use, a quality TLC SSD should last 5–10 years. Monitor health using apps like DriveDx or Disk Drill, which report remaining lifespan based on wear leveling and error counts.
Q: Can I use a PC SSD in my Mac?
A: Only if it matches your Mac’s form factor, interface, and power requirements. Many PC NVMe drives work, but avoid models with aggressive power states or incompatible firmware (e.g., some WD Black drives).
Our Final Recommendations
Best for Budget-Conscious Buyers: Transcend JetDrive 750 (for pre-2016 Macs) or Crucial P3 1TB (for 2016+ Macs). Reliable, macOS-optimized, and priced under $100 for 1TB. Great for students and casual users.
Best Overall Value: OWC Aura Pro X2 (for blade SSD Macs) or Samsung 970 EVO Plus 1TB (for NVMe Macs). Excellent performance, strong macOS integration, and proven long-term reliability. Ideal for most upgraders.
Best Premium Option: Samsung 990 Pro 2TB or OWC Aura Pro X7. Top-tier speeds, exceptional endurance, and robust thermal design. Perfect for video editors and developers.
Best for Beginners: OWC Upgrade Kit with cloning software and tools. Includes everything needed for a hassle-free swap, plus detailed video guides. Minimizes risk of installation errors.
Best for Advanced Users: Sabrent Rocket 4 Plus 4TB with heatsink. High capacity, Gen4 speeds, and customizable firmware. Best for those comfortable with manual tuning and monitoring.
Conclusion: Making the Right Choice
Upgrading your Mac’s SSD with a third-party drive is a powerful way to extend its lifespan, boost performance, and reclaim valuable storage—but only if you choose wisely. Compatibility, macOS integration, and real-world reliability matter far more than raw specs or low prices. By focusing on your specific Mac model, intended use case, and long-term needs, you can avoid costly mistakes and enjoy a seamless upgrade experience.
Remember: not all Macs can be upgraded, and not all SSDs are created equal. Prioritize brands with proven Mac support, verify firmware compatibility with your macOS version, and always back up before you begin. Whether you’re breathing new life into a 2015 MacBook Pro or adding blazing-fast external storage to an M2 MacBook Air, the right SSD will transform how you use your machine.
Take the time to research, compare, and plan. Your future self—and your Mac—will thank you. Ready to upgrade? Start by identifying your Mac model, then explore our recommended drives above. And if you’re unsure, reach out to a specialist retailer—they’ll help you get it right the first time.