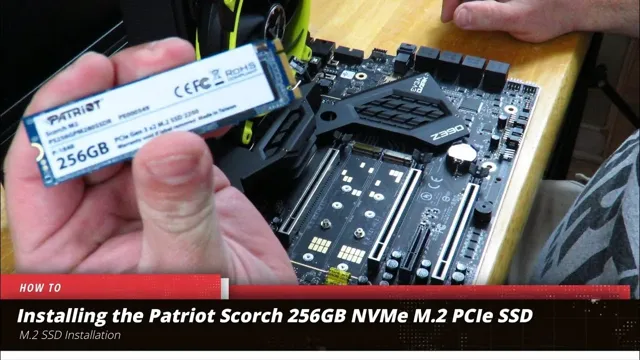
If you’re looking to boost your computer’s performance, you may want to consider installing an NVMe SSD like the Patriot Scorch. While an SSD installation may seem daunting at first, with the right steps, you’ll be able to do it yourself and reap the benefits. With lightning-fast read and write speeds, the Patriot Scorch offers exceptional performance, making it an excellent investment for demanding applications.
And, with the right guide, installing the Scorch in your Windows 10 PC can be a quick and easy process. In this blog post, we’ll walk you through the steps to follow to get your Patriot Scorch NVMe SSD up and running in no time.
Requirements
Installing a Patriot Scorch NVMe SSD in Windows 10 is a task that requires a few prerequisites. Firstly, you need to ensure that your motherboard is compatible with NVMe SSDs since not all motherboards support them. You’ll also need an available M.
2 slot on your motherboard since the Patriot Scorch is an M.2 form factor SSD. Additionally, make sure that your Windows 10 version is up-to-date and that your system supports booting from an NVMe SSD.
Before installing the SSD physically, check that it’s in working condition by connecting it to another computer. Once you’ve verified its functionality, power down your computer and open the case. Insert the Patriot Scorch SSD into the M.
2 slot and secure it in place with the provided screw. Next, close the case and power on the computer. For Windows 10 to recognize the new NVMe SSD, you need to initialize and format it first.
To do this, right-click on the Start menu and select Disk Management. Locate the unallocated drive in the list, right-click it, and select New Simple Volume. Follow the prompts to format and create the partition, and you’re done! In conclusion, installing a Patriot Scorch NVMe SSD in Windows 10 requires a compatible motherboard, an available M.
2 slot, and the latest Windows 10 version. Once installed, initialize and format the SSD in Disk Management for Windows 10 to recognize it. Happy upgrading!
Check whether your PC supports NVMe SSD
If you’re thinking of upgrading your PC’s storage to a NVMe SSD, it’s important to first verify whether your PC supports this type of drive. NVMe SSDs are faster and more efficient than traditional hard drives or SATA SSDs, but they require a compatible motherboard and an available NVMe M.2 PCIe slot.
To check whether your PC supports NVMe SSDs, you can either consult your motherboard manual or use software tools like CPU-Z or HWiNFO64 to identify your motherboard’s chipset and whether it supports NVMe. Once you’ve confirmed that your PC supports NVMe, you can then shop for an NVMe SSD that meets your storage and budget needs. Keep in mind that even if your PC doesn’t support NVMe, you can still benefit from using a SATA SSD, which is much faster than a traditional hard drive.
Ultimately, the specific requirements for upgrading your PC’s storage will depend on your individual hardware setup, so it’s always a good idea to do your research and consult with a trusted professional before making any significant changes to your computer.
Ensure NVMe slot is available in your motherboard
NVMe slot, motherboard One of the most critical aspects of upgrading your computer’s storage system with an NVMe SSD is to ensure that your motherboard has an available NVMe slot. Without this, there is no way to get the full benefits of an NVMe SSD’s blazing-fast performance. It is also essential to check if your motherboard design supports the slot.
Newer motherboards, such as those built in the last two to three years, usually come with at least one NVMe slot and support M.2 NVMe drives. However, some older motherboards may lack NVMe support or have a limited PCIe lane.
In such cases, you’ll need to invest in a compatible motherboard or PCIe adapter to benefit from NVMe technology. So, before you make any purchases, ensure that your motherboard has an available NVMe slot that can connect to an NVMe SSD drive. That way, you get to enjoy faster boot times, shorter load times, and improved overall system performance.
Ensure PCIE NVME adapter card is available (if necessary)
If you’re planning to upgrade your PC with an NVMe SSD, you’ll need to ensure that your motherboard has a compatible slot. Some older motherboards only support M.2 SATA, which won’t work with NVMe drives since they require a PCIe x4 slot.
In this case, you’ll need to get a PCIe NVMe adapter card to use the drive. These cards plug into a PCIe x4 slot and provide an M.2 NVMe slot for your drive to connect to.
They usually come with their own heatsinks to dissipate heat from the drive and ensure optimal performance. However, not all adapter cards are created equal, so make sure you research and choose a reputable brand. Once you have your adapter card, installation is relatively easy – just insert it into a PCIe x4 slot and connect your NVMe drive to the M.
2 slot on the card. With this important requirement taken care of, you’re ready to enjoy lightning-fast NVMe speeds on your PC.
Backup important files and existing data
Backing up important files and data is essential to ensure that your data is not lost in case of unforeseen events such as device malfunctions, theft, or natural disasters. To create a backup, you will need an external storage device such as a USB drive, external hard drive, or online cloud storage. These devices will enable you to store copies of your files, documents, photos, and videos in a safe location, so you can quickly recover them if needed.
It’s important to back up your data regularly, ideally daily, to ensure that you don’t lose any recent updates or changes. By making a habit of backing up your data, you can achieve peace of mind knowing that your important files are safe and accessible. Don’t wait until it’s too late, make backing up your data a priority today!
Installation Steps
Installing a Patriot Scorch NVMe SSD in Windows 10 is a simple process that can significantly improve your PC’s performance. The first step is to shut down your computer and unplug it from the power source. Once it’s completely turned off, open your computer’s case and locate an empty M.
2 slot. Carefully insert the NVMe SSD into the slot and secure it with a screw. After closing the case and plugging in your computer, turn it on and wait for Windows 10 to recognize the new drive.
You can then install the necessary drivers through the manufacturer’s website or through Windows update. Once the installation is complete, you can start using your Patriot Scorch NVMe SSD and enjoy faster boot times, improved application loading speeds, and more efficient data transfers. With these simple steps, you can easily upgrade your computer’s storage and performance.
Shutdown and unplug your PC
When installing new hardware or making changes to your PC, it’s important to start with a clean slate. This means shutting down your computer and unplugging it from the power source. Not only does this protect you from any electrical shock, but it also ensures that no power is surging through your computer while you make changes.
This step may seem like a no-brainer, but it’s an essential precaution to take – even if you’re just adding a new peripheral or accessory. So, before you start to tinker with your PC’s insides, be sure to shut it down and unplug it from the wall. Your safety and the longevity of your equipment could depend on it.
Open up your PC case
Opening up your PC case might sound like a daunting task, but it’s actually not that difficult. Before we jump into it, make sure you have the right tools, such as a screwdriver and possibly pliers. The first step is to shut down and unplug your computer.
Once you’ve done that, remove the side panel of your PC case by unscrewing the screws that hold it in place. Be careful not to damage any wires or components while doing this. With the panel off, you can now access the inside of your PC and begin any installations or upgrades you have in mind.
When you’re finished, put the panel back on and screw it in tightly. As simple as it might seem, opening up your PC case can dramatically increase the performance and functionality of your computer.
Install Patriot Scorch NVMe SSD to NVMe slot or adapter
Installing a Patriot Scorch NVMe SSD to your computer can be a game-changer, boosting your system’s storage capacity and processing speed. However, before you start, ensure that you have an available NVMe slot on your motherboard or an adapter if your system doesn’t support NVMe. To begin the installation process, switch off your computer, and open the case.
Take out the NVMe slot cover if you have one and gently insert the SSD into the slot with the gold connectors facing down. Next, use the screw to fasten the SSD securely to the slot. If you’re using an adapter, insert the SSD into the adapter, place the adapter onto the motherboard in the PCIe x4 slot, and fasten with a screw.
Close the computer case, power on the system, and check the BIOS to confirm that the SSD is detected. If all is well, you can install your favorite operating system or transfer files onto the SSD and enjoy its fast read and write speeds. With a Patriot Scorch NVMe SSD, your computer will run faster, and you’ll have more space for your files and applications.
Close up your PC case
Installing hardware on your PC can seem daunting, but with the right steps and some patience, you can successfully install and close up your PC case. First, make sure you have all the necessary tools, including a screwdriver and cables for your hardware. Once you have them, it’s time to begin the installation process.
Start by plugging your hardware into the appropriate ports and screwing them into place. Remember to be gentle and take your time, ensuring that everything is properly aligned. Once you have installed everything, it’s time to close up your PC case.
Use the screws provided with your case to secure it in place, making sure everything is snug and secure. Double-check that you haven’t missed any cables or screws and that everything is connected properly, and then power on your PC to make sure everything works. Closing up your PC case might seem like a minor step, but it’s crucial to ensuring that your hardware works properly, so take your time and do it right.
Power on your PC and enter BIOS settings
When it comes to installing new hardware in your PC, the first step is to enter your BIOS settings. This might sound complicated at first, but it’s actually really easy. Simply power on your PC and look for the prompt that tells you how to enter BIOS settings.
Usually, this will involve pressing a key like F2 or Delete. From there, you’ll be taken to a menu where you can configure various settings related to your hardware. It’s important to be careful when making changes in your BIOS, as doing so can potentially cause issues with your PC.
But as long as you follow the instructions and take your time, there’s no reason why you can’t tackle this step successfully. With your BIOS settings configured properly, you’ll be ready to move on to the next step in the installation process.
Select NVMe SSD as boot device
If you want faster boot-up times and application loading speeds, then installing your operating system on an NVMe SSD is the way to go. Here are the steps to select NVMe SSD as the boot device. Firstly, make sure that your system supports NVMe SSD, which you can check in the motherboard manual.
Next, turn on your system and enter the BIOS or UEFI setup menu by pressing the designated key during startup. Once you’re in, go to the “Boot” section and look for “Boot Priority” or “Boot Order.” Here, prioritize your NVMe SSD as the first boot device by moving it to the top of the list.
Finally, save your changes and exit the BIOS or UEFI setup menu. Now, your system will boot from the NVMe SSD, which should give you noticeably faster boot-up and loading speeds. So, if you’re ready to upgrade your system’s performance, don’t hesitate to install an NVMe SSD and make it the boot device.
Conclusion
In conclusion, installing a Patriot Scorch NVMe SSD in Windows 10 is a breeze with the right tools and a bit of know-how. Not only will you experience blazing-fast data transfer speeds, but you’ll also gain a newfound appreciation for the power of technology and the convenience it provides. Say goodbye to long load times and frustrating lag, and hello to a seamless computing experience that will leave you wondering how you ever lived without it.
So don’t delay, get your hands on a Patriot Scorch NVMe SSD and see what all the fuss is about – your PC (and your productivity) will thank you!”
Congratulations! You have successfully installed Patriot Scorch NVMe SSD on Windows 10.
Congratulations on acquiring the Patriot Scorch NVMe SSD and completing the installation process on your Windows 10 computer! If you’re not familiar with NVMe SSDs, they provide faster read and write speeds than traditional SATA SSDs, equating to lightning-fast load times and improved computer performance. Now, let’s dive into the installation steps. First, shut down your computer and disconnect all cables, including the power cable.
Open your computer case and locate an available M.2 slot on your motherboard. Next, carefully insert the Patriot Scorch NVMe SSD into the slot and secure it with the screw provided.
Reconnect all cables and power up your computer. Your computer should now recognize the new SSD automatically. If it doesn’t, you may need to update your motherboard’s BIOS.
Once recognized, you can begin transferring files and enjoy the improved speed and performance provided by the Patriot Scorch NVMe SSD. Congratulations again on your successful installation!
FAQs
What are the system requirements for installing a Patriot Scorch NVMe SSD in Windows 10?
The system must have an available PCIe M.2 slot and support NVMe protocol. It is recommended to have an up-to-date version of Windows 10.
How do I physically install the Patriot Scorch NVMe SSD in my Windows 10 PC?
Insert the NVMe SSD into the M.2 slot on the motherboard, secure it in place using the mounting screw, and connect the SSD to the motherboard using an NVMe cable.
How do I initialize the Patriot Scorch NVMe SSD after installation?
Open Disk Management in Windows 10, locate the unallocated space on the new NVMe SSD, and create a new partition. Follow the prompts to format the partition and assign a drive letter.
How do I update the firmware on my Patriot Scorch NVMe SSD in Windows 10?
Download the latest firmware from the Patriot website and follow the instructions provided in the firmware update utility to install the update on the NVMe SSD. It is recommended to backup all data on the SSD before updating the firmware.