
If you’re a Mac user looking to speed up your device’s performance, you may have heard about Sandisk SSDs. These solid-state drives are becoming increasingly popular due to their speed and reliability, but you may be wondering how to use them on your Mac. Fear not, as we’ve got you covered.
In this blog, we’ll be taking a deep dive into using Sandisk SSDs on Macs, from installation to troubleshooting. By the end of this post, you’ll be well on your way to improving your Mac’s performance with a Sandisk SSD. So sit back, relax, and let’s get started!
Check Compatibility
If you’re looking to use a SanDisk SSD on your Mac, compatibility is one of the most important factors to consider. To ensure your Mac is compatible, you need to make sure that your operating system version supports the SSD. SanDisk provides compatibility information for their products on their website, so it’s worth checking what they recommend.
You can also look up which macOS versions are compatible with the SSD’s interface type, whether it’s SATA or NVMe. Once you’ve determined compatibility, you can then proceed with installing your SanDisk SSD on your Mac. With the right compatibility, you can enjoy the fast speeds of your SanDisk SSD and maximize the performance of your Mac.
Verify macOS Version
As a modern-day Mac user, it’s essential to stay up-to-date with the latest macOS versions to ensure compatibility with all your system’s hardware components and software applications. Verifying your macOS version is a relatively simple process that can be completed in just a few clicks. The quickest and easiest way to check what version of macOS your Mac is running is to click on the Apple icon located in the top left corner of your screen and select “About This Mac.
” This will provide you with an overview of your system’s specifications, including the current version of macOS you’re running. It’s worth noting that not all Macs are compatible with the latest versions of macOS. Suppose you’re unsure whether your Mac can run a specific version of macOS.
In that case, you can check the official Apple website to confirm the minimum system requirements needed for an upgrade. Keeping your macOS version up-to-date is crucial to ensure maximum performance and smooth operation of your Mac.
Check Sandisk SSD Model Compatibility
Are you planning to upgrade your computer’s hard drive to an SSD? If so, it’s essential to ensure that the SSD you choose is compatible with your computer’s hardware. Sandisk SSDs are popular options for users looking for faster storage solutions. However, not all Sandisk SSD models are compatible with every computer or device.
To check if your preferred Sandisk SSD model is compatible with your computer, you can check the manufacturer’s website or consult with a certified technician. It’s crucial to choose a compatible SSD for your computer to avoid any performance or compatibility issues. Upgrading to an SSD can improve your computer’s speed and overall performance, but it’s essential to consider compatibility to get the best results.
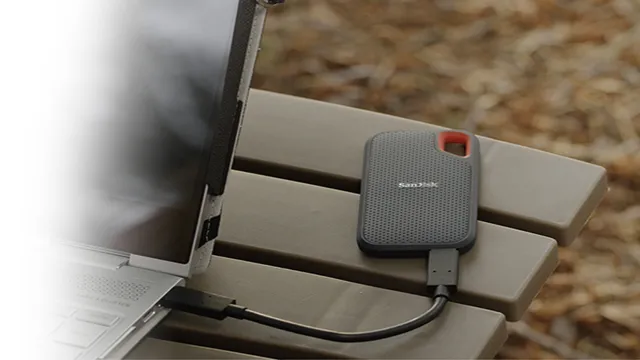
Connecting Sandisk SSD
If you’ve recently purchased a Sandisk SSD and are wondering how to use it on your Mac, don’t worry – it’s quite simple! The first step is to connect the SSD to your computer using a USB cable. Once connected, your Mac should automatically recognize the device, but if it doesn’t, simply navigate to the Finder and look for the SSD in the left sidebar. From there, you can easily transfer files to and from the SSD just like you would with any other external storage device.
One of the great things about the Sandisk SSD is that it’s compact and lightweight, making it perfect for carrying around with you on the go. So whether you’re a student, a photographer, or just someone who needs extra storage space, the Sandisk SSD is an excellent choice. With fast read and write speeds, you can be sure that your data will be safe and easily accessible whenever you need it.
So go ahead and connect your Sandisk SSD to your Mac – you’ll be glad you did!
Connect Sandisk SSD to Mac
If you’re looking to connect your Sandisk SSD to your Mac, you’re in luck. The process is relatively straightforward and easy to do. First, you’ll want to make sure that your Sandisk SSD is properly formatted to work with a Mac.
To do this, simply connect the SSD to your Mac and open up the Disk Utility app. From there, you can select the SSD and format it using the Mac OS Extended (Journaled) file system. Once your Sandisk SSD is formatted, you can connect it to your Mac using a USB cable.
Your Mac should detect the SSD automatically and display it in the Finder window. From there, you can simply drag and drop files to and from the SSD as needed. And that’s it! With just a few simple steps, you can easily connect your Sandisk SSD to your Mac and start using it right away.
Format SSD Drive for macOS
To format a Sandisk SSD drive for macOS, the first step is to connect the SSD drive to your computer. Ensure that the drive is properly connected and recognized by your computer. Once your SSD is connected, open Disk Utility on your Mac.
It can be found in the Utilities folder within the Applications folder. In the left sidebar of Disk Utility, select the SSD drive you want to format. Click on the Erase button at the top of the window.
You will then be prompted to name the new volume for the formatted SSD drive. Make sure to choose the correct file system as per your workflow needs, such as APFS, HFS+, or ExFAT. Then click on the Erase button to confirm the formatting process.
Once the formatting is completed, your Sandisk SSD drive will be ready to use with your Mac and should show up on the desktop. It’s important to note that formatting your SSD will erase all existing data on the drive, so be sure to back up any important files beforehand. By following these steps, you can quickly and easily format your Sandisk SSD drive for macOS.
Transferring Files
If you’re wondering how to use a SanDisk SSD on your Mac, the good news is that it’s a pretty straightforward process. The first thing you’ll need to do is connect your SanDisk SSD to your Mac using a USB cable. Your Mac should recognize the SSD automatically, but if it doesn’t, you may need to format it using Disk Utility.
Once your SSD is connected and recognized by your Mac, you can start transferring files. You can either drag and drop files from your Mac onto your SSD, or you can use a file transfer program like Finder or AirDrop to move them over. One of the benefits of using an SSD over a traditional hard drive is that it can transfer files much faster, so you should be able to move large files quickly and easily.
Just make sure to eject your SSD properly before disconnecting it to avoid any potential data loss. Overall, using a SanDisk SSD on your Mac is a great way to expand your storage space and improve your file transfer speed.
Copy Files from Mac to Sandisk SSD
So, you want to transfer files from your Mac to your Sandisk SSD? Well, lucky for you, once you figure out how to do it, it’s very simple. The key is understanding the process. First, connect your Sandisk SSD to your Mac.
Once connect the SSDs should appear on your Mac’s desktop. Next, locate the files you want to transfer. You can select individual files or folders by dragging and dropping them into the Sandisk SSD folder.
Alternatively, if you want to transfer many files at once, you can select all the files you want to transfer and then drag and drop them into the folder. Once you’ve selected the files you’d like to transfer, simply move them to the Sandisk SSD folder by dragging and dropping them into the folder. The transfer process will start, and depending on the size of the files, it may take a few minutes to complete.
It’s important to note that during the transfer process, don’t remove the Sandisk SSD or disconnect it from your Mac. Doing so could potentially damage or corrupt your files. Congratulations! You have successfully transferred your files.
Simple, right? With the proper steps, transferring files from your Mac to your Sandisk SSD is a breeze.
Copy Files from Sandisk SSD to Mac
Transferring files from a Sandisk SSD to a Mac is a breeze. It’s always a good practice to have backups, and having your files on an SSD can provide an additional layer of security. To transfer your files to your Mac, begin by plugging in the Sandisk SSD to the USB port of your Mac.
Once it’s connected, you will see it appear on your desktop as an external drive. Next, open a Finder window and locate the files you’d like to transfer. Click on the files and drag them to the Sandisk SSD folder on your desktop.
You can also create a new folder on the Sandisk SSD for your files. Alternatively, you can use the command + C and command + V shortcuts to copy and paste your files to the Sandisk SSD folder. After your files have been transferred, you can disconnect the Sandisk SSD from your Mac by dragging the icon to the trash can or right-clicking and selecting “eject.
” It’s important to note that you shouldn’t remove the Sandisk SSD from your Mac while files are being transferred to avoid data loss. Having a Sandisk SSD provides ample storage space and a reliable way to transfer and backup your files to your Mac. With these simple steps, you can easily transfer files between your Sandisk SSD and Mac without any hassle.
Ejecting Sandisk SSD
Using a Sandisk SSD on your Mac can provide a faster and more efficient way to store and access your files. If you’re unsure of how to use it properly, don’t worry, it’s not complicated. To start, you’ll need to plug in the SSD to your Mac’s USB port.
Once it’s connected, the Sandisk SSD icon should appear on your desktop and you can begin transferring files over. When you’re ready to eject the SSD, make sure to properly eject it by dragging the SSD icon to the trash bin on your dock and waiting for the notification that it’s safe to remove it. By following these simple steps, you can safely and effectively use your Sandisk SSD on your Mac.
Safely Disconnect Sandisk SSD from Mac
When it comes to disconnecting your Sandisk SSD safely from your Mac, it’s essential to know the proper way to eject it to prevent data loss or damage. Simply unplugging the SSD can lead to issues and corrupted files. To eject your Sandisk SSD, first, make sure all your applications or files located on the SSD are closed.
Then, locate the Sandisk SSD icon on your desktop or Finder window and right-click or Control-click on it. A menu will appear, and you can select “Eject” or “Unmount” to disconnect the drive safely. Wait for the SSD icon to disappear from your desktop or Finder window before physically unplugging the device.
Following these simple steps will help ensure the safety and longevity of your Sandisk SSD.
Conclusion
In conclusion, using a SanDisk SSD on a Mac is like upgrading from a bicycle to a sports car. It’s fast, reliable, and makes your computing experience smoother than ever before. With just a few simple steps, you can easily set up your SanDisk SSD on your Mac and enjoy lightning-fast speeds and ample storage space.
So why settle for average performance when you can have the best? Get your hands on a SanDisk SSD and take your Mac to the next level!”
FAQs
What is the process to format Sandisk SSD on Mac?
To format Sandisk SSD on Mac, open the Disk Utility application, select the Sandisk SSD from the list, click on the Erase button, choose the file system format, enter a name for the SSD, and click on Erase again to confirm.
Will Sandisk SSD work with Time Machine backup on Mac?
Yes, Sandisk SSD can be used with Time Machine backup on Mac. After connecting the SSD, go to System Preferences, choose Time Machine, select the Sandisk SSD as the backup disk, and turn on Time Machine.
How can I optimize the performance of Sandisk SSD on Mac?
To optimize the performance of Sandisk SSD on Mac, you can enable TRIM support, disable sleep mode for the SSD, and move frequently used files to the SSD. To enable TRIM support, enter the following command in Terminal: sudo trimforce enable.
How do I check the health of Sandisk SSD on Mac?
You can check the health of Sandisk SSD on Mac by using a third-party utility like Disk Utility or DriveDx. These utilities can show you the SMART attributes of the SSD, including the number of bad blocks, temperature, and wear level.