Upgrading your computer’s storage is an excellent way to boost its overall performance, especially if you’re using an M.2 SSD with your current setup. However, switching to a new M.
2 SSD doesn’t necessarily mean you have to reinstall Windows, which can be a pain. If you’re worried about having to back up your data, lose your settings and apps, or spend a lot of time reinstalling everything, don’t be. There’s a simple way to upgrade your M.
2 SSD without having to start from scratch. With a few tools and some basic knowledge, you can take your newly installed M.2 SSD, clone your existing drive to it, and be up and running in no time.
This process is straightforward, even for those who aren’t tech-savvy. As long as you have enough space on your new M.2 SSD to house your current operating system, you can clone your old drive, swap them out, and pick up right where you left off – but with a significant boost in speed and performance.
So don’t let the fear of reinstalling Windows hold you back from upgrading to an M.2 SSD. With this simple method, you can get all the benefits of a new drive without having to start from scratch.
Backup and Preparation
Upgrading your M.2 SSD without reinstalling Windows can be a challenging task, but with proper backup and preparation, the process can be smooth and seamless. First, before starting the upgrade process, it’s essential to back up all your critical files and data to an external storage device.
This backup will ensure that you don’t lose any of your important documents and files during the upgrade process. You can use a cloud service like Google Drive or Dropbox to back up your data or transfer it to an external hard drive or USB stick. Once the backup is complete, you can proceed to upgrade your M.
2 SSD. Before removing the existing SSD, make sure you have the correct screws and tools to avoid damaging the new SSD. Once you’ve installed your new SSD, you can use the backup you created earlier to restore your files and data.
With these steps, you can upgrade your M.2 SSD without the hassle of reinstalling Windows, ensuring a smooth and seamless process.
Create a backup of important files
Having a reliable backup of important files is a crucial aspect of preparation in today’s digital age. Whether it is personal documents, photos, or important work files, losing them can be devastating. There are plenty of ways to create backups of your files such as using external hard drives, cloud storage, or network-attached storage (NAS) devices.
Making a backup schedule is also important to avoid losing recent changes. In addition, it is a good idea to keep your backups in different locations for additional protection against file loss due to natural disasters or theft. Remember, a backup is not a complete solution but it is a necessary step in preparing for the worst-case scenario.
Don’t wait until it’s too late, create a backup of your essential files today!

Prepare the new SSD for installation
When preparing to install a new SSD, one crucial step is to backup your data from the old storage device. It’s important to ensure that all of your files, documents, and media are securely saved before switching to a new drive. There are several ways to backup your data, such as external hard drives, cloud storage, or online backup services.
Once you’ve backed up your data, you’ll need to prepare the new SSD for installation. This involves formatting the drive and partitioning it if necessary. It’s also important to check if there are any firmware updates available for the SSD and install them prior to the actual installation.
By properly preparing the new SSD, you’ll be able to ensure a smooth and trouble-free transition to a faster and more reliable storage solution.
Clone M.2 SSD to New SSD
Are you looking to upgrade your M.2 SSD without having to reinstall Windows? You’re in luck! With the right tools and steps, you can clone your M.2 SSD to a new one without compromising your data or operating system.
One way to do this is by using cloning software such as MiniTool Partition Wizard or Acronis True Image. First, connect your new M.2 SSD to your computer via a USB adapter or enclosure.
Then, open the cloning software and select your current M.2 SSD as the source disk and the new SSD as the target disk. Follow the prompts to clone your data and OS to the new SSD.
Once the cloning process is complete, disconnect the old M.2 SSD and install your new one. It’s that simple! By doing this, you can enjoy faster speeds and improved storage capacity without having to go through the hassle of reinstalling your operating system and software.
Download and install a cloning software
If you want to upgrade your computer’s storage without losing any data, cloning your M.2 SSD to a new SSD is a great option. To do this, you’ll need to download and install a cloning software.
This software will create a bit-by-bit copy of your original M.2 SSD, including the operating system, settings, and programs. Once you’ve downloaded and installed the cloning software, you’ll need to connect the new SSD to your computer either through an external enclosure or by replacing the original M.
2 SSD. Once connected, the cloning software will guide you through the process of cloning the original SSD to the new one. It’s important to note that the new SSD should be at least as large as the original one, or else you may run into issues with limited space.
After the cloning process, you can remove the original SSD and start using your computer with the new SSD. With this simple process, you can upgrade your computer’s storage without losing your data or having to reinstall all your programs.
Clone the M.2 SSD to new SSD
If you’re looking to clone your M.2 SSD to a new SSD, you’re in luck. It’s actually quite easy to do this without losing any data or settings.
The first step is to download and install cloning software on your computer. There are many different options to choose from, both free and paid, so it’s important to do some research and select a tool that fits your needs and budget. Once you have the software installed, you can connect your new SSD to your computer using an external enclosure or adapter.
From there, you’ll need to follow the software’s instructions for cloning your old SSD to the new one. This can take some time depending on the size of your drive and the speed of your computer, so be patient and let the process run its course. Once the cloning is complete, you can remove the old SSD and replace it with the new one.
That’s it! Your new SSD should now be an exact copy of your old one, with all your data, applications, and settings intact. Overall, cloning an M.2 SSD to a new SSD is a straightforward process that any computer user can do with the right tools and a little patience.
Replace Old M.2 SSD with New One
If you’re planning to upgrade your old M.2 SSD with a new one without going through the hassle of reinstalling Windows, then you’re in luck! Upgrading an M.2 SSD can be a straightforward process if you know what you’re doing.
First, ensure that your new M.2 SSD is compatible with your motherboard, and then shut down your system and unplug it before opening up your computer case. Locate your old M.
2 SSD and remove it from its slot by gently pushing down on the locking mechanism and sliding it out. Next, insert your new M.2 SSD into the slot and secure it with the locking mechanism.
Finally, reconnect your computer, turn on your system and ensure that your new M.2 SSD is recognized in the BIOS. Voila! You’ve just upgraded your old M.
2 SSD without the need for a Windows reinstall. Keep in mind; you may need to transfer your data from your old drive to your new one before removing it to ensure none of your precious files are lost!
Turn off and unplug the device
To replace an old M.2 SSD with a new one, the first and most crucial step is to turn off and unplug the device. This is a necessary precaution that ensures your safety and the safety of your device.
It is essential to wait for a few minutes to allow the device to cool down before you begin the replacement process. If your M.2 SSD is already installed, start by removing it carefully from its slot.
You can do this by unscrewing the screw that holds it in place, and then slowly and gently pulling it out of the slot. Make sure to remove the rubber spacer at the back of the old M.2 SSD and place it over the connector pins of the new one.
Once the new M.2 drive is in position, screw it back in place, and then plug the device back in. Turning it on and checking that the new drive is recognized is the last step in the process.
Replacing an old M.2 SSD with a new one is relatively straightforward with the right attention to detail and a bit of care.
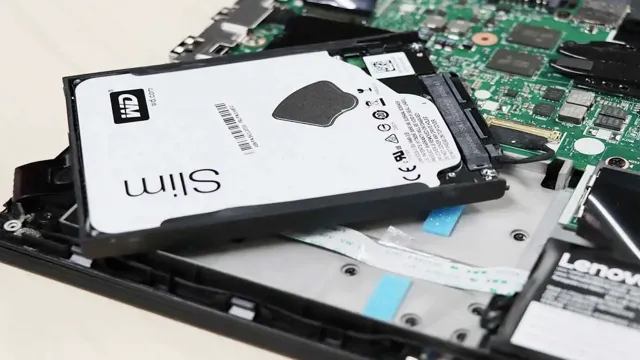
Open the device and locate the M.2 SSD slot
When it comes to upgrading your computer’s performance, replacing the old M.2 SSD with a new one is a great start. Luckily, it is not too difficult to replace it yourself.
The first step is to open up your computer and locate the M.2 SSD slot, which can be found on your motherboard. Once you have located it, you will want to remove the old M.
2 SSD. This can be done by taking out the screw(s) holding it in place and gently lifting it out of the slot. Be careful not to force it out, as this could damage the slot or the SSD.
Once the old SSD is out, you can install the new one by carefully lining it up with the slot and gently pushing it down until it clicks into place. Finally, replace the screw(s) to secure it in place. And there you have it – with just a few simple steps, you have replaced your old M.
2 SSD with a new one, and can enjoy faster performance and better storage capacity on your computer!
Remove the old M.2 SSD and replace with new one
If you are looking to upgrade your M.2 SSD, the first step is to remove the old one. Before you get started, make sure you have a Phillips head screwdriver and an antistatic wrist strap (to prevent damage from static electricity).
First, power off your device and unplug it from any power source. Then, locate the M.2 SSD, which is usually located near the processor and memory modules on the motherboard.
Use your screwdriver to remove the screw that holds the SSD in place. Carefully pull it out of the slot, being sure not to pull too hard or bend any pins. Now, you are ready to replace it with your new M.
2 SSD. Simply insert it into the empty slot at a 30-degree angle, then firmly push it down until it clicks into place. Secure it with the screw you removed earlier and you’re done! Your device should now recognize the new SSD and you’ll be ready to start taking advantage of its faster speeds and greater capacity.
Boot System and Verify New SSD
Upgrading your M.2 SSD without reinstalling Windows may seem like a daunting task, but it’s actually quite simple. First, you’ll need to access your computer’s BIOS and change the boot order to prioritize your new SSD over your old one.
Once that’s done, you can install your new SSD and restart your computer. From there, you’ll want to make sure your system recognizes the new SSD, which you can do by checking your computer’s device manager. If everything looks good, you’re good to go! Your computer should now be using your new SSD as its primary storage, without the need to reinstall Windows or any of your programs.
Of course, it’s always a good idea to back up your important files before making any hardware changes, just in case. With these simple steps, upgrading your M.2 SSD has never been easier, providing faster speeds and better performance for your computer.
Turn on and boot the device
After installing the new SSD in your device, it’s time to turn it on and boot it up. First, plug in the power cord and press the power button to turn it on. You should see the manufacturer’s logo appear on the screen.
If you don’t see anything, make sure the power cord is securely plugged in and try turning it on again. Once the logo appears, press the appropriate key to enter the BIOS or UEFI setup utility. This will allow you to verify that your new SSD is recognized by the system.
Check that the SSD is listed under the boot devices and that it’s set as the primary boot device. If everything looks good, save and exit the BIOS/UEFI setup utility and let the device boot up normally. Make sure to check that your operating system is running correctly and all your files and programs are present.
Congratulations, you’ve successfully installed and verified your new SSD!
Verify that the system is running on the new SSD
To verify that the system is running on the new SSD after the cloning process, it’s essential to boot the system and check if the new drive is being detected correctly. Once you have verified that the new drive is connected, power on the system and enter the BIOS settings to check if the new hard drive is detected. If the new drive is detected correctly, you can proceed to check the boot order and ensure that the system is set to boot from the new SSD.
Once you have verified that the system is booting from the new SSD, you can proceed to check the performance of the new drive and ensure that it’s running at optimal speeds. With the new SSD, you should experience faster boot times, improved system responsiveness, and faster data transfer speeds. In conclusion, by verifying that the system is running on the new SSD, you can be sure that the cloning process was successful, and you can enjoy the benefits of your new drive.
Conclusion
Upgrading your M.2 SSD without reinstalling Windows requires a bit of tech-savvy and a lot of patience. But, ultimately, the payoff is worth it! By following the steps carefully and having the right tools at your disposal, you can easily swap out your old M.
2 SSD for a shiny new one, without ever having to start from scratch again. Now, that’s what we call a clever upgrade!”
FAQs
What is an M.2 SSD?
An M.2 SSD is a compact solid-state drive that uses a PCI Express interface. It is commonly used in laptops and mini PCs for its small form factor and fast performance.
Is it possible to upgrade an M.2 SSD without reinstalling Windows?
Yes, it is possible to upgrade an M.2 SSD without reinstalling Windows. You can clone the existing drive to the new drive using specialized software or hardware.
What is the best way to clone an M.2 SSD?
The best way to clone an M.2 SSD is to use a dedicated cloning software, such as Macrium Reflect or Acronis True Image. These tools can create an exact copy of the source drive and transfer it to the new drive.
Can I upgrade an M.2 SSD on my laptop?
Yes, you can upgrade an M.2 SSD on your laptop if it supports M.2 drives. You should check your laptop’s manual or specifications to see if it has a compatible slot, and make sure the new drive is the right size and interface for your laptop.