Have you ever come across a stubborn screw while trying to install or remove an SSD from your computer? It can be a frustrating experience, especially if you don’t know how to handle it. SSD screws are often small and tightened very tightly, making it challenging to unscrew them. But don’t worry, we’ve got you covered.
In this article, we’ll discuss some effective ways to get that stuck SSD screw undone, without causing any damage to your computer. Whether you’re a DIY enthusiast or a computer repair professional, our tips will come in handy and save you from the hassle of a tricky situation. So, let’s get started and learn how to unscrew a stuck SSD screw the right way!
Preparation
If you’re planning to upgrade your laptop’s hard drive or simply replacing a faulty SSD, there’s a chance that you may encounter a stubborn screw that just won’t budge. To avoid frustration and possible damage to your hardware, it’s crucial to prepare appropriately before attempting to unscrew an SSD screw. The first step is to find the right tools for the job.
Usually, you’ll need a screwdriver with a precision tip that fits snugly into the screw’s head to avoid slipping or stripping. It’s also essential to ensure that you’re working in a stable, well-lit area where you can see the screw clearly. Before proceeding, power off your device and remove the battery to prevent any electrical mishaps.
It’s also a good idea to ground yourself to avoid static discharge that can harm sensitive components. Finally, determine the type of screw you’re dealing with and proceed with caution. With the right tools and preparation, you can successfully unscrew that stubborn SSD screw and get back to enjoying your device’s improved performance.
Gather the necessary tools
When it comes to any project or task, preparation is key to success. Gathering the necessary tools is no exception. Whether you’re a professional or a DIY-enthusiast, having the right tools on hand can save you time and frustration.
First, determine what tools are required for the job. This could involve researching online, consulting with a professional, or referring to a instruction manual. Once you’ve compiled a list of necessary tools, gather them together in one place.
Check to see if any additional equipment is needed, such as safety gear or replacement parts. Remember, having the right tools can make a huge difference in the outcome of your project. So take the time to properly prepare and acquire everything you need before getting started.
Loosening the Screw
Unscrewing an SSD screw can be tricky, but with the right tools and technique, it can be done without damaging your valuable hardware. The first step is to identify the type of screwdriver needed for the job. Most SSD screws use a standard Phillips head, but some may require a Torx or Allen key driver.
Once you have the right tools, it’s time to loosen the screw. Apply gentle pressure to the screwdriver and turn it counterclockwise. If the screw is particularly stubborn, try applying some heat to the area using a hairdryer or heat gun.
This can help to expand the metal and make it easier to turn the screw. Another effective technique is to use a rubber band to grip the screwdriver. Simply stretch the rubber band and wrap it around the screwdriver handle.
This will provide extra grip and help to prevent the screwdriver from slipping. Be patient and avoid applying too much force, as this can strip the screw and cause irreparable damage. With these tips, you should be able to unscrew an SSD screw safely and easily.
Try a screwdriver
If you’re struggling to loosen a screw, sometimes all you need is a trusty screwdriver. First, make sure the screwdriver you’re using is the correct size for the screw. If it’s too small, it won’t have enough grip to turn the screw, and if it’s too big, you risk damaging the screw head.
Once you have the correct size, place the screwdriver into the screw head and apply pressure in a counterclockwise direction. If the screw is still stuck, try using a bit of lubricant like WD-40 or even a drop of olive oil to help loosen it. Another trick is to tap the screwdriver lightly with a hammer to help break up any rust or corrosion that may be holding it in place.
With a little bit of patience and some elbow grease, you should be able to loosen that stubborn screw in no time.
Use a rubber band
If you’ve ever tried to tighten or loosen a stubborn screw, you know it can be a frustrating experience. But don’t worry, there’s a simple solution to this problem – use a rubber band. This may sound like a strange suggestion, but it actually works surprisingly well.
Simply place the rubber band over the top of the screw and press down firmly with your screwdriver. The rubber band will provide extra grip and help you turn the screw more easily. This trick works especially well on small screws or screw heads that have been worn down over time.
So next time you’re struggling with a stubborn screw, give the rubber band trick a try and see if it does the trick. Happy DIY-ing!
Apply heat
To loosen a stubborn screw, one effective method is to apply heat. This technique can be helpful when the screw is rusted or stuck due to corrosion. The heat helps to expand the metal on the screw, making it easier to turn.
Before applying heat, it’s important to ensure that the surrounding area is free of any flammable materials. You can use a heat gun, a soldering iron, or even a lighter to apply heat to the screw. Be sure to wear protective gloves to avoid burns, and hold the heat source a few inches away from the screw.
Once the screw is hot, use a screwdriver or wrench to try turning it. If it still won’t budge, continue applying heat until it loosens enough to turn. Remember, applying too much heat or holding the heat source in one spot for too long can cause damage to the surrounding material or strip the screw.
So, use heat with caution and be patient, and you’ll eventually get that stubborn screw to turn!
Preventing Future Issues
Are you struggling to unscrew your SSD screw? Don’t worry, you’re not alone. It can be frustrating to encounter a screw that refuses to budge, but there are a few things you can do to prevent this issue in the future. First, make sure you have the right tools for the job.
A precision screwdriver set can be a lifesaver when it comes to working with small, delicate screws. Additionally, taking your time and being gentle when unscrewing can help prevent damage to the screw head or the surrounding components. If you’re still having trouble unscrewing the SSD screw, try applying some heat to the area with a hairdryer or heat gun.
This can help loosen any adhesive or other materials that may be causing the screw to stick. Remember, taking care when working with your computer or other electronics can help prevent future problems and save you time and money in the long run.
Avoid over-tightening the screw
When it comes to tightening screws, it’s important not to overdo it. Over-tightening screws can lead to a host of problems, including stripped screws and damage to the material being screwed into. To prevent future issues, it’s important to use the right amount of force when tightening screws.
This means using a torque wrench or screwdriver to ensure that you’re not applying too much pressure. In addition to preventing current issues, this will also help prevent future problems by ensuring that screws are tightened to the correct torque and don’t become loose over time. Remember, it’s better to err on the side of caution when tightening screws.
By using the right tools and techniques, you can avoid common issues and ensure that your projects are built to last. So, the next time you’re tightening a screw, be sure to use the appropriate amount of force, and avoid over-tightening at all costs!
Use the correct size screwdriver
When it comes to DIY projects and repairs, using the correct size screwdriver is essential for preventing future issues. Using the wrong size may not seem like a big deal at first, but it could lead to stripped screws or damage to the screw head, making it difficult to remove or tighten. So, how do you know which size to use? The easiest way is to match the size of the screw head to the screwdriver.
Don’t force a smaller or larger size screwdriver onto the screw, as this can cause damage. It’s also important to use the right type of screwdriver, whether it’s a flathead or Phillips head. By using the correct size screwdriver, you can ensure a smooth and successful DIY project without any future headaches.
Conclusion
In conclusion, unscrewing an SSD screw may seem like a daunting task, but fear not! You can easily conquer this challenge by following a few simple steps. First, ensure you have the right tools (a screwdriver that fits the screw head) and a steady hand. Apply a bit of pressure while turning the screwdriver counterclockwise and voila! The screw will come loose like a magician pulling a rabbit out of a hat.
Remember, it’s all about technique and finesse; don’t rush and don’t force it. Now you’re ready to swap out your SSD or upgrade your storage with ease. Happy unscrewing!”
FAQs
What tool do I need to unscrew an SSD screw?
You will need a screwdriver that fits the size of the screw. Most SSD screws are either Phillips head or Torx.
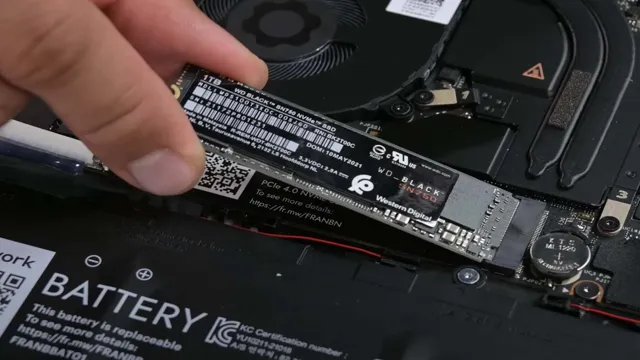
How do I know which screw holds the SSD in place?
Look for the screw or screws that are located near the SSD. Sometimes the screws may be labeled, but if not, use your best judgment to identify the screws holding the SSD in place.
What if the SSD screw is stripped or stuck?
If the screw is stripped, try using a different screwdriver or use pliers to get a better grip on the screw. If it is stuck, try applying some WD-40 or another lubricant to help loosen the screw.
Can I reuse the SSD screw once I’ve unscrewed it?
Yes, as long as the screw is in good condition, you can reuse it to secure the SSD back in place. Just make sure to tighten it securely but not too tightly.