Are you looking for a fast and reliable way to transfer your files to your Samsung SSD T7? Say goodbye to the hassle of slow transfers and unreliable connections! With the Samsung SSD T7, you can easily transfer large amounts of data quickly and efficiently. Whether you’re a photographer, videographer, or just someone who needs to store a lot of files, the Samsung SSD T7 is the perfect device for you. With its sleek, compact design and lightning-fast transfer speeds, the Samsung SSD T7 is the ultimate solution for those who need to transfer files quickly and efficiently.
But how do you go about transferring your files to your new SSD? Don’t worry, it’s easy! There are several ways to transfer files to your Samsung SSD T7, and we’re here to guide you through it. In this blog post, we’ll cover everything from the basics of transferring files to more advanced methods, such as using third-party software. We’ll explore the different options available to you, including USB-C and USB-A connections, and give you step-by-step instructions on how to get your files onto your new SSD.
So, sit back, grab a cup of coffee, and get ready to learn how to transfer your files to your Samsung SSD T You’ll be up and running in no time, with faster transfer speeds and more reliable storage than ever before. Let’s get started!
Check compatibility of devices
If you’re looking to transfer files to your Samsung SSD T7, the first step is to check compatibility with your device. The T7 is designed to work with a variety of computers, including Windows PCs, Macs, and Android mobile devices. However, it’s always a good idea to double-check that your device meets the necessary requirements.
For example, you’ll need a USB Type-C port or adapter in order to connect the T7 to your computer or phone. Additionally, you should ensure that your device’s operating system is supported (e.g.
Windows 7 or higher, Mac OS X 10 or higher, Android 1 or higher).
By confirming these details ahead of time, you can avoid any potential issues and ensure a smooth transfer process. Once you’ve confirmed compatibility, transferring files to the T7 is a breeze – simply connect it to your device, drag and drop your files, and you’re done!
Ensure your computer and SSD are compatible
When upgrading a computer, it’s important to check whether your computer and SSD are compatible. Compatibility issues can lead to wasted time and money, as well as potential damage to your devices. To ensure compatibility, you should check the specifications of both your computer and the SSD you plan to install.
Look for factors such as the type of interface, the size of the SSD, and whether it’s compatible with your operating system. One way to ensure compatibility is to consult with a computer technician, who can help you identify any potential issues and recommend appropriate solutions. By taking the time to check compatibility, you can avoid frustrating and potentially costly issues down the road.
So before you make any changes to your computer, be sure to do your research and ensure compatibility between your devices.
Connect the SSD to your Computer
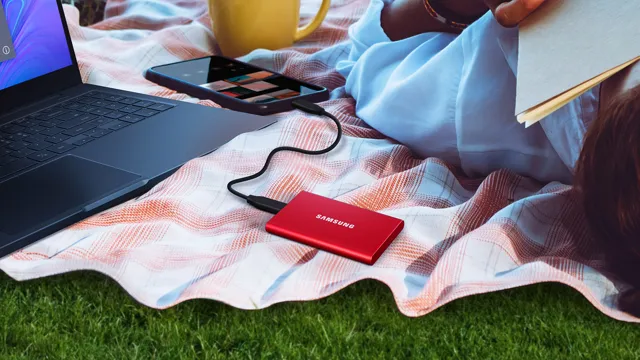
If you have just purchased a Samsung T7 SSD, the next step is to connect it to your computer so that you can start transferring files. The first thing you need to do is check whether your computer has a USB-C port or not. If it does not have a USB-C port, you will need to get a USB-C to USB-A cable to connect the SSD to your computer.
Once you have the cable, connect it to the SSD and then connect the USB-A end of the cable to your computer. Your computer will detect the SSD and you can start transferring files immediately. It’s worth noting that depending on the size and number of files you want to transfer, it may take a little bit of time to complete the transfer.
However, once you’ve transferred your files to the T7 SSD, you can rest assured they will be safe and secure, thanks to the drive’s excellent encryption and password protection features. With its fast read and write speeds, the T7 SSD is an excellent investment for anyone looking to store or transfer large amounts of data quickly and securely.
Use the provided USB cable to connect the SSD to your computer
When you receive a new SSD, the first thing you need to do is connect it to your computer. To do this, locate the provided USB cable and plug one end into the SSD and the other end into a USB port on your computer. Make sure to use a USB
0 port for faster transfer speeds. If your computer doesn’t have any free USB ports available, you may need to use a USB hub. Once the SSD is connected, your computer should automatically detect it and install any necessary drivers.
If not, you may need to manually install the drivers from the manufacturer’s website. Now that your SSD is connected, you can begin transferring files and experiencing faster read and write speeds. Just remember to safely eject the SSD from your computer before unplugging it to avoid any potential data loss.
Formatting the SSD
If you want to transfer files to your Samsung T7 SSD, the first thing you need to do is format the drive. This is an essential step, as formatting your SSD will erase any existing data on it and prepare it for the transfer process. To format the T7 SSD, you can either use Samsung’s software or your computer’s built-in formatting tool.
If you’re using Windows, simply connect your T7 to your computer and go to “This PC”. Then, right-click on the T7 drive and select “Format”. For Mac users, you can use the “Disk Utility” app and follow the prompts to format your T
Once your drive is formatted, you can transfer your files to it by simply dragging and dropping them into the T7 drive on your computer. It’s that easy! With your T7 now formatted and ready for use, you can enjoy its lightning-fast transfer speeds and reliable storage.
Format the SSD to suit your needs; exFAT is recommended for cross-platform compatibility
If you’re planning on using an SSD for storage, it’s important to format it in a way that suits your needs. One of the most popular formats for cross-platform compatibility is exFAT. This format allows your SSD to be used on both Windows and macOS systems, as well as on other devices like cameras and gaming consoles.
It also supports larger file sizes, making it ideal for storing large media files. However, it’s important to note that exFAT is not preferred for use as a boot drive. Other formats like NTFS and HFS+ may be better suited for that purpose.
Ultimately, the choice of format depends on how you plan on using the SSD. It’s important to research and choose the format that best meets your specific needs. Whatever your choice may be, make sure to backup all important data before formatting your SSD as formatting will erase everything on the drive.
Transferring files
If you’ve recently purchased a new Samsung SSD T7, transferring your files can seem like a daunting task, but don’t worry, it’s easier than you might think. First things first, you’ll need to connect your Samsung SSD T7 to your computer either via USB-C or USB-A. Once connected, you can then transfer your files by either copying and pasting them from your computer onto the SSD, or by using specialized software such as Samsung’s Portable SSD Software.
This software allows you to easily transfer files, back up your data, and even secure your SSD with password protection. With the help of these simple steps, you can transfer all your important documents, photos, and videos effortlessly onto your new Samsung SSD T7, giving you peace of mind knowing that your files are safely stored and readily accessible whenever you need them.
Drag and drop files onto the SSD or use a file transfer software like Samsung Portable SSD Software
When it comes to transferring files onto your Samsung Portable SSD, there are a couple of options to choose from. If you prefer a traditional method, then you can simply drag and drop your files directly onto the SSD. This method is easy and straightforward, and it doesn’t require you to install any extra software.
However, if you want to take your file transfer process to the next level, then the Samsung Portable SSD Software is the way to go. This software provides a user-friendly interface that allows you to transfer files quickly and efficiently. It also has additional features like data backup and restoration, so you can rest assured that your important files are always safe and secure.
Whether you prefer the traditional drag-and-drop method or the advanced software solution, transferring files onto your Samsung Portable SSD has never been easier.
Safely eject the SSD
If you want to learn how to transfer files to Samsung SSD T7, it’s actually a pretty simple process. First, connect your Samsung SSD T7 to your computer using the USB-C cable that came with it. Then, open the SamsungPortableSSD.
exe file that should have automatically downloaded onto your computer. Using the application, drag and drop any files you want to transfer onto your Samsung SSD T Once the transfer is complete, make sure to safely eject the SSD by clicking on the eject button in the SamsungPortableSSD application or by using the eject option on your computer.
This ensures that the transfer has been completed successfully and that no data has been lost. With this guide, you can easily transfer your files to your Samsung SSD T7 for secure and speedy storage.
Ensure all files are transferred before ejecting the SSD from your computer
If you have been using an external SSD to transfer files between devices, it is crucial to ensure that all files are safely transferred before ejecting the device from your computer. This step is often overlooked but can lead to data loss and corruption of files. Always check that all transfer processes have been completed before safely ejecting the SSD from your computer.
This can be done by checking the progress bar or closing all active data transfer applications. Ejecting the SSD before all files are transferred may result in incomplete files that could cause issues in the future. Remember to always safely eject your external SSD from your computer to prevent data loss and damage to files.
Additionally, it is important to avoid sudden removal of the SSD during transfer to avoid file corruption. Follow these simple steps to ensure that your data is kept safe and secure.
Conclusion
Congratulations! You are now capable of transferring your files to a Samsung SSD T7 like a pro. The process is quick, easy, and reliable, providing you with a lightning-fast storage solution. No more waiting for hours for your data to transfer.
No more frustrating crashes. With Samsung SSD T7, you can say goodbye to these problems and hello to a world of seamless, uninterrupted storage. So, go ahead, transfer your files, and enjoy the speed and efficiency of the Samsung SSD T
Your digital life will thank you for it!”
FAQs
1. How do I transfer files to Samsung SSD T7 from my Mac? A: To transfer files from your Mac to Samsung SSD T7, connect the SSD to your Mac using the provided USB-C cable. Once it is connected, drag and drop the files that you want to transfer to the SSD. 2. Can I transfer large files to Samsung SSD T7? A: Yes, you can transfer large files to Samsung SSD T7 without any issue. It has a transfer speed of up to 1050MB/s, which allows you to transfer large files quickly and easily. 3. Can I use Samsung SSD T7 with Windows and Mac both? A: Yes, you can use Samsung SSD T7 with both Windows and Mac machines. You just need to reformat the drive according to the file system supported by the operating system you are using. 4. How do I secure my files on Samsung SSD T7? A: Samsung SSD T7 comes with built-in password protection and AES 256-bit encryption, which allows you to secure your files from unauthorized access. To set up a password, install the Samsung Portable SSD software and follow the on-screen instructions.