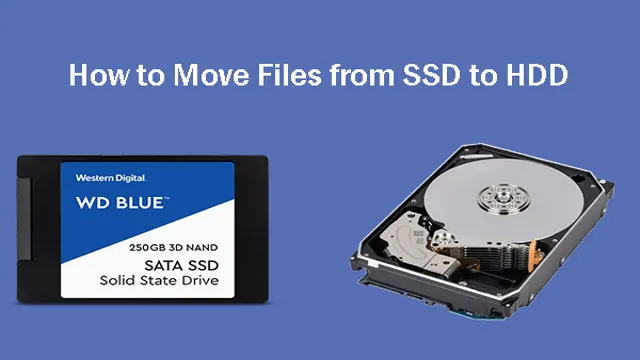
Upgrading your computer’s hard drive to a solid-state drive (SSD) is a great way to speed up your machine and improve overall performance. But once you’ve purchased your new SSD, you’re faced with the task of transferring files from your old hard drive over to your new one. It can be a daunting task, especially if you have a lot of data to move or if you’re not particularly tech-savvy.
But don’t worry – in this blog post, we’ll walk you through the steps you need to take to transfer files to your SSD, making the process as painless as possible. So, grab your old hard drive and your new SSD and let’s get started!
Check SSD and Hard Drive Compatibility
If you’re looking to transfer files from a hard drive to an SSD, the first step is to check the compatibility of both storage devices. While SSDs and hard drives typically use the same SATA interfaces, some SSDs can be incompatible with certain hard drives due to differences in power requirements and connectivity. It’s important to consult the specifications of both devices to determine their compatibility before attempting any file transfer.
Once you confirm compatibility, the next step is to transfer the files themselves. This can be done by simply dragging and dropping the files from the hard drive to the SSD, or by using software tools like Windows’ built-in Data Migration tool or third-party software like Acronis True Image. With a little bit of patience and attention to detail, you can successfully transfer your files from your hard drive to your SSD and enjoy all the benefits that come with SSDs, such as faster boot times and load speeds.
Check the type and cables needed
When it comes to upgrading your computer’s storage, it’s essential to ensure that the new drive you choose is compatible with your system. Before making any purchase, check the specifications of your computer to determine whether it supports solid-state drives (SSD), hard disk drives (HDD), or both. It’s also important to check the type of connectors your computer uses to connect the hard drive or SSD.
The most common connectors are SATA and NVMe, but your computer may require a different connector type, so be sure to check your computer’s specifications. Once you have all the necessary information, you can choose the appropriate drive and cable for your system. In summary, compatibility is key when shopping for a new drive, so take the time to thoroughly check your computer’s specs before making any purchases.
Backup Files and Partition the SSD
If you’re looking for ways to transfer files from your old hard drive to a new SSD, the first step is to create a backup of all your data. This includes all your important documents, photos, videos, and music folders. Once you’ve backed up your files, you’ll need to partition your SSD to allocate the appropriate space for your operating system, applications, and data.
This will require you to format and create new partitions on your SSD using disk management tools. It’s important to note that the transfer speed will depend on the amount of data you want to transfer and the type of connection you’re using. If possible, it’s recommended to use a SATA connection for faster and more reliable data transfer.
Once you’ve completed the partition process, you can begin transferring your files to your new SSD by copying and pasting them from your hard drive to the appropriate partition on your SSD. Finally, it’s important to check that all your files have been transferred successfully and that your system is running smoothly before you remove your old hard drive. By following these steps, you can easily transfer your files from a hard drive to a new SSD with minimal hassle and downtime.
Backup important files
Back up files Partition SSD Making sure your important files are backed up is crucial for ensuring their safety and accessibility. Losing important documents, photos, or videos can be devastating, and while hard drives and SSDs have come a long way in terms of reliability, accidents can still happen. Fortunately, backing up your files is easy and can be done in a variety of ways, including cloud storage, external hard drives, and even USB flash drives.
Another important step in maintaining your SSD’s performance is partitioning it. Partitioning your SSD allows you to create separate spaces for your operating system and other files. This can help prevent file fragmentation, boost your SSD’s performance, and help make organization much easier.
With these crucial steps in mind, you can ensure that your files are safe and your SSD is running smoothly.
Partition the SSD
Partitioning the SSD is an important step in optimizing your computer’s storage system, but it can also be a risky one if you don’t take the proper precautions. Before you start, it is essential to back up all your important files on an external hard drive. This will ensure that you don’t lose any data in case anything goes wrong during the partitioning process.
Once you’ve backed up your files, it’s time to partition the SSD. Partitioning allows you to divide the drive into several parts, each with its own designated space and purpose. This can be especially useful if you want to keep your operating system and personal files separate.
To partition your SSD, you will need to use a reliable partitioning tool. Make sure you follow the instructions carefully and double-check everything before proceeding. With the right precautions and tools, partitioning your SSD can be a straightforward and valuable way to optimize your computer’s storage system.
Clone Hard Drive to SSD
Are you looking to transfer files from your hard drive to an SSD? Cloning your hard drive to an SSD can improve your computer’s performance significantly. First, ensure that your SSD has enough storage space to accommodate all files on your hard drive. Then, install software that can help you clone your hard drive onto the SSD.
This software will automatically copy all files and data from your hard drive to the SSD. Once the cloning process is complete, your computer should recognize the SSD as the primary drive, and you can start enjoying faster boot times, improved performance, and increased storage space. Whether you’re upgrading your old computer or looking to enhance its performance, moving from a traditional hard drive to an SSD can make a significant difference.
So take the plunge, and transfer your files to an SSD now!
Choose a cloning software
If you’re planning to upgrade to an SSD, you’ll probably need to clone your hard drive. Fortunately, there are plenty of cloning software options available to make the process easier. One great option is EaseUS Todo Backup, which allows you to easily transfer your entire hard drive, including your operating system, to your new SSD.
Another popular choice is Acronis True Image, which offers advanced features like disk cloning and data migration. Whatever software you choose, be sure to carefully follow the instructions and create a backup of your data first to ensure a successful transfer. With the right cloning software, you’ll be able to enjoy all the benefits of an SSD without the hassle of reinstalling your operating system and applications.
Connect SSD and hard Drive
If you want to improve your computer’s performance, upgrading your hard drive to a faster SSD is a great place to start. But, before you toss out your old hard drive, you’ll want to clone it onto the new SSD so that you don’t lose any important files. First, connect both the SSD and hard drive to your computer.
You can use an external enclosure if you don’t have enough internal bays. Then, use cloning software to transfer all of the data from your old hard drive to the new SSD. This process can take some time, depending on how much data you’re transferring, but it’s worth the effort to avoid the hassle of reinstalling all of your software and settings.
Once the cloning process is complete, you’ll need to replace your old hard drive with the new SSD and voila! You’ll have a faster, more reliable computer with all of your data intact. So, don’t be intimidated by the process – the benefits of upgrading to an SSD are well worth it!
Clone hard drive to SSD
Cloning a hard drive to an SSD is a smart move for anyone looking to upgrade their computer’s performance. SSDs provide faster read and write speeds, which means your computer will boot up faster, run software quicker, and improve overall response time. But how do you clone your hard drive onto an SSD? First, start by backing up all of your important files onto an external hard drive or cloud storage, just in case anything goes wrong during the cloning process.
Then, you’ll need to purchase an SSD with enough storage capacity for all of your files. Next, download cloning software such as Acronis True Image or Macrium Reflect, which will guide you through the process step-by-step. Once you’ve cloned your hard drive, shut down your computer and swap out the old hard drive for the new SSD.
Finally, reboot your computer and enjoy the speed boost!
Set SSD as Boot Drive in BIOS
If you want to speed up your computer, the best way to do it is to install an SSD. An SSD is a type of hard drive that uses flash memory instead of a spinning disk, which means it’s much faster than a traditional hard drive. However, if you want to transfer files from your existing hard drive to your new SSD, there are a few things you need to do first.
The first thing you need to do is set your SSD as the boot drive in BIOS. This is a simple process that involves accessing your computer’s BIOS and changing the boot order so that your SSD is listed first. Once you’ve done that, you can use software such as Clonezilla or EaseUS Todo Backup to copy the contents of your hard drive onto your SSD.
This will transfer all of your files, programs, and settings to your new SSD, so you won’t have to reinstall anything. Finally, you’ll need to change your computer’s boot settings so that it boots from the SSD instead of the hard drive. This will ensure that your computer starts up quickly and runs smoothly.
So if you’re looking to speed up your computer, transferring your files to an SSD is the way to go, and by setting it as the boot drive in BIOS, the process will be a lot smoother.
Restart computer
So, you’ve finally upgraded your computer with a lightning-fast SSD, boosting its overall performance. But, before you can fully experience the benefits of the new hardware, you need to set it as the boot drive in your BIOS. Don’t worry; it’s relatively simple.
Firstly, restart your computer and access your BIOS settings by pressing the designated key repeatedly during boot-up. Once you’re in, navigate through the menus until you find the option to set your SSD as the primary boot drive, usually located under the ‘Boot’ or ‘Storage’ section. Select it, exit the BIOS, and save your changes.
Congrats! Your computer should now boot up faster than ever before, thanks to your new SSD.
Enter BIOS setup
Entering the BIOS setup is crucial when setting up your SSD as the boot drive. To get started, restart your computer and look for the corresponding key to access the BIOS menu, usually displayed on the screen during the boot process. Once you’re in the BIOS menu, navigate to the Boot tab and select the SSD as the primary boot option.
You may need to change the boot mode to UEFI if it’s not already set up that way. Keep in mind that the BIOS menu options may vary depending on your computer’s brand and model, so you may need to consult your motherboard or computer manual for specific instructions. Always remember to save your changes before exiting the BIOS menu, ensuring that your computer boots from the SSD every time you start it up.
It’s essential to keep your BIOS up to date as well to ensure the best performance and stability. With a few quick adjustments, you can set up your SSD as the primary boot drive and enjoy faster boot times and overall system performance.
Set SSD as first boot drive
To make your PC faster, setting the SSD as the first boot drive is a crucial step. The process of setting the SSD as your boot drive involves accessing your computer’s BIOS settings and updating them. First, turn on your computer and press the designated key (often F2 or Delete) shown on your screen to enter the BIOS.
This will open up the BIOS settings menu. From there, navigate to the Boot Options menu and select your SSD from the list of available boot drives. Once you have selected your SSD, save the changes and exit the BIOS.
By doing this, you are making your SSD the primary drive that will handle your computer’s booting process, and hence making your computer much faster. So, doing this will definitely be worth it.
Verify Cloned Files and Use SSD as Main Drive
When transferring files from a hard drive to an SSD, it’s important to verify that all files have been successfully cloned before using the SSD as your main drive. This can be done by checking the file sizes and dates between the source and destination drives. Additionally, it’s recommended to use cloning software that is specifically designed for SSDs to ensure that the process is as seamless as possible.
Once your files have been transferred and cloned, you can set your SSD as the main drive for faster boot times and improved overall performance. By utilizing the keyword “how to transfer files from hard drive to SSD,” you can easily find step-by-step guides and recommendations for making the switch to an SSD.
Conclusion
In conclusion, transferring files from a hard drive to an SSD may seem like a daunting task, but with the right tools and a bit of strategy, it can be as easy as pie. Just remember to back up your data, choose the right type of SSD, select the right cloning software, and follow the steps carefully. And if all else fails, don’t hesitate to call upon the tech-savvy wizards in your life for assistance.
Now go forth and enjoy the blazing fast speeds of your new SSD!”
FAQs
What is the best way to transfer files from hard drive to SSD?
The easiest and safest way to transfer files from a hard drive to an SSD is by using a cloning software, which creates an exact copy of your hard drive and transfers it to your SSD.
Can I transfer only specific files and programs from my hard drive to SSD?
Yes, you can manually transfer specific files and programs by copying and pasting them to your SSD. However, this process can be time-consuming and may require reinstalling certain programs.
Is it necessary to format the SSD before transferring files?
No, you don’t need to format the SSD before transferring files. But if you’re planning to use your SSD as your primary drive, it’s recommended to format it and install your operating system on it.
How long does it take to transfer files from a hard drive to SSD?
The time it takes to transfer files depends on the size of your hard drive and the transfer method you choose. Cloning your hard drive using software can take several hours, whereas manually transferring files can take longer depending on the number of files you’re transferring.