Wondering how to setup Sandisk Portable SSD for your data transfer needs? Look no further as we’ve got you covered. With the increasing need for portable storage, Sandisk Portable SSD is a highly efficient choice for carrying and transferring your data. However, it might seem a bit daunting to set it up, especially if it’s your first time.
In this blog post, we will walk you through the step-by-step process of setting up your Sandisk Portable SSD. Even if you’re a pro, you can still learn some tips and tricks to ensure seamless usage. So, let’s get started!
Check Compatibility and System Requirements
If you’re planning to set up your Sandisk Extreme Portable SSD, you need to check the compatibility and system requirements of your computer or device. Make sure your computer supports USB 1 Gen2 Type-C connectivity, or you must have a USB adapter with a compatible port.
The SanDisk Extreme Portable SSD needs a power supply of 900mA to function, so ensure your device can provide enough power. Additionally, the SanDisk Extreme Portable SSD is formatted to work with the NTFS file system on Windows and has some compatibility issues with macOS. If you’re a macOS user and need to work with both, you may choose to format the drive as exFAT.
Overall, making sure your computer or device meets the system requirements and checking compatibility is an essential step in setting up your Sandisk Extreme Portable SSD.
Make sure your computer meets the requirements
To have a seamless experience when using software or playing games on your computer, it is essential to check your system requirements and compatibility. Before downloading or installing an application, make sure that your computer meets the necessary specifications outlined by the software vendor. These requirements could be related to your operating system, processor, memory, graphics card, and other hardware components.
It is crucial to note that even if your computer meets the minimum requirements, you may experience performance issues, and in some cases, the application may not launch at all. However, if your computer exceeds the recommended specifications, you can expect to have an optimal experience. In conclusion, it is essential to check compatibility and system requirements to avoid unwanted issues when running applications and games on your computer.
Connect the SSD to Your Device
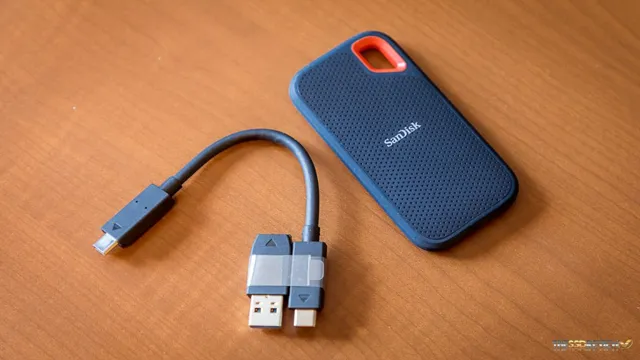
So you’ve got your SanDisk Extreme Portable SSD, and now you’re ready to set it up. The first step is to connect the SSD to your device. The easiest way to do this is via USB.
Simply plug the USB cable into the SSD and the other end into your device’s USB port. If you’re using a Mac or PC, the computer should recognize the SSD automatically. If you’re using a mobile device, you may need to download an app or go through some setup steps to get the SSD connected.
Once your device recognizes the SSD, you’re ready to start using it. From here, you can transfer your files, organize your data, or use any of the other features available with your new SSD – all while enjoying lightning-fast speeds and the peace of mind that comes with knowing that your data is safe and secure. Setting up your SanDisk Extreme Portable SSD may be just the beginning of your journey, but with this simple step, you’re well on your way to experiencing everything that this powerful device has to offer.
Plug in the SSD to a USB port
When it comes to upgrading your device’s storage, plugging in an SSD to a USB port is one of the easiest ways to do it. The first step is to locate the USB port on your device and ensure that it’s compatible with the SSD you have purchased. Once you’ve confirmed compatibility, connect the SSD to the USB port using the cable that came with it.
Make sure it’s securely connected by gently tugging on the cable. Your device should recognize the new storage device almost instantly. If it doesn’t, try restarting your device and reconnecting the SSD.
That’s all there is to it! With your new SSD connected, you’ll enjoy faster load times and better performance for all your favorite applications and files. It’s a simple upgrade that can make a huge difference in your device’s performance. So, what are you waiting for? Plug in that SSD and start enjoying faster speeds today!
Install the SanDisk software
Before you can start using your SanDisk SSD, you need to connect it to your device. First, make sure your computer is turned off. Then, locate the SATA port on your device’s motherboard and plug in the SSD.
Once you’ve done that, you can turn on your computer and install the SanDisk software. This will allow you to configure your SSD and optimize its performance. You can download the software from the SanDisk website and follow the on-screen instructions to install it.
You’ll also be prompted to set up a password to protect your data, so be sure to choose a strong, unique password that you can remember. Once the software is installed, you can start using your SanDisk SSD and enjoy faster boot times and improved overall performance.
Transfer Files and Backup Data
If you’re looking for a fast and reliable way to transfer files and backup data, the SanDisk Extreme Portable SSD is definitely worth checking out. To set it up, simply connect the SSD to your computer using the provided cable and follow the on-screen instructions. Once the device is recognized, you can easily drag and drop files onto it or use a backup software to automate the process.
The SanDisk Extreme Portable SSD offers fast transfer speeds of up to 550MB/s, making it ideal for large video files, high-resolution photos, and other media. Plus, with its rugged design, you can rest assured that your data is safe even in tough conditions. Whether you’re a photographer, videographer, or just need a reliable way to store and transfer your files, the SanDisk Extreme Portable SSD is definitely worth considering.
Drag and drop files
If you’re like me, you remember the old days of transferring files and backing up data using CDs and USB drives. Thankfully, those days are long gone. Nowadays, we have the convenience of drag and drop file transfer to make our lives easier.
With just a click and a flick, you can easily move files from one location to another without the need for external hardware. Not only does this feature save you time, but it also ensures that your data remains secure since there is less room for errors. All you need is your computer and a reliable internet connection, and you’re good to go.
Whether you’re backing up critical documents or sharing files with your colleagues, drag and drop file transfer has got you covered. So, why not give it a try and see how it can revolutionize the way you transfer files and back up your data?
Create a backup schedule
Creating a backup schedule is an essential part of any data management plan. We all know how frustrating it is to lose our important files due to a drive failure or accidental deletion. That’s why it’s crucial to transfer files and backup data on a regular basis, and having a schedule in place makes it easy to keep up with this task.
Set a specific time each week or month, depending on the volume of data you are dealing with, and make sure to stick to it. It’s also important to choose a reliable backup method, whether it be an external hard drive, cloud service, or a combination of both. By creating a backup schedule and sticking to it, you can have peace of mind knowing that your important data is protected in case of any unforeseen circumstances.
So don’t procrastinate and make a backup plan today!
Eject the SSD
If you are wondering how to setup your SanDisk Extreme Portable SSD, it’s a fairly simple process. One of the final steps is to properly eject the SSD from your computer. Ejecting the drive ensures that all files are properly saved and that there are no ongoing processes that may interfere with its safe removal.
To eject the SSD, simply right-click on the drive in your file explorer and select “Eject.” It’s important to wait until the pop-up message confirms that it is safe to remove the SSD before actually physically disconnecting it from your computer. By following these simple steps, you can ensure that your SSD is set up correctly and that your data is protected.
Overall, the SanDisk Extreme Portable SSD is a great choice for anyone looking for a fast, reliable, and portable storage solution.
Safely remove the SSD from your computer
After using your SSD for file transfers or running applications, it is important to safely remove it from your computer. Simply unplugging it could lead to data loss or even damage to the drive. So, how do you properly eject an SSD? On Windows, right-click the drive and select “Eject” from the context menu.
On Mac, drag the drive icon to the trash bin. Wait for the system to confirm that the drive can be safely removed before physically unplugging it. Remember, not ejecting the SSD correctly could potentially cause harm to both the drive and your computer.
So, take a few extra seconds to properly disconnect it and avoid any potential headaches down the road.
Conclusion
Congratulations! You’ve successfully set up your Sandisk Extreme Portable SSD and are now ready to take your data storage game to the next level. With lightning-fast transfer speeds and impressive durability, this portable powerhouse is the perfect companion for your on-the-go lifestyle. So go ahead, store your favorite movies, photos, and music without worry and rest easy knowing your data is safe and sound.
Welcome to the world of next-level data storage, you savvy tech wizard, you.”
FAQs
What are the capacity options available for the SanDisk Extreme Portable SSD?
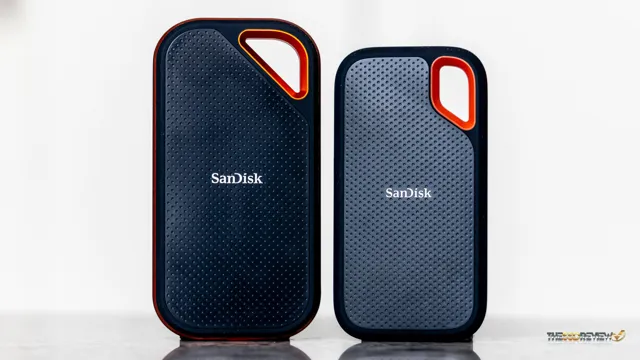
The SanDisk Extreme Portable SSD is available in capacities of 500GB, 1TB, and 2TB.
Is the SanDisk Extreme Portable SSD compatible with both Mac and Windows operating systems?
Yes, the SanDisk Extreme Portable SSD is compatible with both Mac and Windows operating systems.
What is the maximum transfer speed of the SanDisk Extreme Portable SSD?
The SanDisk Extreme Portable SSD has a maximum transfer speed of up to 550MB/s.
How do I set up my SanDisk Extreme Portable SSD?
To set up your SanDisk Extreme Portable SSD, simply connect it to your computer using the included USB-C cable and follow the on-screen prompts to format the drive and transfer your files.