Have you ever wondered why your computer’s SSD (solid-state drive) feels hot to the touch? Over time, these drives can become warm due to constant usage, which is why SSD heatsinks have become increasingly popular. They work by dispersing heat and keeping your SSD running at cooler temperatures. However, there can come a time when you need to remove the SSD heatsink for maintenance or upgrades.
This can seem daunting, but fear not! In this step-by-step guide, we’ll walk you through exactly how to remove your SSD heatsinks with ease.
Prepare Your Tools
Removing the heatsink on an SSD can be a daunting task, but with the right tools and a bit of preparation, it can be done easily. The first step is to gather all the necessary tools required to remove the SSD heatsink effectively. You will need a screwdriver, preferably a small Phillips head of a compatible size with the screw on your laptop or desktop holding the SSD heatsink.
A plastic spudger or a flathead screwdriver will help pry the heatsink off carefully without damaging the motherboard. It is also crucial to have thermal paste cleaner and a microfiber cloth to clean off any thermal paste residue from both the SSD and the heatsink to prevent any damage to the SSD. Once you have all the necessary tools, you are ready to remove the SSD heatsink efficiently and carefully without risking any permanent damage.
By preparing yourself with all the required tools, you can remove the SSD heatsink with ease.
Gather Materials
When it comes to tackling a project, one of the most crucial steps is preparing your tools. Whether you’re a seasoned DIYer or a beginner, having the right materials is key to a successful outcome. Start by making a list of all the items you’ll need, such as screws, nails, and measuring tape.
Consider investing in a good-quality power drill, saw, and other essential tools. If you’re unsure about what to purchase, consult with a specialist at your local hardware store or do some research online. It’s much better to have all the necessary tools on hand before you begin rather than having to stop midway through your project to run to the store.
By taking the time and effort to gather your materials properly, you’ll be setting yourself up for success and ensuring that your project runs smoothly.
Read Manufacturer Instructions
“manufacturer instructions” Before using any tool, it is important to read the manufacturer’s instructions thoroughly. These instructions not only provide important safety information but also provide you with guidance on how to properly prepare your tools. You do not want to start a project only to realize halfway through that you have been using the tool incorrectly, potentially causing damage to yourself or the tool.
Take the time to prepare your tools before starting any new project, ensuring they are clean and in proper working condition. By following the manufacturer’s instructions and properly preparing your tools, you can ensure that your project goes smoothly and without any issues. Remember, taking the time to read the instructions can save you time and money in the long run.
So, next time you begin a new project, take a few extra minutes to prepare your tools and read the manufacturer’s instructions carefully.
Shutdown and Disconnect PC
If you’re looking to remove the heatsink from your SSD, there are a few important steps to follow in order to avoid any damage to your system. First, be sure to shut down your PC properly and disconnect it from any power sources to ensure your safety. Next, locate the SSD and its attached heatsink.
Carefully unscrew the screws holding the heatsink in place and gently remove it, taking care not to damage any components. Be mindful of any thermal paste or pads used to connect the heatsink to the SSD, as these may need to be cleaned and replaced if they are damaged. With the heatsink removed, you can now clean both the heatsink and SSD if necessary, or simply replace the heatsink with a new one.
Always take precautions when handling components of your PC and consult a professional if you are unsure of any steps in the process.
Turn Off Computer
When it comes to turning off your computer, it’s important to properly shutdown and disconnect your PC. This not only ensures that your computer is functioning properly the next time you start it up, but it also protects your hardware and data from potential damage. To begin, you should always properly shutdown your computer instead of just unplugging it or turning it off with the power button.
This will allow your computer to go through the necessary steps of closing files and applications, and will save any changes you’ve made. Once your computer has completely shut down, you can then disconnect it from the wall outlet or power strip. Be sure to unplug any peripherals, such as a printer or mouse, as well.
Taking the extra time to properly shutdown and disconnect your PC can prolong its lifespan and prevent any data loss or hardware damage. So, the next time you’re ready to turn off your computer, remember to follow these simple steps.
Disconnect Cables
When it’s time to shut down your PC for the day, it’s important to do it properly and safely. One of the first steps in this process is to disconnect all of the cables. This includes the power cable, any peripheral cables such as USB or Ethernet cables, and any other cables connected to the computer.
By disconnecting all of these cables, you can prevent any damage to the computer or your other devices. Before you start disconnecting cables, make sure you properly shut down the computer. You can do this by clicking “Start” and selecting “Shut down”.
Once the computer has shut down completely, unplug the power cable from the wall outlet or surge protector. Next, disconnect any peripheral cables from the computer and then from the other device they are connected to. For example, if you have a printer connected to the computer via USB cable, first disconnect the cable from the computer, and then disconnect it from the printer.
It’s also important to disconnect any cables that are connected to the computer’s monitor. This includes the power cable and any other cables such as HDMI or VGA cables. Finally, disconnect any other cables that may be connected to the computer, such as audio cables or additional power cables.
By disconnecting all of the cables, you can ensure that your computer is safe and ready for the next use. It’s crucial to remember to unplug all of the cables from the wall outlet or surge protector before disconnecting them from the computer or other devices. This will prevent any damage or short circuits that could potentially harm your computer or yourself.
Remember to take the time to disconnect all of the cables properly to keep your computer running smoothly.
Remove SSD Heatsink
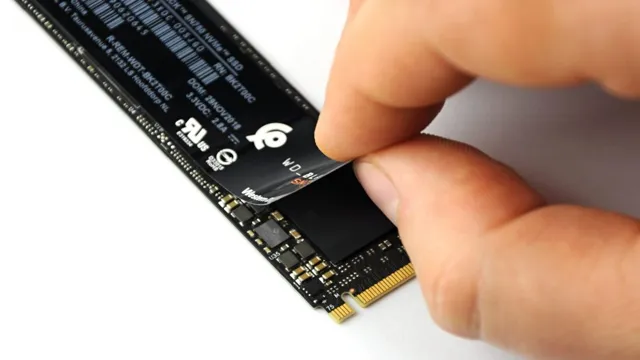
If you need to remove an SSD heatsink, it’s important to do it carefully to avoid damaging the drive. The first step is to determine the type of heatsink on your SSD. Some heatsinks are attached with screws, while others use adhesive.
If there are screws, gently remove them using a screwdriver. Be sure to keep them in a safe place so you don’t lose them. If your heatsink is attached with adhesive, you’ll need to use a heat gun to soften the adhesive.
Hold the heat gun about six inches away from the heatsink and gently heat it until the adhesive begins to soften. Then, use a plastic tool or credit card to carefully scrape the heatsink off the SSD. Be sure not to use metal tools as they could easily scratch the surface of the drive.
With a little patience and a steady hand, removing your SSD heatsink can be a simple and straightforward process.
Identify and Locate Heatsink
If you’re looking to upgrade your SSD or perform maintenance on your existing one, the first step is to locate and remove the heatsink. This essential component helps to dissipate heat and prevent your device from overheating, so it’s crucial to handle it with care. To start, you’ll need to identify where the heatsink is located on your device.
Typically, it’s located near the SSD, either directly on top of it or off to one side. Once you’ve located it, you’ll need to carefully remove any screws or clips holding it in place. Depending on the type of heatsink, you may need to gently pry it off with a tool or carefully slide it out of its slot.
Be sure to follow any specific instructions for your device, as heatsinks can vary widely in design. With the heatsink removed, you can then proceed with your SSD upgrade or maintenance. By taking the time to correctly remove and replace your heatsink, you’ll help ensure your device performs reliably and efficiently.
Remove Screws and Fasteners
When it comes to upgrading your SSD, the first step is to remove the heatsink that’s on top of it. This can be a tricky task, but it’s not impossible. The first thing you’ll need to do is remove any screws or fasteners that are securing the heatsink to the SSD.
You may need to use a screwdriver or other tool to get the job done. Once you’ve removed the screws, you should be able to lift the heatsink off of the SSD. Be careful not to damage any of the surrounding components as you do this.
It’s always a good idea to have a clean, flat workspace to do this on so that you can keep track of all the tiny components that you’re working with. With the heatsink removed, you can proceed with upgrading your SSD and putting everything back together. Remember, taking your time and being patient is key when it comes to working with delicate computer components.
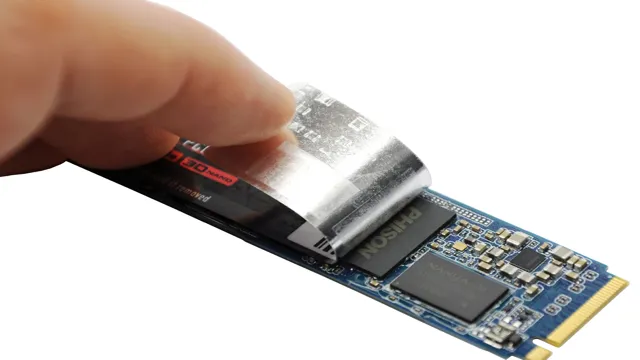
Detach SSD from Heatsink
If you’re looking to remove your SSD heatsink, it’s essential to know what you’re doing to avoid any damage. Start by locating the screws that are holding the heatsink in place. These screws will vary depending on your specific heatsink, so be sure to refer to the manufacturer’s instructions.
Once you’ve found the screws, use a screwdriver to remove them, being careful not to strip them in the process. Then, gently detach the SSD from the heatsink. It’s crucial to handle the SSD delicately to avoid any damage or data loss.
Once the SSD is separated from the heatsink, you can proceed with any maintenance or upgrades necessary. Remember to keep a steady hand and don’t rush the process to avoid costly mistakes. By following these steps, you can safely remove your SSD heatsink and keep your system running smoothly.
Clean and Reapply Heatsink (Optional)
If you’re experiencing high temperatures and slow performance from your SSD, removing the heatsink and cleaning it might improve its efficiency. To remove the SSD heatsink, first, turn off your system and unplug it from the power source. Unscrew the screws holding the heatsink in place and gently remove it from the SSD.
Use a clean, soft cloth to wipe off any accumulated dust or debris from the heatsink. If the debris is stubborn, use a cotton swab dipped in isopropyl alcohol to remove it gently. Once the heatsink is clean, reapply thermal paste to the SSD and reattach the heatsink, securing it in place with screws.
Remember to handle the heatsink with care to avoid damaging any components. Overall, removing and cleaning an SSD heatsink is an optional, yet helpful maintenance procedure that could prevent overheating and improve performance.
Clean the Heatsink
If you’re experiencing overheating issues with your computer, one of the possible culprits could be a clogged heatsink. Over time, dust and debris can accumulate on the heatsink, reducing its ability to dissipate heat properly. If you’re comfortable taking apart your computer, it’s worth giving the heatsink a good clean.
First, make sure your computer is turned off and unplugged. Then, remove the heatsink from the CPU and gently clean any visible dust or debris. You may need to use compressed air or a soft-bristled brush to get into the small crevices.
Once everything is clean, you can reapply thermal paste to the CPU and reattach the heatsink. Doing this can help improve the cooling efficiency of your computer and prevent unexpected shutdowns or damage to your hardware.
Apply Thermal Paste (Optional)
If you’ve decided to clean your computer’s heatsink, it’s a good idea to apply thermal paste as well. This is an optional step but can greatly improve the heat transfer between the CPU and heatsink. After removing the heatsink, use a lint-free cloth and some isopropyl alcohol to clean off the old thermal paste.
Once the surface is free of any buildup or debris, apply a small amount of new thermal paste in the center of the CPU. Be careful not to apply too much, as this can actually hinder heat transfer. Spread the paste evenly with a card or spatula before reattaching the heatsink.
This step is not necessary for everyone, but if you’re experiencing high CPU temperatures or are overclocking, it can be a worthwhile addition to your maintenance routine. Keep your system running cool and efficiently with this simple step for heat management.
Reattach Heatsink to SSD
If you want to take your SSD’s thermal performance to the next level, it’s worth considering cleaning and reapplying the heatsink. This may seem like an unnecessary step, but doing so can help dissipate heat more efficiently, which can improve your SSD’s lifespan and performance. To reattach the heatsink correctly, you’ll need to first remove it and then clean the surface of your SSD with a microfiber cloth and rubbing alcohol.
From there, you can apply new thermal paste to the surface of the SSD and reattach the heatsink carefully. This step may not be for everyone, but if you’re looking to optimize your system’s thermal performance, it’s worth considering.
Reinstall and Reconnect PC
Removing the SSD heatsink from your PC can be intimidating, but necessary if you need to access or replace your solid-state storage. First, shut down your PC and unplug it from the wall. If possible, ground yourself to avoid static electricity discharge that might damage sensitive components.
Locate the heatsink that covers your SSD and unscrew or release it depending on your particular model. Be sure to detach any screws, latches or clips from the motherboard. If your device has adhesive, you may carefully and slowly apply heat (such as from a hairdryer or heat gun) to loosen the bond.
Once the heatsink is removed, you can safely access your SSD for cleaning, replacement, or other maintenance. To reconnect, reverse your previous steps and ensure the screws and clips are secure. Reinstall your SSD heatsink and test your PC.
Following these steps properly can ensure your PC’s longevity and performance.
Reinstall SSD in PC
If you want to reinstall your SSD in your PC, the first step is to turn off your system and disconnect all cables. Then, locate the SSD on your motherboard and carefully remove it by unscrewing any screws holding it in place. Next, simply align the SSD with the appropriate slot and screw it back in.
Make sure to securely connect all cables, including the power and data cables. Once you’ve reconnected everything, turn on your PC and verify that the SSD is being recognized in your BIOS and operating system. Reinstalling your SSD can be a simple process as long as you take the necessary precautions and follow the steps carefully.
With a little bit of knowledge, anyone can do it!
Reconnect Cables and Turn On PC
After you have successfully removed all the components of your PC, it is time to reinstall and reconnect everything. Start by placing the motherboard back into the case and connecting all the necessary cables. Depending on your system’s configuration, you may need to reconnect cables for the power supply, graphics card, and hard drives.
Always refer to the user manual for your motherboard, as it may provide specific installation instructions. Once all the cables are securely fastened, it’s time to turn on your computer. Before pressing the power button, double-check that all the components are properly installed and that there are no loose connections.
Once you hit the power button, listen for any strange noises or beeps. If everything is working smoothly, you should see the BIOS screen pop up. Congratulations, you have reconnected your computer and it’s ready for use!
Conclusion
Well, removing an SSD heatsink can be a tricky and daunting task, but with some patience and a few key tools, it can be done successfully. It’s important to remember that SSDs are delicate creatures, and any mishandling can result in irreversible damage. So, proceed with caution, and take your time.
And if all else fails, just remember that sometimes the best way to remove a heatsink is with a little bit of elbow grease and a lot of determination!”
FAQs
Why should I remove the SSD heatsink?
If you need to replace your SSD or upgrade your system, you may need to remove the SSD heatsink to access the drive.
Can I remove the SSD heatsink without damaging the drive?
If done carefully and correctly, you can safely remove the SSD heatsink without damaging the drive.
What tools do I need to remove the SSD heatsink?
You will need a screwdriver set, thermal paste, and a thermal pad to remove the SSD heatsink.
How do I remove the SSD heatsink from my computer?
First, shut down your computer and unplug all cables. Then, remove the screws holding the SSD heatsink in place and gently lift off the heatsink. Clean off any residual thermal paste and replace with a new pad or paste if necessary.