

Partitioning an SSD is one of those tasks that sounds intimidating but is actually straightforward once you understand what’s happening under the hood. Whether you want to separate your OS from your files, set up a dual-boot system, or simply organize a new drive before first use — this guide covers everything you need to know to do it safely and effectively.
We’ll walk through the process on Windows, macOS, and Linux, explain which file system to choose for each scenario, share recommended partition sizes, and flag the mistakes that trip up most users.
Should You Partition Your SSD? (Honest Answer First)
Before diving into the how-to, it’s worth asking whether partitioning actually makes sense for your situation. The answer depends on what you’re trying to accomplish.
Good reasons to partition an SSD:
- You want to dual-boot two operating systems (e.g., Windows + Linux)
- You want to separate your OS/apps from your personal data so a Windows reinstall doesn’t touch your files
- You’re setting up a shared drive with different file systems (e.g., NTFS for Windows + exFAT for cross-platform access)
- You’re configuring a server or workstation with dedicated volumes for different functions

Situations where partitioning adds little value:
- You just want to organize files — folders achieve the same result without any risk
- You’re hoping partitioning will speed up your SSD — it won’t, provided alignment is correct
- You have a small drive (256GB or under) — splitting it further will leave you perpetually short on space in one partition
If your goal is organization alone, stick to folders. If you have a legitimate structural need, read on.
Understanding SSD Partitions: The Basics
A partition is a logically defined section of your SSD that the operating system treats as a separate drive. Each partition gets its own file system, drive letter (Windows) or mount point (Linux/Mac), and storage allocation. The SSD itself doesn’t change physically — partitioning is purely a software-level division recorded in the drive’s partition table.
MBR vs. GPT — Which Partition Table Should You Use?
Every drive uses a partition table format that governs how partitions are organized. There are two standards:
| MBR (Master Boot Record) | GPT (GUID Partition Table) | |
|---|---|---|
| Max Drive Size | 2TB | 9.4 ZB (effectively unlimited) |
| Max Primary Partitions | 4 | 128 |
| UEFI Boot Support | No | Yes |
| Windows 11 Compatible | Limited | Required for boot drive |
| Recommended For | Legacy systems only | All modern systems |
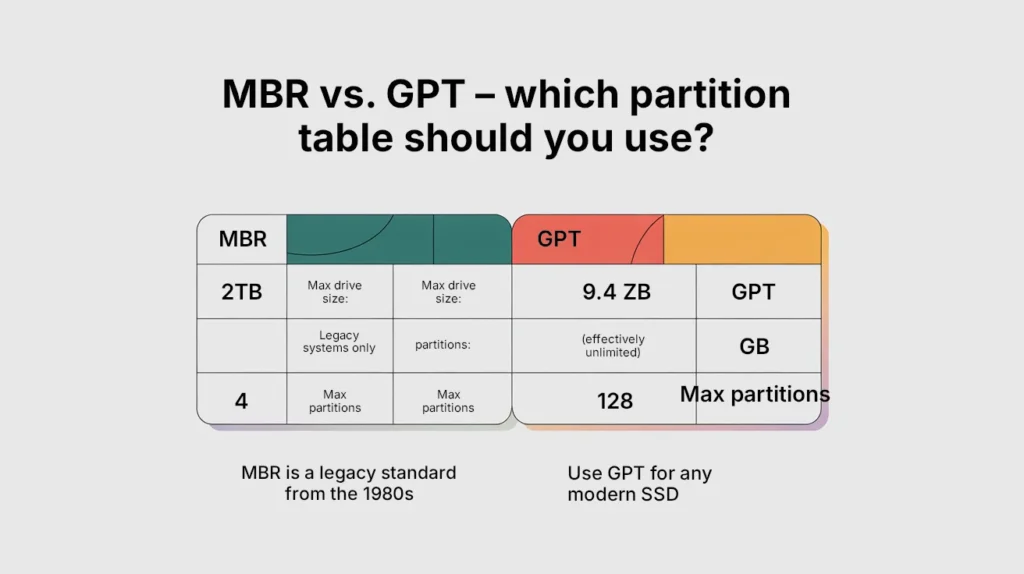
Use GPT for any modern SSD. MBR is a legacy standard from the 1980s. If you’re running Windows 10/11, macOS, or any current Linux distribution, GPT is the correct choice. It removes the 4-partition limit, supports drives over 2TB, and is required for UEFI boot — which all modern motherboards use.
Partition Types Explained
Under GPT, the concept of “primary” vs. “logical” vs. “extended” partitions (which were MBR limitations) no longer applies. Instead, every partition is simply a partition. However, there are functionally distinct types:
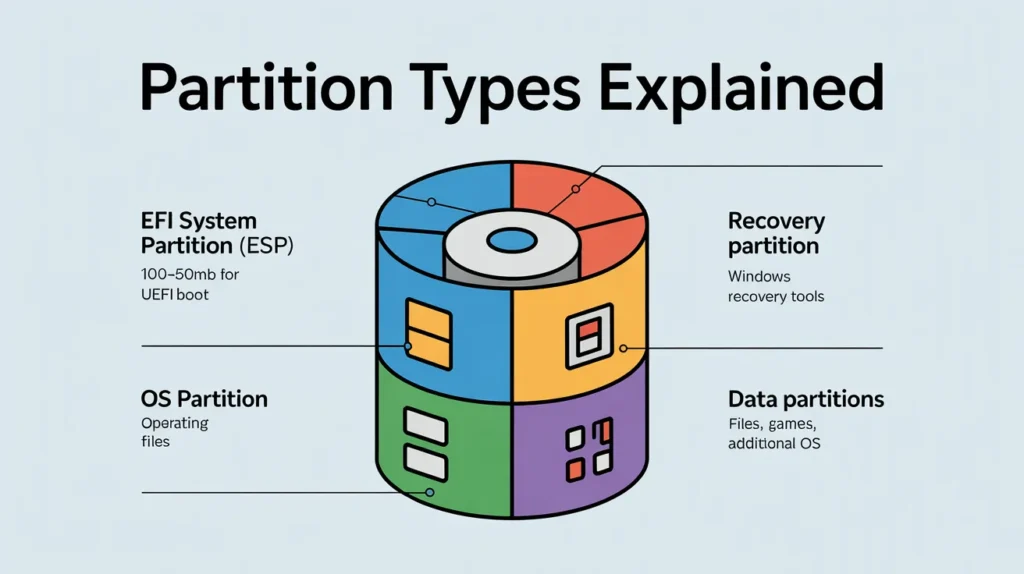
- EFI System Partition (ESP): A small partition (typically 100–500MB) required for booting on UEFI systems. Windows and Linux installers create this automatically. Don’t delete it.
- Recovery Partition: Created by Windows to hold recovery tools. Also auto-created during Windows installation.
- OS Partition: Where your operating system lives.
- Data Partitions: Any additional partitions you create for files, games, or additional OS installations.
How to Partition an SSD on Windows
Before You Start
- Back up your data. Resizing and creating partitions is generally safe, but no partition operation is 100% risk-free. A current backup is non-negotiable.
- Verify your drive uses GPT. Open Disk Management, right-click your disk number (not the partition — the disk), and select Properties → Volumes. It will show “GPT” or “MBR” under Partition style.
Method 1: Windows Disk Management (Built-In — Recommended for Most Users)
Disk Management is Windows’ built-in graphical tool for partition management. It handles the most common tasks without requiring third-party software.
How to open it:
- Press
Win + X→ Disk Management - Or press
Win + R, typediskmgmt.msc, and hit Enter
To create a new partition from free space on an existing drive:
- Right-click the partition you want to shrink (e.g., your C: drive) and select Shrink Volume.
- In the “Enter the amount of space to shrink in MB” field, enter how much space you want to allocate to the new partition. For example, to create a 200GB partition, enter
204800(200 × 1024). - Click Shrink. The freed space will appear as black “Unallocated” space on the disk map.
- Right-click the Unallocated space → New Simple Volume.
- The New Simple Volume Wizard launches. Click Next.
- Set the volume size (leave it at maximum to use all unallocated space, or enter a specific amount).
- Assign a drive letter (e.g., D:, E:).
- Choose a file system — NTFS for a Windows data drive. Add a Volume Label (name) if you want.
- Leave “Perform a quick format” checked.
- Click Next → Finish.
Your new partition appears immediately in File Explorer.
To shrink an existing partition that’s too large:
- Right-click the target partition → Shrink Volume.
- Windows will calculate the maximum shrink amount based on available free space and where unmovable files (like hibernation files) are located.
- Enter the desired shrink amount in MB and click Shrink.
- The freed space becomes Unallocated and can be used to expand an adjacent partition or create a new one.
Limitation: Disk Management can only shrink a volume to the point of the last unmovable file on the partition. If Windows reports a much smaller shrink amount than you expected, see the DiskPart or third-party tool section below.
To extend a partition:
- Right-click the partition you want to extend → Extend Volume.
- The Extend Volume Wizard appears. Select the available unallocated space and specify how much to add.
- Click Next → Finish.
Important: Disk Management can only extend a partition into directly adjacent unallocated space on the right side of the partition. If the unallocated space is on the left, or non-adjacent, use a third-party tool.
Method 2: DiskPart (Command Line — More Powerful)
DiskPart is Windows’ command-line partition tool. It bypasses some of Disk Management’s limitations and is useful for scripted setups or when the GUI tool falls short.
Open DiskPart:
- Press
Win + R, typediskpart, press Enter (accept the UAC prompt).
Common DiskPart workflow to create a new partition:
list disk
select disk 0          (replace 0 with your SSD's disk number)
list partition
select partition 2     (the partition you want to shrink)
shrink desired=204800  (shrink by 200GB)
create partition primary
format fs=ntfs quick label="Data"
assign letter=D
exit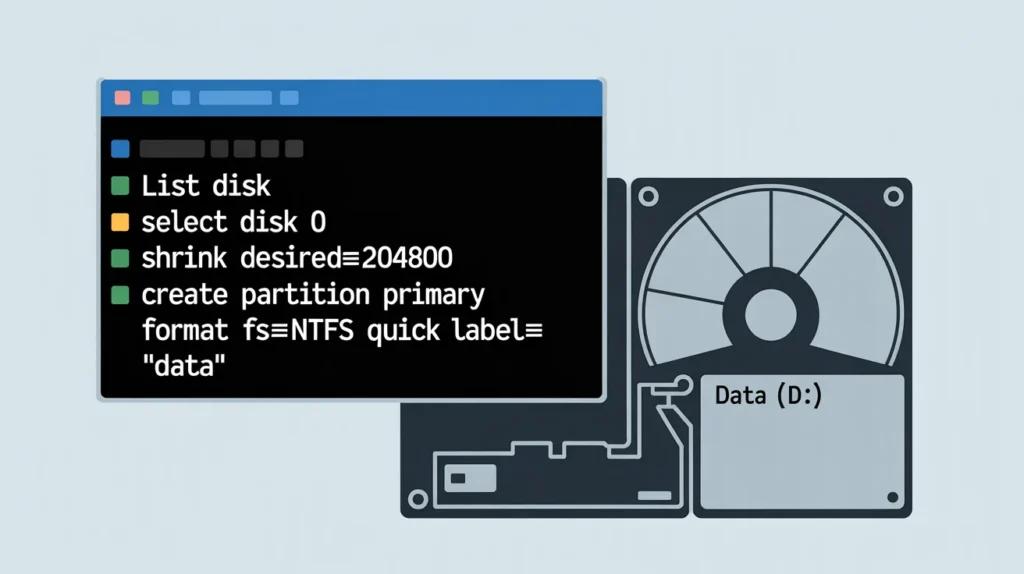
Method 3: Third-Party Tools (When Built-In Tools Fall Short)
For operations Disk Management can’t handle — like moving partitions, resizing without adjacent unallocated space, or converting MBR to GPT without data loss — these free tools are reliable:
- MiniTool Partition Wizard (Free) — Best Windows GUI option. Handles move, merge, convert MBR→GPT, and partition recovery.
- AOMEI Partition Assistant (Free) — Similar feature set to MiniTool; also supports bootable media creation.
- GParted (Free, bootable) — Linux-based but runs from a bootable USB on any system. The most powerful free option.
Always download these from the official developer website, not third-party download sites.
How to Partition an SSD on macOS
macOS uses Disk Utility for partition management. The process is clean and visual, but there are a few important macOS-specific points to know first.
macOS Partition Notes
- APFS (Apple File System) is the default and correct choice for any internal Mac SSD running macOS 10.13 (High Sierra) or later. APFS handles space sharing between volumes dynamically — rather than fixed partition sizes, APFS volumes within a container share a common pool of space.
- HFS+ (Mac OS Extended) is the legacy format, still used for HDDs and Time Machine drives.
- If you’re creating a partition for Windows via Boot Camp, use the Boot Camp Assistant instead of Disk Utility — it handles the setup correctly.
Step-by-Step: Partitioning in Disk Utility
- Open Disk Utility (Finder → Applications → Utilities → Disk Utility, or Spotlight:
Cmd + Space→ type “Disk Utility”). - In the sidebar, select your SSD. Important: Select the top-level drive (e.g., “Apple SSD SM0512G”) — not a volume under it.
- Click the Partition button in the toolbar.
- If prompted to add a partition or add an APFS volume, choose Partition (adding an APFS volume is different and uses space sharing rather than fixed allocation).
- Click the + button below the pie chart to add a new partition.
- Set the partition size by dragging the pie slice or entering a value in the Size field.
- Name the partition and choose the format (APFS for internal macOS use; exFAT for cross-platform compatibility).
- Click Apply → Partition.
Disk Utility will resize the existing partition and create the new one without erasing data, provided there’s sufficient free space.
Removing a Partition on macOS
- Open Disk Utility, select your drive.
- Click Partition.
- Select the partition you want to remove in the pie chart.
- Click the − button.
- Click Apply.
The space is merged back into the adjacent partition automatically.
How to Partition an SSD on Linux
Linux offers the most flexibility for partition management, with both GUI and command-line options.
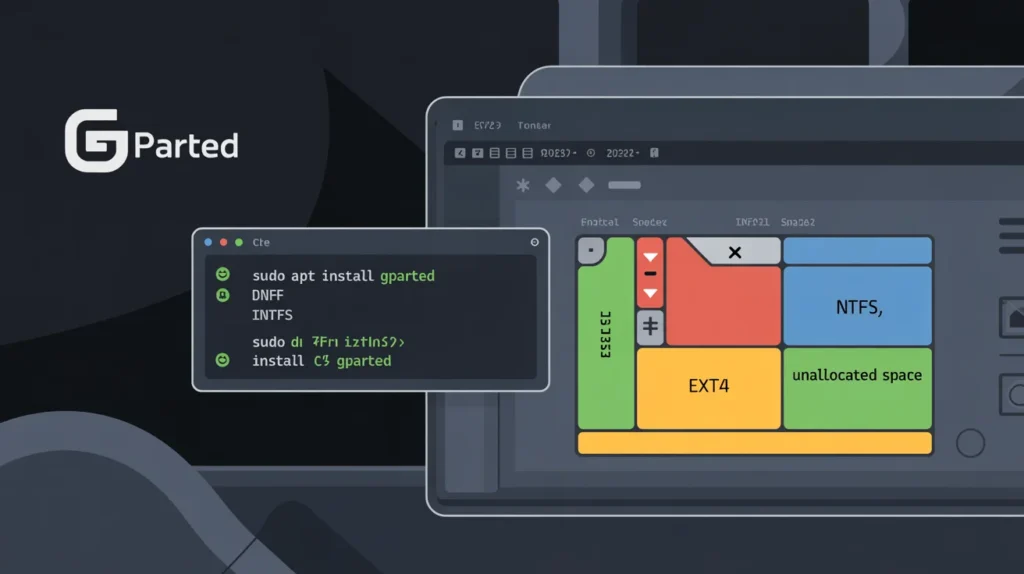
Method 1: GParted (GUI — Recommended for Most Linux Users)
GParted is the most powerful and user-friendly graphical partition editor on Linux.
Install GParted:
bash
# Ubuntu / Debian
sudo apt install gparted

# Fedora
sudo dnf install gparted

# Arch Linux
sudo pacman -S gparted
Using GParted:
- Launch GParted (
sudo gparted). - Select your SSD from the drop-down menu in the top right (e.g.,
/dev/nvme0n1or/dev/sda). - To shrink an existing partition: right-click → Resize/Move → drag the handle or enter a new size → click Resize/Move.
- Right-click the resulting unallocated space → New.
- Set the partition size, file system (ext4 for Linux data, NTFS for Windows-readable, exFAT for cross-platform), and label.
- Click Add.
- Click the green checkmark (Apply All Operations) to commit changes.
GParted queues all changes before executing, giving you a chance to review before anything is written to disk.
Method 2: fdisk / gdisk (Command Line)
For NVMe SSDs and GPT drives, use gdisk:
bash
sudo gdisk /dev/nvme0n1Inside gdisk:
p— print current partition tablen— create new partitiond— delete a partitionw— write changes and exitq— quit without saving
For SATA SSDs and a simpler interface, fdisk works for most tasks:
bash
sudo fdisk /dev/sdaMethod 3: parted (Command Line, Scriptable)
bash
sudo parted /dev/nvme0n1Inside parted:
print                        # Show current layout
mkpart primary ext4 100GB 300GB   # Create 200GB partition from 100GB to 300GB
quit
After creating the partition, format it:
bash
sudo mkfs.ext4 /dev/nvme0n1p3Choosing the Right File System
This is one of the most consequential decisions when partitioning. Choose the wrong file system and you’ll hit compatibility walls or performance issues later.
| File System | Best For | Max File Size | Max Partition Size | Notes |
|---|---|---|---|---|
| NTFS | Windows OS + data drives | 16TB | 256TB | Default Windows FS; read-only on macOS by default |
| APFS | macOS internal drives | 8EB | 8EB | Supports snapshots, encryption, space sharing |
| exFAT | Cross-platform external drives | 16EB | 128PB | Works on Windows, Mac, Linux; no journaling |
| ext4 | Linux system + data drives | 16TB | 1EB | Default Linux FS; not natively readable by Windows |
| FAT32 | Small USB drives, legacy use | 4GB | 2TB | Avoid for SSDs; 4GB file limit is a dealbreaker |
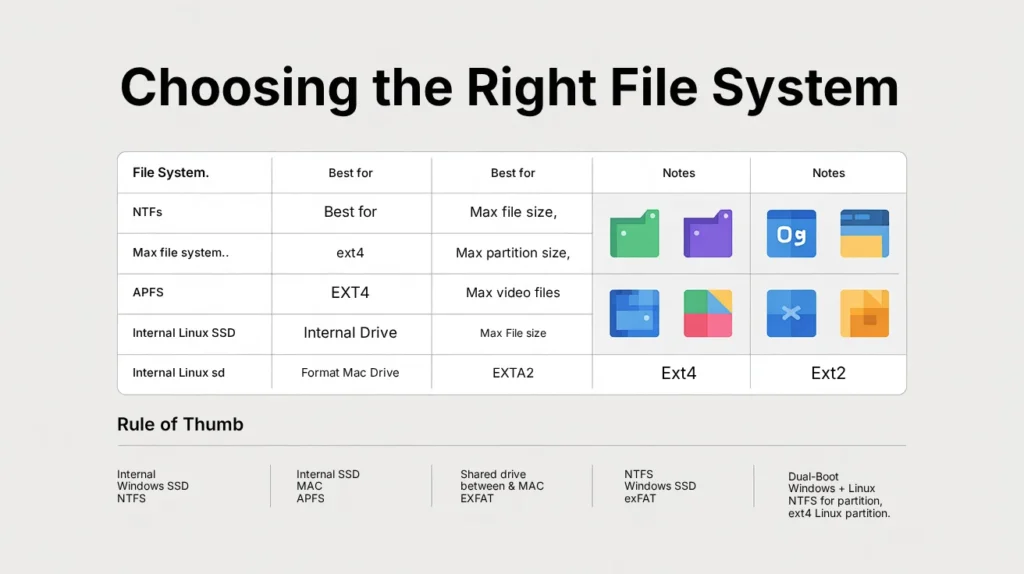
Rule of thumb:
- Internal Windows SSD → NTFS
- Internal Mac SSD → APFS
- Internal Linux SSD → ext4
- Shared drive between Windows & Mac → exFAT
- Dual-boot Windows + Linux → NTFS for Windows partition, ext4 for Linux partition
Recommended SSD Partition Sizes
If you’re partitioning a fresh SSD for Windows, here’s a practical sizing guide based on drive capacity:
For a 500GB SSD
| Partition | Recommended Size | Purpose |
|---|---|---|
| EFI System Partition | 100MB (auto-created) | Boot files |
| Windows OS (C:) | 120–150GB | OS + installed apps |
| Recovery | 500MB (auto-created) | Windows recovery tools |
| Data (D:) | Remaining (~350GB) | Documents, downloads, games |
For a 1TB SSD
| Partition | Recommended Size | Purpose |
|---|---|---|
| Windows OS (C:) | 150–200GB | OS + apps |
| Games (G:) | 400–500GB | Steam/Epic library |
| Data (D:) | Remaining | Documents, media, backups |
For a Dual-Boot Setup (1TB SSD)
| Partition | Recommended Size | Purpose |
|---|---|---|
| EFI System Partition | 500MB | Shared bootloader |
| Windows (C:) | 300–400GB | Windows OS + apps |
| Linux Root (/) | 50–80GB | Linux OS + installed packages |
| Linux Home (/home) | 200–250GB | Linux user files |
| Swap | 8–16GB | Linux swap (match RAM size) |
Don’t go too small on your OS partition. Windows alone occupies 20–30GB and grows with updates. Allow breathing room — a perpetually full OS partition causes performance issues and failed updates.
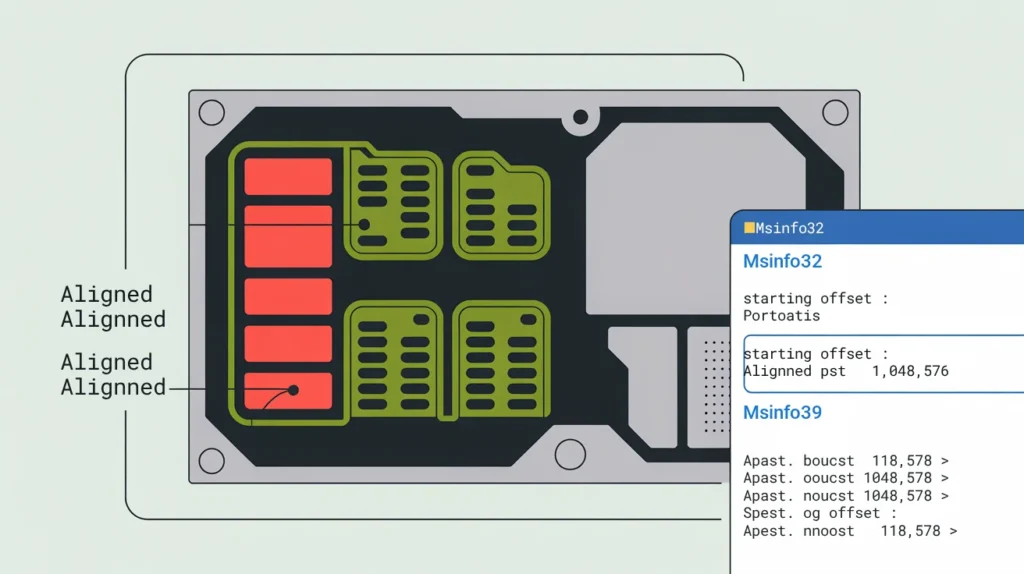
SSD Partition Alignment — Why It Matters
Partition alignment refers to whether your partition boundaries are aligned to the SSD’s physical erase block size. Misaligned partitions cause the drive to perform unnecessary read-modify-write cycles, degrading performance and increasing unnecessary wear.
The good news: Every modern OS installer — Windows 8+, macOS, and any current Linux installer — aligns partitions to 1MB boundaries by default, which satisfies SSD alignment requirements. You don’t need to manually configure this unless you’re using very old tools or working with legacy systems.
How to verify alignment in Windows:
msinfo32 → Components → Storage → DisksOr in DiskPart:
list partitionPartitions aligned correctly will show starting offsets divisible by 1,048,576 bytes (1MB).
Common Partitioning Mistakes to Avoid
1. Making the OS partition too small A 60GB or 80GB Windows partition feels fine at first and becomes a nightmare within a year. Minimum 120GB; 150–200GB is more comfortable long-term.
2. Partitioning a small SSD Splitting a 256GB drive into multiple partitions almost always leads to one partition running out while another has space to spare. On drives under 512GB, partitioning rarely adds value.
3. Using FAT32 for large partitions FAT32’s 4GB per-file limit will cause cryptic errors the moment you try to move a large video file, VM image, or game installation. Use NTFS or exFAT instead.
4. Deleting the EFI or Recovery partition These small partitions at the beginning or end of the disk are created by Windows or your UEFI firmware. Deleting them can make your system unbootable. Leave them alone.
5. Skipping the backup Even “safe” non-destructive operations can go wrong — power outage mid-operation, driver conflicts, or software bugs. A backup costs you an hour. A recovery without one can cost you everything.
6. Expecting partitioning to speed up your SSD Partitioning does not improve SSD read/write speeds. If your SSD is slow, the fix is checking drive health, ensuring TRIM is enabled, or replacing the drive — not rearranging partitions.
Frequently Asked Questions
Does partitioning an SSD reduce its lifespan?
No, not in any meaningful way. The partition table operations themselves involve a negligible number of write cycles. Normal use of the drive after partitioning has no effect on total drive lifespan.
Can I partition my SSD without formatting it?
Yes. Using Disk Management (Windows), Disk Utility (macOS), or GParted (Linux), you can shrink an existing partition and create a new one in the freed space without erasing your existing data — provided there’s enough free space on the drive.
What’s the difference between a partition and a volume?
On Windows, the terms are often used interchangeably. Technically, a partition is the raw disk division, while a volume is a formatted partition that the OS has assigned a drive letter and file system to. On macOS with APFS, volumes within a container share space rather than having fixed partition sizes.
Can I merge two partitions without losing data?
Merging partitions requires deleting one and extending the other into the freed space. This process erases all data on the deleted partition. Always back up before merging. Third-party tools like MiniTool Partition Wizard claim to merge partitions without data loss — results can vary, so a backup is still essential.
Should I use NTFS or exFAT for a second SSD used only in Windows?
NTFS. exFAT is designed for cross-platform drives (Windows + Mac). For a Windows-only internal drive, NTFS is faster, supports permissions, and handles large files and long directory structures better.
How many partitions is too many?
Practically speaking, 2–4 partitions is the sweet spot for personal use. Beyond that, managing free space across multiple partitions becomes more hassle than benefit. There’s no technical limit (GPT supports 128), but diminishing returns set in quickly.
Final Thoughts
Partitioning your SSD is a clean, non-destructive way to create logical structure on your drive — separating your OS from your data, enabling dual-boot, or organizing different workflows into distinct volumes. Done correctly on a GPT drive with proper file system choices and adequate partition sizes, it adds genuine value without any performance penalty.
The process is straightforward on all three major platforms: Disk Management on Windows, Disk Utility on macOS, and GParted or the command line on Linux. Back up your data before you start, follow the steps in this guide, and you’ll have a properly partitioned SSD in under 15 minutes.