Are you looking to improve your computer’s performance by making an SSD your main drive? Switching your primary storage device to a solid-state drive can significantly boost your computer’s speed and make it run smoother, but it can seem like a daunting task. In this blog, we’ll walk you through the steps to make an SSD your primary drive, what benefits this move offers, and how it can impact your computing experience. Whether you’re a gamer looking for faster load times or a professional seeking improved productivity, this guide has you covered.
So, let’s get started on taking your computer’s performance to the next level!
Introduction
Are you tired of slow loading times and sluggish performance on your computer? One way to speed things up is by making your SSD the main drive. To do this, you’ll need to transfer your operating system and files from your old HDD onto the new SSD. Begin by backing up your files and creating a system image.
Next, download a cloning software like EaseUS Todo Backup or Macrium Reflect. Use the software to clone your old drive onto the new SSD. Once the cloning process is complete, you’ll need to change the boot order so that the computer starts up from the new SSD.
This can typically be done in the BIOS settings. By making your SSD the main drive, you’ll notice faster load times and a more responsive computer. Give it a try and see the difference for yourself.
Explaining SSD Main Drive
SSD Main Drive Today, we’ll be discussing one of the most important components of your computer – the SSD main drive. An SSD, or solid-state drive, is a storage device that provides faster access to data and consumes less power than a traditional hard disk drive. It’s like having a personal assistant who can quickly retrieve information for you, instead of sifting through piles of paperwork.
The SSD main drive also provides a more reliable and durable storage solution, as it has no moving parts that can wear out over time. Overall, upgrading to an SSD main drive can greatly improve your computer’s performance and efficiency, making it a wise investment for anyone who wants a faster, more reliable system.
Check SSD Compatibility
If you’re wondering how to make an SSD your main drive, the first thing you need to do is check for compatibility. This means ensuring that your system motherboard and BIOS support the SSD you plan to use. You should also consider the size and form factor of the SSD, as some may not fit your machine’s storage bay.
Additionally, you’ll want to make sure your SSD has enough space to accommodate your operating system and essential applications. A good rule of thumb is to choose an SSD with at least twice the capacity of your current hard drive. Once you’ve confirmed compatibility, you can transfer your operating system to the SSD using software like Macrium Reflect or Acronis True Image, which will guide you through the process.
Remember to back up your data before making any changes to your computer’s storage configuration. With these tips in mind, you can successfully make your SSD your main drive and enjoy faster boot and load times for your everyday tasks.
Choosing the Right SSD
When choosing an SSD for your computer, it’s essential to ensure compatibility with your system. You don’t want to invest in a new SSD only to find out that it’s not compatible with your computer’s hardware. Before purchasing, check the SSD’s specifications to ensure that it supports your computer’s interface and form factor.
Some common interface types include SATA, PCIe, and NVMe, while common form factors include 5 inches and M.
Choosing the right SSD that is compatible with your computer’s hardware can make a big difference in its performance and efficiency. So, take your time to research and find the best SSD that will work seamlessly with your computer.
Check your Motherboard Compatibility
SSD compatibility Before purchasing an SSD for your computer, it’s important to verify if your motherboard is compatible with the type of SSD you’re looking to buy. SSDs come in SATA or NVMe form factors, with NVMe being the faster option. However, not all motherboards support NVMe SSDs and some may require a BIOS update in order to do so.
Checking your motherboard’s specifications will help you determine which form factor your motherboard supports. Additionally, it’s important to check the compatibility of the SSD with your operating system. While most modern operating systems support SSDs, some older versions may require additional drivers to recognize the drive.
By taking the extra time to check your motherboard and operating system compatibility, you can ensure that you’re purchasing an SSD that will work seamlessly with your existing hardware and improve your overall computer performance. So be sure to do your research before buying that new SSD!
Backup and Transfer Data
If you’re looking to switch to an SSD as your main drive, there are a few things you’ll need to do to make sure everything runs smoothly. First, you’ll want to make a backup of all your important data – this way, you won’t lose anything if anything goes wrong during the transfer process. Then, you’ll need to transfer that data over to the new drive.
There are a few ways to do this, but one of the easiest is to use a cloning tool. This will copy your entire hard drive over to the SSD, so you won’t have to worry about re-installing any applications or moving files around manually. Once the transfer is complete, you can set the SSD as your main drive in your computer’s settings.
And voila! With a little bit of effort, you’ll have a much faster and more efficient system.
Backup Your Data From Old Hard Drive
If you’re upgrading to a new computer or hard drive, it’s important to transfer the data from your old hard drive to the new device. This way, you don’t lose any valuable information or files. The first step is to backup your data from the old hard drive.
You can do this by using an external hard drive, cloud storage, or a USB drive. Once you have backed up your data, you can then transfer it to your new computer or hard drive. Make sure to follow the instructions for transferring your data carefully, as different devices may have different processes.
Finally, once your data has been transferred, it’s a good idea to double-check everything to ensure that all of your files are accounted for. With a little bit of planning and effort, you can easily backup and transfer your data from your old hard drive to your new device. Don’t risk losing valuable files – take the time to backup your data today!
Transfer Data to SSD
If you’ve just purchased a new solid-state drive (SSD), the next step is to transfer your data from your old hard drive to the new one. The process of transferring data can seem daunting, but it’s fairly simple once you know what you’re doing. The first thing you’ll need to do is create a backup of all your data.
This is crucial in case something goes wrong during the transfer process. You can create a backup on an external hard drive or use cloud-based backup services. Once you’ve created a backup, you can then begin transferring the data to your new SSD.
You can use cloning software to copy your hard drive’s data to the SSD, or you can manually copy and paste files. The process can take some time, especially if you have a large amount of data, but it’s worth it to have all your files on a faster and more reliable drive.
Install SSD as Main Drive
If you’re looking to boost your computer’s performance, one of the best things you can do is install an SSD as your main drive. Doing so can significantly speed up your boot time, as well as the time it takes to open and run programs. Making an SSD your main drive involves a couple of steps, starting with transferring your operating system to the SSD.
This can be done using a number of tools, such as a cloning tool or a clean install of your operating system, depending on your preference. Once that’s done, you’ll need to ensure that your motherboard supports booting from the SSD, which can typically be done by adjusting the BIOS settings. With these steps completed, your computer will be running faster than ever before, and with the added bonus of increased reliability that SSDs provide.
So if you’re wondering how to make SSD your main drive, these steps should help guide you in the right direction.
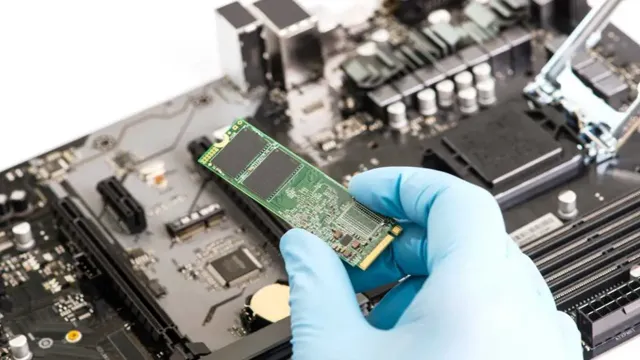
Physically Install SSD Drive
Installing an SSD as your main drive can significantly boost your computer’s performance. Before you start, you’ll need to determine what type of SSD your computer supports and gather the necessary tools. Most modern motherboards support SATA III, which can handle transfer speeds up to 6Gbps.
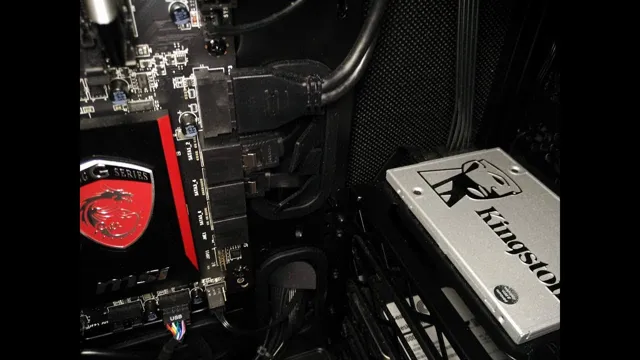
Once you have your SSD, locate a free drive bay in your computer case and mount it securely. Make sure to connect the SATA power and data cables to your new SSD and connect the other ends to your power supply and motherboard respectively. Once everything is connected, turn on your computer and enter the BIOS to ensure that the SSD is recognized as the main drive.
From there, you can install your operating system onto the SSD and enjoy a faster, more efficient computing experience. Don’t forget to enable TRIM in your operating system’s settings to help maintain your SSD’s longevity and performance.
Format and Configure SSD Drive
If you’re considering installing an SSD drive as your main drive, it’s important to configure it properly for optimal performance. Firstly, you’ll need to format the SSD drive to prepare it for installation. This involves wiping any existing files and partitions from the drive.
You can do this using the built-in disk management tool in your operating system or by using a third-party app. Once the SSD drive is formatted, you’ll need to configure it to ensure it’s set up as the main drive. This involves changing the boot order in your computer’s BIOS settings, so the system recognizes the SSD drive as the primary boot device.
With these steps completed, you’ll be able to enjoy the advantages of an SSD’s speed and improved performance. So if you’re looking to boost your computer’s performance and speed, installing an SSD as your main drive is a great upgrade option.
Suggested Configuration and Optimization
If you’re looking to optimize your computer’s performance, one of the best things you can do is to make your SSD the main drive. Doing this will ensure that your system runs faster and smoother than ever before. To make your SSD the main drive, you’ll first need to install it into your system and then transfer your operating system and important files over to it.
It’s also important to configure your system’s settings to optimize the performance of your SSD, such as enabling the TRIM function and disabling disk defragmentation. Additionally, you can optimize your SSD’s performance by minimizing the amount of data you store on it, using it for your operating system and core applications, and regularly cleaning out unnecessary files. By following these steps, you can make your SSD the most important part of your computer and enjoy lightning-fast speeds and improved performance across the board.
Set BIOS to Boot from SSD Drive
When it comes to optimizing the performance of your computer, configuring your BIOS to boot from your SSD drive can make a big difference. By setting your SSD as the primary boot device, your computer will start up faster and run more efficiently, allowing you to get more done in less time. To make this change, you’ll need to enter your BIOS settings and navigate to the boot order menu.
From there, you can select your SSD drive as the first boot device and save your settings. Once you’ve done this, you’ll be able to enjoy faster boot times and improved overall performance. So if you want to take your computer to the next level, be sure to set your BIOS to boot from your SSD drive.
Install SSD Optimizing Software
Are you looking to optimize your SSD and boost your computer’s performance? Installing SSD optimizing software might be just what you need. There are many options available, but it’s important to choose one that’s trustworthy and reliable. One option is the popular software called Solid State Doctor.
This software includes features such as drive information, firmware updates, secure erase, and over-provisioning, which will help prolong the life of your SSD. It also has a performance optimizer that will analyze and optimize your SSD’s performance based on your usage patterns. Another great choice is SSD Tweak Utility, which offers similar features and customization options.
Whichever software you choose, make sure to follow the recommended settings and updates for optimal performance. With these tools at your disposal, you’ll be able to enjoy lightning-fast performance and maximize the lifespan of your SSD.
Tips for Maintaining SSD
Maintaining an SSD can significantly improve the life and performance of your computer’s storage drive. Here are some suggested configurations and optimizations you can do for your SSD. First and foremost, make sure that the TRIM command is enabled on your computer.
This command allows your SSD to erase unused data, which can lead to faster write times and longer lifespan. It’s also important to avoid filling up your SSD to the brim – leaving at least 10-20% of the drive free can help prevent performance degradation. Disable indexing and defragmentation on your SSD, as they are unnecessary and can cause wear and tear on the drive.
Lastly, make sure that you’re running the latest firmware for your SSD. These simple steps can help ensure that your SSD is running at its best and will continue to do so for years to come.
Conclusion
Congratulations! You now have the power to speed up your computer like a superhero. By making your SSD the main drive, you can enjoy lightning-fast boot times, quick app launches, and snappy multitasking. No longer will you be held back by your sluggish old hard drive.
So go forth and conquer the digital world with your newfound speed and reliability. And if anyone asks how you did it, just tell them it was nothing – just another day of being a tech-savvy genius.”
FAQs
Can I use an SSD as my main drive?
Yes, you can use an SSD as your main drive. In fact, it is recommended to use an SSD as your main drive for faster boot-up and improved overall system performance.
How do I install my OS on the SSD?
To install your OS on the SSD, you need to create a bootable USB drive with the OS installer and then boot from it. During the installation process, select the SSD as the destination drive for the OS.
Is it necessary to clone my old hard drive to the SSD?
It is not necessary to clone your old hard drive to the new SSD, but it is recommended if you want to transfer all your data and settings to the new drive. There are many tools available that can help with cloning.
How do I optimize my SSD for better performance?
To optimize your SSD for better performance, you can enable TRIM support, disable defragmentation, and enable AHCI mode in BIOS. You can also limit the amount of data you store on the SSD and avoid filling it up completely.