Are you looking to upgrade your computer’s storage and switch to the latest operating system? Well, you’re in luck because Windows 11 is here! However, installing a new operating system on a new SSD can be an intimidating task, especially if you’re new to computer upgrades. But don’t worry, we’ve got you covered! In this blog post, we’ll walk you through the steps you need to follow to install Windows 11 on a new SSD. We’ll cover all the essential aspects, including how to create a bootable USB drive, how to enter the BIOS setup, and how to partition your new SSD.
By the end of this article, you’ll be able to upgrade your computer’s storage and install the latest operating system with ease. So, why should you upgrade to Windows 11? Well, besides the visually stunning interface, this operating system brings a lot of new features and improvements, including enhanced security, better gaming performance, and improved touch screen compatibility. And let’s not forget that Windows 10 will soon reach its end of life, which means it’s time to move on to the latest technology.
Installing Windows 11 on a new SSD can seem daunting, but it doesn’t have to be. So, grab your coffee and let’s dive into this step-by-step guide together.
Prepare Your PC for Installation
Installing a new operating system can be daunting, but with the right preparation, it can be a seamless transition. If you’re planning to install Windows 11 on a new SSD, there are a few things you need to do first. Firstly, make sure your PC meets the minimum system requirements for the OS.
Next, backup all your important files and data to an external drive or cloud storage since the installation process will wipe out everything on your current drive. You should also create a bootable USB drive with the Windows 11 installation media, which you can easily do by downloading the Media Creation Tool from the Microsoft website. Once you’ve completed these steps, you can shut down your PC, insert the new SSD, and boot the computer from the USB drive to start the installation process.
By taking these necessary steps, you can ensure a smooth installation without any hiccups along the way.
Create a Windows 11 Installation Media
When it comes to installing Windows 11 on your PC, the first thing you need to do is create an installation media. This is a handy tool that contains all the necessary files and drivers to install the operating system on your computer. To get started, you’ll need a USB flash drive with at least 8GB of storage space.
Once you have that, download the Media Creation Tool from Microsoft’s website and follow the on-screen instructions. The tool will download the Windows 11 setup files and create an installation media for you. But before you start the installation process, it’s essential to ensure that your PC meets the minimum system requirements for running Windows 1
This includes a compatible processor, 4GB of RAM, and 64GB of storage space. You can check your PC’s compatibility by using Microsoft’s PC Health Check app or by checking the system requirements on their website. Preparing your PC for installation ensures a smooth and successful installation process without any errors or issues.
So make sure to double-check everything before proceeding with the installation.
Insert Installation Media and Boot from It
Installing a new operating system can be a daunting task for many people. However, preparing your PC for installation doesn’t have to be a complicated process. One of the first steps in preparing your PC for installation is to insert the installation media and boot from it.
This can be done by either inserting a DVD or USB drive with the OS installation file. Once inserted, restart your PC and enter the system BIOS by pressing the designated key during boot-up. From there, you can change the boot priority to the installation media device, allowing you to boot from it.
Once your PC has booted from the installation media, you can begin the installation process. It’s important to follow the instructions carefully and select the appropriate options to ensure a successful installation. Remember, by properly preparing your PC for installation, you can avoid unnecessary errors and ensure a smooth installation process.
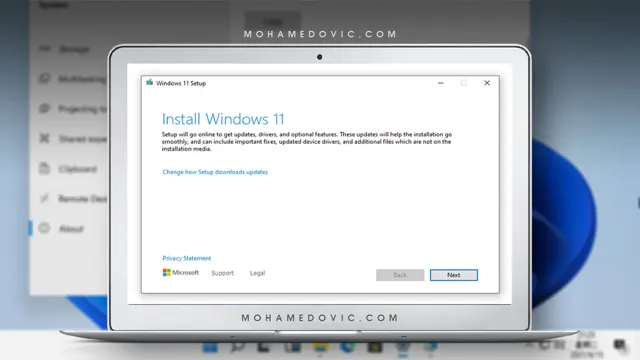
Begin Windows 11 Installation
If you’ve got a brand new SSD and want to install Windows 11 on it, you’ve come to the right place! Installing a new operating system can seem daunting, but it’s a straightforward process that anyone can do. First things first: make sure your computer meets the minimum system requirements for Windows 1 Once you’ve done that, create a bootable USB drive with the Windows 11 installation files on it.
You’ll need to insert the USB drive into your computer and restart it, then boot from the USB drive. From there, follow the prompts onscreen to install Windows 11 on your new SSD. It’s important to note that this will erase any data on your new drive, so make sure you’ve backed up everything important beforehand.
With a little patience and know-how, you’ll have Windows 11 up and running on your new SSD in no time!
Select Language and Other Preferences
When beginning the installation process for Windows 11, it is important to select your preferred language and any other preferences before proceeding. This will ensure that your operating system is set up exactly how you want it from the get-go. Whether you prefer English, Spanish, or any other language, the first step is to choose your preferred language.
Additionally, you may have other preferences such as setting up a specific time zone, keyboard layout, or even choosing what type of internet connection you have. Once you have these settings in place, you can confidently begin the Windows 11 installation process. By taking these small steps to personalize your installation, you can ensure a smoother and more enjoyable experience with your new operating system.
So be sure to take the time to make these selections and get started with Windows 11 today!
Enter the Product Key
As you prepare to install Windows 11 on your computer, one of the essential steps is entering the product key. The product key is a unique code that Microsoft provides to authenticate your copy of Windows. It is a combination of letters and numbers and usually comes with a new Windows 11 purchase.
To begin the installation process, you need to enter the product key when prompted. Without this key, you won’t be able to activate your copy of Windows, and it may not function correctly. The good news is that the product key is easy to find and enter, and it only takes a few minutes.
Once you enter the key, you can sit back and relax as the installation process begins, taking you one step closer to experiencing the improved user interface, performance, security, and features that Windows 11 offers.
Choose Custom Installation
When beginning the installation process for Windows 11, it’s important to choose the custom installation option. Although the express installation may seem tempting as it’s a quicker process, it can also install unwanted software that can slow down your computer or even compromise your security. By choosing custom installation, you have more control over what is installed on your computer, allowing you to deselect any unnecessary features or programs.
It’s like choosing the toppings for your pizza – you have the power to customize it to your liking. Plus, by taking the time to review and select only the necessary components, you can ensure the best performance and security for your computer. So before clicking “yes” to an express installation, take a few extra minutes to go through the custom installation process – your computer will thank you for it.
Set Up and Optimize Windows 11
Are you ready to install Windows 11 on a new SSD? The first step is to make sure your computer meets the system requirements. Once you’ve confirmed that, you can download the Windows 11 ISO file from Microsoft’s website. Next, you’ll need to create a bootable USB drive with the ISO file.
You can use the built-in tools in Windows or a third-party software like Rufus to accomplish this task. After creating the bootable USB drive, insert it into your computer and restart your system. Make the necessary changes to the boot order in your BIOS to boot from the USB drive.
Follow the on-screen instructions to perform a clean install of Windows 11 on your new SSD. Once Windows 11 is installed, optimize your system by updating drivers, disabling unnecessary startup programs, and enabling system protection. These steps will help ensure that your system is running smoothly and optimized for performance.
With these steps, you’ll have your new SSD running smoothly with Windows 11 in no time.
Complete Initial Set Up
Setting up and optimizing Windows 11 is essential to enhance your computer’s performance and ensure a smooth user experience. The initial set up steps include choosing the language, keyboard layout, and time zone. Once these options are selected, it’s vital to customize the privacy settings to ensure your data is protected.
Windows 11 also offers the ability to create multiple user accounts, making it easier to share your computer with family or colleagues. In terms of optimization, you can remove unnecessary software and disable start-up programs to improve boot time. It’s also recommended to update your drivers and optimize power settings to increase battery life.
Overall, taking the time to fully set up and optimize Windows 11 can make a significant impact on your computer’s performance and longevity.
Install Drivers and Updates
Installing drivers and updates is crucial in optimizing your Windows 11 experience. Drivers are essential for your hardware components, such as your graphics card or sound card, to communicate with the operating system properly. Without the correct drivers, you may experience performance and stability issues.
Updating your drivers and software can also prevent security vulnerabilities, as manufacturers frequently release updates to patch potential security threats. To ensure that you have the latest drivers and updates, you can check for them manually or set up automatic updates. It’s essential to keep your PC up to date to avoid problems in the future.
An outdated system can result in slow performance, errors, and even system crashes. So, take the time to install the latest drivers and updates on your Windows 11 machine, and you’ll enjoy a smooth and efficient computing experience.
Conclusion
Congratulations, you have successfully taken the first step towards a faster, better and more efficient computing experience by installing Windows 11 on a new SSD. Now, sit back, relax and let your computer do all the heavy lifting for you. Just remember, if at any point you feel lost or overwhelmed, don’t hesitate to reach out for help.
After all, the beauty of technology is that there is always someone out there who knows more than you do. Happy computing!”
FAQs
What are the minimum hardware requirements for installing Windows 11 on a new SSD?
The minimum hardware requirements for installing Windows 11 on a new SSD include a 64-bit processor with a clock speed of at least 1 GHz, 4 GB of RAM, 64 GB of storage, a DirectX 12 compatible graphics card or integrated GPU with a WDDM 2.0 driver, and a display with at least a 720p resolution.
Can I install Windows 11 on a new SSD without a product key?
Yes, you can install Windows 11 on a new SSD without a product key, but the operating system will not be activated until a valid product key is entered. However, you can still use most of the features of Windows 11 without activation.
How do I create a bootable USB drive for installing Windows 11 on a new SSD?
To create a bootable USB drive for installing Windows 11 on a new SSD, you need to download the Windows 11 ISO file and use a tool like Rufus or the Windows USB/DVD Download Tool to create a bootable USB drive. You can then use this USB drive to boot your computer and install Windows 11 on your new SSD.
How do I migrate my data and programs from my old hard drive to a new SSD after installing Windows 11?
After installing Windows 11 on your new SSD, you can use a data migration tool like EaseUS Todo Backup or Macrium Reflect to migrate your data and programs from your old hard drive to your new SSD. Alternatively, you can manually copy your files and reinstall your programs on the new SSD.