
Are you tired of slow system performance and looking for a solution? Installing an SSD is a great way to improve your system’s performance, and the Samsung SSD 870 EVO is an excellent choice to consider. With its outstanding read and write speeds, it can significantly speed up your system’s boot time and enhance its overall performance. In this step-by-step guide, we will walk you through the process of installing a Samsung SSD 870 EVO into your system.
By following these simple instructions, you’ll be able to perform the installation successfully without any professional help. Let’s dive in and get started with this hassle-free guide to enhance the performance of your system in no time!
Before You Begin
If you’re looking to upgrade your computer’s storage with the Samsung SSD 870 EVO, there are a few things to keep in mind before beginning the installation process. First, it’s important to make sure your computer is turned off and unplugged from any power source. Then, double-check that the drive is compatible with your computer’s motherboard and that you have the necessary cables and tools for installation.
Additionally, you may want to consider backing up any important data before installing the new drive. Once you’ve taken these steps and are ready to begin, carefully follow the manufacturer’s instructions for installation to ensure everything goes smoothly. With a bit of preparation and attention to detail, installing a Samsung SSD 870 EVO can be a straightforward and effective way to boost your computer’s performance.
Check Compatibility of Your Computer with Samsung SSD 870 EVO
Samsung SSD 870 EVO, Compatibility Before upgrading your computer with a new solid-state drive (SSD), it’s essential to ensure compatibility with your system. Fortunately, the Samsung SSD 870 EVO is a highly compatible option for most desktops and laptops. Compatibility typically depends on the interface and form factor of your computer’s current storage drive.
The Samsung 870 EVO supports the SATA III interface, which is commonly found in most modern motherboards and laptops. Another important factor to consider is the physical size of the drive, commonly measured in 5-inch or M.
2 form factors. Therefore, before you begin upgrading your computer’s storage, ensure compatibility with the Samsung SSD 870 EVO. It’s an excellent choice that provides fast read and write speeds, improved performance, and ample storage capacity.
Back Up Your Data
Backing up your important data is crucial for any digital device. Before you begin the process, it is important to determine what data you want to back up and how often you want to do it. This can include your work documents, personal photos, videos, and any other important files.
It is recommended to back up your data at least once a month, if not more frequently. Whether you choose to use an external hard drive, cloud storage, or a combination of both, it is important to ensure that your data is secure and easily accessible. Don’t wait until it’s too late to back up your data – take the necessary steps today to protect your valuable information.
Installation Steps
If you’re wondering how to install the Samsung SSD 870 EVO, don’t worry – it’s a relatively straightforward process. First, ensure that you have all the necessary tools handy, such as a screwdriver, SATA cable, and power cable. Next, disconnect your computer from all power sources and open up the case.
Locate the hard drive bay where you plan to install the SSD. Carefully slide the SSD into the bay and secure it in place with screws. Once the SSD is securely in place, connect the SATA cable to the SSD and the motherboard.
Finally, connect the power cable to the SSD and a power source. Close up the computer case and reconnect all power sources. Your SSD is now installed and ready to use! With the Samsung SSD 870 EVO’s speedy performance and reliable storage, you’ll be enjoying lightning-fast data transfers and seamless multitasking in no time.
Step 1: Shut Down Your Computer and Unplug It
Before diving into the installation process, it’s essential to start with Step 1: shut down your computer and unplug it. This may seem like a no-brainer, but it’s crucial to ensure your safety and prevent any accidents or damage to your device. Turning off your computer and unplugging it from the power source will prevent any electricity from flowing through the circuits and potentially causing harm.
It’s also important to let your computer cool down for a while before starting the installation process to prevent any overheating issues. So, take a deep breath, power down your computer, unplug it, and let it rest for a bit before moving on to the next steps in the installation process. Remember, safety first!
Step 2: Locate Your Current Hard Drive and Remove It
Now that you have gathered all the necessary tools for installing your new hard drive, it’s time to locate your current hard drive and remove it. This process may vary depending on the type of computer you have, so it’s best to refer to your computer’s manual or look up a guide online. Generally, you will need to find the hard drive compartment or bay, which is usually located on the bottom or side of the computer’s casing.
Once you locate it, unscrew any screws or bolts holding the hard drive in place and gently remove it. Be sure to disconnect any cables or connectors before fully removing the drive. It’s important to handle the hard drive carefully and avoid touching any of the internal components.
Once you have successfully removed the old hard drive, you can move on to the next step of installing your new hard drive. Remember, careful handling of your computer’s internal components is key to a successful installation process.
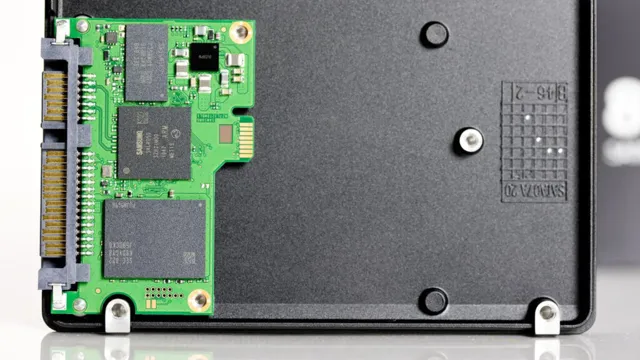
Step 3: Install Samsung SSD 870 EVO into the Drive Bay
To install your Samsung SSD 870 EVO, the first thing you need to do is mount it into the drive bay. You can easily open your computer case by unscrewing the screws on the back using a screwdriver. Once you have access to the drive bay, locate an empty slot where you can insert the SSD.
Align the connector pins on the drive with the socket on the slot and gently slide the drive in until it clicks into place. Make sure the drive is firmly in place to avoid any connection issues down the line. Once you have installed the SSD, you can now secure it in place by screwing it into the drive bay.
This ensures the SSD stays in place and doesn’t move around or get dislodged. With your Samsung SSD 870 EVO properly installed, you’re now ready to transfer your data and experience improved performance.
Step 4: Connect the SSD to Your Computer
Once you’ve successfully installed your new SSD into your computer, the next step is to connect it to your device. This process may differ depending on the type of SSD you have, but most modern computers should have multiple options to connect an SSD. Some of these options include using a SATA cable or a USB adapter.
If you’re using a desktop computer, you can connect the SSD to your motherboard’s SATA port. If you’re unsure which port to use, refer to the manufacturer’s instructions or consult with a professional. On the other hand, if you’re using a laptop, you may need to use a USB adapter to connect your SSD externally.
Once connected, ensure that your computer recognizes the SSD by checking its storage devices. You can then transfer your data to the SSD and start enjoying the benefits of improved speed and performance!
Post-Installation Set-Up
Installing a Samsung SSD 870 EVO is a simple process that can provide a significant performance boost to your computer. Once you’ve physically installed the SSD and connected it to your motherboard, there are a few post-installation set-up steps to take. First, you’ll need to format the drive so that it’s ready for use.
This can be done through your computer’s operating system – simply search for “Disk Management” in the Start Menu and select your new SSD. From there, you can create a new partition on the drive and format it to your preferred file system. Next, you may want to transfer your operating system over to the new SSD to take full advantage of its speed.
This can be done using a cloning tool such as Samsung’s own Data Migration software. Finally, make sure to update your computer’s BIOS to ensure that it recognizes the new SSD and is configured to take advantage of its full potential. With these post-installation steps completed, you’ll be all set to enjoy the improved performance of your Samsung SSD 870 EVO.
Step 5: Turn Your Computer On and Access BIOS Settings
Once you have successfully installed your desired operating system, the next step is to turn on your computer and access the BIOS settings. You can do this by pressing the appropriate key, which is usually displayed on the screen during boot-up, but it varies between different computers. Once you enter the BIOS settings, you will have access to a range of options, such as boot order and hardware configuration.
One essential setting to check is the date and time, which can affect updates and security features. Additionally, you can configure your storage devices, set up passwords, and enable/disabled other features. The BIOS settings can be overwhelming for beginners, but it’s essential to take your time and read the manual or visit the manufacturer’s website for guidance.
Remember to save any changes you make before exiting the BIOS settings to ensure they take effect. Overall, accessing the BIOS settings after installation can help optimize your system’s performance and ensure everything is working correctly.
Step 6: Format and Partition Your Samsung SSD 870 EVO
Post-Installation Set-Up Now that you’ve successfully installed your Samsung SSD 870 EVO, it’s time to format and partition it. This step is crucial for optimizing your SSD’s performance and ensuring it’s ready for use. To format your SSD, you’ll need to connect it to your computer and open the Disk Management tool.
Right-click on your SSD and choose the “Format” option. We recommend selecting the NTFS file system and formatting the drive with a default allocation unit size. Next, you’ll need to partition your SSD into sections.
You can do this by clicking on “New Simple Volume” and following the prompts. You can choose the size of each partition based on your needs. For example, you can create one partition for your operating system and another for your applications and files.
By formatting and partitioning your SSD, you’ll be able to maximize its speed and storage capacity and enjoy optimal performance for years to come.
Conclusion: Enjoy Faster Performance with Samsung SSD 870 EVO
Installing a Samsung SSD 870 EVO is like giving your computer a total makeover. It’s an upgrade that promises faster speeds, enhanced performance, and super-smooth operation. And with this guide, the installation process is as easy as pie! Just follow the steps, stay focused, and voila! Your computer is transformed into a lean, mean, processing machine.
No more slow boots, no more lagging, and no more waiting. So, go ahead and unleash the inner power of your computer with the Samsung SSD 870 EVO – your machine will thank you for it!”
FAQs
What are the system requirements for installing Samsung SSD 870 EVO?
Samsung SSD 870 EVO requires a PC with a SATA III interface and a SATA controller, including cables that connect to the motherboard. It is compatible with Windows 7 (64-bit) or later, macOS X 10.9 (Mavericks) or later, and Android 6.0 or later.
How do I physically install Samsung SSD 870 EVO in my computer?
Firstly, switch off the computer, remove the power cord, and open the case. Then, locate the 2.5-inch drive bay, remove its screw, and secure the SSD in the slot using screws provided with the SSD. Finally, connect the SATA and power cables firmly to the SSD and motherboard.
How do I clone my existing hard drive to Samsung SSD 870 EVO?
Connect the SSD to the computer using a SATA-to-USB adapter, follow the instructions of Samsung Data Migration software, select the source and destination drives, and start the cloning process. Once done, replace the existing hard drive with the SSD and reboot the computer.
How do I optimize Samsung SSD 870 EVO for better performance?
Install the latest firmware update from Samsung’s website, turn on the AHCI mode in the computer’s BIOS, enable TRIM and defragmentation in the operating system, avoid filling the SSD to its full capacity, and minimize file fragmentation by using a disk cleanup tool.