Are you looking for ways to improve the overall performance of your laptop or computer? One of the easiest and most effective methods is by replacing your hard drive with an SSD. Samsung SSDs are among the most popular on the market due to their reliability and high speeds. Fortunately, installing a new Samsung SSD is a relatively straightforward process that requires only basic technical knowledge and a few tools.
In this blog, we’ll guide you through the steps of installing Samsung SSD in your laptop or computer, from backing up your data to installing the drive and transferring your files. Get ready to enjoy faster boot times, quicker file transfers and an overall smoother computing experience.
Gather Necessary Materials
If you’re looking to upgrade your computer’s storage capacity, installing a Samsung SSD can be a great option! To begin, gather the necessary materials before you start. You’ll need your new Samsung SSD, a screwdriver (typically a Phillips head), and any necessary mounting brackets or cables. It’s important to make sure that your Samsung SSD is the right size and type for your computer, so check your computer’s specifications before making a purchase.
Once you have all the necessary materials, you can move on to the next step in the installation process. Remember to take your time and follow the instructions carefully to avoid any potential issues!
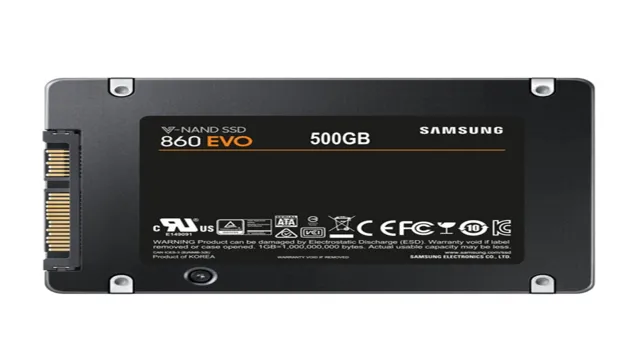
Samsung SSD, screwdriver, SATA cable
Before upgrading your computer’s hard drive to a Samsung SSD, there are a few essential materials that you’ll need to gather. First and foremost, you’ll require a Samsung SSD that suits your computer’s requirements. The size and type will depend on your computer’s make and model, so ensure that you do your research before making a purchase.
Once you have your Samsung SSD, you’ll need a small screwdriver to open up your computer and access your current hard drive. If you’re unsure about what size screwdriver to use, consult the manufacturer’s website or a tech support forum. Lastly, you’ll need a SATA cable to connect your new SSD to your computer’s motherboard.
You can use the same cable that’s currently connected to your hard drive but make sure that it’s in good enough condition and not frayed. With these three materials in hand, you’ll be ready to upgrade your computer’s hard drive and enjoy faster boot times and improved performance.

Disconnect Power
Before installing a Samsung SSD, it’s important to disconnect power to your computer. This means shutting down the computer and unplugging it from the power source. Failure to do so could result in electrical shock or damage to your computer.
Additionally, make sure to ground yourself by touching a metal object before handling the SSD. This will prevent any static electricity from damaging the components. It might seem like a simple step, but taking the time to disconnect power can save you from potentially costly mistakes.
Once the power is disconnected, you can move on to opening your computer and installing the Samsung SSD.
Power off computer and unplug from socket
When it comes to disconnecting power from your computer, the first thing you need to do is to power off your device and unplug it from the socket. This simple but essential step is often overlooked and can cause serious problems in the long run. By disconnecting your computer from the power source, you safeguard it from power surges and prevent any potential damage to your hardware.
It is also important to note that you should never unplug your computer while it’s still running or your hard disk might get corrupted. Therefore, always make sure to shut down your computer first before unplugging it from the socket. By following these simple steps, you can ensure the safety and longevity of your computer while also preventing any possible data loss or hardware damage.
Keep your computer safe and disconnect power when you’re not using it to avoid unnecessary risk.
Open Computer Case
If you’re wondering how to install your brand-new Samsung SSD, the first step is to open up your computer case. It can be intimidating to do so if you’ve never done it before, but don’t worry – it’s not as hard as it looks! Make sure you have a screwdriver on hand, and then locate the screws holding your computer case together. Once you’ve unscrewed them, you should be able to slide off either the side panel or the top panel, depending on the model of your computer.
Now, you can access the inside of your computer and identify where you want to install your Samsung SSD. It’s important to make sure you handle your SSD carefully and avoid touching the gold connectors, as any dirt or fingerprints on them can interfere with its performance. With a bit of patience and care, you’ll have your Samsung SSD installed and ready to use in no time!
Unscrew side panel and remove to access internal components
If you’re looking to upgrade or repair your computer, the first step is to open the case and access the internal components. To do so, you must unscrew the side panel of the case. This may seem like a daunting task, but it is not actually very difficult.
Just make sure you have the correct tools and follow precautions to avoid damaging your computer. Once you’ve unscrewed the panel, carefully remove it to expose the internal components. From there, you can proceed with whatever task you need to do, whether that’s installing new hardware or simply cleaning dust out of your computer.
Remember to be gentle and take your time, as some components may be delicate or sensitive. With a bit of care, you can safely access the internal workings of your computer and help keep it running smoothly.
Locate Hard Drive Bay
So, you’ve decided to upgrade your computer with a new Samsung SSD – great choice! The first step in the installation process is to locate the hard drive bay where you will be inserting the SSD. Depending on your particular computer model, the hard drive bay may be located in different areas. Laptops typically have the bay located on the underside of the computer, which requires removing a panel or unscrewing a few screws to access it.
Desktop computers, on the other hand, may have the bay located inside the case, requiring you to unscrew the case and remove it to access the bay. Once you’ve located the hard drive bay, you’re ready to move on to the next step in the installation process! Just be sure to follow all instructions carefully to ensure a successful installation.
Consult motherboard manual if unsure
When it comes to setting up a new hard drive in your computer, it’s important to first consult your motherboard manual to ensure you’re doing it correctly. Once you’ve double-checked, you’ll need to locate the hard drive bay, which is where your new hard drive will be installed. This area can vary depending on your specific computer model and whether you’re using a desktop or laptop.
In desktops, the hard drive bay is typically located towards the bottom of the computer case, and it may be necessary to remove the side panel to access it. For laptops, the hard drive bay can usually be found on the underside of the computer. Once you’ve located the bay, you can begin installing your new hard drive.
Remember to follow the manufacturer’s instructions carefully to ensure proper installation and avoid any potential damage to your computer. Overall, setting up a new hard drive can seem daunting, but with a little research and careful attention to detail, you’ll be up and running in no time!
Insert Samsung SSD
If you’re looking to upgrade your computer’s hard drive to a faster and more reliable Samsung SSD, you’re in luck – it’s actually quite easy to do! The first step is to make sure you have all the necessary supplies, such as your new Samsung SSD, a screwdriver, and any cables you may need to connect your SSD to your computer. Once you have everything ready, carefully open up your computer and locate the hard drive bay. Depending on your computer model, this may be hidden behind a panel or easily accessible from the exterior.
Next, remove the cables and any brackets or screws holding the old hard drive in place. Once you’ve removed the old hard drive, simply align and insert your new Samsung SSD into the same bay, making sure to properly secure it with any necessary brackets or screws. Finally, reconnect any cables and power on your computer to verify that your new Samsung SSD is working properly.
With these simple steps, you’ll be able to enjoy faster boot times and improved application loading speeds with your new Samsung SSD in no time!
Slide SSD into bay and secure with screws
When installing your Samsung SSD, the first step is to slide it into the bay of your computer or laptop. This is where your new hard drive will reside, so it’s important to make sure it’s secure. You’ll need to unscrew the bay cover if there is one and carefully slide the SSD into place.
Once you’ve done this, use the screws provided to secure it into the bay. It’s essential to ensure that the screws are tightened firmly to ensure that your new SSD doesn’t rattle loose over time. Be sure to check the instructions provided with your SSD drive to ensure you’re using the correct screws and inserting it correctly.
Once you’ve done this, your new SSD is securely in place, and you’re ready to install your operating system and start enjoying the benefits of a faster, more reliable system. With these few simple steps, upgrading your computer or laptop with a new Samsung SSD drive can be quick and easy – giving you faster speeds and a better overall computing experience.
Connect SATA Cable
Installing a Samsung SSD is an easy and quick way to improve the performance of your computer. Once you have attached the SSD properly to the motherboard and power supply unit, the next step is to connect the SATA cable. This cable is long and thin with a flat connector at each end.
One end of the SATA cable should be plugged into the SSD and one should be plugged into the motherboard’s SATA port. These ports are usually located near the bottom right-hand corner of the motherboard, but your specific motherboard manual will be able to show you exactly where the SATA port is located. Once the SATA cable is connected, you’re ready to power on the computer and get started with your new SSD!
Attach cable to SSD and motherboard
When building a desktop computer, one of the most crucial steps is connecting all the necessary components. In order to properly connect your SSD to the motherboard, you’ll need to attach a SATA cable. These cables come in different sizes, so make sure you choose one that’s long enough to reach both the SSD and the motherboard.
The SATA cable consists of two connectors, one for the motherboard and one for the SSD. The connectors should fit snugly, so gently push them in until you hear a click. Once you have the SATA cable securely attached, you can move on to connecting the power cable to the SSD.
This step is important because without power, the SSD won’t work. The SATA power cable should be plugged into the SSD and then to your computer’s power supply. Now that you’ve properly connected the SATA and power cables to the SSD and the motherboard, you can finish assembling your desktop computer.
With a properly connected SSD, you’ll be able to store and access your data quickly and efficiently.
Close Computer Case
Congratulations on successfully installing your new Samsung SSD! Now it’s time to close up your computer case and give it a test run. First, make sure that all of the components are properly seated inside the case and that all cables have been securely connected. This will prevent any unnecessary damage to your hardware.
Once everything is in place, slowly close the case, making sure that none of the cables or components get pinched or stuck by the closing mechanism. Tighten the screws or latch firmly to hold the case in place. Now, it’s time to give your newly installed SSD a test run.
Turn on your computer and check to see if it is detecting the new drive. If everything looks good, it’s time to start optimizing your system and experiencing the lightning-fast speeds that come with an SSD. Remember to take your time and be patient during the installation process.
With a little bit of effort, you can enjoy all of the benefits that your new Samsung SSD has to offer.
Screw side panel back on
After fiddling around inside your computer case, it’s finally time to put it all back together. The last (and perhaps most satisfying) step is to screw the side panel back on. This final touch not only secures everything in place but also gives a sense of closure to your DIY project.
Make sure to align the panel with the case’s edges and push down gently to snap it into place before screwing it in. It’s essential to use the same screws you removed earlier and tighten them just enough to secure but not strip the threads. Once the screws are in place, take a step back, and admire your work.
With the side panel securely on, your computer is ready to go back to its rightful place, ready to tackle whatever tasks come its way.
Power On Computer
If you’re looking to improve the performance of your computer, upgrading to a solid-state drive (SSD) from Samsung is a great choice. Installing an SSD may seem overwhelming at first, but the process is quite simple. To start, power off your computer and unplug it from any power sources.
Open up your computer case and locate the hard drive bay. Make sure your Samsung SSD and any necessary cables are available. Remove the old hard drive and insert the Samsung SSD into the bay.
Connect the appropriate cables and secure the SSD in place. Close up the case, plug in your power source, and power on your computer. The Samsung SSD should automatically be detected and installed.
Congratulations – you’ve successfully installed your new Samsung SSD, and your computer should be running faster and smoother than ever before!
Boot up and check if new SSD is recognized
As you power on your computer after installing a new SSD, the first thing you should do is check if your computer recognizes it. It’s an exciting moment when you’ve finally made the upgrade, but sometimes things may not go as smoothly as planned. You may encounter issues like the system not recognizing your new storage drive or other problems that need troubleshooting.
So, take a deep breath and pay attention to the BIOS screen as your computer starts up. Look for a message that indicates all the connected hardware and ensure that the SSD is listed. If it appears, you’re good to go! If not, double-check the connections and try again.
Don’t hesitate to seek help from professionals or forums if you’re having trouble. It’s crucial to ensure that everything is working correctly before you start using your computer regularly. A little troubleshooting at the start can save you a lot of headaches later on.
Transfer Data (Optional)
Once you have physically installed your new Samsung SSD, you may want to transfer your data from your old hard drive to your new one. This step is optional, but it can save a lot of time and effort if you have a lot of important files and programs that you don’t want to lose. There are several ways to transfer data, including using a cloning tool or transferring files manually.
Using a cloning tool is usually the easiest and most efficient method, as it allows you to transfer all of your data at once, including your operating system and any applications you have installed. Just make sure to back up any important files before you begin the cloning process. Alternatively, you can transfer files manually by simply copying and pasting them from your old hard drive to your new SSD.
This method is more time-consuming and requires more effort, but it may be preferable if you only need to transfer a few important files. Whatever method you choose, make sure to follow the instructions carefully and double-check all of your files to ensure that everything has been transferred correctly.
Use Samsung Data Migration Software
If you’re looking to transfer data from your old computer to a new Samsung device, then the Samsung Data Migration Software can be a great tool to have. This software allows you to easily transfer your files, documents, photos, videos, and other data from your old computer to your new Samsung device. It’s a quick and simple process that can save you time and effort in setting up your new device.
Plus, it’s completely free to use! Simply download the Samsung Data Migration Software from the official Samsung website, install it on your old computer, and follow the step-by-step instructions. With this software, you can transfer files in just a few clicks. So, if you want to make your data transfer process hassle-free, download the Samsung Data Migration Software today.
Conclusion
In conclusion, installing a Samsung SSD is a breeze and a fantastic way to boost your computer’s performance. It’s as easy as simply plugging it in and following a few simple steps. Just like a good workout, it’s a small investment that pays off in big ways.
So what are you waiting for? Get your Samsung SSD and watch your computer sprint to the finish line!”
FAQs
What are the benefits of installing a Samsung SSD in my computer?
Installing a Samsung SSD can greatly improve the overall performance and speed of your computer. SSDs have faster read and write speeds than traditional hard drives, allowing for faster boot times, file transfers, and application launch times.
What do I need to install a Samsung SSD in my computer?
You will need a compatible computer or laptop, a Samsung SSD, a screwdriver, and cloning software to transfer your existing files and operating system to the new drive.
Can I install a Samsung SSD myself or do I need professional help?
Many people are able to install a Samsung SSD themselves with the proper tools and instructions. However, if you are uncomfortable with opening up your computer or transferring your files and operating system, it may be best to seek professional help.
How do I transfer my files and operating system to my Samsung SSD?
Samsung provides cloning software with their SSDs that can transfer your existing files and operating system to the new drive. You can also use third-party software such as Acronis True Image or Macrium Reflect. Just be sure to back up all of your important files before starting the cloning process.