Have you ever experienced the frustration of a broken SSD? It’s a nightmare scenario, but fear not! With this step-by-step guide, you’ll learn how to fix your broken SSD and get your computer up and running again. In today’s digital age, we rely heavily on our computers for work, entertainment, and communication, making a broken SSD a daunting prospect. But don’t worry, we’ve got you covered.
Whether it’s due to physical damage, corruption, or other issues, this guide will take you through the process of recovering your lost data and reviving your computer’s hard drive. So, grab a cup of coffee and let’s get started fixing that broken SSD!
Assess the Damage
If you find yourself with a broken SSD, the first step is to assess the damage. The most common issue is a physical failure, which can occur due to a drop or other physical impact. If this is the case, you may be able to see visible damage to the device.
In this scenario, your best bet is to contact a professional data recovery service, as attempting to fix the damage yourself could potentially cause further harm. If the issue is not related to physical damage, there may be a software problem. In this case, you can try running diagnostic tools to determine the issue.
Some SSD manufacturers provide these tools for free on their websites. If the diagnostic tool indicates a software issue, you may be able to fix the problem by updating the firmware or reinstalling the operating system. In any case, it’s important to make sure you have backed up your data beforehand, as attempting to fix the problem without a backup could result in data loss.
How to assess the extent of physical damage to an SSD?
Carefully inspect the SSD for visible signs of physical damage, such as cracks, dents, scratches, or any other visible indications of harm. If unsure, it is advisable to seek professional assistance to accurately assess the damage.
What are the possible causes of SSD failure?
SSD failure can be caused by bad blocks on the drive, interface problems, corruption, physical damage, or other factors that lead to the drive becoming damaged or corrupted.
What are the signs of SSD damage?
Signs of SSD damage include the inability to read certain files, the need to fix the file system, frequent crashes during startup, the SSD drive becoming read-only, and decreased performance.
How to check if the SSD is failing or about to die?
Look for symptoms such as unreadable data files, the need to fix the file system, frequent crashes during startup, the SSD drive becoming read-only, and slowed performance.
What are the symptoms of a failing SSD?
Some data files cannot be read, resulting in an inability to access any data from the SSD drive.
How can I fix a corrupted SSD on Windows easily?
If you are experiencing issues with a corrupted SSD on Windows and want to fix it easily, there are several methods you can try. Before resorting to professional SSD drive repair utilities, consider the following three regular approaches:
- Update the firmware of the faulty SSD:
- Start by identifying the model of your SSD. To do this, go to File Explorer, right-click on the problematic drive, click on “Properties,” and navigate to the “Hardware” tab. This will reveal the manufacturer’s name.
- Once you know the manufacturer, search for the specific SSD firmware update tool online. Download and install it on your computer.
- Launch the SSD firmware update tool and verify the firmware versions of your SSD using the provided instructions. Follow the prompts to complete the firmware update process.
- Update the drivers to repair the SSD:
- Click on the “Start” button and type “Device Manager” in the search box. Press “Enter” to open the Device Manager.
- Expand the “Disk Drives” category, right-click on the SSD driver, and select “Update driver.”
- Once the update is finished, restart your computer.
Alternatively, you can choose to uninstall the driver in the second step. Afterward, restart your computer, and it will automatically reinstall the disk driver.
- Use CHKDSK to check and repair SSD bad sectors:
- Open the Command Prompt window by clicking the “Start” button, typing “cmd” in the search bar, right-clicking on Command Prompt, and selecting “Run as administrator.”
- In the elevated Command Prompt window, enter the command “chkdsk [drive letter]: /f /r /x” and press “Enter.” Replace “[drive letter]” with the letter assigned to your corrupted SSD.
- This process will scan the target SSD for disk errors and repair them if detected.
In addition to the mentioned methods, there are third-party SSD repair software options available. One example is AOMEI Partition Assistant Standard, which provides four different options for fixing damaged or corrupted SSDs. You can download this software for free and use it to repair your SSD.
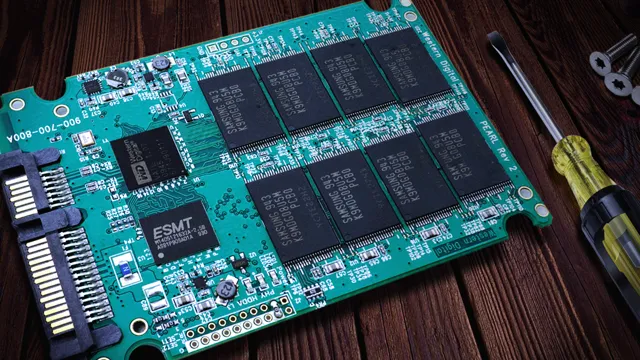
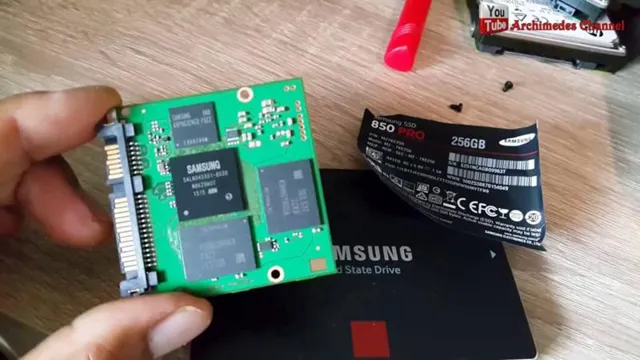
Check for Physical Damage
When it comes to checking for physical damage, the first step is to carefully assess the extent of the damage. This means inspecting your belongings closely and taking note of any cracks, dents, scratches, or other visible signs of damage. It’s important to be thorough during this process, as even small cosmetic damages can lead to bigger issues down the line.
If you’re unsure about the severity of the damage, it’s always best to err on the side of caution and have a professional take a look. Remember, assessing the damage early on can help prevent further deterioration and save you money in the long run. So, the next time you suspect that your belongings may have been damaged, take the time to inspect them carefully.
Run Diagnostic Software
If your computer is acting up, the first step in addressing the issue is to run diagnostic software. This will help you assess the damage and determine what course of action to take. There are a variety of diagnostic tools available, ranging from basic system checkups to more advanced programs that can diagnose specific issues.
One popular option is Windows’ built-in diagnostic tool, which can check for errors in your system’s hardware and software. Another option is third-party software like PC Doctor, which offers more in-depth diagnostics and troubleshooting. By running diagnostic software, you can identify problems early and prevent potential system failures.
So, if you’re experiencing strange behavior from your computer, don’t hesitate to run some diagnostics and get to the root of the problem.
Try Basic Troubleshooting
If you’re experiencing issues with a broken SSD, it can be frustrating to try and figure out what the problem is. A good place to start is with basic troubleshooting techniques. Firstly, try restarting your computer and checking all cables and connections to ensure they are properly connected.
If the issue persists, try updating your drivers and firmware, as this can often resolve many issues. If you’re still having problems, consider running a disk check on your SSD using your computer’s built-in tools or a third-party software. This can help identify any errors or bad sectors on the drive.
If these simple steps don’t solve the issue, it may be time to consider more advanced solutions such as data recovery or even replacing the SSD altogether. Remember, prevention is key, so make sure to back up your important files regularly to avoid any potential data loss in the future.
Disconnect and Reconnect the SSD
One of the most basic troubleshooting steps you can take when experiencing issues with your SSD is to disconnect and reconnect it. This simple action can often fix any connection issues or loose cables that may be causing your SSD to malfunction. It’s important to make sure your computer is turned off and unplugged before attempting this, as well as grounding yourself to prevent any static electricity from harming your computer.
Once you’ve opened your computer case and located your SSD, carefully remove the data and power cables and then reattach them firmly. Double-check to make sure everything is securely in place before closing up your computer and turning it back on. This simple step may be all it takes to get your SSD running properly again.
Update Drivers and Firmware
If you are experiencing issues with your SSD, it’s important to diagnose the problem accurately to determine the appropriate solution. In some cases, a software issue may be the underlying cause. In such situations, updating the firmware or reinstalling the operating system can often resolve the problem. Before attempting any fixes, it is crucial to prioritize the safety of your data. Take the time to back up all your important files and documents. This precaution ensures that you have a copy of your data in case any issues arise during the troubleshooting process.
To update the firmware of a not working SSD, you can follow a step-by-step approach. Begin by identifying the model of your SSD. You can easily do this by opening File Explorer, right-clicking on the drive that contains the problematic SSD, and selecting ‘Properties’. Then, navigate to the ‘Hardware’ tab, where the name of the SSD maker will be displayed. Once you have determined the manufacturer, proceed to search for the specific SSD firmware update tool online. Download the tool and install it on your computer. These tools are designed to assist you in updating the firmware of your SSD effectively.
After installing the firmware update tool, run the program and check for the current firmware version of your SSD. The tool will provide hints and prompts to guide you through the firmware update process. It is essential to carefully follow these instructions to ensure a successful update. Remember, updating the firmware of your SSD should only be attempted if the diagnostic tool indicates a software issue. If you are unsure or uncomfortable performing this task on your own, it is always advisable to seek professional assistance. By following these thorough steps and guidelines, you can confidently update the firmware of your not working SSD, potentially resolving any software-related issues while safeguarding your valuable data.
How do I run the firmware update tool and check the firmware versions of my SSD?
After downloading the firmware update tool, follow these steps to run it and check the firmware versions of your SSD:
Where can I find the specific firmware update tool for my SSD?
Once you have identified the SSD maker, you can find the specific firmware update tool by following these steps:
How can I find out the model of my non-working SSD?
To identify the model of your non-working SSD, follow these steps:
Check for Bad Sectors
What are some other options for checking and fixing bad sectors on an SSD?
Apart from using third-party software like AOMEI Partition Assistant Standard, you can also use the error-checking utility provided by your operating system to scan and fix bad sectors on an SSD. Additionally, there are various other third-party software available that offer advanced diagnostic options for checking and repairing bad sectors on SSDs.
What is the purpose of checking for bad sectors regularly?
Checking for bad sectors regularly is important to prevent data loss and other issues that can arise from problematic hard drives. By identifying and fixing bad sectors early on, you can ensure the integrity and stability of your system.
How do I run CHDDSK commands to check and fix SSD drive errors?
To run CHDDSK commands to check and fix SSD drive errors, you can follow these steps:
What are the steps to check and fix bad sectors on an SSD using AOMEI Partition Assistant Standard?
To check and fix bad sectors on an SSD using AOMEI Partition Assistant Standard:
How can I repair SSD bad sectors using a third-party software?
To repair SSD bad sectors using a third-party software like AOMEI Partition Assistant Standard.
How can I repair an SSD using a powerful SSD repair tool?
To repair an SSD using a powerful SSD repair tool, you have several options available to you. One such option is to employ third-party software specifically designed for SSD repair, such as AOMEI Partition Assistant Standard. This software offers four different methods to help you fix a damaged or corrupted SSD.
Firstly, you can repair bad sectors on your SSD. If you are unable to use the CHDDSK commands to check and fix SSD drive errors, this software can assist you. By installing and running the SSD repair tool on your PC, you can right-click on the dead SSD and select “Advanced” > “Check Partition”. From there, you can choose a method to check and fix partition errors, including repairing bad sectors. Additionally, there is an option to perform a surface test to check for disk errors.
Another effective method is to reformat the damaged SSD. By migrating the existing data to another disk and then performing a full format, you can resolve issues caused by file system corruption or write protection on the SSD. Running AOMEI Partition Assistant allows you to right-click on any partition of the SSD and select “Format Partition” from the menu. From there, you can choose a desired file system, such as FAT32, and apply the changes.
If the Master Boot Record (MBR) on the SSD becomes damaged, you may lose access to all the data stored on it. In such cases, you can rebuild the MBR using AOMEI Partition Assistant Standard. By right-clicking on the SSD drive in the main interface of the SSD repair utility, you can select “Rebuild MBR”. From there, you can choose the appropriate MBR type for your operating system and apply the changes.
Lastly, if none of the aforementioned methods prove successful, you can try securely erasing the damaged SSD. This method involves completely wiping all data on the target SSD drive. AOMEI Partition Assistant Professional offers an “SSD Secure Erase” feature specifically designed for this purpose.
With the help of a powerful SSD repair tool like AOMEI Partition Assistant, you can easily and effectively repair a corrupted Solid State Drive on Windows 11/10/8/7. The software provides multiple options to address various issues, such as repairing bad sectors, reformatting the SSD, rebuilding the MBR, and securely erasing the SSD if necessary.
Advanced SSD Repair Methods
If you’re dealing with a failing SSD, don’t panic just yet. There are a few advanced repair methods you can try to fix it yourself. First, you can attempt to reformat the drive to fix any firmware or software issues.
If that doesn’t work, you can try using specialized software designed to repair faulty SSDs. However, be warned that these programs can be expensive and may not always work. Another option is to try using a data recovery tool to salvage any important files before replacing the SSD altogether.
Remember, prevention is always better than a cure, so make sure to regularly back up your data and avoid storing excessive amounts on your SSD to reduce the risk of it failing in the future. Overall, fixing a broken SSD can be tricky and time-consuming, but with persistence, you may just be able to salvage it and all your important data.
Replace the SATA Cable
If your SSD is not functioning well even after running diagnostic tests, then your SATA cable may be the culprit. Replacing your SATA cable can accelerate your computer’s speed and improve the performance of your SSD. A faulty cable can restrict the transfer of data and can lead to performance issues.
It is a simple process, which you can do yourself with some screwdrivers. First, shut down your computer and unplug all the wires connected to it. Next, locate the SATA cable attached to your SSD and remove it from both the SSD and the motherboard.
Finally, attach the new SATA cable to your SSD and motherboard and start your computer to ensure the cable is connected properly. Overall, replacing a damaged SATA cable can solve several performance issues with your SSD, and it’s cheaper than replacing the SSD itself.
Perform a Secure Erase
Perform a Secure Erase When it comes to repairing an SSD, there are several advanced methods that can be used to restore its functionality. One such method is performing a secure erase. This essentially wipes the drive of all data, including any corrupted or damaged files that may be causing issues.
To perform a secure erase, you will need to use specialized software that is designed for this purpose. Once you have the software, you will need to follow the instructions carefully to ensure that the process is completed successfully. It is important to note that a secure erase will completely erase all data on the drive, so it is essential to back up any important files before proceeding.
Additionally, this process can take several hours to complete, so it is not a quick fix for SSD issues. Overall, performing a secure erase can be an effective method for repairing SSDs, particularly if the issues are related to data corruption or damage. However, it is essential to proceed with caution and carefully follow the instructions to avoid any potential data loss or damage to the drive itself.
Send the SSD to Professional Data Recovery Services
If all else fails and your SSD still refuses to work, it might be time to consider sending it to professional data recovery services. These experts have access to advanced SSD repair methods that may be beyond your expertise, ranging from hardware and software solutions to data extraction procedures. While this option might be pricier than the DIY route, it offers a much higher chance of successful data recovery.
Moreover, they can diagnose the root cause of your SSD failure and provide insights and recommendations on how to prevent the same issue from happening again. Rest assured that your data will be handled with utmost care and confidentiality, so you can focus on getting your files back intact. Keep in mind, though, that not all data recovery companies are created equal.
Do your due diligence and choose a reputable provider that can deliver reliable results.
Prevent Future SSD Failure
If you’re looking for ways to prevent future SSD failure, there are a few things you can do to keep your SSD running smoothly. First of all, make sure to keep your SSD clean and free from dust and debris. This can be done by simply wiping it down with a microfiber cloth and making sure it’s stored in a clean environment.
Secondly, be cautious of the number of read and write operations you’re putting on your SSD. Frequent and repetitive data transfers can wear down the SSD’s components over time. Lastly, try and avoid overheating your SSD.
Excessive heat can cause components to break down and ultimately lead to failure. If you follow these tips, you’ll be able to keep your SSD working efficiently for years to come and avoid any potential costly replacements. Remember, prevention is key when it comes to protecting your valuable data.
Backup Your Data
SSD failure is a real concern for many computer users. As SSDs become more prevalent, it is important to know how to prevent future SSD failure. One of the best ways to do this is by backing up your data.
By creating regular backups of your important files and documents, you can ensure that you don’t lose everything in the event of an SSD malfunction. There are many different backup options available, including cloud storage and external hard drives, so it’s important to choose the one that works best for you. It may take some time and effort to set up a backup system, but it’s worth it in the long run to protect your valuable data.
Don’t risk losing everything – start backing up your data today!
Avoid Overheating and Power Surges
If you’re looking to prevent future failure of your SSD, one of the first things you should do is avoid overheating and power surges. Overheating can be a major issue for SSDs, as it can cause damage to the components and shorten the lifespan of the drive. To prevent overheating, you should make sure that your computer is properly ventilated and that the air flow is unobstructed.
You may also want to consider adding additional fans or cooling systems to your computer to keep it from getting too hot. Power surges can also be a major problem for SSDs, as they can cause damage to the delicate electronic components of the drive. To prevent power surges, you should use a high-quality surge protector to protect your computer and other electronics.
In addition, you should make sure that your computer is properly grounded to prevent electrical fluctuations from damaging your SSD. By taking steps to avoid overheating and power surges, you can help ensure that your SSD lasts as long as possible and continues to perform at its best.
Consider Upgrading Your SSD
If you’re someone who heavily relies on their SSD for important files and data, it may be wise to consider upgrading your current SSD to prevent future failure. As time goes on, SSDs can begin to experience wear and tear, and may eventually stop working altogether. Upgrading to a newer model not only ensures higher performance but can also prevent data loss and potentially costly data recovery services.
Additionally, newer SSDs have higher capacities and faster speeds, making them more efficient in handling larger files. Don’t wait until your SSD starts to show signs of failure – consider upgrading now to ensure your peace of mind and the safety of your important files.
Test Your SSD Regularly for Errors
If you want to prevent future SSD failure, it’s important to regularly test your SSD for errors. Solid-state drives are more reliable than traditional hard drives, but they’re still vulnerable to failure over time. Running regular tests can help you catch any potential problems before they become major issues.
One easy way to test your SSD is to use the built-in Windows error-checking tool. Just right-click on your SSD in File Explorer, select Properties, then click on the Tools tab and select Check under the Error-checking section. This will scan your drive for errors and fix any issues it finds.
Another option is to use a third-party program specifically designed for SSD testing, like CrystalDiskInfo or SSD Life. These programs can provide more in-depth analysis of your drive’s health and give you a better understanding of any potential problems. By keeping a regular testing schedule, you can help ensure that your SSD stays healthy and reliable for years to come.
So, make sure you set up a reminder to test your SSD every few months, and you’ll have peace of mind knowing your data is safe.
Can I use the mentioned SSD repair software for other SSD brands?
Yes, the mentioned SSD repair software, AOMEI Partition Assistant Standard, is not limited to a specific brand of SSD. In addition to the methods discussed earlier, you can also utilize this third-party software to repair SSD drives from various brands, including Kingston, Intel, Samsung, and others. It offers multiple options specifically designed to help fix damaged or corrupted SSDs, making it a versatile solution for addressing SSD issues. You can download this software for free and take advantage of its capabilities to repair your SSD drive, regardless of the brand.
What is a summary of the information provided?
In summary, the provided information states that the mentioned SSD repair software is capable of repairing various brands of SSD drives, including Kingston, Intel, and Samsung. Additionally, the Professional edition of the software offers support for SSD partition alignment, which can enhance the overall performance of the SSD. For users of Windows Server, the recommended choice would be AOMEI Partition Assistant Server.
Conclusion
So, there you have it folks – a clear and concise guide to fix a broken SSD. Remember, this is not a task for the faint-hearted, but with a little bit of technical savvy and a lot of patience, you can bring your SSD back to life. And if all else fails, just remember the words of the great Douglas Adams – “Don’t Panic”.
Happy Fixing!”
FAQs
What are the common causes of a broken SSD?
There are several reasons why an SSD can fail, such as physical damage, power surges, corrupt firmware or software, firmware bugs, or logical failures.
How can I troubleshoot a broken SSD?
First, try connecting the SSD to another computer or using a different cable. If it still does not show up, check the BIOS and see if it is recognized. You can also try using recovery software or seek the help of a professional.
Can a broken SSD be repaired?
It depends on the extent of the damage. If the failure is due to a logical issue, such as corrupt files or bad sectors, it may be possible to repair it using recovery tools. However, if there is physical damage, such as a cracked circuit board, it may not be repairable.
How can I prevent my SSD from breaking?
To prevent SSD failure, it is recommended to keep your firmware up to date, use a surge protector, avoid sudden power loss, and handle your SSD with care, such as not dropping it or exposing it to extreme temperatures. Regularly backing up your data is also important.
How do I update firmware of a not working SSD?