Ready to upgrade your computer’s storage and boost its performance? Installing a Solid State Drive, or SSD, can be the easiest and most impactful way to do so. Switching from a traditional hard drive to an SSD can result in faster booting, quicker loading times and an overall smoother experience. But how do you install a Windows SSD? Don’t worry, it’s easier than you might think! In this blog, we will guide you step-by-step through the process of installing Windows on your new SSD.
Whether you’re a beginner or an experienced user, we have got you covered. So, let’s get started and give your computer the upgrade it deserves!
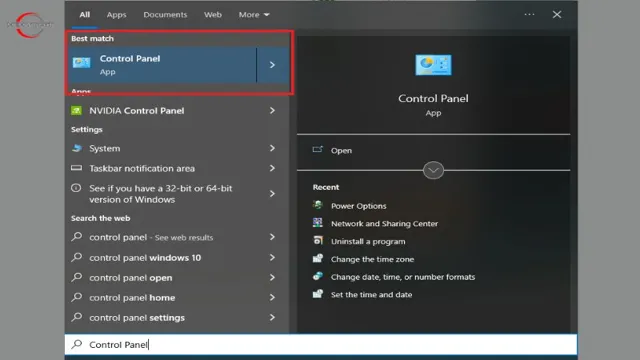
Preparation
Installing Windows on an SSD drive is a great way to increase your computer’s performance and reduce boot time. However, the installation process can take some time, depending on the speed of your computer and the size of the SSD. On average, it can take about 30-45 minutes to install Windows on an SSD using a USB drive.
But before you start the installation process, it is essential to back up all your files and make sure that your computer BIOS is set up to boot from the USB drive. You also need to have a valid Windows product key and enough space on the SSD for the operating system and any other applications you want to install. So, make sure you have everything in place, and you set aside enough time for the installation process to complete without interruptions.
In the end, the time you spend preparing and installing Windows on an SSD will be well worth it because your computer’s performance will be significantly improved.
Back up your files
Preparing for a backup of your files is crucial to ensure that you don’t lose your important data. First of all, you need to assess the amount of data you need to backup and decide where you want to store it. Do you want to use an external hard drive, a cloud-based storage, or both? Once you have decided on that, it’s important to ensure that the device you will use for the backup is functioning properly.
Check for any errors or defects that may hinder the backup process. Lastly, make sure that your computer or device is updated to the latest software version to avoid any conflicts during the backup process. These preparations will make the backup process easier and faster, saving you time and effort.
Don’t forget to use the main keyword “backup your files” organically to help improve your website’s SEO ranking.
Gather necessary equipment
If you’re planning to work on a project, one of the most important things to consider is being prepared with all the necessary equipment. This means that you should not only have all the tools and materials ready but also ensure that they’re in good condition. The primary keyword here is “preparation.
” This includes checking your supplies and testing your equipment before you start working, ensuring that everything is in proper working order, and ready to be used. Being prepared in this way will help you avoid downtime or delays in completing your project. Additionally, you will have a more focused and clear mindset, enabling you to work more efficiently for a successful end result.
Installation
When it comes to installing Windows on an SSD, many factors can affect the installation time. However, the average installation time for Windows 10 on an SSD is usually around 20 to 30 minutes. This is because SSDs are faster than traditional hard drives, which means that the read and write speeds are significantly faster.
Additionally, the use of modern computers makes installation much quicker with top-notch processing speed. Despite this, installation time can depend on your hardware and other factors such as the size of the SSD, the speed of the CPU, the amount of RAM, and more. Furthermore, the installation process may take longer if you’re coming from an older version of Windows, have a slow internet connection, or have lots of data to migrate.
Overall, it is important to keep in mind that the installation times for Windows on SSDs can vary and that a lot will depend on your specific system’s performance.
Open your computer case
If you’re looking to install new hardware or perform maintenance on your computer, the first step is to open the computer case. This can sound intimidating, but it’s a relatively easy process. First, gather any necessary tools such as a screwdriver.
Next, turn off your computer and unplug it from the power source. Once that’s done, locate the screws on the back of the case that secure it in place. Use your screwdriver to remove the screws and gently slide the case off.
Inside, you’ll see the various components that make up your computer. Be cautious not to touch any delicate parts or wiring. When you’re finished, simply slide the case back on and screw it back into place.
Opening your computer case is an essential step in maintaining or upgrading your computer, and with proper precautions, it can be done with ease.
Insert the SSD into the slot
When it comes to installing an SSD into your device, the process can seem daunting at first, but it’s actually quite simple. First, you need to locate the slot for the SSD in your device, which can vary depending on the make and model. Once you’ve found the slot, it’s time to insert the SSD.
Make sure to handle it carefully and avoid touching the contacts on the bottom. Align the SSD with the slot and gently insert it until it clicks into place. It’s important to note that not all devices have a dedicated SSD slot, so you may need to use an adapter or connect it via a cable.
Once the SSD is securely installed, you’re ready to enjoy the increased speed and performance it provides. Just remember to properly dispose of your old hard drive and regularly back up your data to ensure your new SSD stays running smoothly.
Connect the cables
When it comes to installing devices, even the most tech-savvy individuals can sometimes get confused on which cable goes where. So, let’s talk about how to “connect the cables” during the installation process. First and foremost, it’s important to read the manual carefully to identify which cables need to be connected and where they need to be plugged in.
Once you have a good understanding of what you need to do, start by positioning your device near a power source, as most installations require a power cable. Next, identify any Ethernet or HDMI cables that may be required to connect your device to other devices or networks. If you’re not sure, always refer to the manual first.
Once you’ve identified which cables you need, simply plug them into their corresponding ports, making sure they’re securely connected. Finally, turn on your device and follow any remaining installation instructions provided. Remember, always double-check your connections before starting up your new device and if you’re unsure about anything, consult the manual or contact the manufacturer for assistance.
With a little patience and attention to detail, you’ll be up and running in no time!
Configuration
If you’re planning on installing Windows on your SSD, you may be wondering how long the process will take. The answer to this question can vary depending on a number of factors, such as the speed of your computer and the size of the SSD. However, in general, the installation of Windows onto an SSD can take anywhere from 20 to 40 minutes.
This is relatively quick compared to installing Windows on a traditional hard drive, which can take several hours. It’s worth noting that the configuration of your new installation can take additional time, including the installation of drivers and updates. However, once this is done, you’ll be able to enjoy significantly faster load times and boot times than with a traditional hard drive.
Overall, the time it takes to install Windows on an SSD is well worth the performance boost you’ll experience.
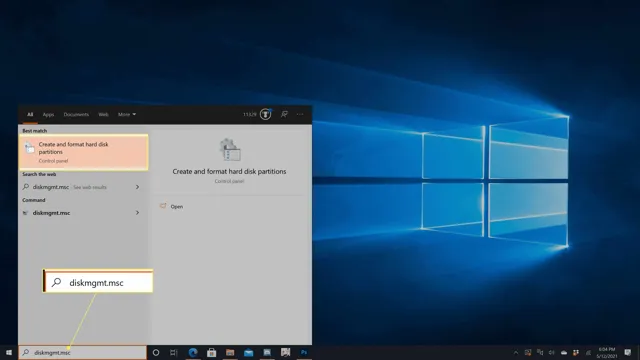
Boot your computer from the SSD
If you’ve recently installed an SSD on your computer, the next step is to configure your computer to boot from it. By doing so, you’ll be able to take full advantage of the faster speeds and improved performance that SSDs offer. Start by accessing your computer’s BIOS or UEFI settings.
This can typically be done by pressing a specific key (such as F2 or Delete) during the bootup process. Once you’re in the settings, look for an option that lets you choose the boot device order. You’ll want to select your SSD as the first boot option.
If you’re having trouble finding the correct setting, consult your computer’s manual or look online for guides specific to your motherboard or computer model. Some newer motherboards may even have a dedicated SSD boot option that makes things even easier. Once you’ve made the necessary changes, save your settings and restart your computer.
Your computer should now boot directly from your SSD, giving you a faster, more responsive experience overall. Remember, it’s crucial to regularly back up your data and keep your computer’s software and firmware up to date to ensure the best performance and security. By taking these steps, you’ll be able to get the most out of your SSD and enjoy a faster, more efficient computing experience.
Install Windows on the SSD
When it comes to installing Windows on an SSD, you’ll need to do some configurations to ensure that everything runs smoothly. First and foremost, ensure that the SSD is properly connected to your computer and recognized by the system. Then, you’ll need to boot your computer from the Windows installation media.
During the installation process, be sure to select your SSD as the destination drive for the operating system. Once the installation is complete, you should check to make sure that Windows is properly configured to take advantage of the SSD’s speed. This includes enabling AHCI mode in your computer’s BIOS and disabling features like disk defragmentation that can negatively impact SSD performance.
By taking these steps, you’ll be able to maximize the benefits of your SSD and enjoy faster boot times and improved application performance.
Conclusion
In the time it takes to make a cup of coffee, you can install Windows on an SSD and transform your computer from a slowpoke to a speedy gazelle. Whether you prefer bold espresso or creamy latte, in just a few minutes you’ll have a fresh installation of Windows ready to go. So don’t let a sluggish computer bring you down, grab a cup of joe and get ready to enjoy the benefits of an SSD!”
FAQs
How long does it take to install Windows on a SSD?
The installation process typically takes around 30-45 minutes, but it can vary depending on your computer’s hardware specifications.
What are the benefits of installing Windows on a SSD?
Installing Windows on an SSD can improve your computer’s boot up time, application loading times, and overall system performance.
Can I install Windows on an SSD without losing my data?
Yes, you can install Windows on an SSD without losing your data by using a cloning tool to transfer your existing operating system and files to the new drive.
Do I need to format my SSD before installing Windows?
No, you do not need to format your SSD before installing Windows. The installation process will automatically partition and format the drive for you.