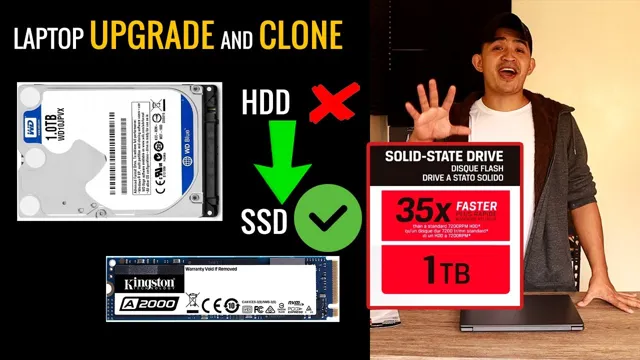
Have you recently purchased a new 1TB SSD but are unsure how to transfer your data from your old 256GB SSD? Cloning your old SSD to your new one can seem like a daunting task, but with the right tools and knowledge, it can be done quickly and easily. Upgrading your SSD can significantly improve the speed and overall performance of your computer, and with more storage space, you can store more files and programs without worrying about running out of space. In this blog, we’ll guide you through the process of cloning your 256GB SSD to a 1TB SSD, ensuring you don’t lose any precious data along the way.
Ready to dive in? Let’s get started.
Introduction
“How long does it take to clone 256GB SSD to 1TB SSD?” This is probably one of the most common questions asked by those who are planning to upgrade their computer’s hard drive. The answer to this question is not straightforward, as there are many factors that can affect the cloning process. Generally, the time it takes to clone a 256GB SSD to a 1TB SSD can vary from a few hours to several days.
The speed of your computer, the amount of data you’re transferring, and the quality of your SSD and cloning software are some of the factors to consider. Additionally, the cloning process requires careful attention to detail and can be time-consuming. However, with the right tools and resources, you can easily accomplish this task and ensure a smooth transition to your new SSD.
What is SSD Cloning?
SSD Cloning is the process of copying the entire contents of one solid-state drive (SSD) to a different drive. It is a useful option for when you want to upgrade your system’s storage drive or switch to a new one without losing your data. Cloning a drive creates an exact replica of your operating system, files, applications, settings, so you can transfer all your data with its original configuration.
It is a straightforward process, and you can use various tools to perform SSD cloning, such as Macrium Reflect, Clonezilla, or Acronis True Image. Overall, SSD cloning saves you a lot of time and effort and lets you keep your system running the way it was before the switch.
Why Clone an SSD?
Clone an SSD If you’re looking to upgrade your computer’s storage without having to reinstall your operating system or start from scratch, then cloning your SSD can be an excellent solution. SSD cloning is essentially creating an exact copy of your existing hard drive onto a new, larger SSD. The process is relatively straightforward, and with the right tools, you can quickly transfer all of your files, applications, and operating system to the new drive in no time.
Not only does cloning save you time and hassle, but it’s also a cost-effective way to upgrade your computer’s performance without having to purchase a new system altogether. So if you’re looking to boost your computer’s speed and capacity, then cloning your SSD might just be the perfect solution for you.
Determining Cloning Time
When it comes to cloning a 256GB SSD to a 1TB SSD, the time it takes will depend on a few factors. First, the speed of your computer and the SSDs themselves will play a role. Typically, it can take anywhere from 30 minutes to a few hours to complete a clone of this size.
Additionally, the software used for cloning can also affect the time it takes, as some programs may be faster or more efficient than others. It’s important to note that during the cloning process, your computer may run slower and some programs may not be responsive, so it’s best to avoid using your computer during this time. Overall, if you want to ensure a successful clone and minimize the time it takes, it’s important to use a reliable cloning program and have a computer with good specs.
Factors That Affect Cloning Time
Cloning time is one of the most talked-about issues in the world of biotechnology. Determining cloning time can be affected by a number of different factors, such as the cell type being used, the vector being used, and the method of transfection. Other factors, such as the quality of the cells being used, the culture medium being used, and the temperature and pH of the culture environment can also impact cloning time.
Ultimately, determining cloning time will depend on many different factors, and it’s important to carefully consider each factor to ensure that the cloning process is as efficient and effective as possible. By taking the time to carefully consider all of these different factors, scientists can ensure that they are able to produce high-quality clones that meet their specific research goals.
Calculating Cloning Time for 256GB to 1TB Cloning
When it comes to determining the cloning time for large amounts of data, such as cloning from a 256GB to a 1TB drive, there are several factors to consider. The speed of the target and source drives, as well as the connection type being used, can all impact the overall time it takes to complete the cloning process. Typically, a faster drive and connection type will result in quicker cloning times.
It’s also important to consider the software being used for the cloning process, as some programs may be more efficient than others. Overall, cloning 256GB to 1TB of data can take anywhere from a few hours to several days, depending on these various factors. It’s important to take the time to properly assess each variable in order to determine the most accurate estimate for cloning time.
Cloning Mission
Hardware:
| Hardware | Description |
|---|---|
| Source SSD (256GB) | The drive you want to clone data from (the smaller one). |
| Target SSD (1TB) | The drive you want to clone data to (the larger one with at least enough space to hold all the data from your source drive). |
| SATA to USB adapter (optional) | This is only necessary if your target SSD is an external drive and doesn’t have a SATA connection. |
Software:
There are several software options available to clone your SSD, both free and paid. Here’s a quick rundown of some popular choices:
| Software | Description | Price |
|---|---|---|
| Clonezilla | A free and open-source program that’s popular for its reliability and ease of use. | Free |
| EaseUS Todo Backup Free | Another free option that offers a variety of backup and cloning features. | Free |
| Acronis True Image | A paid program with a wider range of features, including incremental and differential backups. | Paid |
| AOMEI Backupper Professional | Another paid option that offers similar features to Acronis True Image, along with some unique cloning capabilities. | Paid |
The best software for you will depend on your needs and budget. If you’re a home user looking for a simple and free solution, Clonezilla or EaseUS Todo Backup Free are both great options. If you need more features, such as incremental or differential backups, then you’ll need to consider a paid program like Acronis True Image or AOMEI Backupper Professional.
Pre-Flight Check: Data Backup is King
Before we embark on our cloning adventure, there’s one crucial step: backing up your data! Think of it like buckling your seatbelt before takeoff. Cloning is a generally safe process, but unforeseen technical gremlins can always lurk around the corner. Having a recent backup ensures your precious files and documents remain safe and sound, no matter what.
There are several ways to back up your data. You can use an external hard drive, a cloud storage service, or even another partition on your larger SSD (once it’s cloned, of course!). The key is to choose a method that’s reliable and convenient for you.
Cloning Process
If you want to clone a 256GB SSD to a 1TB SSD, it shouldn’t take too long if you have the right tools. The cloning process involves copying all the data from the source drive to the target drive, including the operating system, applications, and personal files. This can be done using cloning software, which creates an exact copy of the source drive on the target drive.
The time it takes to complete the cloning process will depend on the speed of your computer’s hardware and how much data needs to be transferred. Generally, it should take anywhere from 30 minutes to a few hours to clone a 256GB SSD to a 1TB SSD, but this will vary depending on the specifics of your situation. If you have a lot of data to transfer, it may take longer, and you should be sure to give yourself plenty of time to complete the process without interruption.
Regardless of the time it takes, cloning is a great way to upgrade your storage without losing any of your data or settings. So, if you want to clone your 256GB SSD to a 1TB SSD, make sure you have a reliable cloning software and enough time to complete the process.
Cloning 101: A Step-by-Step Guide
Now that you’re prepped with the right tools and your data is safely backed up, let’s dive into the exciting world of SSD cloning! Here’s a step-by-step guide to navigate this process smoothly, complete with screenshots to keep you on track.
Selecting the Right Software:
- Free and Easy: If you’re comfortable with a basic interface and prefer a free option, Clonezilla is a fantastic choice. Head over to their website (https://clonezilla.org/downloads.php) and download the version compatible with your operating system.
- Feature-Rich Powerhouse: If you crave a user-friendly experience with additional features like scheduling and incremental backups, consider EaseUS Todo Backup Free. Download it from their official website (https://www.easeus.com/backup-software/tb-free.html).
Preparing the Drives:
- Connect Both SSDs: Physically connect both your source (256GB) and target (1TB) SSDs to your computer. You can use SATA cables for internal drives or a SATA to USB adapter for external ones.
- Check Drive Health (Optional): While not strictly necessary, it’s a good practice to verify the health of both drives before cloning. Most software offers a built-in drive health check option. In EaseUS Todo Backup Free, navigate to the “Tools” section and select “Disk Check” (see screenshot 1).
Initiating the Clone Process:
- Launch Your Chosen Software: Open Clonezilla or EaseUS Todo Backup Free.
- Select the Clone Mode: In Clonezilla, choose the “Disk to disk copy” option (screenshot 2). EaseUS Todo Backup Free offers a more straightforward approach – simply select the source and target drives on the main interface (screenshot 3).
- Source and Target Selection: Carefully select the source (256GB SSD) and the target (1TB SSD) drives. Double-check to avoid accidentally cloning to the wrong drive! (screenshots 2 & 3)
Monitoring Progress:
- Start the Clone Process: Once you’ve confirmed your source and target selections, initiate the cloning process. Both programs will display a progress bar so you can monitor the cloning operation. This might take some time depending on the size of your data.
- Let it Finish!: Resist the urge to interrupt the process! Grab a cup of coffee, catch up on some emails, or browse the web – just let the cloning magic happen.
Remember: These are general guidelines. Specific steps may vary slightly depending on the software you choose. Don’t hesitate to consult the software’s documentation for detailed instructions.
Post-Clone Power Up: Verifying Success
Congratulations, adventurer! You’ve conquered the cloning challenge. But before you celebrate with a digital victory dance, it’s crucial to verify the success of your operation. Here’s how to ensure your new 1TB haven is a perfect replica of your old 256GB SSD:
Method 1: Boot Test (For Internal Target SSD)
- Disconnect the Source Drive (Optional): If you’re cloning an internal SSD, you can disconnect the source drive (256GB) to avoid any boot order confusion.
- Restart Your Computer: Power down your computer and then restart it. If everything goes according to plan, your computer should boot up normally from the cloned drive (1TB).
- Verify Functionality: Once booted, explore your system and open a few programs you regularly use. Ensure everything functions as expected.
Method 2: File System Check
- File Explorer (Windows) or Finder (Mac): Open your file explorer or finder and navigate to both the source and target drives.
- Visual Comparison: Compare the file structure and contents visually. Check if all folders and files appear identical on both drives.
- Hash Verification (Optional): While time-consuming, a more thorough verification method involves calculating checksums (hashes) of your files on both drives. Tools like MD5 or SHA-256 can generate these hashes. If the hashes match, it confirms an exact copy.
Troubleshooting Tips:
- Boot Issues: If your computer fails to boot from the cloned drive, try reconnecting the source drive and restarting. This might help identify any boot configuration issues.
- Missing Files: If you encounter missing files, double-check the cloning process for any errors. You might need to repeat the cloning with a different software.
Remember: Data recovery becomes more challenging after overwriting your source drive. If you’re unsure about disconnecting the source drive (especially for internal SSDs), it’s best to verify functionality through the file system check method.
Bonus Round: Advanced Cloning Techniques (For Tech-Savvy Adventurers)
Conquered the basic cloning process? Feeling the urge to push your tech boundaries? Buckle up, because this bonus round dives into some advanced cloning techniques for the truly tech-savvy adventurer!
1. Partition Management:
- Scenario: Your source SSD might have multiple partitions (e.g., separate drive for your operating system and personal files).
- The Challenge: By default, cloning software copies the entire source drive, including all partitions. But what if you only want to clone a specific partition to your larger SSD?
- Advanced Maneuvers: Some software, like Acronis True Image or AOMEI Backupper Professional, allows you to clone specific partitions instead of the entire drive. This can be useful for optimizing your storage space on the target SSD.
2. Migrating the Operating System (OS):
- Scenario: You’re cloning your entire boot drive (including the OS) to a new SSD.
- The Challenge: Simply cloning the drive might not guarantee a flawless boot on the new SSD. Hardware differences can sometimes cause compatibility issues.
- Advanced Maneuvers: Advanced software like Acronis True Image offers a “Universal Restore” feature. This attempts to automatically adjust the OS for the new hardware environment, ensuring a smooth boot experience. Caution: This process can be complex, so ensure you have a recent backup before proceeding.
3. Advanced Data Migration Techniques:
- Scenario: You want to clone your data but don’t necessarily need a perfect, sector-by-sector copy.
- The Challenge: Standard cloning creates an exact replica, even copying unused space on the source drive. This can be inefficient for a larger target drive.
- Advanced Maneuvers: Some software offers features like “intelligent cloning” or “partition resizing.” These options can migrate only the used data from the source drive, automatically resizing partitions to fit the target SSD efficiently.
Remember: These advanced techniques involve a higher risk of encountering issues. Always ensure you have a recent backup before attempting any of these methods. If you’re a beginner, it’s best to stick to the basic cloning process outlined earlier.
Tips for Successful Cloning Process
The cloning process can be a complex and sensitive procedure, and there are a few tips you should keep in mind to ensure its success. Firstly, it’s important to select a healthy and viable donor cell. This will increase the chances of producing a healthy and fully functioning clone.
Secondly, the recipient egg should also be carefully chosen based on its quality and developmental potential. The third tip is to use the right technique for the cloning process, such as somatic cell nuclear transfer or embryo splitting, depending on the type of clone you want to produce. Additionally, it’s important to create optimum growth conditions, including the right temperature, pH, and nutrient levels.
Lastly, it’s vital to monitor the development of the clone closely, to ensure any issues or complications are quickly addressed. By paying attention to these tips, you can ensure a successful cloning process that results in a healthy and fully functional clone for your needs. So, whether you’re producing livestock, conducting research, or simply exploring the capabilities of cloning technology, keeping these tips in mind will help you achieve your goals.
Conclusion
When it comes to cloning a 256gb SSD to a 1tb SSD, the amount of time it takes can vary depending on several factors. However, one thing is for sure: it’s not a process to be taken lightly. Just like cloning a human being, you need to have the right tools, expertise, and patience to get the job done right.
So, whether you’re a tech whiz or a curious novice, remember that cloning your SSD is not a task to rush through. Take your time, do your research, and may the (hard) drive be with you.”
FAQs
What software can I use to clone my 256gb SSD to a 1tb SSD?
There are various software options available such as Clonezilla, EaseUS Todo Backup, and Macrium Reflect that can be used to clone your SSD.
Is it possible to clone a 256gb SSD to a 1tb SSD without losing any data?
Yes, it is possible to clone a smaller SSD to a larger one without any data loss. The extra space on the larger SSD will remain unallocated until you decide to use it.
How long does it take to clone a 256gb SSD to a 1tb SSD?
The time it takes to clone a 256gb SSD to a 1tb SSD depends on various factors such as the speed of your SSDs, the cloning software used, and the computer’s processing power. However, it may take anywhere between 30 minutes to a few hours.
Do I need any special cables or equipment to clone my SSDs?
No, you do not need any special cables or equipment to clone your SSDs. You can simply connect both SSDs to your computer using SATA cables and use any cloning software to complete the process.