If you’re looking to boost the performance of your computer, one of the best ways to do so is by installing Windows 10 on an SSD. Solid-state drives (SSDs) are faster and more reliable than traditional hard drives, and they can significantly improve your computer’s overall speed and efficiency. But how do you go about installing Windows 10 on an SSD? Is it a complicated process? Don’t worry! We’ve got you covered.
In this blog post, we’ll walk you through the steps you need to follow to install Windows 10 on an SSD without any hassle! So, get ready to give your computer a much-needed boost!
Preparation
If you are wondering how long it takes to install Windows 10 on an SSD, it really depends on your computer’s configuration and internet speed. Before installing Windows 10 on your SSD, there are some preparations you need to make to ensure that the process goes smoothly. First, you should back up all of your important files and data to an external hard drive or cloud storage.
Next, check that your SSD has enough space to accommodate the Windows 10 installation. You should also update your BIOS and drivers to make sure that everything is up to date. Once you have completed these preparations, the actual installation process should only take about 20 to 30 minutes.
However, if you are installing additional software and updates, it may take longer. Overall, preparation is a crucial factor in ensuring a smooth and efficient installation of Windows 10 on an SSD.
Backing up important data
When it comes to backing up important data, preparation is key. You never know when a hardware failure, virus, or other unexpected event might result in the loss of valuable information. Therefore, it’s best to make a comprehensive plan and put it into action ahead of time.
The first step is to identify what information needs to be backed up and where it’s located. This could include important documents, family photos, financial records, and more. Then, decide on the best backup method for your needs.
Some options include cloud storage, external hard drives, or even physical backups like DVDs or flash drives. It’s important to regularly test your backups to ensure they’re working properly and that you have easy access to your data in case of an emergency. By taking the time to prepare ahead of time, you can rest assured that your important data is safe and secure.

Creating a bootable Windows 10 USB drive
If you want to create a bootable Windows 10 USB drive, there are a few things you need to do in advance. Firstly, ensure you have an ISO file of the Windows 10 installation. An ISO file is a disk image file that contains all the installation files for Windows
You can download an ISO file from the Microsoft website or other reputable sources. Secondly, you will need a USB drive, preferably with a minimum of 8GB of storage space. The USB drive should be empty and have no other data on it.
Once you have these items prepared, you are ready to create your bootable Windows 10 USB drive.
Installation
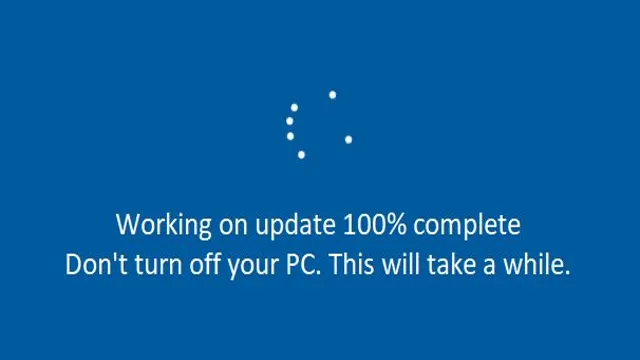
When it comes to installing Windows 10 on an SSD, the amount of time required can vary. Generally speaking, the process should take anywhere from 20 to 30 minutes. However, this is dependent on the size of the SSD and the speed of your computer.
If you have a small SSD and a slower computer, it could take longer. On the other hand, if you have a larger SSD and a faster computer, the installation process can be completed in a shorter amount of time. It is important to note that the installation process will involve several steps including downloading and installing Windows 10, configuring settings and drivers, and more.
Overall, it is best to be patient and allow the process to run its course, ensuring that your computer is properly set up for optimal performance with the new Windows 10 installation on your SSD.
The time it takes to install Windows 10 on an SSD
Installing Windows 10 on an SSD is a quick and easy process that can be completed in just a few simple steps. The time it takes to install the operating system typically depends on the speed of both your computer and SSD, but on average, it usually takes around 20-30 minutes to complete. That’s much faster than installing Windows on a traditional hard drive, which can take up to an hour or more.
One thing to keep in mind is that you will need to have a valid Windows 10 product key and a bootable USB drive with the Windows 10 installation files. Once you have those, simply insert the USB into your computer and boot from the USB drive. Follow the on-screen instructions to complete the installation process, and you’ll soon be up and running on your new and improved SSD-powered Windows 10 system!
Factors affecting installation time
Installation Time Installation time can be affected by various factors, including the complexity of the project, the size of the area, the type of materials used, and the experience of the installer. A larger space may require more time to install as there is more area to cover, while a complex project may require more time due to the need for careful planning and execution. Similarly, the type of materials used can also have an impact on installation time.
For instance, a hardwood floor may take longer to install than a laminate floor. Additionally, the experience of the installer can affect the time taken to complete a project. An experienced installer is likely to work more efficiently and complete the job in a shorter amount of time than a less experienced installer.
Overall, the installation time can vary depending on the specific project requirements and the expertise of the installer. It’s important to choose an experienced installer who can provide an estimated timeline for the project and work diligently to ensure timely completion.
Optimizing SSD Performance
If you’re wondering how long it takes to install Windows 10 on an SSD, the answer is that it varies. Factors such as the speed of your SSD, the amount of RAM in your system, and the CPU power all play a role in how quickly your operating system can be installed. However, once you’ve got Windows up and running, you can take steps to optimize the performance of your SSD.
One important step is to make sure the TRIM feature is enabled, which helps to keep the SSD running smoothly by minimizing the amount of read/write operations. Another helpful tip is to disable unnecessary services and programs, which can cause your system to consume more resources and slow down. By taking these steps, you can ensure that your SSD is performing at its best and enjoying speedy performance.
Enabling TRIM and defragmentation
As SSDs have become more popular, it’s important to ensure you’re getting the most out of their performance. Enabling TRIM and defragmentation can have a significant impact on their speed and longevity. TRIM helps SSDs maintain their performance by clearing data blocks that are no longer needed.
On the other hand, defragmentation shouldn’t be performed on SSDs as they don’t have physical disks to optimize. However, some SSDs come with built-in garbage collection features that do a similar function to defragmentation. By taking advantage of TRIM and SSD-specific optimization tools, your SSD will perform at its best.
So next time you’re setting up or updating your computer, make sure to consider optimizing your SSD.
Adjusting power settings for longer SSD lifespan
As an SSD owner, you want to make sure you’re getting the most out of your investment by optimizing its performance while prolonging its lifespan. One way to do this is by adjusting the power settings of your computer. By default, most systems have their power settings set to “balanced,” which can cause unnecessary wear and tear on your SSD.
However, if you switch the power settings to “high-performance,” your SSD will be able to operate at its full potential while also reducing the amount of data it writes. This means your SSD will not only last longer, but it will also perform better overall. Keep in mind that adjusting the power settings may also result in increased energy usage, so consider your priorities and usage habits before making any changes.
By making simple adjustments to your power settings, you can optimize your SSD’s performance and prolong its lifespan, providing you with the best possible experience for years to come.
Conclusion
In conclusion, asking how long it takes Windows 10 to install on an SSD is like asking how long it takes to boil water in a high-tech, super-speed kettle. Sure, the speed of the SSD may influence the process, but ultimately it depends on various factors such as the installation method, device specifications, and internet speed. So, buckle up and enjoy the ride, because no matter how long it takes, it’ll be worth it in the end!
FAQs
How long does it take to install Windows 10 on an SSD?
The time taken for installation depends on various factors like the speed of your SSD, processor speed, and available memory. However, on an average, it takes around 20-30 minutes for the installation process to complete.
Is it worth installing Windows 10 on an SSD?
Yes, installing Windows 10 on an SSD is a worthwhile investment as it significantly improves the overall system performance. The SSD reduces boot times, application and file load times, and improves system responsiveness.
What are the requirements for installing Windows 10 on an SSD?
The requirements for installing Windows 10 on an SSD are similar to installing it on a traditional hard drive. You need a bootable USB or DVD drive, a valid Windows 10 license key, and a compatible SSD. Also, make sure to backup all your important data.
Can I clone my existing Windows 10 installation to an SSD?
Yes, you can clone your existing Windows 10 installation to an SSD using specialized software. However, it is recommended to do a fresh installation on the SSD as it ensures optimal performance and stability. Also, cloning may result in data loss or other issues if not done properly.
