Have you been thinking about upgrading your computer’s storage? Then you might want to consider switching out your old hard drive for a solid-state drive (SSD). Not only do SSDs offer faster loading times, but they are also more reliable and less susceptible to damage caused by drops and bumps. In this brief guide, we’ll walk you through the steps of changing SSD drives.
Think of it as switching out your car’s engine for a faster, more efficient one – but without all the heavy lifting. So, grab a screwdriver and let’s get started!
Why Change SSD Drives?
Changing SSD drives is not as hard as it may seem. If you find that your computer is lagging or struggling to keep up with the demands of your work, it may be time to consider upgrading your SSD drives. SSDs are faster and more reliable than traditional hard drives, making them a popular choice for those who need quick access to large amounts of data.
Upgrading your SSD drives can significantly improve the speed and performance of your computer, allowing you to run multiple applications and tasks simultaneously without delay. Additionally, changing SSD drives is a relatively simple process. Most modern computers have easily accessible compartments where the SSDs can be installed.
With a few basic tools and a little bit of technical know-how, you can upgrade your SSD drives quickly and easily. So, if you’re looking to speed up your computer and increase your productivity, consider upgrading your SSD drives today.
Benefits of Upgrading SSD Drives
Upgrading SSD drives is a wise decision for anyone who wants to take their computer’s performance to the next level. There are several benefits of replacing your old hard drive with a solid-state drive, which is much faster and more reliable. An SSD drive can load your OS, programs, and files in a fraction of the time it used to take, reducing boot times and application launch times significantly.
This upgrade can give your computer an instant speed boost, helping you complete tasks faster and more efficiently. Another advantage of SSD drives is their reliability, as they have no moving parts that can fail. Moreover, they consume less power and generate less heat than traditional hard drives, thus extending the lifespan of your device while reducing its overall energy consumption.
Finally, upgrading to an SSD drive is more cost-efficient than buying a new computer, as it improves your device’s performance for a fraction of the cost.
How Hard is it to Change SSD Drives?
If you’re looking to upgrade your computer’s speed and storage capabilities, changing an SSD drive might seem like a daunting task. However, it’s actually fairly easy to do. The first step is to identify the type of SSD that your computer uses – this can usually be done by checking the manufacturer’s website or by consulting the user manual.
Once you have the correct type of SSD, you’ll need to power down your computer and remove the existing drive. This is typically done by unscrewing a few screws and gently sliding the drive out of its slot. Then, you can insert the new SSD and reassemble the computer.
While it might take a bit of time and patience, changing SSD drives is not a difficult or complex process. And the rewards – increased speed and storage – make it well worth the effort.
Assessing Your Computer’s Compatibility
Changing SSD drives is not a difficult task for those who have basic computer knowledge. However, before making any changes, it is crucial to assess your computer’s compatibility with the new SSD. First, determine the form factor of your current drive, as there are different sizes of SSDs available.
Then, check if your computer supports the SATA or NVMe interface, as the two types of SSDs are not interchangeable. If your computer has an older SATA interface, then you may need to update your BIOS to support NVMe before swapping your drive. It is also essential to back up your data before transferring it to the new SSD.
Once you have checked the compatibility and backed up your data, replacing the SSD is a straightforward process that involves opening the chassis, unscrewing the old drive, and replacing it with the new SSD. Finally, you will need to reinstall your operating system and other software applications on the new drive. In summary, changing SSD drives is not a complicated task, but it is essential to assess your computer’s compatibility and back up your data before making any changes.
Preparing for the SSD Upgrade Process
Changing SSD drives is not a complicated or challenging process, but it does require some preparation to ensure a smooth and successful upgrade. The first step is to back up all important files and data and create a bootable USB drive with the operating system installer. Next, gather the necessary tools, including a screwdriver and an anti-static wrist strap to prevent any electrostatic discharge damage to the SSD or other components.
Before beginning the process, it is also essential to research the specific type of SSD required for the computer and ensure it is compatible with the motherboard. With these preparations complete, changing SSD drives becomes a straightforward process that can significantly improve computer performance and speed. Remember to take your time and follow all instructions carefully to avoid any damage to components or data loss during the installation process.
Step-by-Step Guide to Changing SSD Drives
Changing SSD drives might seem like a daunting task, but it is actually much simpler than you might imagine. Here is a step-by-step guide to help you change your SSD drive without any hassles. Start by backing up all your data because you will need to clone your old drive to the new one.
You should then turn off your computer, remove the old SSD drive, and insert the new one in its place. After that, you need to boot your computer using a bootable USB drive with cloning software to clone the old drive onto the new one. Once the cloning is complete, shut down your computer, remove the USB drive, and reboot your computer.
Your computer will now start using the new SSD drive. That’s it! Changing an SSD drive is not hard at all and can be accomplished within a matter of minutes. So, if you are thinking of upgrading your computer’s storage, go ahead and do it.
Removing and Replacing the SSD Drive
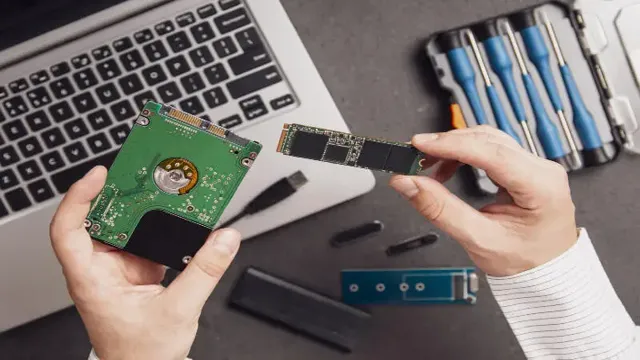
If you’re looking to upgrade or replace your laptop’s storage drive, this step-by-step guide will show you how to remove and replace the SSD. Before you start, make sure that you have a new SSD that is compatible with your laptop. First, shut down your laptop and disconnect all cables and other peripherals.
Place the laptop upside down and locate the bottom panel that covers the SSD. Use a screwdriver to remove the screws and then gently pull off the panel. Next, locate the SSD and carefully remove it by unscrewing it or gently pulling it out.
Once your old SSD is removed, take your new SSD, align it properly, and attach it to the interface. Finally, replace the screws and the bottom panel and then turn your laptop on. Congratulations, you’ve successfully replaced your SSD! Remember to format the drive and transfer your files over to enjoy the extra storage space.
Installing the New SSD Drive
Upgrading your computer’s storage capacity by installing a new SSD drive can greatly improve its performance. Here is a step-by-step guide to changing SSD drives. First, shut down your computer and unplug it from the wall to ensure safety.
Next, locate the current HDD or SSD drive and remove it from the computer. Carefully install the new SSD drive into the same slot and connect any necessary cables. Restart your computer and enter the BIOS to ensure the drive is recognized.
Finally, install your operating system and any necessary drivers onto the new SSD drive and enjoy the faster read/write speeds and overall improved performance. With just a few simple steps, upgrading your computer’s storage capacity with a new SSD drive can vastly improve your computing experience.
Transferring Data to the New SSD Drive
If you’re planning to upgrade your computer’s SSD drive, you’ll need to transfer your data to the new drive. Here’s a step-by-step guide to help you through the process. Firstly, you’ll need to make sure that your new SSD is properly installed and recognized by your computer.
Next, you can use a cloning software to transfer all your files and programs from the old SSD to the new one. This method ensures that everything is transferred, including the operating system, so you won’t have to reinstall anything. Once the cloning is complete, you’ll need to set the new SSD as the primary boot drive in your computer’s BIOS settings.
Finally, you can verify that everything has been transferred successfully by checking that all your files, programs, and settings are present on the new SSD. With these easy steps, you can upgrade your SSD without the hassle of losing any data or starting from scratch.
Conclusion: Upgrade Your SSD Drive with Ease
Changing SSD drives is as easy as updating your Facebook profile picture. With the right tools and a little know-how, you can upgrade your storage in no time. Don’t be intimidated by the process – it’s not rocket science, unless you’re a rocket scientist, in which case it might be slightly less challenging.
So go ahead and make the switch, your computer (and your selfies) will thank you!”
FAQs
What tools are needed to change an SSD drive?
To change an SSD drive, you will need a screwdriver, a mounting bracket, and an anti-static wristband.
Can I replace my laptop’s SSD drive myself?
Yes, replacing your laptop’s SSD drive is a simple process that can be done at home. However, it is recommended to seek professional assistance if you are not familiar with the procedure.
How long does it take to change an SSD drive?
The duration of changing an SSD drive can vary depending on the device and the person’s skill level. However, it typically takes about 30 minutes to an hour.
Do I need to reinstall my operating system after changing the SSD drive?
Yes, you will need to reinstall your operating system and all the applications you had on your previous drive. It is recommendable to back up all your important files before performing the replacement.