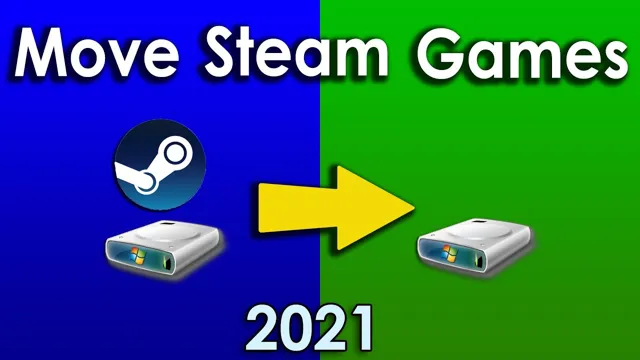
Do you find that your beloved gaming library is getting too heavy for the old hard disk drive (HDD) that you’ve been using for years? Are you experiencing slow load times or stuttering performance? If so, it might be time to transfer some of your favorite games over to a new solid-state drive (SSD) on Steam. Not only will it free up some space on your HDD, but it can also significantly decrease loading times and improve overall game performance. Think of it like moving from a cramped apartment to a spacious new home – except for your games.
In this blog, we’ll walk you through the steps to move games from your HDD to an SSD on Steam, so you can get back to playing your favorite games with ease.
Check the Storage Devices
If you want to improve your gaming experience, it’s important to check your storage devices. Moving your game from a hard disk drive (HDD) to a solid-state drive (SSD) can significantly increase your loading times and reduce stuttering in-game. But how fast should you move the game from HDD to SSD on Steam? This largely depends on the size of the game and the speed of your SSD.
For larger games, it may take a bit longer to transfer, but the payoff in smoother gameplay is worth it. When transferring games, it’s also important to make sure that your SSD has enough space to accommodate the game. Steam will automatically detect the new location of the game and update it accordingly, so there’s no need to worry about losing any progress.
Overall, if you’re looking to take your gaming setup to the next level, transferring your games to an SSD is a simple and effective solution.
Make sure your HDD and SSD are properly connected and recognized
When your computer is not functioning properly, it is important to check that your hard disk drive (HDD) and solid-state drive (SSD) are properly connected and recognized. To begin with, you need to physically check if both devices are properly connected to the motherboard. Make sure that the SATA cables and power connectors are properly connected.
After that, access the BIOS setup utility and check if the drives are detected by the system. If they are not, then you need to troubleshoot the problem. One possible reason is that the drives are not properly formatted.
In such a case, you need to format the drives using Windows Disk Management tool. Alternatively, your drives might have been damaged. Whatever the reason may be, make sure you take the necessary steps to ensure that your HDD and SSD are properly connected and functioning well.
This will not only optimize your computer’s performance but also prevent any potential data loss in the future.

Create a Backup
If you’re wondering how fast to move a game from your HDD to your SSD on Steam, there are a few things you should consider. First and foremost, you’ll want to be sure that you create a backup of your game before transferring it. This will ensure that you don’t lose any progress or data in the process, should anything go wrong.
Once you have a backup in place, you can begin the transfer process. The speed at which you can move a game will depend on a variety of factors, including the size of the game, the speed of your internet connection, and the overall speed of your computer. Generally speaking, transferring a game from an HDD to an SSD can take anywhere from a few minutes to an hour or more, depending on these factors.
However, the improved performance and load times that come with running games from an SSD are well worth the effort. So, if you’re looking to improve your gaming experience, don’t be afraid to make the switch!
To avoid any data loss, create a backup of your game files on the HDD
Creating a backup of your game files on the HDD is an essential step to avoid any data loss. Losing your game progress due to system crashes, viruses, or any other unforeseen circumstances can be frustrating and heartbreaking. Therefore, it is crucial to take precautions and create a backup of your game files on an external hard drive or a cloud storage service.
This way, you can restore your game progress even if your system is entirely wiped out. Creating a backup is not a complicated process; all you need to do is navigate to your game folder, select the files you want to backup, and copy them to the external storage device. Also, remember to update your backup regularly to avoid losing any new progress you make in your game.
By creating a backup of your game files, you can rest easy knowing that your game progress and achievements are never at risk of loss.
Open Steam Settings
If you’re looking to move a game from your HDD to your SSD in Steam, the process is relatively easy. The first step is to open Steam Settings by clicking on the “Steam” button in the top left corner of your screen and selecting “Settings” from the drop-down menu. From there, you’ll want to click on the “Downloads” tab and then select “Steam Library Folders.
” This will bring up a list of all the folders where games are stored on your computer. Simply select the game you want to move, click on “Move Folder,” and then choose the location on your SSD where you want to move it. Keep in mind that depending on the size of the game and the speed of your SSD, it may take anywhere from a few minutes to several hours for the move to complete.
So, how fast can you move a game from your HDD to your SSD in Steam? That depends on a variety of factors, including the size of the game and the speed of your SSD. Generally speaking, however, moving a game from an HDD to an SSD can significantly improve loading times and overall performance, making it well worth the effort.
Go to the Downloads tab and select ‘Steam Library Folders’
If you’re a gamer who loves playing games on Steam, chances are you’ve encountered the need to manage your game library at some point. This is where Steam Library Folders come in – they allow you to create and organize your game library on external drives or other storage locations. To access this feature, simply open Steam Settings and go to the Downloads tab, then select “Steam Library Folders.
” From there, you can create new folders, move existing ones, or delete folders as needed. This is especially useful if you have a lot of games and limited storage on your PC or want to separate large games from smaller ones for organizational purposes. So if you haven’t explored Steam Library Folders yet, give it a try and take your gaming organization to the next level!
Click ‘Add Library Folder’ to add your SSD as a new library folder
If you’re an avid gamer with a growing Steam library, you may find that your computer’s hard drive is running out of space. Fortunately, Steam has an option to add a new library folder to a different drive, such as your SSD. To get started, open Steam and go to the Settings menu.
From there, click on the “Downloads” tab and then click “Add Library Folder.” Next, select the location on your SSD where you want to create the new library folder and give it a name. Your SSD will now be set up as a new library folder, and any new games you download can be saved there.
This will free up valuable space on your main hard drive and improve your gaming experience by reducing loading times and increasing your computer’s overall performance. So, go ahead and give it a try – your hard drive (and your games) will thank you!
Move the Game Files
If you’re an avid gamer, you probably know the value of moving your game files from a HDD to an SSD. Doing so can drastically increase the speed and performance of your favorite games. But, how fast can you actually move your game files from your HDD to your SSD in Steam? The time it takes will depend on several factors, including the size of the game and the transfer speed of your hardware.
Generally, it should take anywhere between 10 minutes to an hour or more to move a game from your HDD to an SSD in Steam, but it all depends on the variables involved. If you’re looking for the fastest way to move your game files, consider using a dedicated software tool that can automate the process and ensure that nothing gets lost or corrupted during the transfer. All in all, with the right hardware and tools at your disposal, moving your game files from an HDD to an SSD in Steam can be a quick and easy process that’s well worth the effort.
Go to your Steam Library and right-click on the game you want to transfer
If you’re looking to move the game files of a Steam game from one drive to another, it’s actually a pretty easy process. All you have to do is go to your Steam Library and right-click on the game you want to transfer. From there, select “Properties” and then click on the “Local Files” tab.
Next, click on the “Move Install Folder” button and choose the new location where you want the game files to be moved to. Once you’ve selected the new location, click “Move Folder” and Steam will start the transfer process. This method can save you a lot of time and hassle, especially if you’re trying to free up space on your computer or if you have a faster or larger drive that you want to use for your games.
So next time you need to move your Steam game files, remember these simple steps and you’ll be up and running in no time!
Select ‘Properties’ and then click on the ‘Local Files’ tab
Moving game files may seem like a daunting task at first, but with a few simple steps, you can save yourself a lot of hassle and free up valuable storage space. One way to easily move game files is by accessing the “Properties” menu within your game’s library. To do this, simply right-click on the game in question, select “Properties,” and then click on the “Local Files” tab.
From there, you can choose to move the game’s files to a new location on your computer’s hard drive or an external storage device. This not only helps with organization but can also speed up loading times and improve overall performance. By taking the time to move your game files, you’ll be able to enjoy your favorite games without any unnecessary lag or disruptions.
So why not give it a try and see the difference for yourself?
Click on ‘Move Install Folder’ and select your SSD as the new destination
Moving game files from your computer’s hard drive to an SSD can be a game-changer in terms of loading speeds and overall performance. Fortunately, the process is straightforward and easy to manage. To begin, you’ll need to navigate to your game’s settings and find the “Move Install Folder” option.
From there, choose your SSD as the new destination for your game files, and the transfer will commence. The process might take some time, depending on the size of your game and the speed of your SSD, but it’s worth the wait. The benefits of a faster loading time and improved performance are sure to enhance your gaming experience.
So, don’t hesitate any longer! Click on “Move Install Folder,” choose your SSD, and let the process begin. You’ll be amazed at how much smoother your gameplay will become in no time!
Wait for the Transfer
When it comes to transferring games from an HDD to an SSD on Steam, it’s important to exercise patience and wait for the transfer to complete before playing the game. Depending on the size of the game and the speed of your equipment, the transfer can take anywhere from a few minutes to a few hours. It can be tempting to start playing as soon as the transfer begins, but this can lead to errors and interruptions that can slow down or even cancel the transfer altogether.
Instead, take a break and allow the transfer to complete without any distractions or unnecessary activities. This will ensure that your game is properly installed on the SSD and ready for seamless, speedy gameplay. So, be patient and let your transfer complete efficiently to avoid any problems or delays in your gaming experience.
Depending on the size of the game and the speed of your SSD, the transfer may take a few minutes to a few hours.
If you’re transferring a game to an SSD, it’s important to be patient and wait for the transfer to complete. Depending on the size of the game and the speed of your SSD, the transfer may take anywhere from a few minutes to a few hours. It can be tempting to try and speed up the process by interrupting the transfer or attempting to use your computer for other tasks while it’s working, but this can actually slow down the transfer and cause errors.
Instead, try to find something else to do while you wait, like taking a walk or catching up on some reading. By giving the transfer plenty of time to complete without interruption, you’ll ensure that the game runs smoothly and efficiently on your SSD. So sit back, relax, and let the transfer do its thing.
Final Thoughts
If you’re wondering how fast to move a game from HDD to SSD on Steam, the speed will depend on the size of the game and the speed of your SSD and HDD. However, in general, moving a game from an HDD to an SSD on Steam will significantly increase the loading times and performance of the game. This is because SSDs are faster at reading and writing data than HDDs, which means games stored on an SSD will load and respond faster.
Moving games from an HDD to an SSD is simple, and you can do it through Steam or by manually moving the game files. It’s essential to note that while SSDs are faster, they’re also generally more expensive per gigabyte than traditional HDDs. So if you have limited storage space on your SSD, it’s best to prioritize the games you play frequently and leave the rest on your HDD.
Moving games from HDD to SSD on Steam is a simple process that can greatly improve your gaming experience.
Moving games from HDD to SSD on Steam is a simple process that every gamer should know about. If you’re someone who wants to experience gaming at its best, then you must have an SSD. It is faster, more reliable, and makes your games load quicker.
Moreover, the process of moving games from HDD to SSD is straightforward, as Steam allows you to transfer game files easily. All you need to do is right-click on the game in your Steam library, select Properties, then go to the Local Files tab, and click the “Move Install Folder” button. This will allow you to choose the destination folder, which can be your SSD.
Once the game has moved, you’ll see a significant impact on your gaming experience. Everything from loading times to in-game performance will see a massive boost. So, if you’re still using an HDD for your games, it’s time to consider moving to an SSD; your gaming experience will thank you for it!
Conclusion
In the world of gaming, speed is key. Moving your favorite games from your HDD to an SSD can provide lightning-fast load times and a truly immersive experience. But just how fast should you move your games? The answer, my friend, is faster than Sonic the Hedgehog running towards a chili dog stand.
So, grab your SSD and get ready to experience gaming at warp speed!”
FAQs
What is the difference between installing a game on an HDD and an SSD?
The main difference is speed. SSDs can load and access data much faster than HDDs, resulting in faster game load times and smoother gameplay.
How long does it take to transfer a game from an HDD to an SSD on Steam?
The time it takes to transfer a game from an HDD to an SSD on Steam depends on the size of the game and the speed of your SSD. Generally, it can take anywhere from a few minutes to an hour.
Can you play a game while it is being transferred from an HDD to an SSD on Steam?
No, you cannot play a game while it is being transferred from an HDD to an SSD on Steam. You will need to wait until the transfer is complete before launching the game.
Do all games benefit from being installed on an SSD instead of an HDD on Steam?
Yes, all games can benefit from being installed on an SSD instead of an HDD on Steam. However, the degree of improvement will vary depending on the game and the speed of your SSD. Games with longer load times and frequent loading screens will see the most significant improvement in performance.
Do you need to reinstall a game after transferring it from an HDD to an SSD on Steam?
No, you do not need to reinstall a game after transferring it from an HDD to an SSD on Steam. Simply copy the game files over to the SSD and use the “Verify Integrity of Game Files” option in Steam to ensure that everything is in order.