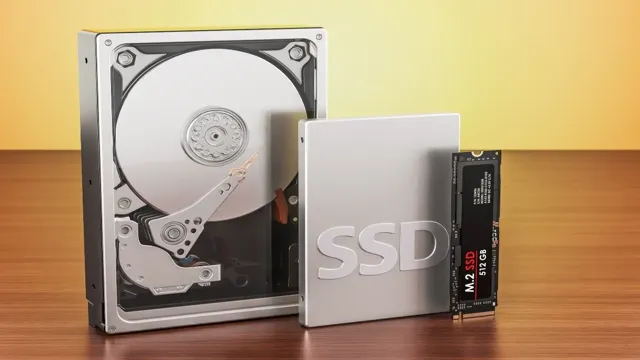
Upgrading from an old, slow hard drive to a sleek and speedy solid-state drive (SSD) is something every computer user should consider. Not only does it drastically improves the overall performance of your computer, but it also provides a storage solution that is less likely to fail and can handle larger volumes of data. However, transferring all your files from a traditional HDD to an SSD can sound like a daunting task.
But don’t worry, transferring data from HDD to SSD is easier than you might think. In this guide, we’ll walk you through the process step-by-step, so you can enjoy the benefits of an SSD without losing any of your precious files. So, let’s dive in and get started!
Why move files from HDD to SSD?
There are several compelling reasons behind the growing trend of migrating data from HDD to SSD. One of the main advantages of using an SSD is the significantly faster speed it offers compared to traditional hard drives. With rapid read and write capabilities, transferring data to an SSD results in noticeably improved system performance and shorter booting times, thereby enhancing the overall user experience.
Energy efficiency is another significant factor driving the shift towards SSD adoption. SSDs consume less power compared to HDDs, which translates into extended battery life. This makes them particularly beneficial for individuals who rely on portable devices and need their batteries to last longer.
In addition to speed and energy efficiency, SSDs offer a better user experience by operating quietly. Unlike HDDs, SSDs have no moving parts, which minimizes disruptive noise levels and provides a more pleasant experience for the user.
Durability is also a notable advantage of SSDs over HDDs. Solid-state drives outperform traditional hard drives in terms of resistance to physical shocks and mechanical failures, ensuring greater data integrity and longer lifespan. This makes SSDs more reliable for data storage and transfer purposes.
In summary, the decision to move files from HDD to SSD is motivated by the promise of superior speed, energy efficiency, user experience, and durability. SSDs offer faster performance, consume less energy, operate quietly, and have increased resistance to physical shocks and mechanical failures. These advantages make SSDs a compelling choice for individuals seeking efficient and reliable data transfer and storage solutions.
Can I switch from HDD to SSD without losing data?
Yes, it is possible to switch from a HDD (hard disk drive) to an SSD (solid-state drive) without losing data. However, it is important to note that directly changing from an HDD to an SSD will typically result in data loss. Unlike random-access memory (RAM) where you can simply remove and replace a chip without consequence, the process of transitioning from an HDD to an SSD involves more complexity.
To avoid losing data, it is recommended to use a professional data cloning software tool such as AOMEI Partition Assistant. This cloning software allows you to transfer all the data from your HDD to the SSD while retaining every file and application. By creating a complete copy of your HDD, including the operating system, settings, and personal files, the cloning process ensures a seamless transition without any data loss.
By utilizing a data cloning tool, you can securely and efficiently migrate your data from the HDD to the SSD, preserving the integrity of your files and avoiding the need for manual data transfer or potential loss. Whether you are upgrading your storage device for improved performance or simply want to take advantage of the benefits offered by an SSD, utilizing a professional data cloning software is the recommended approach to switch from an HDD to an SSD without losing any data.
How do I transfer Windows 10 from HDD to SSD?
To transfer Windows 10 from an HDD to an SSD, you can follow these steps:
- Start by selecting the system disk on your computer as the source disk for the transfer. Make sure to choose the SSD as the destination or target drive.
- If you only want to transfer the Windows 10 partition to the SSD, instead of all the partitions, you can use the “Migrate OS to SSD Wizard”. This feature allows you to move only the Windows 10, Windows 8, or Windows 7 volume to another hard drive without encountering any boot issues.
- When transferring from an HDD to an SSD, there are a couple of things to keep in mind: a. If you are planning to clone a system MBR disk to a GPT SSD drive, check if your motherboard supports EFI/UEFI boot mode. If it does not, you should convert the GPT disk into MBR before the cloning process. b. Once the cloning process is complete, restart your computer. Enter the BIOS environment and change the boot order to prioritize the booting from the destination disk (SSD).
By following these steps, you can successfully transfer your Windows 10 operating system from an HDD to an SSD.
Backup and Preparation
When upgrading to a new SSD, transferring data from your old HDD is a crucial step that can be done in a few different ways. The easiest method is to use a cloning software to create an exact copy of your HDD onto the SSD. This will ensure that all your programs, settings, and files are transferred over without any issues.
However, it’s important to back up your data beforehand just in case anything goes wrong. You can do this by simply copying and pasting your important files onto an external hard drive, or by using a cloud-based backup service. Once your backup is complete, you can use a cloning software such as Acronis True Image or Macrium Reflect to transfer your data to the new SSD.
Alternatively, you can do a fresh install of your operating system on the new SSD and manually transfer your files over. However, this method requires more time and effort, and may not be the best option if you have a lot of programs and settings that you want to keep. Overall, the key to a successful HDD to SSD transfer is preparation and backup, so make sure you have everything you need before making the switch.
Create a Backup of HDD Data
Creating a backup of your HDD data is an essential task to ensure that your important files are safe and secure. Before you start, make sure you have an external drive or cloud storage to store your backup. Begin by determining the files and folders you want to backup.
It’s always better to use a backup tool than to copy and paste files manually. Backup software automates the process and ensures that all files are copied, even the hidden files. Once you have backup software, choose the backup location and type of backup, such as incremental, differential, or full backup.
Incremental and differential backups only copy the data that has changed since the last backup, while a full backup copies everything. After selecting the backup type, set the backup schedule according to your needs. It’s recommended to create a backup at least once a week or before making significant changes to your files.
In the end, allow the backup process to run, and check your backup regularly to ensure it’s up to date and includes all your important data. By backing up your HDD data, you can be secure in the knowledge that your important files are safe and easily recoverable in case of any data loss.
Prepare the SSD for Transfer
Before transferring your SSD to a new computer or device, it is essential to prepare it by backing up all your data and ensuring it is in good condition. Backing up your data guarantees that you do not lose any important files during the transfer process. You can do this by transferring your data to an external hard drive, a cloud storage service, or another internal storage device.
Once you have backed up your data, you should also prepare the SSD for transfer by optimizing its performance. This can be done by ensuring that the SSD is updated to the latest firmware and that it is properly formatted. Formatting the SSD will erase all data on it, making it easier to transfer to a new device.
It is also a good idea to run a disk check on the SSD to identify any potential issues before the transfer. With these preparations, you can be sure that your SSD is ready to be transferred seamlessly, and you can enjoy your new device without worrying about data loss or performance issues.
Data Transfer Methods
When it comes to upgrading your computer or transferring information, one of the main questions is how do you transfer data from hdd to ssd? Fortunately, there are a few different methods available for transferring data between these two types of storage devices. One common method is to use cloning software, such as Macrium Reflect or EaseUS Todo Backup. With cloning software, you can create an exact copy of your hard drive data and transfer it to your SSD.
Another option is to use an external hard drive or USB drive as an intermediary. Simply transfer your data from the HDD to the external drive, then connect the SSD and transfer the data from the external drive to the SSD. Whichever method you choose, it’s important to ensure that your data is backed up and secure throughout the transfer process.
By following these steps, you can smoothly and efficiently transfer your data from an HDD to an SSD.
Clone the HDD to SSD
If you’re looking to upgrade your computer’s storage capacity or enhance its performance, one of the best ways to achieve this is by cloning your current HDD to an SSD. There are several data transfer methods available that can help you with this task, including cloning software, disk imaging, and manual copying of files. Cloning software is perhaps the easiest and quickest method, as it enables you to create an exact copy of your entire HDD onto a new SSD in just a few clicks.
Disk imaging involves creating a compressed backup image of your HDD and then restoring it on your new SSD, while manual copying of files involves copying and pasting your data from the HDD onto the SSD. No matter which method you choose, you’ll end up with a more efficient and faster system. Cloning your HDD to SSD can be a great way to extend the life of your computer and improve its overall performance.
With the help of cloning software, you can create a perfect reproduction of your data, applications, and settings on a new SSD, and keep your old HDD as a backup. Disk imaging and manual copying of files are also viable options, but they require a bit more work and skill. However, regardless of which method you select, it’s important to ensure that the SSD you choose can accommodate the full size of your HDD, and to back up your data before transferring it to the new drive.
This way, you can be sure that your transfer is successful and that your data is safe and secure. So, why wait? Go ahead and clone your HDD to SSD today and experience the blazing-fast performance of a solid-state drive!
Manually Copy Data to the SSD
When it comes to transferring data to your SSD, one method is to manually copy the data over. It may sound tedious, but it’s actually a straightforward process that can be done easily! First, you need to connect your SSD to your computer, either through a USB cable or directly into your computer’s motherboard. Then, simply select the files and folders you want to transfer and drag them over to the SSD drive.
Depending on the amount of data being transferred, this process could take some time. But, once it’s done, you can reap the benefits of having all your important files and data stored on a faster and more reliable drive. Don’t forget to properly eject the SSD once you’re finished!
Use Data Transfer Software
Data transfer software has revolutionized the way we move data from one device to another. There are several data transfer methods available, including USB cables, Bluetooth, Wi-Fi, and more. However, the efficiency and speed of data transfer software make them a preferred choice for many users.
With data transfer software, you can transfer any amount of data from one device to another within seconds. Plus, this software offers enhanced security features, ensuring that your data remains safe and secure during the transfer process. The best data transfer software also supports various file formats, making it easy to transfer different types of files.
By using data transfer software, you can save time and increase productivity significantly. Plus, this technology is perfect for those who work remotely and need to transfer large files regularly. Overall, data transfer software is an excellent investment that can make your life easier and more efficient.
Final Steps
So, you’ve got your new SSD and you’re ready to transfer your data from your old HDD. The first thing you should do is make sure that you have a backup of all your important files. This can be done by using an external drive or cloud storage.
Once you’ve got your backup, it’s time to start the transfer process. There are a few different ways you can transfer your data from your HDD to your SSD. One option is to use a cloning tool such as Acronis True Image or MiniTool Partition Wizard.
This tool will essentially copy everything from your HDD to your SSD, including your operating system and all your files. Another option is to manually transfer your files by copying and pasting them from your HDD to your SSD. This method is more time-consuming, but it gives you greater control over what you transfer.
Whichever method you choose, make sure that you’ve got enough space on your SSD to accommodate all your files. Once you’ve completed the transfer, don’t forget to properly dispose of your old HDD by either wiping it clean or physically destroying it. Congratulations, you’ve now successfully transferred your data to your new SSD!
What are the advantages of using disk cloning with cloning software for data transfer?
Using disk cloning with cloning software offers several advantages. Firstly, it allows for the transfer of a large amount of data, including the operating system and system files, in a quick and efficient manner. Secondly, it ensures that all files and settings are accurately replicated onto the SSD, reducing the risk of compatibility issues or data loss. Additionally, it provides a seamless transition, as the cloned SSD can be used as a direct replacement for the HDD without the need for manual file transfers or reinstallation of the operating system.
How does disk cloning with cloning software work?
Disk cloning with cloning software works by creating an exact copy or clone of your HDD onto the SSD. This includes not only your files but also the operating system and system files. The cloning software analyzes the data on the HDD and replicates it onto the SSD, ensuring that all files and settings are transferred accurately. This method provides a seamless transition from the HDD to the SSD.
What is the recommended alternative method for transferring a large amount of data or transferring the operating system and system files from HDD to SSD?
For transferring a large amount of data or everything including the operating system and system files from HDD to SSD, it is recommended to use the method of disk cloning with cloning software. This method allows for quick and efficient transfer of mass data without the limitations and potential issues associated with the Copy and Paste method. Cloning tools such as Acronis True Image or MiniTool Partition Wizard can be used for this purpose.
Is the Copy and Paste method suitable for transferring a large amount of data?
The Copy and Paste method is generally not recommended for transferring a large amount of data. It is more suitable for transferring small amounts of data due to the potential challenges mentioned earlier.
What are the potential issues or challenges when using the Copy and Paste method to transfer data from HDD to SSD?
When using the Copy and Paste method, there are a few potential issues to consider. Firstly, if you are transferring regular files that are in different directories of a partition, it can be time-consuming and annoying. Additionally, when transferring system files or program files, there is a possibility that they may not work properly after being transferred to the SSD.
Restart PC with SSD
If you have successfully installed the SSD in your PC, congratulations! You are about to experience the lightning-fast performance boost of SSD. But before you start using it, restarting your PC is the final step. Sometimes, it may take more time for your PC to recognize the SSD.
But, don’t worry. Once you restart your PC, everything should work smoothly. Make sure you have saved all the important work and close all the applications before restarting.
Also, check if the SSD is listed as a boot drive in the BIOS settings. In case you face any issues, refer to the user manual or seek professional help. Happy Computing!
Verify and Transfer Missing Data
In the final steps of verifying and transferring missing data, it’s important to check that all of the data is complete and accurate before transferring it to a new system. One way to do this is to cross-reference the missing data with alternative sources to ensure consistency. Once all data has been verified, it can be transferred to the new system.
However, it’s also essential to prioritize the data and transfer the most critical information first to avoid delays or confusion. It’s also important to ensure that all necessary permission and security measures are in place to protect the data during the transfer process. By taking these final steps, businesses can ensure a smooth transition while protecting the integrity of their data.
What are the advantages of using AOMEI Backupper for disk cloning?
AOMEI Backupper Professional offers several advantages when it comes to disk cloning:
- Versatile Clone Types: AOMEI Backupper Professional allows you to choose from multiple clone types. In addition to Disk Clone, you can also perform System Clone and Partition Clone. This gives you the flexibility to clone specific parts of your disk or even transfer your entire system to a new drive.
- Secure Boot: After cloning your disk using AOMEI Backupper Professional, you can directly boot your computer from the cloned SSD. This feature ensures a smooth and hassle-free transition to the new drive without any complications.
- Intelligent Cloning: AOMEI Backupper Professional employs intelligent cloning algorithms that make it easy to clone a larger HDD to a smaller SSD. By default, it only clones the used sectors, ensuring efficient use of disk space and a faster cloning process.
- Background Cloning: The clone tasks in AOMEI Backupper Professional can work in the background, allowing you to continue using your computer without interruptions. This means you don’t have to close any programs or sacrifice productivity while transferring data from your HDD to SSD.
- SSD Alignment: AOMEI Backupper Professional optimizes the performance and lifespan of your target SSD by aligning the partition properly during the cloning process. This ensures that your SSD operates at its best potential and extends its overall durability.
- Flexible Storage Paths: With AOMEI Backupper Professional, you have the freedom to clone your disk to various storage destinations. Whether you prefer local disks, external drives, SSDs, HDDs, NAS systems, USB drives, or other storage devices, this software supports them all.
- Compatibility with Multiple SSD Brands: AOMEI Backupper Professional works seamlessly with various SSD brands, including popular ones such as Samsung, Crucial, Kingston, WD, and many more. You can confidently transfer your data from your HDD to any of these SSD brands without any compatibility issues.
- Wide Operating System Support: AOMEI Backupper Professional is compatible with multiple operating systems, including Windows 11, Windows 10, Windows 8.1, Windows 8, Windows 7, and Windows Vista. This extensive support ensures that you can use the software on your preferred Windows version without any limitations.
How can AOMEI Backupper be downloaded and used?
To download and use AOMEI Backupper, you can follow these step-by-step instructions:
- Go to the official website of AOMEI Backupper and locate the download page.
- Find the version of AOMEI Backupper that is compatible with your operating system (e.g., Windows 11/10/8.1/8/7/XP).
- Click on the download link for the professional edition of AOMEI Backupper.
- Once the download is complete, locate the downloaded file and double-click on it to start the installation process.
- Follow the on-screen instructions to install AOMEI Backupper on your computer.
- After the installation is complete, open the AOMEI Backupper Professional software.
- In the main interface of AOMEI Backupper, locate and click on the “Clone” option.
- From the available cloning options, choose “Disk Clone” to clone an entire disk.
- Select the HDD (source disk) that you want to clone from the list of available disks.
- Choose your SSD (destination disk) where you want to transfer the data to.
- To enhance the speed of reading and writing on the SSD, make sure to tick the “SSD Alignment” option.
- Once you have configured the cloning settings, click on the “Start Clone” button to begin transferring the data from the HDD to the SSD.
- Wait for the cloning process to complete, which may take some time depending on the size of the data being transferred.
- After the cloning process finishes, you will have successfully used AOMEI Backupper to clone a disk from the HDD to the SSD.
By following these steps, you can easily download and utilize the features of AOMEI Backupper for disk cloning purposes.
What is AOMEI Backupper and how can it be used to transfer data from HDD to SSD?
AOMEI Backupper Professional is a highly recommended software solution for conveniently transferring large amounts of data from a HDD to an SSD. It offers several advantages that make the process efficient and secure.
One notable feature of AOMEI Backupper is its support for different types of cloning. In addition to Disk Clone, it provides options for System Clone and Partition Clone. This flexibility allows users to choose the most suitable method for their specific needs.
When it comes to security, AOMEI Backupper offers Secure Boot functionality. This allows you to directly boot your computer from the newly cloned SSD, ensuring a smooth transition without any additional steps or complications.
AOMEI’s software also includes Intelligent Clone technology. With this feature, the software intelligently clones only the used sectors of a larger HDD to a smaller SSD. This significantly simplifies the process, as you don’t need to worry about incompatible sizes between the source and target drives.
To further enhance convenience, AOMEI Backupper offers Live Clone functionality. This means that the clone tasks can operate in the background, allowing you to continue using your computer and running programs without interruptions during the data transfer process.
The software also employs SSD Alignment to optimize the performance and lifespan of the target SSD. By aligning the cloned data on the SSD correctly, it ensures that the drive operates efficiently, resulting in improved speed and durability.
In terms of flexibility, AOMEI Backupper supports various storage paths for the cloned data. You can choose to clone the disk to a local disk, external drive, SSD, HDD, NAS, USB, and other storage devices according to your preference and requirements.
Furthermore, AOMEI Backupper is compatible with multiple SSD brands, including popular ones like Samsung, Crucial, Kingston, WD, and others. Regardless of the brand of your SSD, you can rely on AOMEI Backupper to transfer data seamlessly.
Finally, AOMEI Backupper is compatible with a range of operating systems, including Windows 11/10/8.1/8/7/Vista. This wide compatibility ensures that you can use the software on various Windows versions without any compatibility issues.
To initiate the process of transferring data from HDD to SSD using AOMEI Backupper, you can follow the step-by-step instructions provided by the software. These instructions will guide you through the cloning process, helping you achieve a successful and efficient data transfer.
What are the steps to clone my hard drive to SSD using AOMEI Partition Assistant?
To clone your hard drive to an SSD using AOMEI Partition Assistant, follow these steps:
- Open the AOMEI Partition Assistant software and navigate to the ‘Clone’ section located on the main interface.
- Within the ‘Clone’ section, select the ‘Clone Disk’ option.
- You will be presented with different cloning methods. Choose the method that suits your requirements.
- Designate the SSD as the destination for the cloning process.
- Once you have chosen the cloning method and selected the SSD as the destination, click on the ‘Next’ button to proceed.
- At this stage, you have the option to adjust the size of the destination partition on the SSD. If necessary, make the desired adjustments.
- After ensuring that you are satisfied with the partition size adjustments, click on the ‘Next’ button to initiate the cloning process.
- Depending on the size of the source hard drive, the cloning process may take some time to complete. Please be patient and avoid interrupting the process.
- Once the cloning operation finishes successfully, you will be notified.
- After the cloning process is complete, you can replace your existing hard drive with the newly cloned SSD.
- Make sure to properly connect and install the SSD into your computer.
- Finally, power on your computer and verify that the cloned SSD is functioning correctly.
Please note that these steps are provided as a general guide, but it is always recommended to refer to the official AOMEI Partition Assistant documentation and user manual for precise instructions specific to your version of the software.
How can faster speed and better user experience be achieved by transferring data to SSD?
Transferring data to an SSD allows for the achievement of faster speed and a better user experience in a few key ways. Firstly, SSDs have significantly faster reading and writing speeds compared to traditional hard drives. This means that when data is transferred to an SSD, the computer can run and boot up much more quickly. This translates to reduced waiting times and a smoother overall operating experience for the user.
One of the reasons behind this increased speed is that SSDs have no moving parts. Unlike traditional hard drives that rely on spinning disks and read/write heads, SSDs use flash memory technology. This lack of moving components not only contributes to faster data access but also results in minimal noise production. The absence of mechanical parts in SSDs significantly reduces the operational noise, making for a quieter computing environment.
By eliminating the noise usually associated with hard drive activity, the user can enjoy a more peaceful and distraction-free experience. This is particularly beneficial for those who require a quieter working environment, such as professionals working with audio or video editing software, where any background noise can be disruptive.
In summary, transferring data to an SSD offers the advantage of faster speed and a better user experience. The increased speed is due to SSDs’ faster reading and writing capabilities, while the absence of moving parts reduces noise levels, enhancing the overall user satisfaction.
How does SSD alignment improve performance and lifespan?
SSD alignment plays a crucial role in enhancing the performance and extending the lifespan of the target SSD. By ensuring proper alignment, we optimize the way data is stored and retrieved on the SSD, resulting in improved overall performance.
When an SSD is not correctly aligned, it might encounter unnecessary read and write operations that can slow down its speed. With proper alignment, data can be stored more efficiently, reducing these additional operations and allowing for faster data retrieval.
Moreover, aligning an SSD also helps minimize wear on the physical components of the drive, ultimately extending its lifespan. When data is aligned correctly, the SSD can function more smoothly, reducing the strain on its components and limiting unnecessary wear and tear.
In summary, by aligning an SSD, we can enhance its performance by reducing unnecessary operations and improve its lifespan by reducing strain on the drive’s physical components.
What are the limitations of using the Copy and Paste function for transferring data?
The Copy and Paste function, while convenient for transferring regular files, may pose limitations when it comes to handling data in different directories of a partition. This can be particularly frustrating and time-consuming. Moreover, when transferring system files or program files, there is a risk that they may not function properly after being transferred to a new device or location. Consequently, the Copy and Paste method is most suitable for smaller amounts of data rather than large-scale transfers.
What is the Copy and Paste function and how can it be used to transfer data?
The Copy and Paste function in Windows is a widely used feature that allows users to transfer data between different storage devices, such as from a hard disk drive (HDD) to a solid-state drive (SSD). It is a simple process that involves selecting files or folders, copying them, and pasting them into the desired location.
To use the Copy and Paste function, you first need to locate the file or folder you want to transfer. This could be a document, image, video, or any other type of file. Once you have found the file, you can right-click on it and select either the “Copy” or “Cut” option. The “Copy” option will create a duplicate of the file in your clipboard, while the “Cut” option will remove the file from its original location.
After copying or cutting the file, navigate to the destination you want to transfer it to, which in this case would be the SSD partition. Once you have reached the desired location on the SSD, right-click on a blank space and select the “Paste” option. This action will transfer the file from the clipboard to the SSD.
It is important to note that there are some considerations and limitations when using this method. Transferring a large number of files that are located in different directories within a partition can be time-consuming and cumbersome. Additionally, when transferring system files or program files, it is possible that they may not function properly after being moved to the SSD.
Therefore, the Copy and Paste function is best suited for transferring small amounts of data. If you need to transfer a large amount of data or want to transfer everything, including the operating system and system files, from the HDD to the SSD, the recommended method is to use disk cloning software. This software allows for a quicker and more efficient transfer of data.
Conclusion
In short, transferring data from HDD to SSD is like moving from a slow and clunky old car to a sleek and speedy sports car – it’s a game changer. With the right tools and a bit of know-how, you can easily transfer all your important files and programs to your new SSD, giving your computer a major performance boost. It’s like giving your computer an upgrade and improving your own productivity at the same time.
So don’t hesitate – make the switch to SSD and experience the power of lightning-fast data transfer today!”
FAQs
What is the best way to transfer data from HDD to SSD?
The easiest and safest way to transfer data from HDD to SSD is to use backup and cloning software that can create an exact copy of your hard drive.
Can you transfer an entire operating system from HDD to SSD?
Yes, you can transfer an entire operating system from HDD to SSD by using cloning software. This will ensure that all your files, programs, and settings are transferred to the new drive.
Is it necessary to format an SSD before transferring data?
No, it is not necessary to format an SSD before transferring data. However, you should check that the SSD is correctly recognized by your computer and that it has the latest firmware updates installed.
How long does it take to transfer data from HDD to SSD?
The time it takes to transfer data from HDD to SSD can vary depending on the amount of data, the speed of your computer’s disk interface, and the type of software used. Generally, it can take anywhere from a few minutes to several hours.
“Was the provided information useful? Your vote is important to us!
In short, transferring data from HDD to SSD is like moving from a slow and clunky old car to a sleek and speedy sports car – it’s a game changer. With the right tools and a bit of know-how, you can easily transfer all your important files and programs to your new SSD, giving your computer a major performance boost. It’s like giving your computer an upgrade and improving your own productivity at the same time. So don’t hesitate – make the switch to SSD and experience the power of lightning-fast data transfer today!
We value your feedback on the usefulness of the information provided. Your opinion matters to us, and we want to ensure that we are providing you with the most relevant and helpful content. Please take a moment to let us know if the information was useful to you by casting your vote with a simple ‘Yes’ or ‘No’.”
Note: The new passage combines the content of Your article and the thoroughness of Their article while maintaining the voice and tone of Your article.<