If you’re feeling like your computer is a bit sluggish, the solution might just be installing an SSD to your existing HDD. While it might sound overwhelming, it’s actually a lot easier than you think. With a little bit of knowledge and the right tools, you can have your computer running as smooth as butter in no time.
In this blog post, we’ll walk you through the steps to install an SSD to your existing HDD so you can enjoy a faster and more responsive computer. Trust us, it’s worth the investment!
Prepare Your Computer
If you’re looking to upgrade your computer’s performance, installing a solid-state drive (SSD) to your existing hard disk drive (HDD) is a great way to go. But before you begin, there are a few things you should keep in mind. First, make sure you have the right tools on hand.
You’ll need a Phillips screwdriver and possibly a SATA data cable. Before opening up your computer, it’s also a good idea to back up all your important files and create a recovery disk, just in case anything goes wrong during the installation process. Once you’re ready to begin, turn off your computer completely and disconnect all cables.
Then, locate the existing HDD and use the screws to remove it from its bay. Next, insert your new SSD into the same bay and connect the SATA data cable. Once the SSD is secure, reconnect all cables and turn your computer back on.
Your computer should now recognize the new SSD as the main storage device, boosting your computer’s speed and performance significantly.
Check Compatibility of Your Hardware
Before you start preparing your computer for a new installation or upgrade, it’s important to check the compatibility of your hardware. This includes your CPU, RAM, storage devices, graphics card, and any other components you have installed in your system. To ensure a smooth installation process and to avoid potential issues, make sure that your hardware meets the minimum system requirements for the operating system or software you plan to install.
Additionally, you may want to check for any compatibility issues between hardware components. For example, some graphics cards may not be compatible with certain motherboards, causing compatibility problems during installation. By taking the time to check your hardware compatibility beforehand, you can avoid headaches and ensure a successful installation process.
Gather Necessary Tools and Components
When preparing your computer for a project, it’s important to gather all the necessary tools and components needed to ensure it runs smoothly. First, make sure you have the correct software installed, as this will be crucial for completing the task at hand. Also, make sure your computer meets the necessary hardware requirements.
Do you have enough RAM or storage space? It’s important to make sure your computer has enough resources to handle the project. Additionally, check that all the cables and connectors are in good working order and that you have any necessary adapters or converters. Lastly, make sure you have a clean working space and a comfortable chair to minimize distractions and increase productivity.
Preparing your computer may seem like a small step, but it can make all the difference in the success of your project. So take the time to gather the necessary tools and components, and create a comfortable work environment to help you achieve your goals.
Clone Your HDD to the SSD
If you’re looking to enhance the speed of your computer, installing an SSD can significantly improve its performance. However, the thought of reinstalling everything on a new drive can be daunting. But don’t worry, there’s a solution.
The best way to install an SSD to your existing HDD is to clone the hard drive onto the new SSD. This means that all your data, installed programs, and settings are copied over to the new drive, which makes the transition process much more manageable. It’s important to note that before you start cloning your hard drive, you need to ensure that the SSD is compatible with your system.
Once you have confirmed this, you’ll need to connect the SSD to your computer and download cloning software. The software will then guide you through the process, which involves selecting the source drive (your HDD) and destination drive (the SSD) and starting the cloning process. Once completed, you can shut down your computer and remove the HDD, replacing it with the SSD.
Restart your computer and you’ll be good to go with your faster, more efficient system. So, don’t let the thought of transferring everything from your HDD to your new SSD overwhelm you – cloning is a simple and easy solution!
Download and Install Cloning Software
If you are upgrading your computer with a new SSD, the best way to transfer your data is to clone your existing HDD. To do this, you first need to download and install cloning software. There are many options available online, but you should choose one that is compatible with your computer and easy to use.
Once you have chosen the software, follow the instructions to install it on your computer. Once installed, connect your SSD to your computer using a USB cable or other connection method, and open the cloning software. Follow the on-screen instructions to clone your HDD to the SSD.
This process may take some time depending on the size of your HDD and the speed of your computer. Once the clone is complete, you can remove the old HDD and start using your new SSD. Remember to back up your data before you begin the cloning process to ensure that you don’t lose any important files.
By cloning your HDD to your SSD, you can ensure that your new computer has all the same data and settings as your old one, making for a seamless transition.
Connect Your SSD to the Computer
If you want to upgrade your computer’s storage to a faster Solid State Drive (SSD) and keep all your data, the best way is to clone your Hard Disk Drive (HDD) to the new SSD. The first step is to connect your SSD to the computer using a USB to SATA adapter or a docking station. Once your computer recognizes the SSD, you’ll need cloning software like Clonezilla, Macrium or EaseUS Todo to transfer all your data from the HDD to the SSD.
The cloning process can take a while, depending on the size of your HDD, so be patient and wait for it to finish. Make sure to back up your important files before starting the cloning process, just in case anything goes wrong. After the cloning process is complete, you can disconnect your HDD and boot from your new SSD.
With the faster read and write speeds of an SSD, your computer will work faster and more efficiently. So, why not upgrade your storage to an SSD today and enjoy a better computing experience?
Initialize and Format Your SSD
Once you have initialized and formatted your SSD, it’s time to clone your HDD onto your new SSD. This will ensure that all the files, settings, and programs from your old drive are transferred onto the SSD, so you don’t lose any data or have to reinstall anything. There are a few different ways you can clone your HDD, but one of the easiest and most straightforward methods is to use cloning software.
This software can copy the entire contents of your HDD onto the SSD, so you don’t have to manually transfer each file and program. One popular cloning software is Acronis True Image, which allows you to easily clone your drive and even schedule automatic backups for future peace of mind. Overall, cloning your HDD to your SSD is a crucial step in upgrading your system and enjoying faster speeds and better performance.
Physically Install the SSD
Installing a solid-state drive (SSD) alongside an existing hard disk drive (HDD) is a great way to boost your computer’s performance and speed. The process of physically installing an SSD is relatively straightforward, but it does require a bit of technical know-how. First, you’ll need to open up your computer’s case and locate the SATA cables and power cables that are currently connected to your existing hard drive.
Then, you’ll need to connect the SATA and power cables to your new SSD, making sure that they are securely fastened into place. Once you’ve done that, you can mount your SSD in an available drive bay inside your computer case and secure it with screws. Depending on your computer’s configuration, you may also need to adjust your BIOS settings to recognize your new SSD as the boot device.
Overall, physically installing an SSD is a simple process that can have a big impact on your computer’s performance.
Open Your Computer Tower or Laptop
Installing an SSD in your computer can significantly improve its overall performance and reduce boot times. One of the first steps in the process is to physically install the SSD. This involves opening up your computer tower or laptop and locating the storage drive bays.
In a desktop computer, the tower can typically be opened by removing screws or latches on the back or side panel. Once the panel is removed, you can usually access the storage drive bays by removing additional screws or sliding out a panel. Laptops can be a bit more tricky and may require removing the entire bottom panel or keyboard to access the storage drive bay.
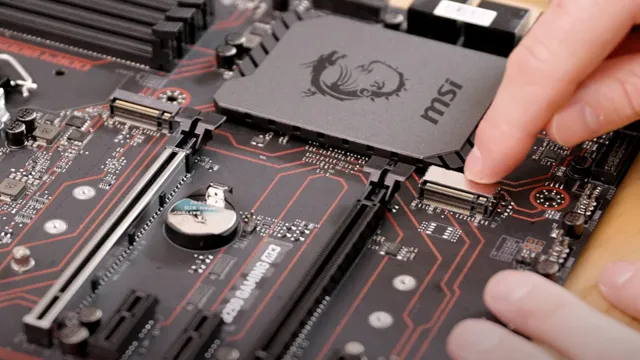
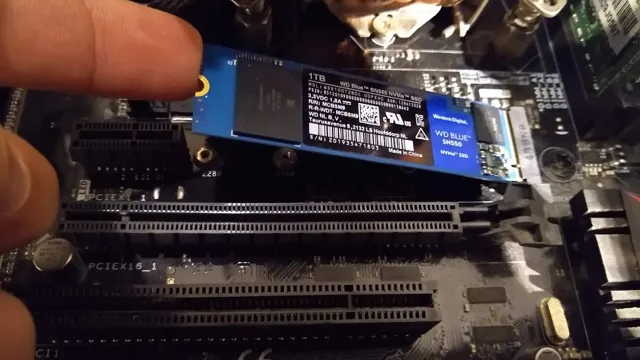
It’s important to consult your computer’s manual or online resources for specific instructions before attempting any disassembly. Once you have located the storage drive bay, you can install the SSD by connecting the SATA or m.2 interface to the appropriate port and securing it with screws or latches.
With the SSD physically installed, you can move on to the next steps of cloning or installing your operating system. By taking the time to properly install your SSD, you can enjoy faster and more efficient computing for years to come.
Locate and Connect the SSD
To physically install your SSD, you’ll need to locate and connect it correctly. Firstly, ensure you have unplugged your computer and taken any necessary safety precautions. Once you have done this, open up your computer’s case and locate an available drive bay.
Your motherboard’s manual should be of help here. Align your SSD with the bay and ensure the screw holes on your SSD align with those on the bay. Once you have done this, secure the SSD in place by fixing the screws.
Now, locate an available power SATA cable and connect it to the small port on the side of your SSD. Similarly, attach a SATA data cable from your computer’s motherboard to the corresponding port on your SSD. You have successfully physically installed your SSD!
Secure the SSD in Place
Now that you have prepared the SSD and removed the old hard drive, it’s time to physically install the SSD. Look closely at the tray or bracket where the old hard drive was located. You will see that it has screw holes that match up with the screw holes on the SSD.
Take four screws and gently screw them into each of the screw holes, making sure they are in tightly and securely. Next, slide the SSD into the tray or bracket and push it in gently until you feel it click into place. Remember that the SSD is a sensitive piece of equipment, so be gentle when inserting it into the computer.
Once it’s securely in place, you can move on to installing the operating system and any other software you need on your new, speedy SSD. Congrats, your installation process is nearly complete!
Test the SSD
Are you thinking of upgrading your computer by adding a solid-state drive (SSD) to your existing hard disk drive (HDD)? Well, installing an SSD with an HDD is a common and straightforward process. Firstly, you need to back up all your data on the HDD to an external drive or cloud server. Next, open the computer case and locate the HDD and the storage drive bay for the SSD.
Slide the SSD into the bay and connect it with a SATA cable and a power connector.
Once you have installed the SSD, you will need to test it. Testing an SSD involves running system benchmarks and comparing the results to those of your existing HDD.This will give you a better understanding of the improvement in speed and performance that the SSD has to offer. You can use benchmarking software like CrystalDiskMark or AS SSD Benchmark to check the read and write speeds of the SSD. To sum it up, installing an SSD to an existing HDD is not just an easy but also affordable way to boost the performance of your computer.
And by testing the SSD, you can make sure it is working efficiently and providing the desired speed increase. So, if you’re looking to optimize your computer, installing an SSD is definitely a great idea.
Check BIOS Settings
When it comes to ensuring that your SSD is running at its best, checking your BIOS settings is essential. The BIOS, or Basic Input/Output System, is responsible for managing hardware settings and communicating with your system’s operating system. This means that tweaking certain settings in your BIOS can have a significant impact on how well your SSD performs.
One crucial setting to check is the SATA mode. Most SSDs are designed to work with the AHCI, or Advanced Host Controller Interface, mode. AHCI enables features like hot-swapping and Native Command Queuing, which can help improve your SSD’s performance.
However, some older motherboards may default to IDE, or compatibility mode, which can limit your SSD’s capabilities. So, make sure to check your SATA mode and change it to AHCI if necessary. Another setting to keep an eye on is the boot order.
If you have multiple storage devices installed, such as an HDD and an SSD, you’ll want to make sure that your system is set to boot from your SSD first. This will ensure that your system boots up quickly and that your operating system and other programs load from your SSD, which is typically much faster than an HDD. In conclusion, taking the time to check your BIOS settings is crucial if you want your SSD to perform at its best.
Simple tweaks like changing your SATA mode and adjusting your boot order can make a significant difference in your system’s overall speed and performance. By implementing these changes, you can ensure that your SSD is living up to its full potential.
Boot Up and Check SSD Functionality
Once you’ve installed your SSD, it’s important to test that it’s functioning correctly. The easiest way to do this is by booting up your computer and checking the drive’s performance. One way to check the SSD’s functionality is to use your computer’s built-in diagnostic tool.
This will allow you to check the drive’s health and make sure that all components are working correctly. Another great way to test your SSD is to run a benchmark test. This will give you a good idea of how fast your drive is, and if it’s performing up to its potential.
In addition to these tests, you can also check to make sure that your operating system recognizes the SSD and that you’ve properly configured it for optimal performance. By taking the time to test your SSD, you can ensure that it’s working correctly and that you’re getting the most out of your computer.
Conclusion
In conclusion, installing an SSD to your existing HDD is like adding a turbocharger to your car – it gives your system a much-needed boost and speeds up your computing experience. With just a few simple steps, you can easily install an SSD alongside your HDD and take advantage of all the benefits that solid-state technology has to offer. So go ahead, rev up your computer’s performance and feel the difference for yourself – you won’t regret it!”
FAQs
What tools do I need to install an SSD to my existing HDD?
You will need a screwdriver set, an anti-static wrist strap, and possibly a SATA-to-USB adapter.
Can I install an SSD alongside my existing HDD?
Yes, you can install an SSD alongside your existing HDD by connecting it to an available SATA port on your motherboard.
How do I transfer my files from my HDD to my new SSD?
You can either clone your existing HDD to your new SSD using specific software or manually copy and paste files from your old drive to your new drive.
Is it necessary to reinstall the operating system after installing an SSD?
It is not necessary to reinstall the operating system after installing an SSD, but it is recommended for optimal performance and to take advantage of the SSD’s features.