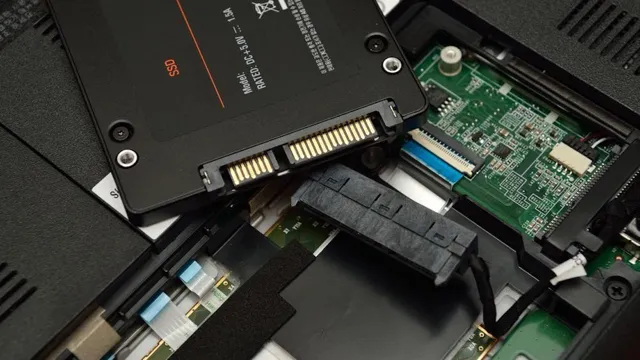
Congratulations on purchasing a new SSD! You are ready to upgrade your computer’s storage and performance. However, before you can start using your new SSD, you will need to get your computer to recognize it. It can be frustrating when your computer fails to detect a new SSD, but this blog can help you overcome this issue.
Installing an SSD into your computer can provide you with various benefits, including faster boot times and application load times. However, getting your computer ready to use the newly installed SSD can be a daunting task. But don’t worry – we’ve got your back.
In this blog, we will discuss the process of getting your computer to recognize a new SSD. We’ll provide you with some tips to help overcome any potential issues along the way and also touch on some troubleshooting measures. Whether you’re a seasoned computer user or a beginner, this blog will provide you with valuable information on how to make your new SSD work with your computer.
With our step-by-step guide, you’ll be up and running in no time, ready to experience the benefits of your new storage device. So let’s dive in and learn how to get Windows to recognize a new SSD!
Check the BIOS Settings
If you have recently installed a new SSD on your computer and Windows does not recognize it, you may need to check your BIOS settings. The BIOS, or Basic Input/Output System, is responsible for managing hardware devices connected to your computer. To check the BIOS settings, restart your computer and enter the BIOS setup by pressing a specific key (such as F2 or Del) during the boot process.
Once in the BIOS setup, navigate to the storage settings and ensure that the new SSD is detected and enabled. If it is not detected, try restarting the computer again or checking the connections of the SSD. Additionally, you should also check if your motherboard supports the type of SSD you have installed, as some older motherboards may not support newer SSD technologies.
By checking your BIOS settings, you can ensure that your new SSD is properly recognized by your computer and Windows, allowing you to take advantage of its increased speed and storage capacity.
Access the BIOS
Accessing the BIOS on your computer is essential if you want to check and potentially modify certain settings. The BIOS, which stands for Basic Input/Output System, is where your computer’s hardware settings are stored. To access the BIOS, you’ll need to restart your computer and press the designated key during the boot-up process, which varies depending on the manufacturer and model of your computer.
Some common keys to access the BIOS are F2, Del, and F Once you’ve accessed the BIOS, you can check the settings and modify them as needed. These settings might include boot order, time and date, security settings, and more.
It’s important to use caution when modifying BIOS settings, as changes can have a significant impact on your computer’s performance. Always be sure to save any changes you make before exiting the BIOS.
Enable AHCI Mode
If you’re struggling with slow performance on your computer, enabling AHCI mode could help speed things up. However, before you do so, it’s important to check your BIOS settings. AHCI mode can only be enabled if your computer’s BIOS supports it.
To check, go into your computer’s BIOS settings and locate the SATA Controller Mode option. If it’s set to IDE or something similar, AHCI mode may not be supported. If it is supported, you’ll want to reset the SATA Controller Mode to AHCI to enable the mode.
Once you’ve done this, be sure to save your changes and exit the BIOS. Keep in mind that this process is different for each computer, so you may need to consult your computer’s documentation or manufacturer’s website for specific instructions. Enabling AHCI mode can improve your computer’s performance by allowing it to take advantage of features like NCQ and hot-swapping, so it’s definitely worth considering if you’re having performance issues.
Initialize the SSD
If you’ve got a new SSD for your computer, you might be wondering how to get Windows to recognize it. Fear not, because it’s a relatively easy process. The first thing you’ll need to do is initialize the SSD.
This means that you’ll be preparing the disk to be used by Windows. To begin, go to the start menu and search for “Disk Management.” Once you’ve found it, click on it to open the Disk Management window.
From here, you’ll see all of the physical drives that are connected to your computer, including the new SSD. Right-click on the unallocated space of the SSD and select “New Simple Volume.” Follow the prompts to create a new volume and give it a drive letter.
Once this is complete, your computer should recognize the new SSD, and you can start using it as you would any other storage device. By initializing the SSD, you’ve allowed Windows to communicate with it, making it an essential part of your system. So, if you want to take full advantage of your new SSD, make sure to initialize it before using it.
Disk Management in Windows
When you’ve installed a new SSD, the first thing you need to do in order to use it is initialize it. Initializing the SSD is a process that allows the drive to be recognized by your computer’s operating system. Windows provides a Disk Management tool that can be used to initialize your SSD.
To do so, open Disk Management and locate your SSD in the list of drives. Right-click on the SSD and select “Initialize Disk.” You’ll then be prompted to choose between MBR and GPT partition styles.
MBR is the older partition style and is used for drives smaller than 2TB, while GPT is the newer standard and can support drives up to 4 zettabytes in size. Select the partition style of your choice and click “OK” to initialize the SSD.
Once the process is complete, your SSD will be ready to use.
Initialize the SSD
When it comes to setting up an SSD, initializing it is an essential step in the process. This helps prepare the device for use and ensures that it’s in proper working order. The initialization process involves partitioning the SSD, which means dividing it into one or more sections that can be used separately.
It’s important to note that if you’re using a new SSD, you’ll want to initialize it before using it. To do this, you’ll need to go to the Disk Management tool on your computer and select the unallocated space on the SSD. From there, you can choose to create a new partition, format it, and assign a drive letter.
This will ensure that your SSD is properly set up and ready for use. So, whether you’re using it as your primary storage device or as a backup drive, initializing your SSD is an important step in the process.
Format the SSD
If you’ve recently installed a new SSD in your computer, you might be wondering how to get Windows to recognize it. The first step is to format the SSD before using it. To do this in Windows, open the Disk Management tool from the Control Panel.
Locate the new SSD in the list of available disks (it should be labeled as an unallocated space), right-click on it, and select “New Simple Volume”. Follow the wizard to format the SSD and assign a drive letter to it. Once the formatting process is complete, your computer should recognize the SSD and you can start using it to store and access data.
Keep in mind that formatting the SSD will erase any existing data on it, so be sure to back up any important files before proceeding. With these simple steps, you can easily get Windows to recognize your new SSD and start enjoying faster storage and improved performance.
Assign a Drive Letter
When you install a new SSD, one of the essential steps to take is formatting it. This process prepares the drive for use by your computer. Usually, Windows will prompt you to format the SSD when you connect it for the first time.
However, if that doesn’t happen, you can format the drive manually. Here’s how to do it: First, assign a drive letter to the SSD. This step ensures that the drive is easily recognizable by your computer.
Once you name the drive, the next step is to format it. Formatting will erase all data on the drive, so ensure you have a backup of any important files. The formatting process takes a few minutes to complete.
Once done, your SSD is ready for use. Remember to always keep your SSD formatted regularly to maintain optimal performance. Assigning a drive letter to your SSD is important, so it’s easily accessible when you need it.
This process ensures that your computer can identify the drive and assign it a specific letter. Generally, Windows automatically assigns drive letters to storage devices, but in some cases, they might not appear in the File Explorer window. Renaming your SSD to a particular letter will solve this problem.
To do this, go to Disk Management and right-click on the SSD. Choose the option to “Change Drive Letter and Path,” then select the “Add” button. Choose a letter that’s not assigned to any other drive on your computer and click “OK.
Format the SSD
Formatting the SSD can be a daunting task for some people, but it’s not as complicated as it may seem. Essentially, formatting an SSD means wiping all the data from it and preparing it for new usage. There are different ways to format an SSD, but the most common one is through the built-in utility in your operating system.
When formatting an SSD, it’s essential to back up any data that you might need as the process will permanently erase all the information on the drive. Once the backup is complete, you can proceed with formatting the drive. This process will also enable you to choose the file system that best suits your needs.
Popular options include NTFS, FAT32, and exFAT. Choosing the right file system depends on your intended use of the drive. After formatting is complete, your SSD will be ready to use again, and you can start adding data as desired.
Remember to perform regular maintenance on your drive to ensure optimal performance and longevity.
Conclusion
In conclusion, getting your Windows operating system to recognize a new SSD is like introducing a new friend to a clique. You need to make sure that your new friend is compatible with the group, presents themselves well, and is officially introduced to the group. Similarly, ensure that your newly installed SSD is compatible with your system, is properly formatted, and is recognized by the BIOS.
Once all these steps are followed, your Windows operating system will welcome your new storage friend with open arms and allow you to enjoy faster performance and increased storage capacity.”
FAQs
What is an SSD and why is it important for a computer?
An SSD is a solid-state drive that stores data using flash memory. It is important for a computer because it improves its speed, efficiency, and overall performance.
How do I physically install a new SSD in my computer?
First, shut down your computer and unplug it from the power source. Open up the case and locate an available slot for the SSD. Install the SSD using screws or brackets. Finally, reconnect any cables and close the computer case.
How do I format my new SSD so that it can be recognized by Windows?
Go to the Start menu and search for “Disk Management.” Open the Disk Management utility and locate your new SSD. Right-click on it and select “Format.” Choose your preferred file system and follow the prompts to complete the formatting process.
How do I make sure that Windows recognizes my new SSD as the primary boot drive?
Go to the BIOS settings of your computer and select the Boot menu. Change the boot order so that the SSD is listed first. Save the changes and exit the BIOS. Your computer should now recognize the SSD as the primary boot drive.