If you are currently receiving Supplemental Security Income (SSI) benefits, but find that you are no longer eligible due to changes in your circumstances, you may be wondering what your options are. Fortunately, the Social Security Administration (SSA) offers another program that could potentially meet your needs: Social Security Disability Insurance (SSD). But how exactly do you change from SSI to SSD? It can seem like a confusing and overwhelming process, but fear not! In this step-by-step guide, we will break down everything you need to know so that you can make the transition as smoothly as possible.
Check Compatibility
If you’re looking to switch to a faster storage solution, like SSD, from SSI, there are a few things you need to keep in mind. First and foremost, you need to check if your computer is compatible with an SSD. Depending on the age and model of your computer, it may not have a compatible port for an SSD.
It’s also important to determine the size and type of SSD that is compatible with your system. Once you’ve confirmed compatibility, you will need to physically install the SSD in your computer. This involves opening up your computer and replacing the existing SSI with the new SSD.
It’s essential to back up all your important data before making any changes to your storage drive. Once you’ve installed the SSD and restored your backed up data, your computer should boot up faster and run more smoothly. Overall, changing from SSI to SSD can significantly improve the performance of your computer, but make sure to do your research and check compatibility before making the switch.
Compatible motherboards, CPUs, and storage types
When building a computer, it’s important to make sure all the components are compatible with each other. This includes the motherboard, CPU, and storage types. Doing so will help prevent any issues or problems down the road.
First, check that the CPU is compatible with the motherboard. Not all motherboard sockets work with all CPUs, so you need to make sure you’re making the right match. For example, an AMD CPU won’t work with an Intel-based motherboard.
Next, consider the type of storage you’ll be using. Make sure the motherboard supports the type of storage you want to use. For example, if you want to use an NVMe SSD, you need to make sure the motherboard has an M.
2 slot that is compatible with NVMe drives. Finally, take a look at the other components you’ll be using and ensure they are also compatible with the motherboard. For example, the RAM you choose needs to be supported by the motherboard.
It may seem overwhelming at first, but taking the time to check compatibility can save you time and frustration in the long run.
Back Up Your Data
If you’re looking to change SSI to SSD, you’ll need to clone your existing hard drive onto your new solid-state drive. First, make sure your new SSD is compatible with your computer and has enough storage space to accommodate all your data. Next, use a cloning software to transfer all your files, programs, and operating system from your old hard drive to your new SSD.
This process could take several hours, depending on the amount of data you have, but it’ll save you the time and hassle of reinstalling everything from scratch. Once the cloning is complete, you’ll need to install your new SSD into your computer, typically by opening up the case and connecting it to the motherboard. After that, simply boot up your computer and enjoy the lightning-fast speed of your new SSD.
Remember to always back up your data before making any changes to your computer’s hardware or software, just in case something goes wrong.
Methods for backing up data
Backing up your data is an essential aspect of data management. There are several methods available for backing up your data, each with its own advantages and disadvantages. One of the most popular methods is cloud backup.
This involves storing your data on remote servers, which you can access from any device with an Internet connection. Another common method is to create physical backups, using external hard drives or USB drives. This ensures that your data is safe in case of hardware failure, but may be vulnerable to theft or damage.
Other methods include network attached storage, which allows you to store data on a local network, and tape backup, which involves storing data on magnetic tapes. Whatever method you choose, it’s essential to back up your data regularly to avoid losing important files in case of accidental deletion, computer crashes, or other system failures. By backing up your data properly, you can ensure that your information is safe and secure at all times.
Purchase the Right SSD
Changing from SSI to SSD can be a game-changer for your computer’s performance. However, choosing the right SSD can be quite confusing, especially if you’re not familiar with computer hardware. The first step is to identify the type of SSD your computer supports, which can be SATA or NVMe.
SATA is the most common type and is suitable for most computers, while NVMe is faster but may not be compatible with older computers. It’s also essential to consider the storage capacity that you need and whether you want a 5-inch or M.
2 form factor. Once you’ve determined your computer’s compatibility and your storage needs, you can choose the right SSD that fits your budget. Remember, purchasing a good quality SSD can improve your computer’s speed and performance, so make sure to invest in a reputable brand that comes with a warranty.
With the right SSD, your computer will feel like new again, and you can enjoy faster load times and improved overall performance.
Factors to consider when buying an SSD
When it comes to buying an SSD, there are several factors to consider to ensure that you purchase the right one for your needs. One of the most important factors is the storage capacity. You should consider the amount of storage you require for your data and applications.
The speed of an SSD is also important and can impact performance. Therefore, it is essential to select an SSD that provides you with a suitable speed that matches your workflow. Additionally, you should consider the form factor and compatibility of the SSD.
Different SSDs come in different shapes and sizes, and not all of them may be compatible with your computer. Finally, you should consider the brand and price. Although it is tempting to buy a cheaper brand, it is often best to invest in a reputable brand that has good customer reviews and offers excellent support.
By considering these factors, you can ensure that you buy the right SSD for your needs and have a reliable storage solution that improves the performance of your computer.
Install New SSD
If you’re looking to improve the performance of your computer, upgrading from an SSI to an SSD is a great move. However, you may be wondering how to change an SSI to an SSD. The first step is to find the right SSD for your device.
Once you have the new hardware, you’ll need to shut down your computer and disconnect all cables. Open up the case and locate the SSI. Remove it from its slot, being careful not to damage any surrounding components.
Next, insert the SSD into the same slot and secure it in place. Finally, reattach all cables, close up the case, and turn on your computer. You may need to install new drivers or transfer data from your old drive to the new one, but with a little patience, you’ll be up and running on your new SSD in no time.
With the faster load times and improved performance, your computer will feel like new again.
Physical installation steps for SSDs
If you’re looking to upgrade your computer’s storage capacity and speed, installing a new SSD is definitely an excellent option. Fortunately, the physical installation process is fairly simple, even for those who aren’t tech-savvy. First, open up your computer’s case and locate the SATA data and power cables.
These two cables will be used to connect the SSD to the motherboard and power supply, respectively. Next, insert the SSD into an empty drive bay and secure it with screws if necessary. Finally, connect the SATA data and power cables from the SSD to the motherboard and power supply, respectively.
Once everything is connected, you can close up the case, plug in your computer, and turn it on to make sure everything is working correctly. With these simple steps, you’ll have a brand new SSD ready to take on all your computer’s storage needs!
Transfer Data to New SSD
If you’re looking to upgrade your computer’s storage by replacing a hard disk drive (HDD) with a solid state drive (SSD), you’re in luck. With SSDs becoming faster, cheaper, and more reliable, it’s no surprise that many people are choosing to make the switch. The good news is that transfering your data to the new SSD is a relatively simple process.
First, you’ll need to clone your old HDD to the new SSD using an external device such as a docking station or a USB-to-SATA adapter. The second step involves removing the old HDD and replacing it with the new SSD. Finally, boot up your computer and ensure that everything is working as intended.
With these steps completed, you’ve successfully changed your HDD to an SSD and can enjoy all the benefits that come with it, including faster load times, improved system responsiveness, and increased reliability. So, why wait? Try upgrading your computer to an SSD today and see the difference for yourself!
Methods for transferring data to a new SSD
When transferring data to a new SSD, there are several methods that you can consider. One of the easiest ways to transfer your files is to use a cloning software that makes a duplicate of your existing drive. This involves creating an exact copy of the entire drive on the new SSD, including the operating system and all the applications installed.
Another method is to manually transfer your files using a file transfer tool, such as Windows Easy Transfer. This allows you to select the files and folders that you want to transfer and move them to the new drive. Additionally, you may want to consider using cloud-based storage services, such as Google Drive or Dropbox, to move your files.
This can be a great option if you have limited space on the new SSD or if you want to access your files from multiple devices. Whatever method you choose, it’s important to back up your data before you start the transfer to ensure that you don’t lose any important files. By taking these steps, you can ensure a seamless transfer process when upgrading to a new SSD.
Test and Set Up New SSD
Changing your computer’s solid-state drive (SSD) is a great way to boost its performance. This process is easy and can be done by following a few simple steps. The first thing you need to do is to test the new SSD to ensure that it is working properly.
You can do this by connecting the SSD to your computer and running a speed test. Once you have confirmed that the new SSD is working correctly, you can then set it up in your computer by cloning your existing system to the new drive. This will ensure that all your data, files, and operating system will be transferred to the new SSD.
After this process is complete, you can then remove the old SSD from your computer and replace it with the new one. This will give your computer a significant boost in speed and performance. Overall, changing your computer’s old SSD to a new one is a simple process that can quickly improve your computer’s performance.
Methods for testing and configuring new SSD
If you’re investing in a new SSD, making sure it works correctly is essential. Fortunately, there are several methods for testing and setting up a new SSD that can ensure optimal performance. One of the easiest ways to configure your SSD is by connecting it to your computer and initiating the formatting process.
Formatting your SSD enables you to prepare it for data storage and ensure it’s compatible with your system. Additionally, you can run various diagnostic software to test your SSD’s performance and check for any defects. These programs will often provide information on your SSD’s health, speed, and overall functionality.
For optimal results, be sure to update your SSD’s firmware regularly, as these updates can improve performance and security. Finally, consider optimizing your system to ensure it benefits fully from your new SSD’s capabilities. These methods will help you configure your SSD and get the most out of your investment.
Conclusion
Changing SSI to SSD is about as easy as swapping out a vowel in Scrabble. Just like how swapping a tile can completely change the word and its worth, switching from SSI to SSD can greatly improve your financial stability and provide the support you need. Just make sure you follow the rules and regulations, and you’ll be on your way to a better quality of life.
So, next time you’re staring at your Scrabble tiles, think about swapping that “I” for a “D” and changing your SSI to SSD instead.”
FAQs
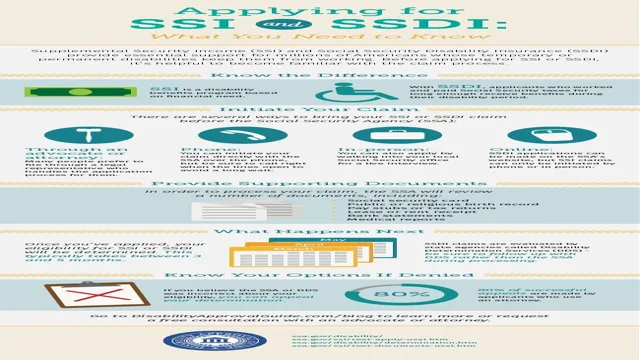
What is the difference between SSI and SSD?
SSI (Supplemental Security Income) is a needs-based program providing assistance to those with low income and limited resources, while SSD (Social Security Disability) provides benefits to individuals who are disabled and unable to work.
How do I apply for SSD benefits?
You can apply for SSD benefits online at the Social Security Administration website, by calling their toll-free number, or by visiting a local SSA office.
Can I receive both SSI and SSD benefits at the same time?
Yes, it is possible to receive both SSI and SSD benefits at the same time, but the amount of SSI benefits will be reduced by the amount of SSD benefits received.
What is the average wait time for SSD benefits approval?
The average wait time for SSD benefits approval can vary depending on the individual case, but it typically takes 3 to 5 months for an initial decision and up to 2 years if an appeal is necessary.
How can I check the status of my SSD application?
You can check the status of your SSD application by contacting your local SSA office, calling the SSA toll-free number, or checking online through the Social Security Administration website.