Have you ever found yourself in a situation where you’ve outgrown your computer’s storage capacity? Maybe there just aren’t enough slots or upgrading the internal drive would void your warranty? Whatever the case may be, adding an SSD to your external drive can be a great way to give your computer a boost without having to replace the entire system. In this blog, we’ll explore the benefits of adding an SSD to your external PC and walk you through the steps to do it yourself. So grab a cup of coffee and let’s get started!
Intro
Have you ever wondered how to add an SSD to your PC externally? Well, it’s actually a fairly straightforward process that can greatly improve your computer’s speed and performance. First, you’ll need an external SSD enclosure and a compatible SSD. Once you have those, you can insert the SSD into the enclosure and connect it to your computer via USB or Thunderbolt.
From there, you can format the SSD and transfer over any files or programs you want to run faster. It’s important to note that external SSDs may not be as fast as internal ones, but they still offer a significant improvement over traditional hard drives. So if you’re looking to boost your PC’s performance without getting your hands dirty inside the case, adding an external SSD could be the solution you’ve been searching for.
Understand SSDs vs HDDs
When it comes to the world of computer storage, there are two main types of drives: solid-state drives (SSDs) and hard disk drives (HDDs). Both serve the purpose of storing data, but there are some distinct differences between them that can affect overall performance and functionality. An SSD is essentially a big, fast, and ultra-responsive memory stick that can access data very quickly.
It contains no moving parts and uses flash memory, which makes it less prone to failure and faster overall. On the other hand, an HDD uses spinning disks to read and write data, making it slower in comparison. Although it has a higher capacity for storage, it can take longer to access data because of its mechanical nature.
Overall, the choice between an SSD and an HDD depends on the user’s storage needs and desired performance level.
Check compatibility with PC
When you’re looking to buy a new peripheral for your computer, like a printer or scanner, it’s essential to check its compatibility with your PC. Not all devices work with every computer, and you don’t want to waste time and money on something that won’t function correctly. Incompatibility issues can result in errors, crashes, and even damage to your machine.
It’s always smarter to spend a little extra time doing research and reading reviews before making a purchase. Check the product specifications to ensure that the device is compatible with your operating system, hardware configuration, and any other necessary software. This precaution will save you from headaches and frustration down the line and ensure that your new peripheral works seamlessly with your computer.
Hardware needed
Adding an SSD to your PC externally is not too difficult. First, you will need to get an external enclosure for the SSD drive. This can be purchased online or at a computer hardware store.
Next, you will need to connect the enclosure to your computer using a USB cable. Once connected, you can open up your computer’s file explorer and the SSD drive should appear as a new drive. You can then begin transferring files to and from the SSD.
Keep in mind that the transfer speeds may not be as fast as if the SSD were installed internally, but it still provides a significant upgrade in storage and speed. Overall, adding an SSD externally to your PC is a great way to boost performance without having to open up your computer’s case and physically install the drive.
SSD Drive
If you’re looking to upgrade your computer’s hardware, investing in an SSD drive is a great option. But first, you need to make sure that your computer is compatible with this type of drive. This means having a motherboard that supports SATA or NVMe interface, as these are the most common types used by SSDs.
You’ll also need to decide on the size of the drive, and whether you want a 5-inch or M.2 form factor.
Once you’ve determined these factors, you can start looking at different brands and models of SSDs. Some popular ones include Samsung, Crucial, and Western Digital. Keep in mind that while SSDs may be more expensive than traditional hard drives, they offer much faster read and write speeds, which can greatly improve your computer’s overall performance.
Whether you’re a gamer or just a casual user, investing in an SSD drive is definitely worth it.
SATA to USB Adapter Cable
If you ever find yourself needing to access data from a SATA hard drive and don’t want to install it inside your computer, a SATA to USB adapter cable is just what you need. This hardware is essential for accessing your data quickly and easily. You can use this cable to connect an internal hard drive to an external USB port on your computer or laptop.
Once connected, you can easily transfer data between the two devices, without having to open up your computer or laptop. It’s a simple plug-and-play solution that can save you a lot of time and trouble. Plus, since the SATA to USB adapter cable is small and lightweight, it’s easy to carry with you wherever you go.
Whether you’re using it for personal or professional purposes, this hardware is a must-have for anyone who needs to access data from a SATA hard drive.
Screwdriver
When it comes to DIY projects, having the right tools is essential. One of the most basic but important tools is the screwdriver. It’s used to tighten or loosen screws, which can be found on a variety of items, from furniture to electronics.
There are different types of screwdrivers available, including flathead, Phillips, and Torx. The type you’ll need depends on the type of screw you’ll be working with. Other factors to consider when selecting a screwdriver include the handle, which should be comfortable for your grip, and the length of the shaft, which should be appropriate for the job.
Investing in a good quality set of screwdrivers will make your life much easier when it comes to DIY projects. They’ll become an essential part of your tool kit and you’ll wonder how you ever managed without them.
Installation Steps
If you’re looking to add an SSD to your PC externally, there are a few simple steps you can follow to get started. First, you’ll need to purchase an external SSD housing or enclosure, which can be found at most electronics retailers. Once you’ve got your enclosure, you can open it up and insert the SSD into the designated slot.
Then, you’ll need to connect the housing to your PC using a USB cable. From there, you’ll be able to format the SSD and transfer your files over to it. Keep in mind that the speed of your SSD will be limited by the speed of your USB connection, so it’s best to use a USB
0 or higher port for optimal performance. With these simple steps, you’ll be up and running with your new external SSD in no time!
Clone or Install fresh OS
Installing a fresh OS can be a daunting task, but it’s not as complicated as it seems. Whether you’re looking to clone an existing installation or start from scratch, there are a few key steps to follow. First, you’ll need to back up any important files and data.
Once you’ve done that, it’s time to create a bootable USB drive or DVD with your chosen OS. This will allow you to start the installation process. Follow the on-screen instructions, making sure to select the correct disk and partition for the installation.
Next, you’ll need to enter your user information and any settings you want to configure. Once the installation is complete, you can start customizing your new OS to your liking. If you’re cloning an existing OS, the process is similar, but you’ll need to use specialized software to create an exact copy of your current installation.
With a fresh OS installed, your computer should be running smoothly and efficiently, with all your favorite programs and settings ready to go.
Remove panel and locate SATA port
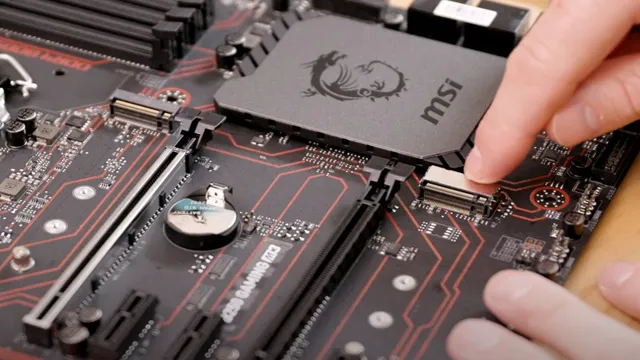
If you want to install a new SSD on your computer, the first step you need to take is to remove the panel and locate the SATA port. This can be a bit tricky depending on your computer model, so make sure to read the instructions carefully before you start. Once you remove the panel, it should be fairly easy to locate the SATA port.
It will be a small, rectangular-shaped connector located on the motherboard. If you’re having trouble finding it, consult your computer’s manual or look online for a diagram of your motherboard. Once you locate the SATA port, it’s time to connect the SSD.
Simply insert the SATA cable into the connector, making sure that it fits snugly. Tighten the screws to hold it in place, and you’re done! Your computer should now recognize the new SSD and you can start using it right away. With this simple installation, you’ll be able to increase your computer’s performance and speed, making it faster and more efficient than ever before.
Install SSD using SATA to USB Cable
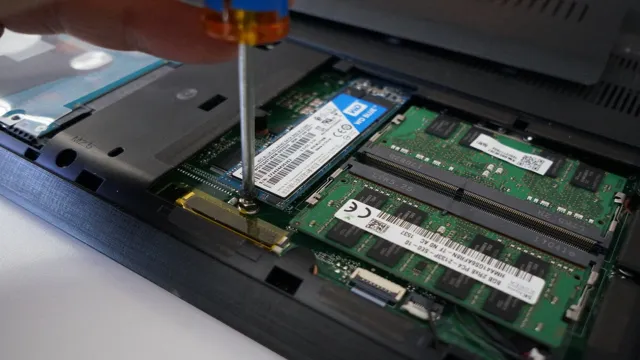
Installing an SSD using a SATA to USB cable can be a great way to upgrade your computer’s storage space without having to replace your entire hard drive. To start, you will need to purchase a SATA to USB cable and an SSD that fits your computer’s specifications. Once you have these items, shut down your computer and unplug it from the power source.
Then, remove the back panel of your computer and locate the hard drive bay. Carefully disconnect the old hard drive and connect the new SSD using the SATA to USB cable. Once it’s connected, replace the back panel and plug your computer back in.
You may then need to go into your computer’s BIOS and change the boot order to ensure that your computer recognizes the new SSD as the primary boot drive. With the SSD installed, you should notice a significant improvement in your computer’s speed and performance. So why wait? Upgrade your computer’s storage space today with an SSD and SATA to USB cable!
Replace panel and start PC
If you’re looking to replace a panel on your PC, there are a few important steps you should follow to ensure a successful installation process. First, make sure to shut down your computer and unplug all cables and cords for safety. Next, locate the panel you want to replace and remove it carefully, being sure not to damage any of the surrounding components.
Once the old panel is out, it’s time to install the new one – be sure to align it properly and secure it in place with any necessary screws or other hardware. Finally, plug everything back in and start up your computer to check that everything is working as it should. Following these easy steps can help you get your PC in top shape in no time.
Final Thoughts
Adding an SSD to an existing PC as an external storage option is a straightforward process. First, you’ll need to purchase an external SSD enclosure that supports your drive’s form factor and interface, whether it’s SATA or NVMe. Once you have the enclosure, simply slide your SSD into the slot and secure it in place.
Next, connect the included cables to your PC’s USB ports, and your external SSD is ready to use. One advantage of using an external SSD is that you can easily move it between different systems or use it for portable storage. It’s worth noting that external SSDs will be limited by the speed of the USB interface, so if you’re looking for the fastest possible performance, it’s better to install an SSD into your PC’s internal drive bay.
Overall, adding an external SSD is a great way to expand your storage options and improve your system’s performance without breaking the bank.
Conclusion
Now that you know how to add an SSD to your PC externally, you’ll be able to give your machine a boost of lightning-fast speed and unparalleled performance. It’s like giving your computer a shot of adrenaline right in the hardware! And who doesn’t want their technology to be energized and ready to take on any task? So go forth, my tech-savvy friend, and add that SSD with confidence and a smile on your face.”
FAQs
What is an SSD and why would I want to add one to my PC externally?
An SSD (solid-state drive) is a fast, durable storage device that can improve the performance of your computer. Adding an SSD externally can give you more storage space and allow you to transfer files quickly between multiple devices.
What type of external SSD should I choose for my PC?
The type of external SSD you choose will depend on your specific needs, but factors to consider include size, speed, and price. Look for an SSD with a high read/write speed and enough storage space for your needs.
How do I physically connect an external SSD to my PC?
Depending on the type of SSD you choose, you may need to connect it to your PC using a USB cable, Thunderbolt cable, or other type of connector. Follow the manufacturer’s instructions to ensure proper connection.
Can I use an external SSD as my primary boot drive for my PC?
Yes, you can use an external SSD as your primary boot drive for your PC, but it will depend on your computer’s capabilities. You may need to adjust your BIOS settings or install an operating system onto the SSD before using it as a boot drive. Consult your computer’s manual or a professional for assistance.