Are you planning to upgrade your laptop or PC’s storage to give it a speed boost? One of the best ways to do this is by transferring your operating system (OS) to a Samsung SSD. Solid-state drives (SSDs) are faster and more reliable than traditional hard disk drives (HDDs), which can significantly improve your device’s overall performance. However, transferring an OS to an SSD can seem like a daunting task, especially if you’re not tech-savvy.
But don’t worry, we’re here to help! In this blog, we’ll guide you through the step-by-step process of transferring your OS to a Samsung SSD. By the end of this post, you’ll be able to enjoy faster boot-up times, smoother application launches, and overall better performance in your laptop or PC. So, let’s get started and learn how to transfer your OS to a Samsung SSD!
Check Compatibility
If you’re looking to transfer your operating system to a new Samsung SSD, the first thing you’ll need to do is check compatibility. Make sure that your computer’s motherboard and BIOS are compatible with the SSD’s interface and capacity. You’ll also need to check that your computer’s operating system is compatible with the SSD’s drivers.
Once you’ve confirmed compatibility, you can begin the transfer process. One option is to use Samsung’s Data Migration software, which is designed to transfer your OS, applications, and data from your old drive to your new Samsung SSD. The software is easy to use and will guide you through the migration process step-by-step.
It’s important to back up any important data before starting the migration, just in case anything goes wrong. From there, you should be good to go with your new Samsung SSD!
Ensure Samsung SSD is Compatible with Your System
When it comes to upgrading your system by adding a Samsung SSD, the first step is to ensure that it is compatible with your system. This will save you a lot of headaches and frustration later on. It is important to check your computer’s manual or specifications to see if it can support the type of SSD that you want to install.
You should also ensure that you have the necessary cables and hardware to connect the SSD to your system. In addition, it is important to make sure that your system’s BIOS is up-to-date. The BIOS is responsible for controlling the communication between the SSD and your computer, so it is vital that it is functioning properly.
By taking the time to check compatibility, you can avoid any potential issues with your new SSD and ensure that it functions correctly. So, before making any purchases, make sure to do your research and check if your system is compatible with a Samsung SSD.
Backup Data
If you’re looking to transfer your OS to a Samsung SSD, the first thing you’ll want to do is backup all of your important data. This ensures that if anything goes wrong during the transfer process, you won’t lose any of your files. There are a few different ways to backup your data, depending on your preferences and the amount of data you have.
One option is to use an external hard drive to copy all of your files over, which can be time-consuming but provides a physical backup in case anything happens to your computer. Another option is to use a cloud storage service to upload your files, which is convenient and allows you to access your data from anywhere with an internet connection. Once you’ve backed up your data, you can then proceed with transferring your OS to the Samsung SSD using a cloning tool or by installing a fresh copy of Windows on the new drive.
With a bit of patience and preparation, you can enjoy faster speeds and improved performance on your computer with a Samsung SSD.
Create a Full Backup of Your System
Backing up data is an essential step in ensuring the safety and security of your computer system. Creating a full backup of your system is the best way to guarantee that all of your data, including files, folders, and programs, is safe in case of a hardware failure or a data breach. To create a complete backup, one can use an external hard drive or cloud-based backup services to store their data.
This process can take some time, but it is worth the effort to ensure that you have a backup copy of everything on your system. With a backup in place, you won’t have to worry about losing important files or data if something goes wrong with your machine. So, whether you are a business owner wanting to protect customer data or an individual looking to keep their personal information safe, backing up your computer system is an essential task that should not be overlooked.
Clone OS to Samsung SSD
Are you planning to upgrade your system’s storage with a brand new Samsung SSD? The good news is that you can easily transfer your operating system to your new SSD with the help of a reliable cloning software. Before starting the process, make sure to back up all your important files and documents to avoid any data loss. Then, download and install a cloning software, such as Samsung Data Migration, onto your computer.
Connect your new SSD and select it as the destination drive. Follow the on-screen instructions and let the software clone your operating system to the SSD. Once the cloning process is complete, restart your computer and enter the BIOS settings to change the boot order, so that your system boots from the new SSD instead of the old hard drive.
With these simple steps, you can quickly and easily transfer your OS to your new Samsung SSD without any hassle.
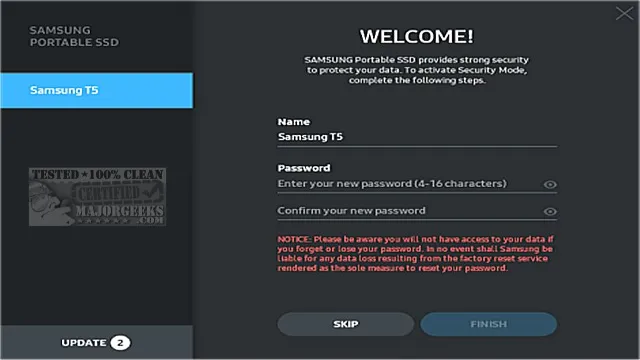
Download a Data Migration Software such as Samsung Data Migration
If you just got yourself a brand new Samsung SSD and want to transfer your operating system and data from your old hard drive, then you should consider using Samsung Data Migration software. This program is designed to help you clone your OS to the new SSD without losing any data or software installed on your PC. The best thing about this software is that it’s user-friendly and easy to use, even if you don’t have much experience with these kinds of tasks.
Just download the software from Samsung’s website, connect the SSD to your PC via a SATA cable or USB adapter, and follow the simple instructions provided by the software. The entire process will only take a few minutes, and you’ll have a faster and more reliable operating system running on your new Samsung SSD. So, if you want to maximize the potential of your new hardware, download Samsung Data Migration today and start cloning your OS.
Connect Samsung SSD and Run Software
So you’ve got your new Samsung SSD and you’re ready to transfer your operating system over. The first step is to connect your Samsung SSD to your computer and ensure that it is properly recognized and working. Once that is done, you can run the software that came with the SSD or download it from the Samsung website.
The software will guide you through the process of cloning your OS from your current drive to the new Samsung SSD. This will ensure that all of your files, software, and settings are transferred over and ready to go on the new drive. It’s important to make sure that you follow the instructions carefully and back up any important data before starting the cloning process.
With a little patience and attention to detail, you’ll soon have your OS up and running on your new Samsung SSD, and enjoy the improved performance and faster boot times that come with it. So don’t hesitate, get started today and take your computing experience to the next level!
Select OS Partition and Destination Drive
When it comes to upgrading your system’s SSD, it can be daunting to navigate which partition to select as the OS partition and which destination drive to clone it onto. Luckily, Samsung SSDs come with a Data Migration Software that simplifies the process. The software allows you to select the source drive and the destination drive, where the OS partition will now reside.
It’s important to note that the destination drive needs to have enough space to accommodate all the data from the source drive. Additionally, make sure you select the correct partition as the OS partition; this is where your operating system files are saved, and it’s essential to clone these files to the new SSD for optimal performance. Once you have made the selections, the software takes care of the rest, copying over all the necessary files and settings.
With just a few clicks, you can transfer your OS to your Samsung SSD and enjoy faster performance and increased storage capacity.
Begin Cloning Process
If you’re planning to upgrade your computer and switch to an SSD, you might be wondering how to clone your current operating system to the new drive. Well, good news! The process is relatively straightforward and can save you a lot of time compared to a fresh installation. First, you’ll need to connect your Samsung SSD to your computer, either by plugging it into an available SATA port or using a USB-to-SATA adapter.
Next, you’ll need cloning software, like Samsung Data Migration, which can be downloaded from their website. Once the software is installed, you’ll need to select the source disk (your current drive) and the destination disk (your new Samsung SSD). Make sure to double-check these selections since a mistake here could be disastrous.
Finally, start the cloning process and wait for it to complete. Depending on the size of your drive, this could take a while, so make sure you have enough time set aside. Once it’s complete, you can remove the old drive and start using your new, faster, Samsung SSD! Now you can enjoy faster boot times, reduced load times, and a smoother computing experience.
Happy cloning!
Boot from Samsung SSD
If you’ve recently purchased a Samsung SSD and want to transfer your operating system (OS) to it, there are several steps you’ll need to take. First, you’ll need to ensure that your system is compatible with the Samsung SSD. Once you’ve confirmed that, you’ll need to create a system image of your current OS and save it to an external hard drive or USB.
Next, you’ll need to install the Samsung SSD and boot your system from it. Once you’re up and running, you can then restore the system image onto the new SSD. It’s important to note that this process can be complex and may require technical knowledge, so if you’re unsure, it’s best to seek the help of a professional.
However, with the right tools and guidance, transferring your OS to a Samsung SSD can provide significant performance benefits and breathe new life into your system.
Restart Your System
If you want to speed up your computer and enhance its performance, you should consider booting from a Samsung SSD. This can help you restart your system and make it function more efficiently than ever before. Samsung SSDs are known for their high speed and durability, making them a popular choice for anyone looking to upgrade their computer’s storage capabilities.
By using a Samsung SSD, you can ensure that your operating system loads up quickly, and your applications run smoothly and without any lag. So if you want to experience a more productive and faster computer, why not invest in a Samsung SSD and boot up your system in seconds? It’s fast, easy, and a great way to give your computer a new lease on life.
Enter BIOS and Change Boot Order to Samsung SSD
Booting from a Samsung SSD can significantly improve the performance of your computer. However, before you can do that, you need to change the boot order in the BIOS settings. To do this, you need to restart your computer and press the key that takes you to the BIOS settings.
This key varies depending on your computer’s manufacturer, but it is usually F2 or Del. Once you are in the BIOS settings, look for the Boot tab and select the Samsung SSD as the primary boot device. Save the changes and exit the BIOS settings.
When your computer restarts, it will automatically boot from the Samsung SSD, giving you faster boot times and better overall performance. It’s a simple process that can make a big difference in the way your computer operates. So, if you have recently installed a Samsung SSD in your computer, make sure to change the boot order in the BIOS settings to get the most out of it.
Save Changes and Exit BIOS
Congratulations, you have successfully updated your BIOS settings and now it’s time to boot from your Samsung SSD. But before we proceed, make sure you save the changes you made and exit the BIOS. This is important to ensure that your changes take effect and your system boots from the preferred source.
To save changes and exit, look for the “Save and Exit” option in your BIOS settings and press the corresponding key. It may differ depending on your motherboard manufacturer, so be sure to check your system manual for reference. Once you’ve saved changes and exited the BIOS, it’s time to boot from your Samsung SSD.
To do this, you need to access the boot menu during startup. Usually, this can be done by pressing the F12 key on your keyboard, but it can also vary depending on your system configuration. Check your motherboard manual or search for the specific instructions for your computer online.
Once you access the boot menu, look for your Samsung SSD in the list of available boot devices. Use the arrow keys to highlight the SSD and press enter. This will now boot your system from the Samsung SSD, providing faster read and write speeds compared to traditional hard drives.
In conclusion, make sure to save your BIOS settings before exiting and access the boot menu during startup to boot from your Samsung SSD. With these steps, you can enjoy faster performance and smoother system operation. Just remember to keep your system updated and well-maintained for optimal performance.
Final Verification
If you are upgrading to a Samsung SSD and want to transfer your operating system, there are a few steps you need to follow. Before transferring any data, make sure that your new SSD is connected to your computer. Begin by downloading and launching Samsung’s Data Migration software.
This program will automatically detect your Samsung SSD and your current operating system. Follow the prompts to clone your current OS to the SSD. Once the transfer is complete, you will need to verify that the OS was successfully transferred.
To do this, restart your computer and make sure that the SSD is selected as the primary boot device in the BIOS settings. If everything is working properly, the computer should boot up with the new SSD as the primary storage device. With these steps, you can quickly and easily transfer your operating system to your new Samsung SSD, so you can enjoy faster speeds and better performance.
Ensure System is Running on Samsung SSD
Once you have installed your Samsung SSD, it is crucial to verify whether your system is running on it or not. The final verification process is the last step, and it ensures that you have correctly installed the SSD and that your system is using it. This step is effortless, and all you need to do is head to your computer’s properties, click on the Device Manager, and check the Disk Drives section.
If you can see the Samsung SSD listed under Disk Drives, congratulations, your system is running on it! However, if you cannot see it, check your connections, recheck your installation process, and make sure that the SSD is properly recognized. Ideally, you should also run a speed test to ensure that your Samsung SSD is providing the promised speeds and boost to your system. So, go ahead and run some tests to make sure everything is working correctly!
Check OS and Files to Verify Transfer
Once you’ve completed transferring files and data to your new operating system, it’s important to verify that everything was successfully transferred. The first step is to check your operating system to make sure it’s running smoothly and all of your applications are functional. You can also check your files to make sure they are all there and in the correct locations.
One way to do this is to search for a specific file or folder and confirm that it is accessible and working as expected. Don’t forget to check for any important documents or data that may have been missed during the transfer process. It’s always better to be safe than sorry, so taking the time to double-check everything can save you a lot of potential headaches down the road.
With these final verification steps, you can rest assured that your files and operating system are ready to go and function optimally.
Conclusion
In short, transferring your OS to a Samsung SSD is like giving your computer a shot of espresso. It’ll wake up faster, load programs quicker, and overall give your computer a performance boost that’ll have you wondering how you ever lived without it. And luckily, the process is as simple as following a step-by-step guide – so what are you waiting for? Give your computer that caffeine fix it deserves and transfer your OS to a Samsung SSD today!”
FAQs
What tools do I need to transfer my OS to a Samsung SSD?
You need a Samsung data migration software, a source drive (existing hard drive), a destination drive (Samsung SSD), and a compatible computer.
How do I clone my existing hard drive to a Samsung SSD?
Download the Samsung data migration software and install it on your computer. Connect your Samsung SSD and launch the software. Select the source drive and destination drive and start the cloning process.
Do I need to erase my existing hard drive after transferring the OS to a Samsung SSD?
No, you can keep your existing hard drive as a backup or use it for additional storage. However, it is recommended to wipe the hard drive if you plan to sell or dispose of it.
Can I transfer my OS to a Samsung SSD if my computer is not compatible with the Samsung data migration software?
You can use third-party cloning software that is compatible with Samsung SSDs. Some examples include EaseUS Todo Backup, Acronis True Image, and Macrium Reflect. Ensure that the software supports disk cloning and supports Samsung SSDs.