
Are you running a slow Windows operating system? Does your computer take ages to boot up or run basic applications? If so, then it’s high time to upgrade to a Solid State Drive (SSD) to improve your system’s overall performance. An SSD can provide you with lightning-fast data transfer speeds and can even make your old PC feel like brand new again. But setting up an SSD for Windows can seem a bit daunting, especially if you’re not familiar with the technicalities involved.
Don’t worry, though. In this blog post, we’ll guide you through the process of setting up an SSD for Windows step-by-step, ensuring that your PC is up and running in no time!
Requirements for using an SSD
“Setting up an SSD to load Windows” can improve your computer’s overall speed and performance significantly. To get started, you will need to ensure that your computer’s motherboard supports SATA III, the fastest connection available for SSDs. Next, you will need to create a bootable USB drive with Windows OS using Microsoft’s Media Creation Tool.
With the SSD connected, go into your computer’s BIOS settings and change the boot order to prioritize the USB drive. Then, follow the on-screen instructions to install Windows on your SSD. Once installation is complete, you can transfer your files and programs from your old hard drive to the SSD manually or by using cloning software.
It is important to note that while SSDs do not require defragmentation, enabling TRIM in your operating system’s settings can help maintain its performance and longevity. Overall, setting up an SSD to load Windows involves a few extra steps than using a traditional hard drive, but the benefits of improved speed and performance make it well worth the effort.
Compatibility of SSD with your computer
When it comes to using an SSD on your computer, there are a few requirements you need to keep in mind. First and foremost, you need to ensure that your computer has a suitable interface for SSD, which typically includes SATA and M.2 ports.
Additionally, you need to check the maximum capacity your computer can handle, as some older models may have limited storage options. Another factor to consider is the type of operating system you are using, as different OS versions have different requirements for SSD compatibility. For instance, Windows 7 may require additional drivers to support SSDs, while newer versions like Windows 10 have built-in support.
In conclusion, if you want to enhance your computer’s performance by installing an SSD, check these factors to ensure that your computer is compatible with this type of storage device.
Tools required for setting up SSD
When it comes to setting up an SSD, there are a few tools that you’ll need in order to do it properly. Firstly, you’ll need a screwdriver to open up your computer and install the SSD into the correct drive bay. You’ll also need a SATA or USB cable, depending on whether you want to clone your existing hard drive or install a fresh copy of your operating system onto the new SSD.
Additionally, you’ll need a cloning or installation software, which can either be downloaded online or provided by the SSD manufacturer. It’s important to make sure that your computer is compatible with your new SSD, so be sure to check its specifications before purchasing. By having these tools on hand and following proper installation procedures, you can ensure that your SSD will run smoothly and provide the fast boot and load times that it’s known for.
Backup your data before proceeding
If you’re planning to upgrade your hard drive by installing an SSD, you’ll need to set it up to load Windows. Before you proceed, it’s essential to back up your data, just in case anything goes wrong during the installation. Once you’ve backed up your data, you can connect your SSD to your computer using a SATA cable or USB enclosure.
Then, you’ll need to open the Disk Management tool in Windows and format the SSD. After formatting, you can clone your existing hard drive to the SSD using software like Clonezilla or EaseUS Todo Backup. Alternatively, you can perform a clean installation of Windows on the SSD by creating a bootable USB drive using the Media Creation Tool from Microsoft.
Once you’ve set up the SSD to load Windows, you’ll be able to enjoy faster boot times and improved overall performance. Remember to double-check your backup before proceeding with the installation to avoid losing any important data.
Why it’s important to backup first
Before proceeding with any software or hardware updates, it is crucial to backup your data. Whether you are updating your laptop or installing a new software, there is always a risk of losing important files, documents, and media. Moreover, some updates may go wrong, leading to system crashes or software malfunctions that could wipe out your data.
Therefore, it is always advisable to create a backup of your data before proceeding with any change. That way, even if something goes wrong, you can always restore your data back to its original state. In essence, backing up your data is like having an insurance policy against unforeseen data loss.
So, make sure to take some time to backup your important files before making any major changes to your system or software. Trust me, it could save you a lot of hassle and stress in the long run.
How to backup your files and data
Backing up your data is crucial to ensure that you don’t lose any important files or information. There are several methods you can use to backup your data, depending on your needs. One popular option is to use an external hard drive to copy your files onto.
This can be done manually, or you can choose from a range of software options that will automate the process for you. Another option is to use cloud storage services, which store your data on remote servers. This means that your files can be accessed from anywhere with an internet connection, and you don’t have to worry about losing your data if your computer is lost or stolen.
Whichever method you choose, it’s essential to make sure that you backup your data on a regular basis to ensure that you always have access to your critical files. Don’t wait until it’s too late – start backing up your data today!
Physically installing SSD in your computer
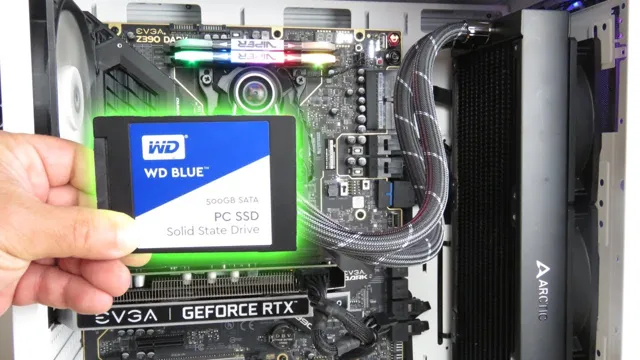
If you’re looking to set up an SSD to load Windows, it’s a relatively simple process. First, you’ll need to physically install the SSD in your computer. This involves finding an available slot, often located on the motherboard or under a panel on the back of the tower.
Once you’ve found the proper slot, simply attach the SSD to it using the screws provided. Once you’ve completed the physical installation, you’ll need to make some changes to your computer’s settings in order to utilize the SSD for booting up Windows. This involves going into the BIOS and changing the boot order to prioritize the SSD over your previous primary storage device.
You’ll also need to download and install Windows onto the SSD, either via USB or a disc drive. Once these steps are completed, you should be all set up to start using your new SSD.
Step-by-step guide to installing SSD
Installing an SSD in your computer can be a game-changer when it comes to speed and performance. To physically install an SSD, the first step is to locate the hard drive bay in your computer. This is typically found on the lower front or side of the tower or laptop.
Once located, unscrew the mounting bracket and remove the hard drive from the bay. Then, attach the SSD to the mounting bracket using screws. Slide the SSD into the hard drive bay and secure it with screws.
Finally, reconnect any cables or connectors that were removed and power on the computer to ensure the SSD is recognized. With a properly installed SSD, your computer’s boot-up time will be faster, programs will load quicker, and overall performance will be greatly improved. So why not make the upgrade today?
Configuring BIOS settings for SSD
If you’ve recently purchased an SSD for your computer, one of the most important steps is configuring BIOS settings to ensure that it’s running as smoothly and efficiently as possible. First, you’ll need to physically install the SSD inside your computer by opening up the case and finding an available slot. Make sure to take proper precautions and ground yourself before handling the SSD to avoid any damage from static electricity.
Once you’ve installed the SSD, you’ll need to enter BIOS and change the boot order so that the computer boots from the SSD instead of the hard drive. You may also need to adjust settings such as AHCI and SATA mode to optimize the SSD’s performance. By taking the time to properly configure BIOS settings for your SSD, you can ensure that it runs smoothly and provides a noticeable improvement in your computer’s speed and performance.
Installing Windows on the SSD
If you’re looking to improve the performance of your computer, installing Windows on your SSD is a fantastic place to start. Not only will it be faster, but it will also give you more storage space for files and applications. The first step in setting up an SSD to load Windows is making sure it’s properly connected to your motherboard.
Once you’ve done that, you’ll need to go into your computer’s BIOS settings and change the boot order so that your SSD is the primary boot drive. From there, you can install Windows onto your SSD by following the on-screen prompts. It’s important to note that you’ll need a valid Windows license key to complete the installation process.
Once the installation is complete, you can start enjoying the fast and efficient performance of your new SSD.
Creating a bootable USB for Windows installation
Installing Windows on the SSD can be a little tricky, but with a few steps, you’ll be up and running in no time. First, you’ll need to ensure that your bootable USB, which you created earlier, is plugged into your computer. Before starting the installation process, you should go into your BIOS settings and make sure that your computer is set to boot from the USB.
Once you’ve configured your BIOS settings, you can click “Install Now” and select the version of Windows you want to install. Next, you’ll need to select the partition where you want to install Windows. Make sure you select your SSD as the location for the installation.
Now, all you need to do is sit back and wait for the installation process to complete. Once it’s finished, you should have Windows up and running smoothly on your brand new SSD. With this simple process, you’ll be enjoying the benefits of faster speeds and quicker load times in no time!
Step-by-step guide to installing Windows on SSD
If you’re looking to install Windows on your SSD, the process is pretty straightforward. First, you’ll need to make sure your SSD is properly installed and recognized by your system. Then, you’ll want to create a bootable USB drive with the Windows installation files.
This can be easily done with the Windows Media Creation Tool. Once you’ve created your bootable USB drive, you’ll want to boot from it and follow the prompts to install Windows on your SSD. It’s important to make sure you select your SSD as the destination drive during the installation process to ensure that Windows is installed on the correct drive.
Overall, the process of installing Windows on your SSD is fairly simple and can significantly improve system performance and boot times. With these easy steps, you’ll be up and running with Windows on your new SSD in no time!
Optimizing SSD performance
Setting up an SSD to load Windows can significantly boost your computer’s performance. First, you need to ensure that your BIOS is set up to recognize your SSD as the primary boot device. Next, you can optimize the performance of your SSD by disabling disk defragmentation and turning off superfetch.
These actions enhance the SSD’s wear-leveling technology and reduce unnecessary disk activity. You might also consider enabling TRIM, a feature that helps keep your SSD functioning optimally by clearing unused cells. Finally, make sure that you have the latest firmware updates and drivers installed.
With these optimizations, you’ll be able to enjoy lightning-fast loading times and seamless performance from your Windows system.
Enabling TRIM command for SSD
If you want to optimize the performance of your SSD, enabling the TRIM command is an essential step that you should not overlook. TRIM is a function that operates in the background, cleaning up blocks of data that have been marked as unused by your operating system. This process helps to prevent SSD devices from becoming sluggish over time, as it ensures that they are only writing and storing active data.
In essence, TRIM helps to ensure that your SSD runs faster and lasts longer, increasing its lifespan and reducing the need for disk defragmentation. To enable TRIM, you can use a command-line tool or a utility such as Trim Enabler if you have a macOS device. Once enabled, you should notice a marked improvement in your SSD’s performance, making it well worth the effort.
So, if you haven’t yet enabled TRIM on your SSD, now is the time to do it!
Disabling hibernation and indexing for SSD
If you want to optimize the performance of your SSD, disabling hibernation and indexing can be beneficial. Hibernation is a feature that saves the current state of your computer to the hard drive. While it can be useful, it can also take up valuable space on your SSD and decrease its lifespan.
Disabling hibernation not only frees up space but also prevents unnecessary writes on the drive, which can extend its life. Similarly, indexing is a feature that helps you find files faster by creating a searchable database. However, it also continually writes and reads data from the drive, which can slow down your computer and cause unnecessary wear and tear on the SSD.
Turning off indexing will not only improve performance but also increase the lifespan of your SSD. By disabling hibernation and indexing, you can optimize your SSD’s performance and extend its lifespan.
Other tips to improve SSD performance
Optimizing SSD performance can greatly improve the overall speed and responsiveness of your computer. Aside from upgrading to a faster SSD, there are other tips you can follow to get the most out of your drive. One helpful technique is to enable TRIM, a command that allows the operating system to inform the SSD which unused blocks of data can be wiped clean.
This can help prevent performance degradation over time. Additionally, make sure your SSD is properly aligned and partitioned to avoid unnecessary write amplification. You can also disable unnecessary services and background programs to reduce the amount of unnecessary disk activity.
Regularly cleaning up files and moving large files to an external drive can help free up space and ensure optimal performance. By implementing these optimization techniques, you can optimize your SSD’s performance and get the most out of it for years to come.
Conclusion
In conclusion, setting up an SSD to load Windows is not rocket science, but it does require some technical know-how. However, with the right tools and patience, you can speed up your computer’s boot-up time and make it run smoother than a freshly shaved dolphin. So, don’t be intimidated – take the plunge and install that SSD.
Your computer (and your sanity) will thank you!”
FAQs
What are the benefits of using an SSD for loading Windows?
Using an SSD can significantly improve the boot and load times of your operating system, as well as increase overall system responsiveness.
Do I need to do anything special when setting up an SSD to load Windows?
Yes, you will need to format the SSD and ensure that it is properly configured as the primary boot device in your system’s BIOS settings.
Can I clone my existing Windows installation onto my new SSD?
Yes, there are several tools available that can help you clone your existing Windows installation onto your new SSD, including popular options like Acronis True Image and Macrium Reflect.
How much storage space do I need on my SSD for Windows?
The minimum recommended amount of storage space for a Windows installation on an SSD is 128GB, although you may want to consider getting a larger drive if you plan on installing additional software or storing a large amount of data on your system.