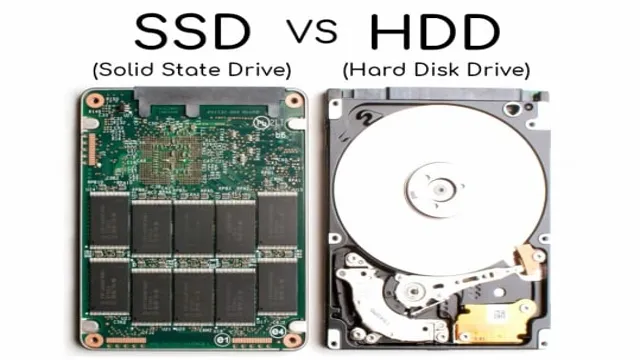
If you’re an avid PC user or a gamer, you’d know that SSDs (solid-state drives) offer a faster and more efficient means of storage compared to traditional HDDs (hard disk drives). However, as SSDs typically come with less storage capacity due to their higher cost, you may find that you soon need to move files from your SSD to your HDD to free up space. But how do you transfer your files without compromising your data and ensuring all your files reach their intended destination? Don’t worry, we’ve got you covered.
In this blog, we’ll be discussing the easiest and most effective ways to move your files from SSD to HDD without any critical data loss or complications. So, sit back, and let’s dive in!
Locate the Files
So you want to move files from your SSD to your HDD, but you aren’t sure how to go about it. The first step is to locate the files you want to move. This may seem obvious, but it can be easy to miss important files or accidentally move the wrong things if you don’t take the time to identify them first.
Start by reviewing the contents of your SSD and identifying any files or folders that take up a lot of space or that you no longer need on your primary storage drive. Once you have a list of these, you can begin the process of moving them to your HDD. Simply select the files you want to move, right-click, and choose “cut” or “copy.
” Then navigate to the folder on your HDD where you want to store these files and right-click again, choosing “paste.” Depending on the size and number of files you are moving, this process may take some time, so be patient and make sure you don’t accidentally interrupt the file transfer while it’s in progress. And that’s it! With a little patience and attention to detail, you can easily move files from your SSD to your HDD and free up valuable space on your primary storage drive.
Check the SSD
When you’re trying to locate files on your SSD, it’s crucial to check the disk for any issues first. You may encounter problems with your SSD if it’s old or getting full. To detect any problems, you can use the inbuilt diagnostic tool on your operating system.
Once you’ve established that the SSD is functioning correctly, you can start your search for the files you need. It’s essential to organize your files in a structured manner to make them easier to locate. You can segregate them into different folders or categorize them by type or date.
Another useful tip is to use the search functionality built into your operating system to find the files you need quickly. By checking the SSD and organizing your files, you can save yourself valuable time and avoid losing critical data due to disorganization.
Check the HDD
When it comes to checking the HDD, the first step is to locate the files you need to inspect. This may require some digging, particularly if you’re dealing with large drives with a lot of data. Start by opening the File Explorer (or equivalent on your operating system) and navigating to the folder or drive you want to check.
From there, you can use the search bar to find specific files or sort the contents by date, size, or other criteria. One keyword that can help narrow down your search is “corrupt,” as this may indicate files that are causing issues with your system. It’s important to remember that not all HDD issues are caused by corrupted files, however.
Other factors such as physical damage or software conflicts can also play a role. If you’re not comfortable troubleshooting these issues on your own, it may be worth taking your computer to a professional for diagnosis and repair. But for those who are willing to get their hands dirty, careful file inspection and maintenance can go a long way in keeping your HDD running smoothly.
Copy and Paste
So, you have finally decided to move your files from your SSD to HDD? Great! There might be several reasons behind this decision; you might need additional storage space, or maybe you want to keep your frequently-used files on SSD and store the less-used ones on HDD for better performance. Whatever the reason is, the process is simple and straightforward. The first thing you need to do is to identify the files that you want to transfer.
Next, select and copy them to your clipboard. Now, open the destination folder in your HDD where you want to move the files. Finally, right-click on the empty space and select paste.
That’s it! The files will now be transferred from your SSD to your HDD, and you can access them from there. Just remember to double-check the files you have moved to make sure everything is transferred successfully, and you didn’t miss any important files.
Open the SSD
If you’re curious about how your SSD works, you might be tempted to open it up and take a look inside. However, we don’t recommend doing this, as it can damage the drive and void your warranty. Instead, there’s an easier way to explore the contents of your SSD: copy and paste.
By copying files from one location to another on your computer, you can see how quickly your SSD can transfer data. You can also test different file types to see if your SSD performs better with certain types of data. Just remember to always handle your SSD with care and avoid any actions that could compromise its performance or integrity.
By treating your SSD with respect and using it responsibly, you can maximize its lifespan and enjoy speedy storage for years to come.
Select the File
When you need to share a file with someone else, the first step is always to select the file. This may sound like a simple process, but it can often be more complicated than you might expect. You need to ensure that you have chosen the correct file, and that it’s not too large to send.
Additionally, you need to choose the right method for sharing the file, whether it’s through email or a cloud storage platform. Once you have selected the file, the next step is to copy and paste it into the appropriate platform to ensure that the recipient receives the file correctly. It’s important to remember that copying and pasting files can take some time, so be patient and make sure that the transfer is complete before closing the program.
Whether you’re sharing a document for work or a photo with a friend, selecting the file and copying and pasting it into the correct platform is critical for successful file sharing.
Copy the File
When you want to make a copy of a file, the easiest way to do it is to use the copy and paste function. To get started, simply select the file you want to copy. Then, right-click on it and choose “Copy.
” Next, find the folder or location where you want to paste the file and right-click again. This time, choose “Paste,” and your file will be copied over. It’s that simple! But keep in mind that if you’re copying a large file or a lot of files at once, it may take a few minutes for the process to complete.
So, be patient and let your computer do its thing. With this process, you’ll have a duplicate copy of your file that you can use however you like. Whether you want to keep a backup of important documents or share a file with a friend, copying and pasting is a quick and easy way to get the job done.
Open the HDD
Opening up your HDD can be a daunting task, but once you have done it, copying and pasting files becomes a breeze. Before you begin, make sure you have the right tools and a backup plan in case something goes wrong. A small screwdriver and a clean workspace are essential.
Once you have everything laid out, begin by removing the screws that hold the casing together. Be careful not to damage the internal components as you separate the case. Once the HDD is exposed, locate the files you want to copy and paste to another location.
Simply right-click on the file, select “copy,” and then navigate to the location where you want to paste it. Right-click again and select “paste.” It’s that easy.
Just remember to handle your HDD with care and put everything back together properly to ensure optimal performance.
Create a New Folder
Creating a new folder may seem like a daunting task, but it’s actually quite simple. All you need to do is right-click on your desktop or in a file explorer window and select “New Folder”. This will create a new, empty folder that you can name whatever you like.
If you want to copy and paste files into this folder, it’s just as easy. Simply select the files you want to move, right-click and select “Copy”. Then navigate to your new folder, right-click and select “Paste”.
The files will now be in your new folder, ready for you to organize and access as needed. This method is particularly useful if you want to group together files that belong to a specific project or category, such as work-related documents or family photos. Overall, creating a new folder and copying and pasting files is a straightforward process that can help you keep your digital life organized.
Paste the File
If you’ve ever needed to share a file with someone quickly, but didn’t have access to a file sharing service, you may have resorted to copying and pasting the file directly into an email or chat. This method, known as copy and paste, can be convenient for small files or pieces of text, but can quickly become cumbersome for larger files. Additionally, certain file types may not be compatible with this method, so it’s important to double-check before you send.
However, if you’re in a pinch and need to quickly send something to someone, the copy and paste method can be a useful tool to keep in your arsenal. Just make sure to stay aware of file size and type limitations.
Check the Transfer
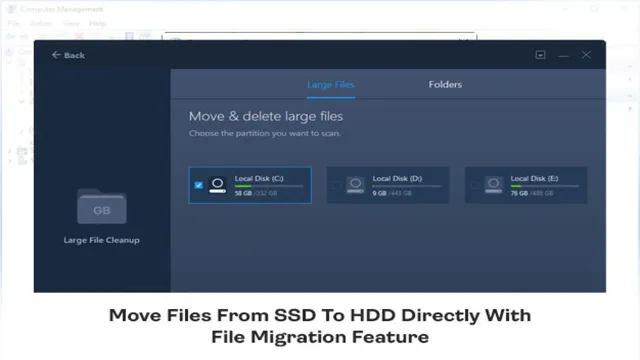
If you’re wondering “how do I move files from my SSD to HDD?” it’s a fairly simple process. First, you’ll need to make sure your SSD and HDD are both connected to your computer. Once you’ve done that, you can begin the transfer.
One option is to manually drag and drop files from your SSD to your HDD, but this can be time-consuming if you have a lot of files to move. Another option is to use specialized software designed to make the transfer process easier. Just make sure to check the transfer once it’s completed to ensure that all your files have been successfully moved over.
By doing this, you can free up space on your SSD and make sure your important files are safely stored on your HDD.
Conclusion
Moving files from your SSD to your HDD can be as easy as tossing a frisbee. Just drag and drop, and voila! Your files are safely stored away. But don’t get too comfortable with your fancy new storage setup, as technology is always evolving and there may come a day where we’ll have to figure out how to move files to something completely different, like a holographic storage system or our brains.
But for now, let’s just enjoy the simplicity of moving files from SSD to HDD, and bask in the glory of our organized and efficient file systems.”
FAQs
What is the difference between an SSD and an HDD?
SSD stands for Solid State Drive and HDD stands for Hard Disk Drive. SSDs use flash memory to store and access data, while HDDs use spinning disks. SSDs are faster and more reliable, but also more expensive.
How do I know which files should be moved from my SSD to HDD?
You should move large files like videos, photos, and music to your HDD, as they take up a lot of space and don’t benefit much from being on an SSD. Smaller files like documents, programs, and games can stay on your SSD for faster access.
Can I move my operating system from my SSD to my HDD?
Yes, but it is not recommended unless you have a lot of experience with computer hardware and software. Moving an operating system requires a lot of technical knowledge, and you risk losing important files or damaging your computer if you make a mistake.
How do I physically move files from my SSD to my HDD?
You can use any file manager software, such as Windows Explorer or Finder on Mac, to drag and drop files from your SSD to your HDD. Alternatively, you can use backup software like Acronis True Image or EaseUS Todo Backup to clone your entire SSD onto your HDD.