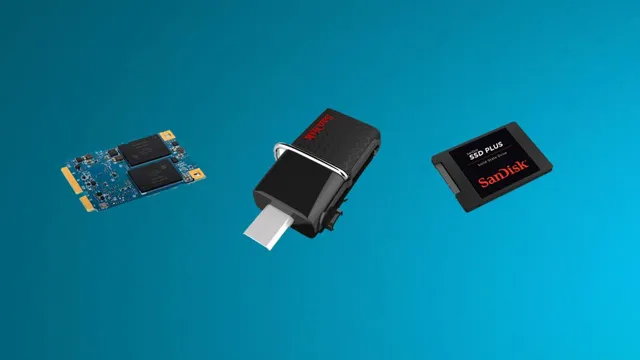
If you’re an avid PS4 gamer looking for a way to boost your system’s loading speed and overall performance, flashing your SSD may be just what you need. Flashing SSDs is a technical process that can appear daunting at first, but with the right tools and guidance, it can be done easily, quickly, and without any major complications. But why flash your SSD in the first place? The benefits of an upgraded SSD include faster loading times, reduced lag, and smoother overall gameplay.
Additionally, SSDs have no moving parts, so they are less prone to damage and failure than traditional hard drives that have spinning disks. Flashing an SSD is essentially the process of updating its firmware to improve its performance. In order to do so, you will need a computer, a compatible SSD, and a USB drive.
You will also need to format the USB drive to the correct file system, download the necessary firmware update, and follow a simple set of instructions. Overall, flashing your SSD can be a relatively straightforward procedure that can significantly enhance your PS4 gaming experience. So why not give it a try and see for yourself how much of a difference it can make?
Preparation
If you’re considering upgrading your PlayStation 4’s storage capacity, flashing an SSD is a great option that will have your system running much faster and smoother. The first step is to make sure you have a compatible SSD. Check your PlayStation’s user manual or consult with the manufacturer to ensure you choose the right SSD that will work with your console.
Next, back up all of your important data and files. It’s crucial that you do this to ensure that you don’t lose any important information during the installation process. You can back up your data using an external hard drive or to the cloud.
Once you’ve backed up your data, you’ll need to obtain the necessary tools, which typically includes a USB drive with the system software, a Phillips head screwdriver, and a SATA to USB adapter. It’s essential that you follow the instructions provided in your SSD’s user manual carefully. Once the SSD is installed, restore your saved data and files and enjoy the speedy upgrade to your system’s performance.
With a properly flashed SSD, your PlayStation 4 will be able to load games faster, and you’ll have more space to download and save games and media.
Check PS4 compatibility with SSD
If you’re considering upgrading your PS4 with a solid-state drive (SSD), it’s important to make sure that the SSD you choose is compatible with your console. Before making any purchases, there are a few preparatory steps you will need to take in order to ensure a seamless installation process. Firstly, it’s vital to do your research and make sure the SSD you’re interested in is compatible with the PS
Compatibility issues can cause performance problems or even damage your hardware. Secondly, you will need to back up all your data, as installing a new hard drive will erase all current data on your PS Ensure that you have adequate storage space available on your backup device.
Finally, make sure you have all the necessary tools, including a screwdriver, to safely remove the old hard drive and install the new SSD. Taking the time to prepare and research before upgrading your PS4 with an SSD will save you time, money, and frustration in the long run.
Backup game data and saves
Are you tired of losing your game progress and saves? Don’t despair, it’s easy to back up your game data and keep it safe. Before you start, make sure you have a reliable storage device, such as an external hard drive or a cloud storage service. Once you have your storage solution, navigate to the game’s save location folder and copy it to your backup device.
Some games automatically save to a cloud or server, which makes the process a lot easier. However, for those that don’t, it’s essential to remember to regularly back up your game data to avoid losing hours of progress. By doing this simple task, you’ll have peace of mind knowing that your game progress and saves are safe, and you can pick up from where you left off anytime.
Gather necessary tools
When it comes to completing any task, preparation is key. Gathering all the necessary tools beforehand can save you a lot of time and hassle. This is especially important when beginning a new project.
Before starting, take the time to research what tools you’ll need and make sure you have everything readily available. It can be frustrating to start working only to realize you’re missing a tool you need. By having everything on hand, you’ll be able to work uninterrupted and efficiently.
The keyword “preparation” is crucial to this process. By being prepared, you’re setting yourself up for success and ensuring that you’re able to complete the task at hand without any major disruptions. Don’t underestimate the importance of preparation – it can make a world of difference in the outcome of your project.
Formatting and Partitioning
If you’re looking to upgrade your PS4’s storage by swapping out the old hard drive for a solid-state drive (SSD), you’ll need to format and partition the new drive before it can be used. First, you’ll want to back up any important data from the old hard drive before removing it from the PS Then, insert the new SSD into the PS4 and start the console in Safe Mode by holding down the power button for seven seconds.
From there, you can select the “Initialize PS4” option and follow the prompts to format and partition the SSD. Once the process is complete, you can reinstall games and apps onto the new drive. It’s important to note that not all SSDs are compatible with the PS4, so be sure to do your research before purchasing one.
Additionally, while an SSD can improve loading times and overall performance, it won’t improve the graphics or frame rate of your games.
Format SSD to exFAT
If you’re looking to format your SSD to exFAT, there are a few things you should consider first. Firstly, formatting your SSD will erase all data on the drive, so it’s important to back up any important files before proceeding. Once you’ve backed up your files, you can begin the process of formatting and partitioning your SSD.
To format your SSD to exFAT, you’ll need to use a formatting tool that supports exFAT. This can typically be found in your operating system’s disk utility tool. Once you’ve opened the tool, locate your SSD and select the option to format it.
From here, you can select exFAT as the file system format and customize the partitioning settings to suit your needs. It’s important to note that exFAT is an ideal file system format for SSDs due to its ability to handle large file sizes and be read and written on both Windows and Mac operating systems. However, if you plan on using your SSD primarily on a Windows system, it may be more beneficial to format it to NTFS instead.
In summary, formatting your SSD to exFAT requires careful consideration and backup of important files before proceeding. However, once the process is complete, you can enjoy the benefits of a file system format that is suitable for both Windows and Mac operating systems.
Partition SSD into two drives
When you purchase a new SSD, it often comes unpartitioned and unformatted. You will need to partition and format it to start using it. Before doing so, make sure you have backed up any important files on your computer as the process will erase all data on the SSD.
When partitioning your SSD, you’ll need to decide on the number of partitions to create. We recommend partitioning the SSD into two drives; one partition for your operating system and applications and the other partition for your personal files. By partitioning the SSD, you’ll have better control over your data, as well as improved performance.
Additionally, separate partitions can help reduce data fragmentation and increase the speed of file transfers. Overall, partitioning your SSD is a crucial step in setting up your computer for optimal use.
Installation
If you are wondering how to flash an SSD to use in PS4, it is a fairly simple process. First, make sure you have backed up your important data, as the process will erase everything on the SSD. Then, obtain a USB flash drive with at least 1GB of free space.
Download the latest PS4 system software from the official PlayStation website and save it onto the flash drive in a folder labeled “PS4”. Turn off your PS4 and unplug all cables. Remove the hard drive cover and pull out the hard drive.
Replace it with the SSD, screwing it into place. Plug in the USB flash drive and boot up the PS4 in safe mode by holding down the power button for seven seconds. Choose “Initialize PS4 (Reinstall System Software)” and follow the on-screen instructions, selecting the option to install the system software from the USB drive.
When the installation is complete, your PS4 should be running on the newly installed SSD.
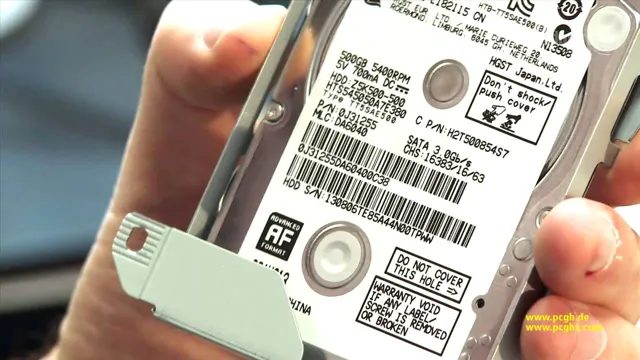
Remove old PS4 hard drive
If you’re looking to upgrade your PS4’s hard drive, you’ll first need to remove the old one. This process can seem intimidating, but it’s actually quite straightforward. To start, power down your PS4 and unplug all cables.
On the back of the console, you’ll find a small plastic panel covering the hard drive. Using a screwdriver, gently pry off this panel and set it aside. Next, locate the screw that’s holding the hard drive in place.
This screw is typically located towards the center of the console, near the back. Remove this screw, and then slide the hard drive out of its compartment. Be careful not to yank it out or handle it too roughly, as delicate components and cables may be attached.
With the old hard drive removed, you’re ready to install your new one and experience improved performance and storage capacity.
Insert SSD into PS4
Installing an SSD into your PS4 can greatly improve your gaming experience. However, it is essential to follow the proper steps to ensure a successful installation. First, make sure that the new SSD is compatible with your PS
Once you have confirmed compatibility, turn off your PS4 and unplug all cables from the console. Next, locate the hard drive bay cover on the left side of your PS Use a Phillips-head screwdriver to remove the screw that secures the hard drive bay cover.
Slide the cover off to reveal the hard drive assembly. Use your fingers or a flathead screwdriver to slide the hard drive caddy out of the assembly. Remove the four screws securing the hard drive to the caddy and remove the hard drive from the caddy.
Insert the new SSD into the caddy and replace the four screws. Slide the caddy back into the hard drive assembly and replace the hard drive bay cover. Plug all cables back into your PS4 and turn it on to ensure the new SSD is running correctly.
Overall, installing an SSD into your PS4 is a relatively straightforward process, and with a bit of care, you can accomplish it with ease.
Initialize PS4 with new SSD
If you’re looking to upgrade your PS4’s storage capacity, installing a new SSD is a great option. The process can seem intimidating, but it’s actually quite simple. First, backup all your important data, as the installation process will wipe your existing hard drive clean.
Next, gather all the necessary tools, including a Phillips-head screwdriver and an external hard drive enclosure. Once you’ve removed the console’s outer shell, carefully remove the old hard drive and install the new SSD in its place. Finally, reassemble the console, initialize the new SSD, and restore your saved data from your external hard drive.
With a new, faster SSD, you’ll experience improved load times and smoother gameplay. So why wait? Upgrade your PS4’s storage capacity today.
Conclusion
In conclusion, flashing an SSD to use in your PS4 is like giving your gaming performance an adrenaline shot. It’s a shortcut to faster loading times, smoother gameplay and an overall more enjoyable experience. So if you’re ready to take your gaming to the next level, saddle up and prepare for an electrifying ride.
Just don’t forget to back up your data beforehand, because once you’re on this SSD train, there’s no going back!”
FAQs
What is SSD?
SSD stands for solid-state drive that is a type of data storage device that uses NAND-based flash memory to store data on an integrated circuit board.
How does an SSD differ from an HDD?
HDD stands for hard disk drive and it has mechanical moving parts such as spinning disks to read and write data whereas SSD has no moving parts and uses NAND-based flash memory to store data. SSDs are faster, quieter, and more durable as compared to HDDs.
Can I use any SSD in PS4?
No, you cannot use any SSD in PS4. You must use a SATA III (6gb/s) SSD for PS4 with a capacity of at least 250 GB and not more than 8TB.
How do I flash my SSD for PS4?
To flash your SSD, you need to download the latest PS4 system software from the official PlayStation website and install it on a USB flash drive. Then, remove the old hard drive from your PS4 and install the new SSD. Finally, connect the USB flash drive to your PS4 and follow the on-screen instructions to install the system software on your new SSD.